OAuth2.0 Authentication
Workato supports OAuth 2.0 (Open Authorization 2.0), a widely adopted protocol that enables secure, standards-based third-party access to user or system data. This protocol is commonly used to grant limited, secure access to APIs without exposing user credentials.
Workato now supports both Authorization Code Grant and Client Credentials Grant flows:
- Authorization Code Grant is ideal for applications where a user is present to authorize access and where the client can securely store the client secret. This flow is commonly used in interactive applications and is considered highly secure because it requires the exchange of an authorization code for an access token.
- Client Credentials Grant is used for server-to-server communication, where no user is involved. Instead, the client application authenticates directly using its client ID and secret to obtain an access token. This method is suitable for system integrations where background processes or services need access to protected resources.
Both of these grant types are applicable for on-premise SAP applications and SAP S/4HANA Cloud, Private Edition.
Enable OAuth2.0
Complete the following steps to enable OAuth2.0 for OData V2 services:
ENABLE OAUTH2.0 FOR ODATA V4 APIS
Please refer to the SAP Note 3304204 to create an OAuth scope for OData V4 APIs.
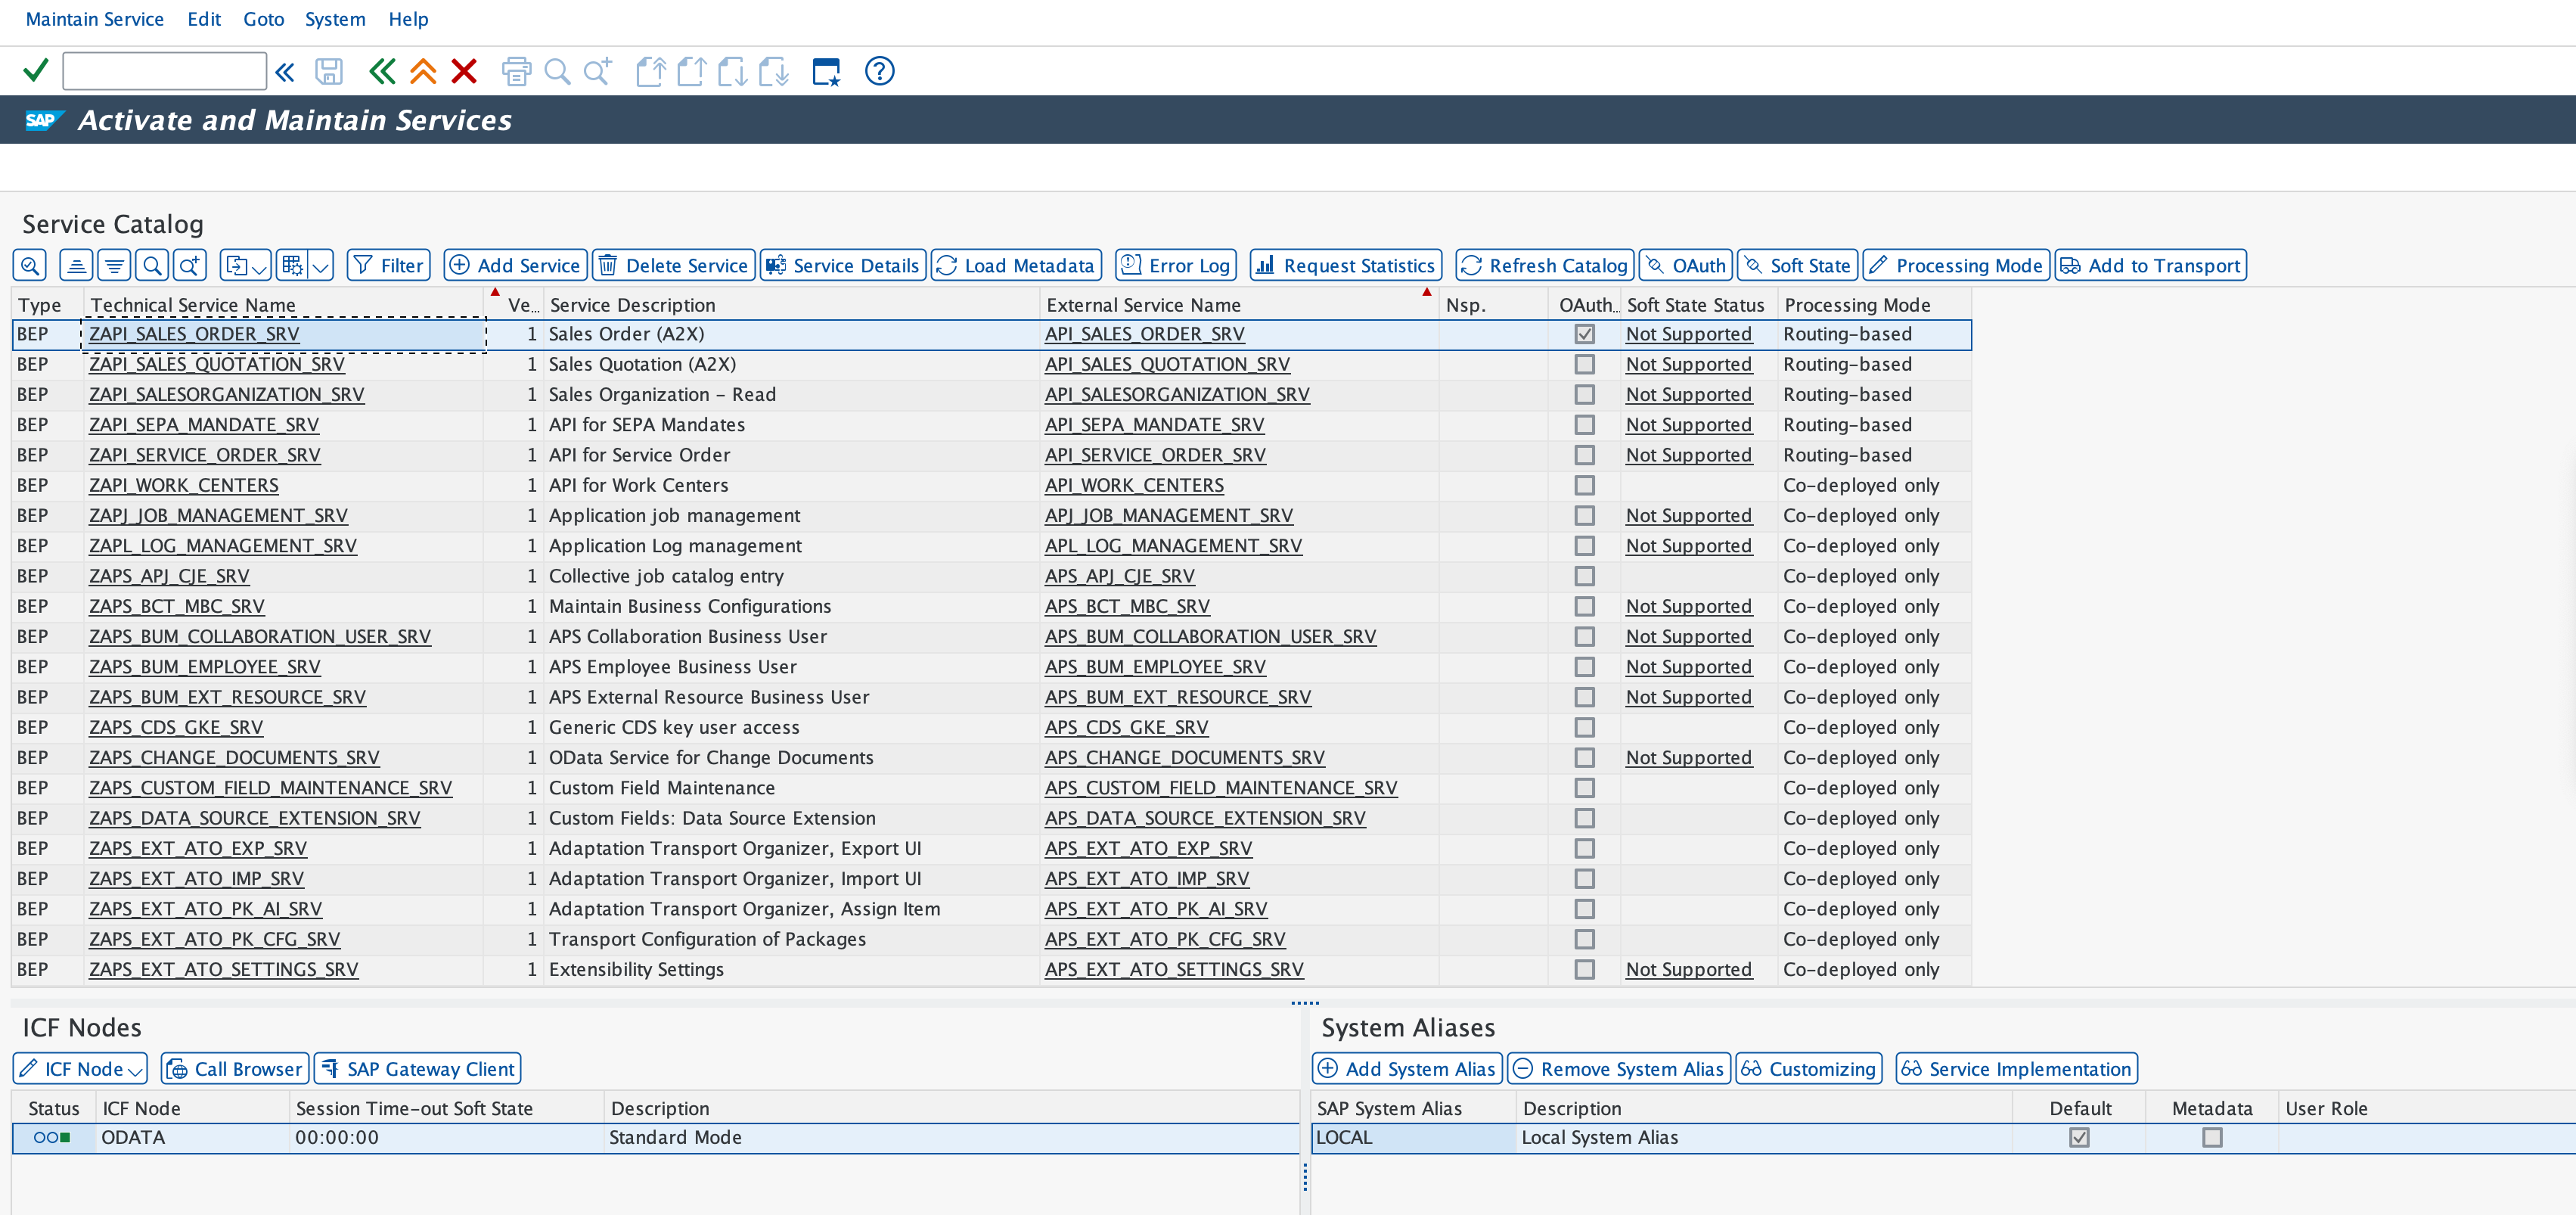
Log in to SAP system through SAP Logon and go to transaction code /n/iwfnd/maint_service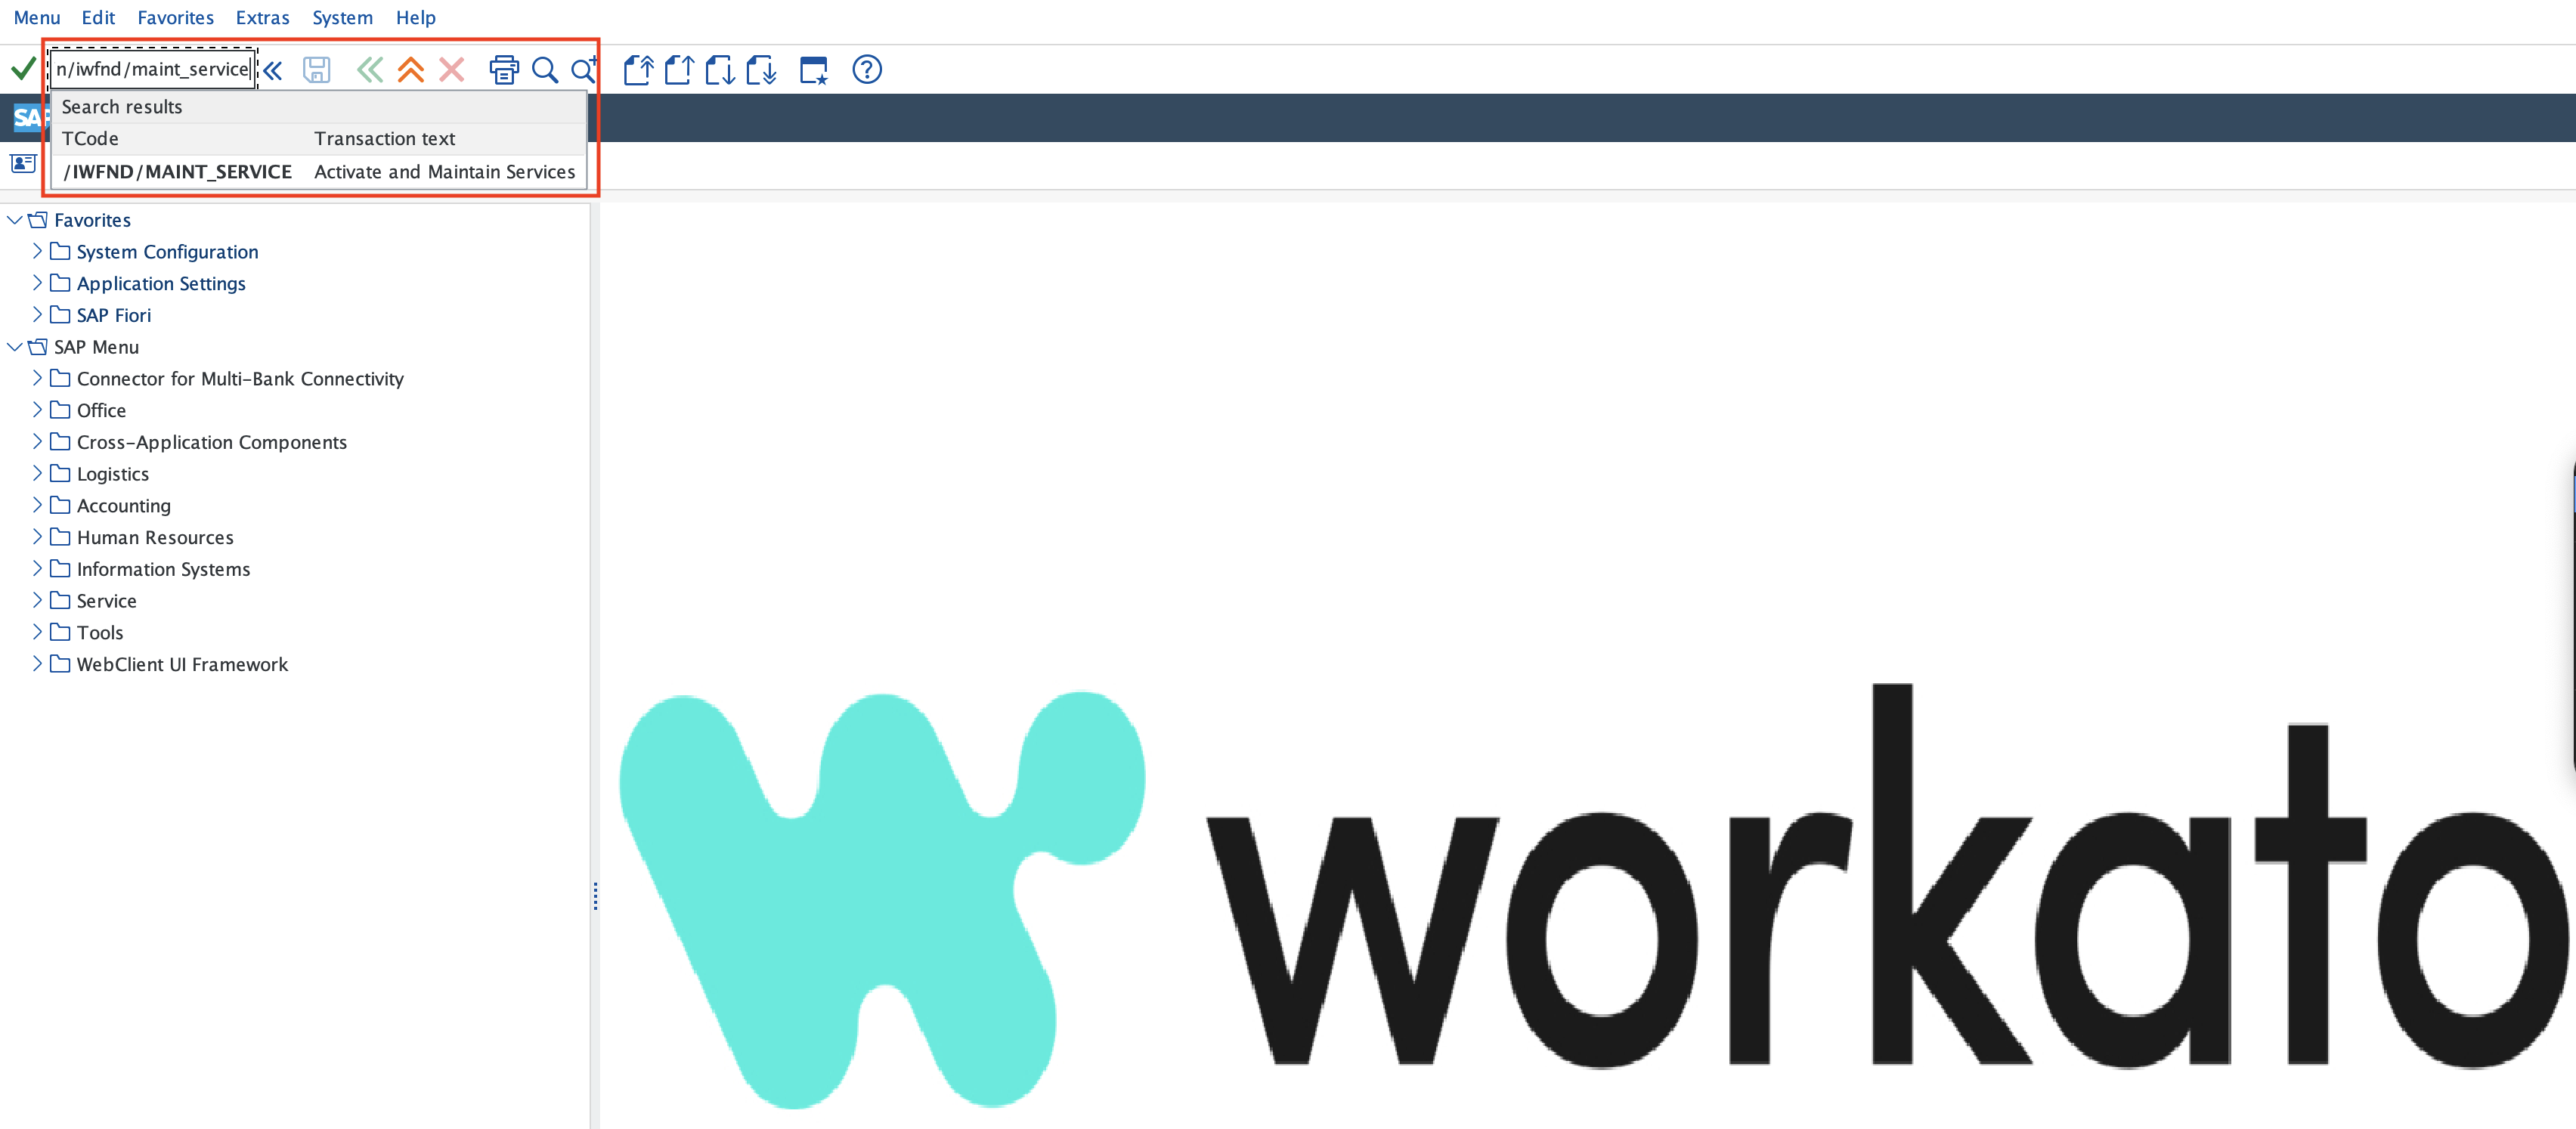
Click Add Service, maintain LOCAL in System Alias and press Enter. 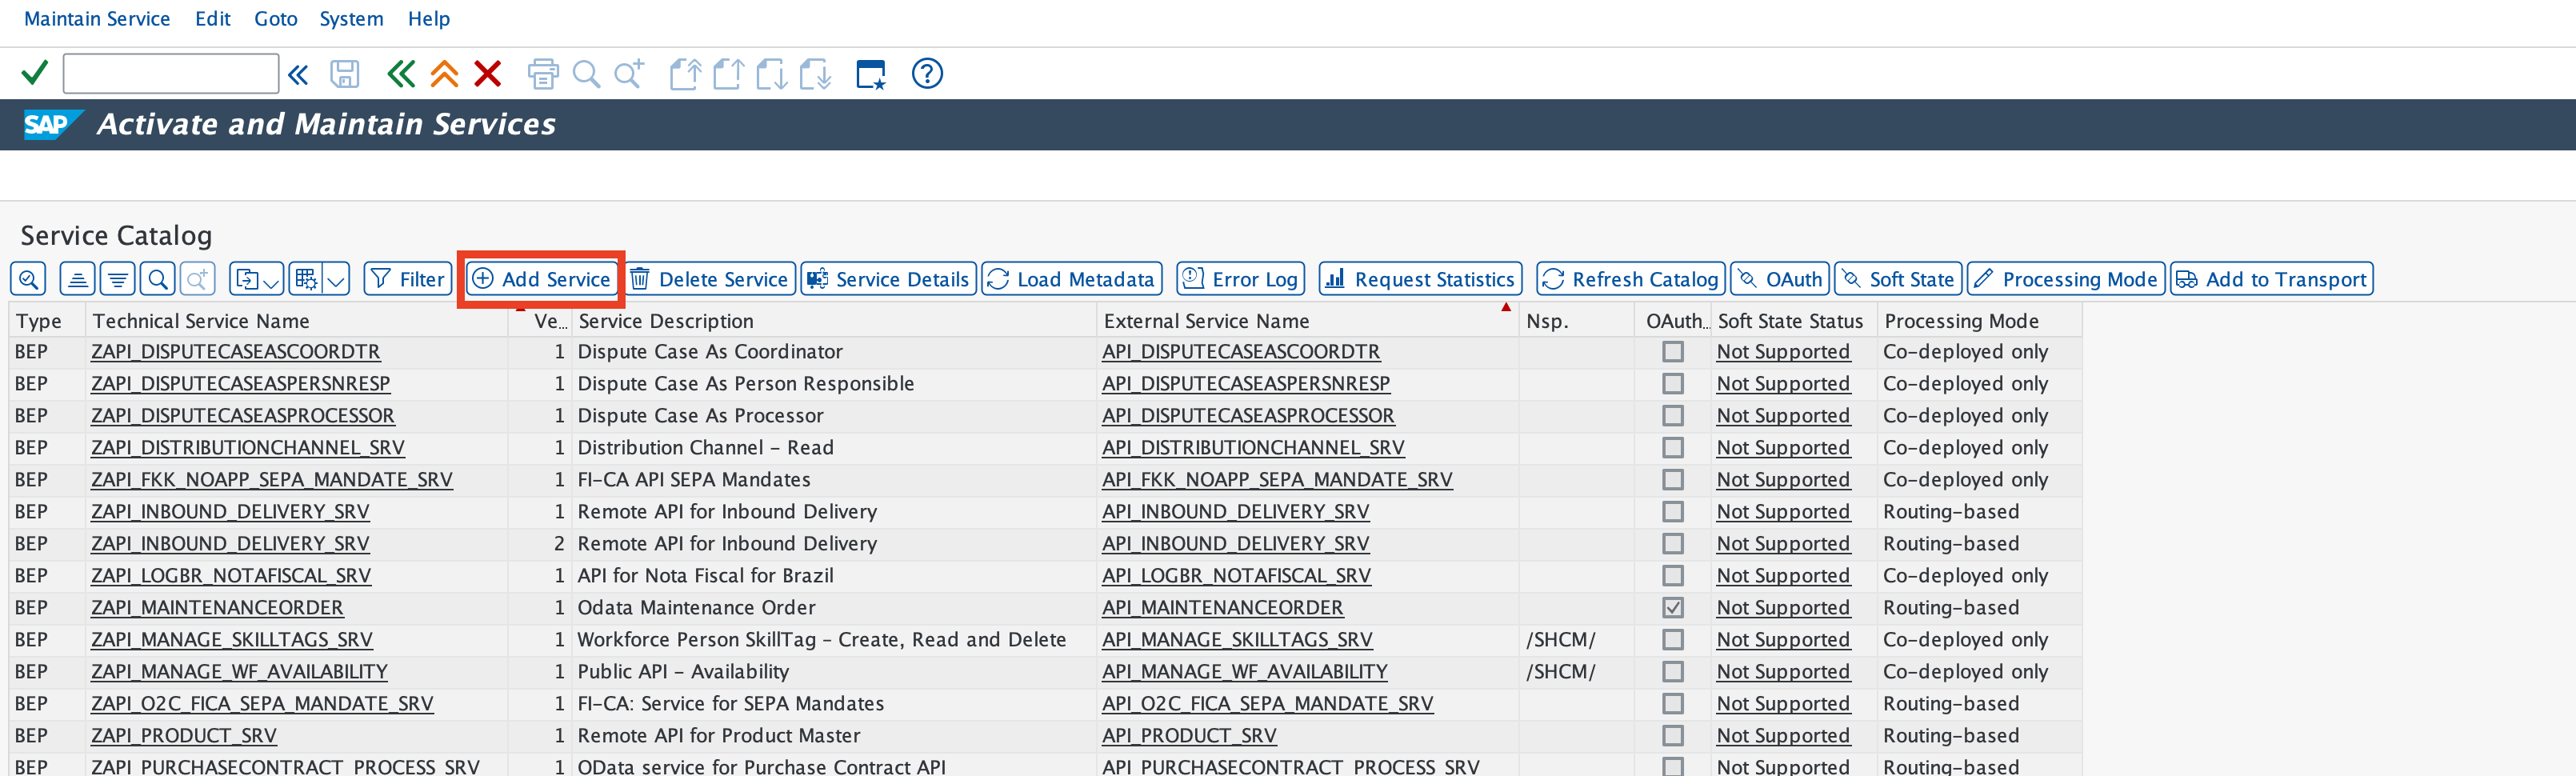
Select the service you plan to use and click Add Selected Services. This example adds API_SALES_ORDER_SRV, a standard SAP API. 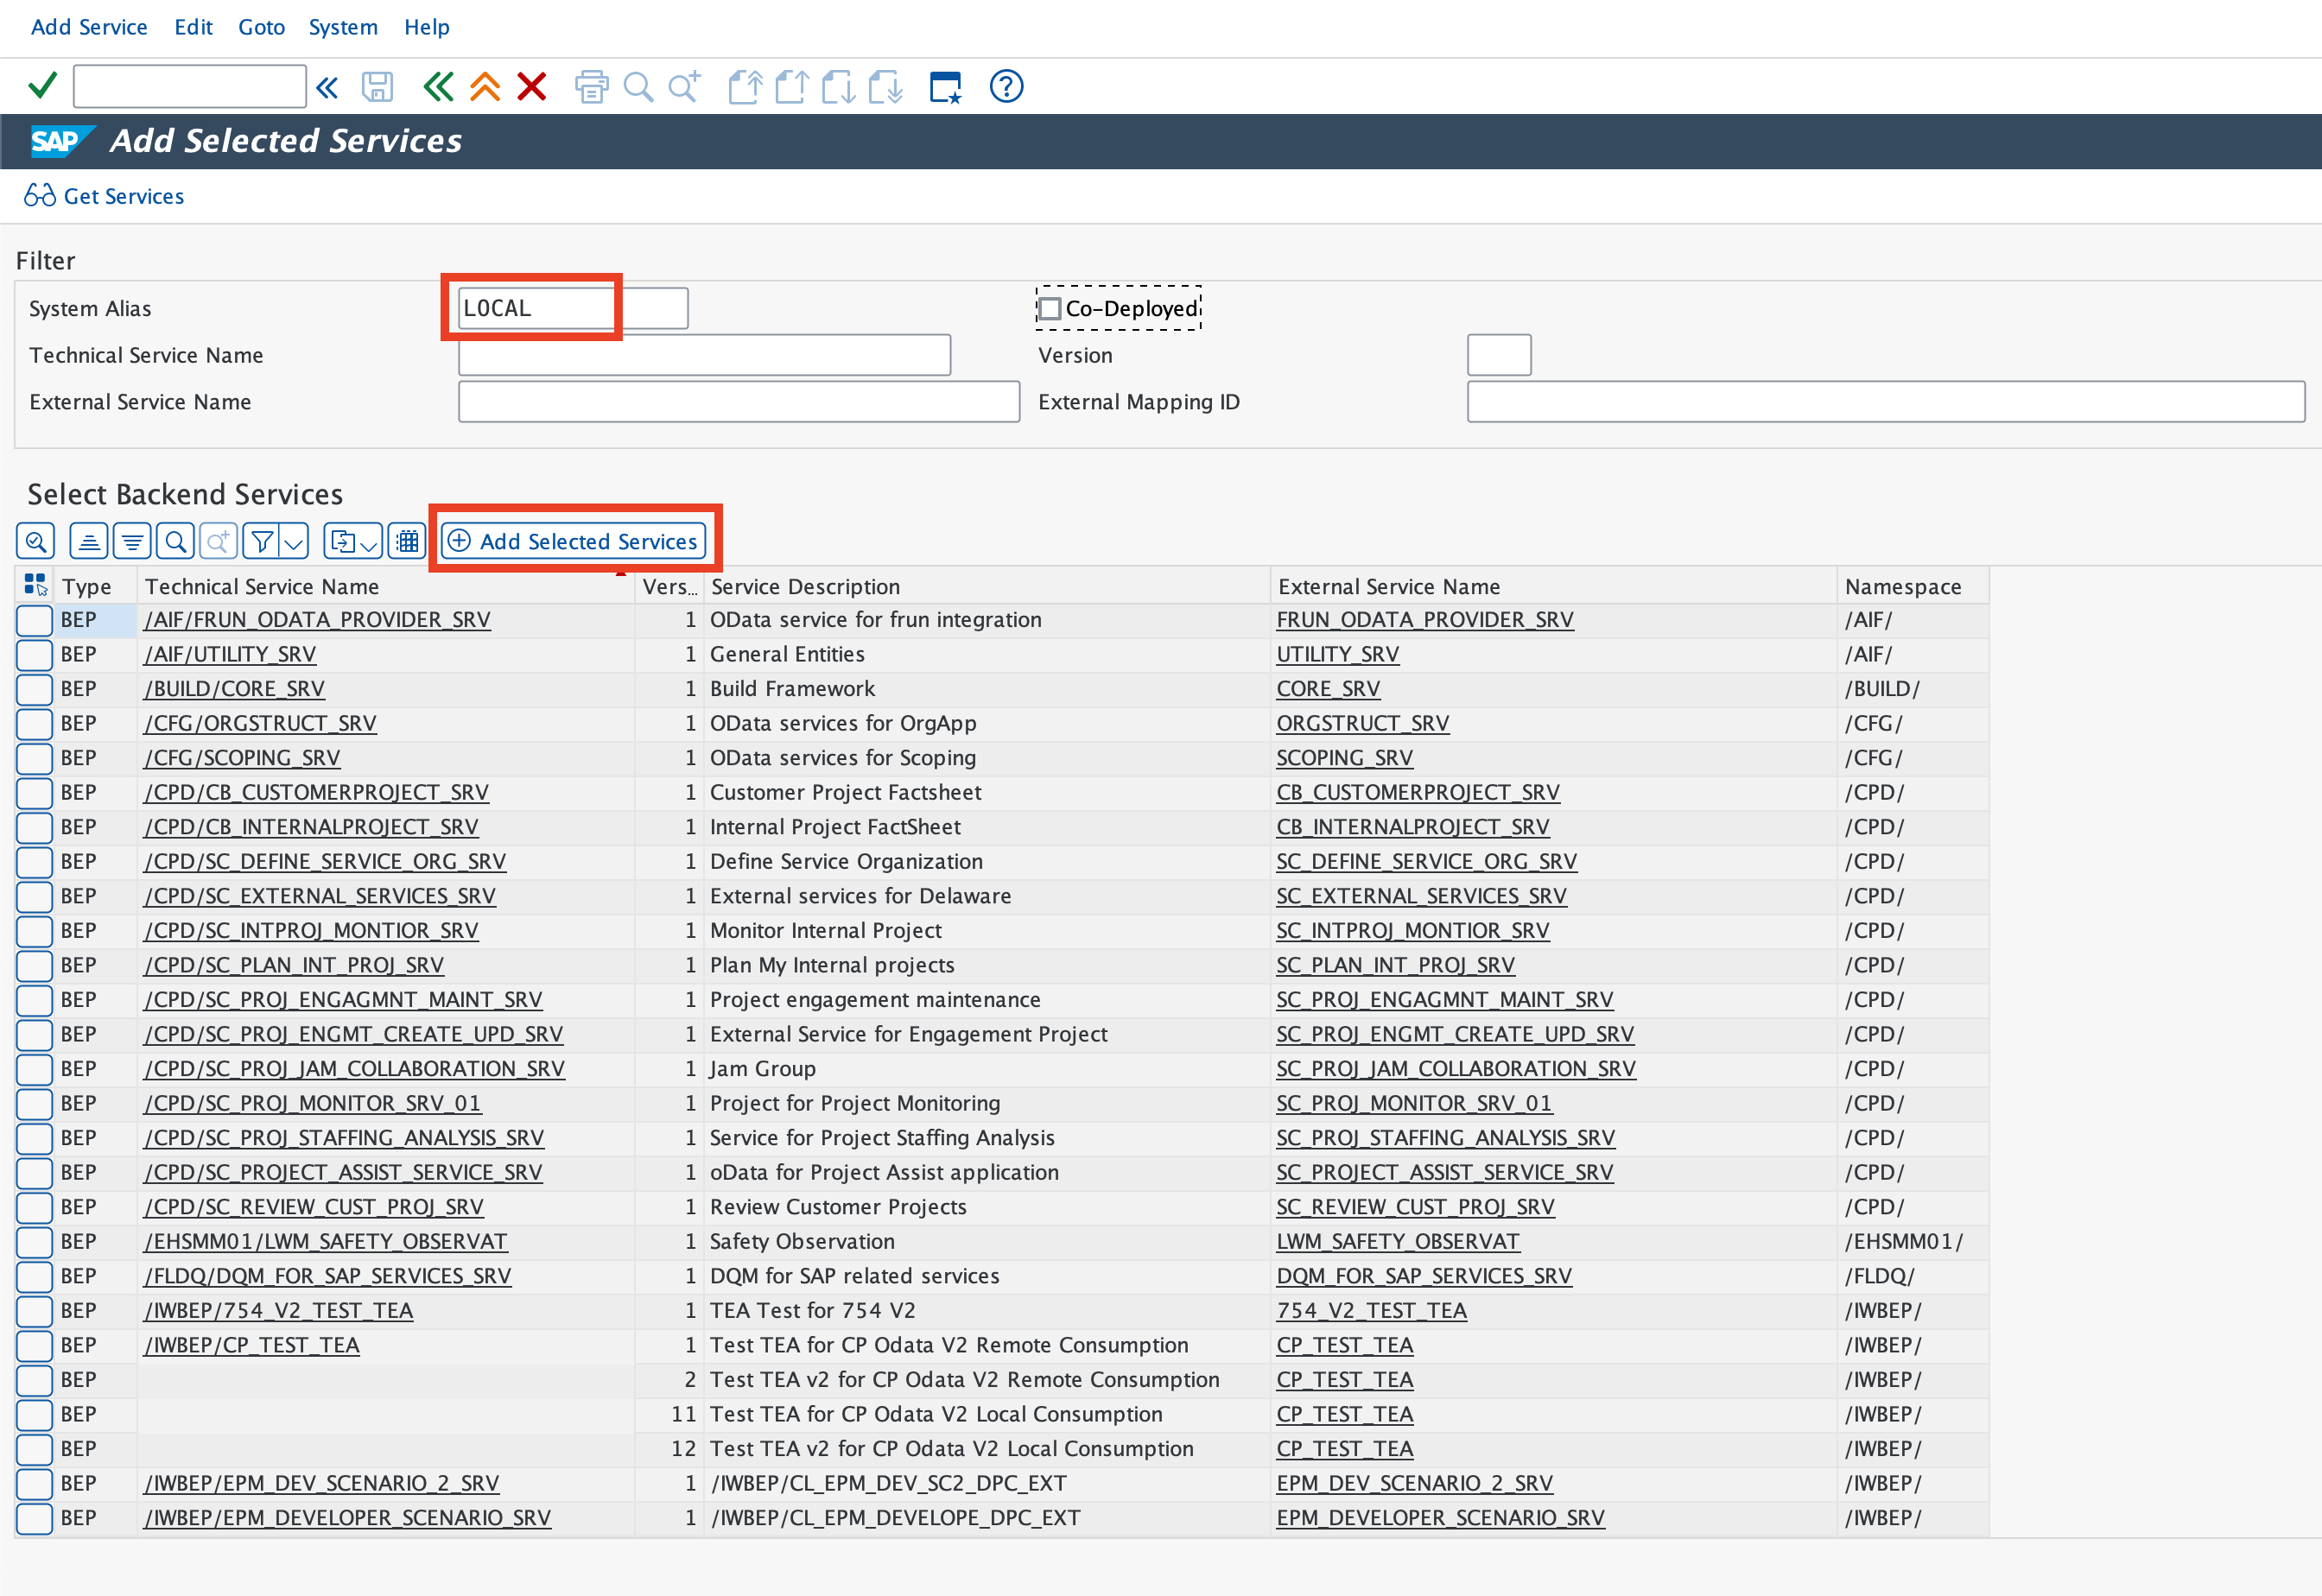
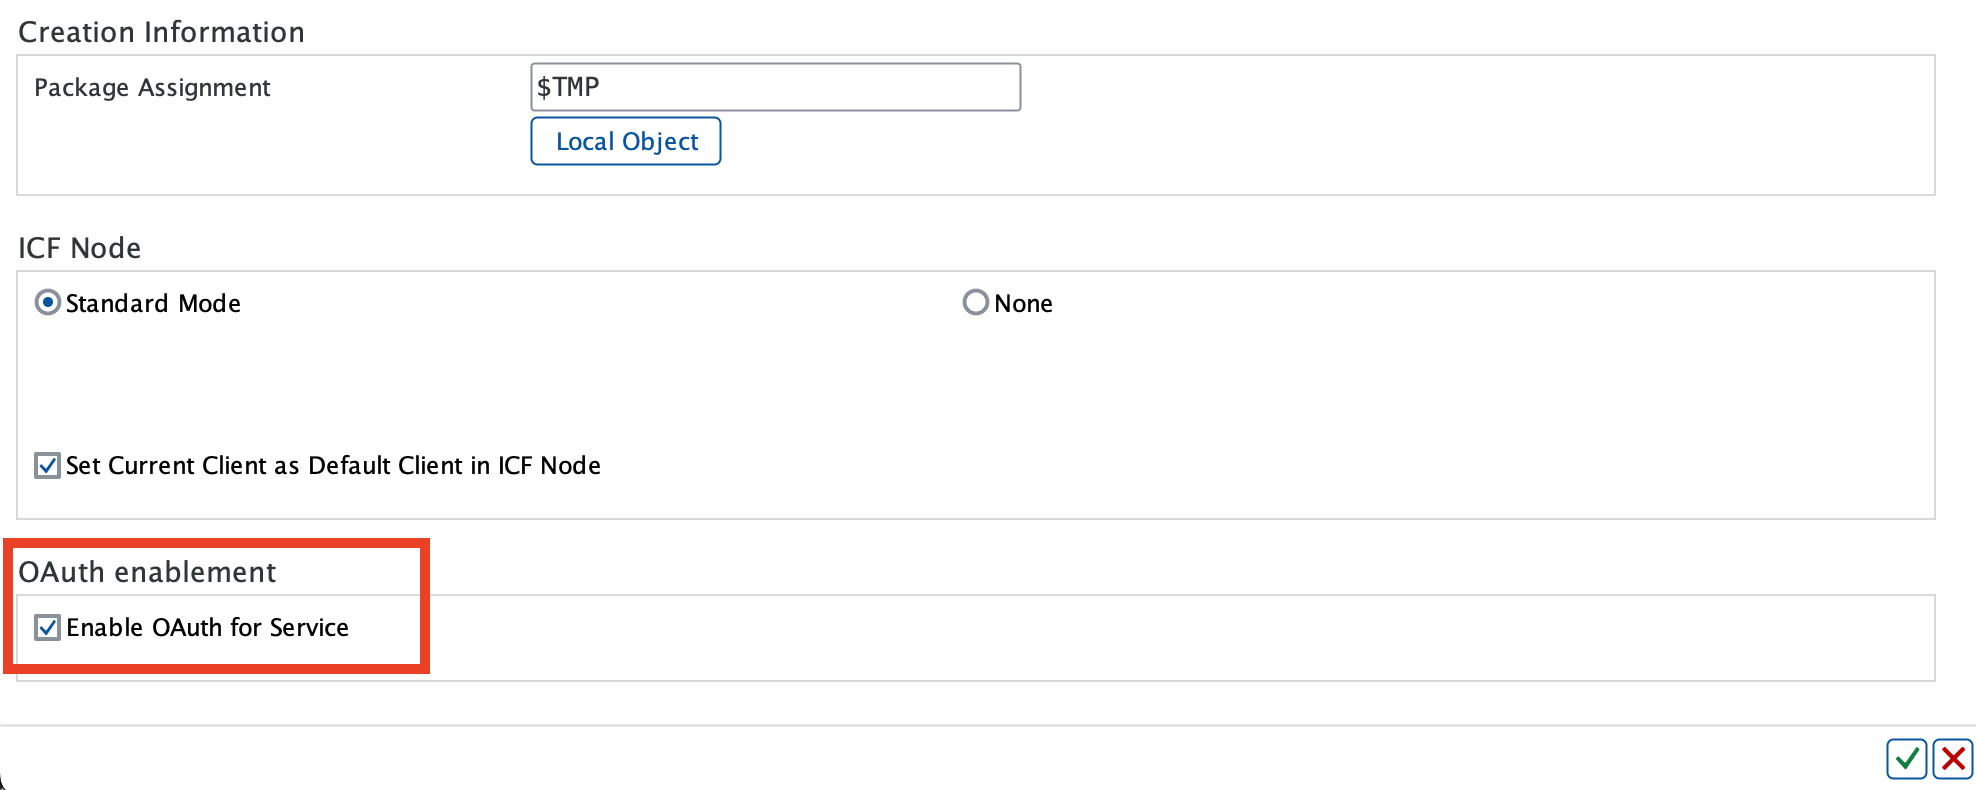
Provide a custom name for the technical service, for example: ZAPI_SALES_ORDER_SRV.
Click Local Object to save the service in the local package and select the Enable OAuth for Service checkbox under OAuth enablement.
Double-click Alias and validate that the SAP System Alias is correct for the Service Doc. Identifier. 
If the service already existed in the service catalog, then you can directly navigate to the service and click on OAuth to enable OAuth authentication. 
Prerequisites for OAuth2.0
Complete the following prerequisite steps to configure OAuth:
Go to transaction code SICF. 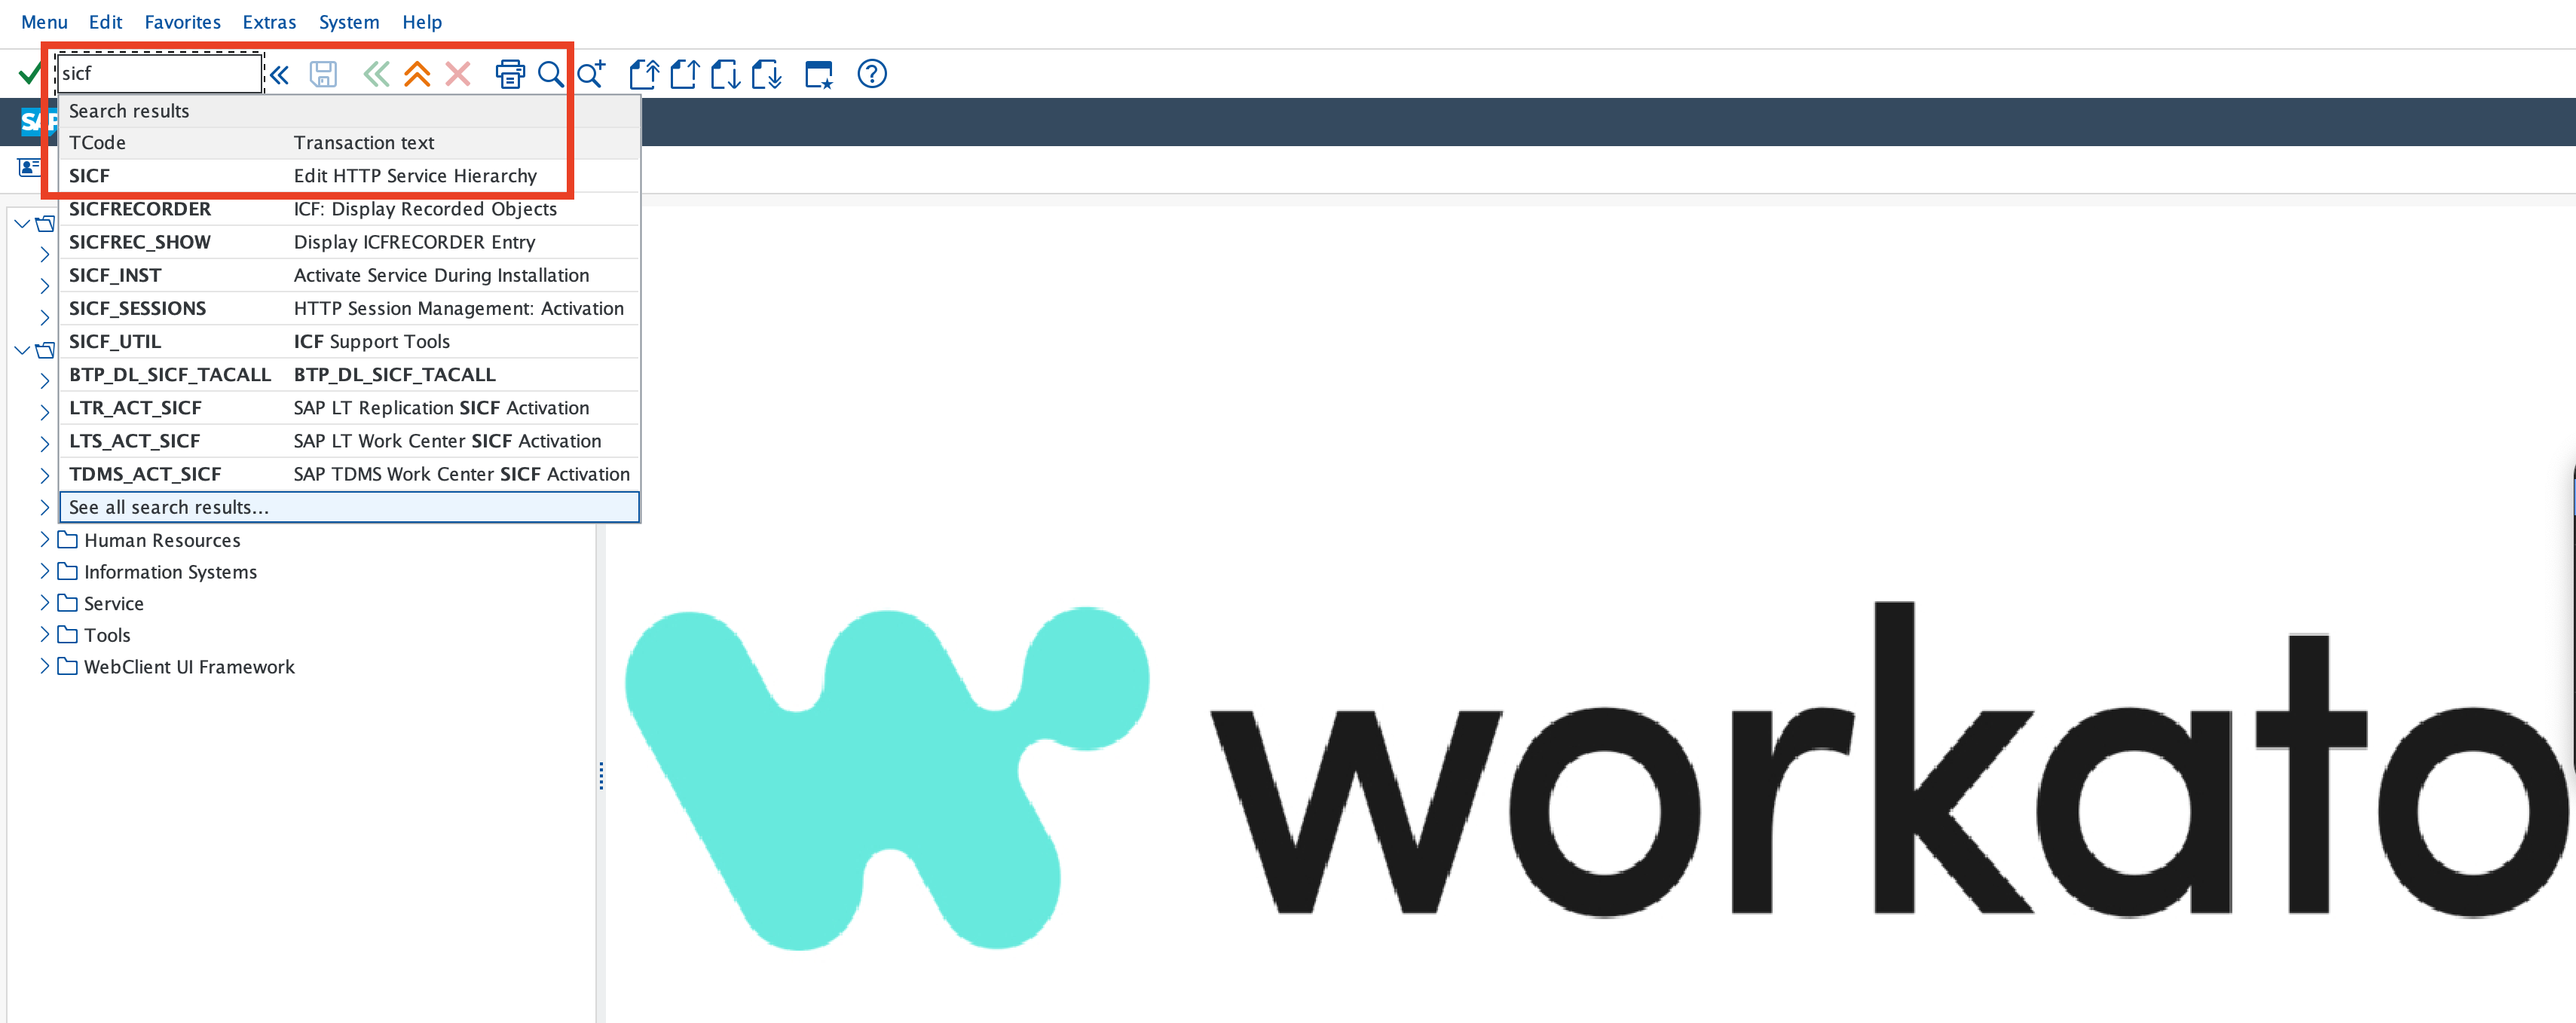
Navigate to the service authorize under path: default_host/sap/bc/sec/oauth2/. 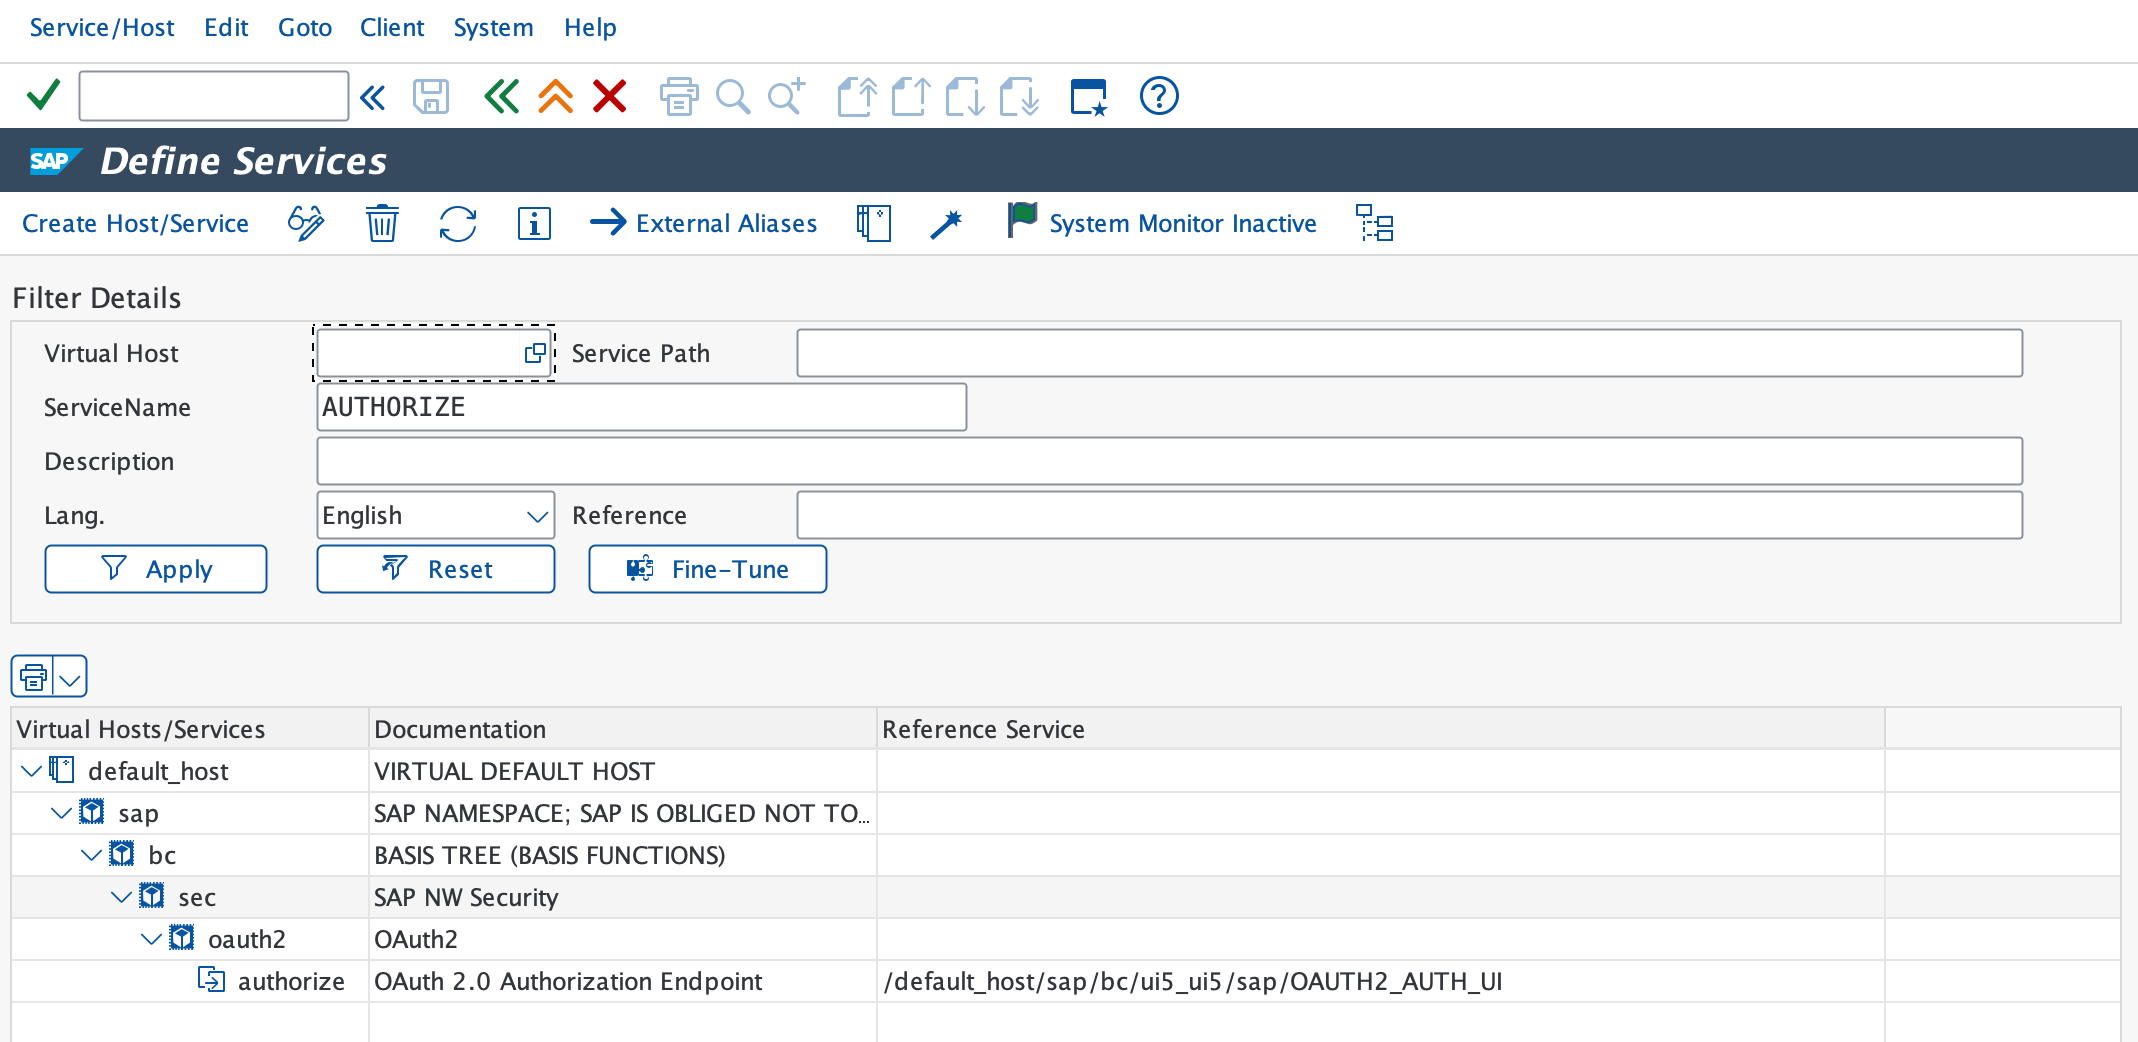
Right-click the authorize service and select Activate Link.
Right-click the service a second time and select Test Link to verify the URL for the service. The URL should be: https://<hostname>:<port>/sap/bc/sec/oauth2/authorize?sap-client=<XXX>
Navigate to the service token under path: default_host/sap/bc/sec/oauth2/.
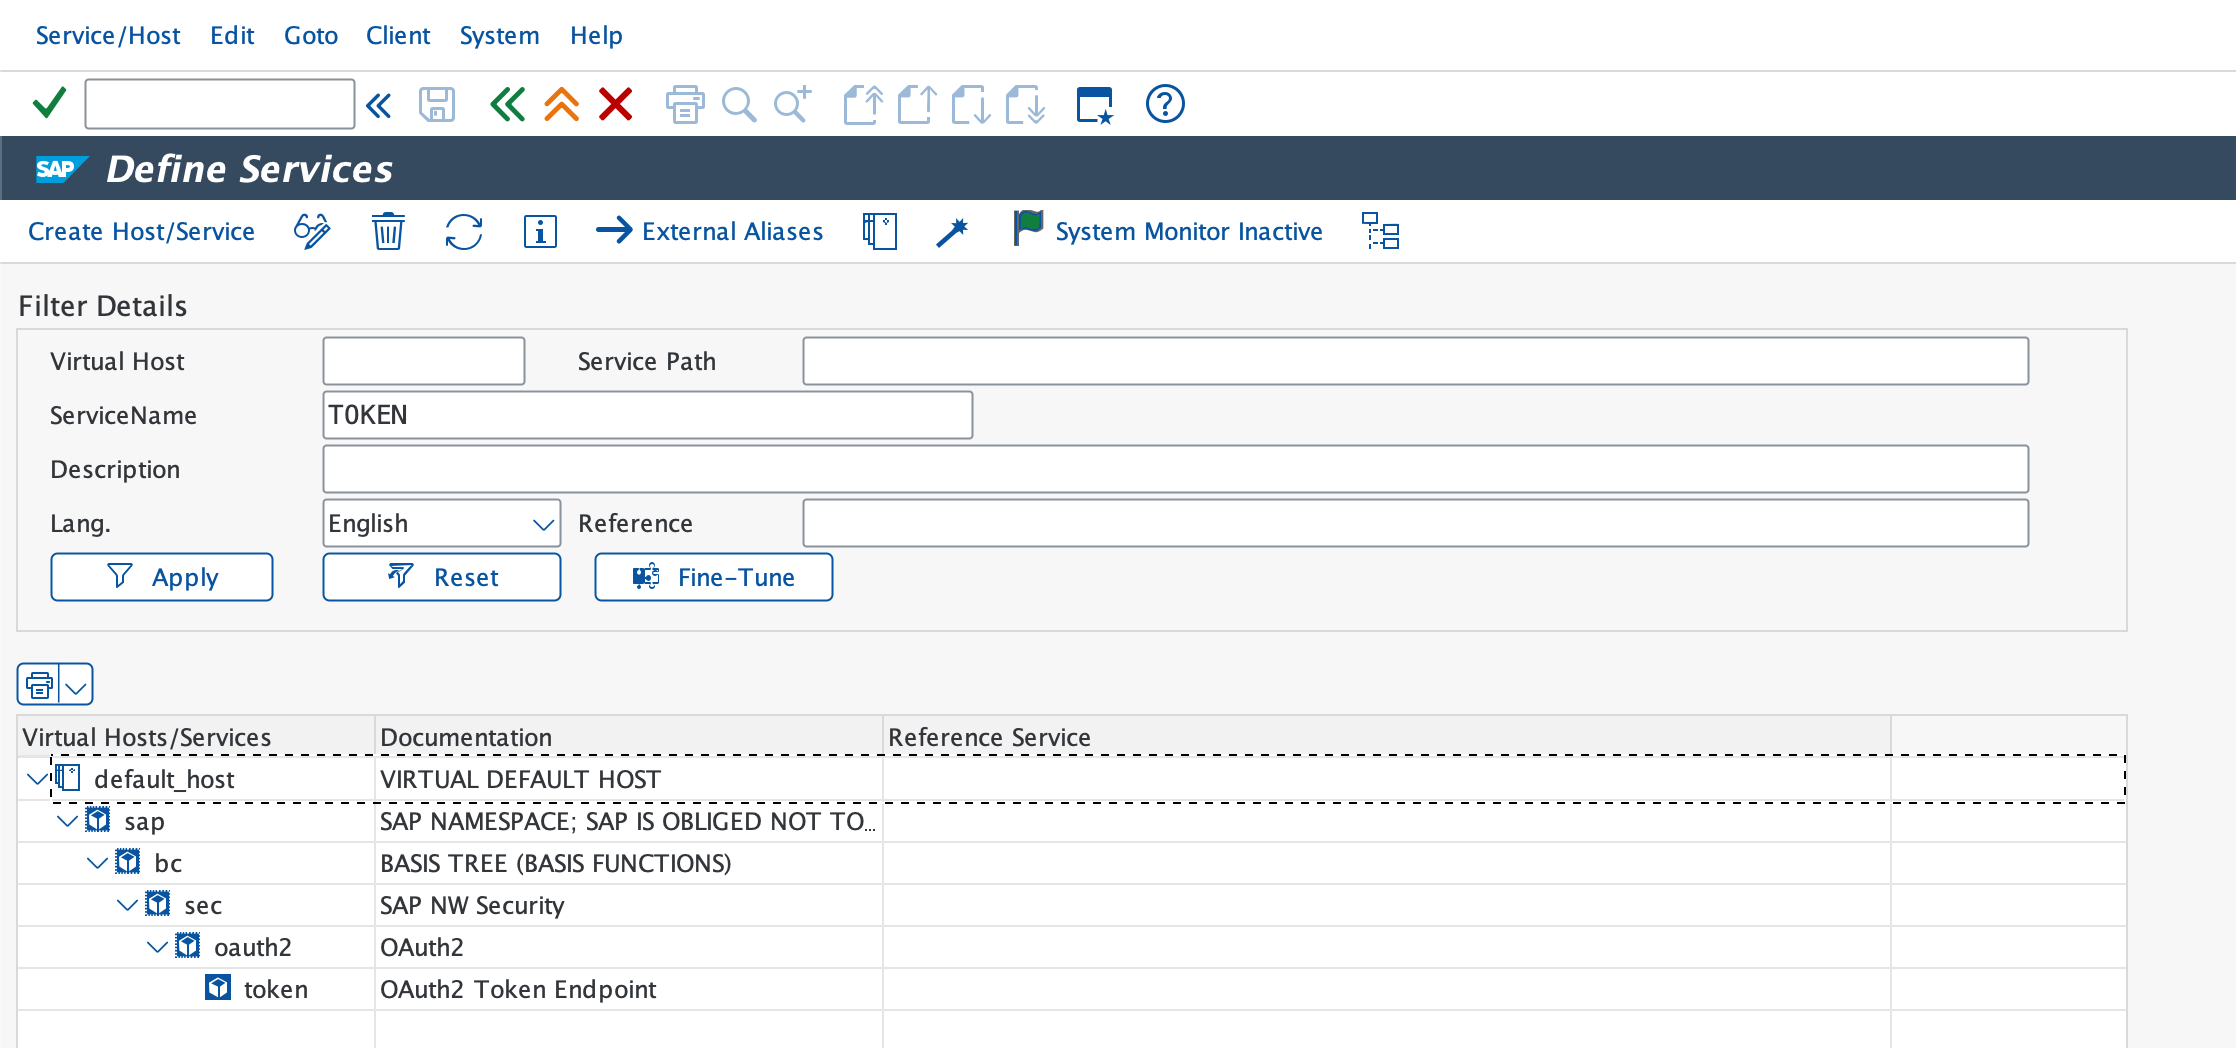
Right-click the token service and select Activate Service.
Right-click the service again and select Test Service to verify the service URL: https://<hostname>:<port>/sap/bc/sec/oauth2/token?sap-client=<XXX>
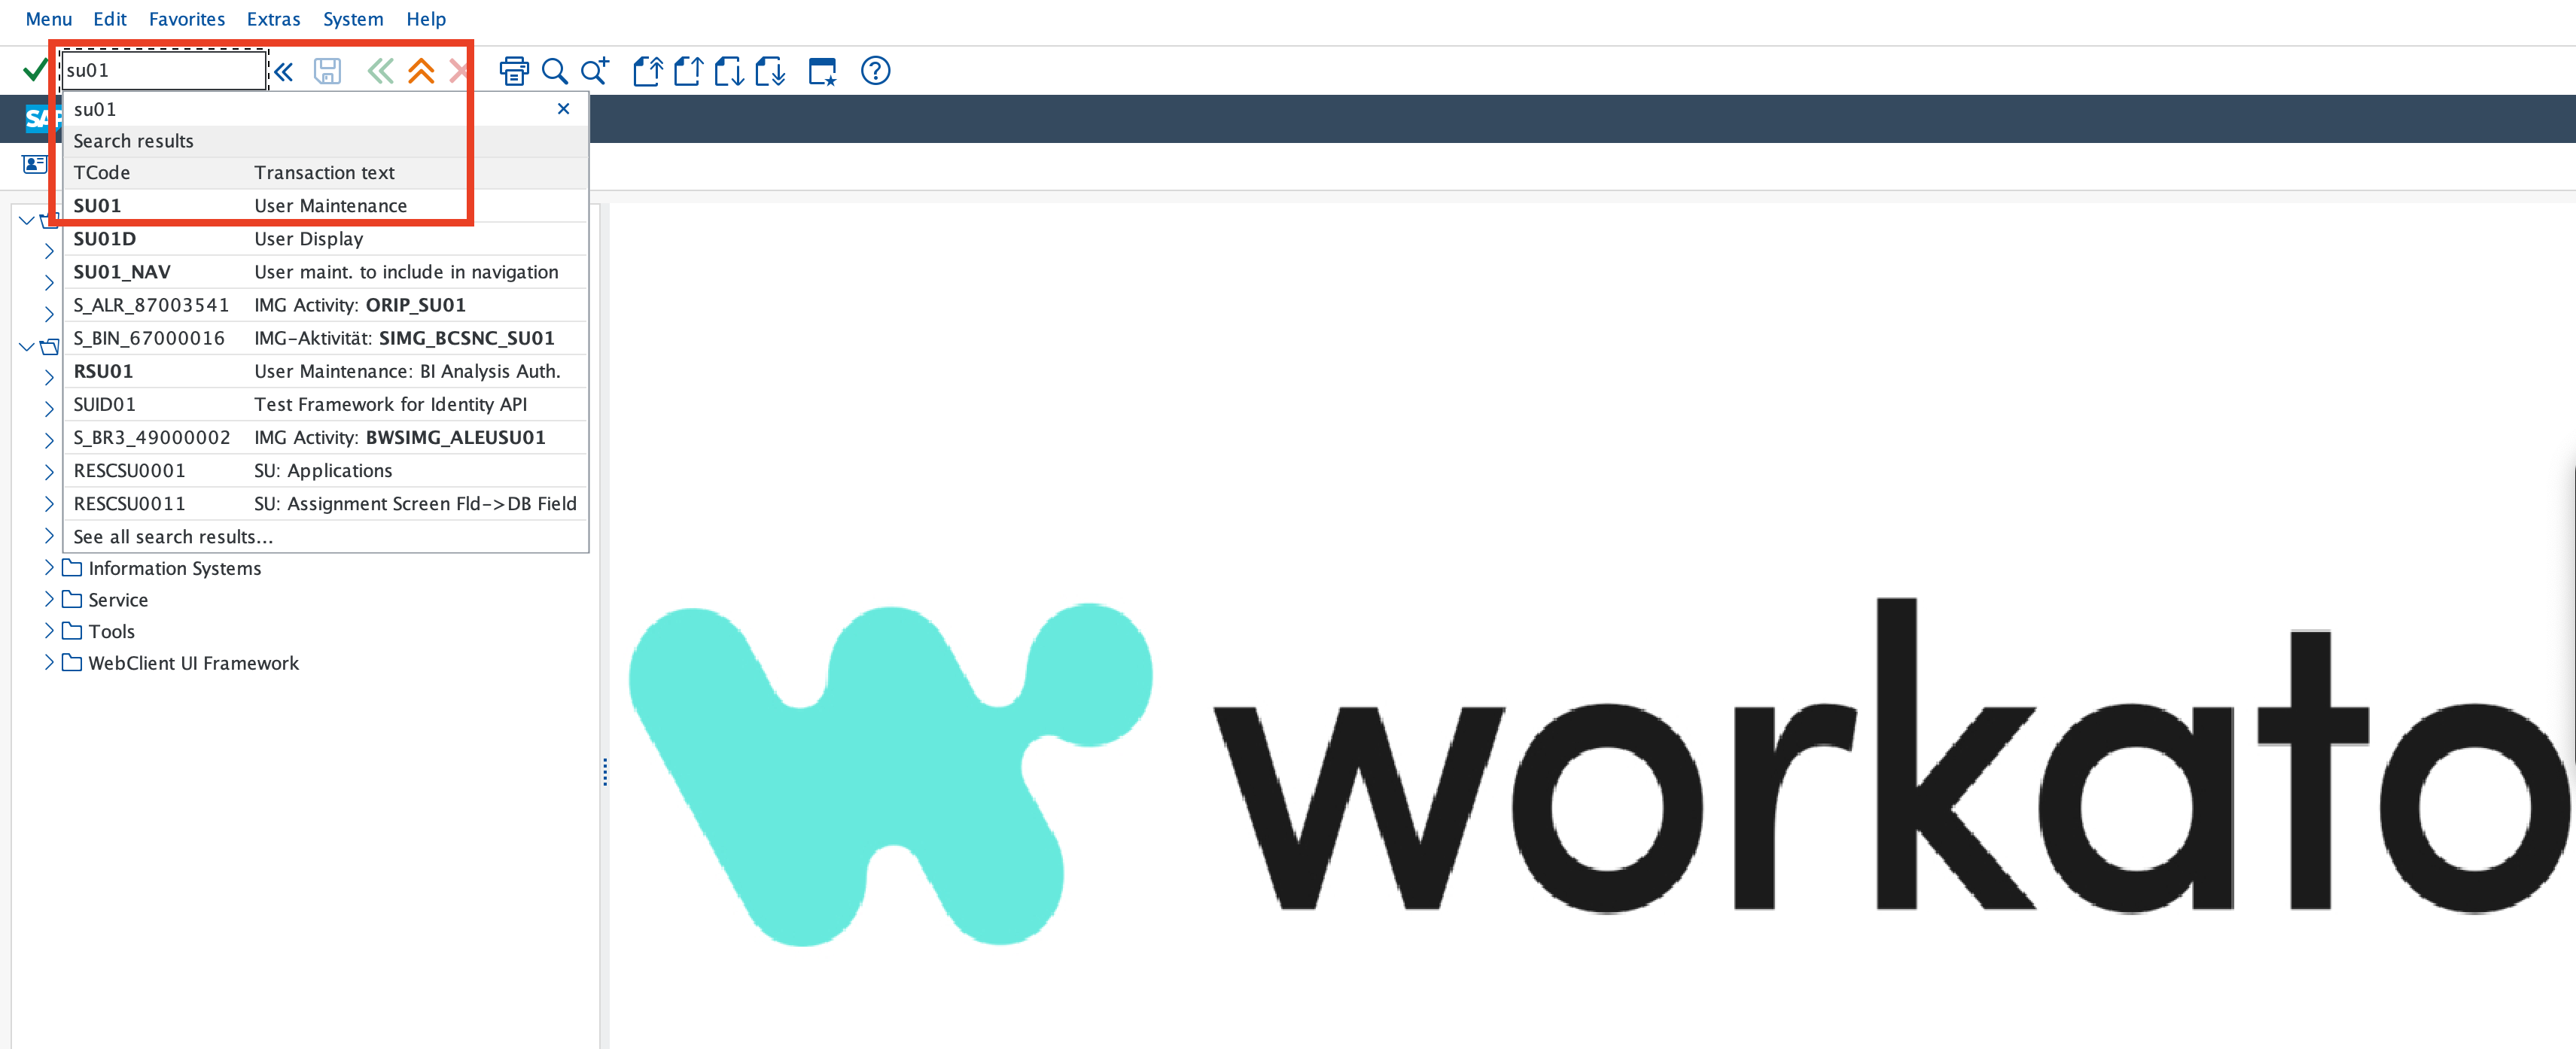
Go to transaction code SU01.
INTEGRATION USER TO BE USED AS CLIENT ID
Refer to the SAP minimum permissions section for the minimum permissions required to establish an OAuth connection.
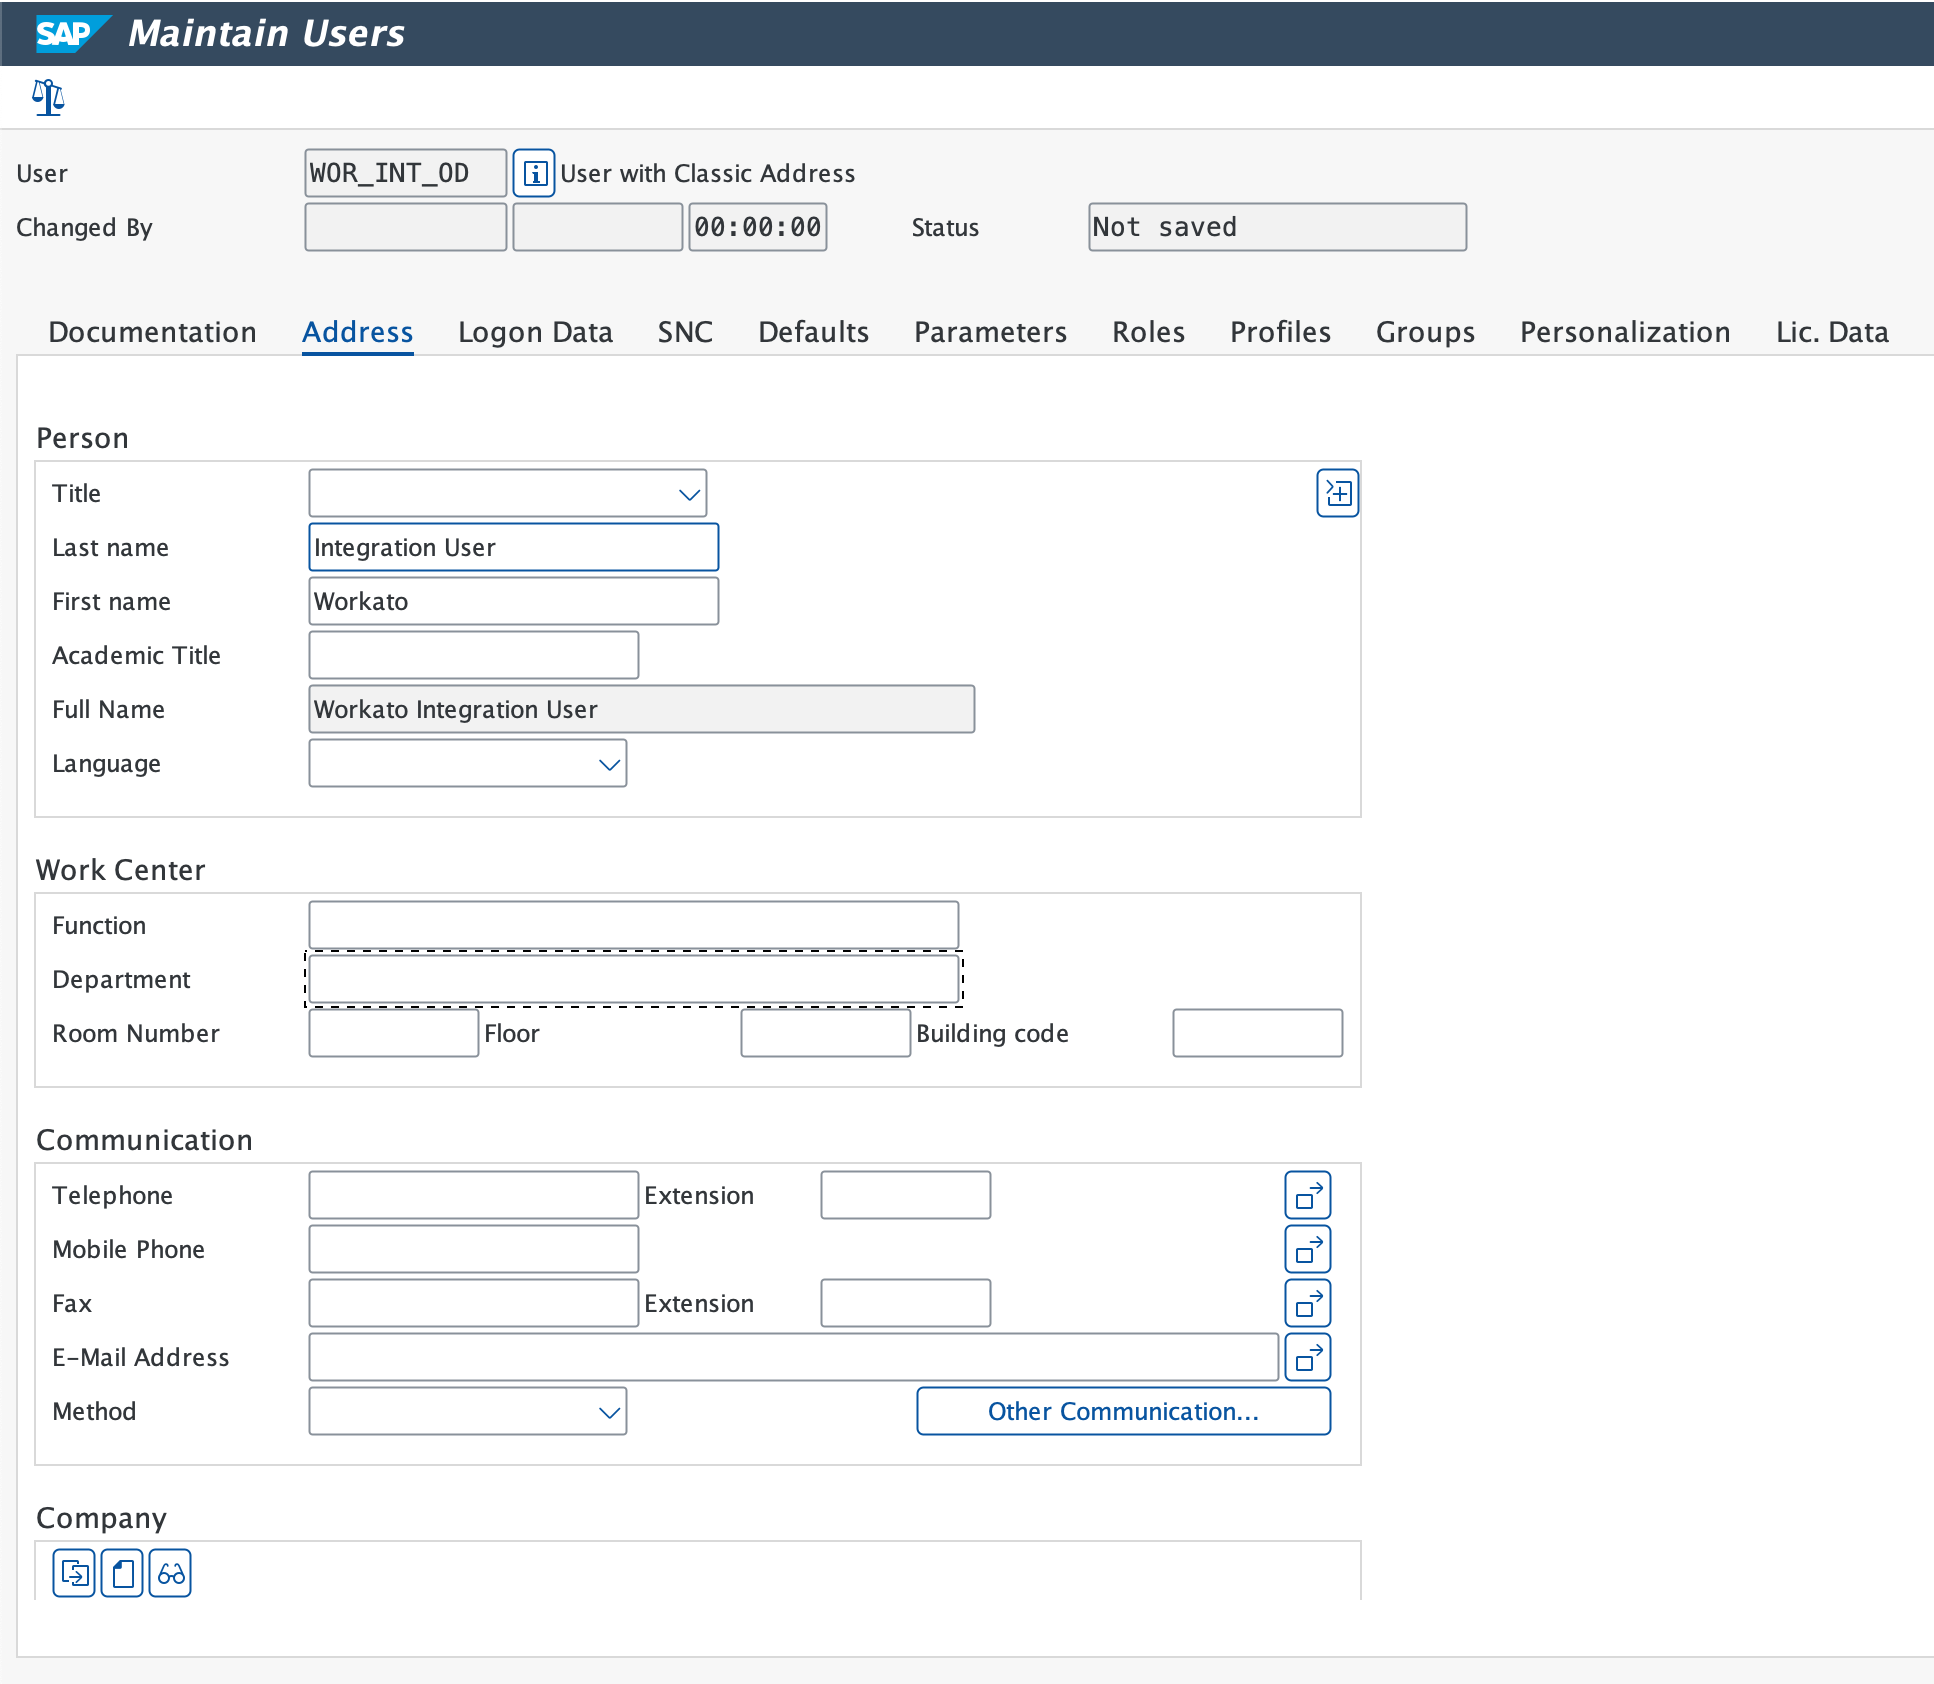
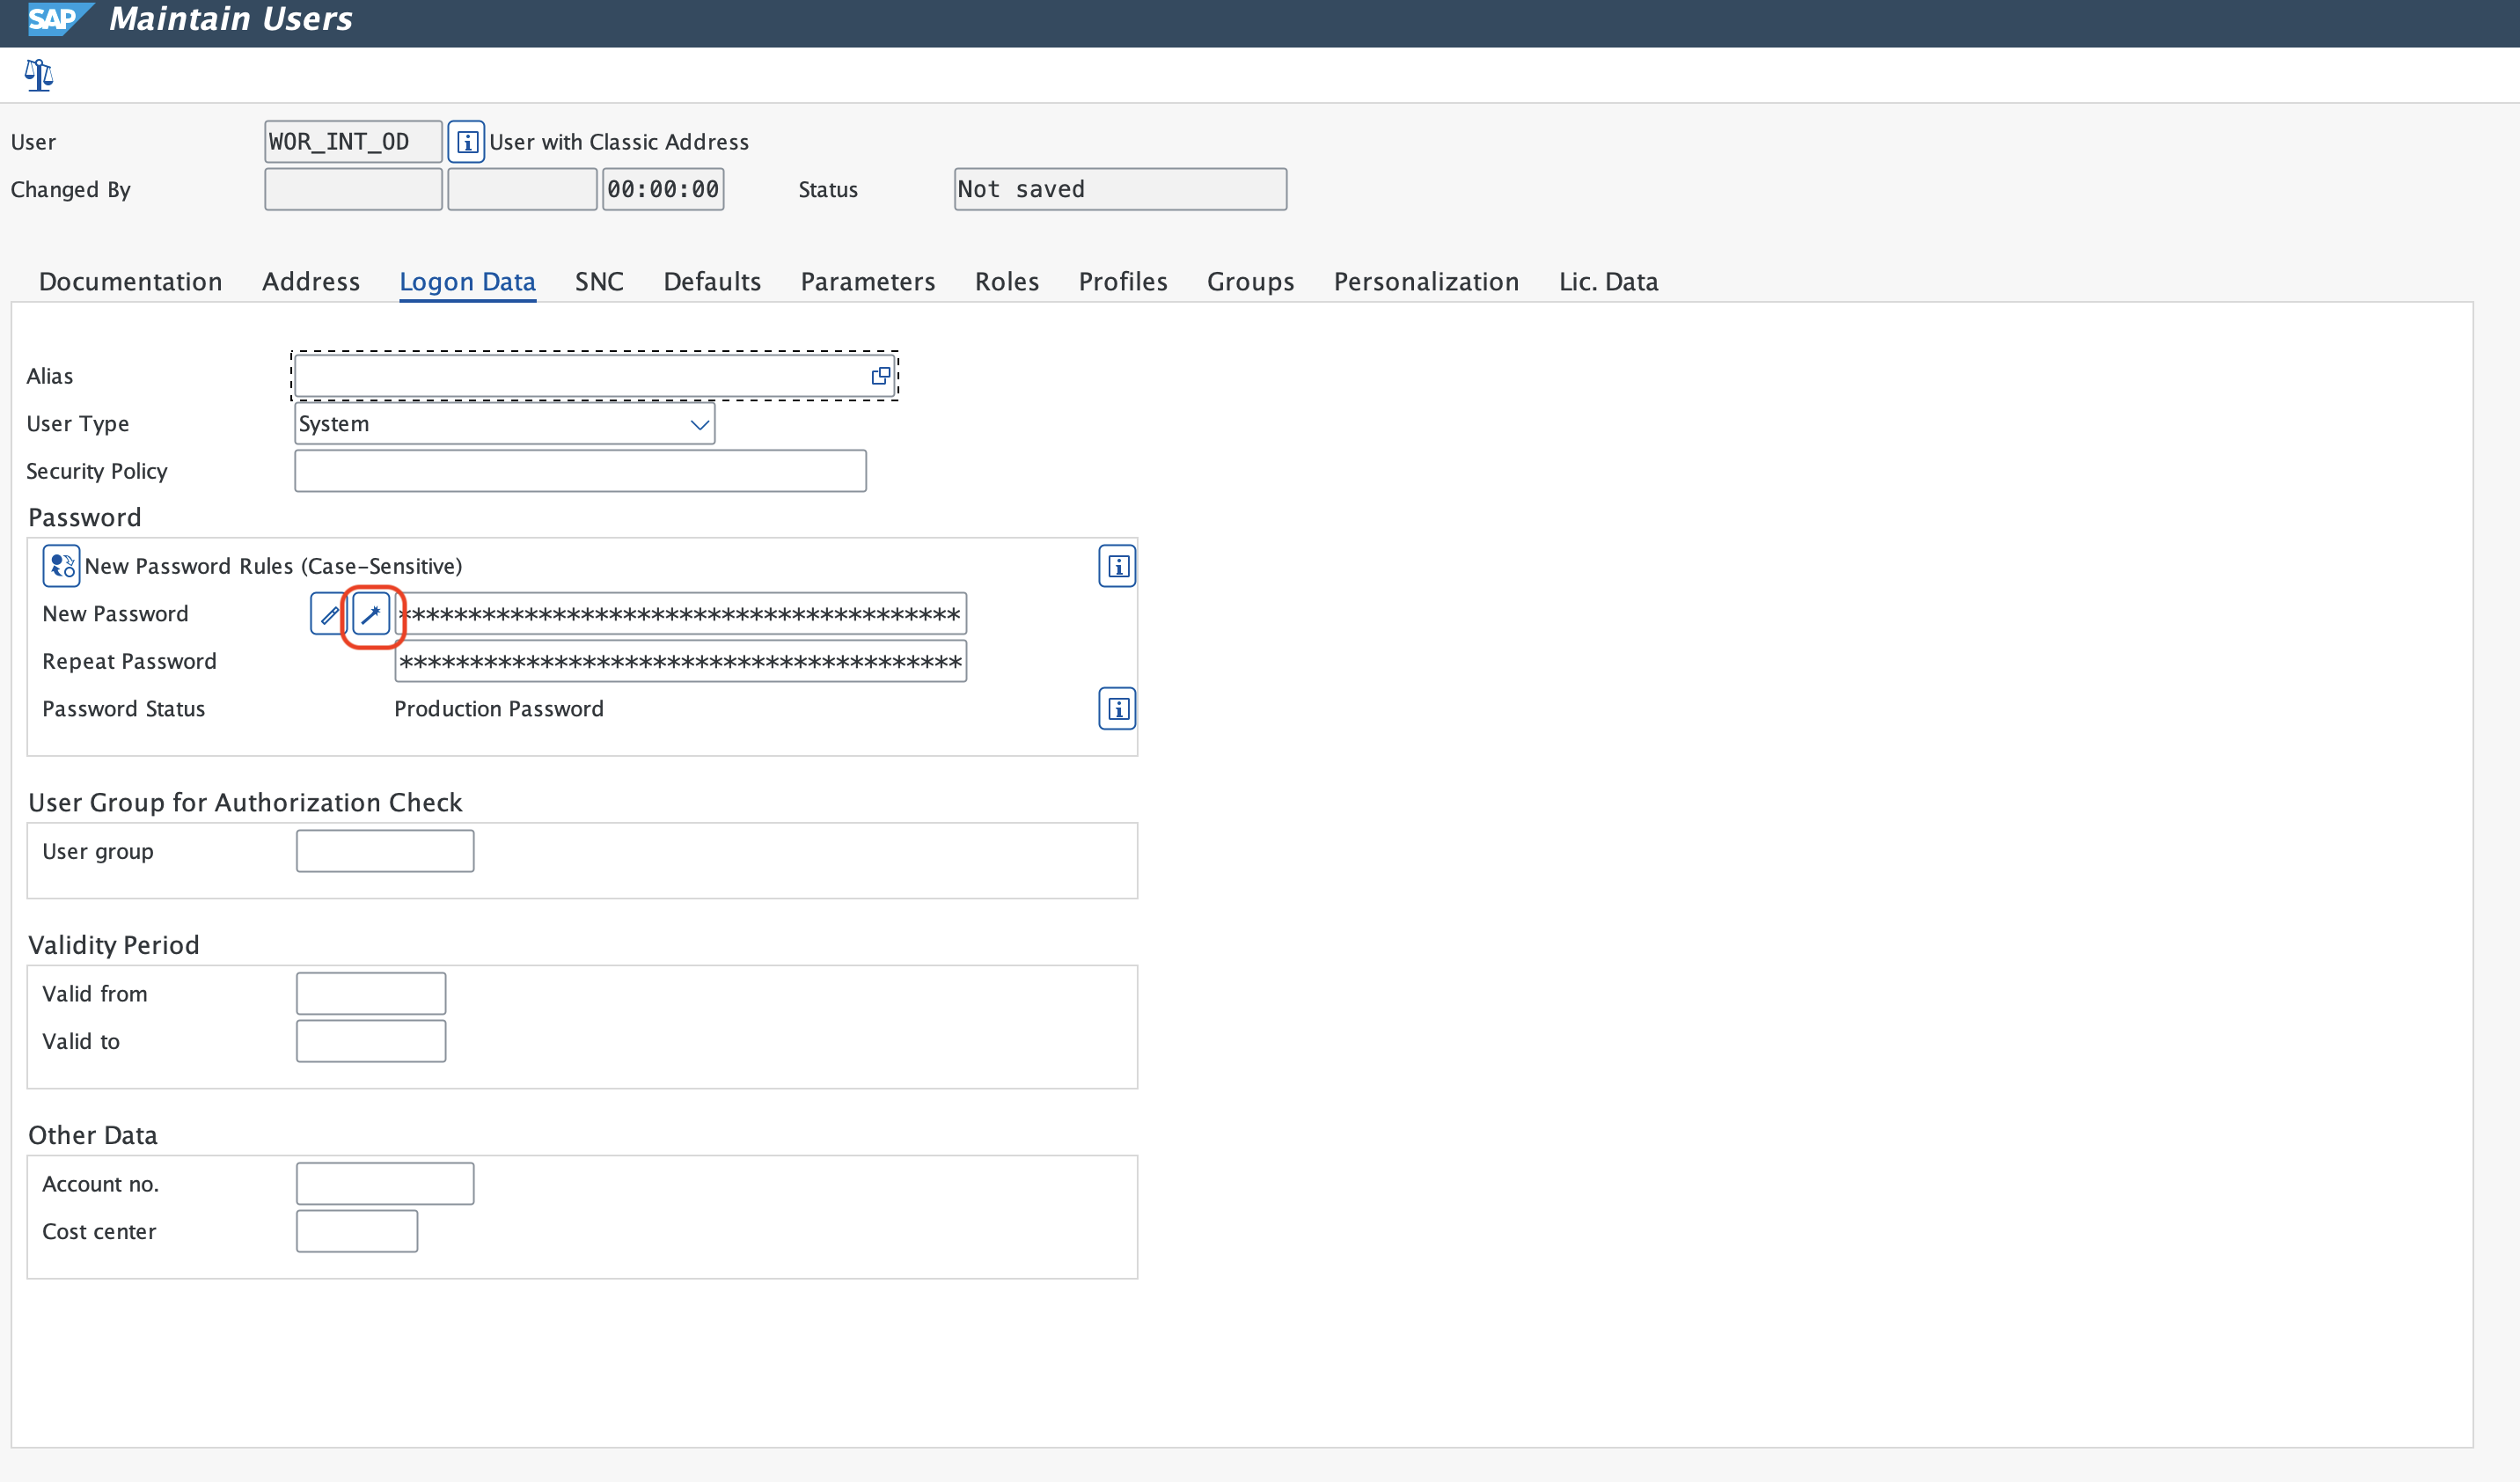
Create an integration user to whom you plan to assign OAuth scopes and ensure that Last name and New Password in the Address and Logon Data tabs are maintained.
PASSWORD AND USER RECOMMENDATION
We recommend that you use the Generate option to obtain a complex string for enhanced security. This string is used as the client secret. Additionally for this user, maintain the user type as System user which will restrict GUI access for this user.
Configuration for OAuth2.0 Client ID
Complete the following steps to set up the OAuth Client ID:
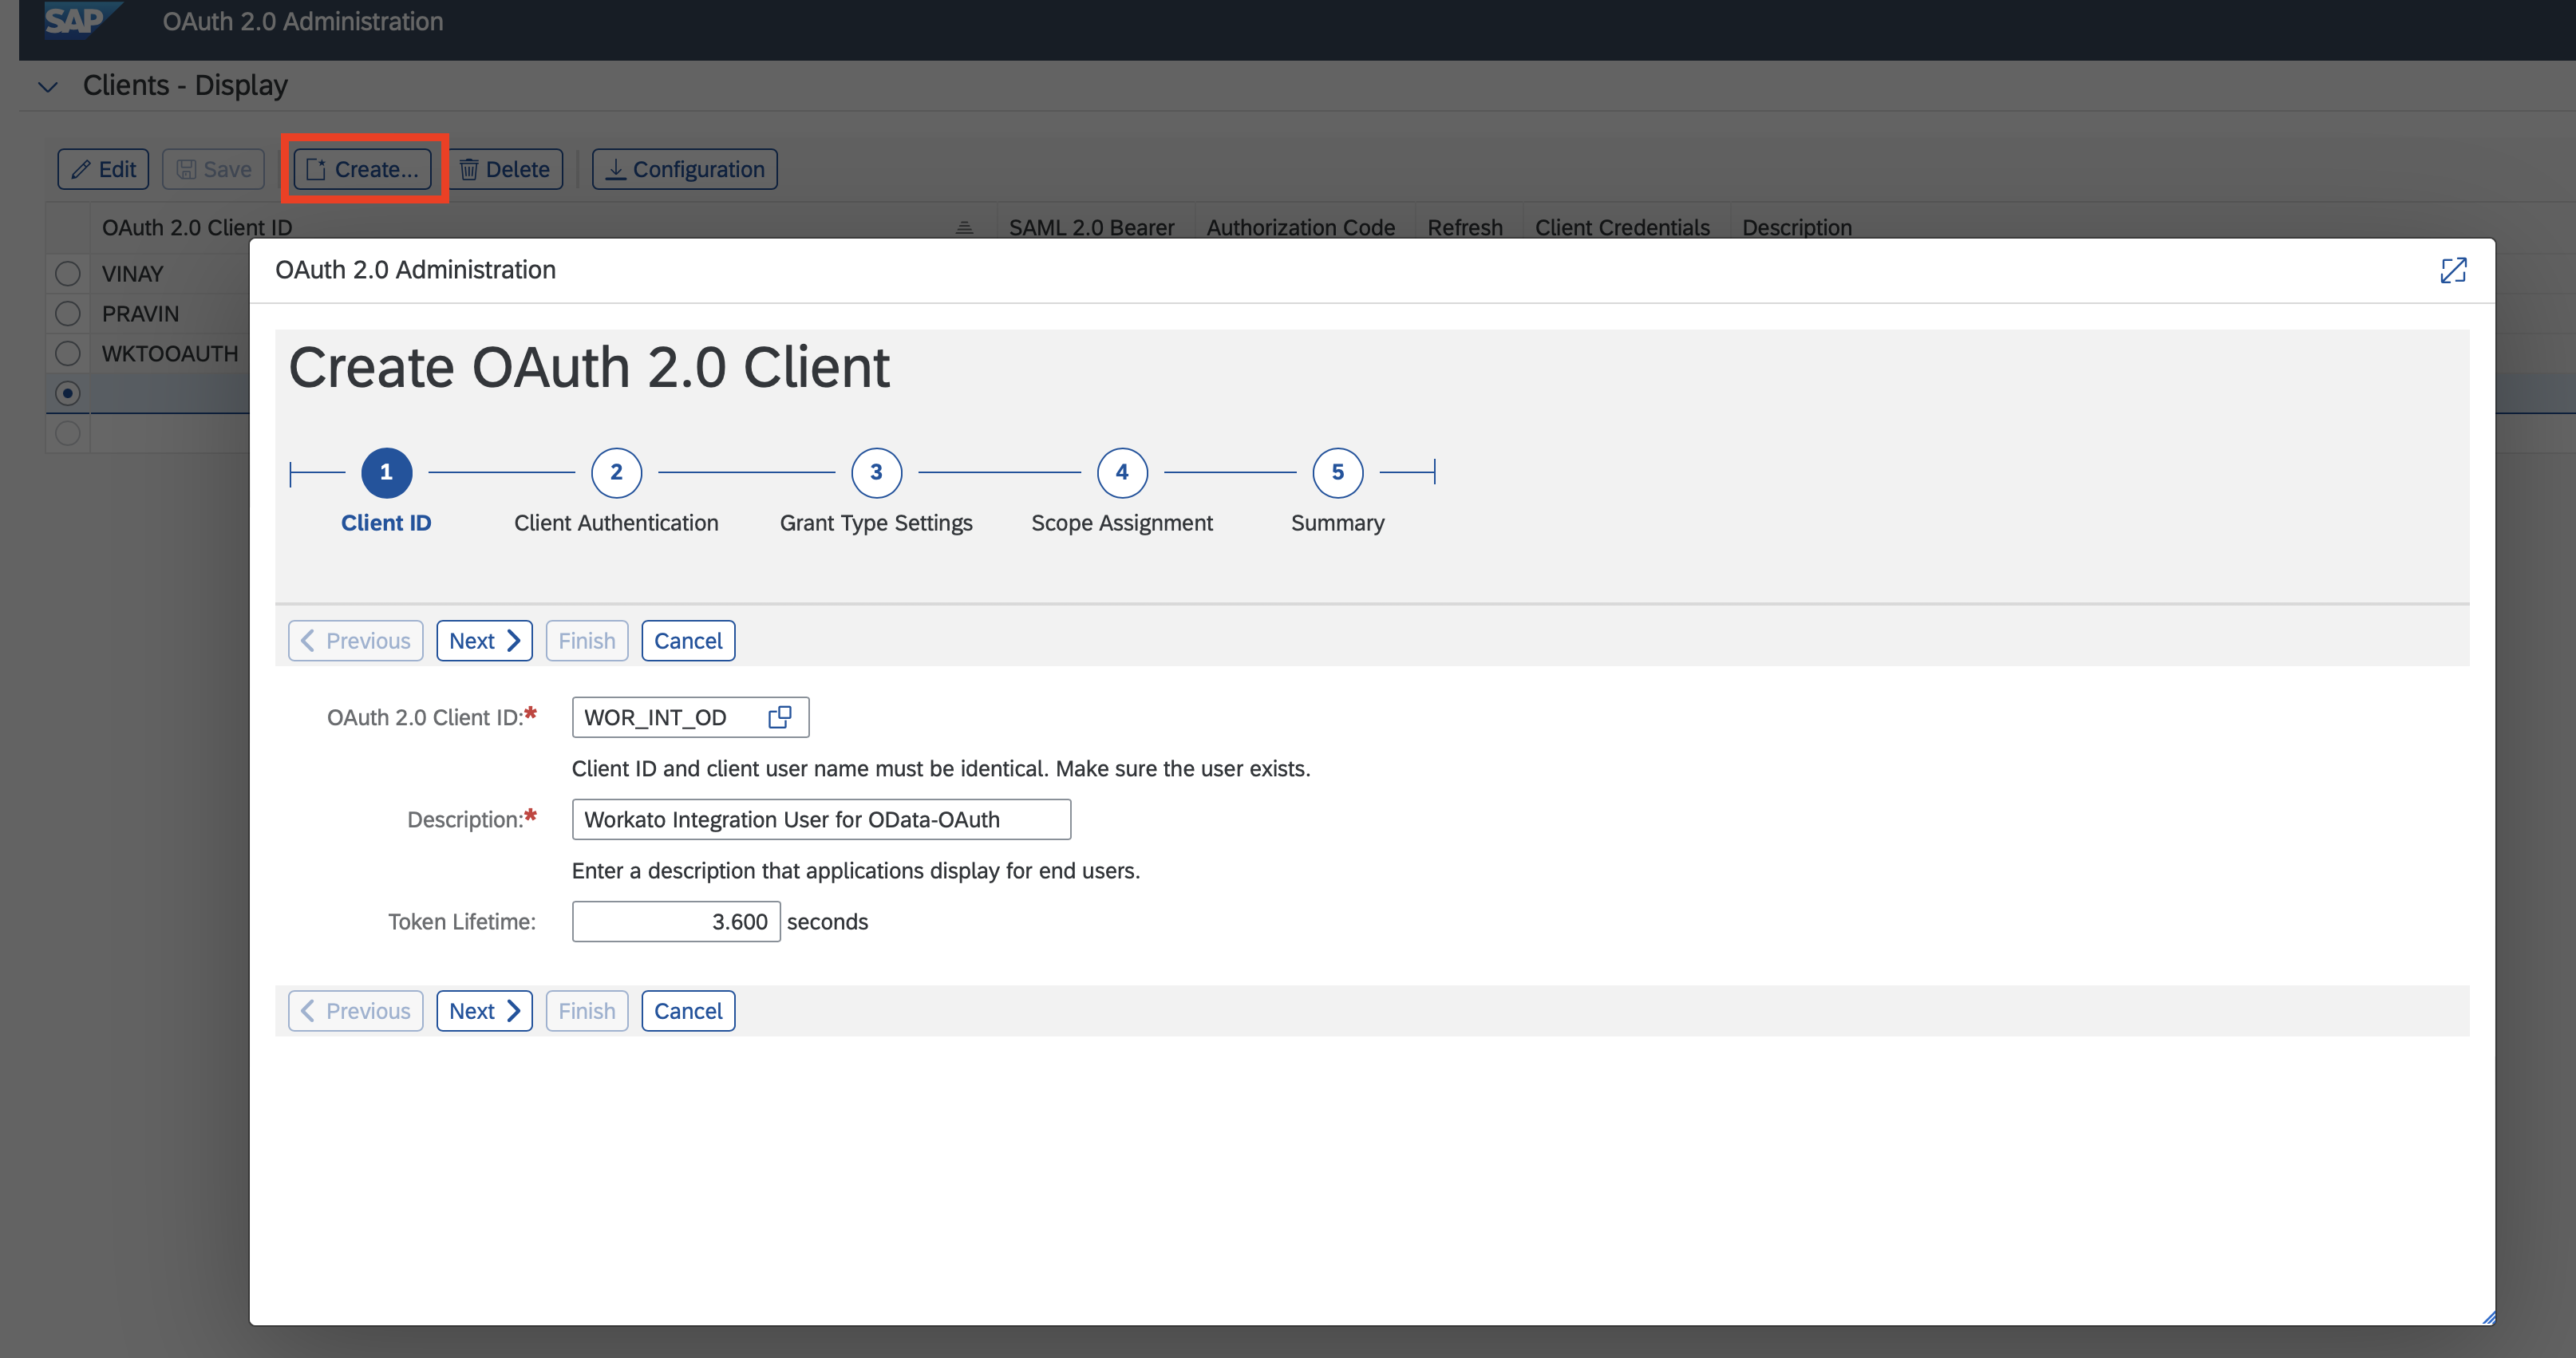
Go to transaction code SOAUTH2. 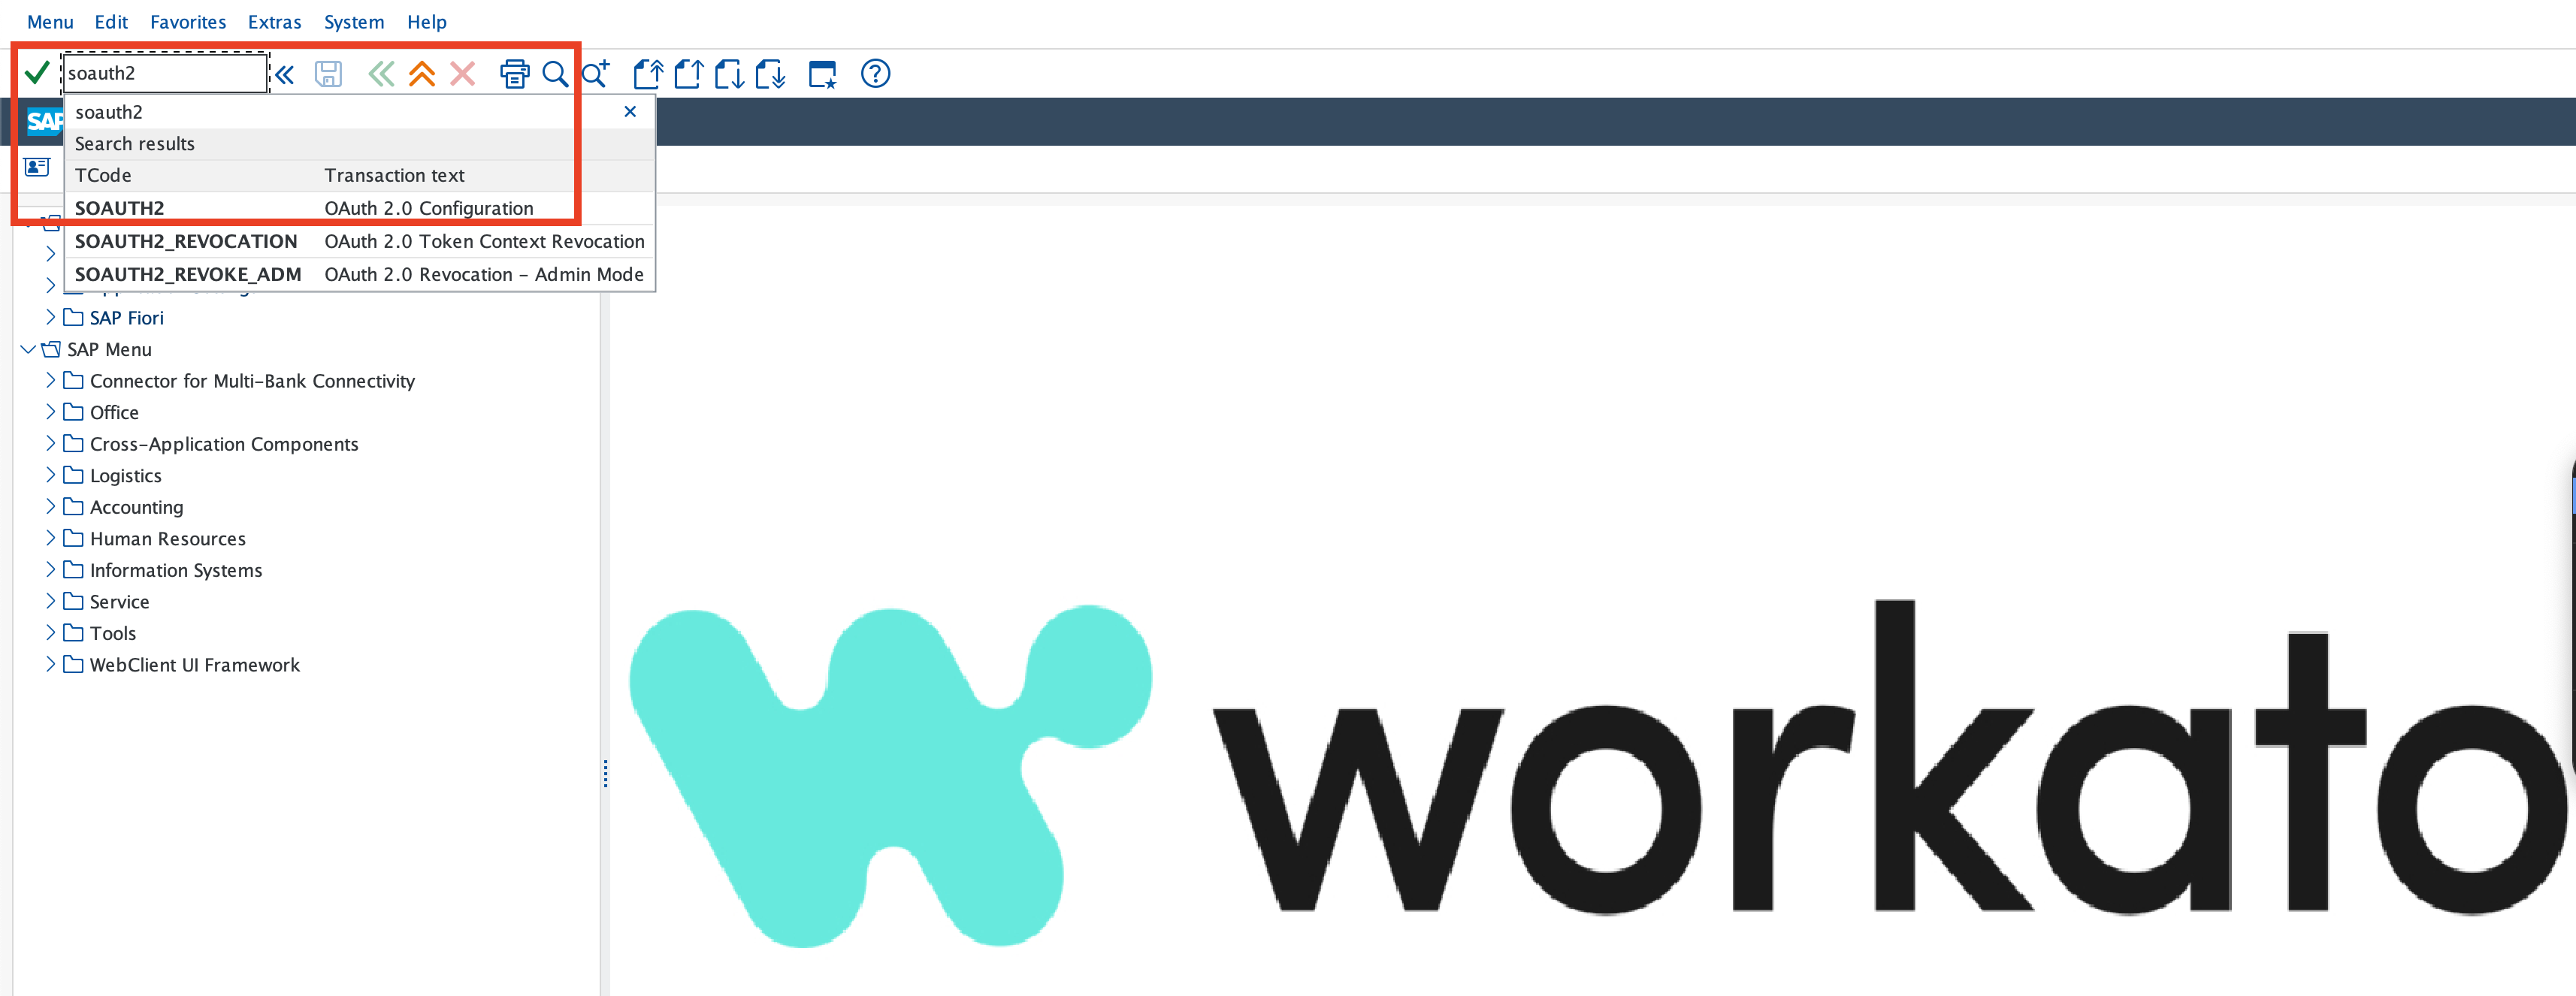
Click Create and fill in the required user details and values.
CLIENT ID USAGE RECOMMENDATION
We recommend that you create multiple client IDs for individual connections to avoid connection loss if you plan to create multiple connections in Workato that point to the same SAP system.
Based on the chosen grant type, select the Grant Type Authorization Code Active or Grant Type Client Credentials Active and Refresh Allowed checkboxes. Maintain the Redirect URI with callback URI for your data center. 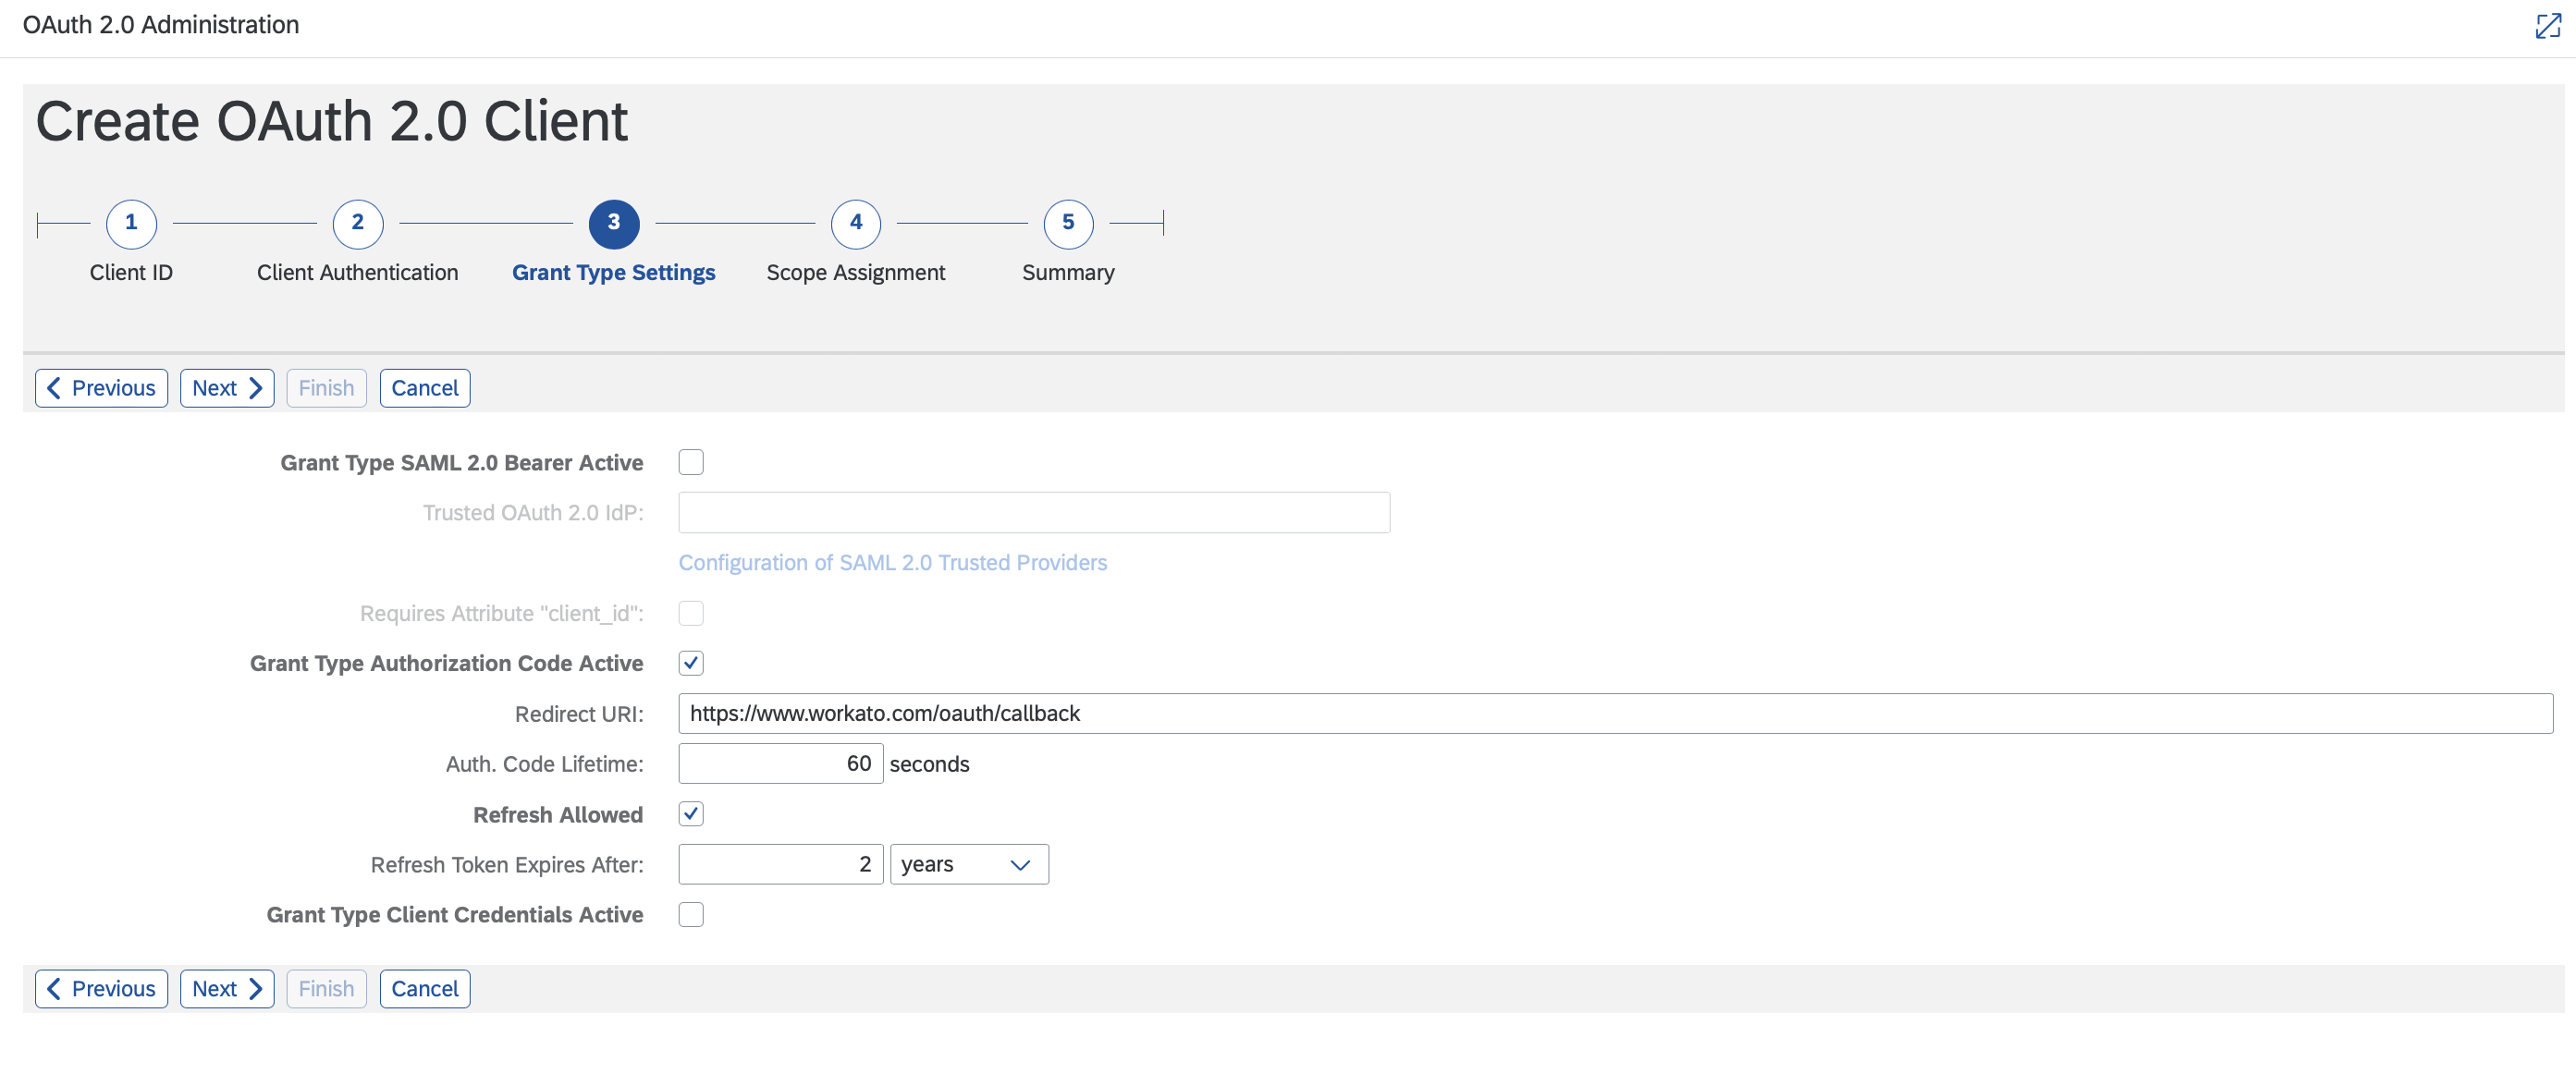
Click Add and select the scope you plan to use from the list. For example: the selected scope ZAPI_SALES_ORDER_SRV_0001 provides access to the API_SALES_ORDER_SRV service. 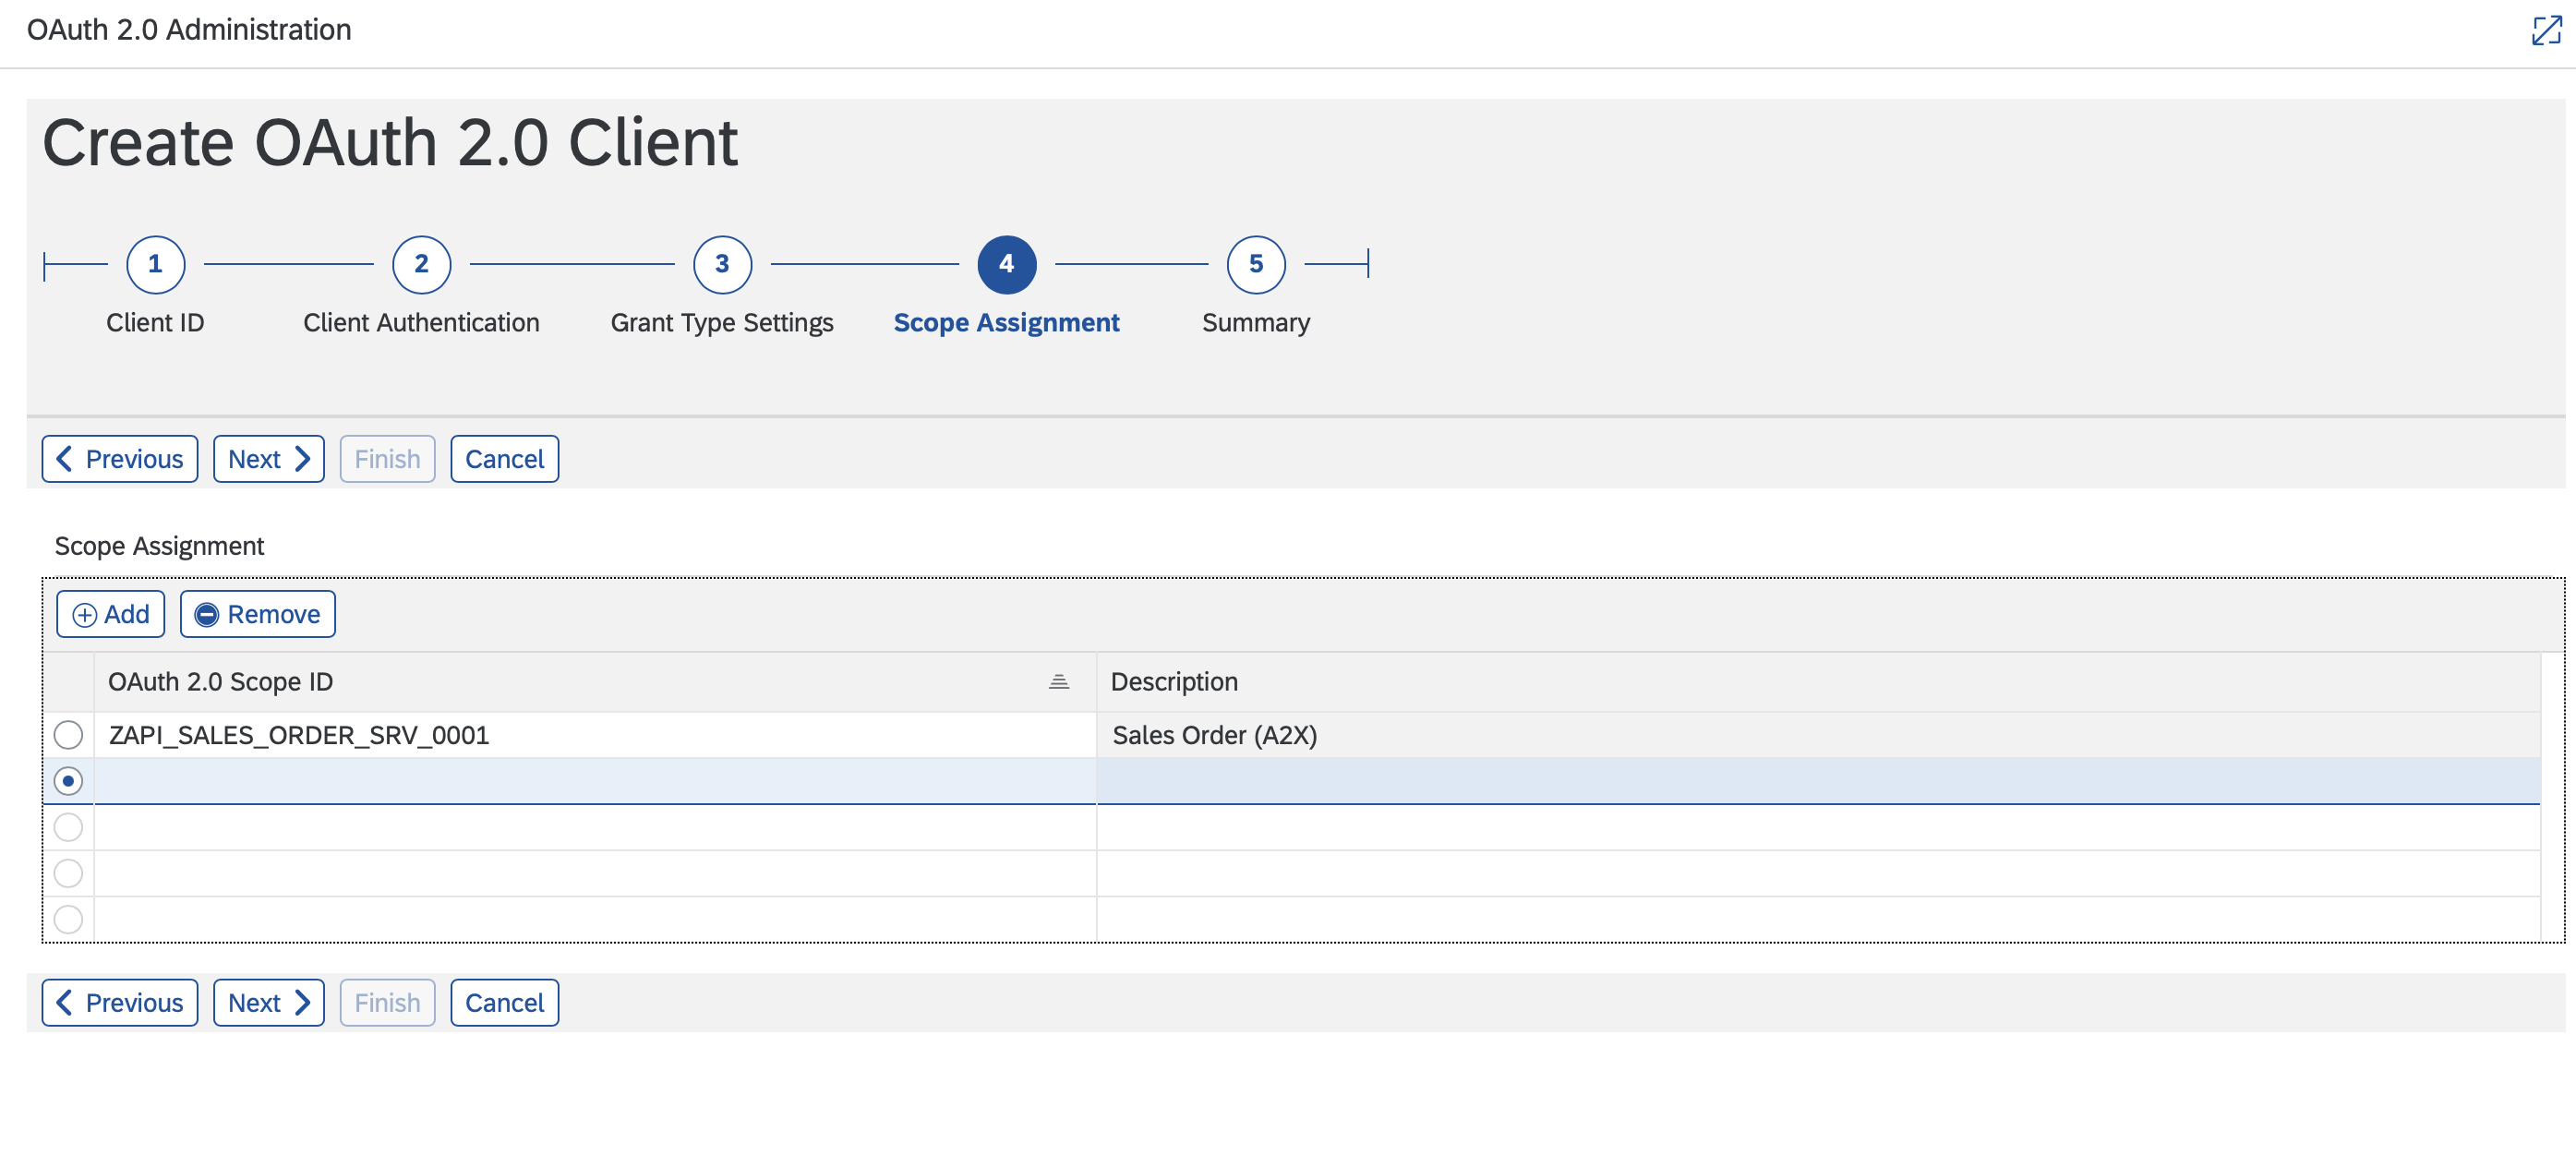
Click Next, review the summary, and then click Finish.
Your OAuth2.0 Client ID setup is complete. 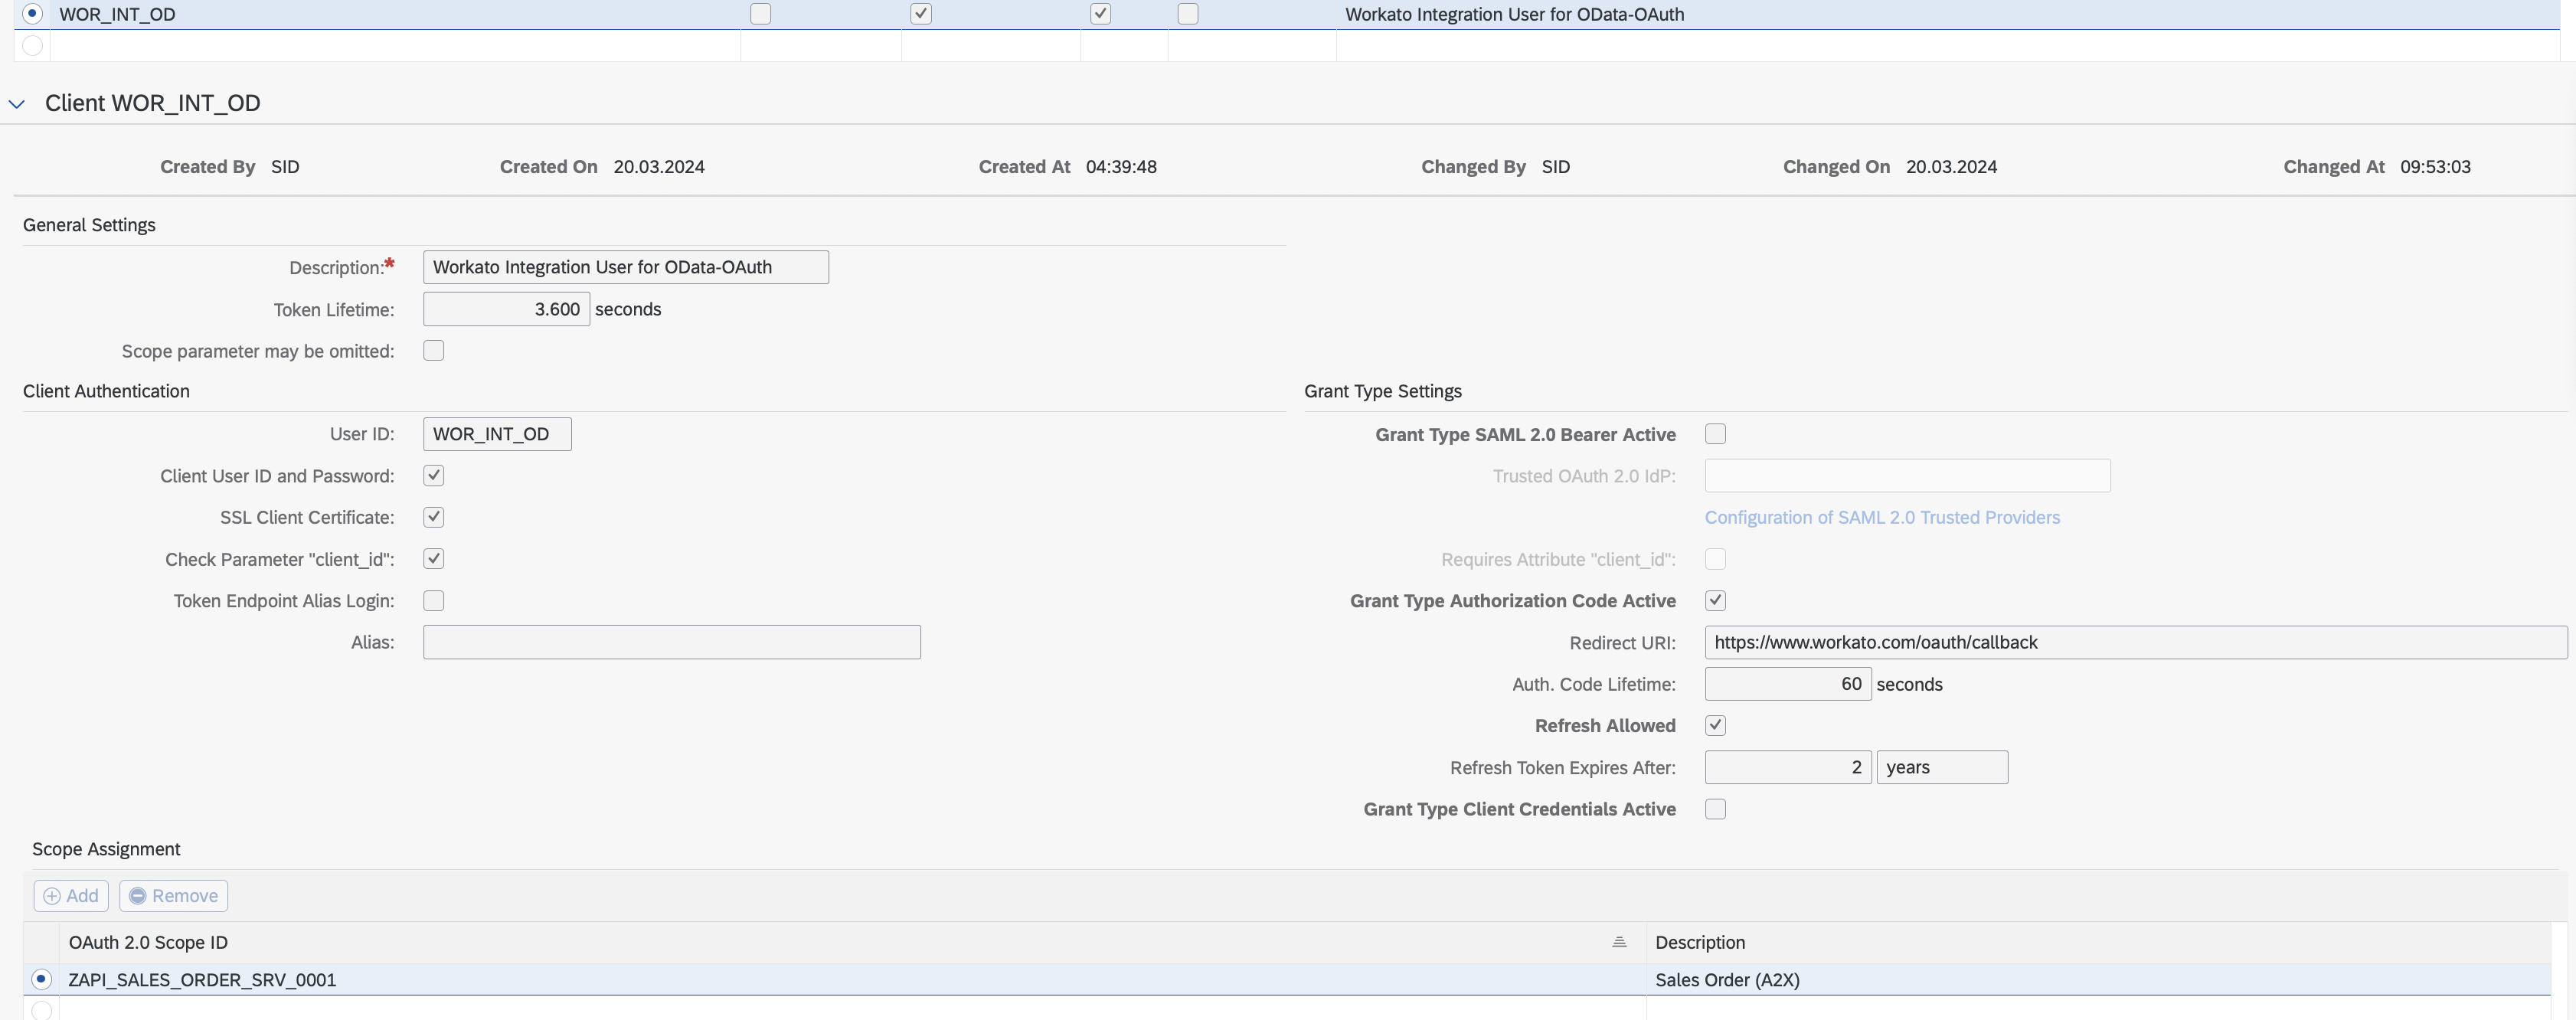
Connection fields
Complete the following fields in Workato to finish establishing your connection:
ODATA VERSIONS
We recommend that you create dedicated connections for V2 and V4 APIs.
| Field | Description |
|---|---|
| Connection name | Provide the connection with a descriptive name so you can reuse it in other recipes. |
| Connection type | Choose an on-prem agent running on the same domain as the on-premise SAP system. Before attempting to connect, make sure you have an active on-prem agent. |
| Authentication type | Select OAuth2.0 Authorization code or OAuth2.0 Client credentials. |
| OData version | Select the OData version for the API you plan to use in this connection - v2 or v4. |
| Client ID | Enter the userID created during the OAuth connection setup. |
| Client Secret | Enter the password. This is the password you either generated or added during the OAuth connection setup. |
| Scopes | Provide the scopes you plan to use to access your SAP OData system. For example: ZAPI_SALES_ORDER_SRV_0001. You must separate multiple scopes with a comma. |
| Host | The base path of your SAP OData services. For example, if the service URL is https://www.myS4HanaSystem.com/sap/opu/odata/sap/API_SALES_ORDER_SRV, then your host is https://www.myS4HanaSystem.com/sap/opu/odata/sap/. |
| Service | Provide a sample service that you can use to test authentication. This can be the first service that you configured. For example, if the service URL is https://www.myS4HanaSystem.com/sap/opu/odata/sap/API_SALES_ORDER_SRV, then your Service is API_SALES_ORDER_SRV. |
| SAP client | Provide the SAP client in which this OData service exists. For example, if the service URL is https://www.myS4HanaSystem.com/sap/opu/odata/sap/API_SALES_ORDER_SRV?sap-client=100, then your sap client is 100. If you do not specify a client, the default client set in SAP is used. |
| Bypass SSO/SAML2 | Only valid for OAuth2.0 Authorization code. Select Yes to establish a connection to the SAP system by bypassing SAML 2.0 setup with a non-federated user. |
Last updated: