Zoom
Zoom provides a cloud platform for video and audio conferencing, collaboration, chat, and webinars. Zoom is accessible across mobile devices, desktops, telephones, and room systems.
Watch a quick video
API version
The Zoom connector uses Zoom's REST API v2.
Connection setup
The Zoom connector uses OAuth 2.0 authentication.
Zoom setup for OAuth 2.0 authentication
Complete the following steps to connect to Zoom in Workato with OAuth 2.0 authentication:
RECOMMENDED SETUP
We recommend that you set up a dedicated API user account in Zoom or create a custom OAuth profile to authorize Workato. This allows you to assign the API user to a role with only the necessary permissions.
Alternatively, you can use an existing Zoom owner or admin account if it has the required permissions. Some admin accounts may have restricted access based on their configuration.
Add an API user
Complete the following steps to set up a provisioned API user for Workato:
Sign into your Zoom account.
Go to Admin > User Management > Users.
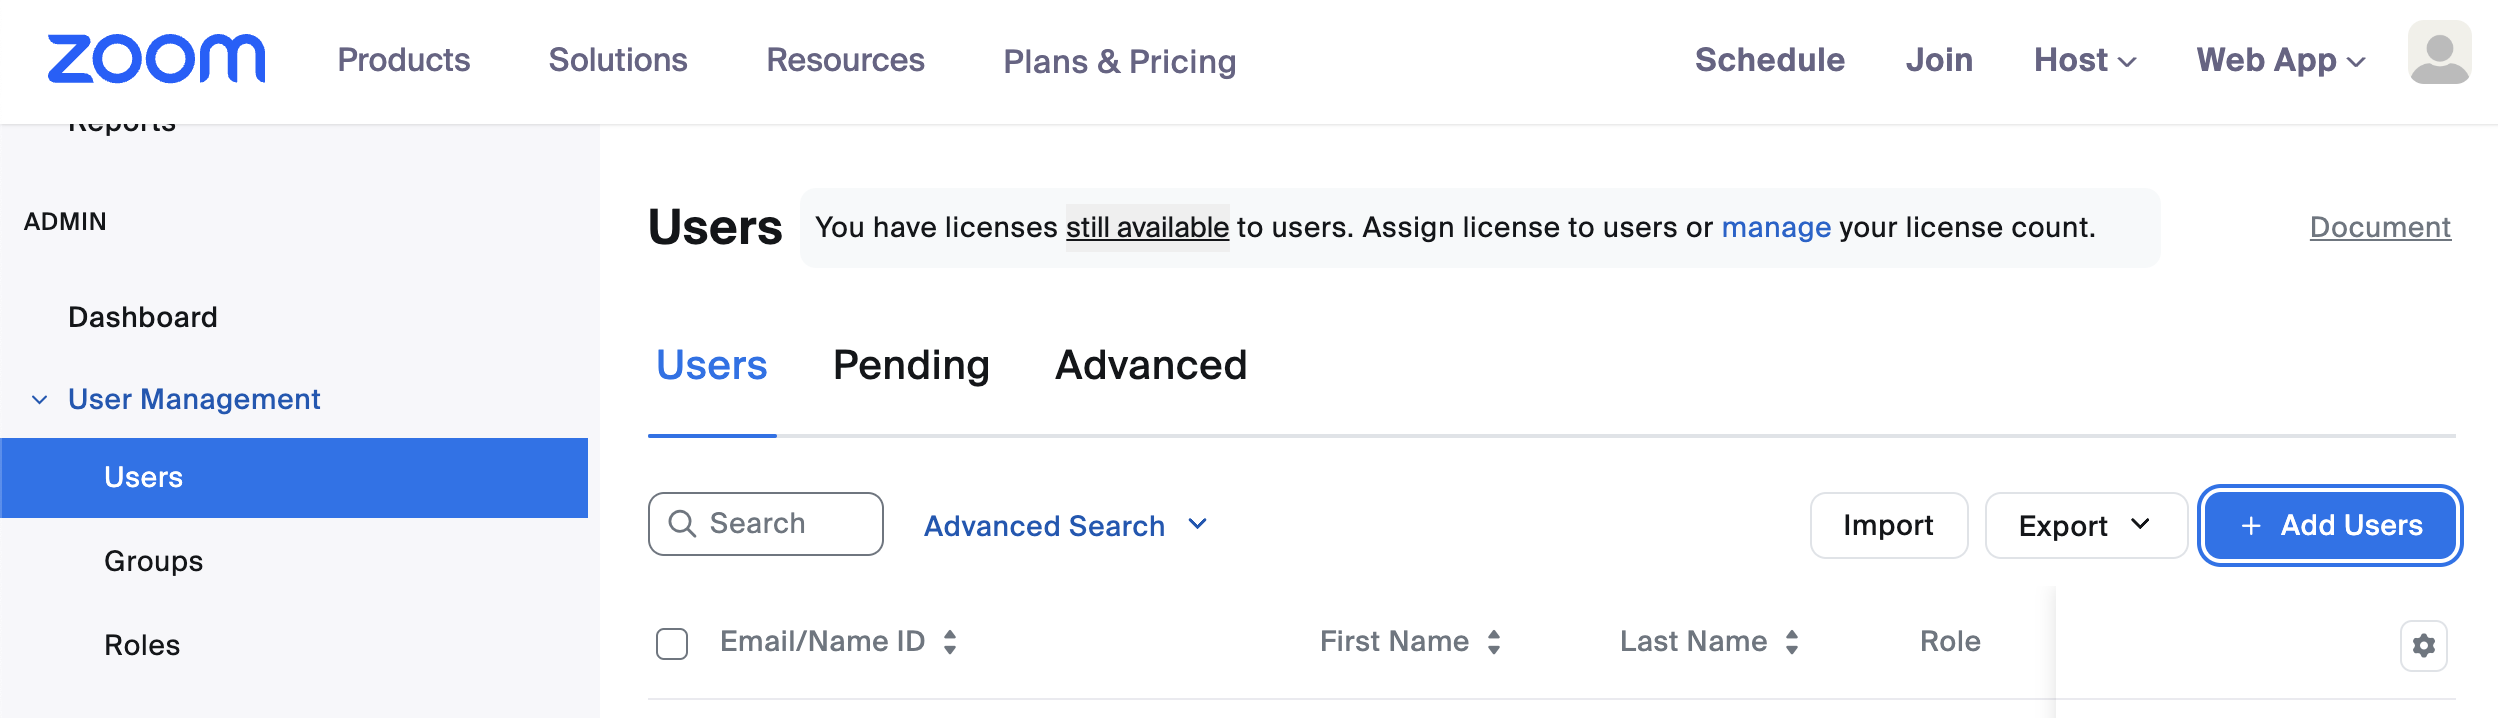 Add users
Click Add Users.
Enter an appropriate email for the API user. We recommend an IT admin alias.
Enter N/A or make selections based on your requirements for the following fields: Department, Manager, Job Title, Location, and User Groups.
Click Add.
Go to Admin > Roles.
Select Add Role.
Provide a Role Name and Description.
Click Add.
Go to Roles > Roles Settings and add the following permissions to your Zoom role. Role permissions are required to allow the Workato Zoom connector to perform account-level actions, such as scheduling meetings or webinars on behalf of other Zoom users.
Users: View and EditRole management: View and EditGroups: View and EditRecording management: View and EditZoom rooms: View and EditMeetings: ViewWebinars: ViewUsage reports: ViewSchedule tracking fields: View and Edit
Click Save Changes.
Go to User Management > Users and locate the user you created in the preceding steps.
Click Edit and use the User Role drop-down menu to select the role you created.
Click Save.
Create a custom OAuth profile
Complete the following steps to create a custom OAuth profile for Workato:
Go to Tools > Custom OAuth profiles in Workato.
Click + New custom profile.
Search for Zoom and select it as your app.
Enter a name for your custom OAuth profile in the Name field.
Click Create new app.
Go to the Zoom App Marketplace and sign in to your Zoom account if you're not signed in already.
Click Develop > Build App.
 Build app
Choose the kind of app to create from the following options: General App, Server to Server OAuth App, or Webhook Only App. If you can't select the options, you must enable the Zoom for developers role. Refer to the Zoom Select general app features page to learn how to enable the Zoom for developers role.
Click Create.
Enter a name for your app and select how the app is managed. Refer to the Zoom Step 2: Maintain basic information page for more information.
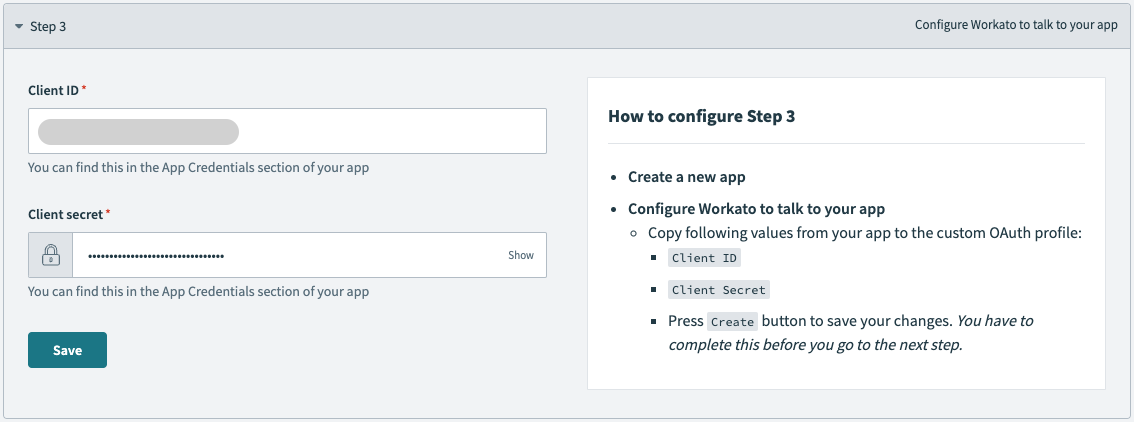
Copy and save the Client ID and Client Secret for use in Workato.
 Copy the Client ID and Client Secret
Enter https://www.workato.com/oauth/callback in the OAuth Redirect URL field.
Optional. Configure settings in the Access, Surface, and Embed tabs as required.
Go to Scopes and click + Add Scopes to add the required scopes.
Search for and select the required scopes for your connection.
Click Done.
Go to the Local Test tab and select Preview your app listing page to ensure your settings are properly configured.
Return to the New custom profile page in Workato and paste the Client ID and Client secret into their respective fields.
 Paste the client ID and client secret
Click Save.
Connect to Zoom with OAuth 2.0 authentication
Complete the following steps to connect to Zoom in Workato:
Click Create > Connection.
Search for Zoom and select it as your app.
Enter a name for your connection in the Connection name field.
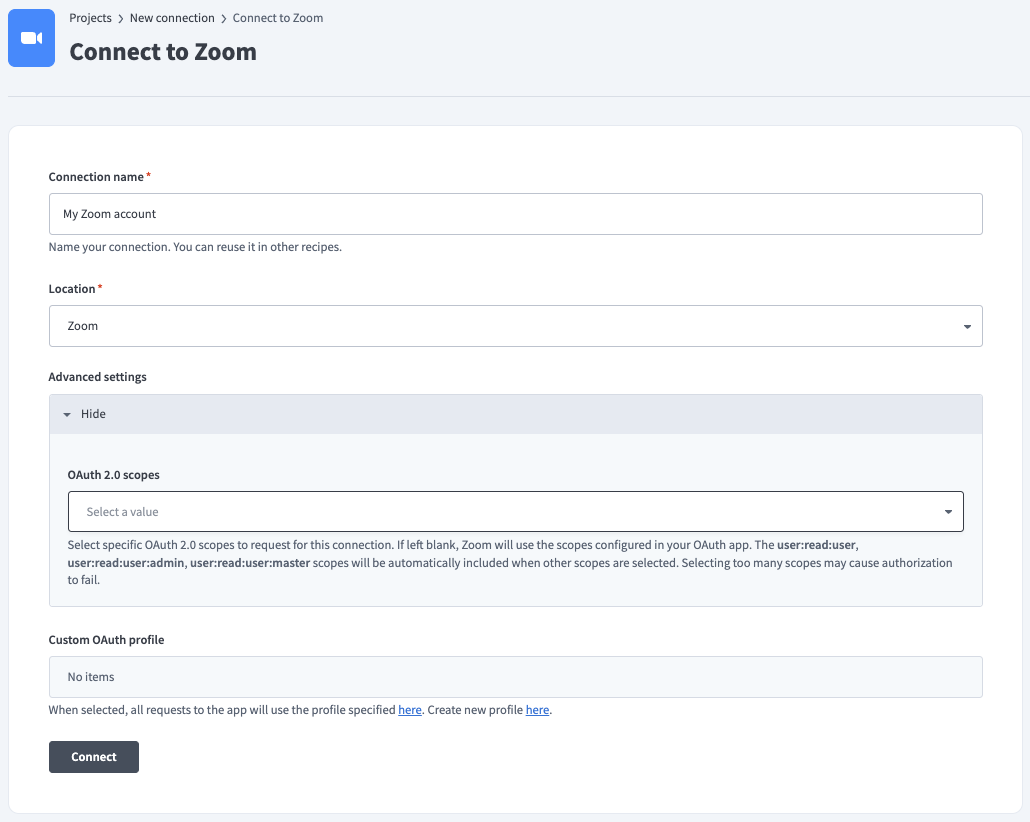 Name your connection
Optional. Expand the Advanced settings section and use the OAuth 2.0 scopes drop-down menu to specify OAuth scopes to request for your connection.
Optional. Use the Custom OAuth profile drop-down menu to select a custom OAuth profile to use for the connection.
Click Connect.
Sign in to your Zoom account.
How to uninstall Workato from Zoom
UNINSTALLING ZOOM STOPS ACTIVE RECIPES USING THE CONNECTOR
Uninstalling Zoom stops all active recipes that use the Zoom connector in your Workato account. You must establish a new app connection on Workato to reinstall Zoom.
Complete the following steps to uninstall Workato from Zoom:
Go to the Connections page in Workato and disconnect all active Zoom connections.
Go to the Zoom App Marketplace and sign in with your account administrator credentials.
Click Manage > Added Apps.
Find the app you plan to remove, click ..., and select Remove.
 Remove app
Optional. Use the drop-down menu to select a reason for removing this app.
Click Remove to confirm the app removal.
Last updated: