Registering a new client
The prebuilt Workato connectors are designed to meet most of your business needs. However, there are instances with requirements that go beyond the scope of Workato's prebuilt connectors.
Why register a new client
In cases where the scope of the prebuilt connector is insufficient, you must register a custom client with relevant scopes to satisfy your use-case.
This applies only to connectors that use OAuth 2.0 authentication. These connectors use OAuth 2.0 clients to interact with the API on behalf of your account, and usually have a fixed set of scopes attached to it. This means that the connector may not be able to interact with all the endpoints of an API.
Use custom clients with Workato connected apps
To use a custom client, you must create a custom connector. Use your custom client credentials with the HTTP universal connector or the SDK. This enables you to use the additional scopes from your custom client together with other connectors on Workato's platform.
Callback URL
Many cloud apps use OAuth 2.0 for authentication. Part of the OAuth 2.0 flow involves a callback URL (or Redirect URL). Some cloud apps, like Google, require you to register this callback URL at the point of client registration. It may also involve authorizing this URL. This is a security measure to prevent unwanted access to your account. If you do not register the callback URL, you may encounter an error like this.
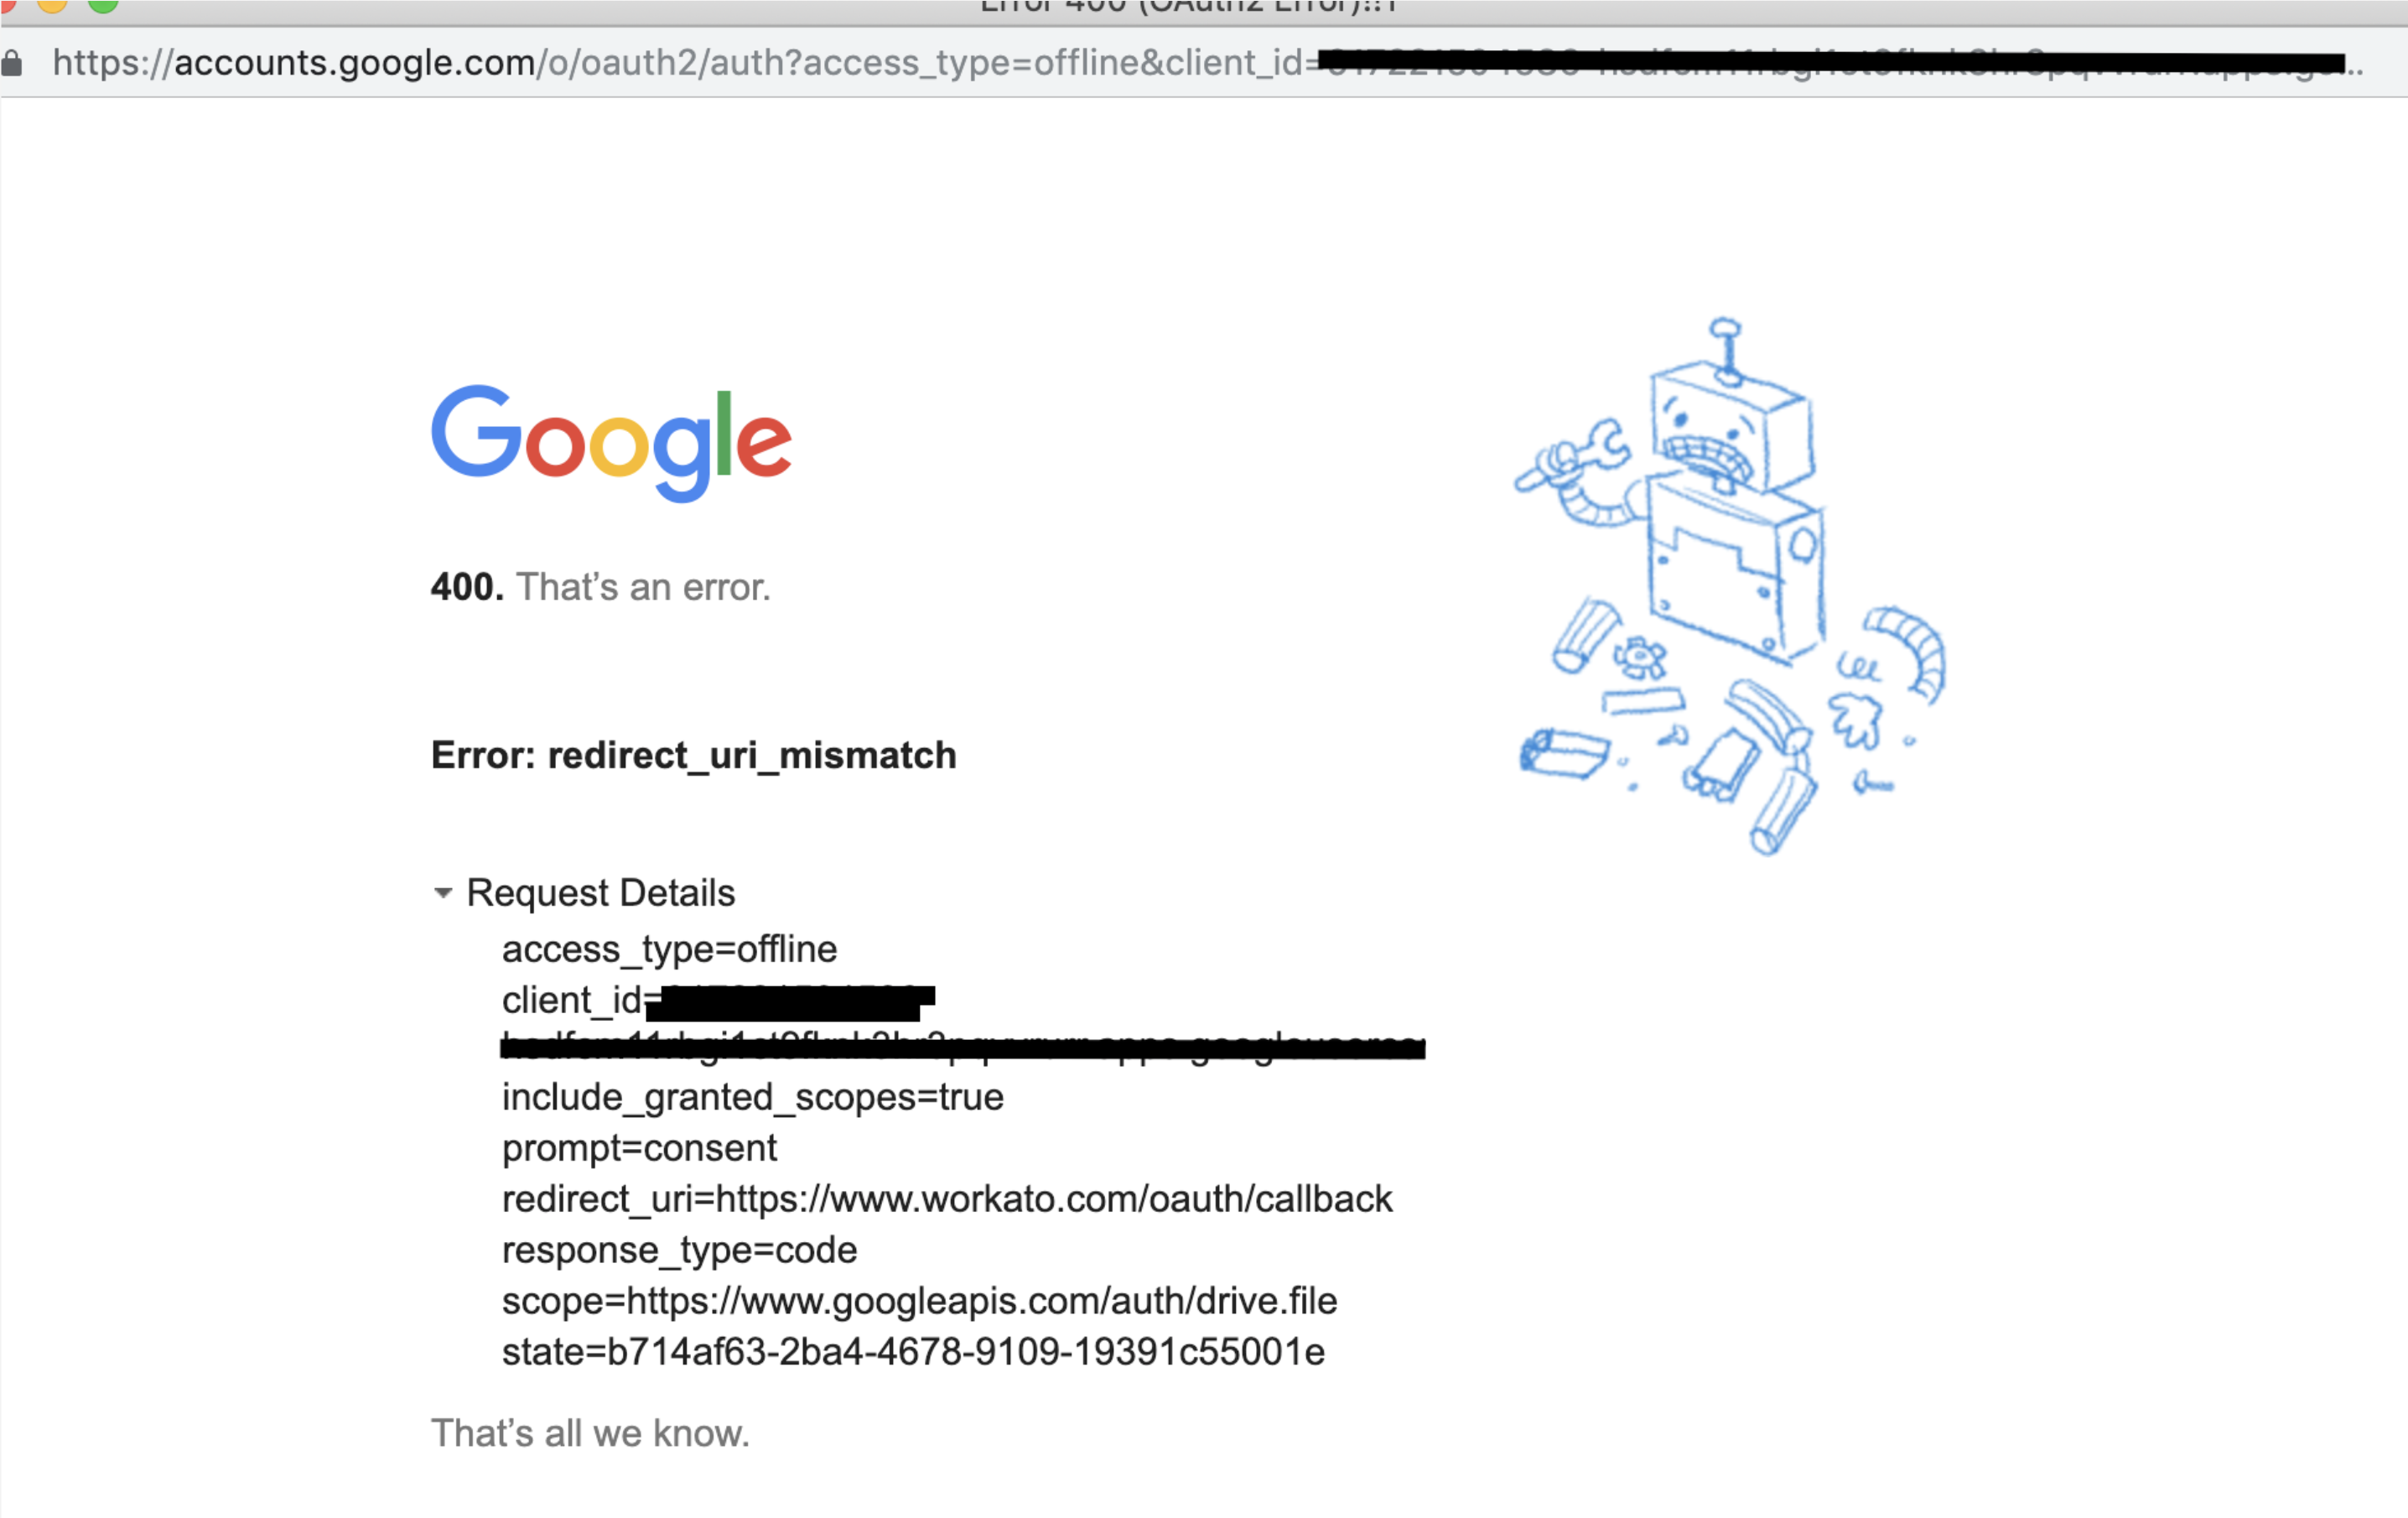 400 Error. Redirect URI mismatch
Universal Callback URL
Use the following callback URL to complete the OAuth flow with Workato, regardless of your data center region:
If you are using platform connectors or a custom OAuth profile, configure the callback URL:
https://www.workato.com/oauth/callback
For custom connectors, use the URL configured in the custom connector code:
https://www.workato.com/oauth/callbackorhttps://app.workato.com/oauth/callback
The universal callback URL ensures you avoid any "400 Error. Redirect URI mismatch" issues.
Register a new client with a callback URL
The following steps provide an example of how to register a new client on the Google Cloud Platform.
Select Create credentials > OAuth client ID.
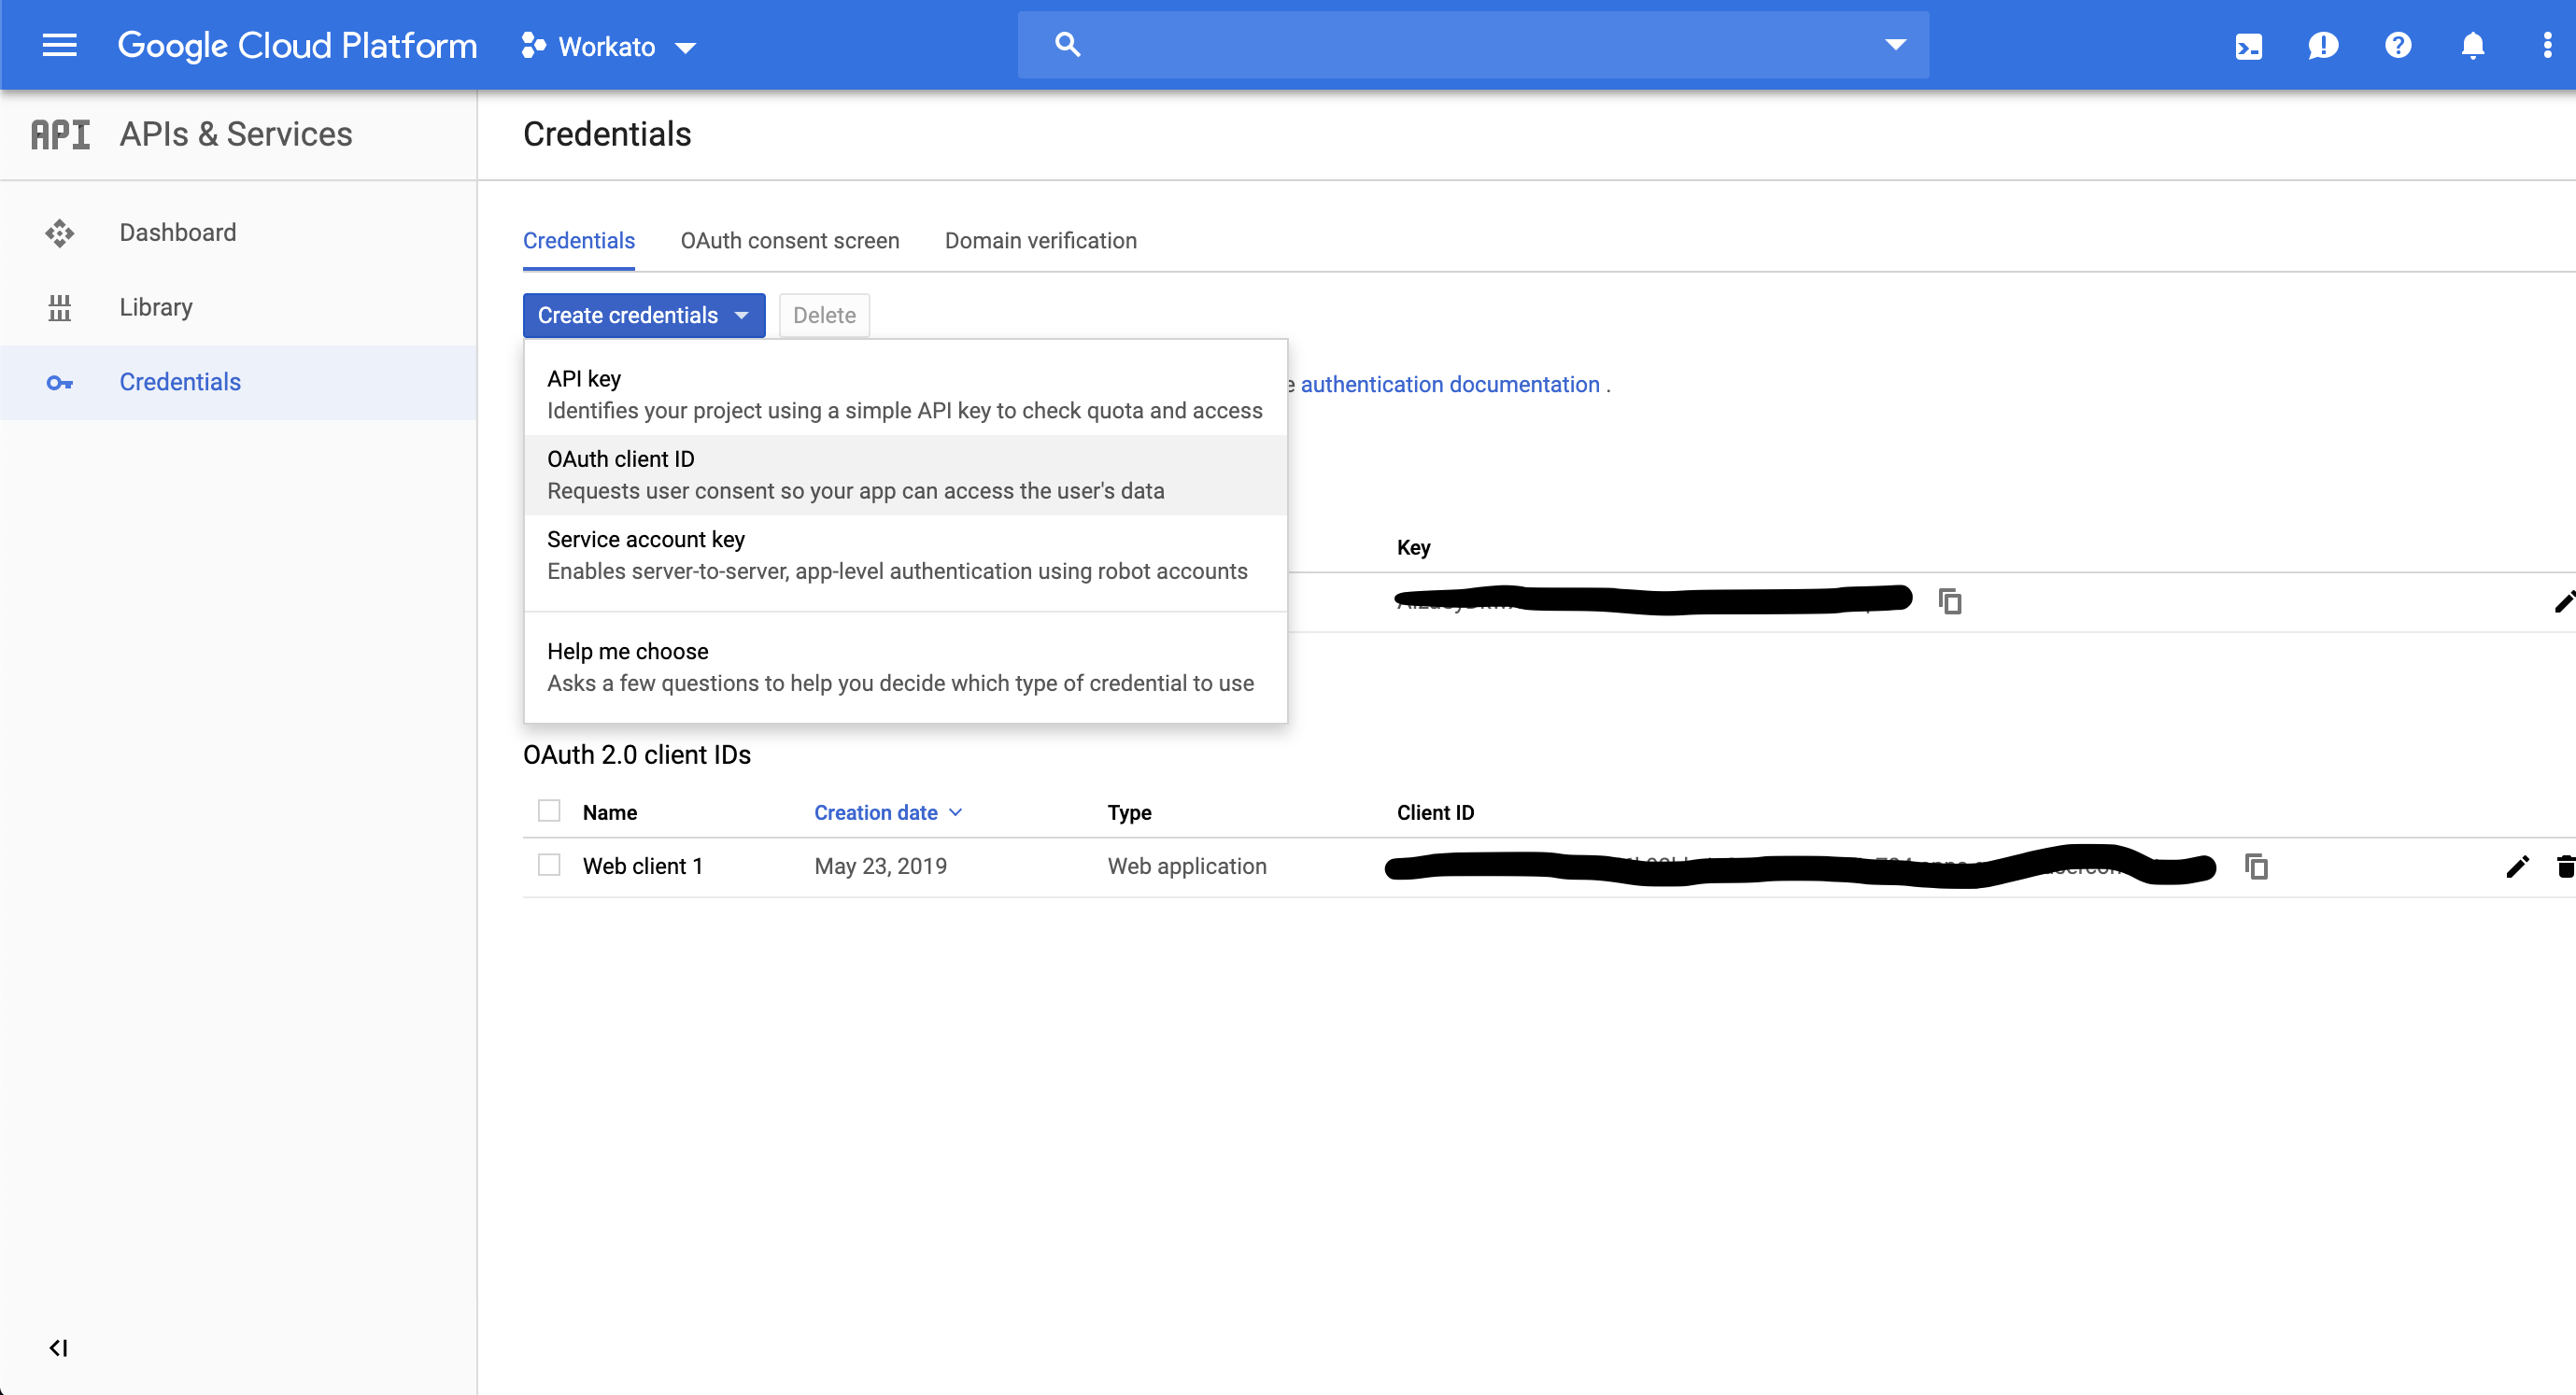 Google Cloud Platform API Credentials
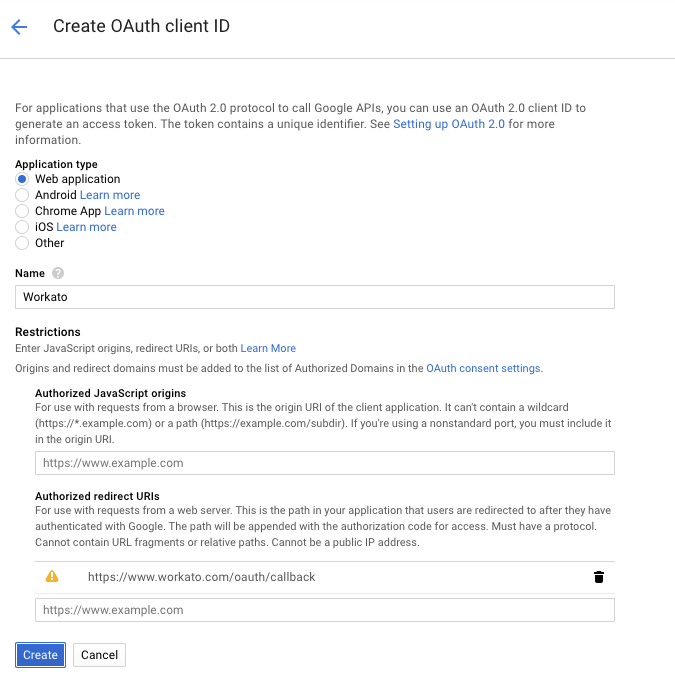
Select Web application and enter the name you plan to use in the Name field.
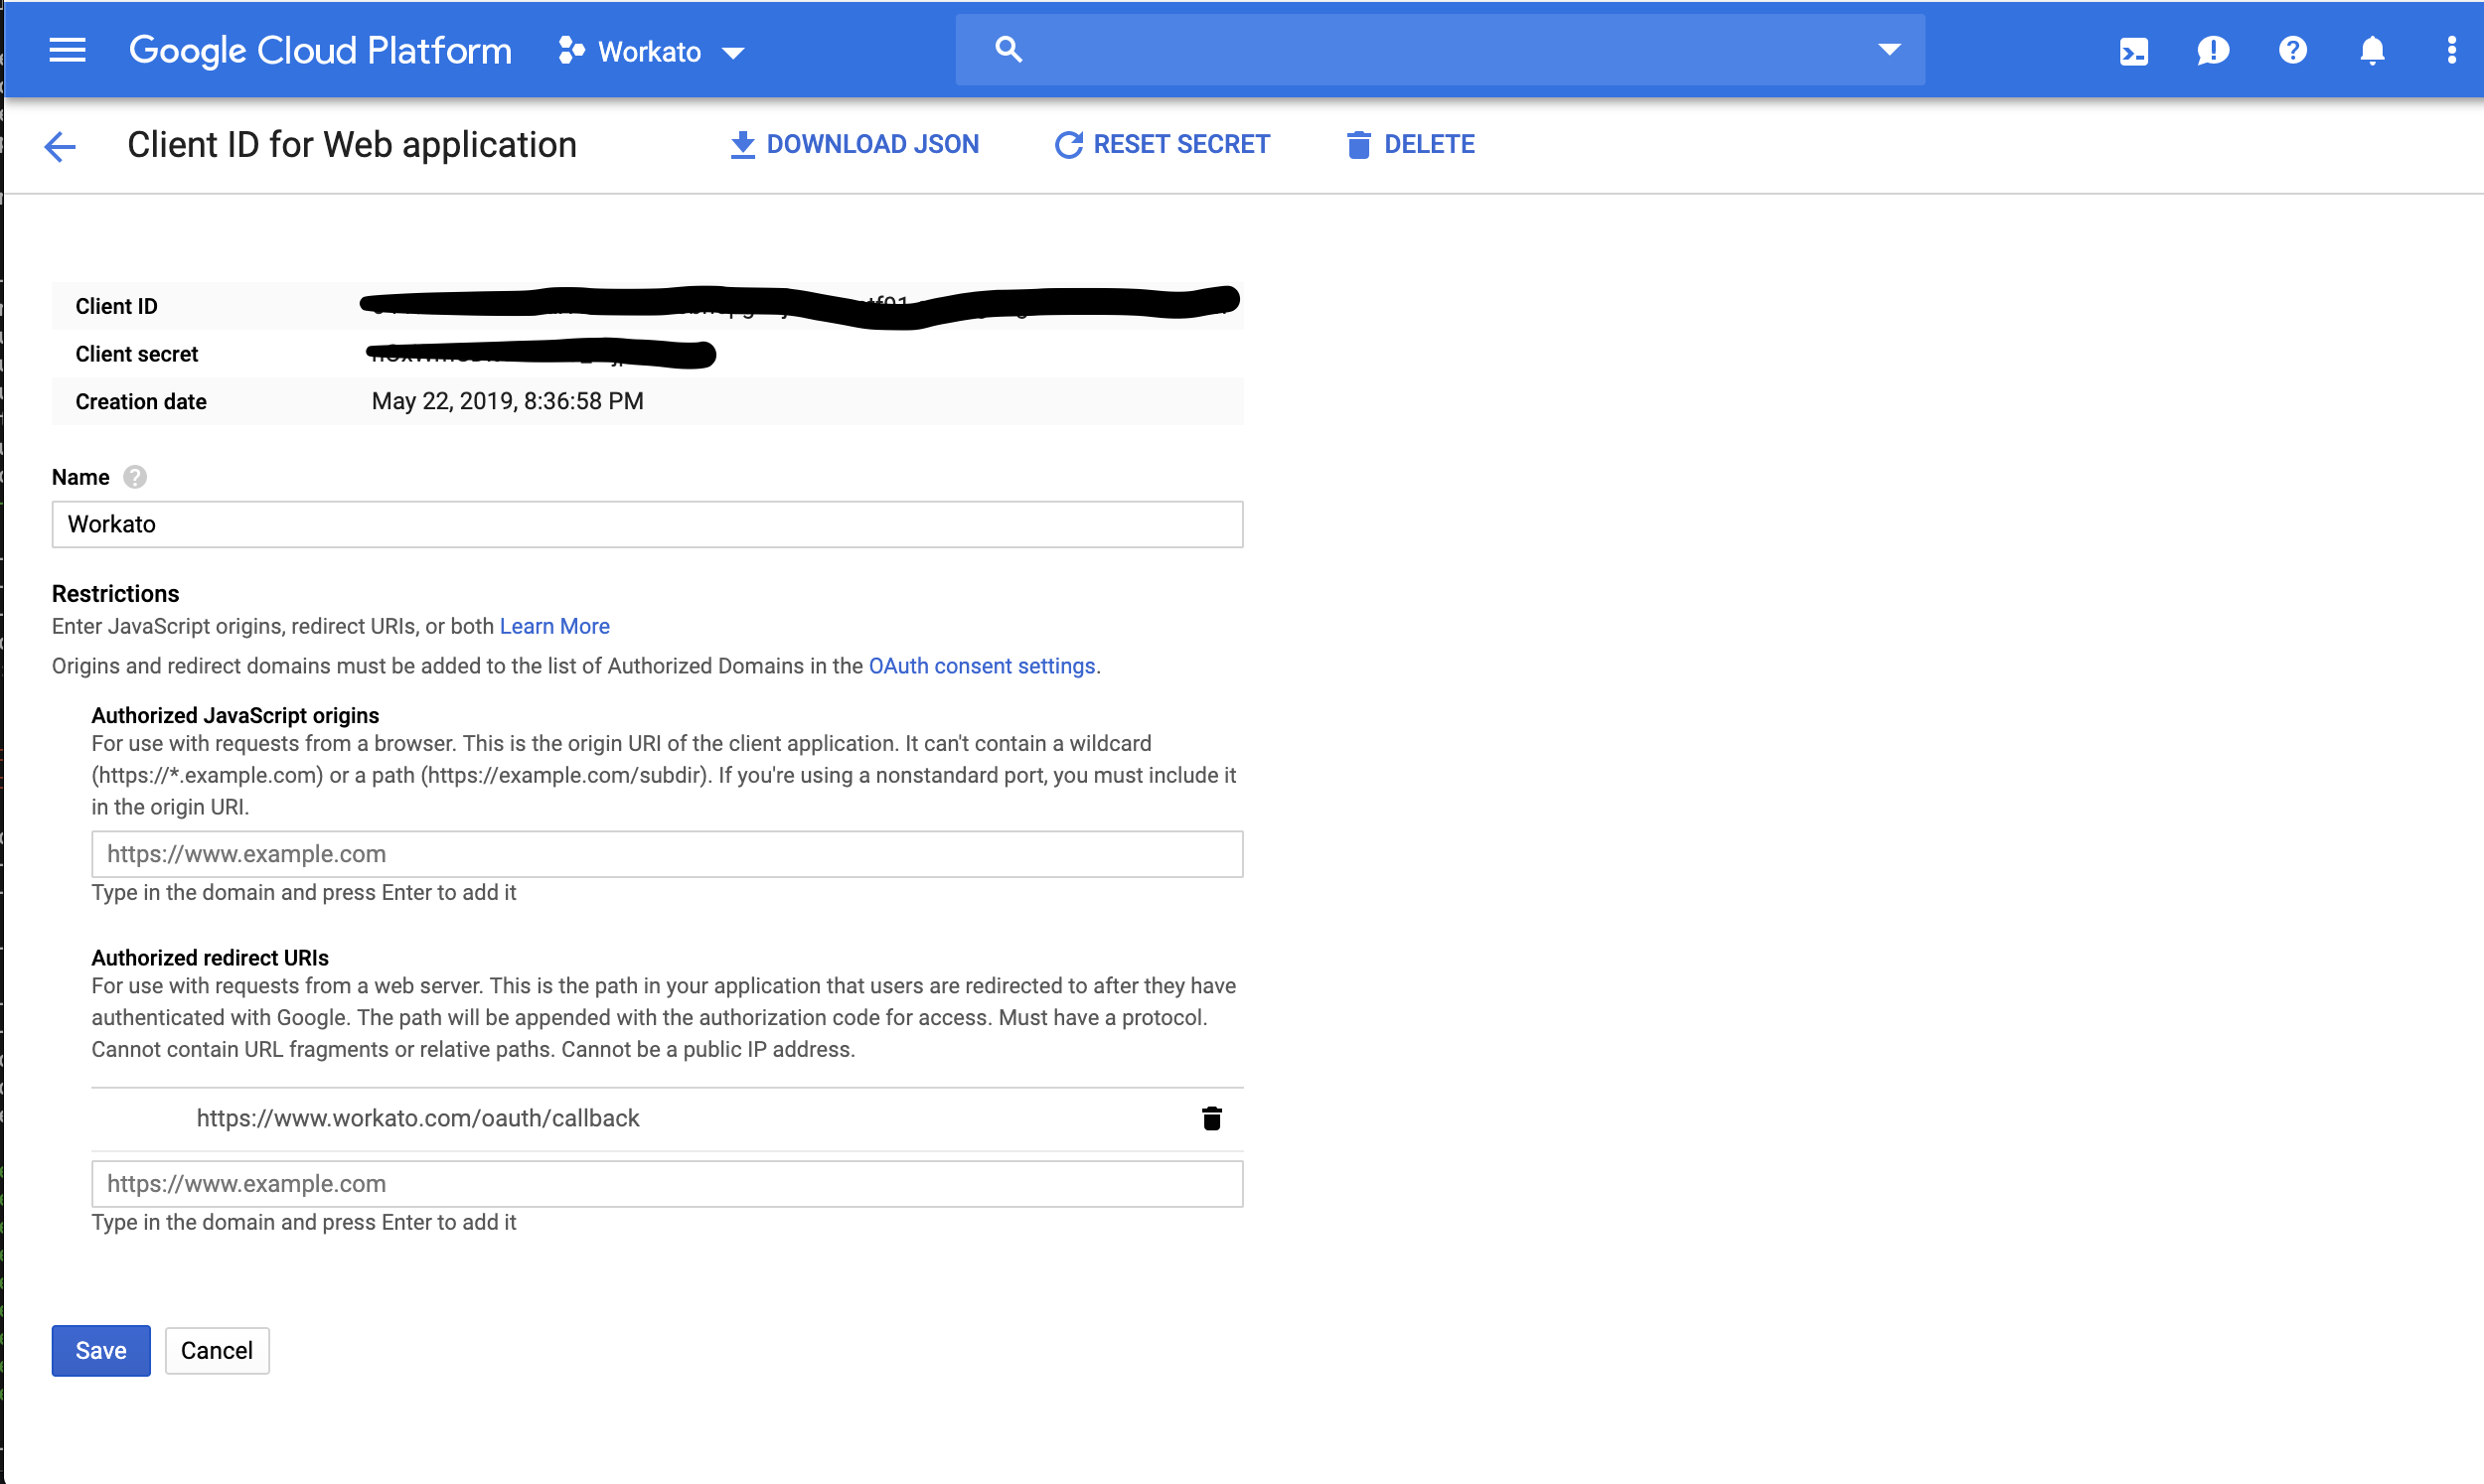
Enter the callback URL in the Authorized redirect URIs field:
- If you are using platform connectors or a custom OAuth profile, configure the callback URL as
https://www.workato.com/oauth/callback. - For custom connectors, use the URL configured in the custom connector code:
https://www.workato.com/oauth/callbackorhttps://app.workato.com/oauth/callback
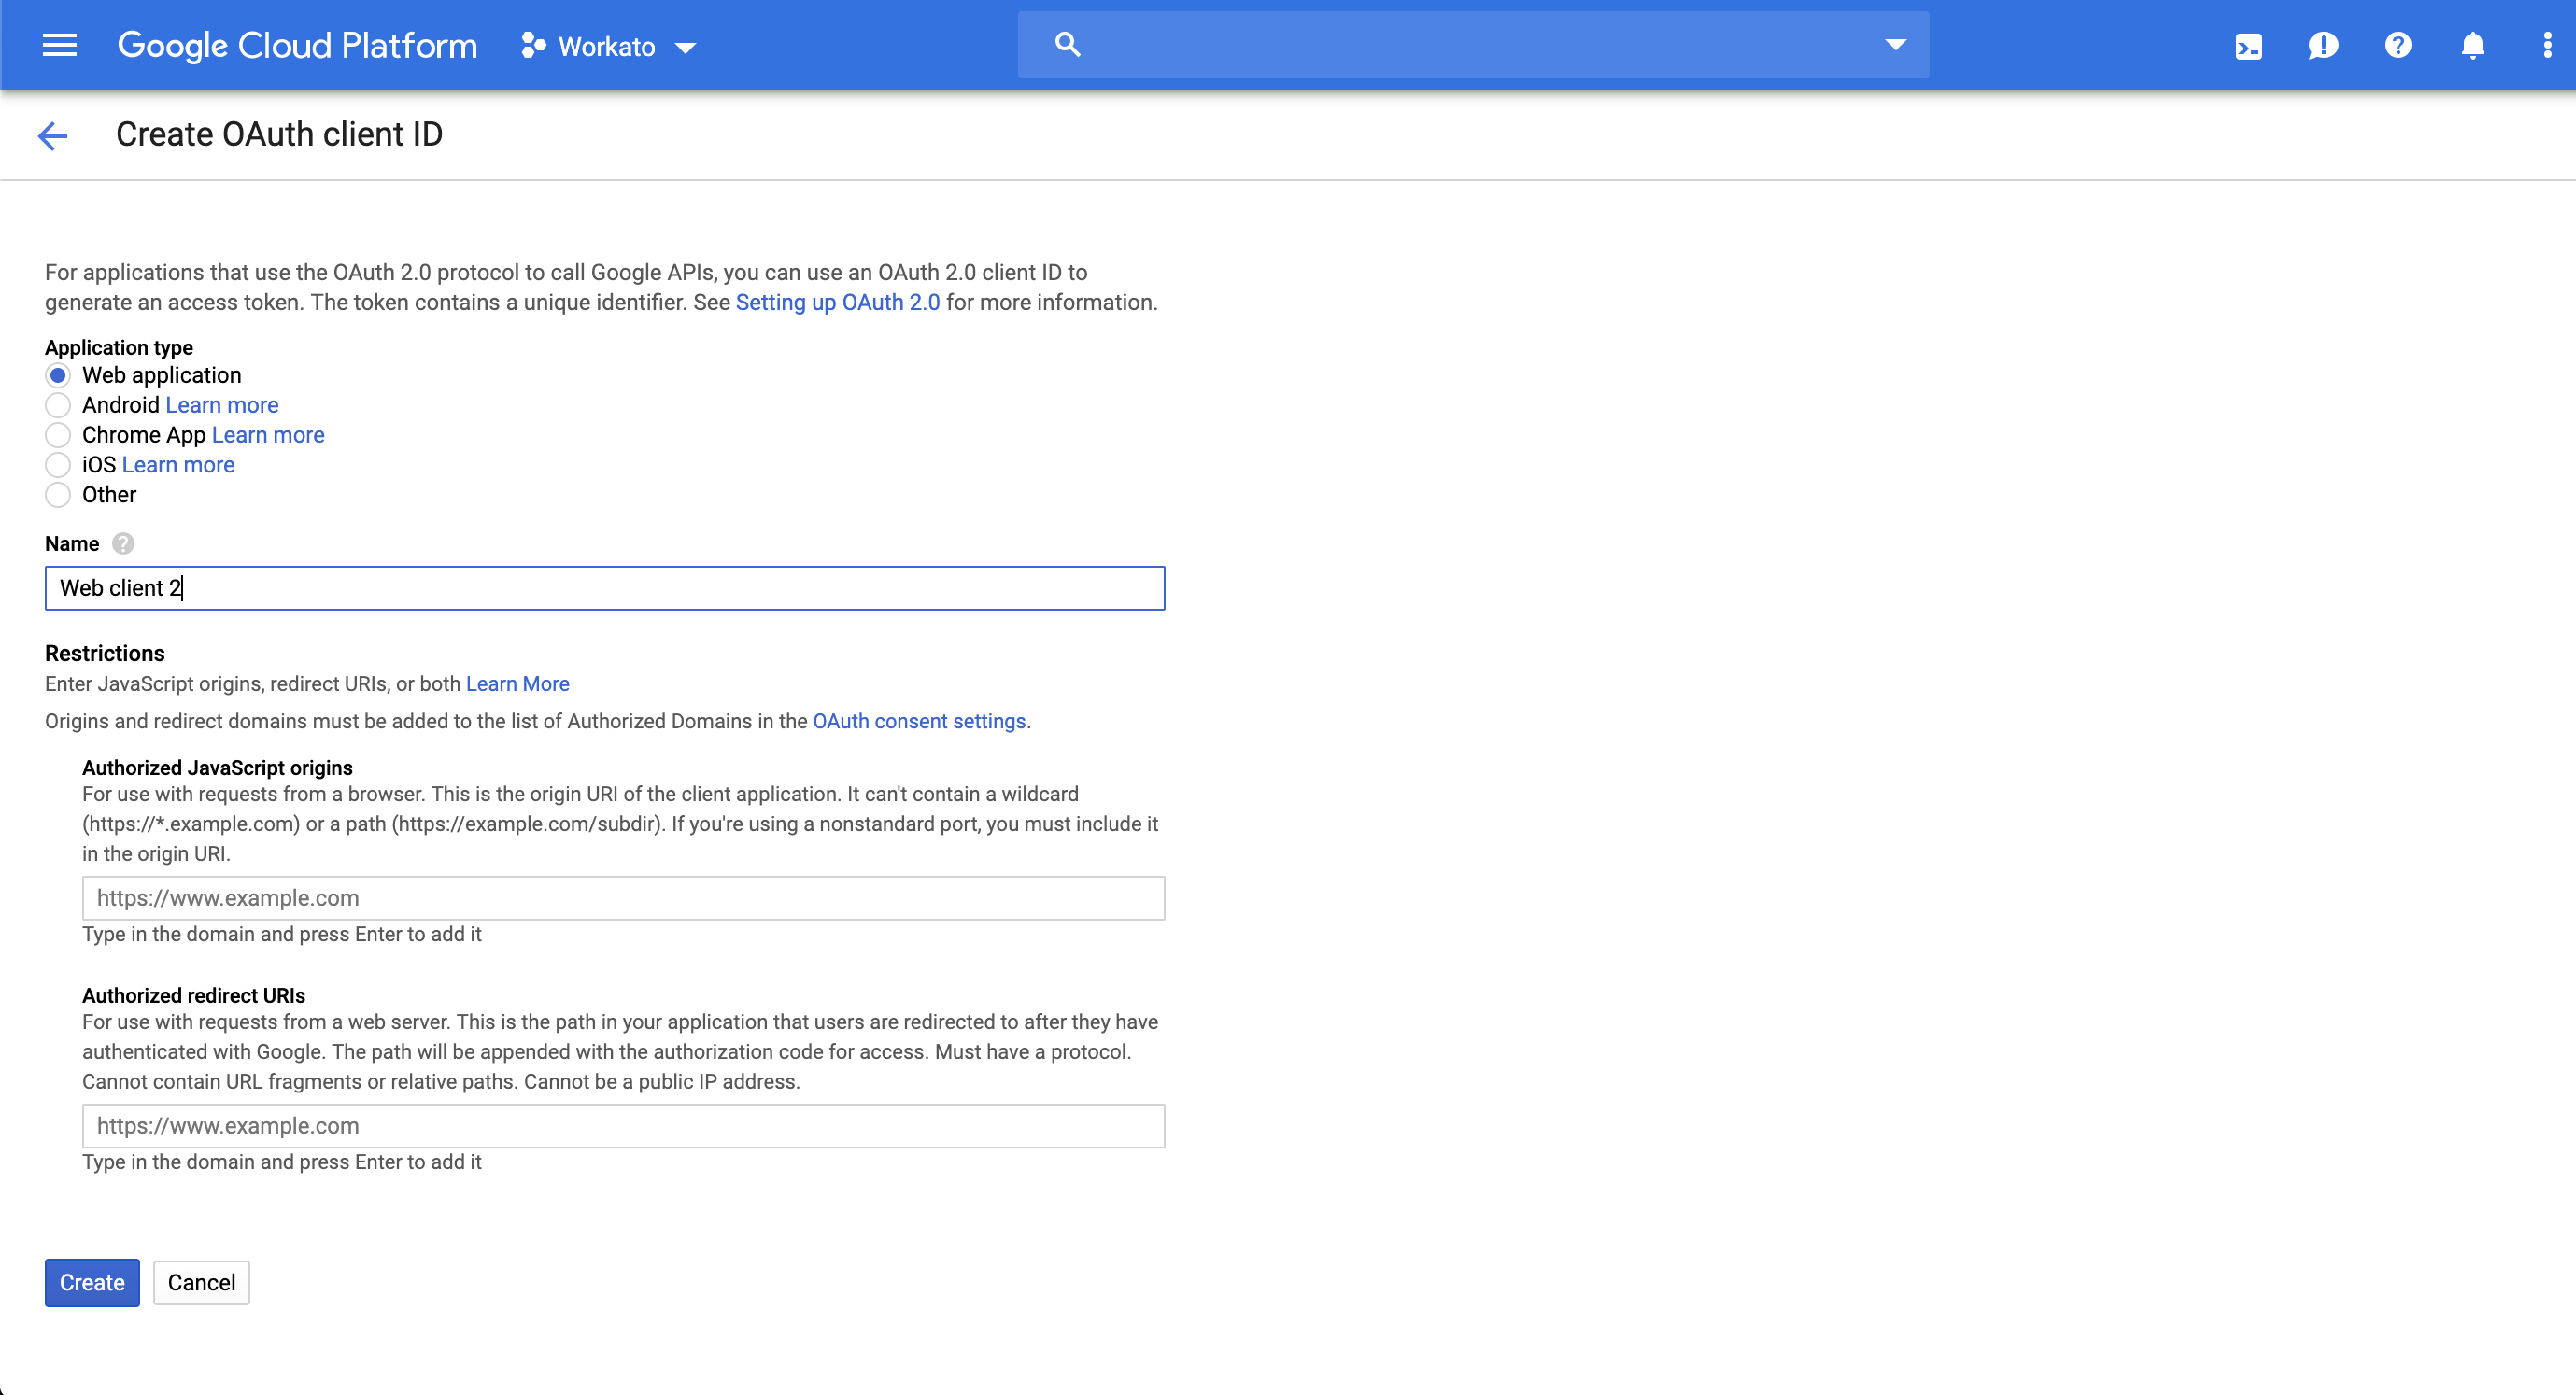 Create OAuth client ID
INVALID REDIRECT MESSAGE
This step is where most people encounter an Invalid Redirect message. To resolve this, select authorized domains list.
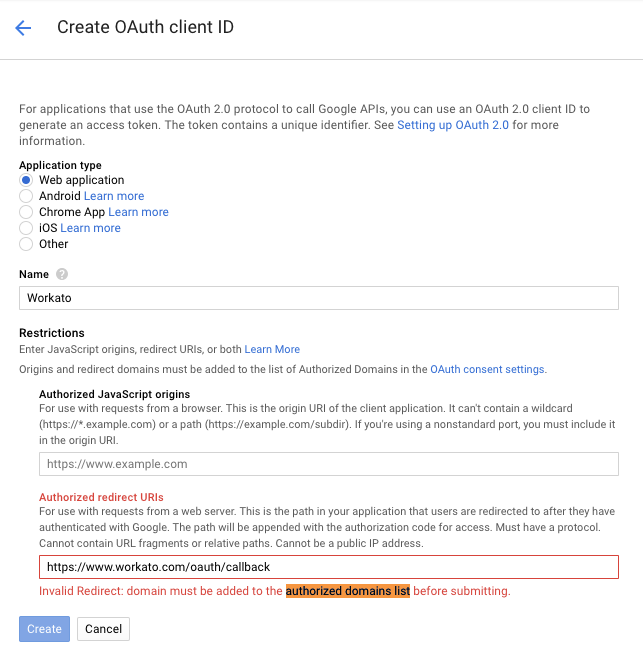 Invalid redirect URL
Click Create > Client credentials. The OAuth consent screen page displays. Alternatively, you can access this page by selecting APIs & Services > Credentials > OAuth consent.
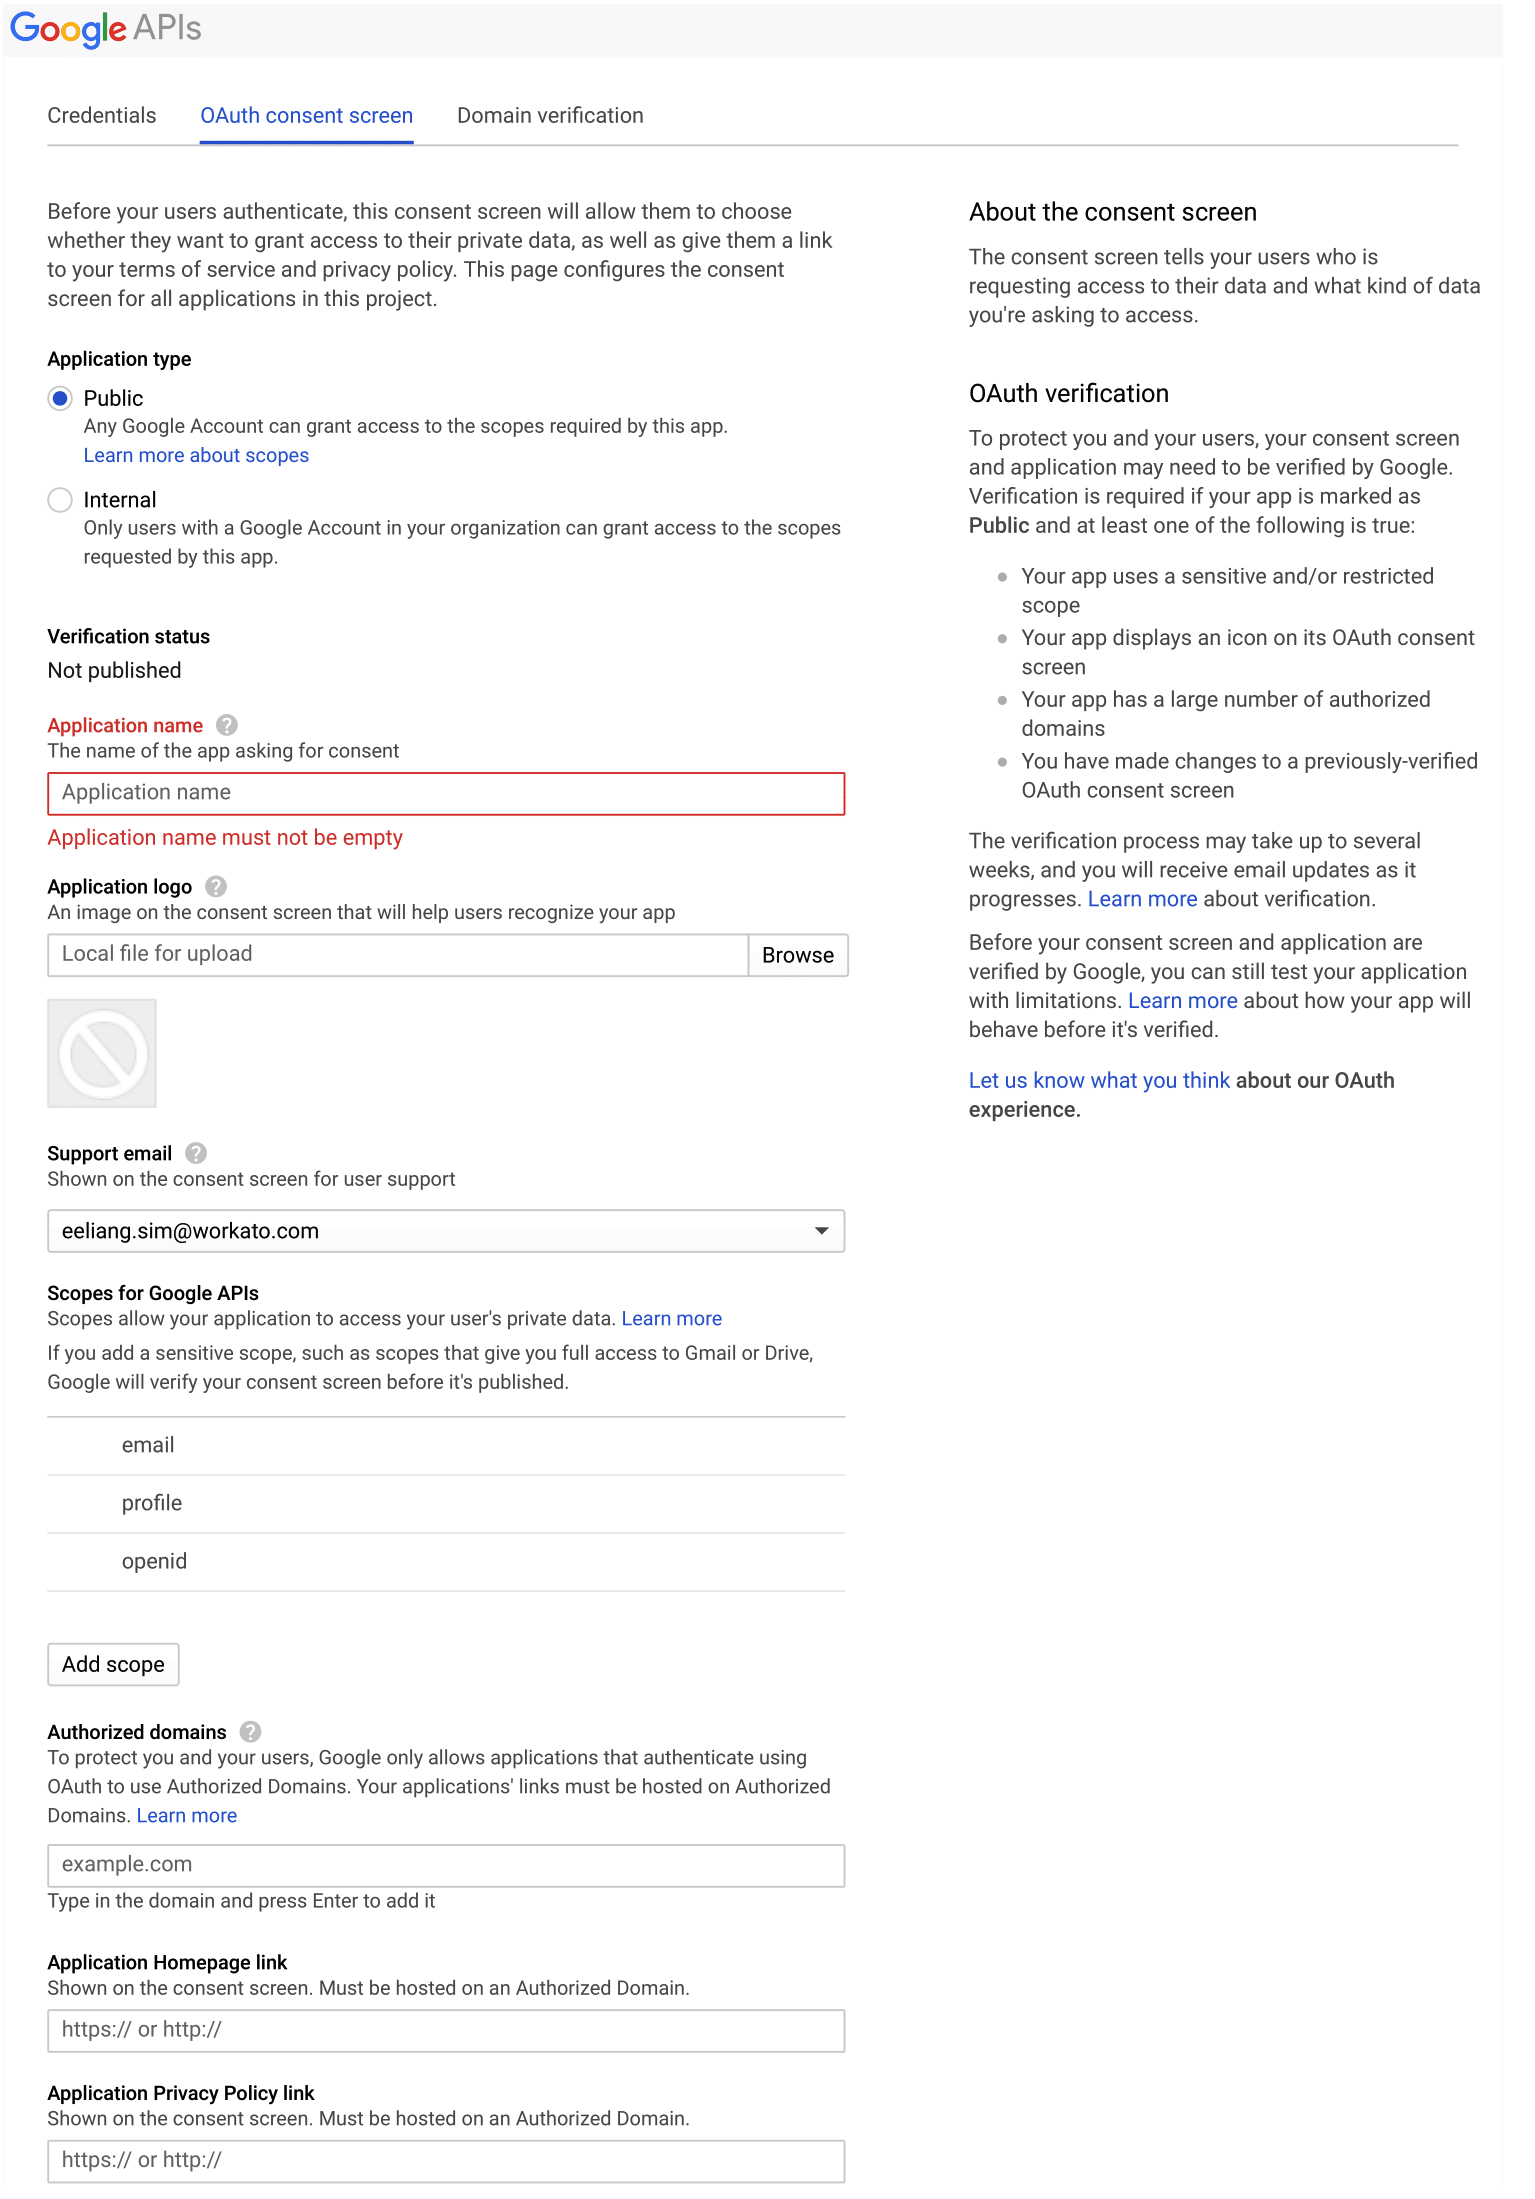 OAuth consent screen
Enter Workato in the Application name field.
 Application name
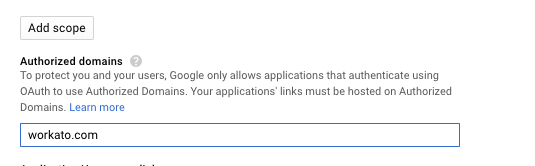
Select Add scope and enter the following scopes:
https://www.googleapis.com/auth/admin.directory.grouphttps://www.googleapis.com/auth/admin.directory.user
 Add scope
Enter workato.com in the Authorized domains field and click Save.
 Authorize Workato.com
Click Create credentials > OAuth client ID.
Google Cloud Platform API Credentials
Click Web application and enter the name you plan to use in the Name field.
Enter https://app.workato.com/oauth/callback in the Authorized redirect URIs field and click Create.
 Accepted redirect URL
Your custom client is now on Google Cloud Platform.
 New custom client
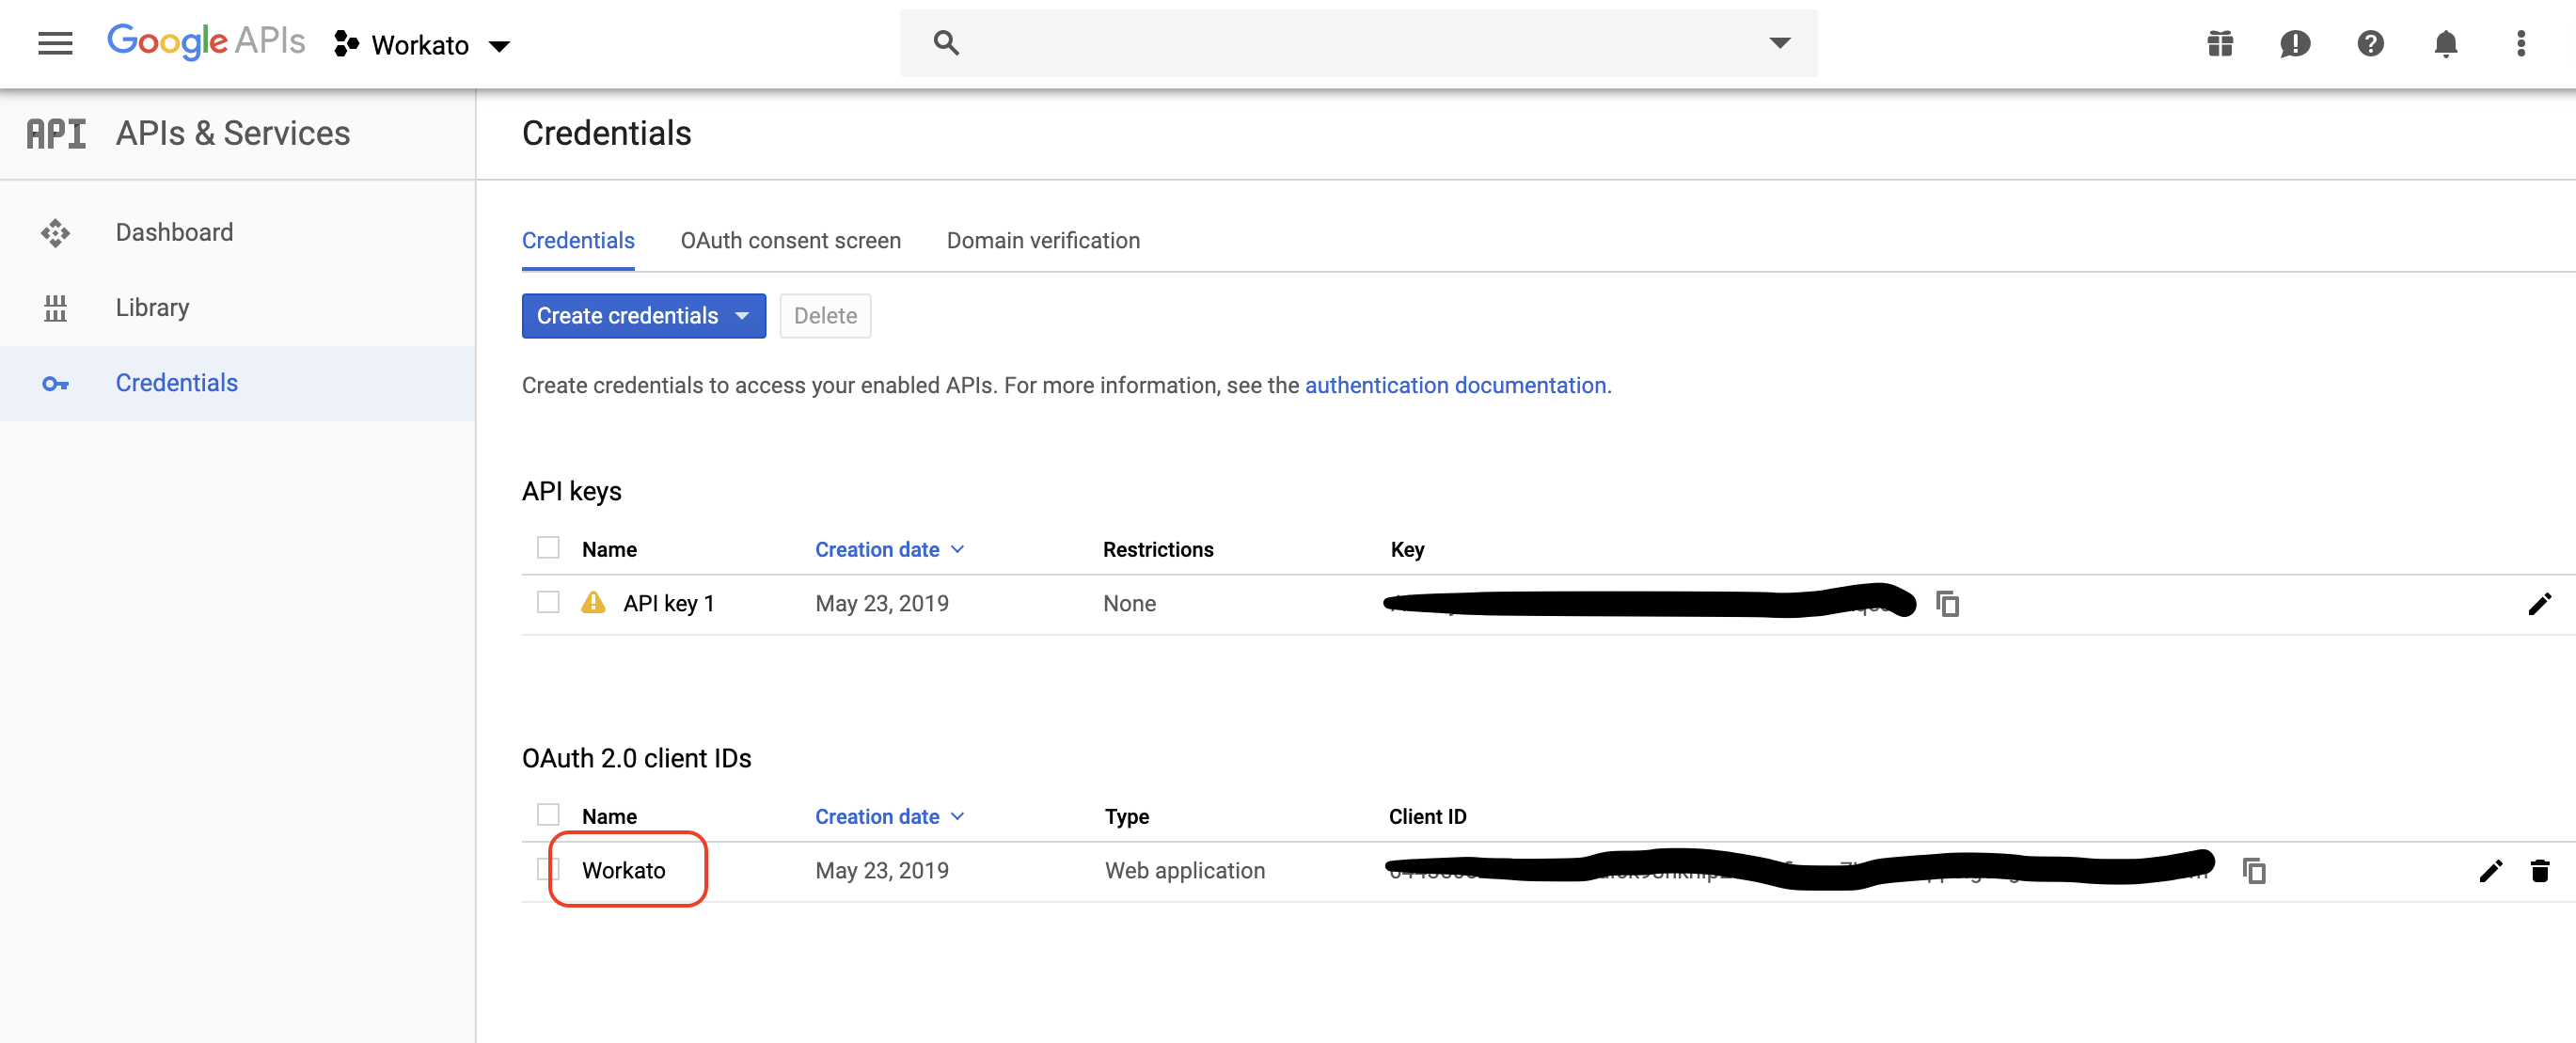
Retrieve client credentials
Now your custom client is ready to be connected to Workato. Open your custom client (for example, Workato) to view the client credentials. You will need the client ID and client secret for OAuth 2.0 authentication.
 Client credentials
Frequently encountered problems
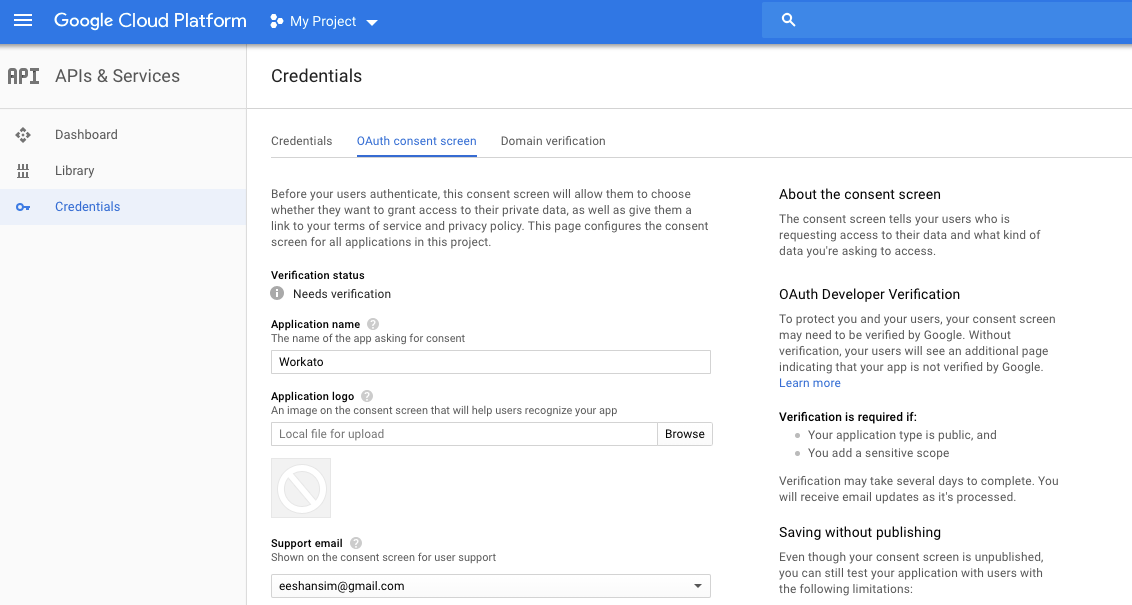
We noticed that some of our customers were misdirected to verify the domain http://www.workato.com on Google Cloud Platform like in the screenshot below.
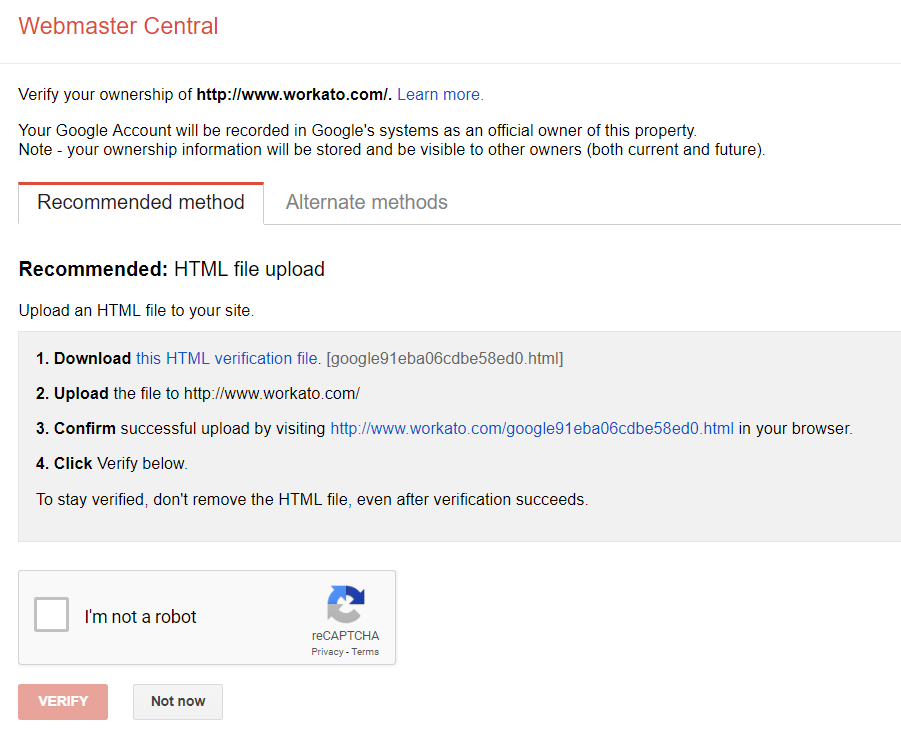 Request to verify domain
This is not a required step. If you find yourself at this page, return to APIs & Services > Credentials (Step 1).
Last updated: