How to connect to Microsoft Entra ID
Connecting to Microsoft Entra ID (formerly Azure Active Directory) on Workato is a multistep process involving configuration steps in Microsoft Entra ID and Workato.
MICROSOFT MFA ENFORCEMENT
Microsoft is rolling out mandatory multifactor authentication (MFA) gradually to different applications and accounts in phases. This enforcement continues throughout 2025 and beyond. Refer to the Microsoft Mandatory multifactor authentication for Azure and admin portals documentation for more information.
We strongly recommend enabling MFA now for all Microsoft accounts used with Workato to avoid service disruptions from short-notice enforcement changes.
Complete the following steps to maintain uninterrupted service:
Enable MFA for your Microsoft organization following the Microsoft MFA setup guide. Refer to Set up multifactor authentication for Microsoft 365 for more information.
Reconnect your Microsoft connection in Workato.
Complete the OAuth flow with MFA when prompted.
Test your recipes to ensure they work with the updated connection.
Create the Workato app in Microsoft Entra ID
You must complete the following steps to create the Workato app in Microsoft Entra ID:
- Register your application
- Grant your application permissions
- Generate a client secret for your application
Register your application
Register your Workato application with Microsoft Entra ID.
Sign in to Microsoft Entra ID.
Select App registrations.
On the resulting page, click + New registration.
Name your application. This is the user-facing display name for this application. Microsoft allows you to change this name later.
 Register an application on Microsoft Entra ID
In Supported account types, select the option that matches your use case:
- Accounts in this organizational directory only (Default Directory only - Single tenant): Select this if only users within your own Microsoft Entra ID directory will connect to Workato.
- Accounts in any organizational directory (Any Azure AD directory - Multitenant) and personal Microsoft accounts: Select this if users from other organizations need to connect, for example, in a vendor, partner, or multi-company deployment scenario (
[email protected]or[email protected]).
UPDATE APP MANIFEST
If you registered your app as a single tenant and need to switch to multitenant later, you must first update "requestedAccessTokenVersion" to 2 in the app Manifest before changing the account type. If you don't update the Manifest, you might encounter this error: Property api.requestedAccessTokenVersion is invalid on the Microsoft Entra platform. Refer to the Microsoft Entra app manifest (Azure AD Graph format) documentation for more information.
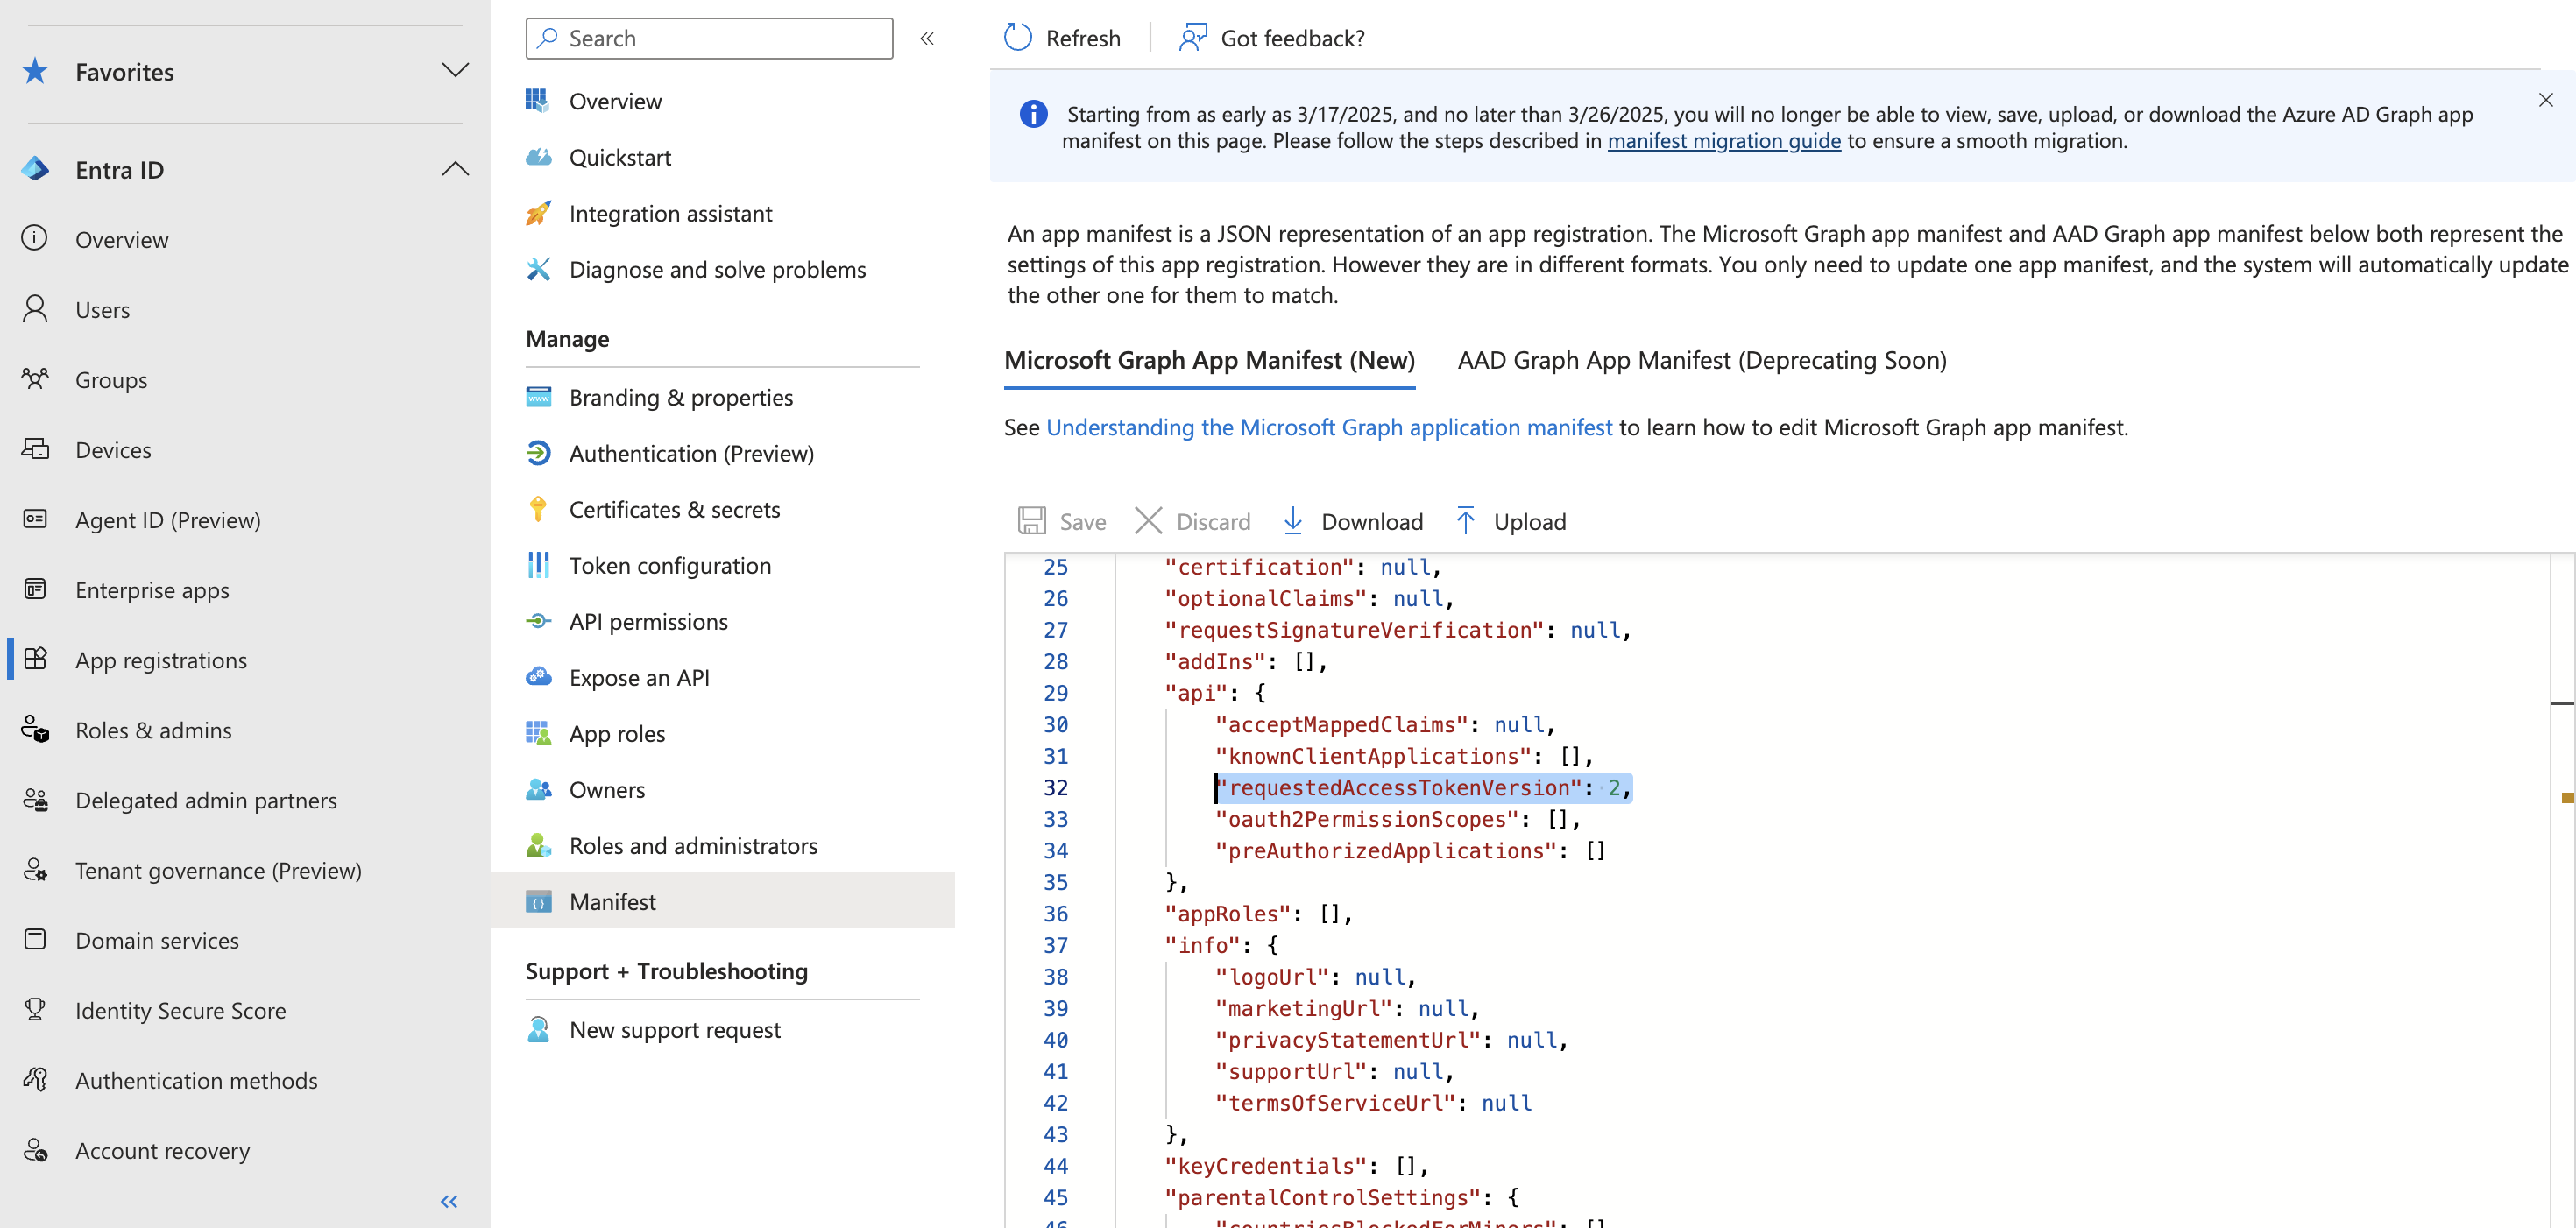 Update app Manifest
In the Redirect URI field, set the platform type to Web and provide the following redirect URI: https://www.workato.com/oauth/callback.
The next page displays the details of the newly-created application. Pay attention to the Application (client) ID and the Directory (tenant) ID. You will need these values later to authenticate in Workato. When you select Accounts in any organizational directory (Any Azure AD directory - Multitenant) and personal Microsoft accounts in the Azure portal, also set the Tenant ID field in Workato to common instead of your specific Directory (tenant) ID. Refer to step 5 in Connect to Microsoft Entra ID in Workato for more information.
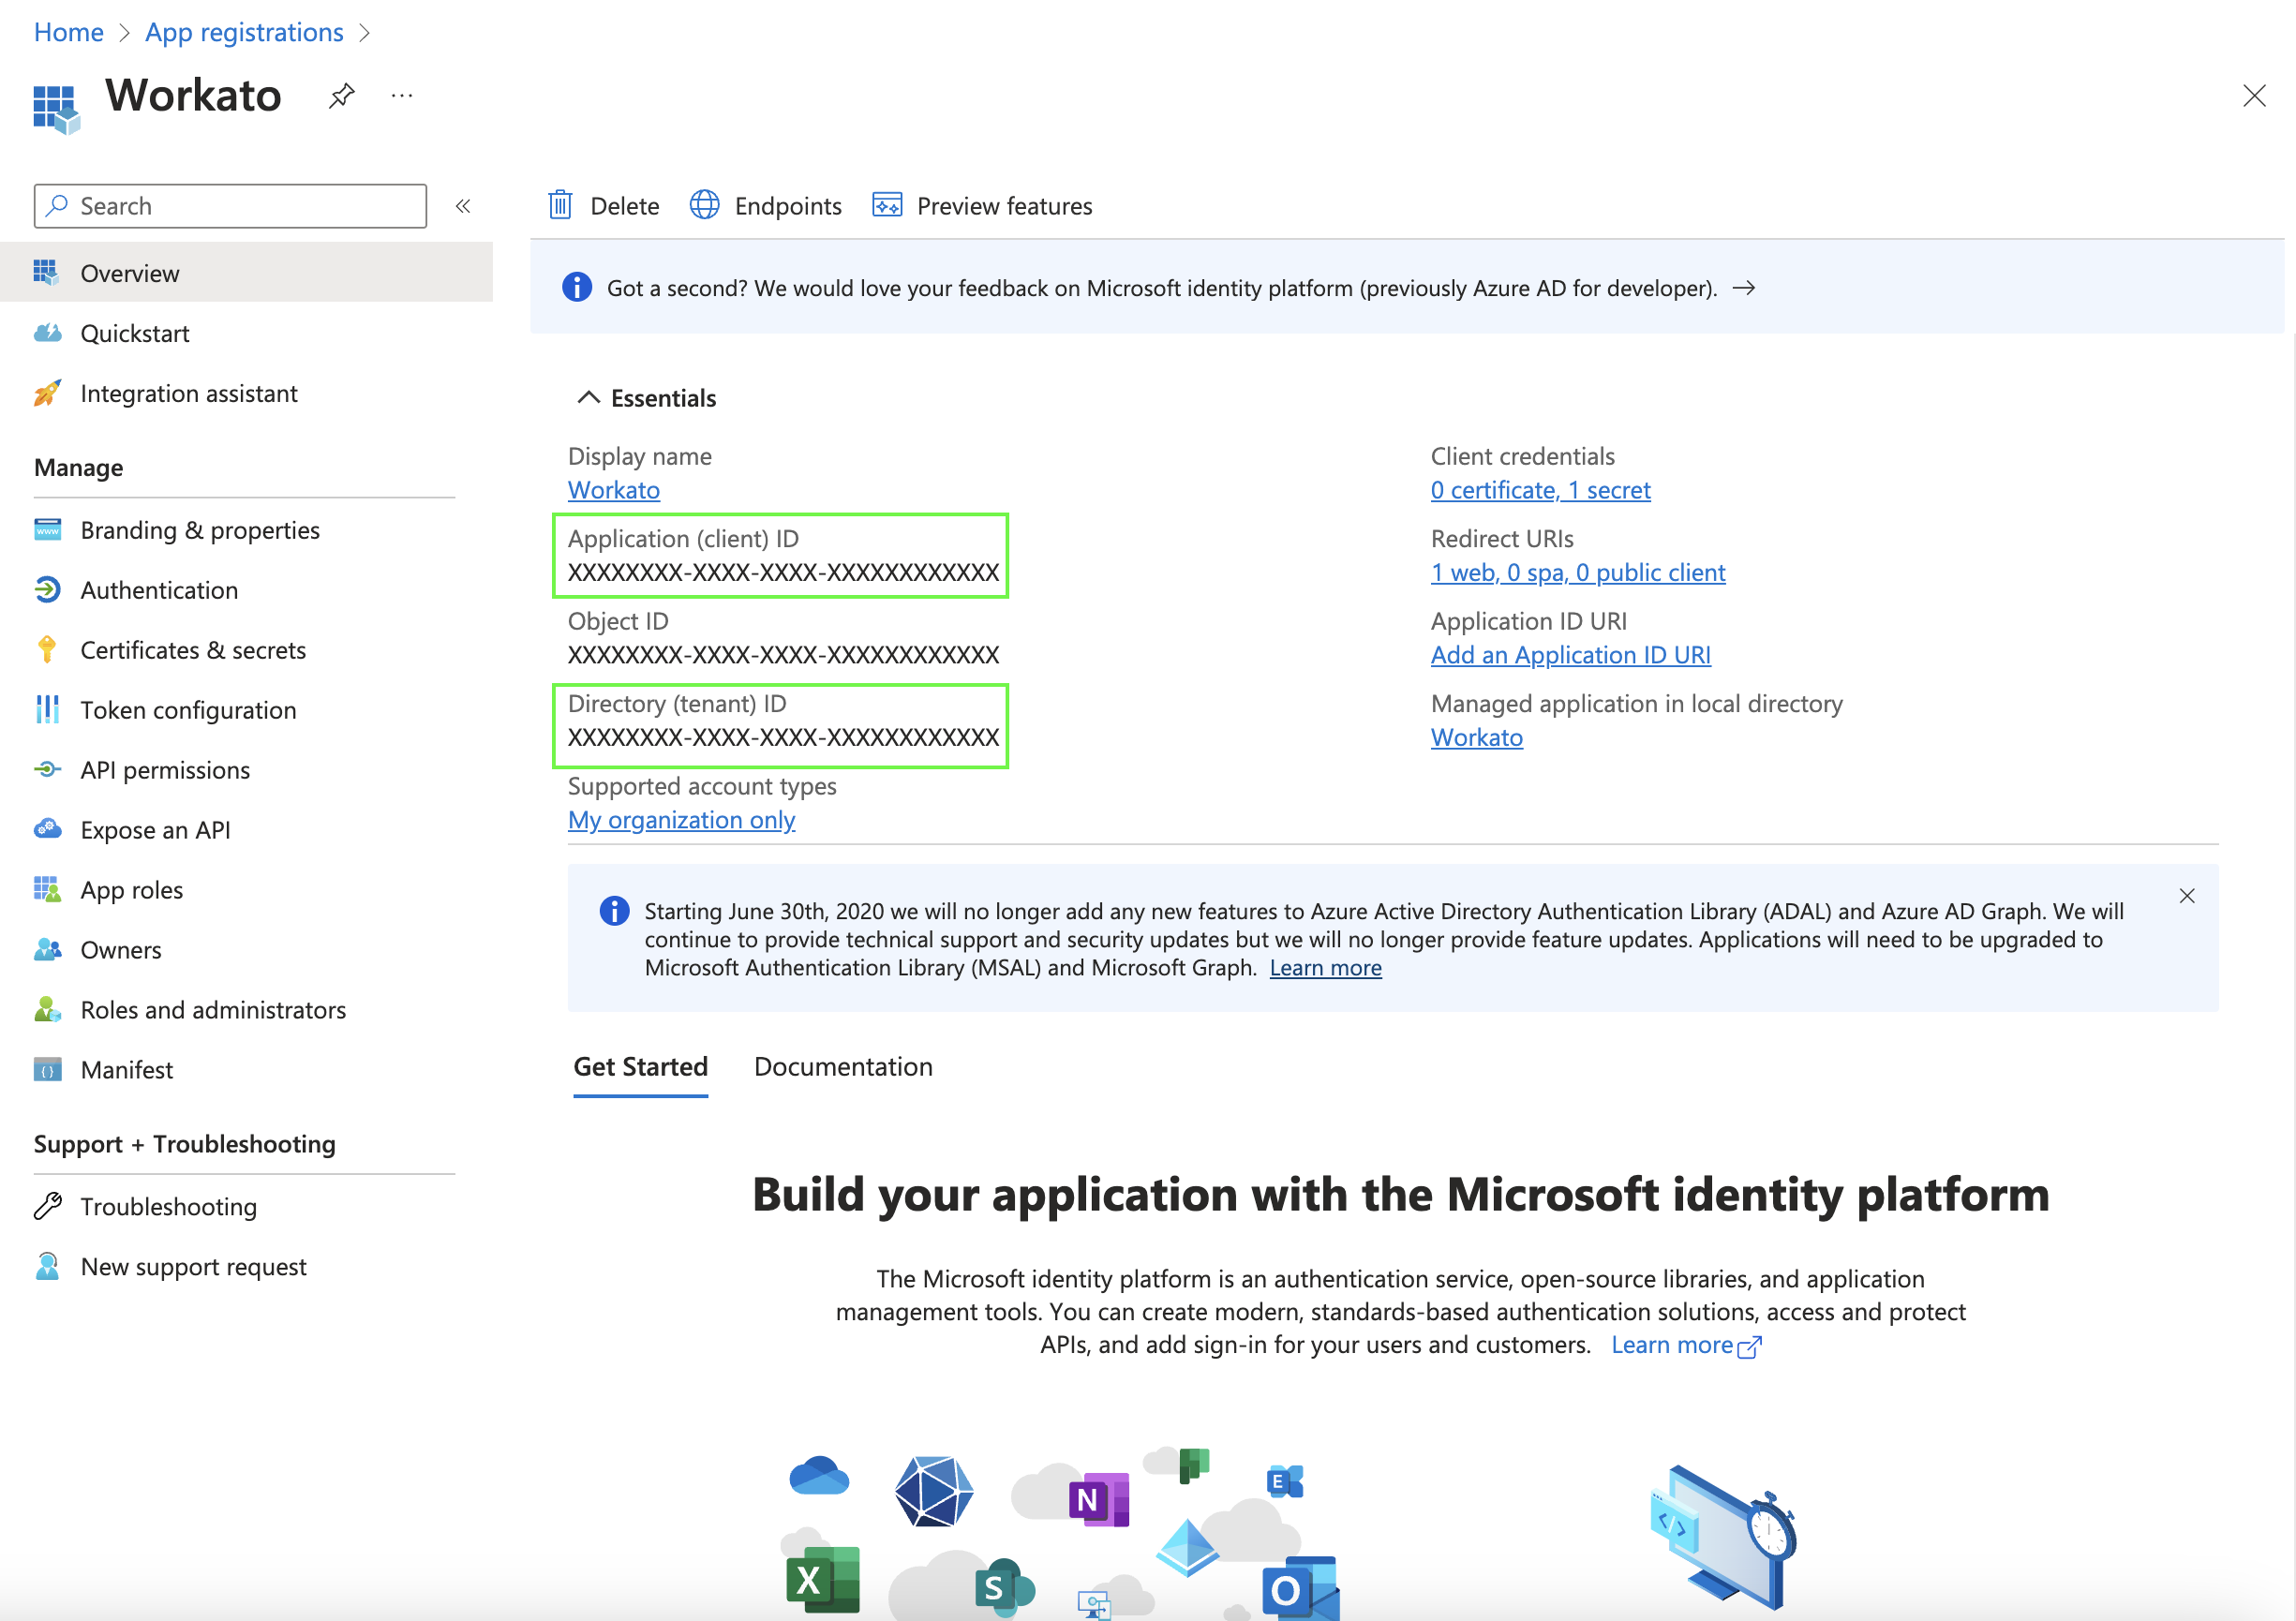 Take note of the Application (client) ID and Directory (tenant) ID
Assign permissions to your application
Now it's time to assign permissions to our Workato application.
These instructions demonstrate how to grant the minimum permissions necessary to establish a connection with Workato. The permissions you need are variable and based on your use case. See the Microsoft Entra ID permissions section for additional permissions you may need to assign to your Workato application in order for it to perform optimally.
Select API permissions from the left navigation sidebar.
Click + Add a permission.
Click Microsoft Graph to open the permissions interface.
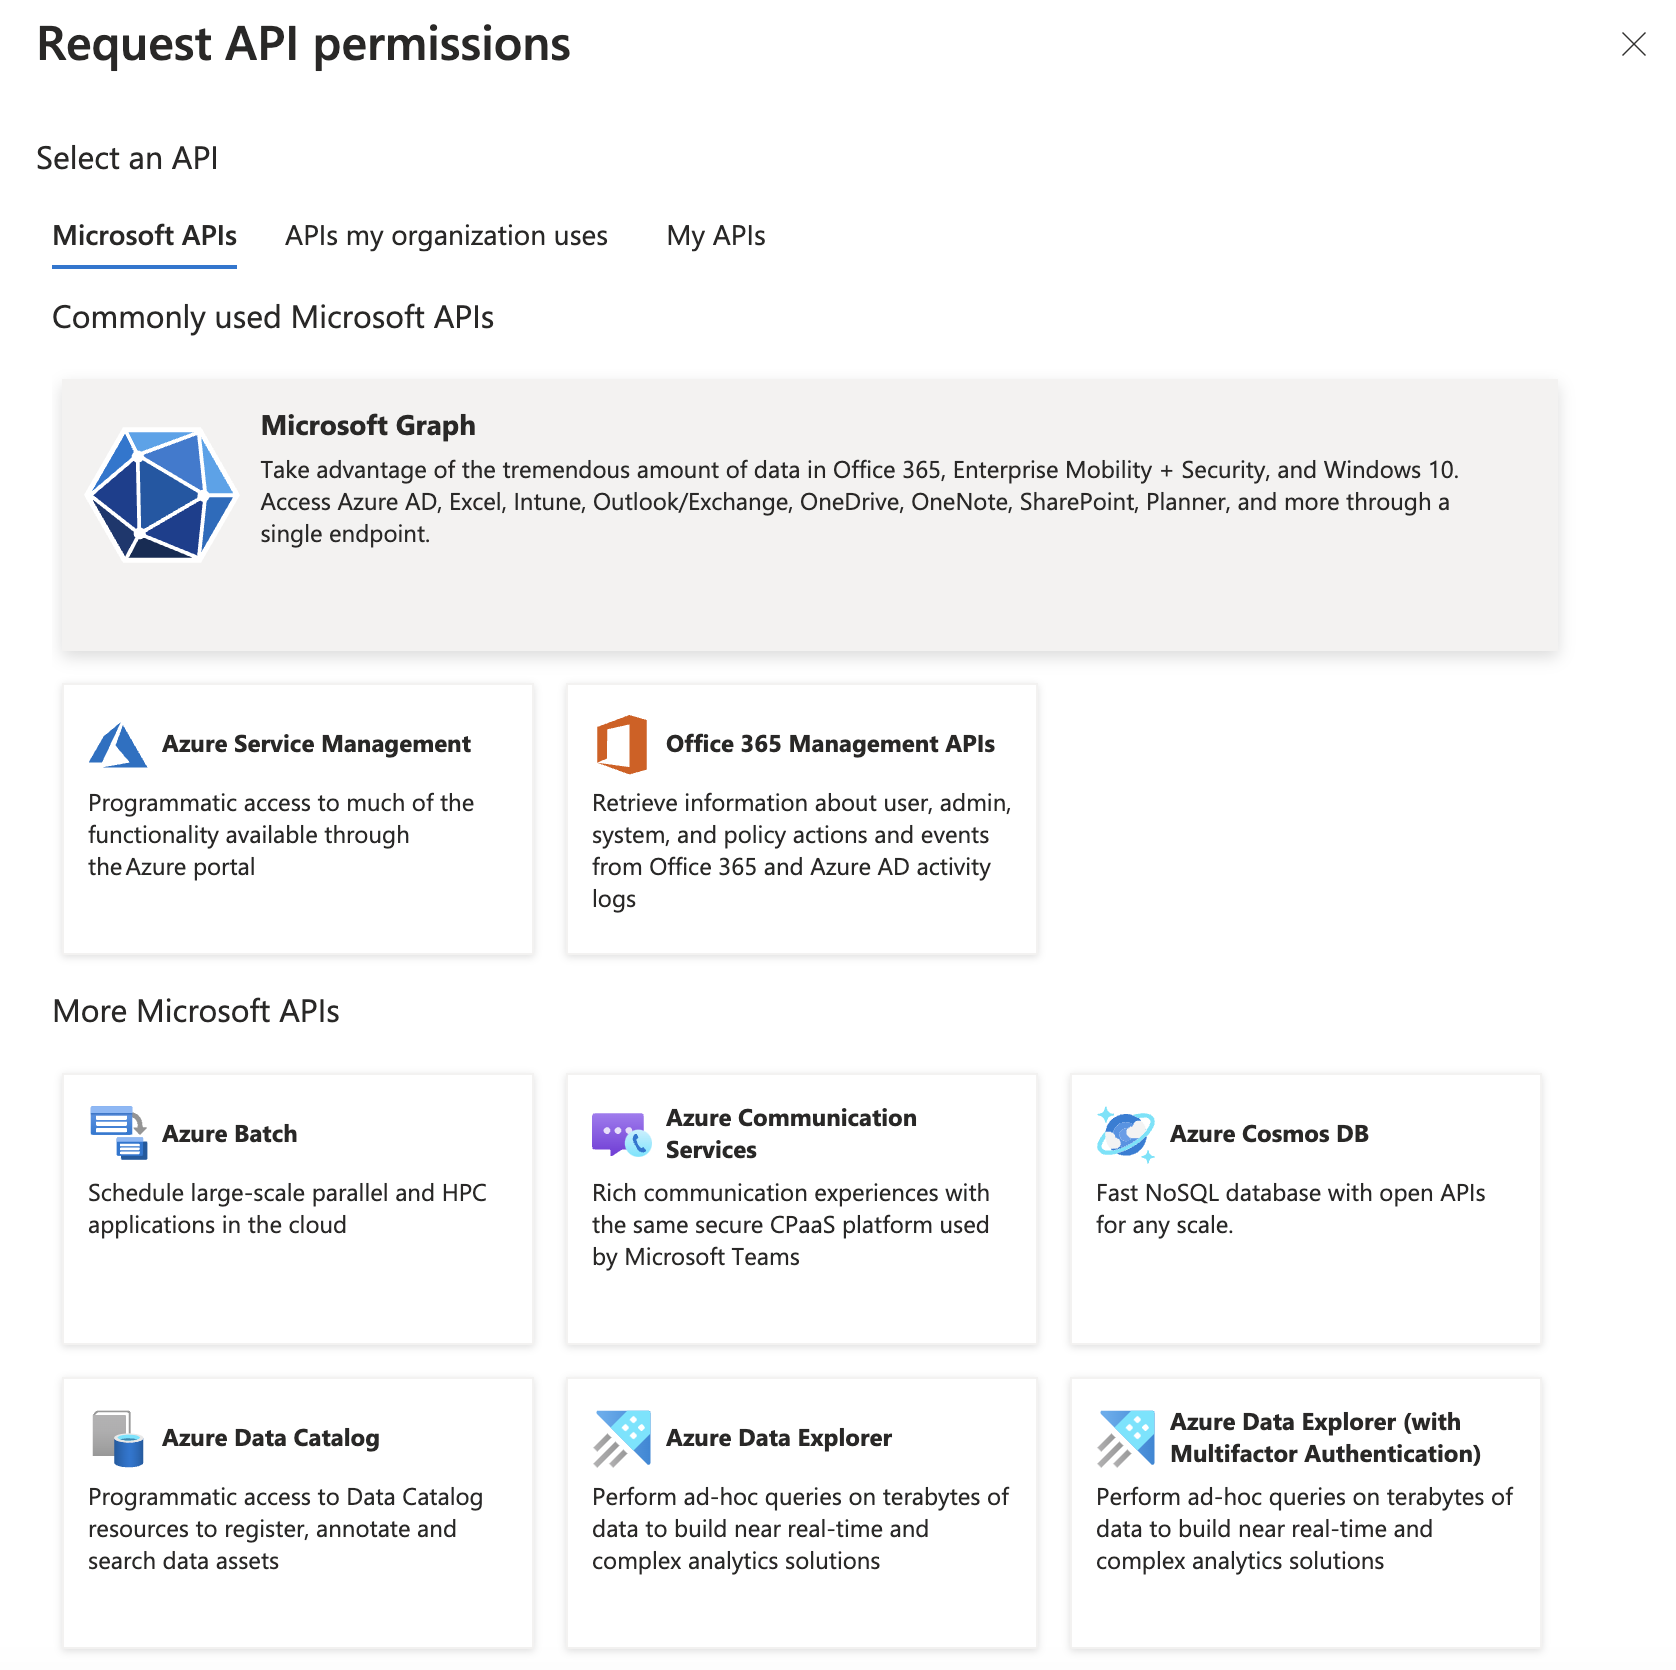 Open the permissions interface
Select Application permissions.
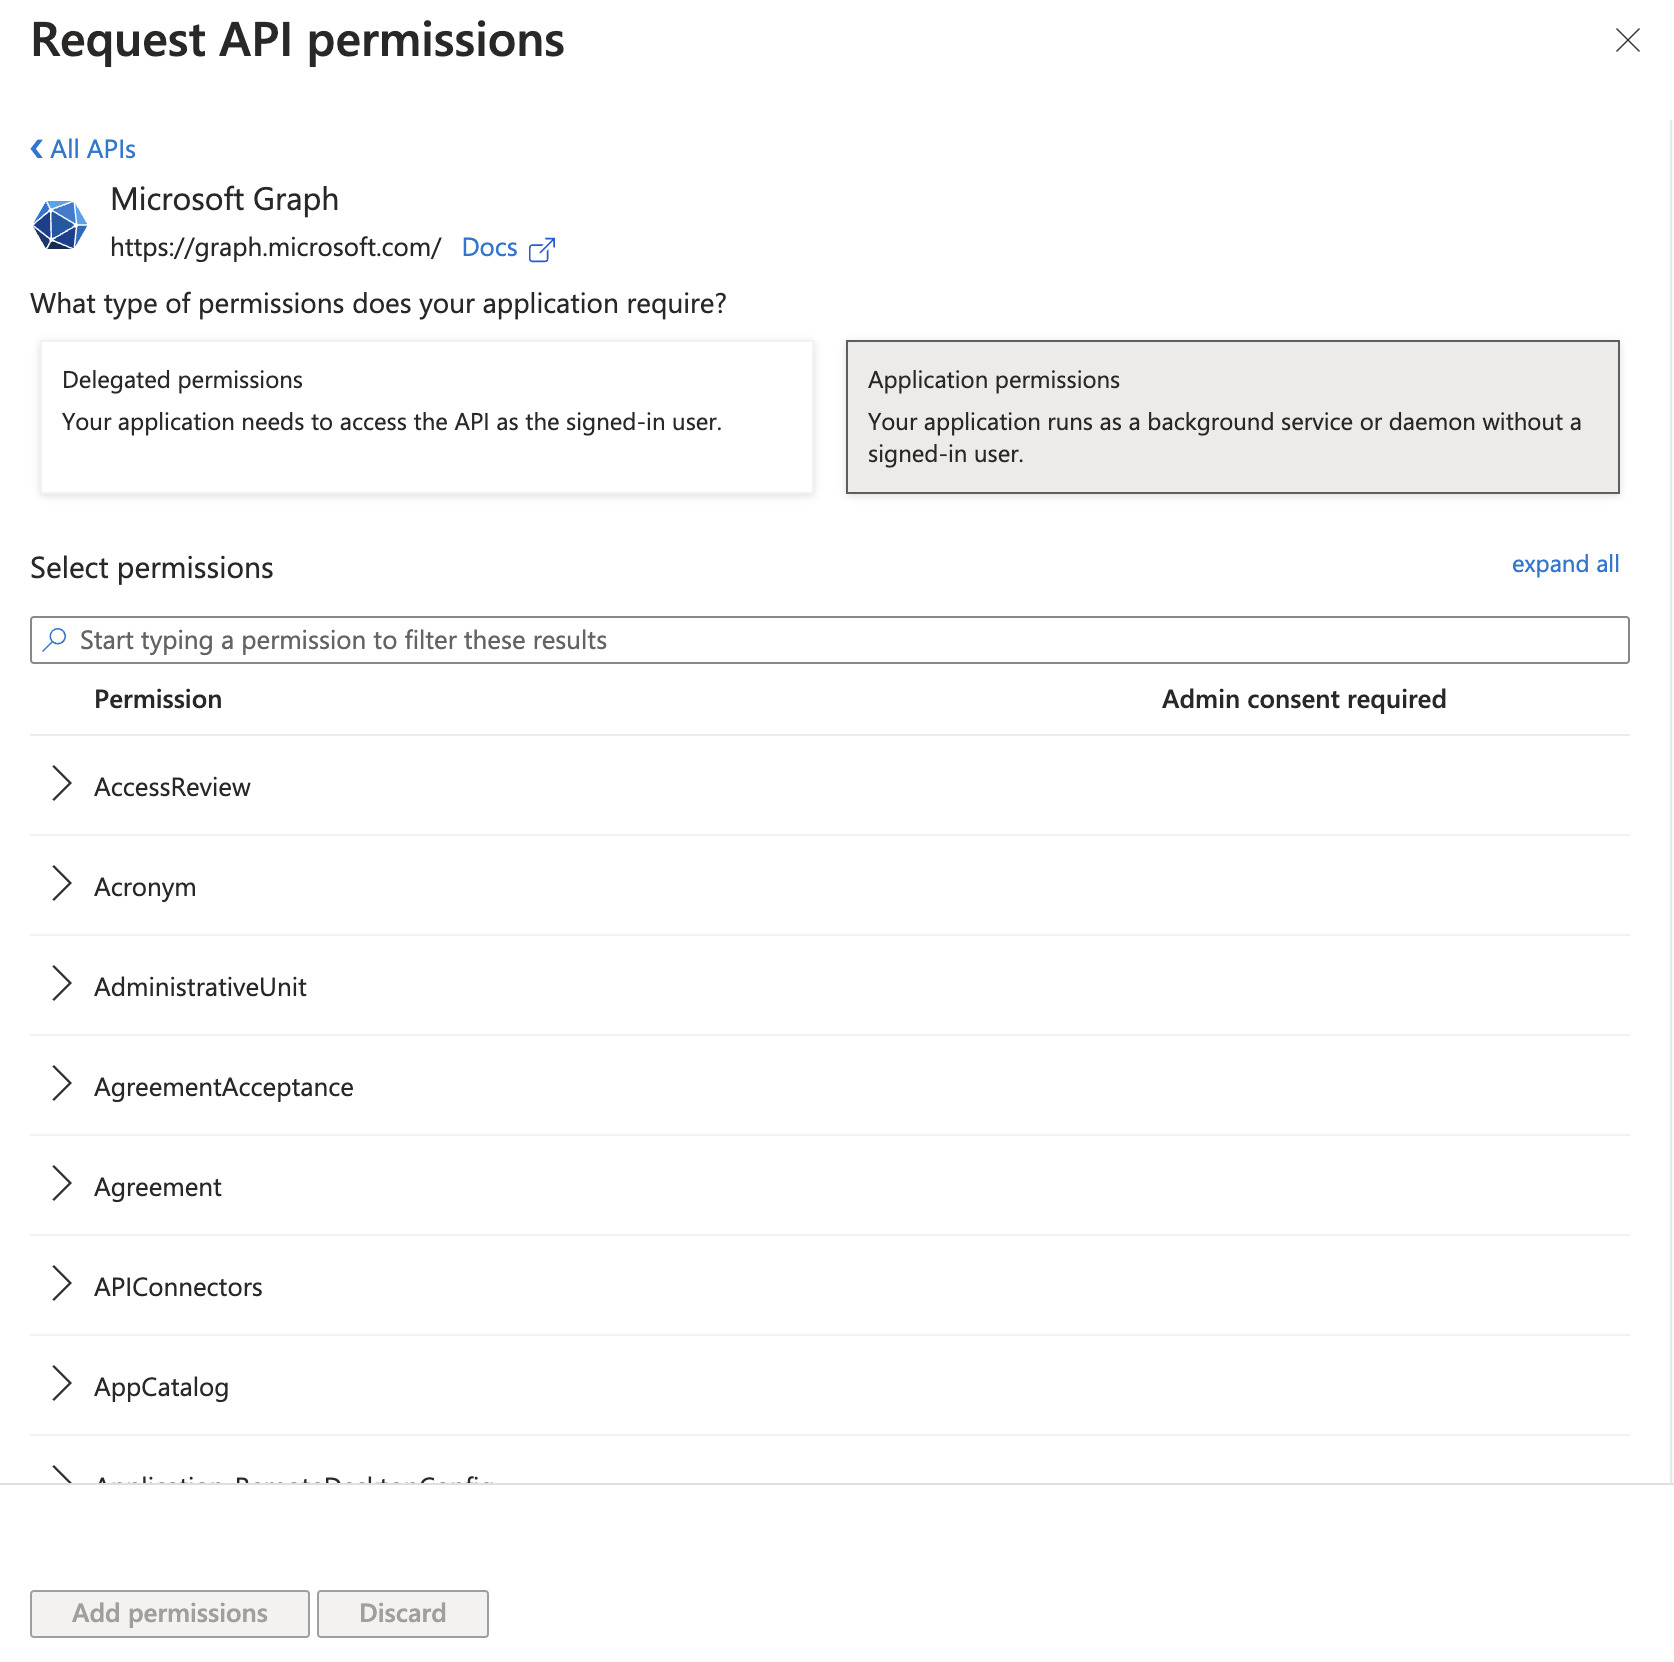 Select application permissions
Scroll to User. Add the following permissions, along with any other necessary permissions. Refer to Permissions for more information.
Directory.Read.AllDirectory.ReadWrite.AllGroup.ReadWrite.AllGroup.CreateGroup.Read.AllGroupMember.Read.AllGroupMember.ReadWrite.AllUser.ManageIdentities.AllUser.Read.AllUser.ReadWrite.All
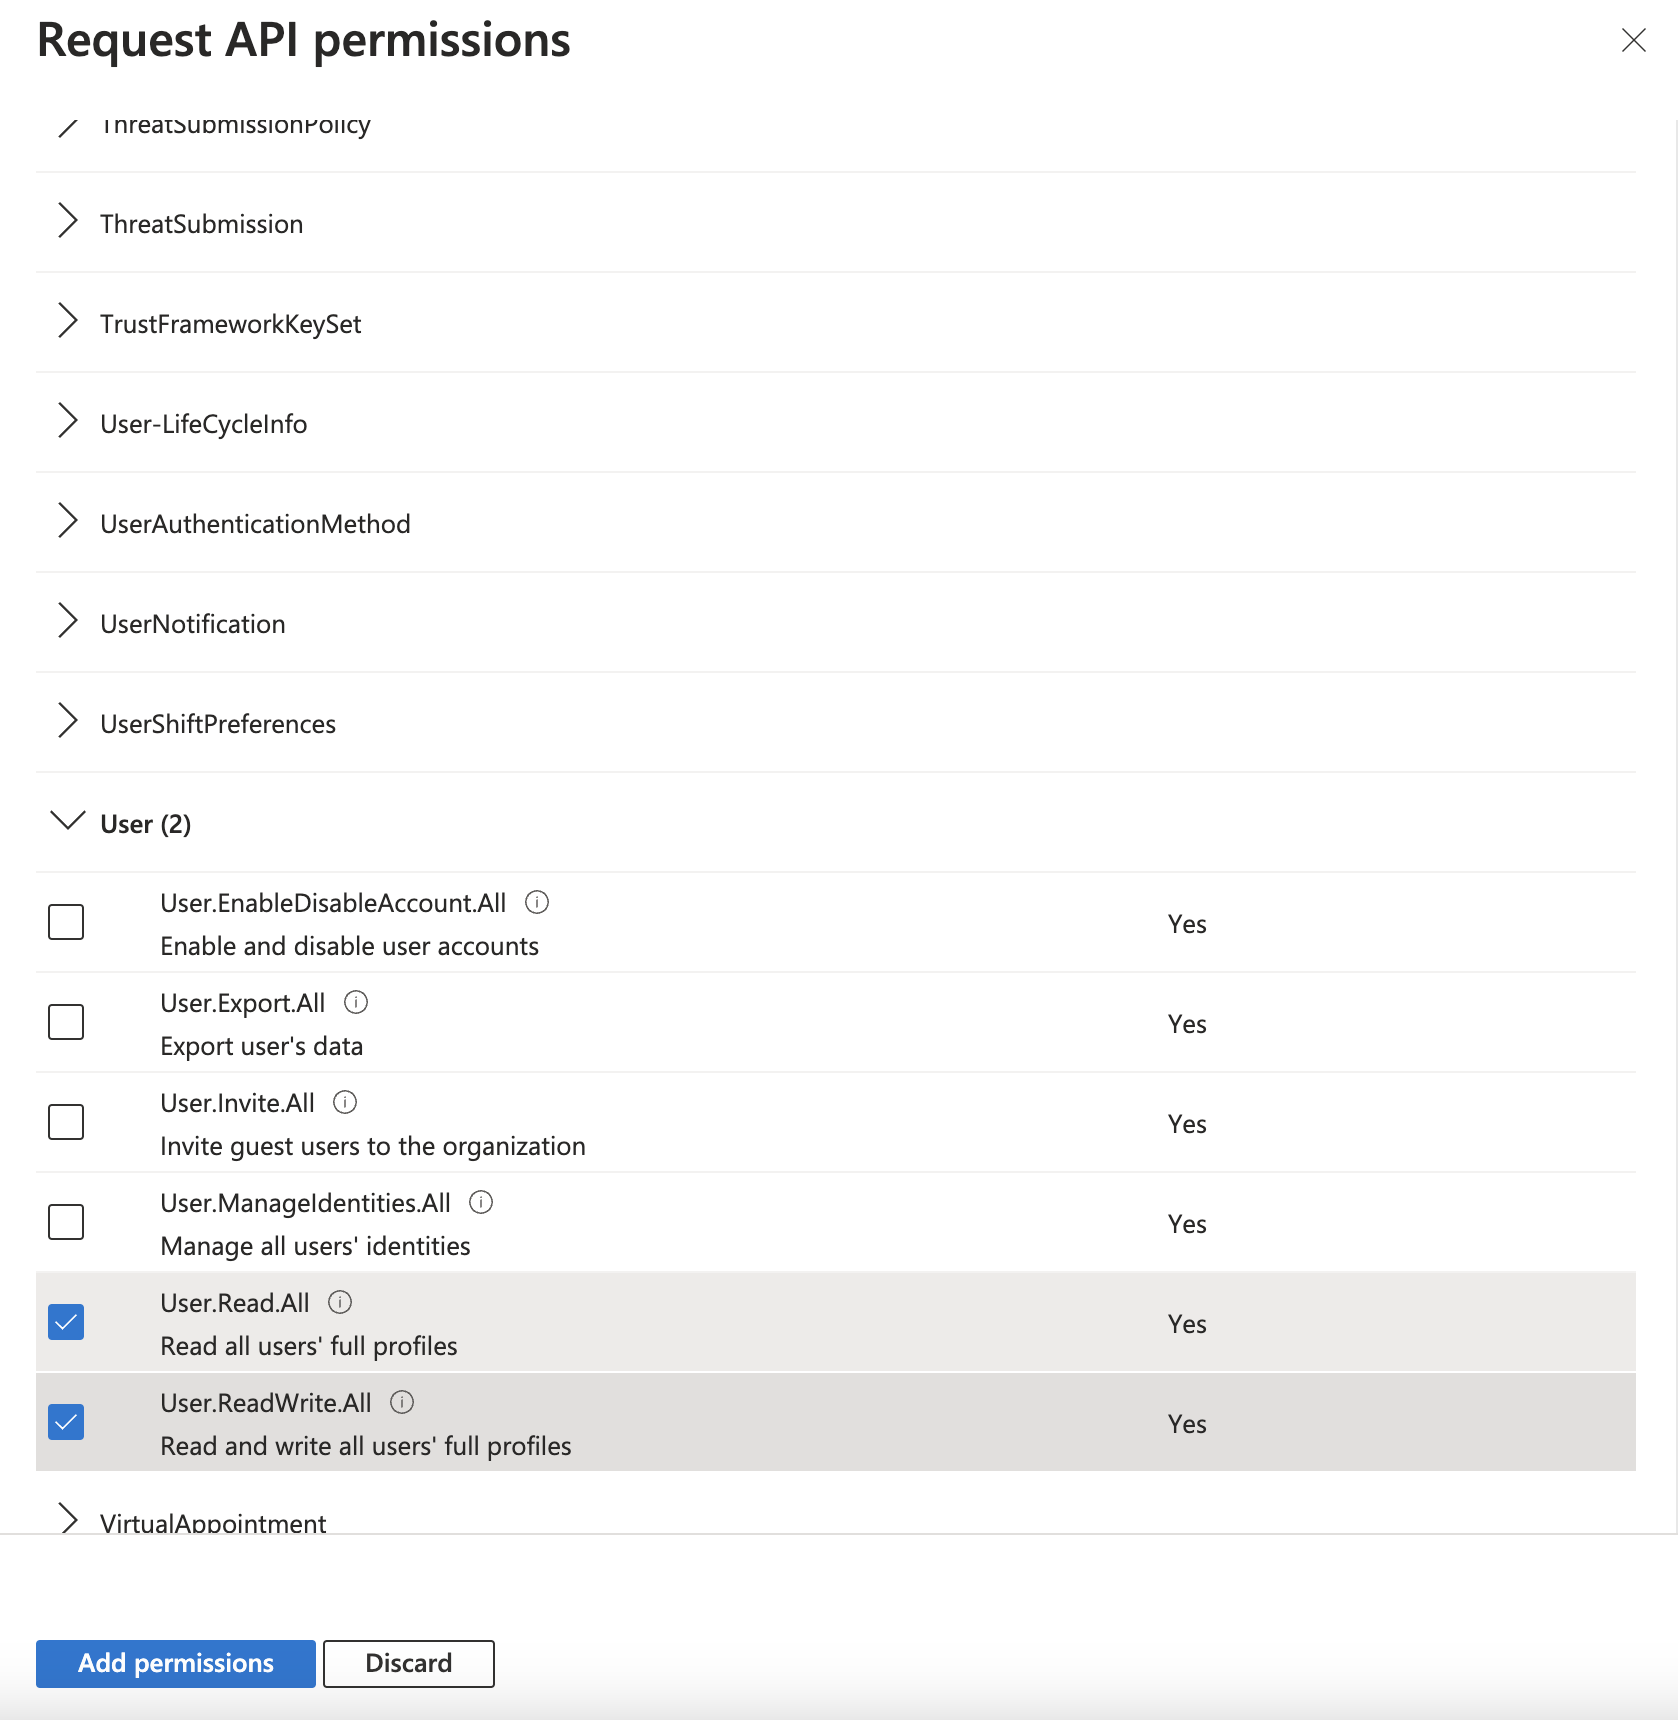 Select the necessary permissions
Click Add permissions.
You will see these permissions added to Microsoft Graph. However, you will need admin approval to grant them to your application officially.
If you are logged in with an administrator account, click Grant admin consent for [your organization].
Once admin consent is granted, Microsoft updates the Status column to Granted.
 Once admin consent is granted, Microsoft updates the Status column
Generate a client secret for your application
Select Certificates & secrets from the left navigation sidebar.
Click + New client secret.
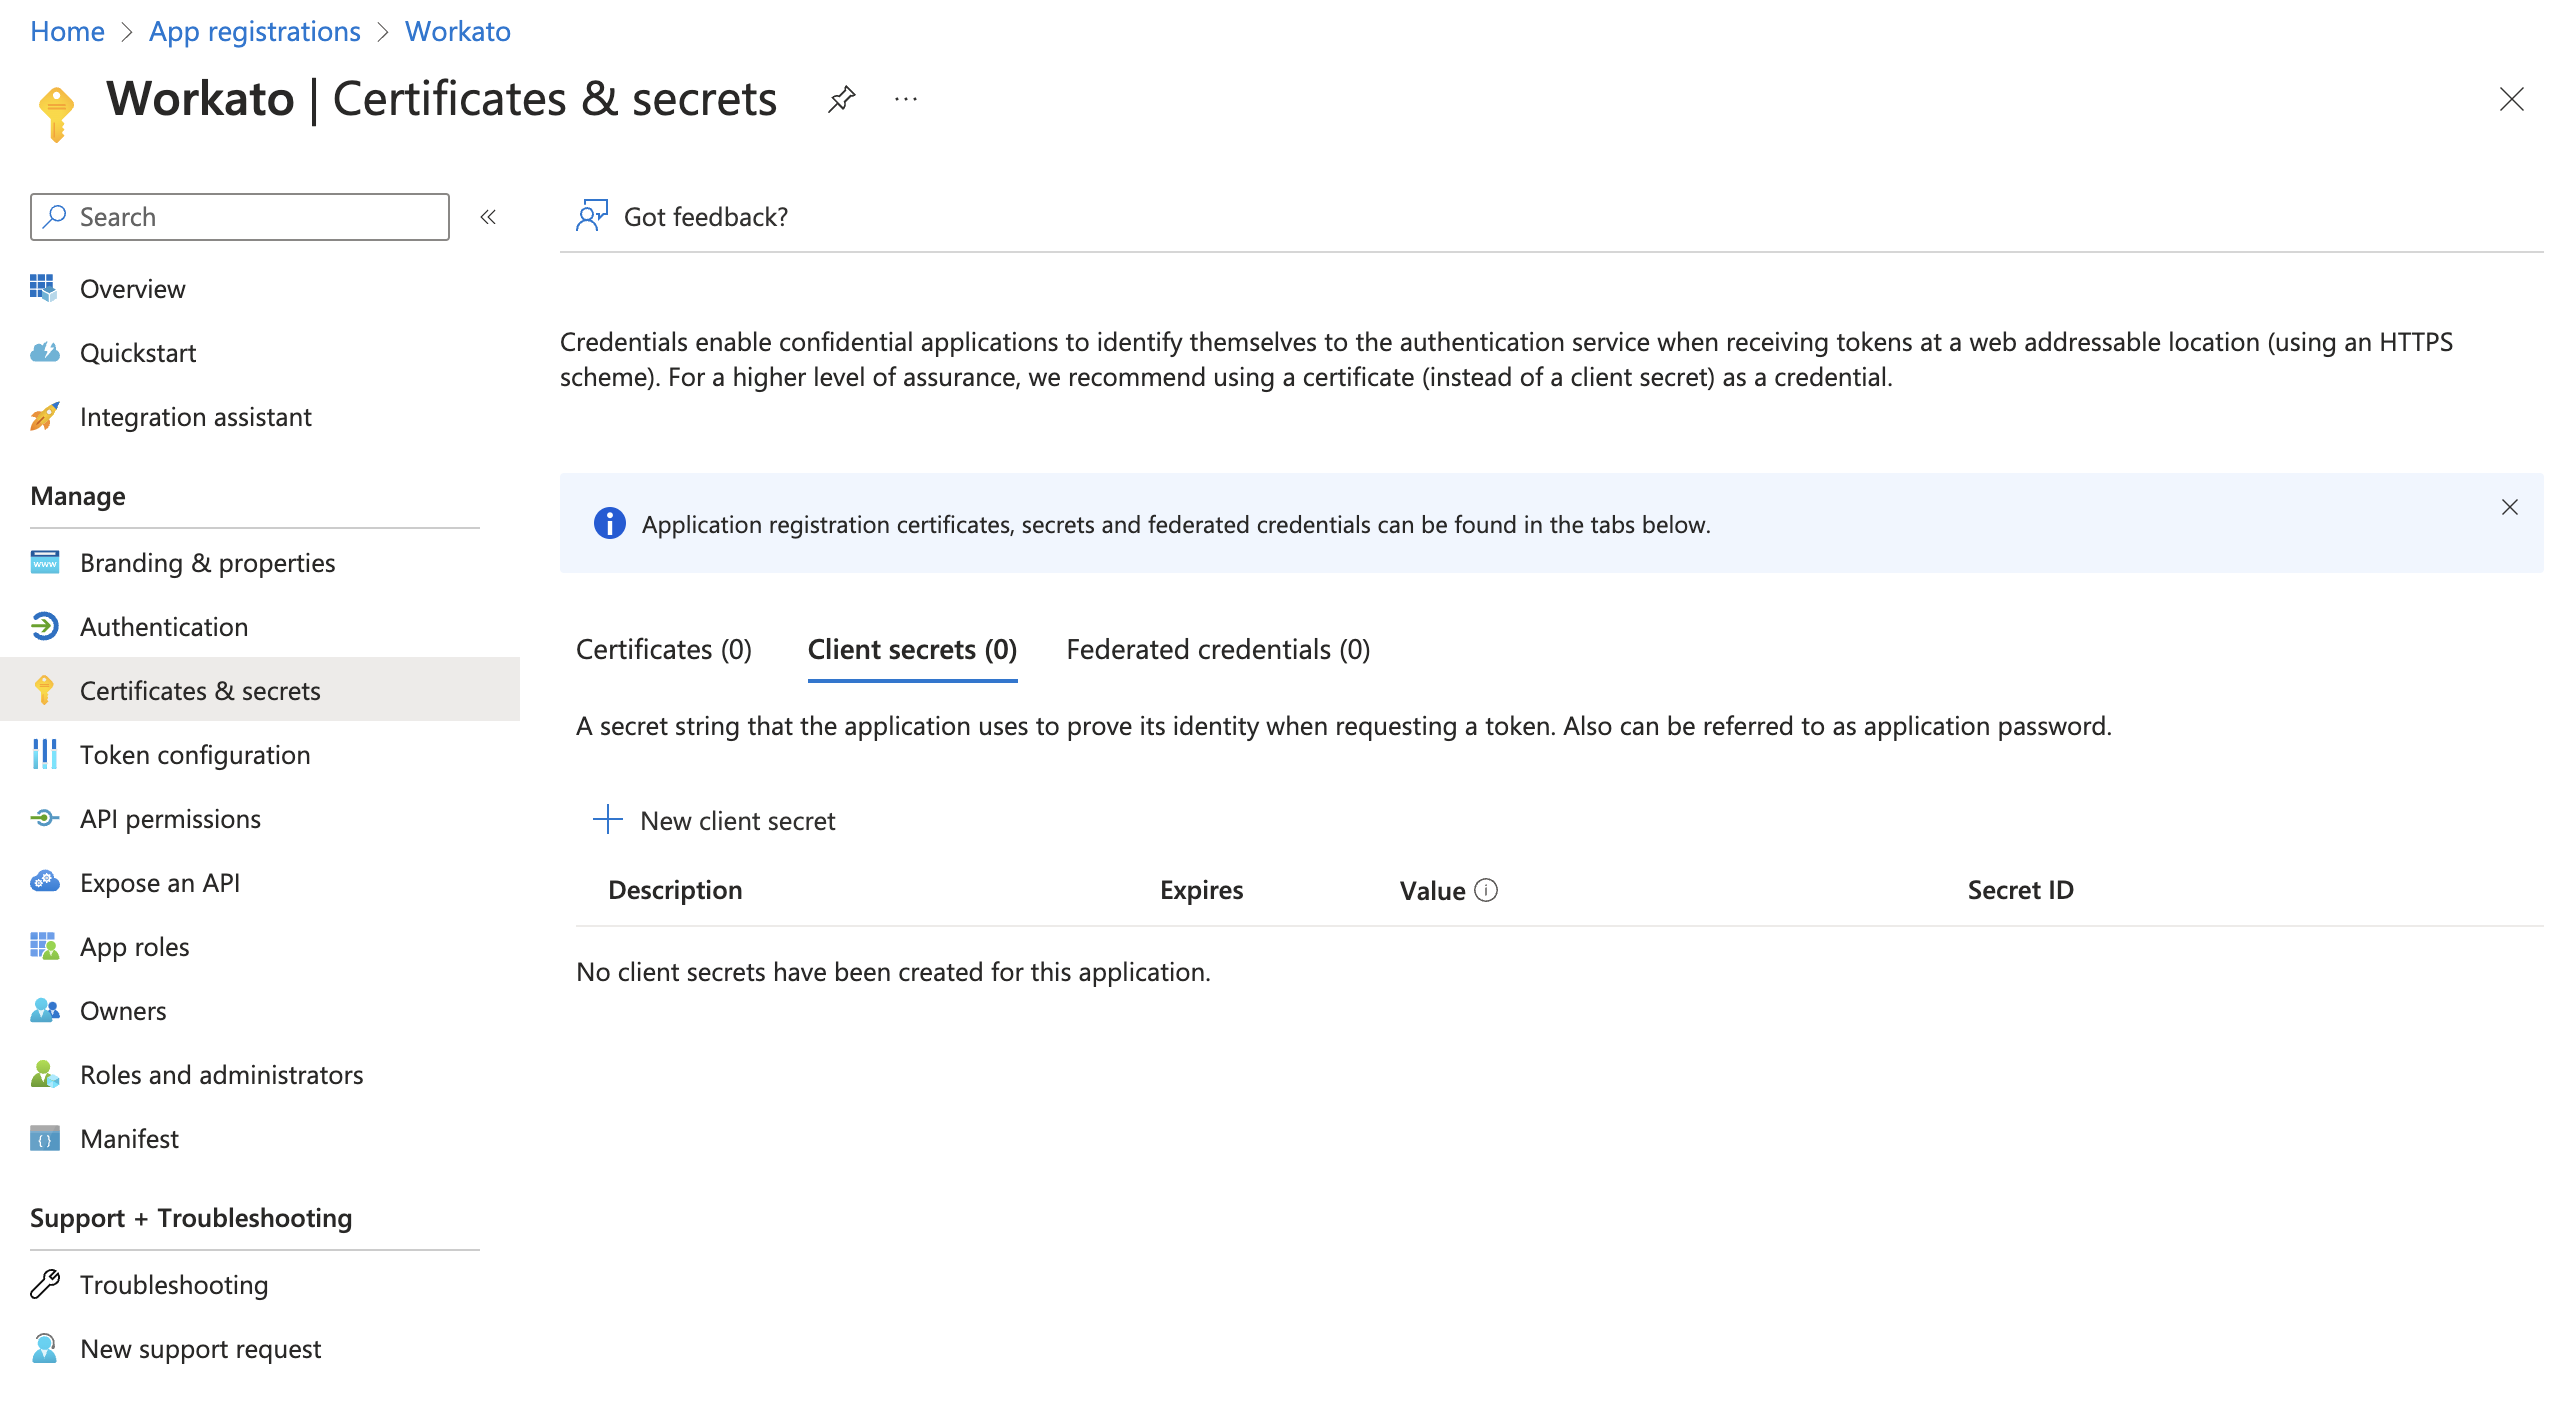 Create a new client secret
In the interface that appears, provide a description of the secret and determine when the secret will expire.
Copy and save the Value in a safe place. This is the only time Microsoft Entra ID displays this value.
Connect to Microsoft Entra ID in Workato
Configure the following fields in Workato.
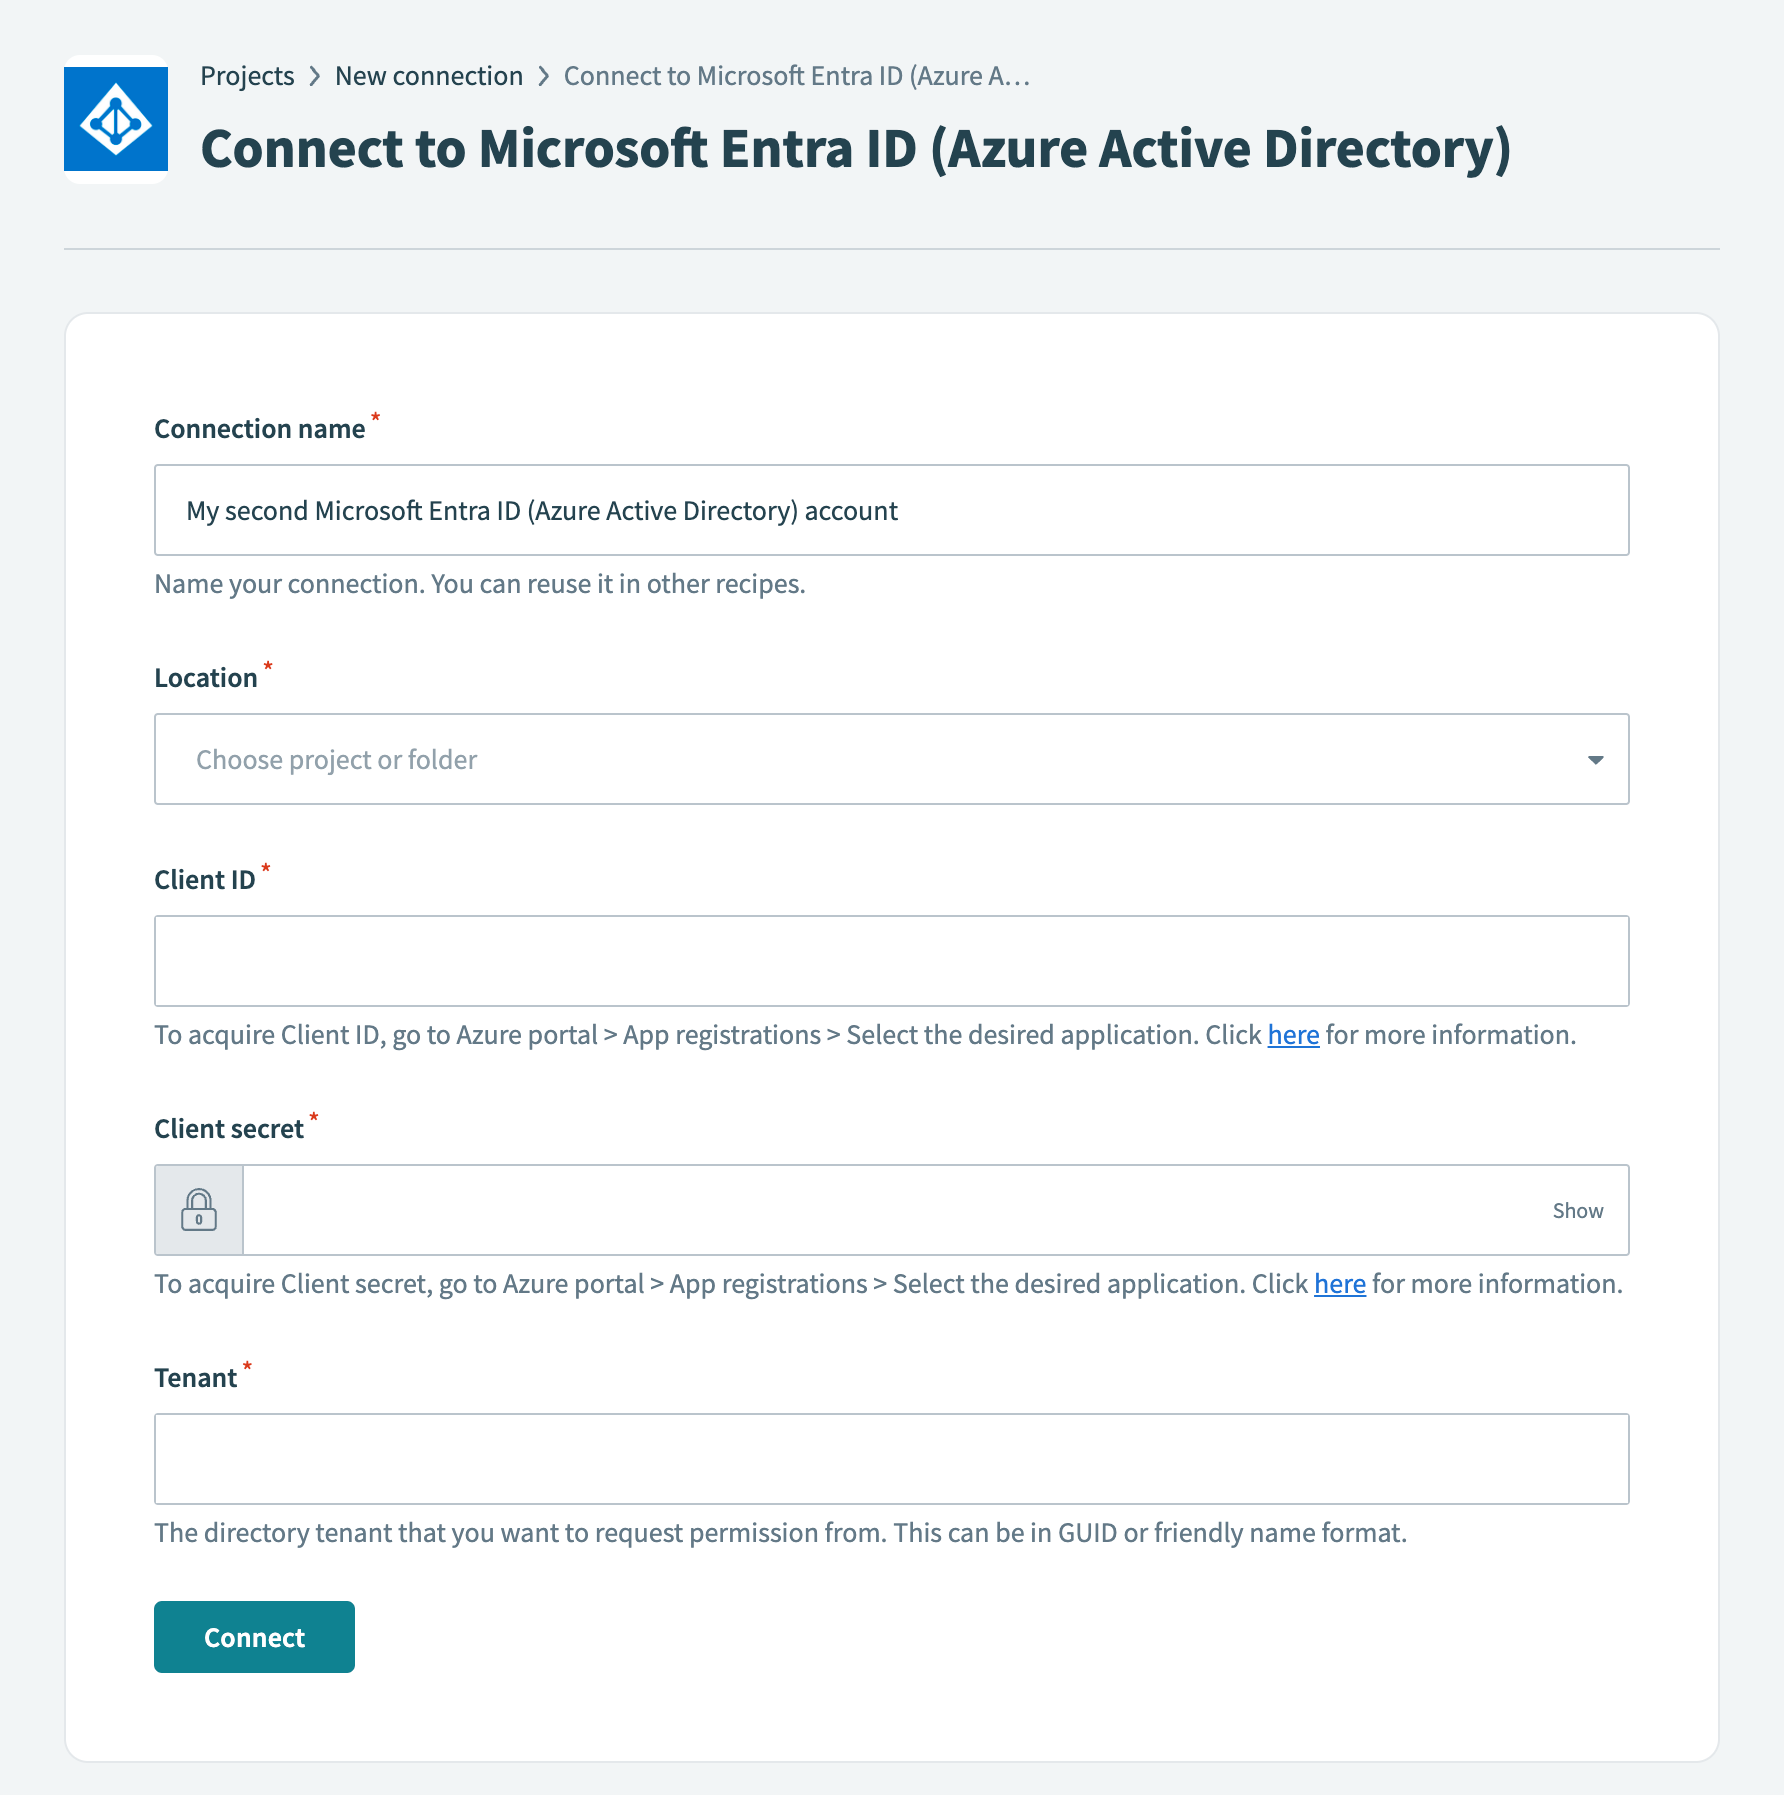 Connect to Microsoft Entra ID in Workato
- Connection name
- Name your connection.
- Location
- Choose a location (folder) for your connection.
- Client ID
- Provide your Client ID, which Azure refers to as the Application (client) ID. Obtain this value by navigating to Azure portal > App registrations. Select your application and copy the Application (client) ID.
- Client secret
- Provide your client secret, which Azure refers to as the secret Value. This was obtained in Step 1.3.
- Tenant
- Provide the directory tenant from which you plan to request permission. Azure refers to this as the Directory (tenant) ID. Obtain this value by navigating to Azure portal > App registrations. Select your application and copy the Directory (tenant) ID. Set the Tenant value to common if Accounts in any organizational directory (Any Azure AD directory - Multitenant) and personal Microsoft accounts is selected for Supported account types. Refer to step 5 in Register your application for more information.
Click Connect.
Permissions
There are two types of permissions Delegated permissions and Application permissions that you can assign to your application. To perform optimally, Microsoft Entra ID requires the following Microsoft Graph permissions.
Application permissions
Directory.Read.AllDirectory.ReadWrite.AllGroup.ReadWrite.AllGroup.CreateGroup.Read.AllGroupMember.Read.AllGroupMember.ReadWrite.AllUser.ManageIdentities.AllUser.Read.AllUser.ReadWrite.All
Delegated permissions
Directory.Read.AllDirectory.ReadWrite.AllDirectory.AcessAsUser.AllGroup.ReadWrite.AllGroupMember.ReadAllGroup.Read.AllGroup.Read.AllGroupMember.ReadWrite.AllUser.ReadUser.ReadBasic.AllUser.Read.AllUser.ReadWrite.All
Last updated: