# Create a Custom OAuth profile for Outlook
Complete the following steps to create a Custom OAuth profile for your Outlook connection:
PREREQUISITES
The user establishing the connection (the Outlook account associated with the required credentials) must meet the following requirements:
- Hold the Application Administrator role.
- Possess, at minimum, a Microsoft 365 Business User license.
Refer to the Assign roles and licenses section to learn how to grant these roles and licenses to a user.
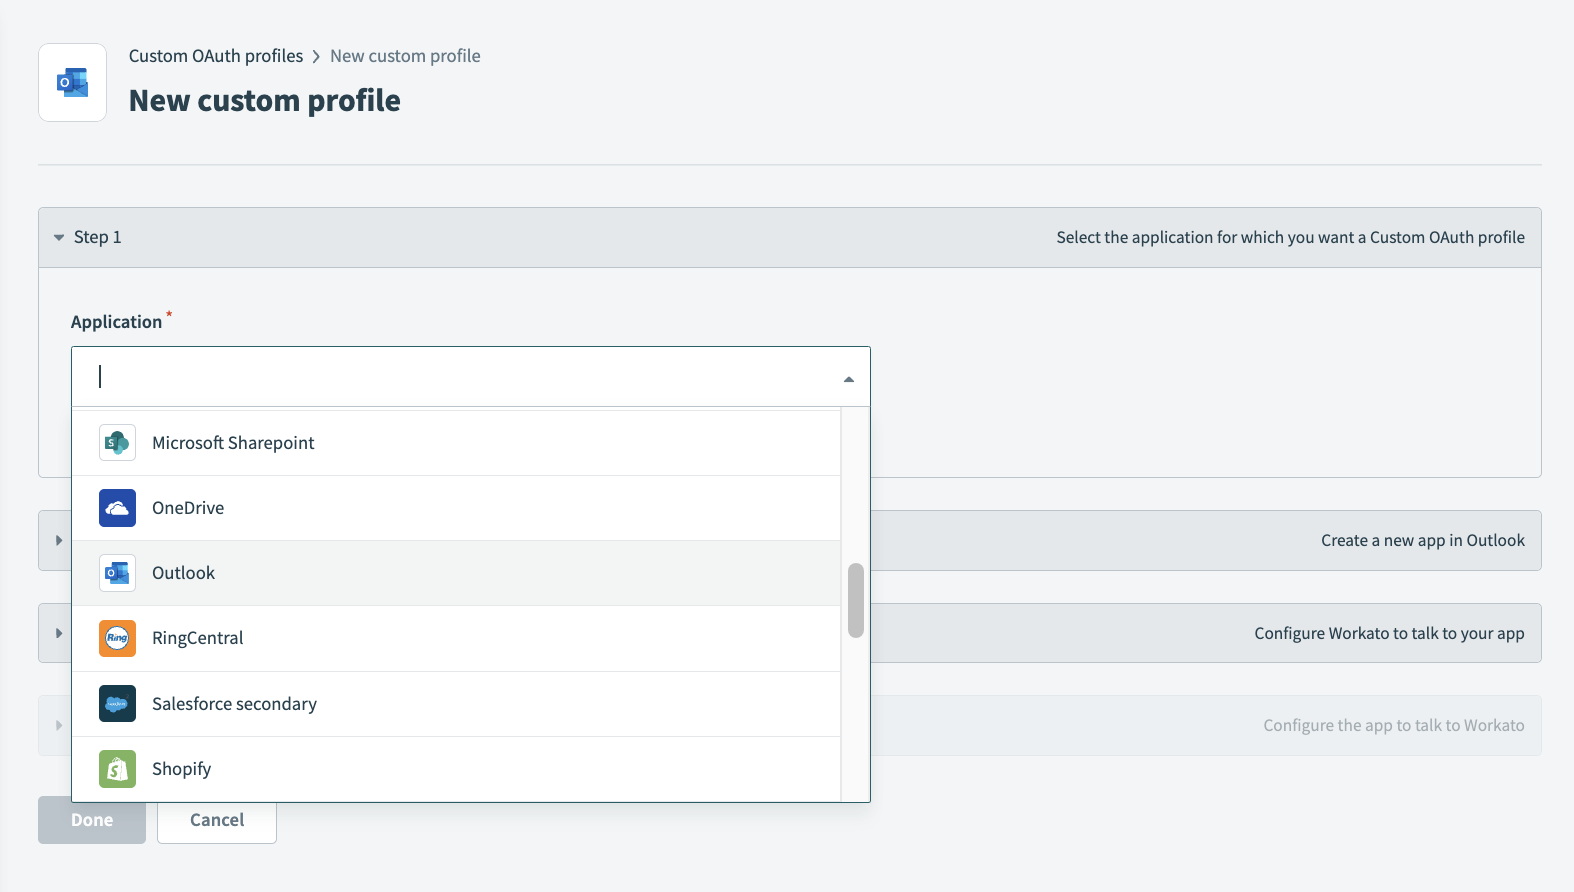
Go to Tools > Custom OAuth profiles using the navigation sidebar.
Click + New custom profile.
Select Outlook from the Application drop-down.
 Select Outlook
Provide a Name for this account.
Click Create new app.
Create a new app or use an existing app.
Register the Workato App in the Azure Portal
Complete the following steps to register the Workato app in the Azure portal:
Sign in to the Azure portal (opens new window).
Select App registrations > + New registration.
Enter a unique name for the application.
Use the Supported account types drop-down menu to select an account type.
Select Web from the Select a platform drop-down menu.
Use the following URI for the Redirect URI:
https://www.workato.com/oauth/callback
Select Register.
Obtain the client ID
In the Azure portal (opens new window), go to App registrations > Overview.
Copy the Application (client ID) for use in Workato.
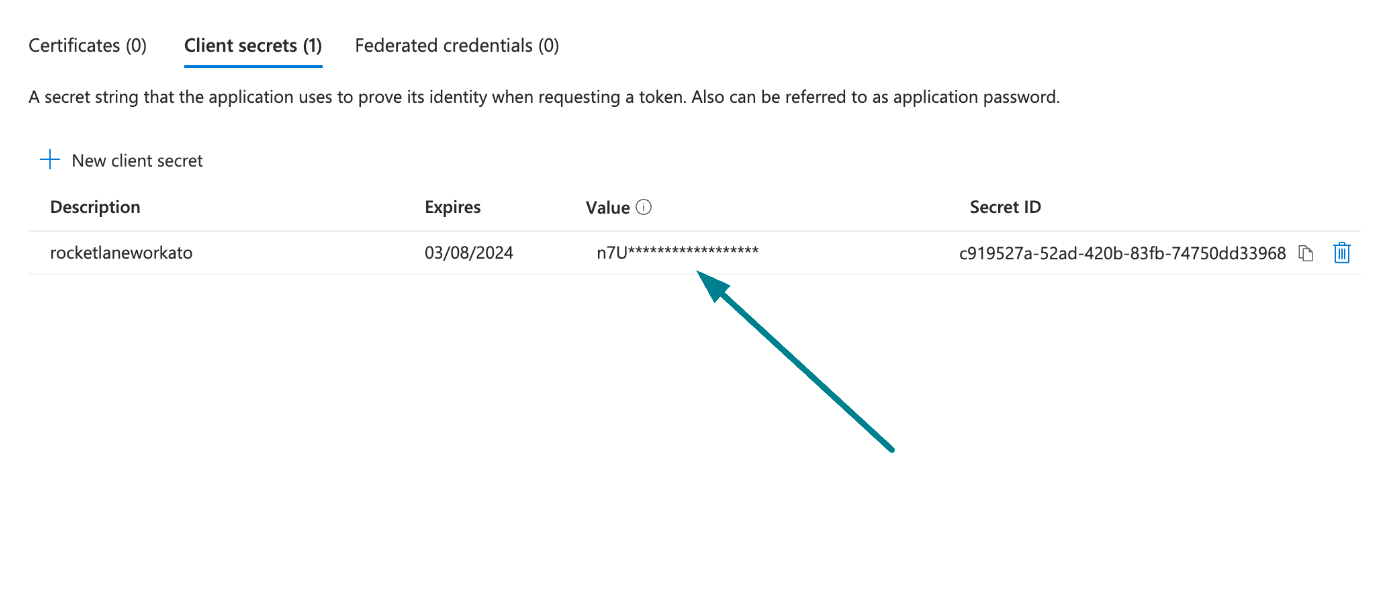
Generate a client secret
Complete the following steps to generate a client secret:
Go to Manage > Certificates & Secrets > Client secrets.
Click + New client secret.
Provide a Description for the client secret and specify an Expires date.
Click Add.
Copy and save the client secret Value—not the Secret ID—for use in Workato.
 Copy and save the client secret value
Enter your Client ID and Client Secret in Workato.
Click Save and Done.
# Assign roles and licenses in the Azure portal
The user establishing the connection (the account associated with the required credentials) must meet the following requirements:
- Hold one of the following roles:
- Application Administrator
- Global Administrator
- Cloud Application Administrator
- Possess, at minimum, a Microsoft 365 Business User license.
Complete the following steps to assign roles and licenses to a user in the Azure portal (opens new window) and Microsoft 365 Admin Center (opens new window)
Assign a role to your user
Go to Home > Users.
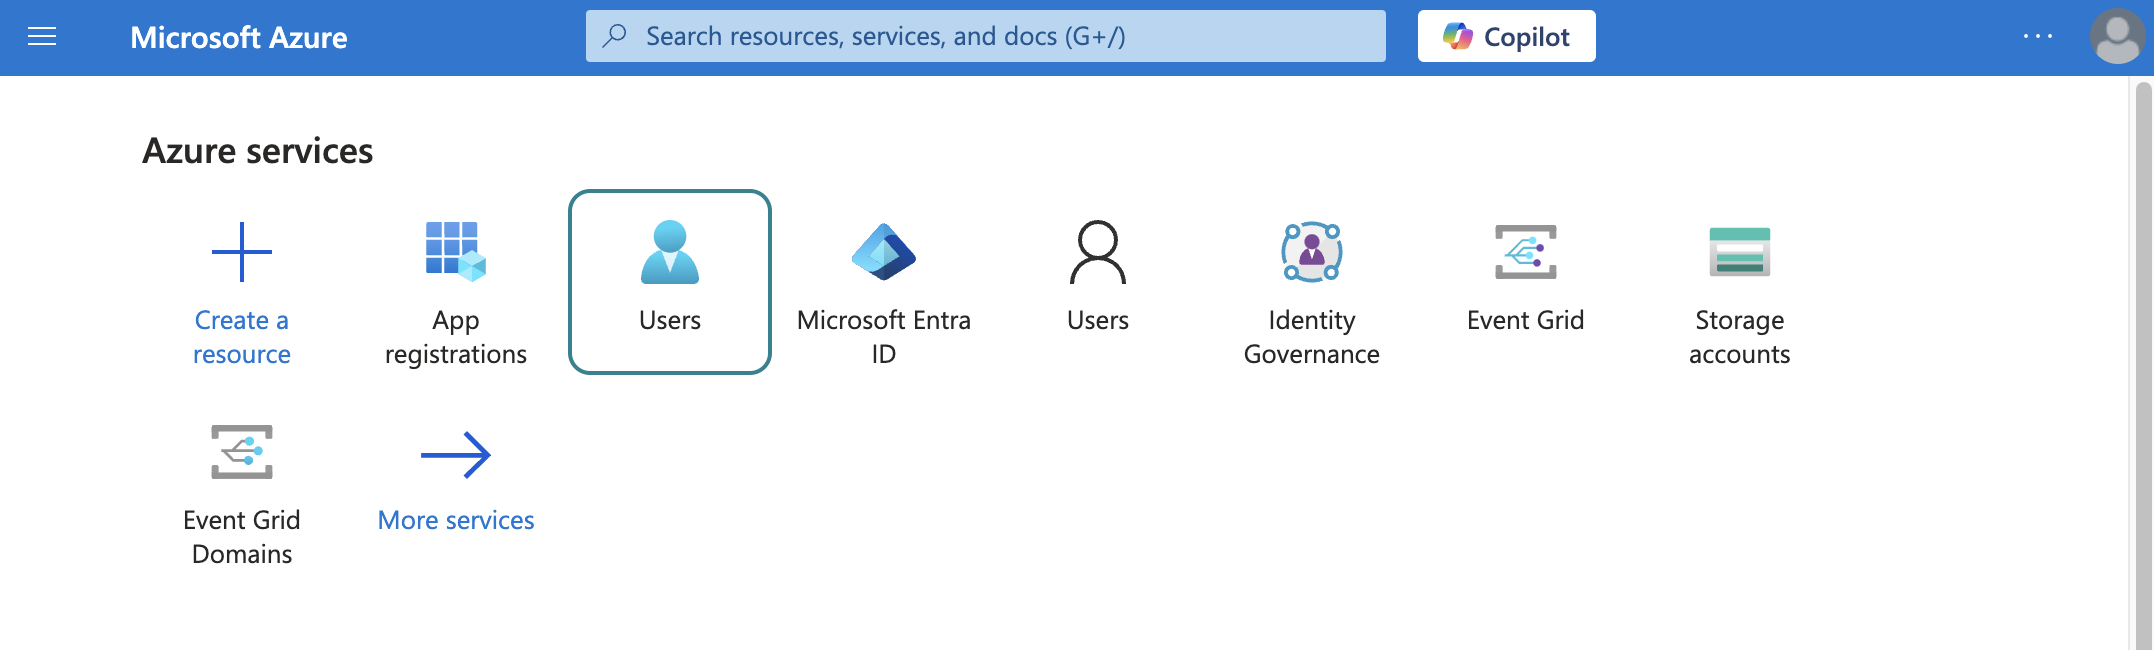 Select users
Search for and select the user associated with your account.
Select Assigned roles from the left sidebar.
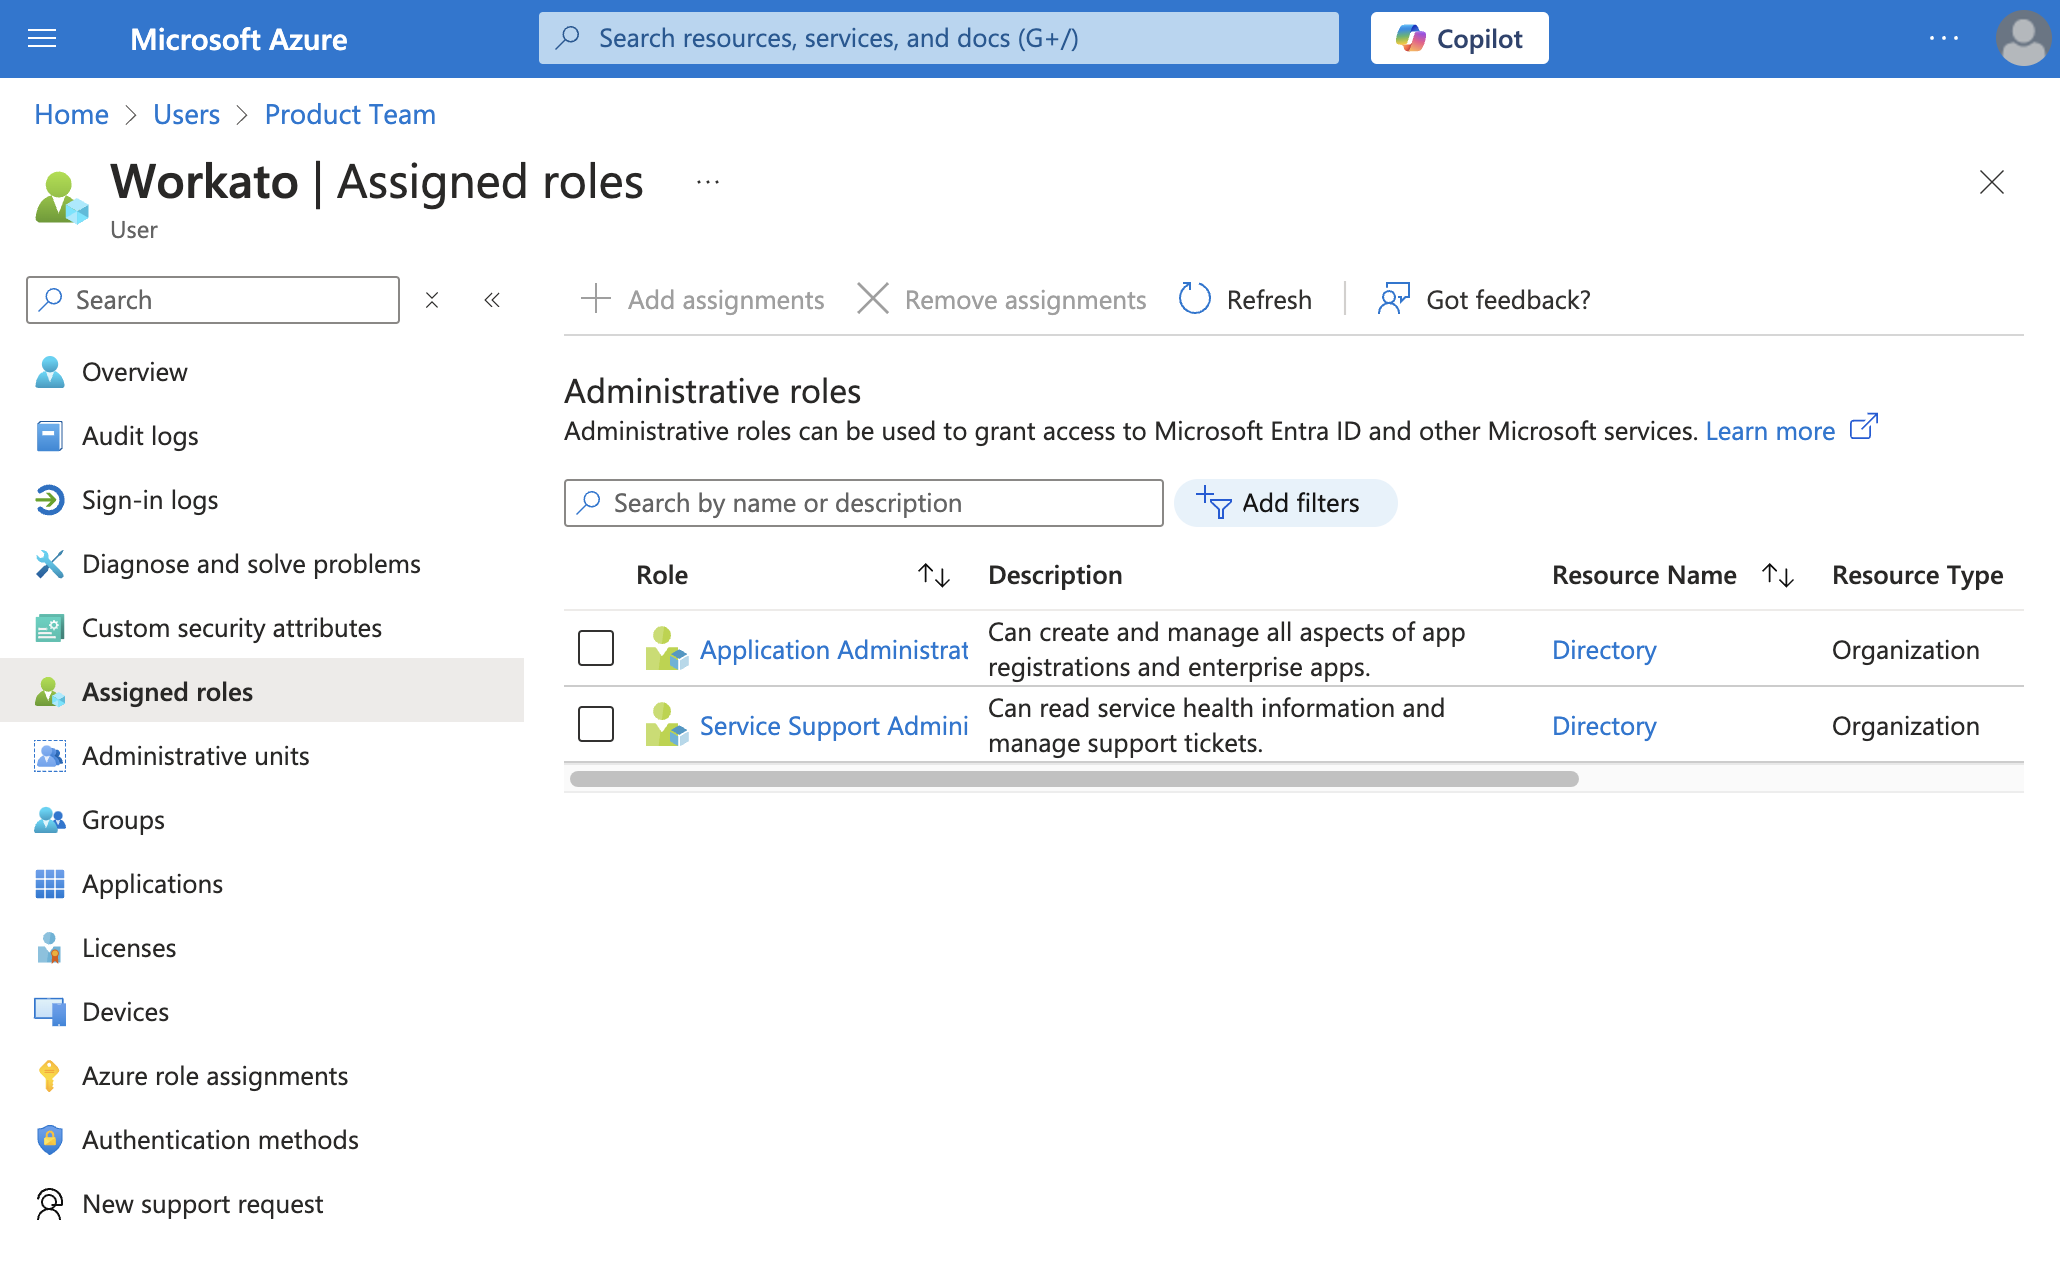 Assigned roles
Click + Add assignments.
Select the Application Administrator, Global Administrator, or Cloud Application Administrator role from the Role tab.
In the Members tab, assign the role to the user account associated with this connection.
Refer to Microsoft's documentation (opens new window) for more information on assigning roles to your users.
Assign the Microsoft 365 Business User License
Go to Billing > Licenses.
Select the Microsoft 365 Business User license from the list.
On the product details page, select Assign licenses.
In the Assign licenses to users pane, start typing a name, and then choose it from the results to add it to the list. You can add up to 20 users at a time.
Select Turn apps and services on or off to assign or remove access to specific items.
Select Assign, then close the right pane.
Refer to Microsoft's documentation (opens new window) for more information on assigning licenses to your users.
Last updated: 10/14/2025, 4:38:57 PM