UiPath
UiPath combines core Robotic Process Automation (RPA) capabilities with tools for process discovery and analytics, making it easy to automate thousands of workflows across various applications. With UiPath, companies can easily build, manage, and run robots that emulate human interactions with digital systems.
Install UiPath from the community library
Complete the following steps to install the UiPath connector from the community library:
Open the recipe editor and search for a connector. Alternatively, you can search for a connector in the community library.
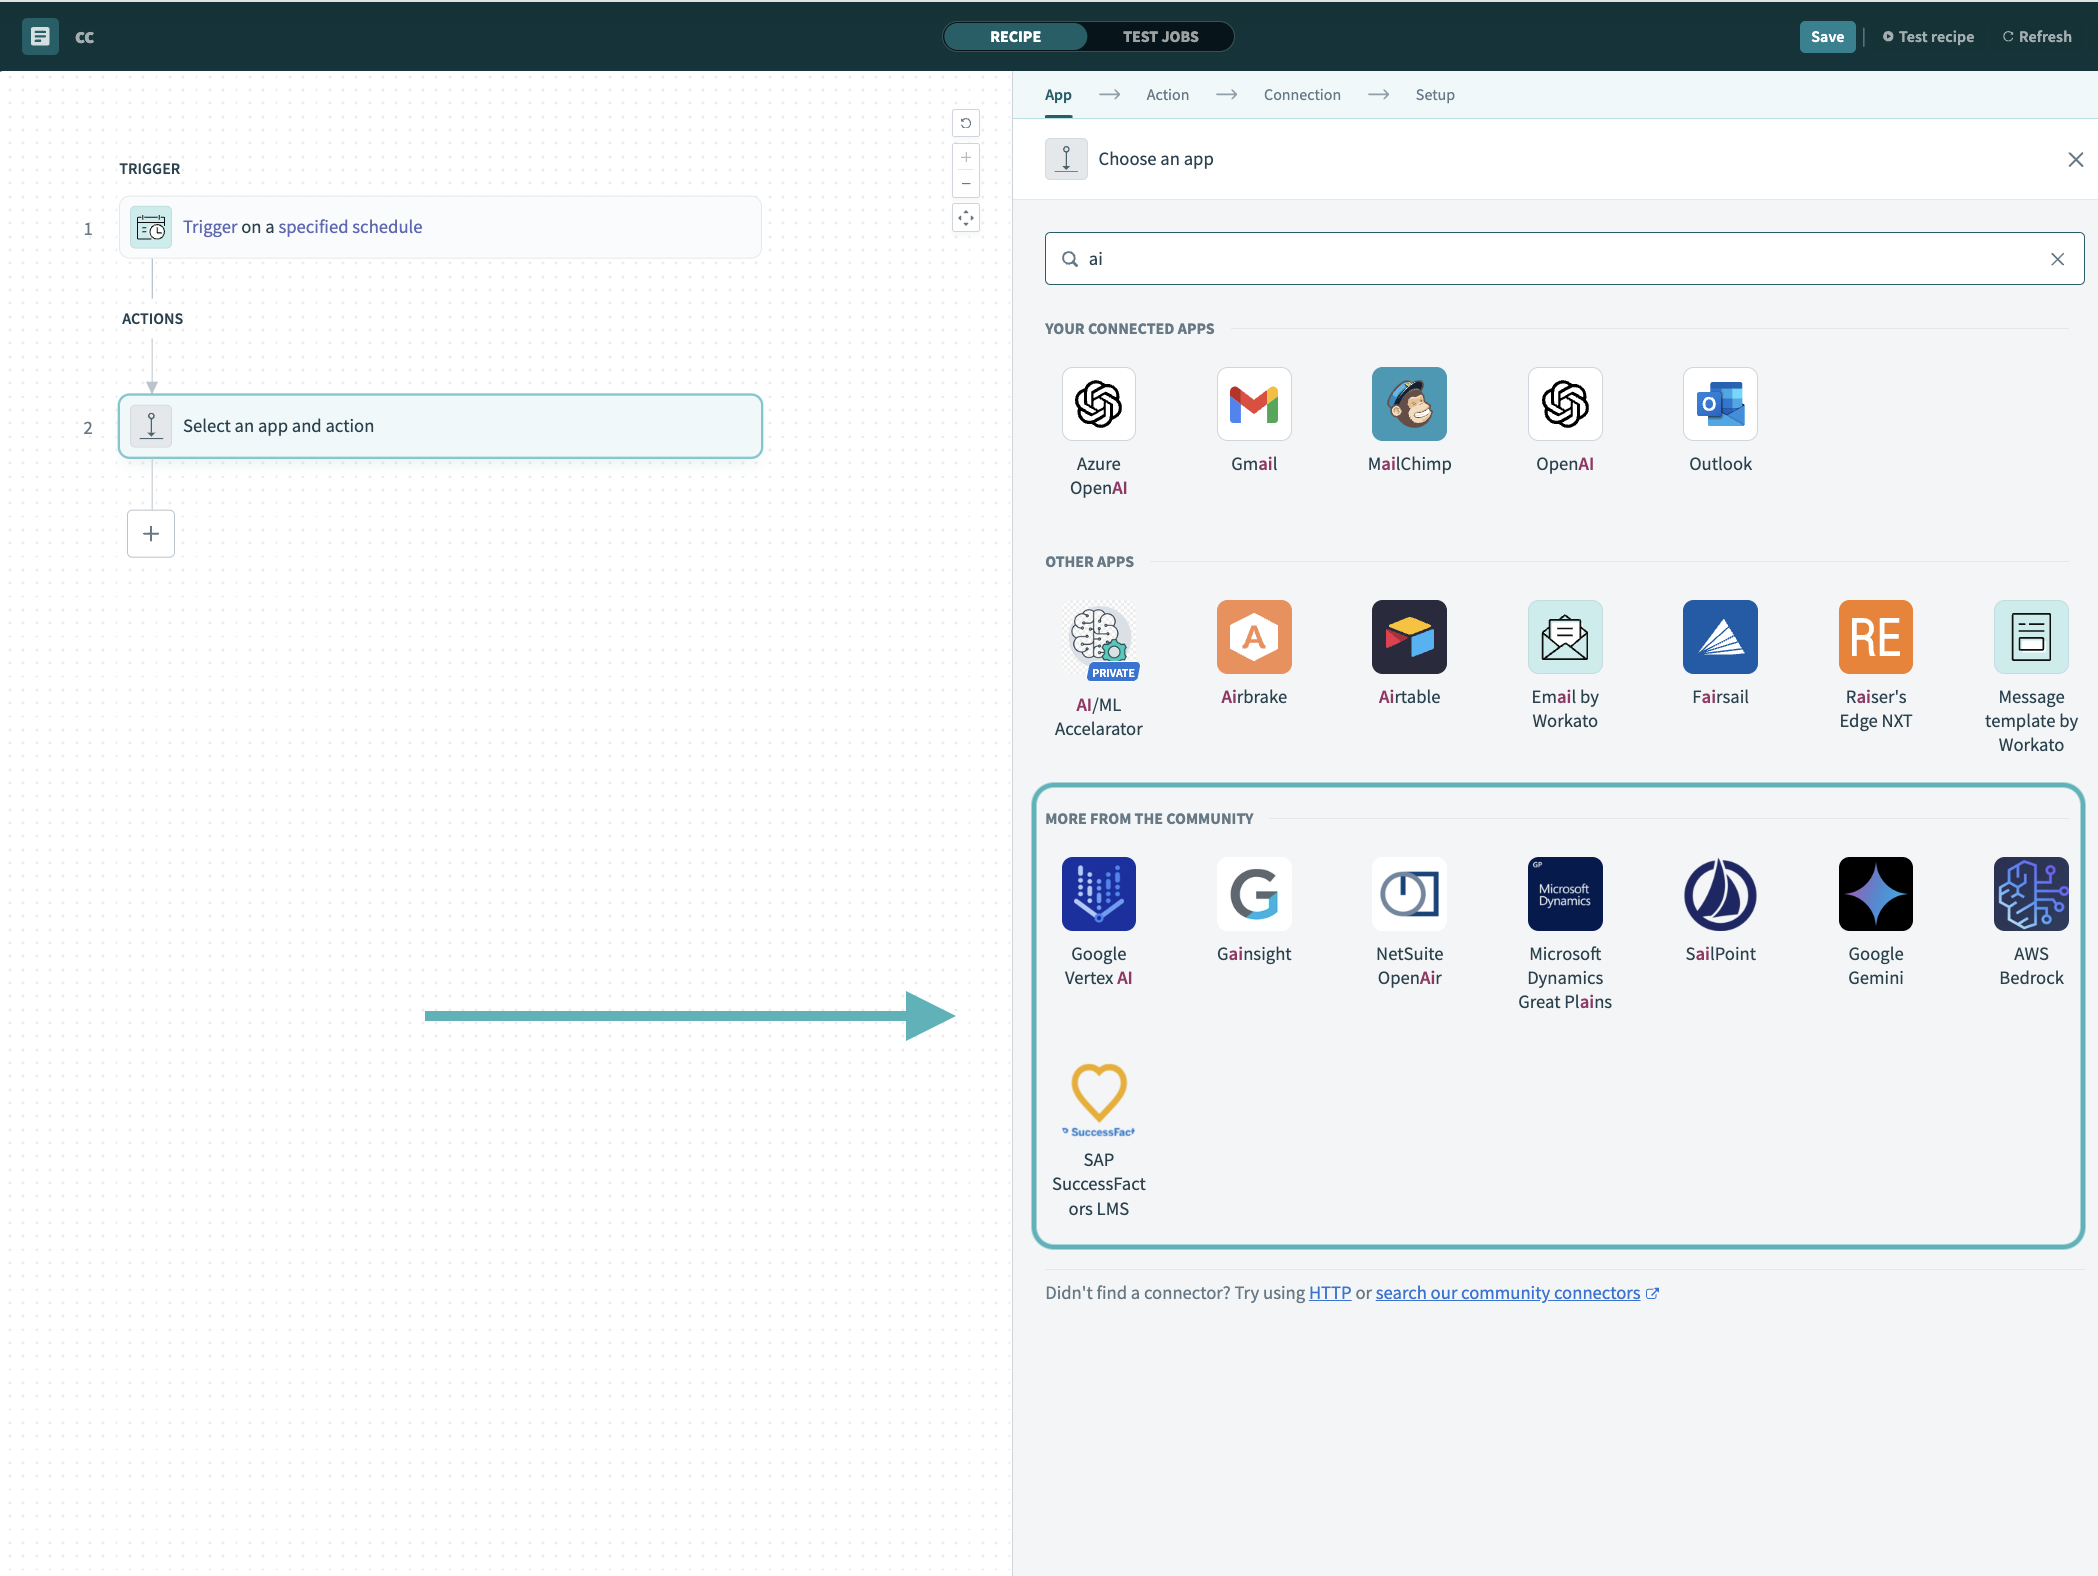 Search for community connectors in the recipe editor
Select the community connector you plan to install.
Click Install to install the connector from the community library.
 Click Install
Select Release connector. Alternatively, select Review code to review and modify the connector code before releasing it to the workspace.
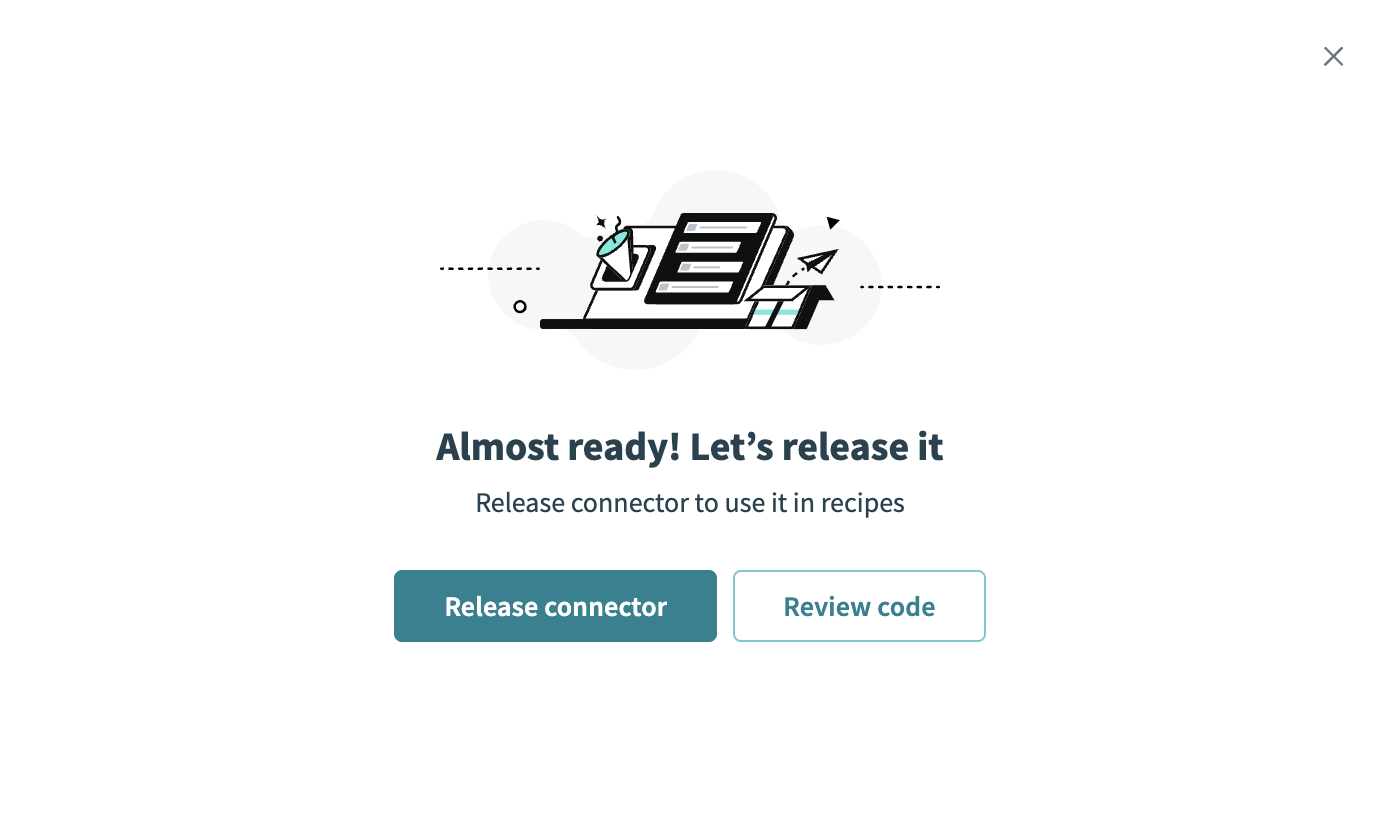 Release the connector
Summarize any changes you made to the connector, then click Release to allow workspace collaborators to use the connector in recipes.
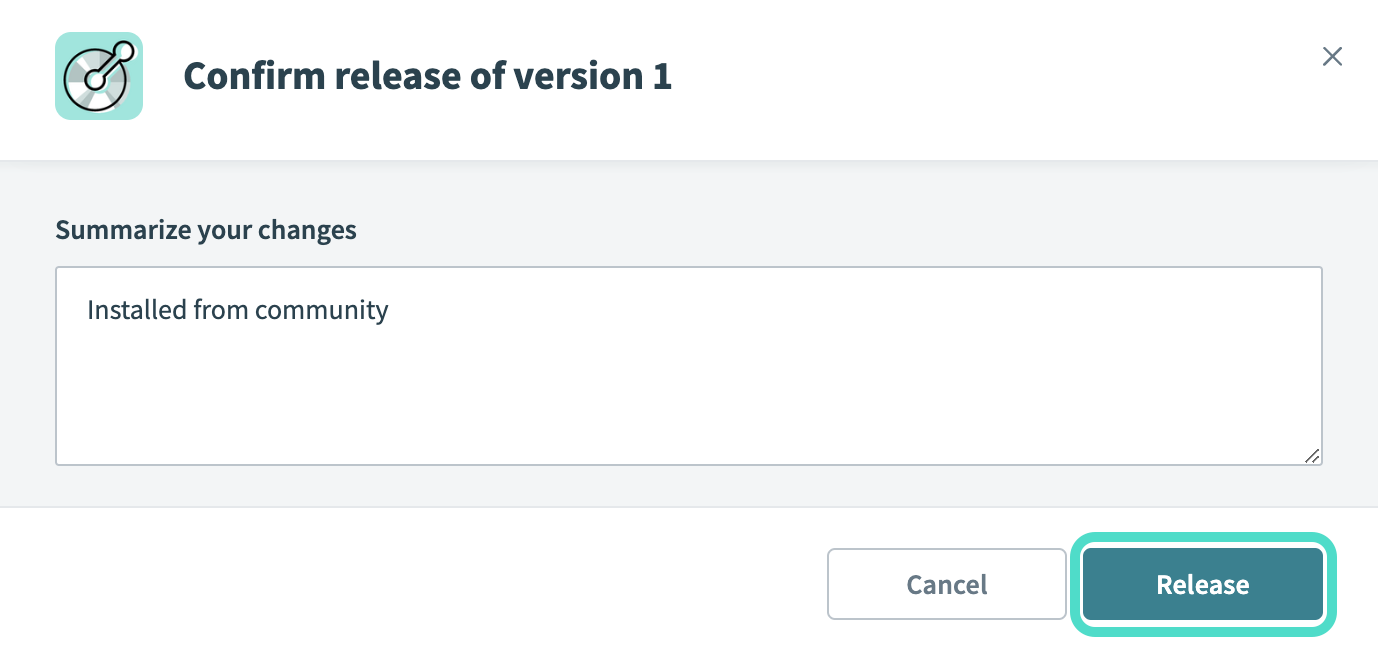 The Confirm release dialog
Connection setup
The UiPath connector supports the following authentication types:
Personal access token authentication
Use personal access token authentication to connect to UiPath Automation Cloud using a token scoped to specific resources.
Retrieve the account and tenant logical names
Complete the following steps to retrieve the account and tenant logical names:
Sign in to UiPath Automation Cloud.
Copy the part of the URL that appears after https://cloud.uipath.com/ or https://platform.uipath.com/. This is the account logical name.
Go to the Services tab and locate your Orchestrator service.
Click the three dots next to the service and select API Access.
Copy the tenant logical name.
Alternatively, you can find both names directly in the Orchestrator URL. For example, in https://cloud.uipath.com/yourSite/yourTenant:
- The account logical name is
yourSite - The tenant logical name is
yourTenant
Generate the client ID and secret
Complete the following steps to generate the client ID and secret:
Go to Tenant > Machines.
Create a machine template or a standard machine.
Configure the required fields and click Provision to create the machine object.
Copy the client ID and client secret.
Refer to the UiPath documentation for more information.
Generate a personal access token
Complete the following steps to generate the personal access token:
Click the user icon in the top-right corner of UiPath Automation Cloud and select Preferences.
Go to Personal Access Token and click Create token.
Enter a name for the token and set an expiration date.
Click Add scopes, select a Resource, and select scopes to request for your connection.
Click Save to generate the token.
Copy the token immediately, as it's only displayed once.
Refer to the UiPath documentation for more information on generating a personal access token.
Connect to UiPath using personal access token
Complete the following steps to set up a personal access token connection to UiPath in Workato:
Click Create > Connection or press C twice.
Search for UiPath and select it as your app.
Provide a unique name for the connection in the Connection name field.
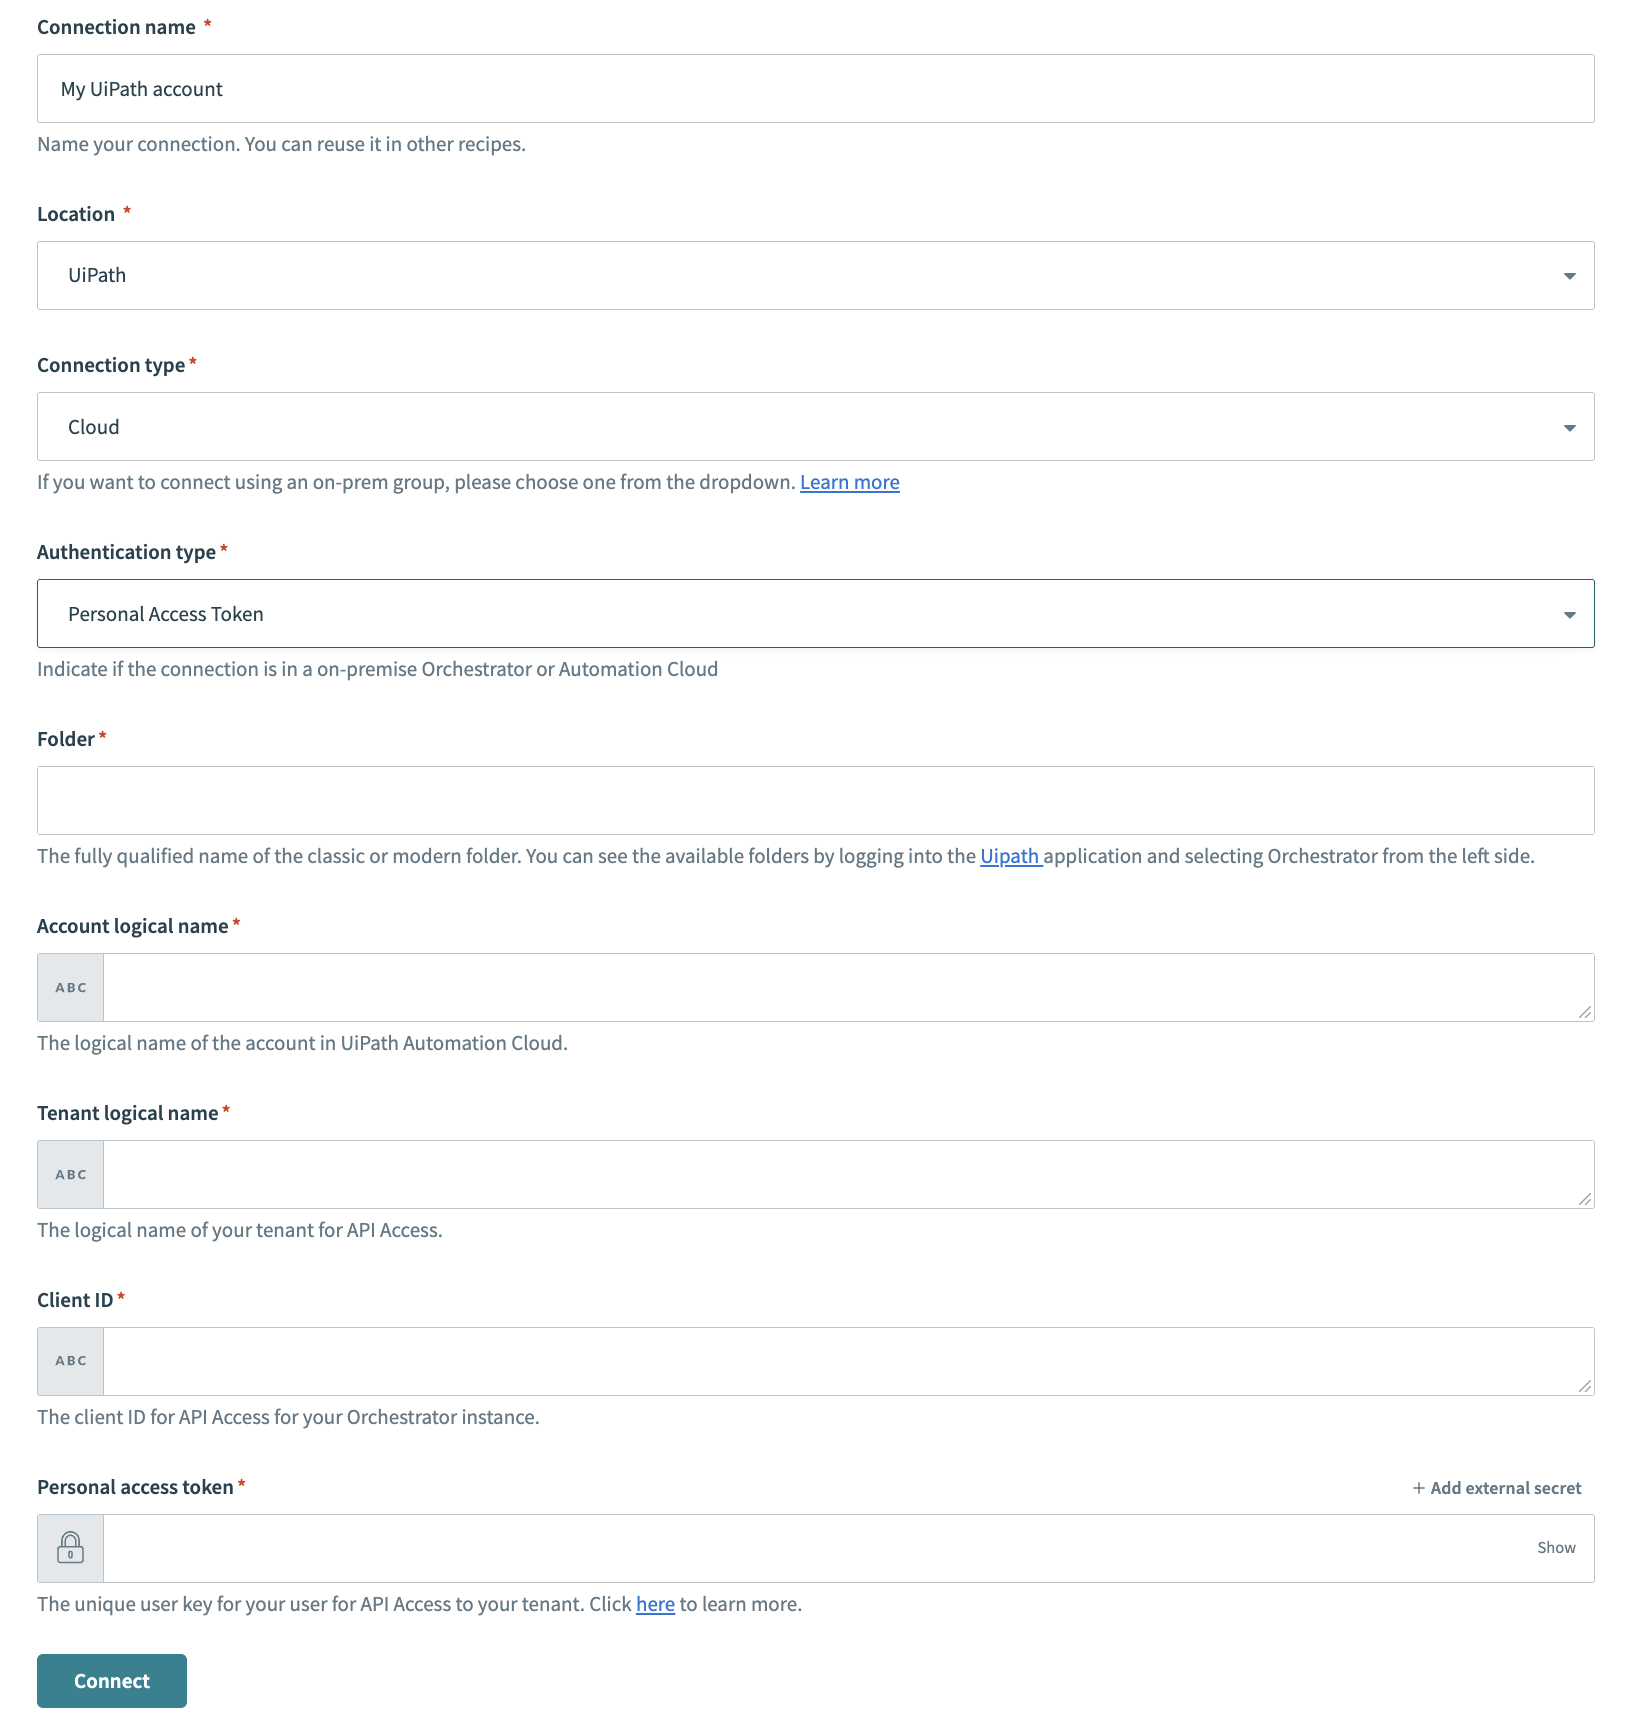 UiPath Personal access token
Use the Location drop-down menu to select the project where you plan to store the connection.
Use the Connection type drop-down menu to specify whether the connection is a cloud or on-prem connection.
Use the Authentication type drop-down menu to select Personal Access Token.
Enter the fully qualified folder name in the Folder field. For example, Shared. You can view available folders in UiPath under Orchestrator.
Enter your account logical name in the Account logical name field.
Enter your tenant logical name in the Tenant logical name field. For example, DefaultTenant.
Enter the client ID from your machine configuration in the Client ID field.
Enter your personal access token in the Personal access token field.
Click Connect.
On-premise authentication
Use on-premise authentication to connect to a self-hosted UiPath Orchestrator instance using a tenant username and password.
Retrieve the orchestration URL
Complete the following steps to retrieve the orchestration URL:
Sign in to your UiPath Orchestrator instance, either cloud-based or on-premises.
Navigate to the Management tab and click Machines.
Locate the machine object associated with your robot or UiPath Studio.
Click the machine name to view its details.
Copy the orchestrator URL. This is typically the base URL found before /orchestrator_ in the browser address bar.
Copy the machine key displayed in the machine details section.
Use the copied orchestrator URL and machine key to configure UiPath Assistant or Studio and connect to Orchestrator.
Create a tenant
Complete the following steps to create a tenant:
Sign in to the Orchestrator host portal as a system administrator.
Go to the Tenants page and click Add Tenant.
Enter the Tenant Name and Password in the Provision Tenant dialog, then click Confirm Password.
Optional. Fill in the First Name, Last Name, and Email Address fields.
Click Provision to create the tenant and tenant admin.
The new tenant now appears on the Tenants page. Refer to the UiPath documentation for more information on creating a tenant.
Connect to UiPath using on-premise authentication
Complete the following steps to set up an on-premise connection to UiPath in Workato:
Click Create > Connection or press C twice.
Search for UiPath and select it as your app.
Enter a name for your connection in the Connection name field.
 UiPath On-premise
Use the Location drop-down menu to select the project where you plan to store the connection.
Use the Connection type drop-down menu to specify whether the connection is a cloud or on-prem connection.
Use the Authentication type drop-down menu to select On Premise.
Enter the fully qualified folder name in the Folder field. For example, Shared. You can view available folders in UiPath under Orchestrator.
Enter the orchestration URL in the Orchestration URL field.
Enter the tenant to connect to in the Tenant field.
Enter the user name or email address associated with the tenant in the User field.
Enter the password associated with the tenant in the Password field.
Click Connect.
OAuth 2.0 (Authorization code) authentication
Use OAuth 2.0 authorization code authentication for user-delegated access to UiPath. This method requires User scopes when registering your external application in UiPath.
Register an external application in UiPath
Registering an external application generates an App ID and App Secret in UiPath, which correspond to the Client ID and Client secret fields in Workato.
Complete the following steps to register an external application:
Sign in to UiPath Automation Cloud and go to Admin.
Select External Applications.
Click + Add Application and enter a name for your application.
Select Confidential application as the Application type.
Click Add scopes, select Orchestrator API Access as the resource, and select the User scopes required for your integration.
SELECT USER SCOPES ONLY
Select User scopes only. Selecting Application scopes instead results in a 400 Bad Request error when connecting.
Enter https://www.workato.com/oauth/callback in the Redirect URL field.
Click Add to register the application.
Copy the App ID and App Secret. These values correspond to the Client ID and Client secret fields in Workato.
Retrieve the account and tenant logical names
Retrieve your account and tenant logical names following the steps in the Personal access token section.
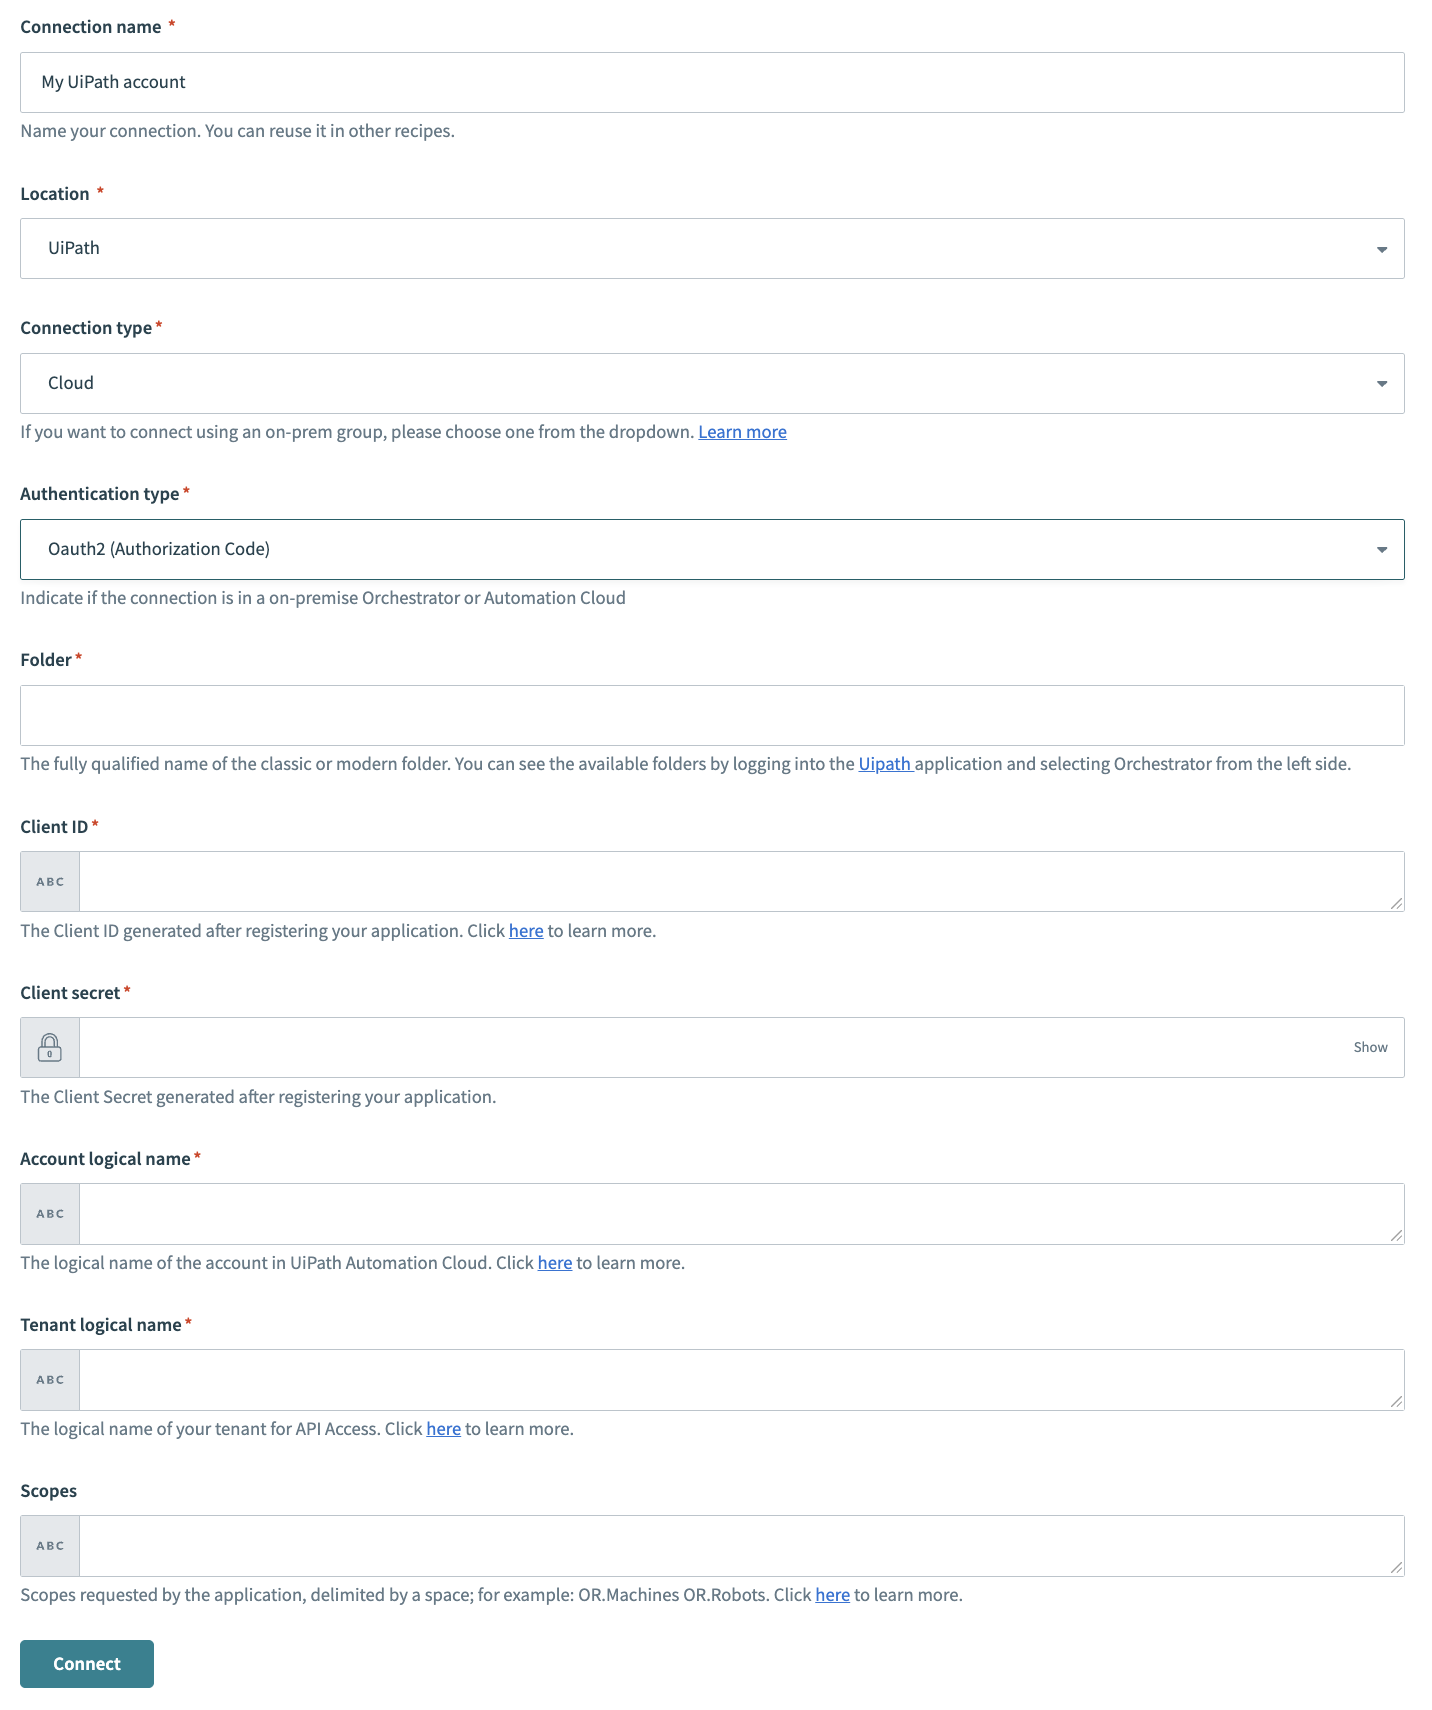
Connect to UiPath using OAuth 2.0 (Authorization code)
Complete the following steps to set up an OAuth 2.0 (Authorization code) connection to UiPath in Workato:
Click Create > Connection or press C twice.
Search for UiPath and select it as your app.
Provide a unique name for the connection in the Connection name field.
 UiPath OAuth 2.0
Use the Location drop-down menu to select the project where you plan to store the connection.
Use the Connection type drop-down menu to specify whether the connection is a cloud or on-prem connection.
Use the Authentication type drop-down menu to select OAuth2 (Authorization Code).
Enter the fully qualified folder name in the Folder field. For example, Shared. You can view available folders in UiPath under Orchestrator.
Enter the app ID from your external application registration in the Client ID field.
Enter the app secret from your external application registration in the Client secret field.
Enter your account logical name in the Account logical name field.
Enter your tenant logical name in the Tenant logical name field. For example, DefaultTenant.
Enter user scopes in the Scopes field. Separate each scope with a space.
Click Connect.
OAuth 2.0 (Client credentials) authentication
Use OAuth 2.0 client credentials authentication for machine-to-machine access to UiPath without user interaction. This method requires Application scopes when registering your external application in UiPath.
Register an external application in UiPath
Registering an external application generates an App ID and App Secret in UiPath, which correspond to the Client ID and Client secret fields in Workato.
Complete the following steps to register an external application:
Sign in to UiPath Automation Cloud and go to Admin.
Select External Applications.
Click + Add Application and enter a name for your application.
Select Confidential application as the Application type.
Click Add scopes, select Orchestrator API Access as the resource, and select the Application scopes required for your integration.
SELECT APPLICATION SCOPES ONLY
Select Application scopes only. Selecting User scopes instead results in a 400 Bad Request error when connecting.
Enter https://www.workato.com/oauth/callback in the Redirect URL field.
Click Add to register the application.
Copy the App ID and App Secret. These values correspond to the Client ID and Client secret fields in Workato.
Retrieve the account and tenant logical names
Retrieve your account and tenant logical names following the steps in the Personal access token section.
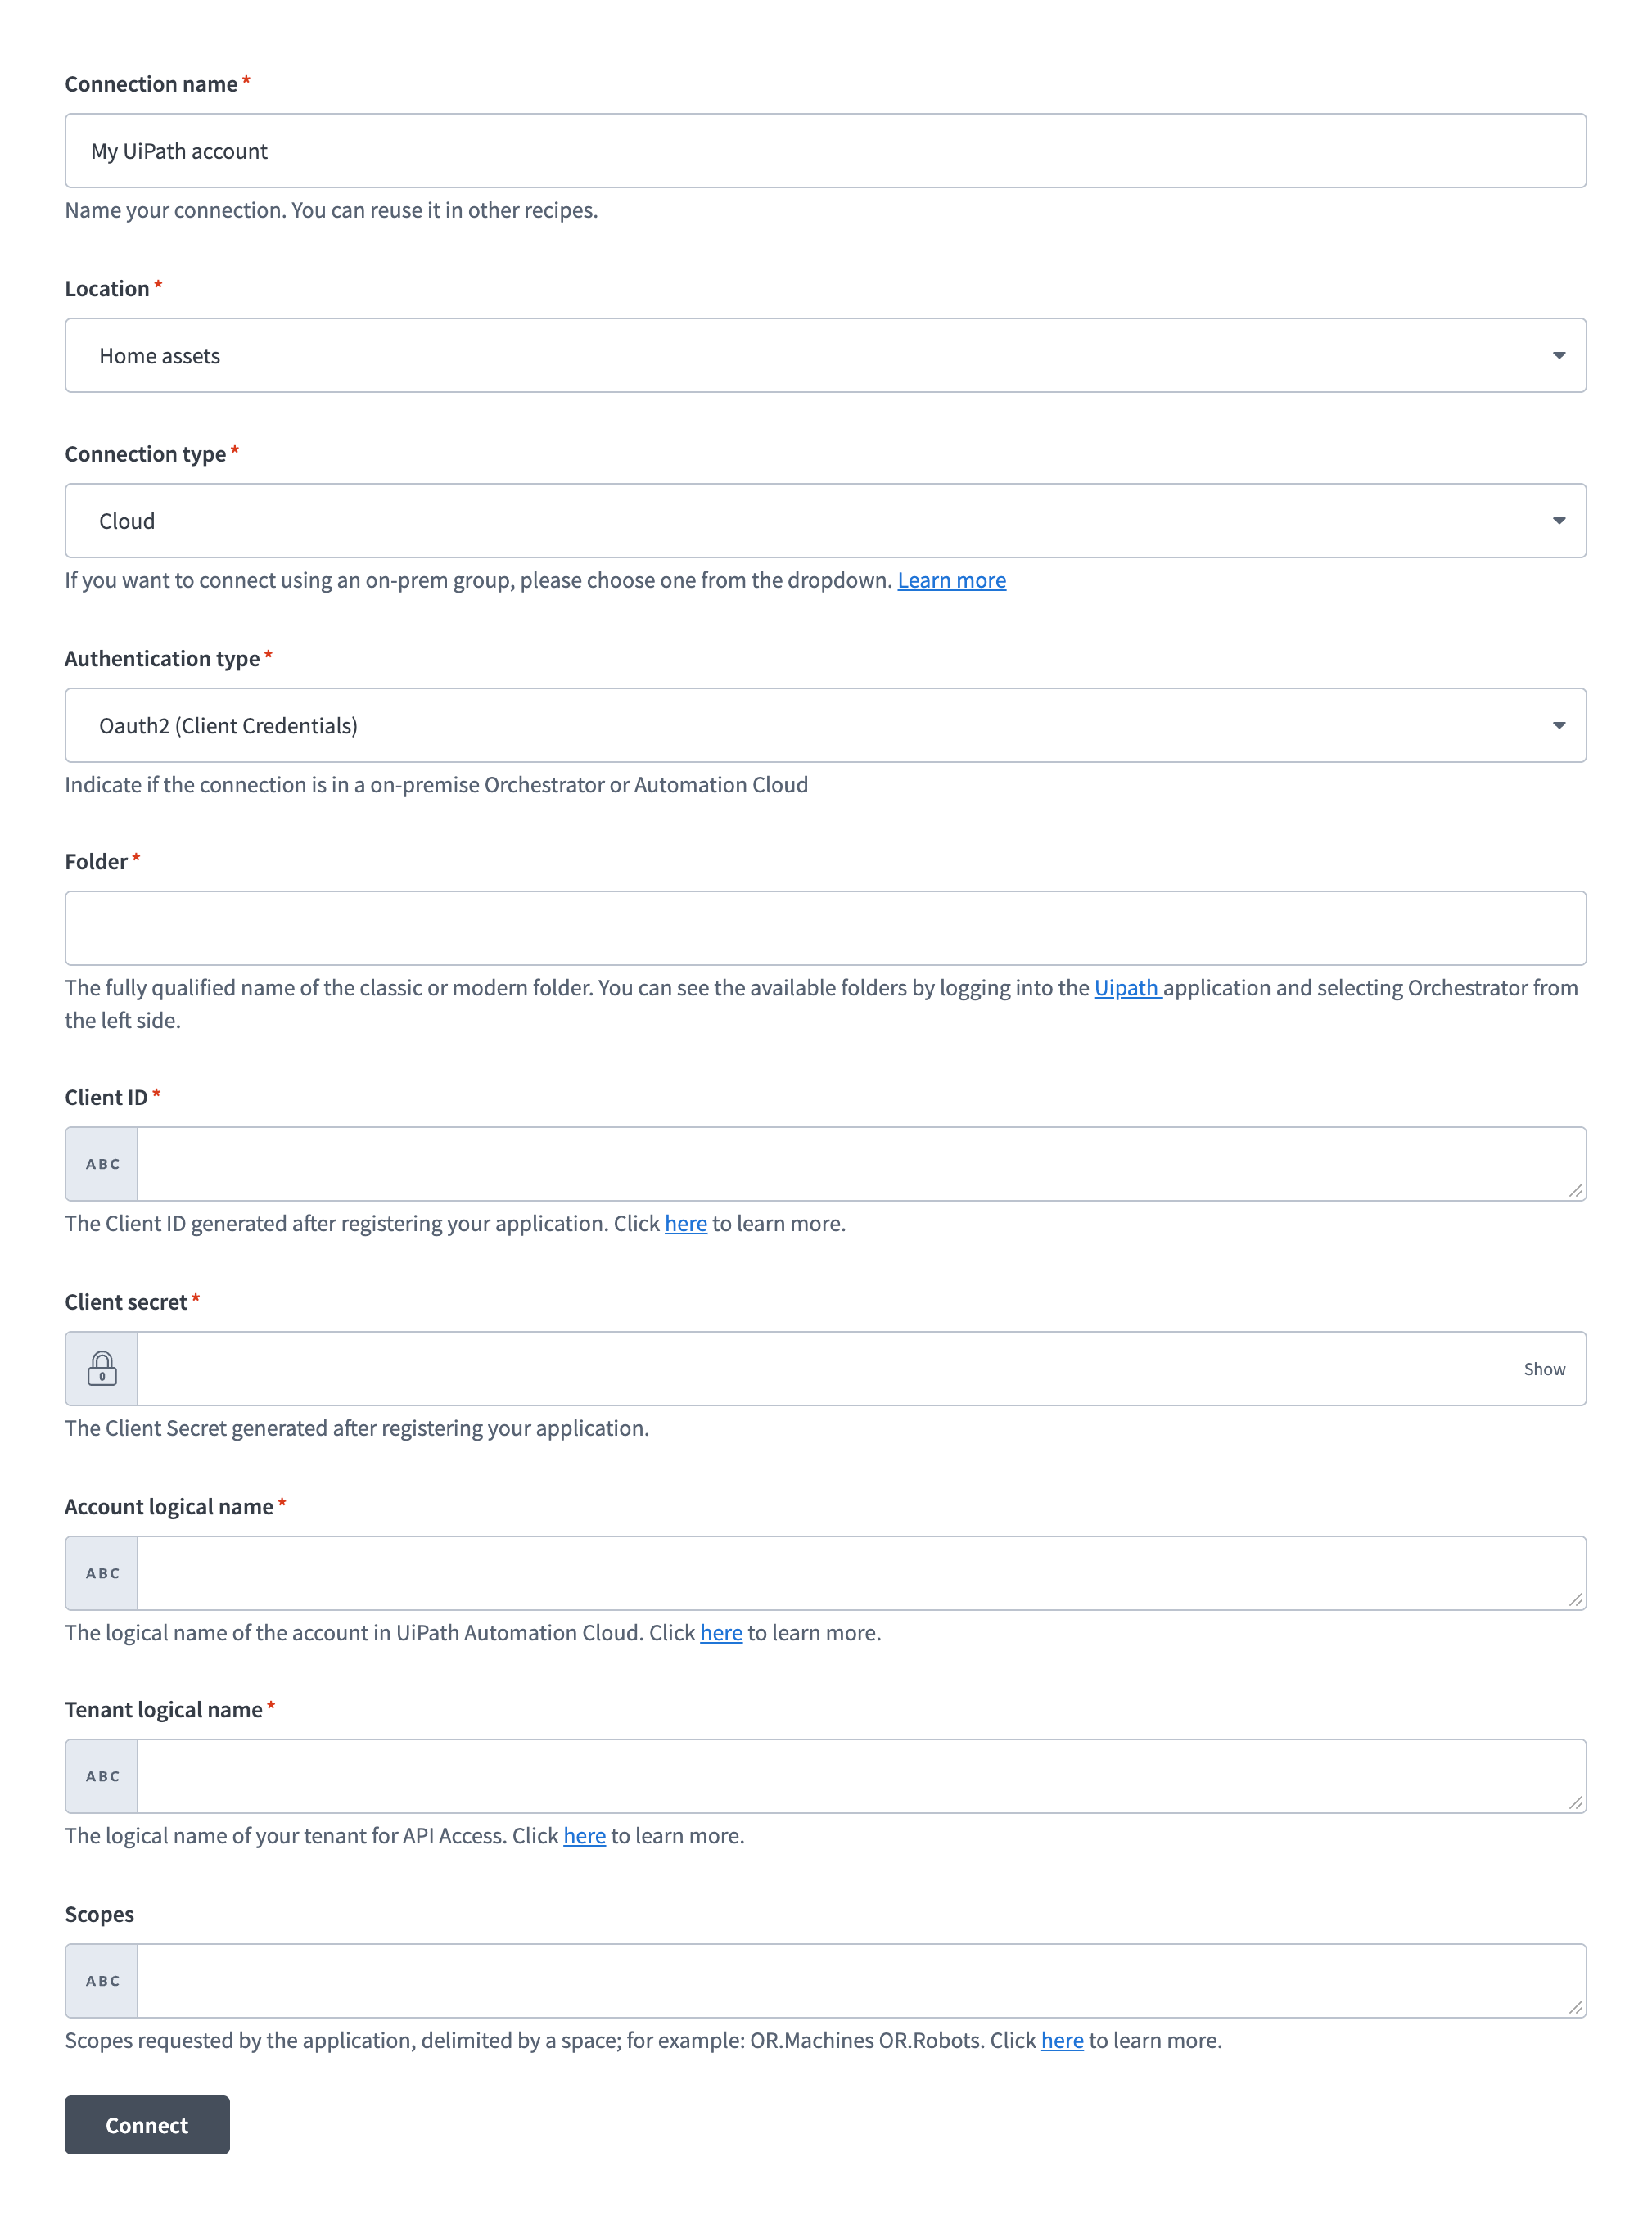
Connect to UiPath using OAuth 2.0 (Client credentials)
Complete the following steps to set up an OAuth 2.0 (Client credentials) connection to UiPath in Workato:
Click Create > Connection or press C twice.
Search for UiPath and select it as your app.
Provide a unique name for the connection in the Connection name field.
 UiPath OAuth 2.0
Use the Location drop-down menu to select the project where you plan to store the connection.
Use the Connection type drop-down menu to specify whether the connection is a cloud or on-prem connection.
Use the Authentication type drop-down menu to select OAuth2 (Client Credentials).
Enter the fully qualified folder name in the Folder field. For example, Shared. You can view available folders in UiPath under Orchestrator.
Enter the app ID from your external application registration in the Client ID field.
Enter the app secret from your external application registration in the Client secret field.
Enter your account logical name in the Account logical name field.
Enter your tenant logical name in the Tenant logical name field. For example, DefaultTenant.
Enter application scopes in the Scopes field. Separate each scope with a space.
Click Connect.
Last updated: