Workato FileStorage UI
Use the Workato FileStorage user interface (UI) to upload, delete, and manage files or directories stored in the FileStorage system. Go to Tools > FileStorage to access the FileStorage UI.
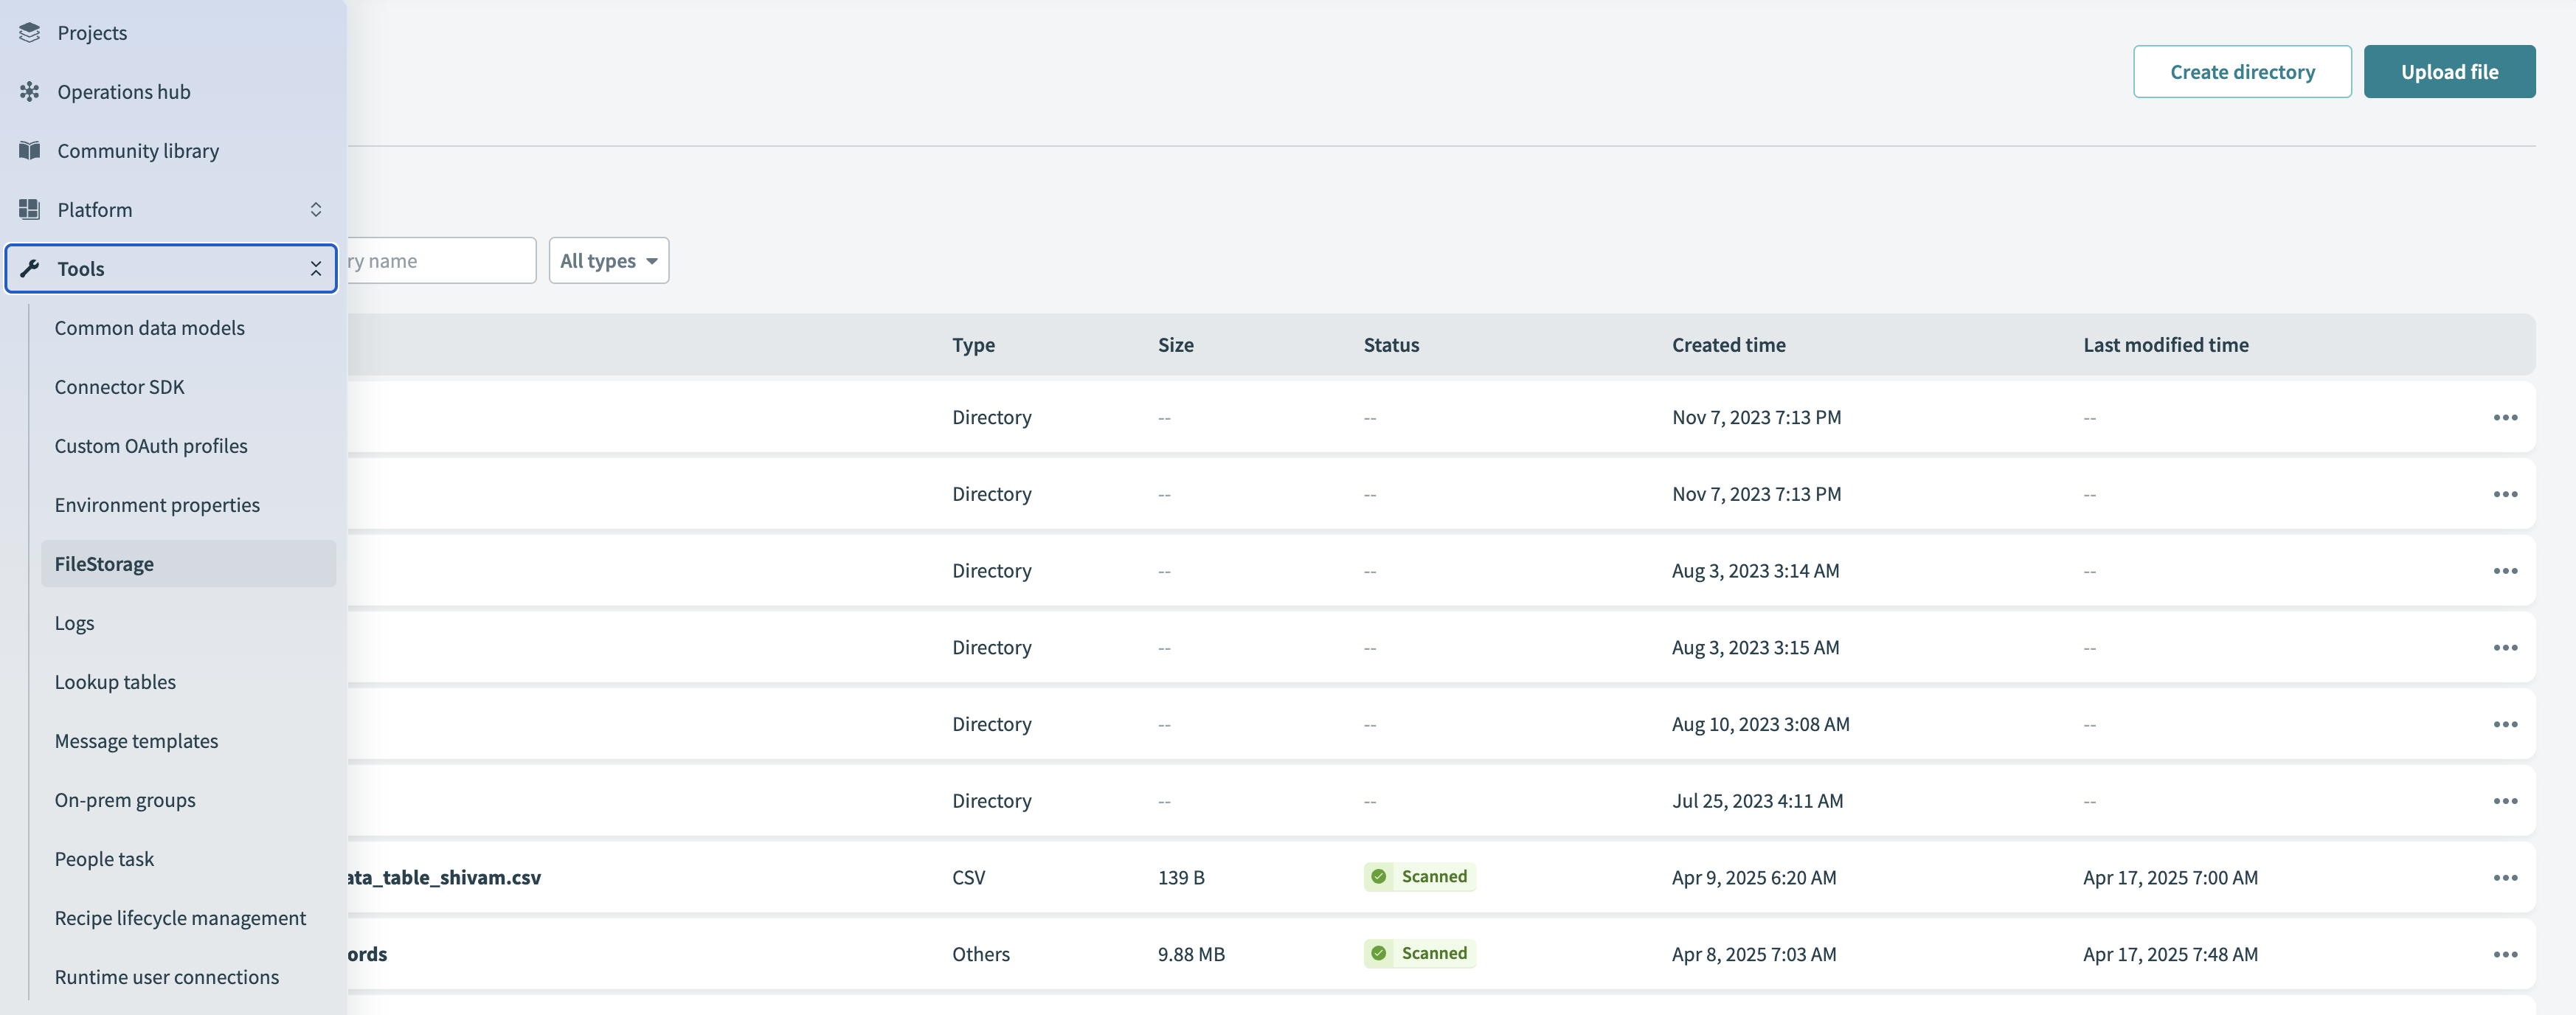 Navigating to the FileStorage UI
FILE SECURITY BEST PRACTICES
Workato runs virus scans on uploaded files to prevent malicious content from entering your workflows. Files that don't pass a scan trigger a warning before download. Review scan results before you use these files in downstream systems to add another layer of protection.
Refer to the Virus scanning support section for more information.
Supported operations
You can perform the following operations using FileStorage UI:
- Upload files
- Create directories
- Delete files and directories
- Rename files
- Move files
- Download files
- Browse files and directories
- Search files and directories
- Preview file metadata
- Preview file operations
Upload files
To upload a file:
Select the Upload file button, next to the Create directory button. The file is uploaded to the directory that you select Upload file in. In this example, the directory that files are uploaded to is the root directory.
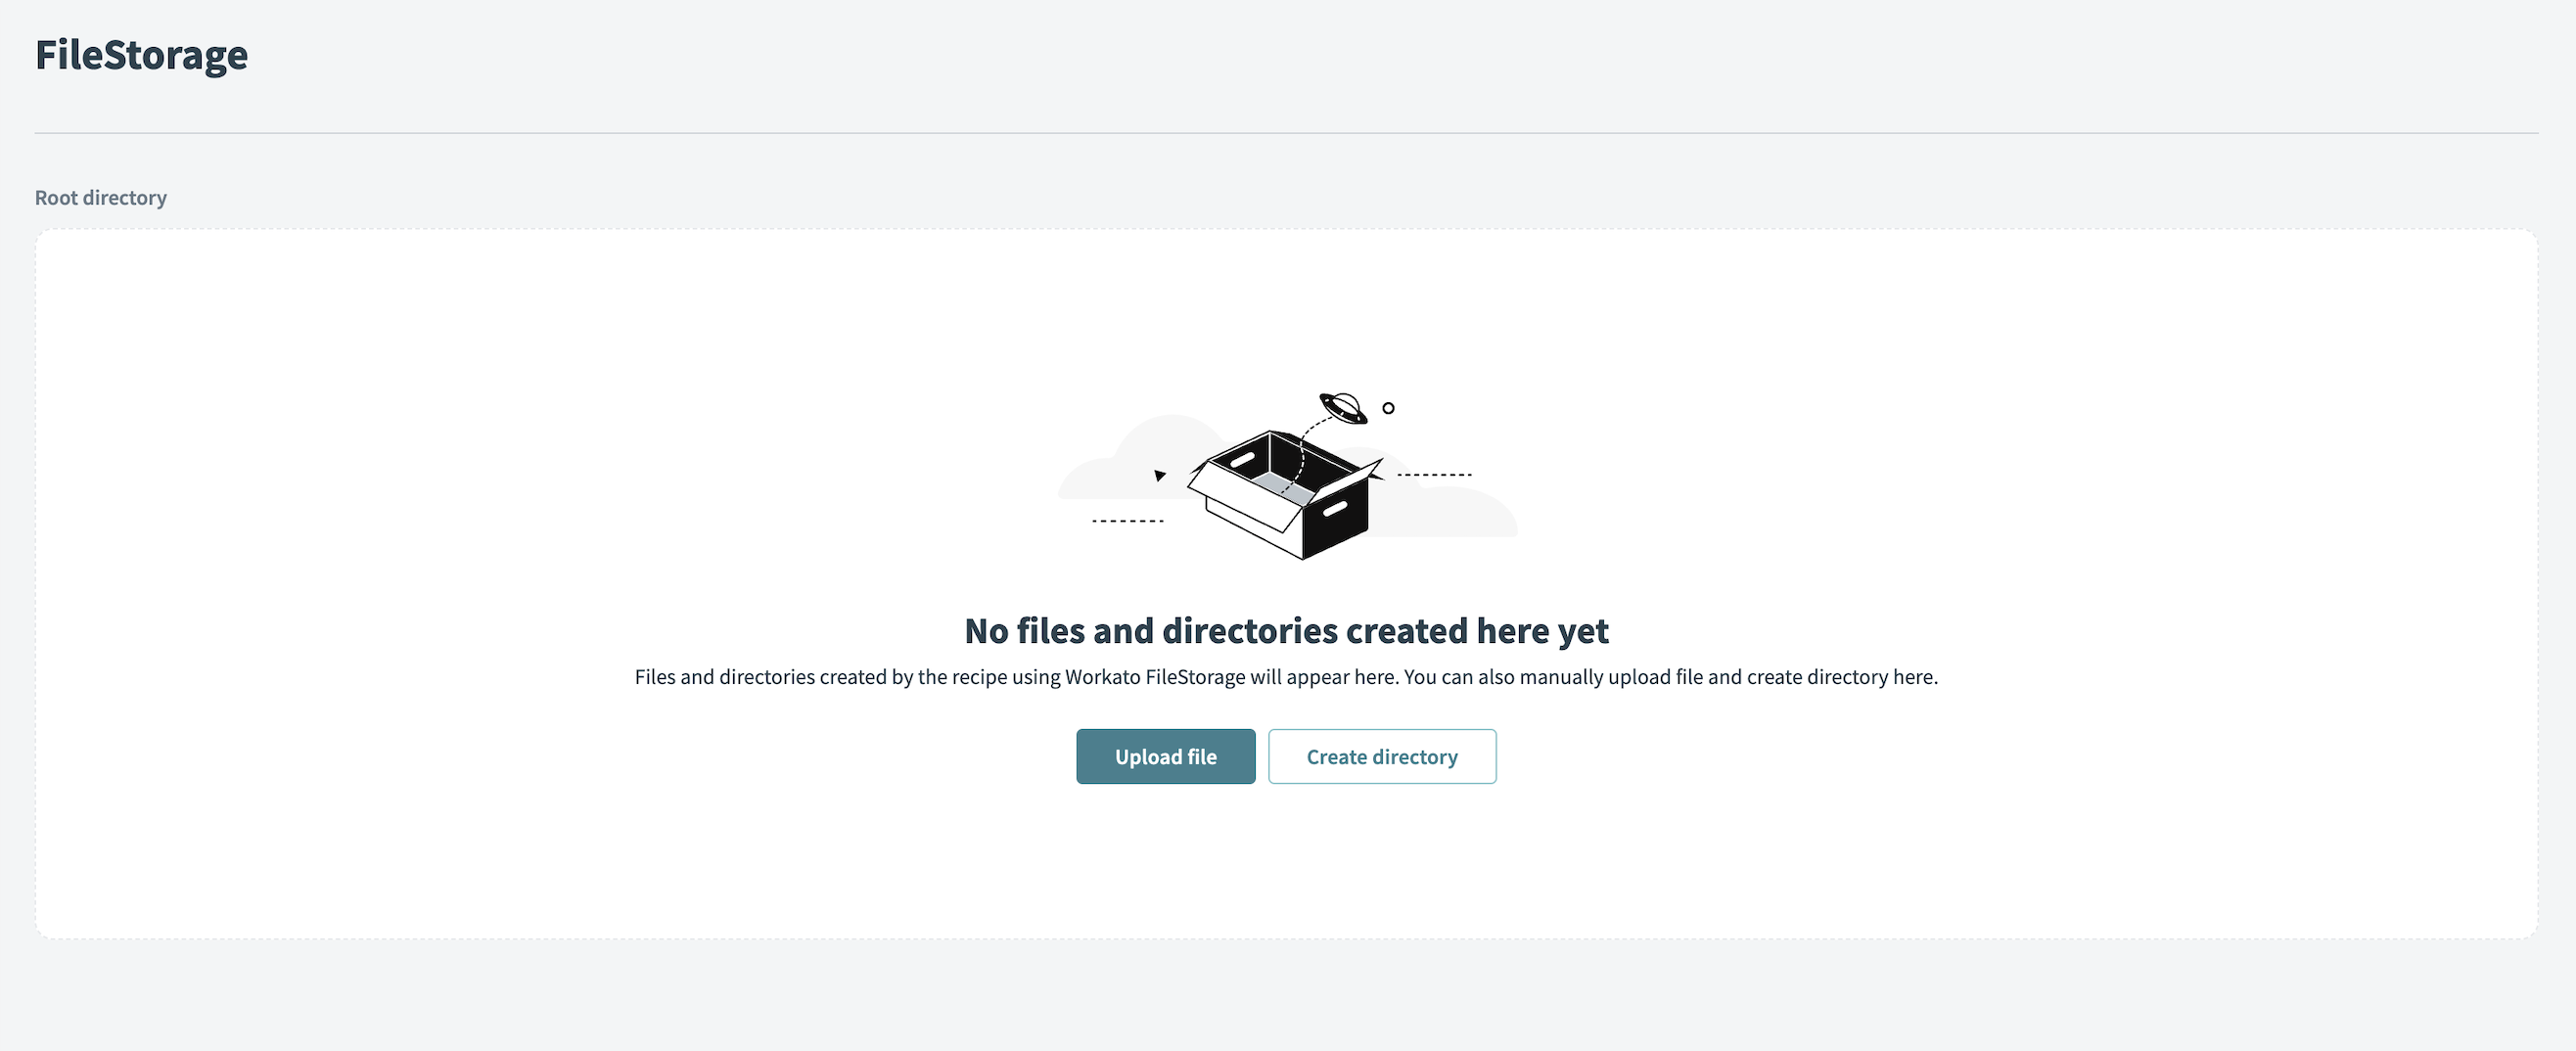 The Upload file button in the FileStorage UI
FILE SIZE LIMIT
When you upload files through the FileStorage UI, each file has a 5 GB size limit. If you want to upload larger files, use the FileStorage connector's Create file action in a recipe.
Drag and drop a file or select a file from your device in the modal that appears. You can upload one or multiple files at a time.
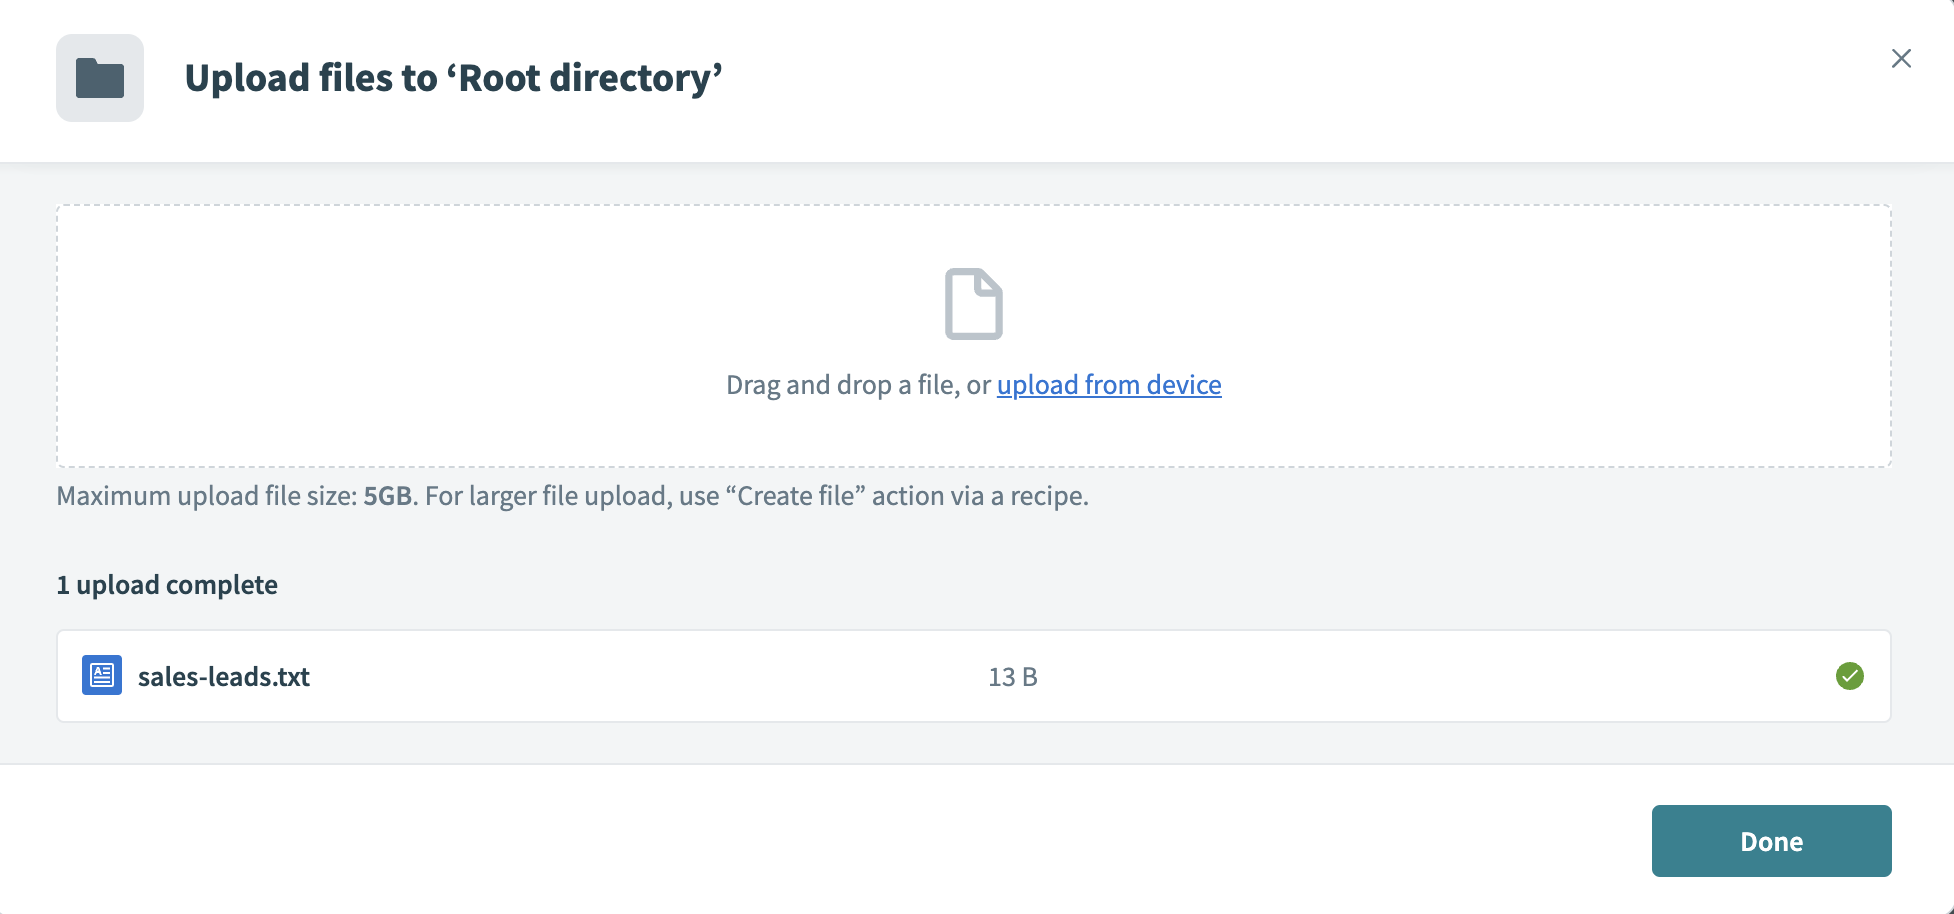 Successfully uploading a file
After you finish uploading all files, select the Done button at the bottom left of the modal. The files you uploaded display in your FileStorage directory.
Once you have one or more files or subdirectories within a directory, the Upload file and Create directory buttons will move to the top right of the UI.
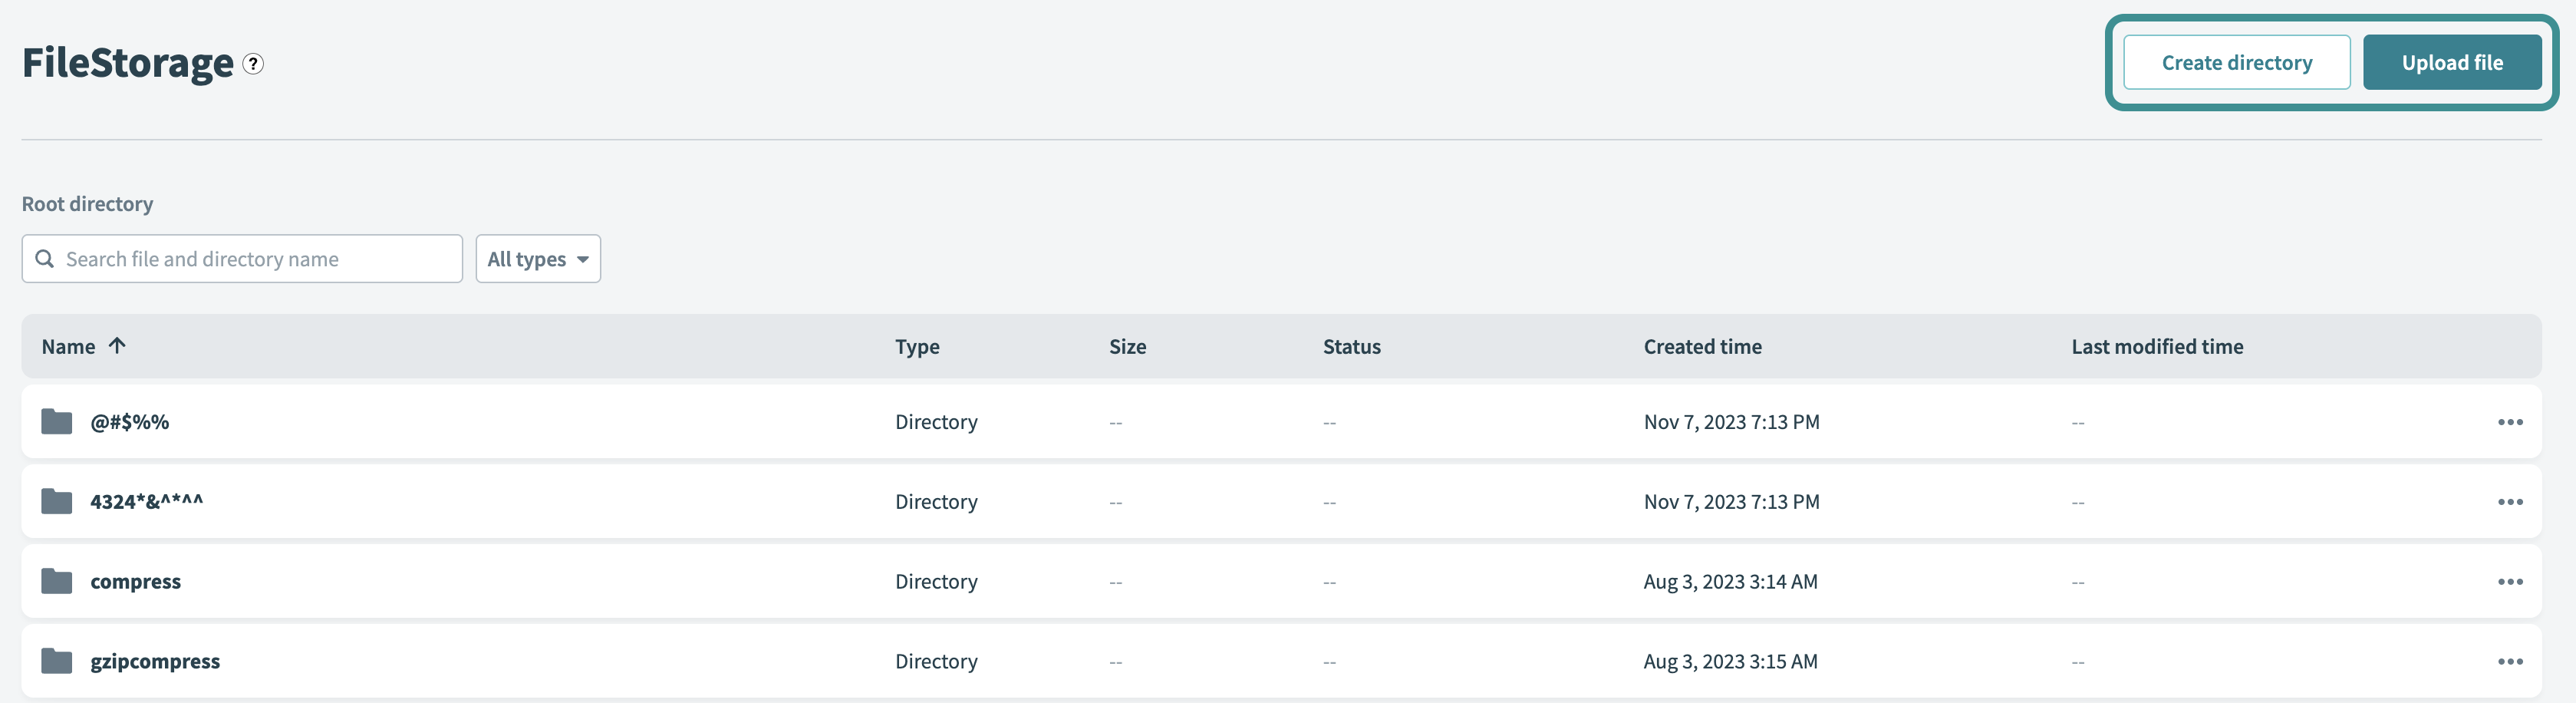 The Upload file and Create directory buttons are at the top right
Create a directory
To create a directory in the FileStorage UI:
Select the Create directory button in the upper right of the UI.
 The Create directory button in the FileStorage UI
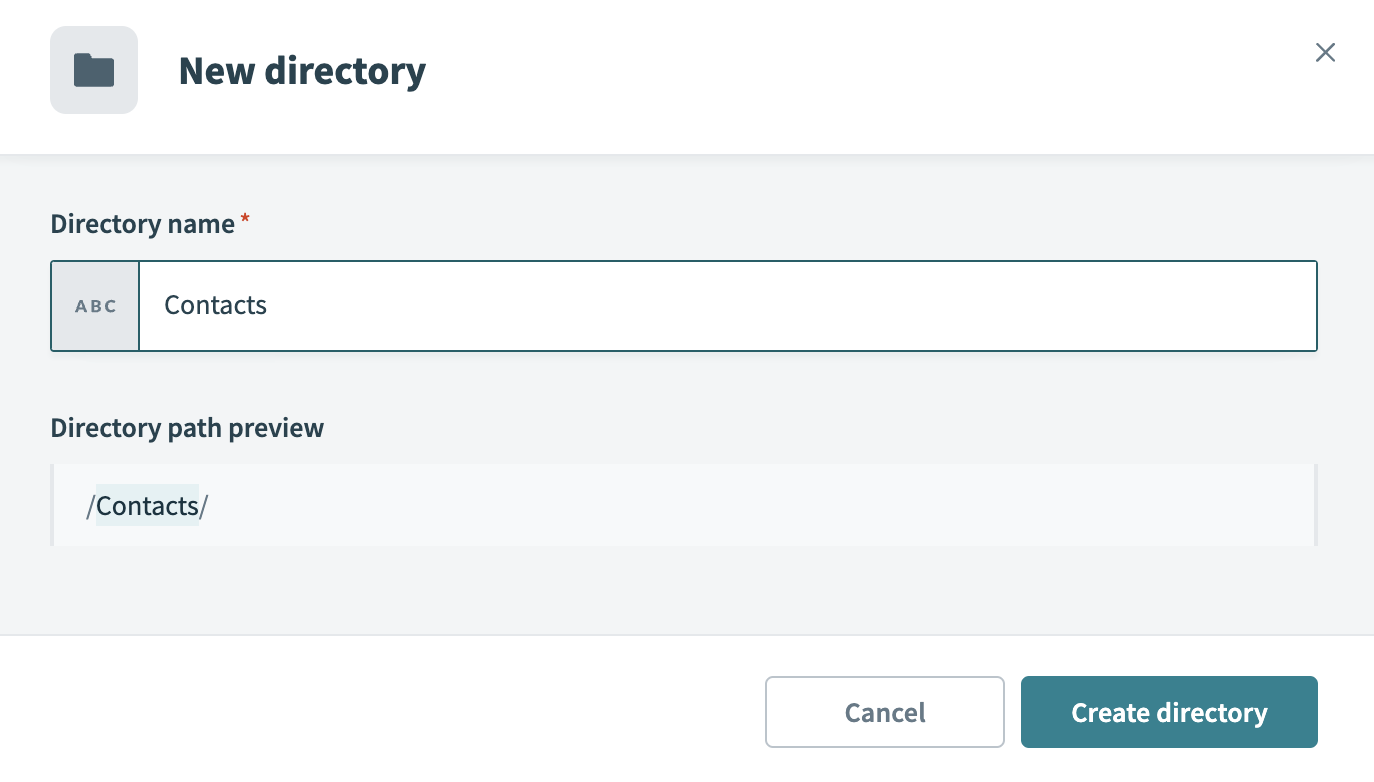
Enter the directory name in the modal that appears. The UI shows the directory path preview.
In the following example, the directory path preview is /Contacts/:
 Entering a directory name
Select Create directory.
Delete files and directories
Within the FileStorage UI, you can delete existing files and directories. You cannot undo deleting a file or a directory.
To delete a file or directory:
In the FileStorage UI, navigate to the directory that the file or directory is in. If the file or directory is not in the root directory, select the subdirectory that your intended file or directory is in.
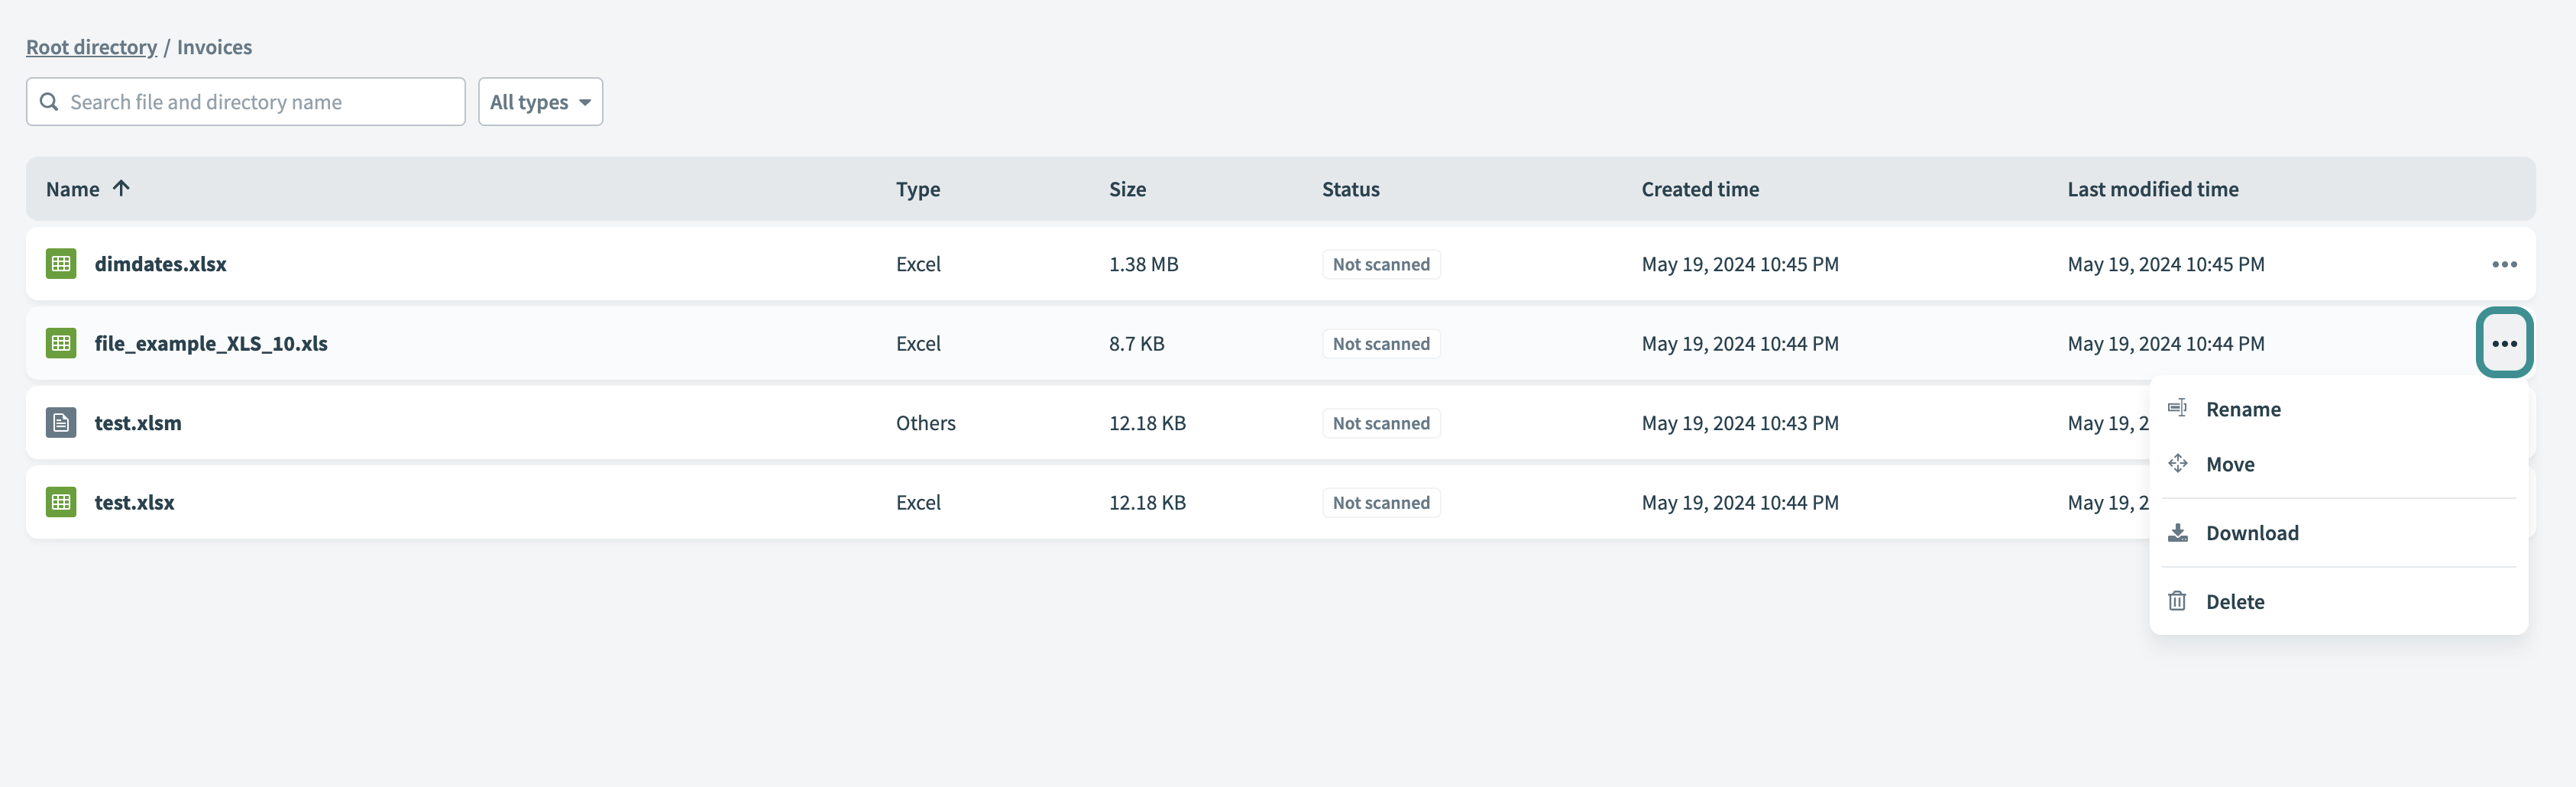
Select the three dots in the far right of the file or directory.
 Selecting the three dots for a directory
Select Delete directory or Delete file.
DELETING A DIRECTORY
When you delete a directory, you also delete all files and subdirectories in the directory.
Rename files
Within the FileStorage UI, you can rename files.
To rename a file:
In the FileStorage UI, navigate to the directory that the file or directory is in. If the file or directory is not in the root directory, select the subdirectory that your intended file or directory is in.
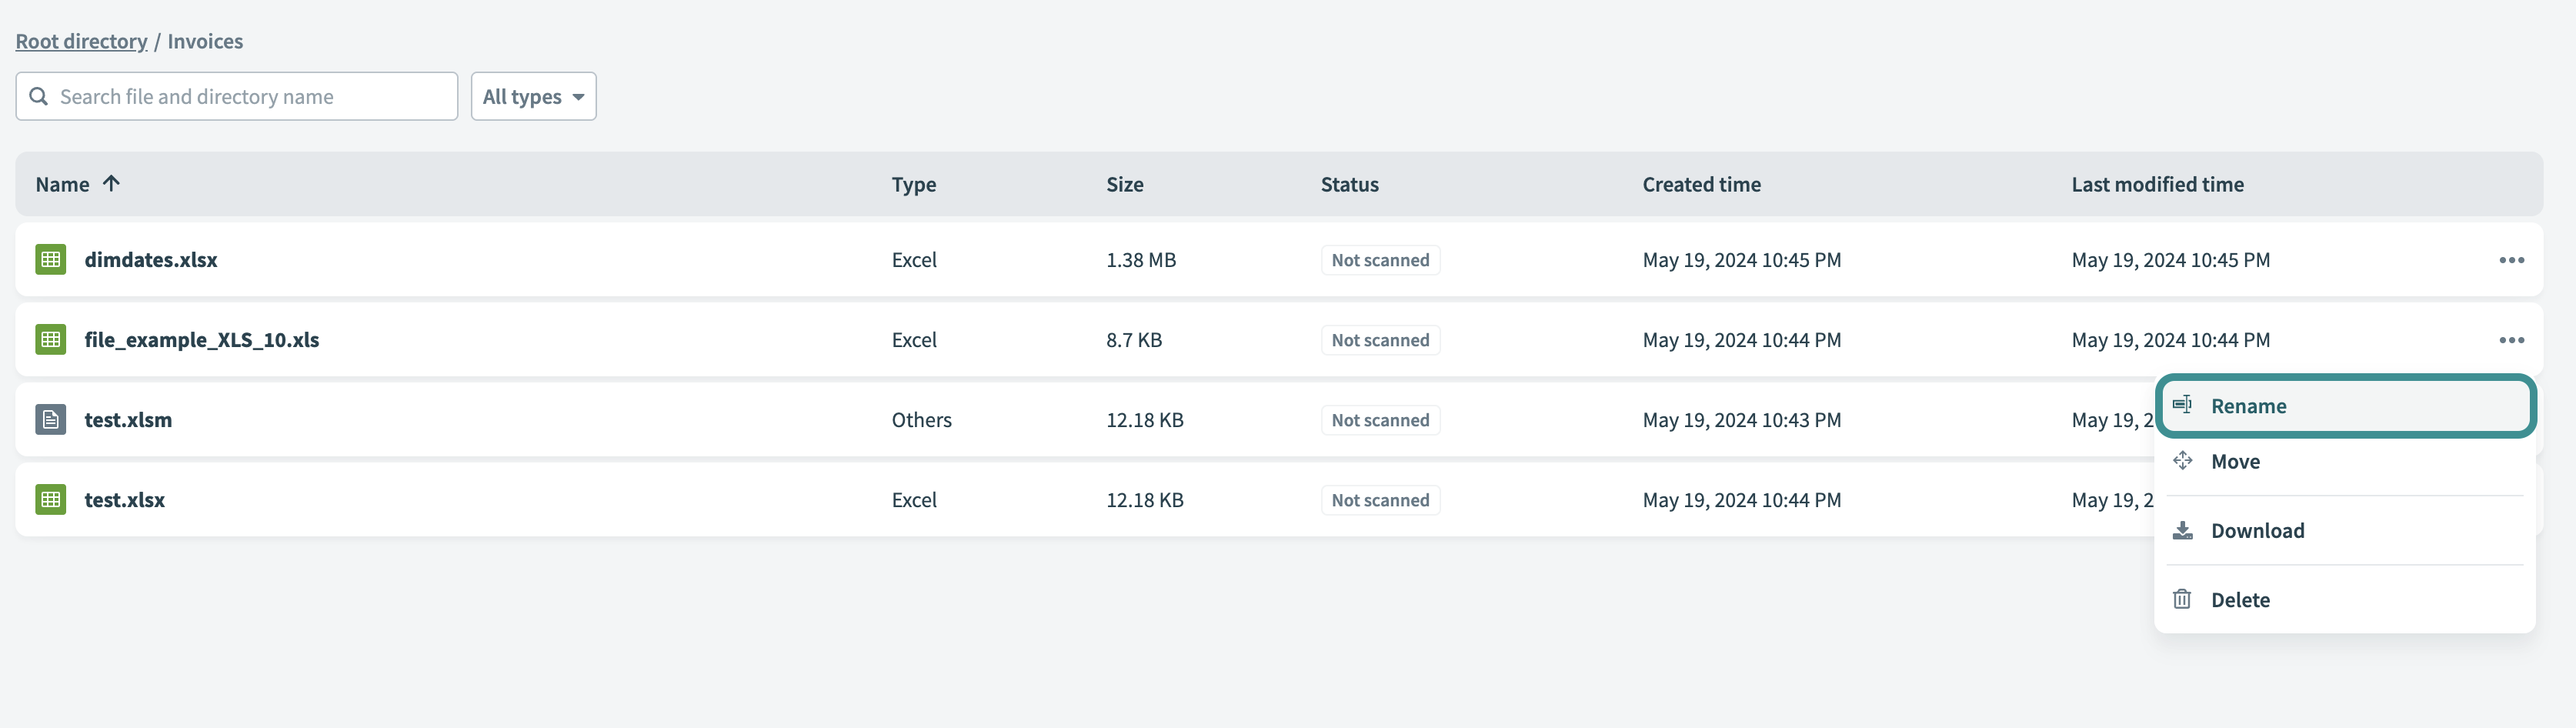
Select the three dots in the far right of the file.
 Selecting the three dots for a file
Select Rename and enter the new file name.
 Example of input text field
Select the checkmark icon next to the input field to save the new file name. After you save the file name, a file preview side panel displays on the right side of the UI. Select the X button within the panel to exit the file preview.
Move files
Within the FileStorage UI, you can move files to other directories in the FileStorage UI.
To move a file:
In the FileStorage UI, navigate to the directory that the file is in.
Select the three dots in the far right of each file or directory.
Selecting the three dots for a file
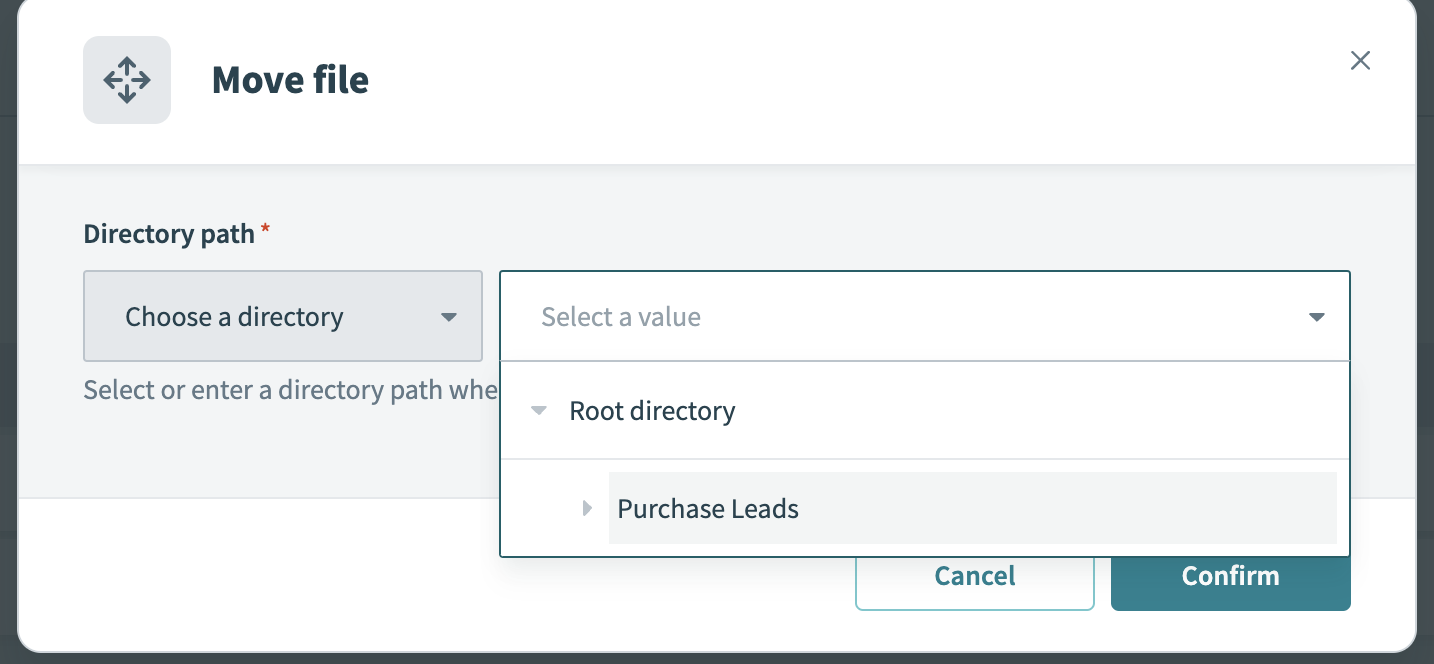
Select Move. This opens the Move file modal.
In the Move file modal, there are two ways you can move a file to another directory. You can either use the Choose a directory method, or the Enter a directory path method. To use Choose a directory, you select the directory path from a drop-down menu. To use Enter a directory path, you enter the directory path directly.
To use Choose a directory:
In the Move file modal, using the left drop-down, make sure that you've selected the drop-down option Choose a directory.
Select the vertical triangle next to the name of the directory the file is. This opens a drop-down list of all the subdirectories within the current directory. If the directory you'd like to move the file to is not listed in the list of subdirectories after selecting the vertical triangle, continue to expand the subdirectories using the vertical triangle until you see the subdirectory you'd like to move the file to.
 Finding the directory you'd like to move the file to
From the drop-down list of subdirectories, select the name of the directory you want to move your file to.
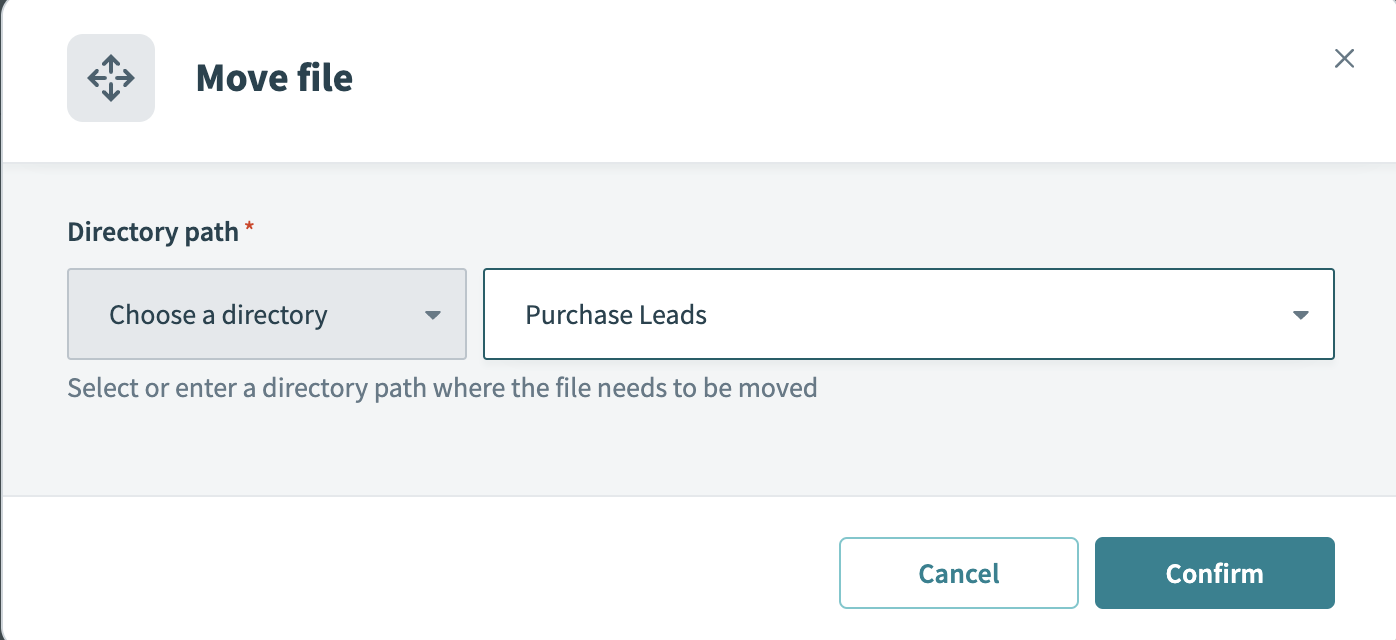 The directory is selected within the drop-down list
Select the Confirm button.
To use Enter a directory path:
In the Move file modal, using the left drop-down, select the drop-down option Enter a directory path.
Enter the path of the subdirectory you want to move the file to. Directory paths in the FileStorage UI take the format of /Directory_Name. If you are moving a file to a nested subdirectory, the format for the path is /Directory_Name/Subdirectory_Name. The path for the root directory is /.
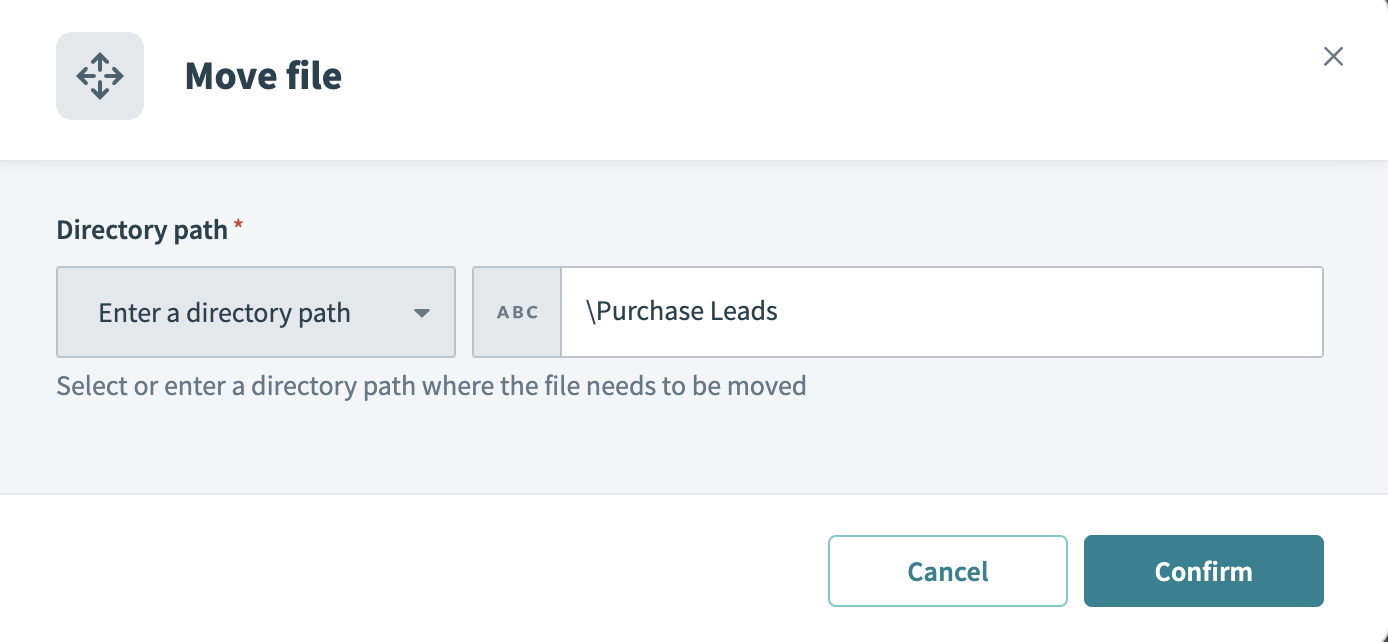 Entering the path of a subdirectory
Select the Confirm button.
CONFIRM NEW DIRECTORY
After you move a file, a green popup displays at the top of the UI. This popup confirms the file was moved successfully. When you select the Show file location link in the popup, the link redirects to the file's new directory.
Download a file
Within the FileStorage UI, you can download previously uploaded files.
To download a file:
In the FileStorage UI, navigate to the directory that the file is in.
Select the three dots in the far right of each file or directory.
Selecting the three dots for a file
Select Download.
Browse files and directories
The FileStorage UI displays the FileStorage system's root directory by default. From the root directory, you can view a list of files and subdirectories, select a file to preview, select a subdirectory to browse, or create a directory.
 Browsing files and directories in the Workato FileStorage UI
The UI displays the following information for each file in the list:
- Name
- Type
- Size
- Status
- Created time
- Last modified time
The UI displays the following information for each directory in the list:
- Name
- Type
- Created time
You can sort by Name or Created time by selecting the appropriate column name. Select it again to reverse the sort direction.
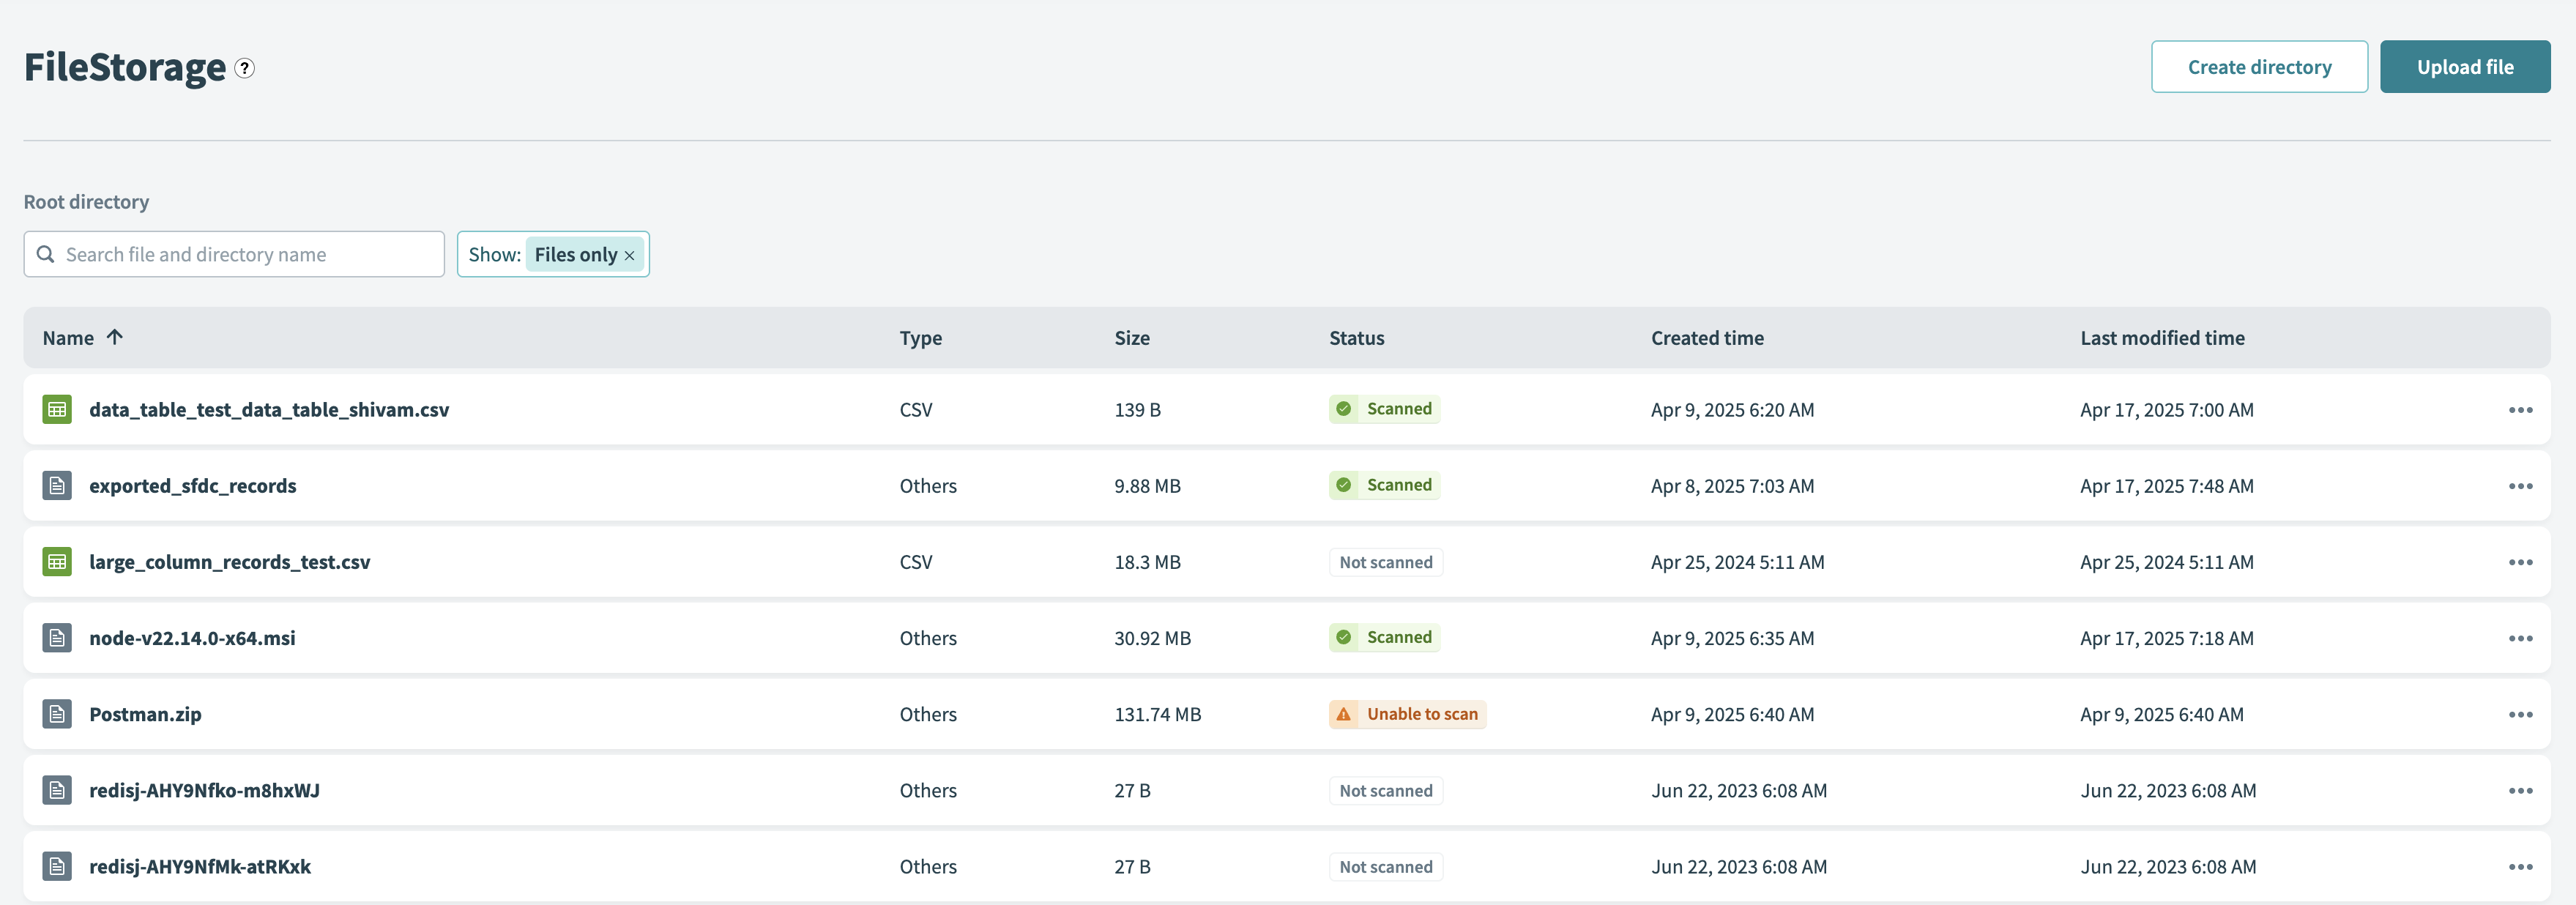
Search files and directories
You can recursively search both files and directories using FileStorage UI. To search only files or only directories, select the All types drop-down menu and choose the desired type.
The search function is case insensitive. For example, the search terms contacts and CONTACTS return the same files.
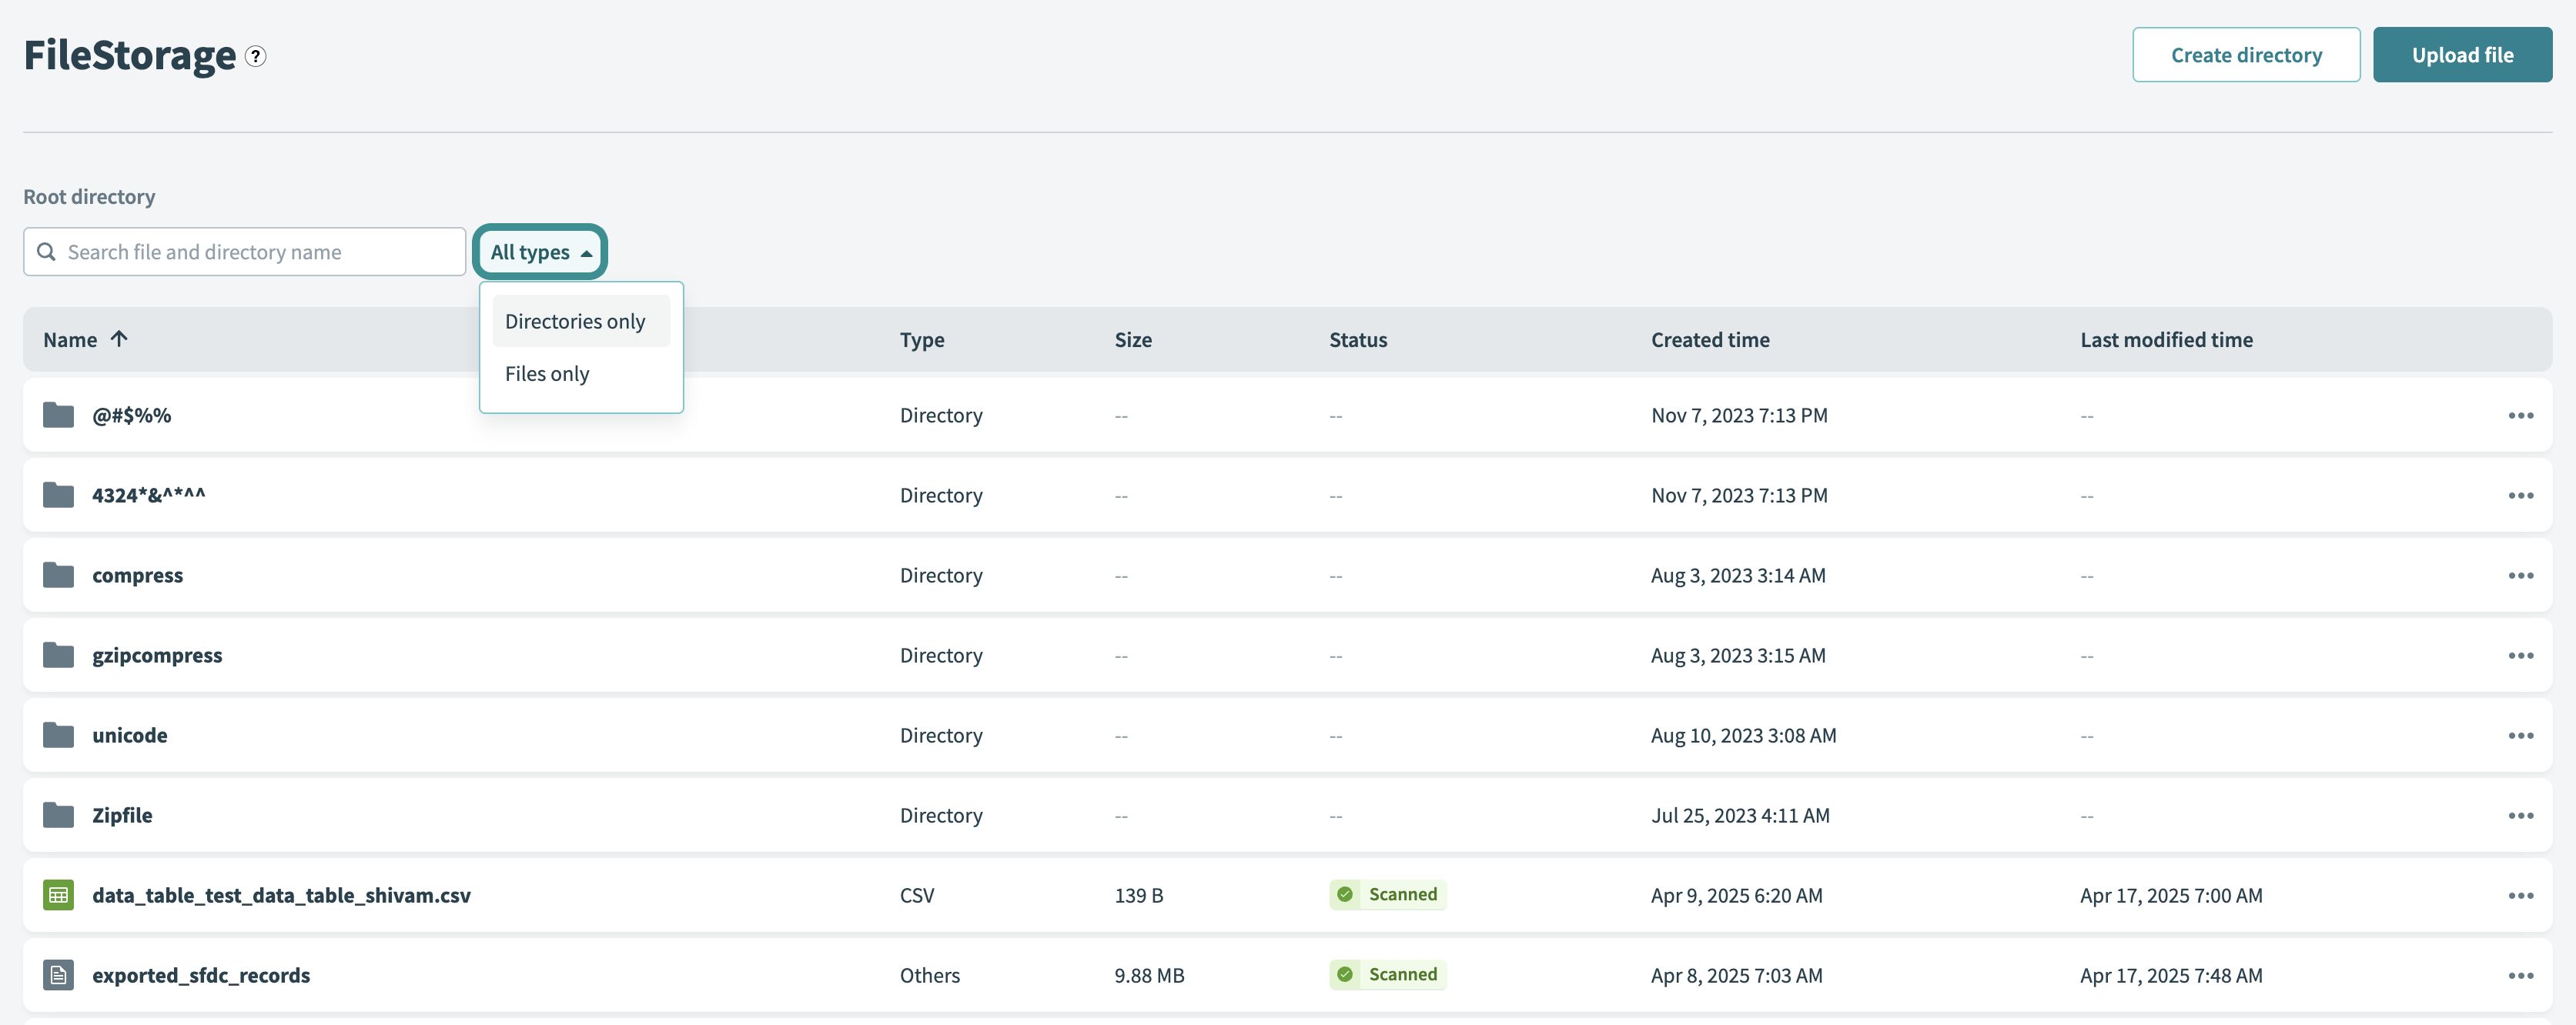 Searching FileStorage by files only, directories only, or both
Preview a file and its metadata
When you select a file from the list of files and directories, the FileStorage UI opens a side panel displaying the file's metadata. For CSV files, the panel also displays a preview of the file's contents.
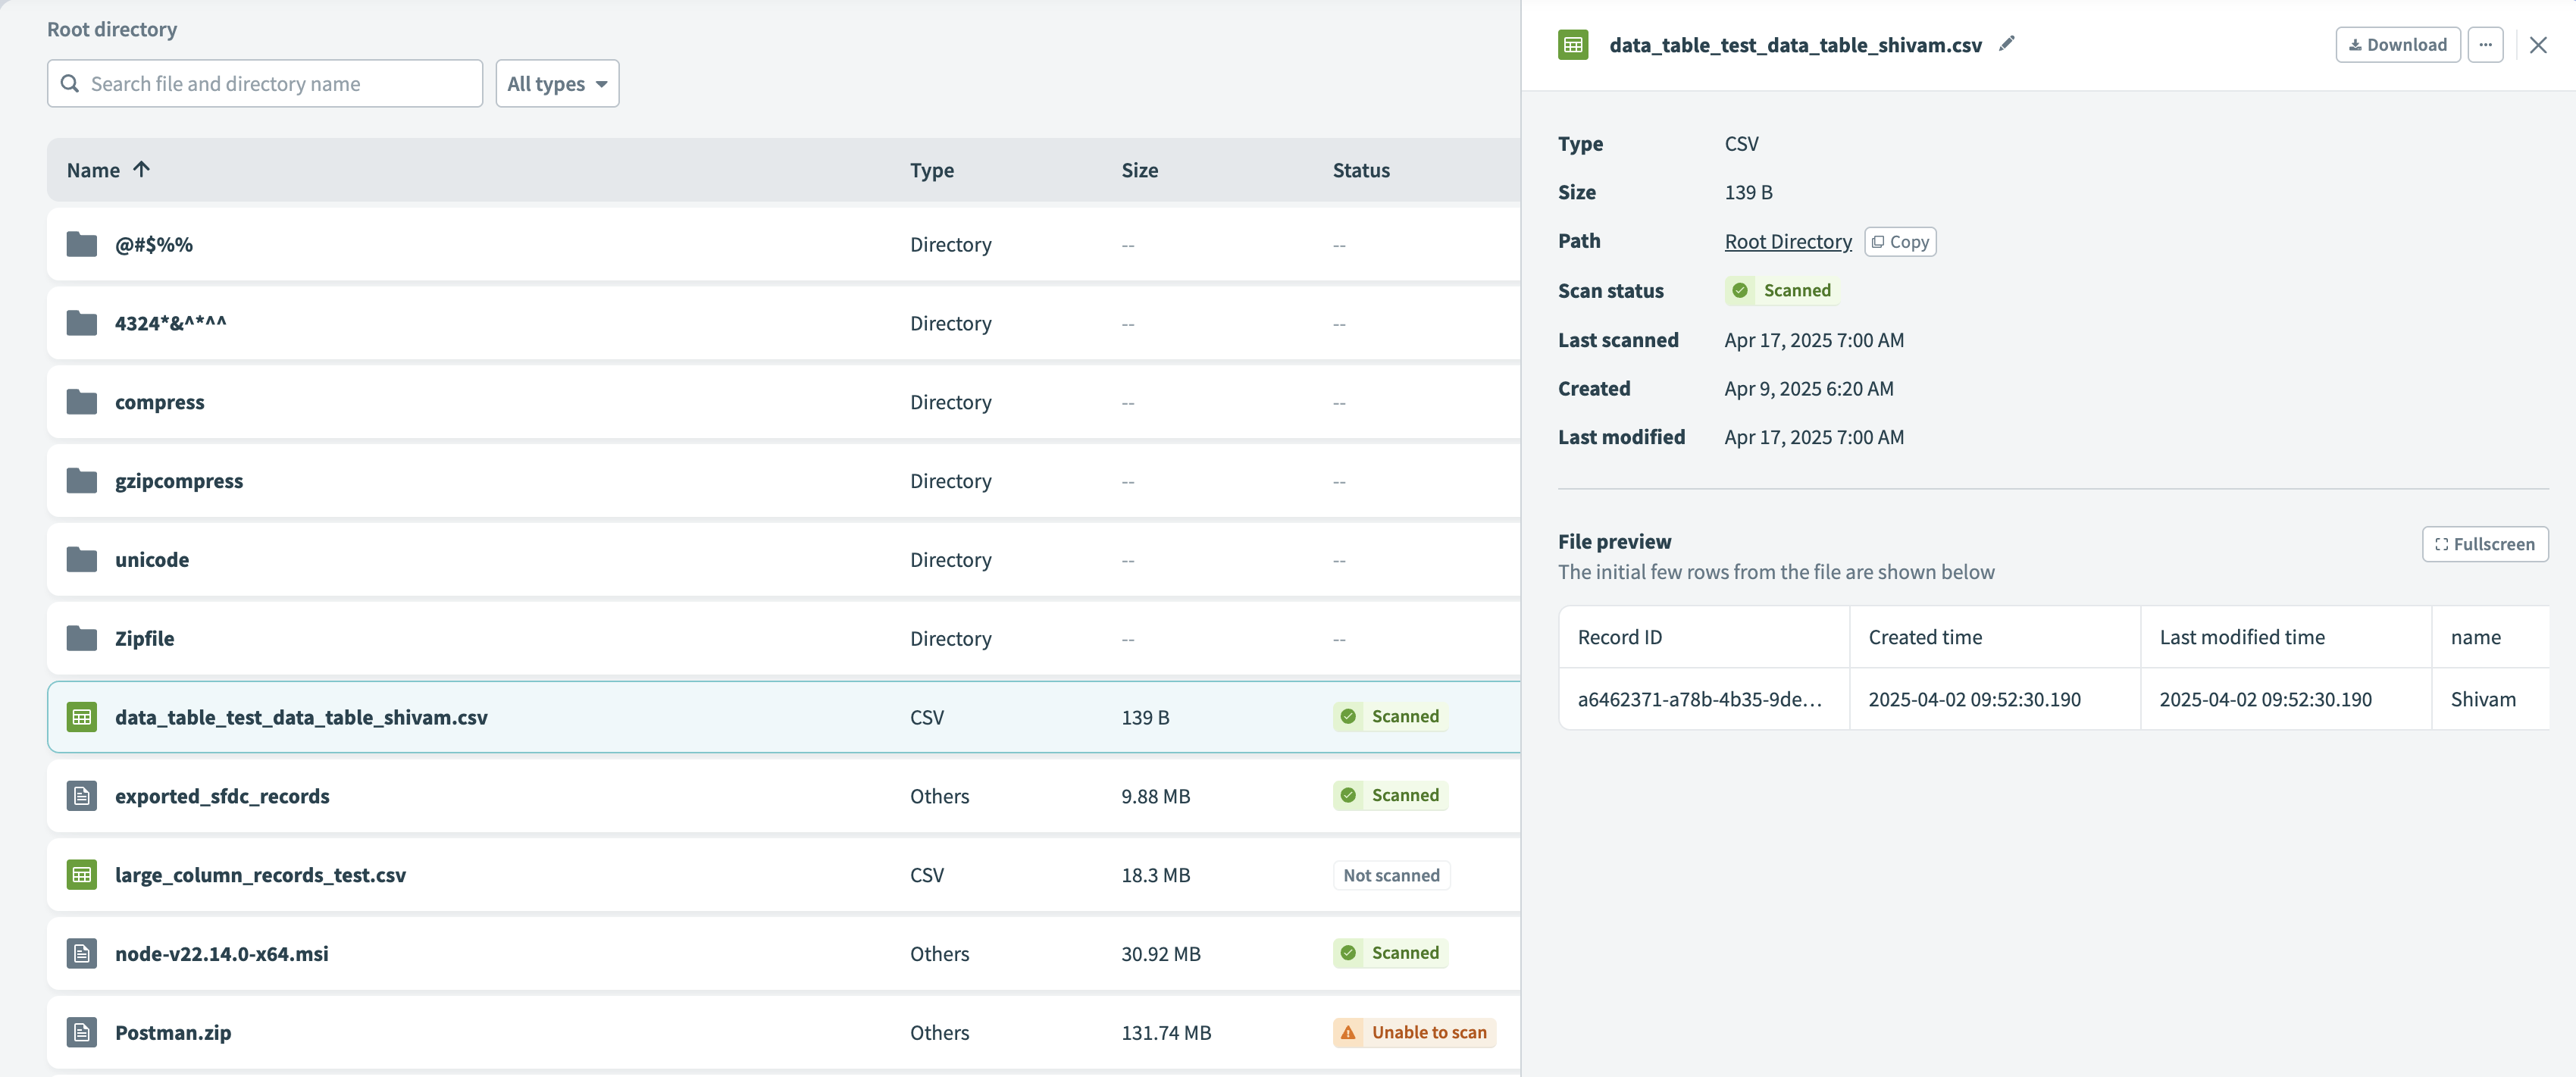 Previewing a file in the FileStorage UI
The UI displays the following metadata for the selected file:
- Type
- Size
- Path (select Copy to copy the file path)
- Scan status
- Last scanned
- Created
- Last modified
When you select a CSV file, the preview displays up to the first 10 rows of the CSV.
Select the Fullscreen button to view a fullscreen preview of the file. You can also use the keyboard shortcut Command + Enter (macOS) or Ctrl + Enter (Windows).
Select Exit or use the keyboard shortcut Esc to return to the default preview.
Delete, move, download, and rename files from preview
When you select a file from the list of files and directories, the FileStorage UI opens a side panel displaying the file's metadata. Within this side panel, you can delete, move, download, and rename the file.
Previewing a file in the FileStorage UI
To delete or move a file from preview:
Select the three dots at the top right of the side panel.
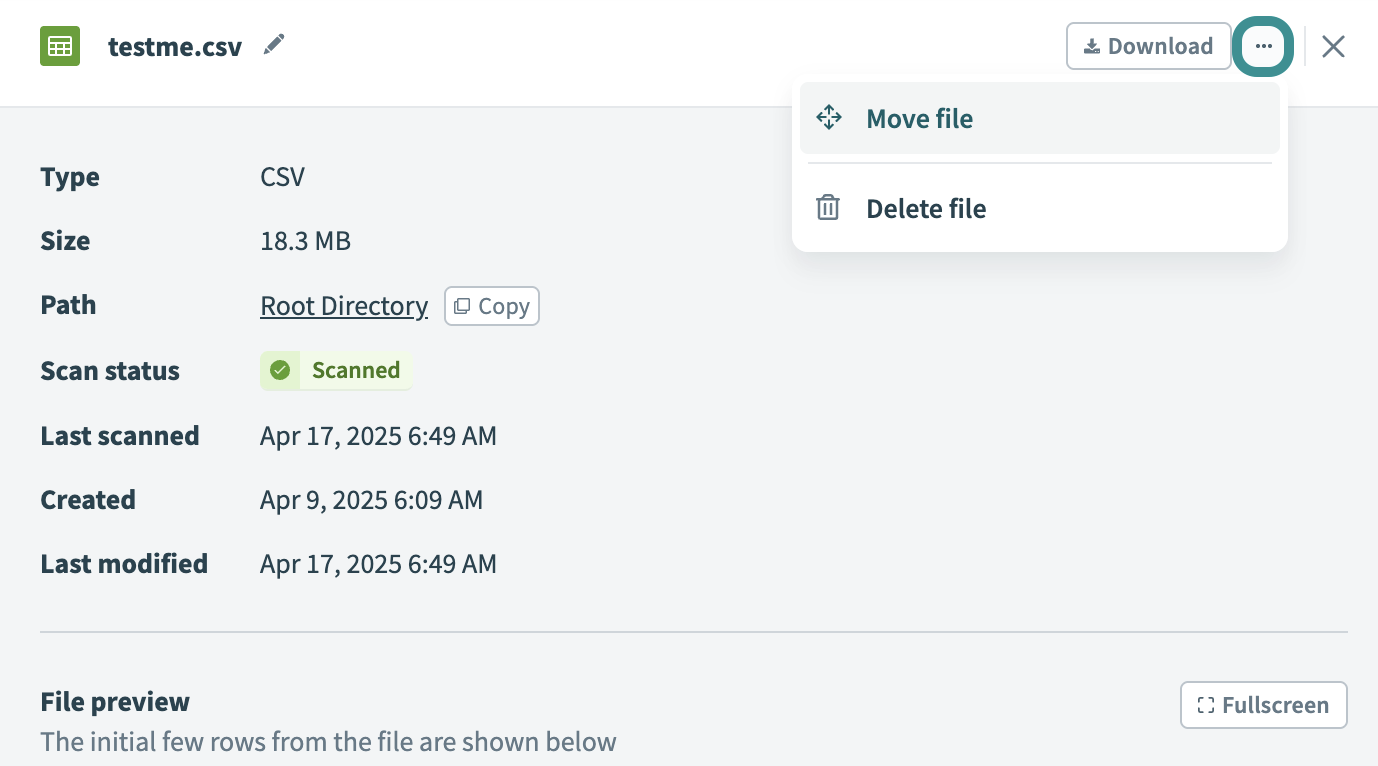 When you select the dots, a drop-down menu opens with the options to Move file or Delete file
From the drop-down menu, select either Move file or Delete file. For detailed instructions on how to use these options, see Move file or Delete file.
To download a file from preview, select the Download button in the upper-right corner of the side panel.
To rename a file from preview, select the pencil icon next to the file's name. After you enter a new name in the input field, select the checkmark icon.
Virus scanning support
FileStorage automatically scans uploaded files for viruses in the background. This helps protect your workflows and ensures uploaded files are safe. You don't need to trigger scans manually. FileStorage schedules and runs them based on the file's size and type.
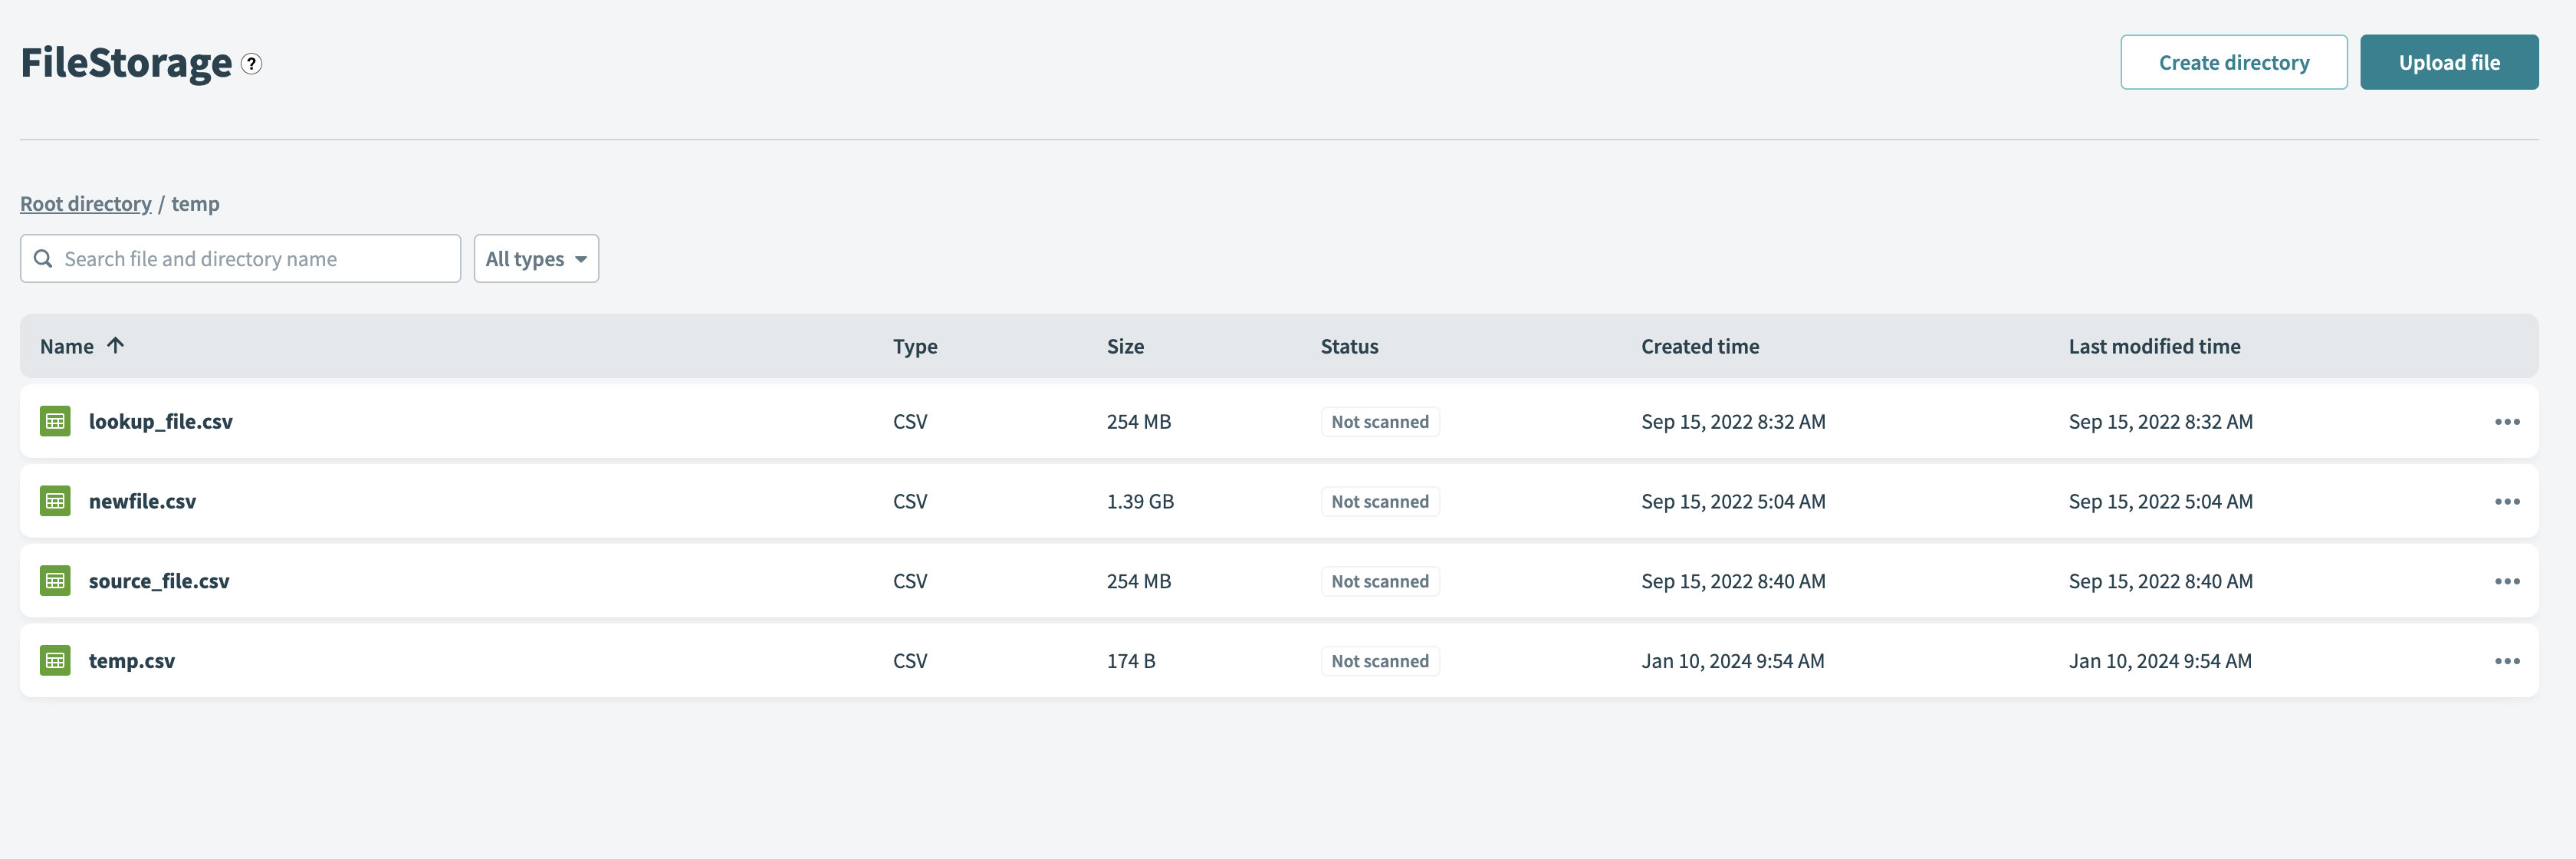
Scan status
Each file includes a scan Status field, which displays whether the system has scanned the file for viruses. This data appears in the file list and in the file preview panel.
 FileStorage root directory
FileStorage assigns one of the following scan statuses to each file:
 Not scanned status
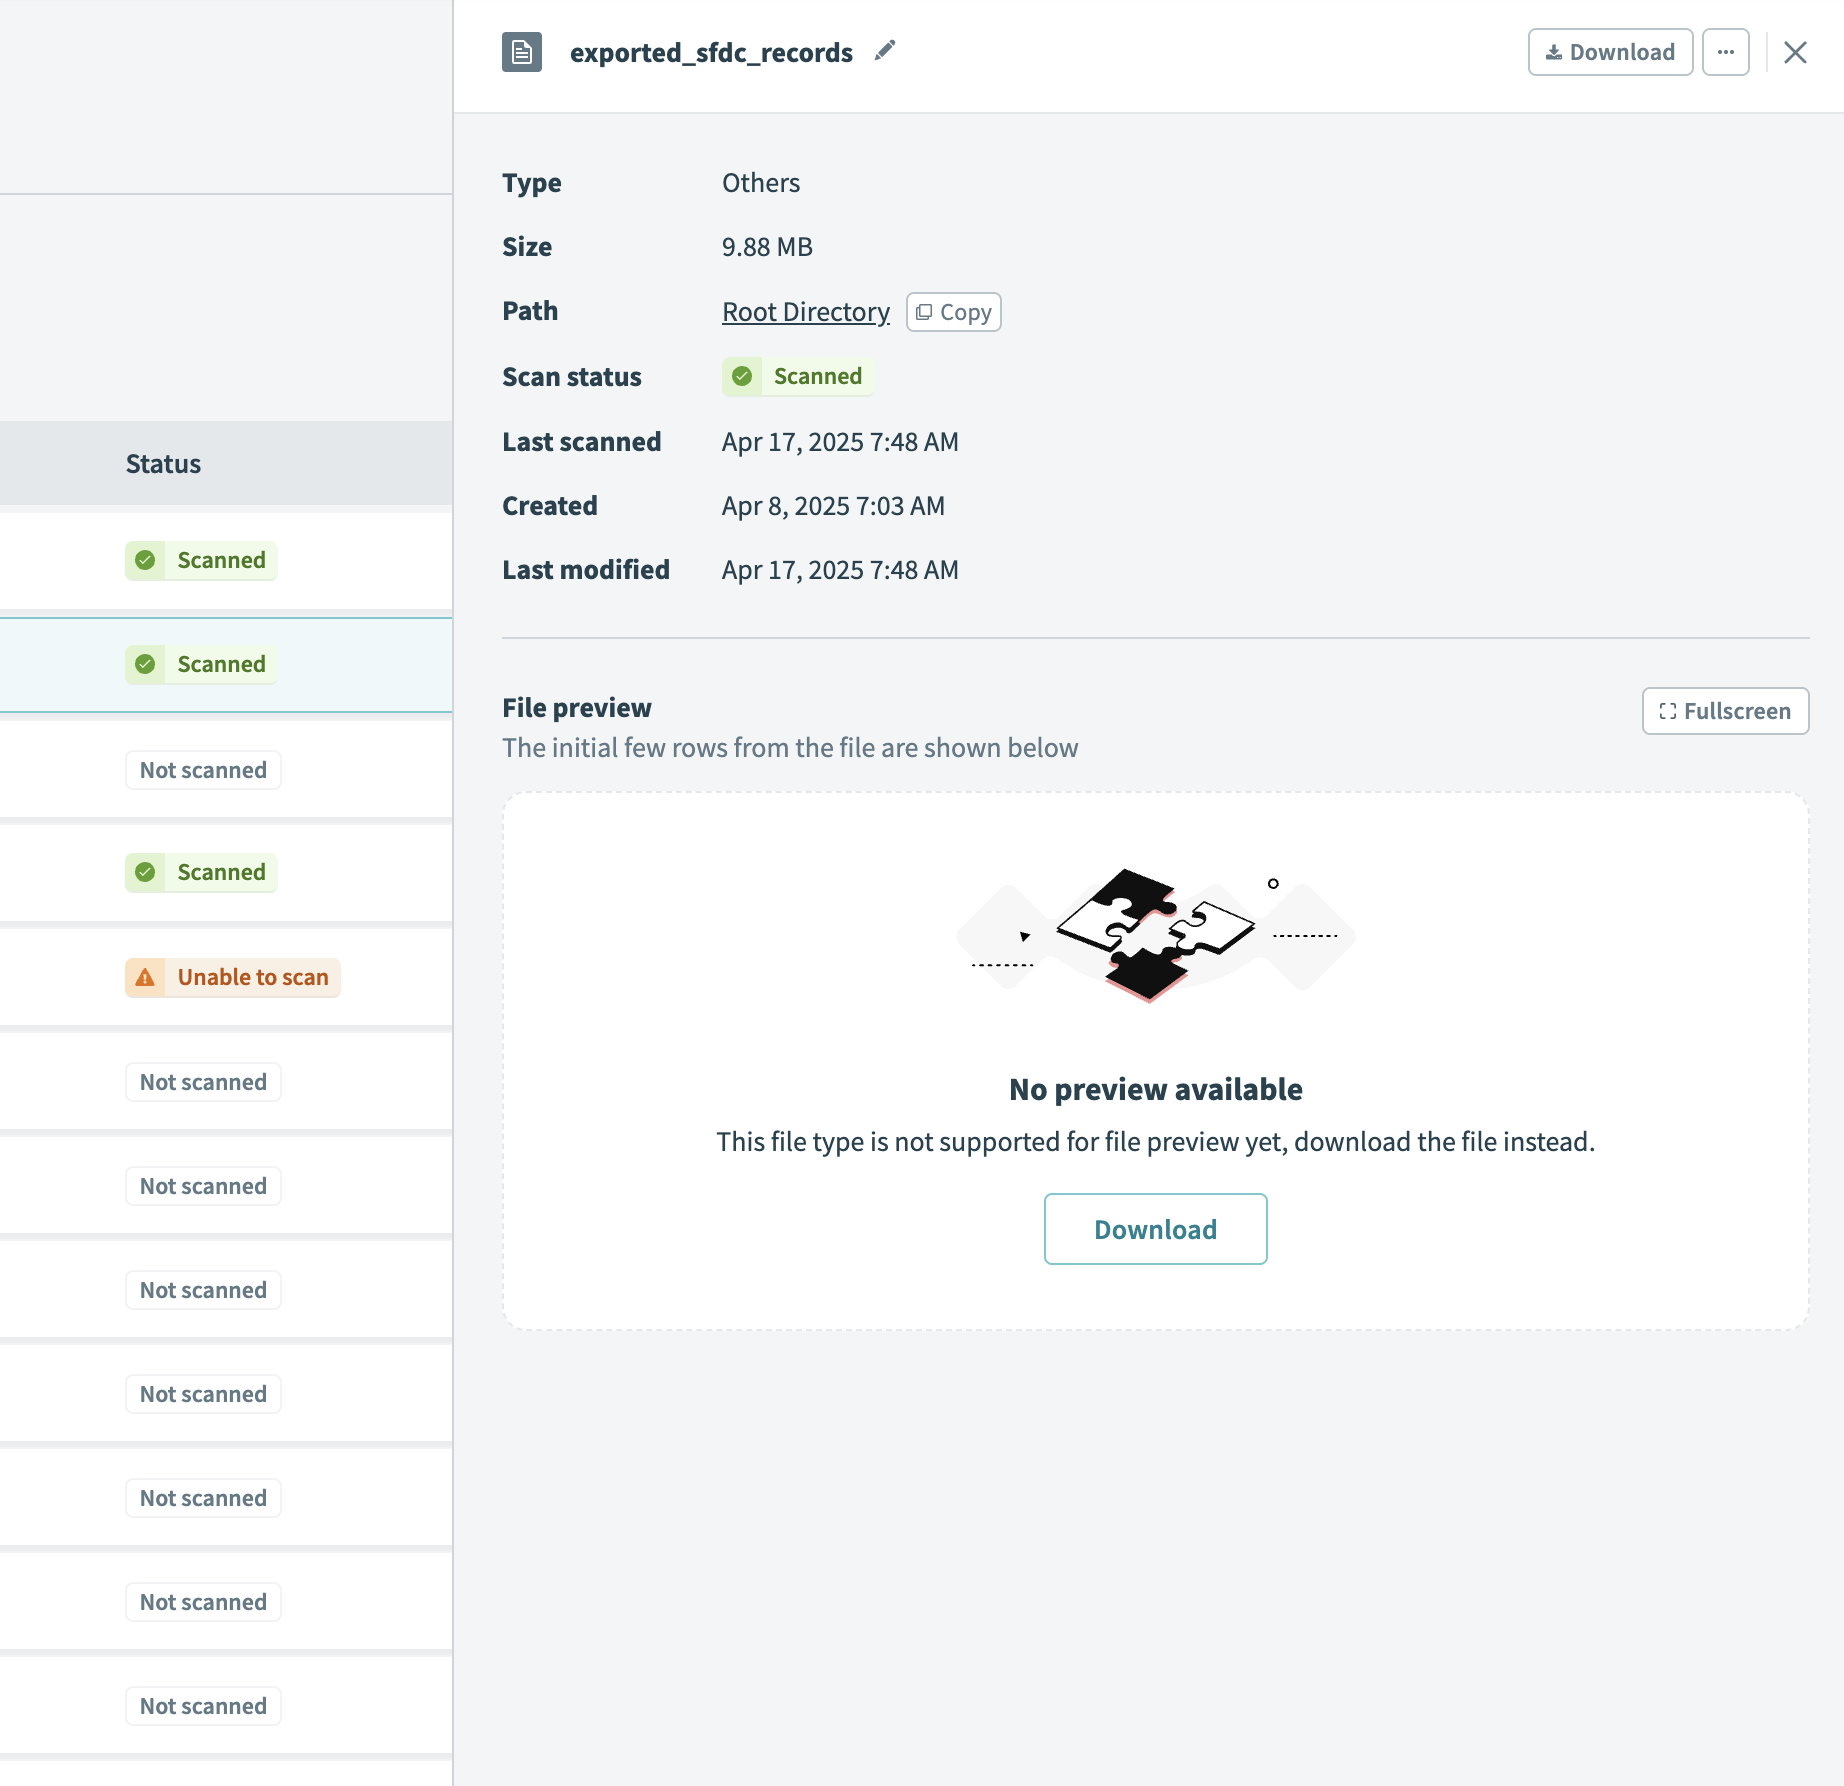 Scanned status
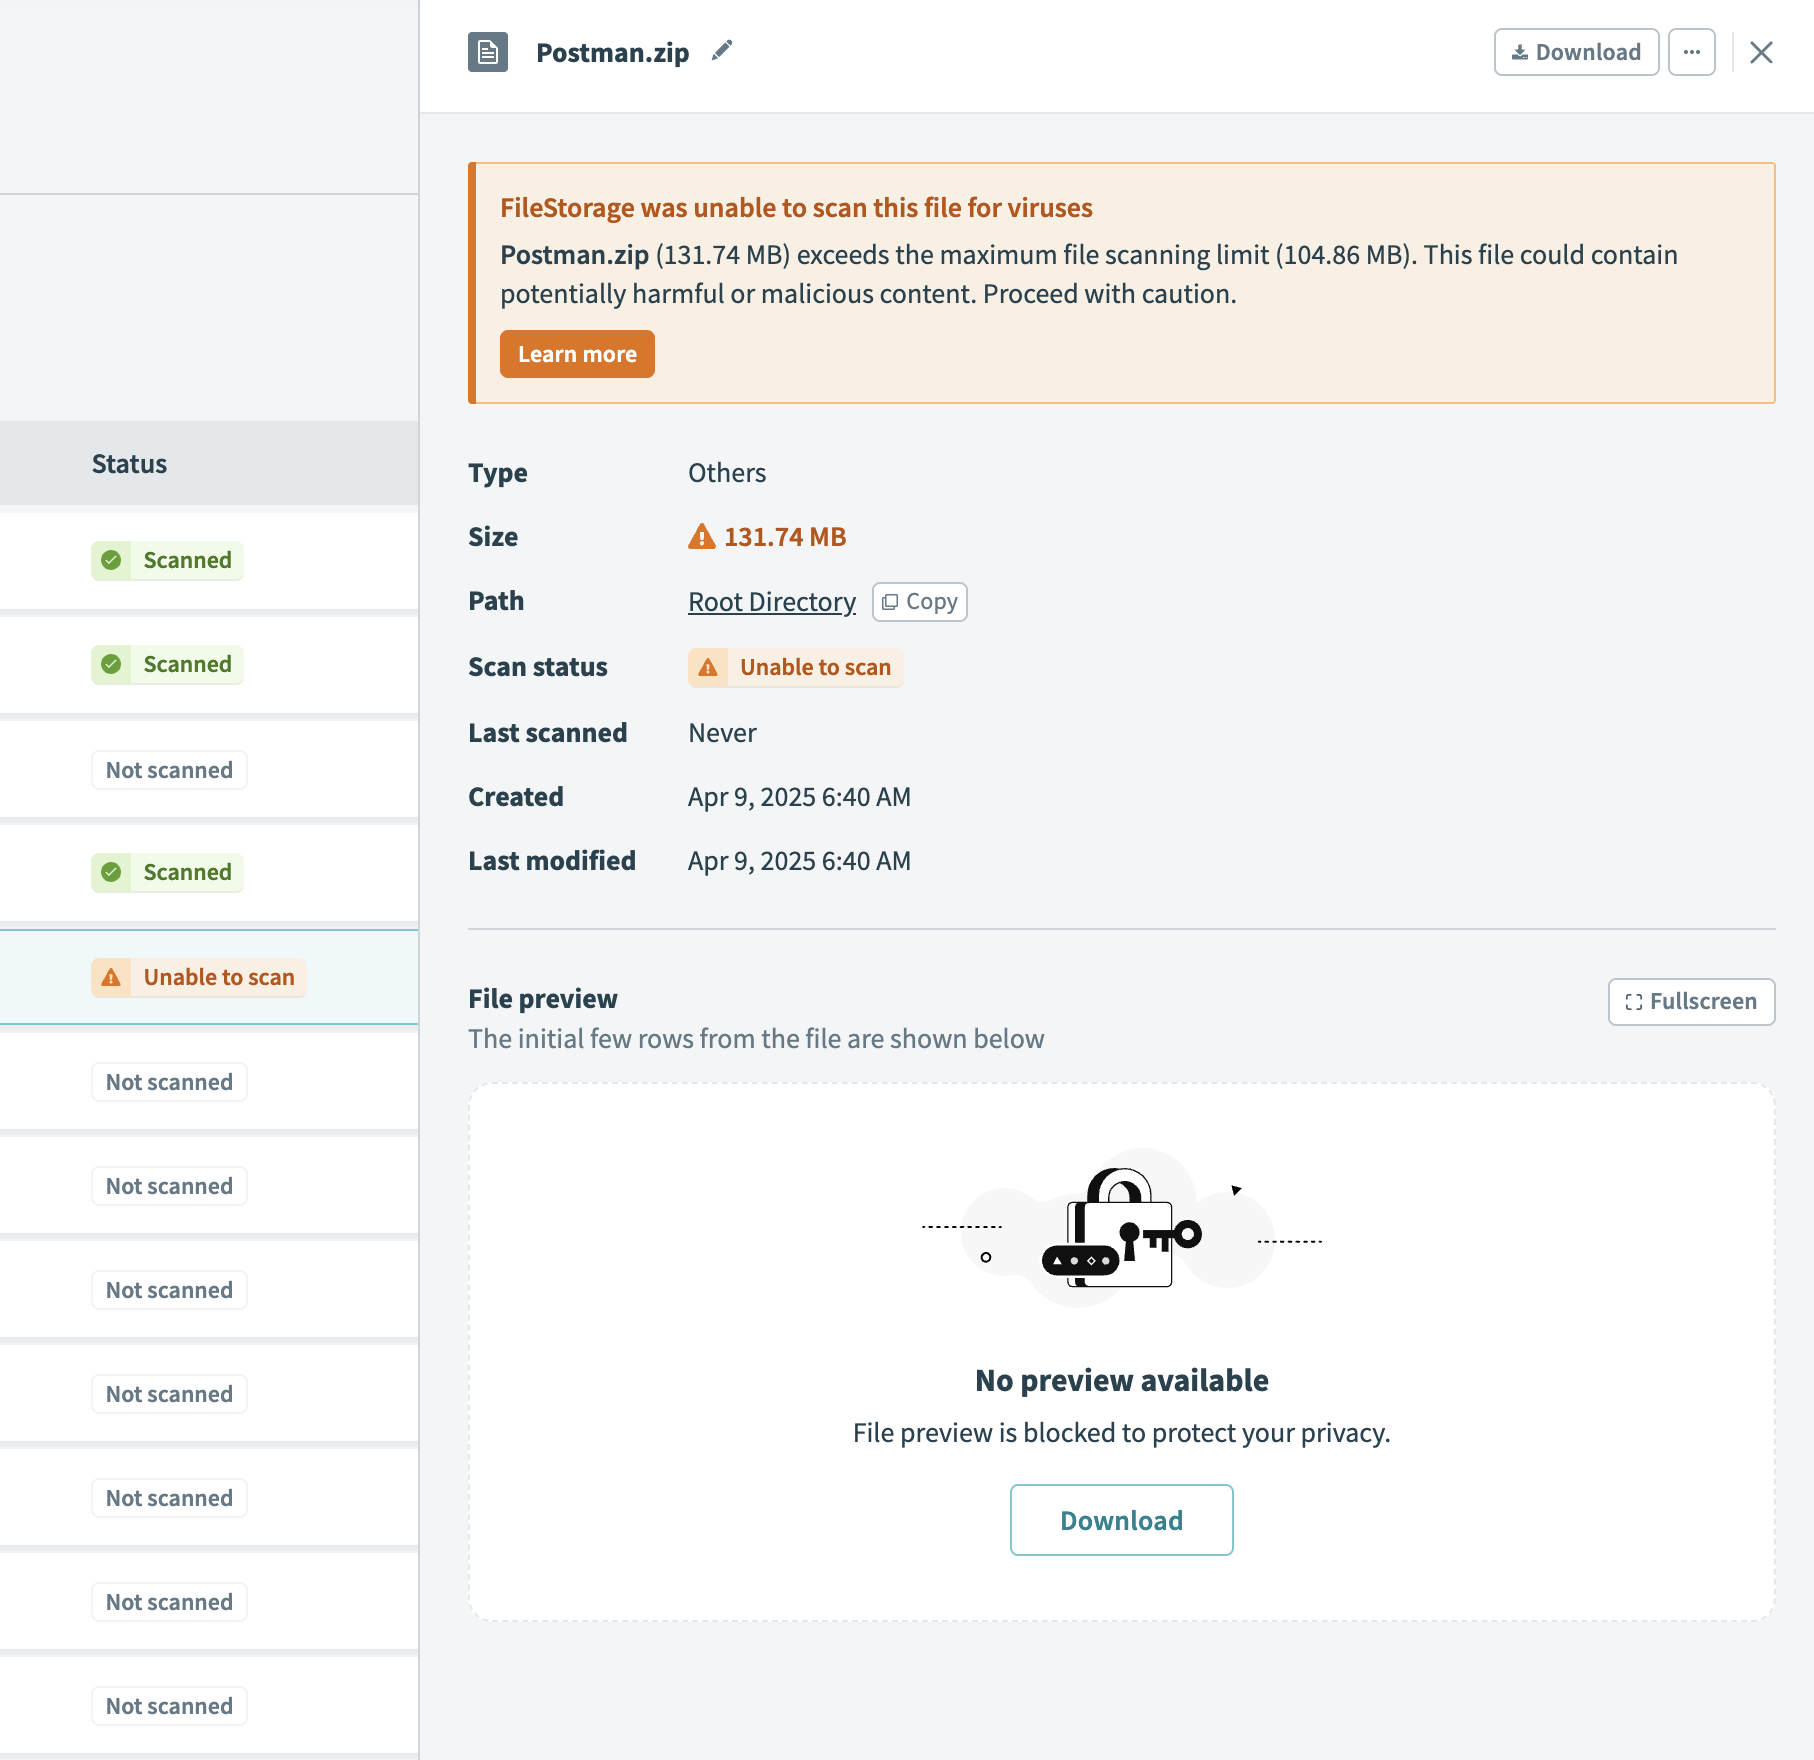 Unable to scan status
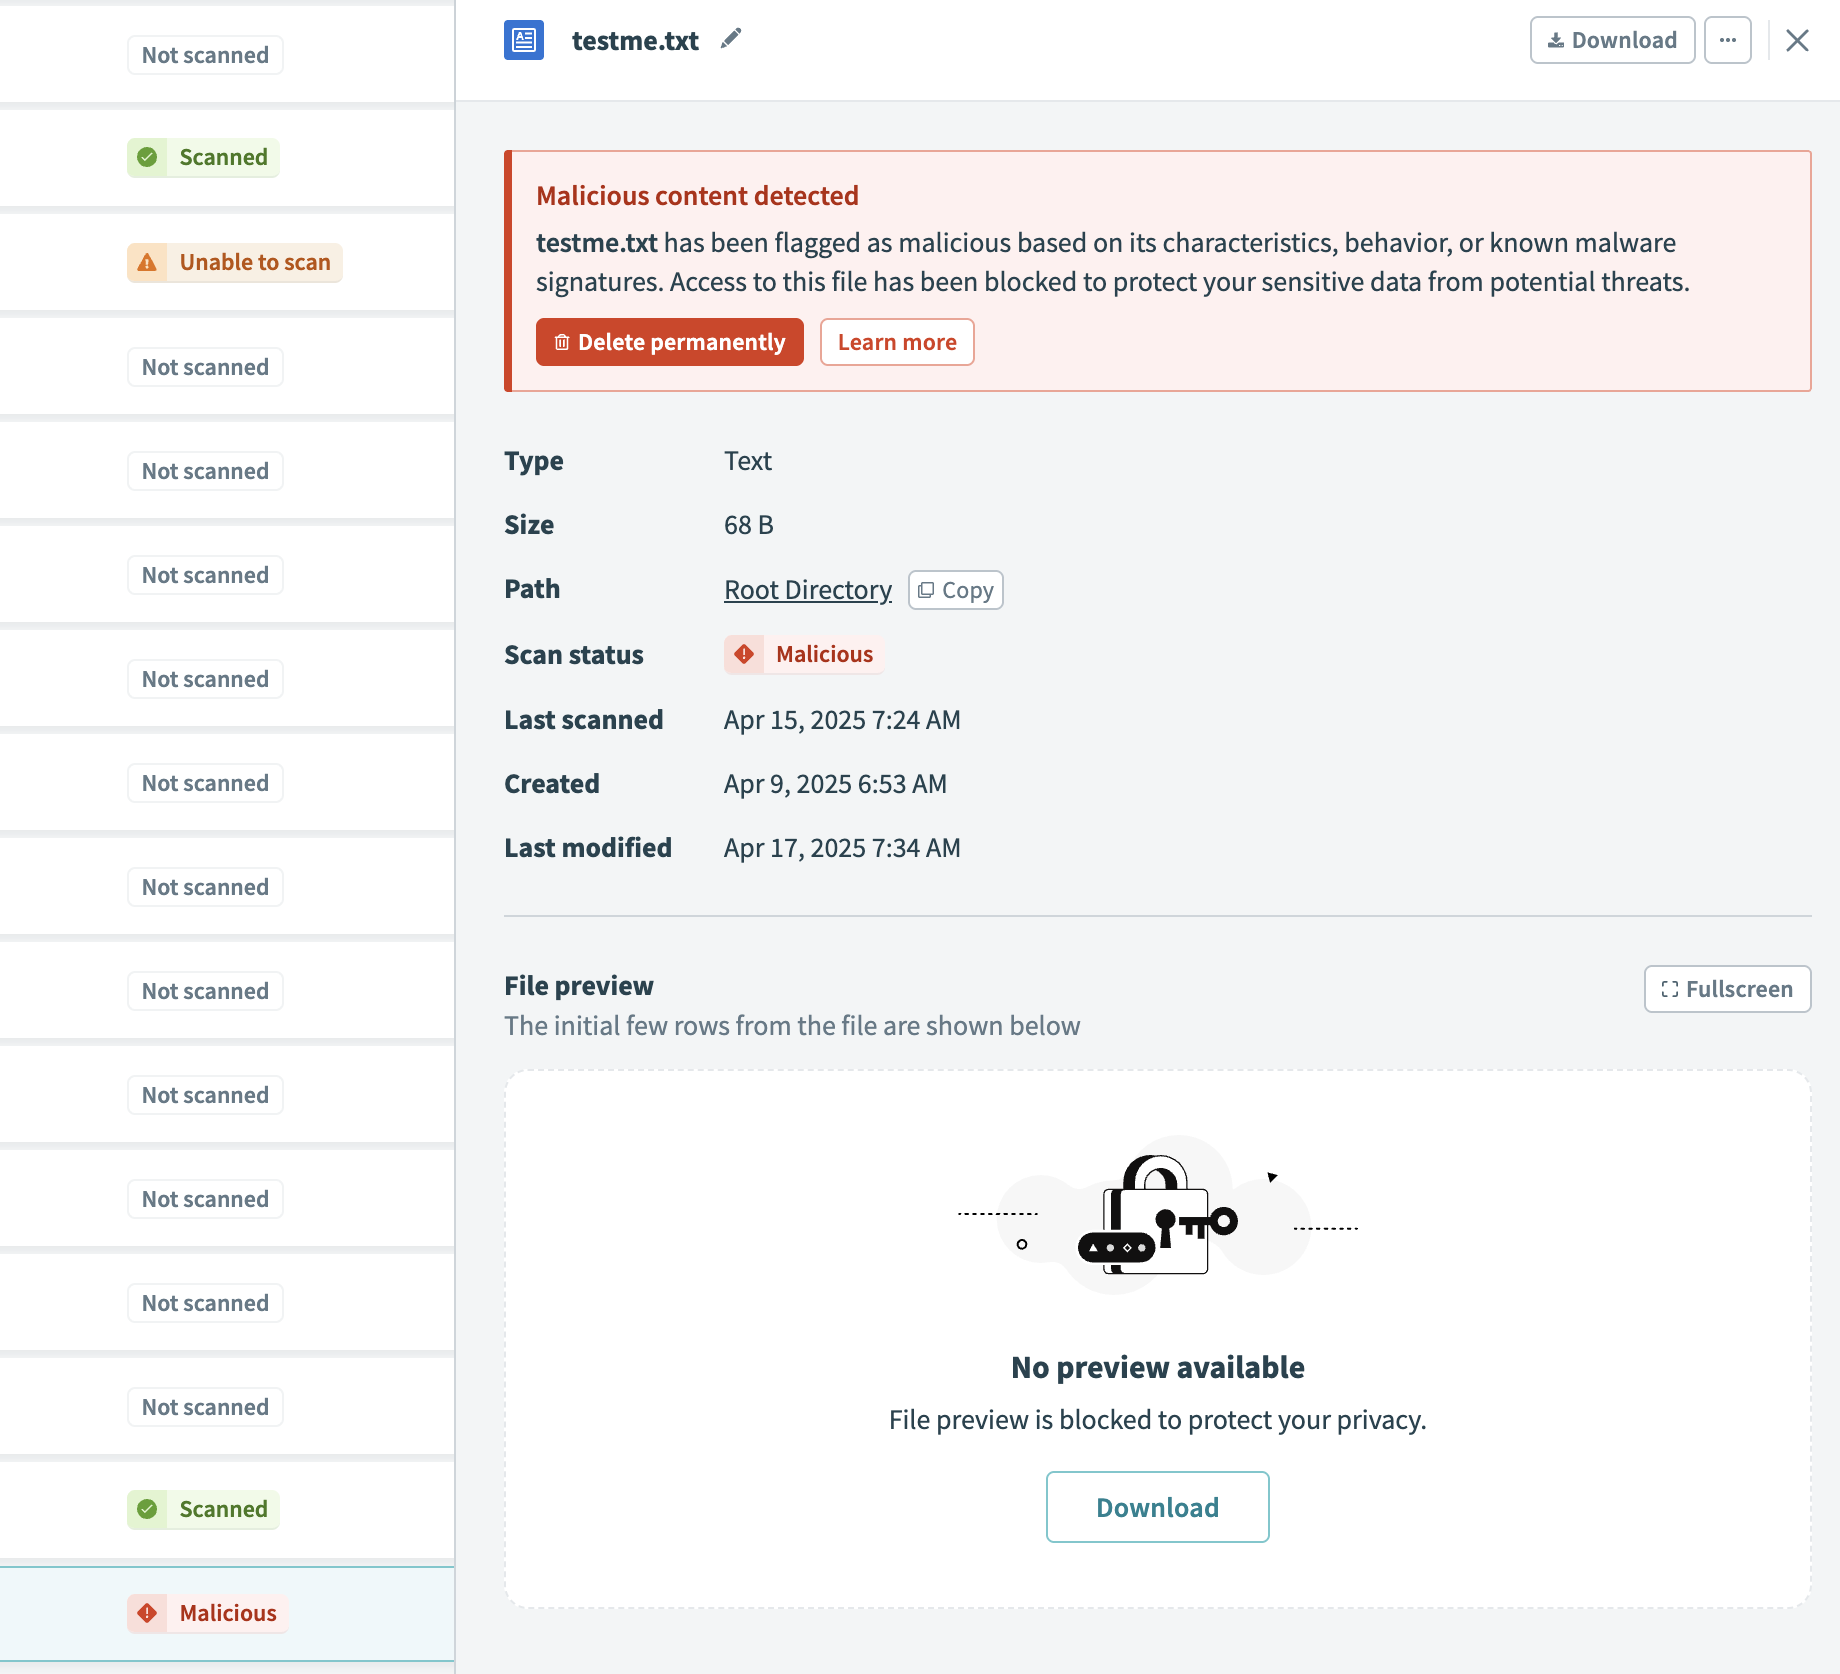 Malicious status
Workato displays a warning before you download files with the Not scanned, Unable to scan, or Malicious status. The alert displays the scan status and informs the user of potential risks.
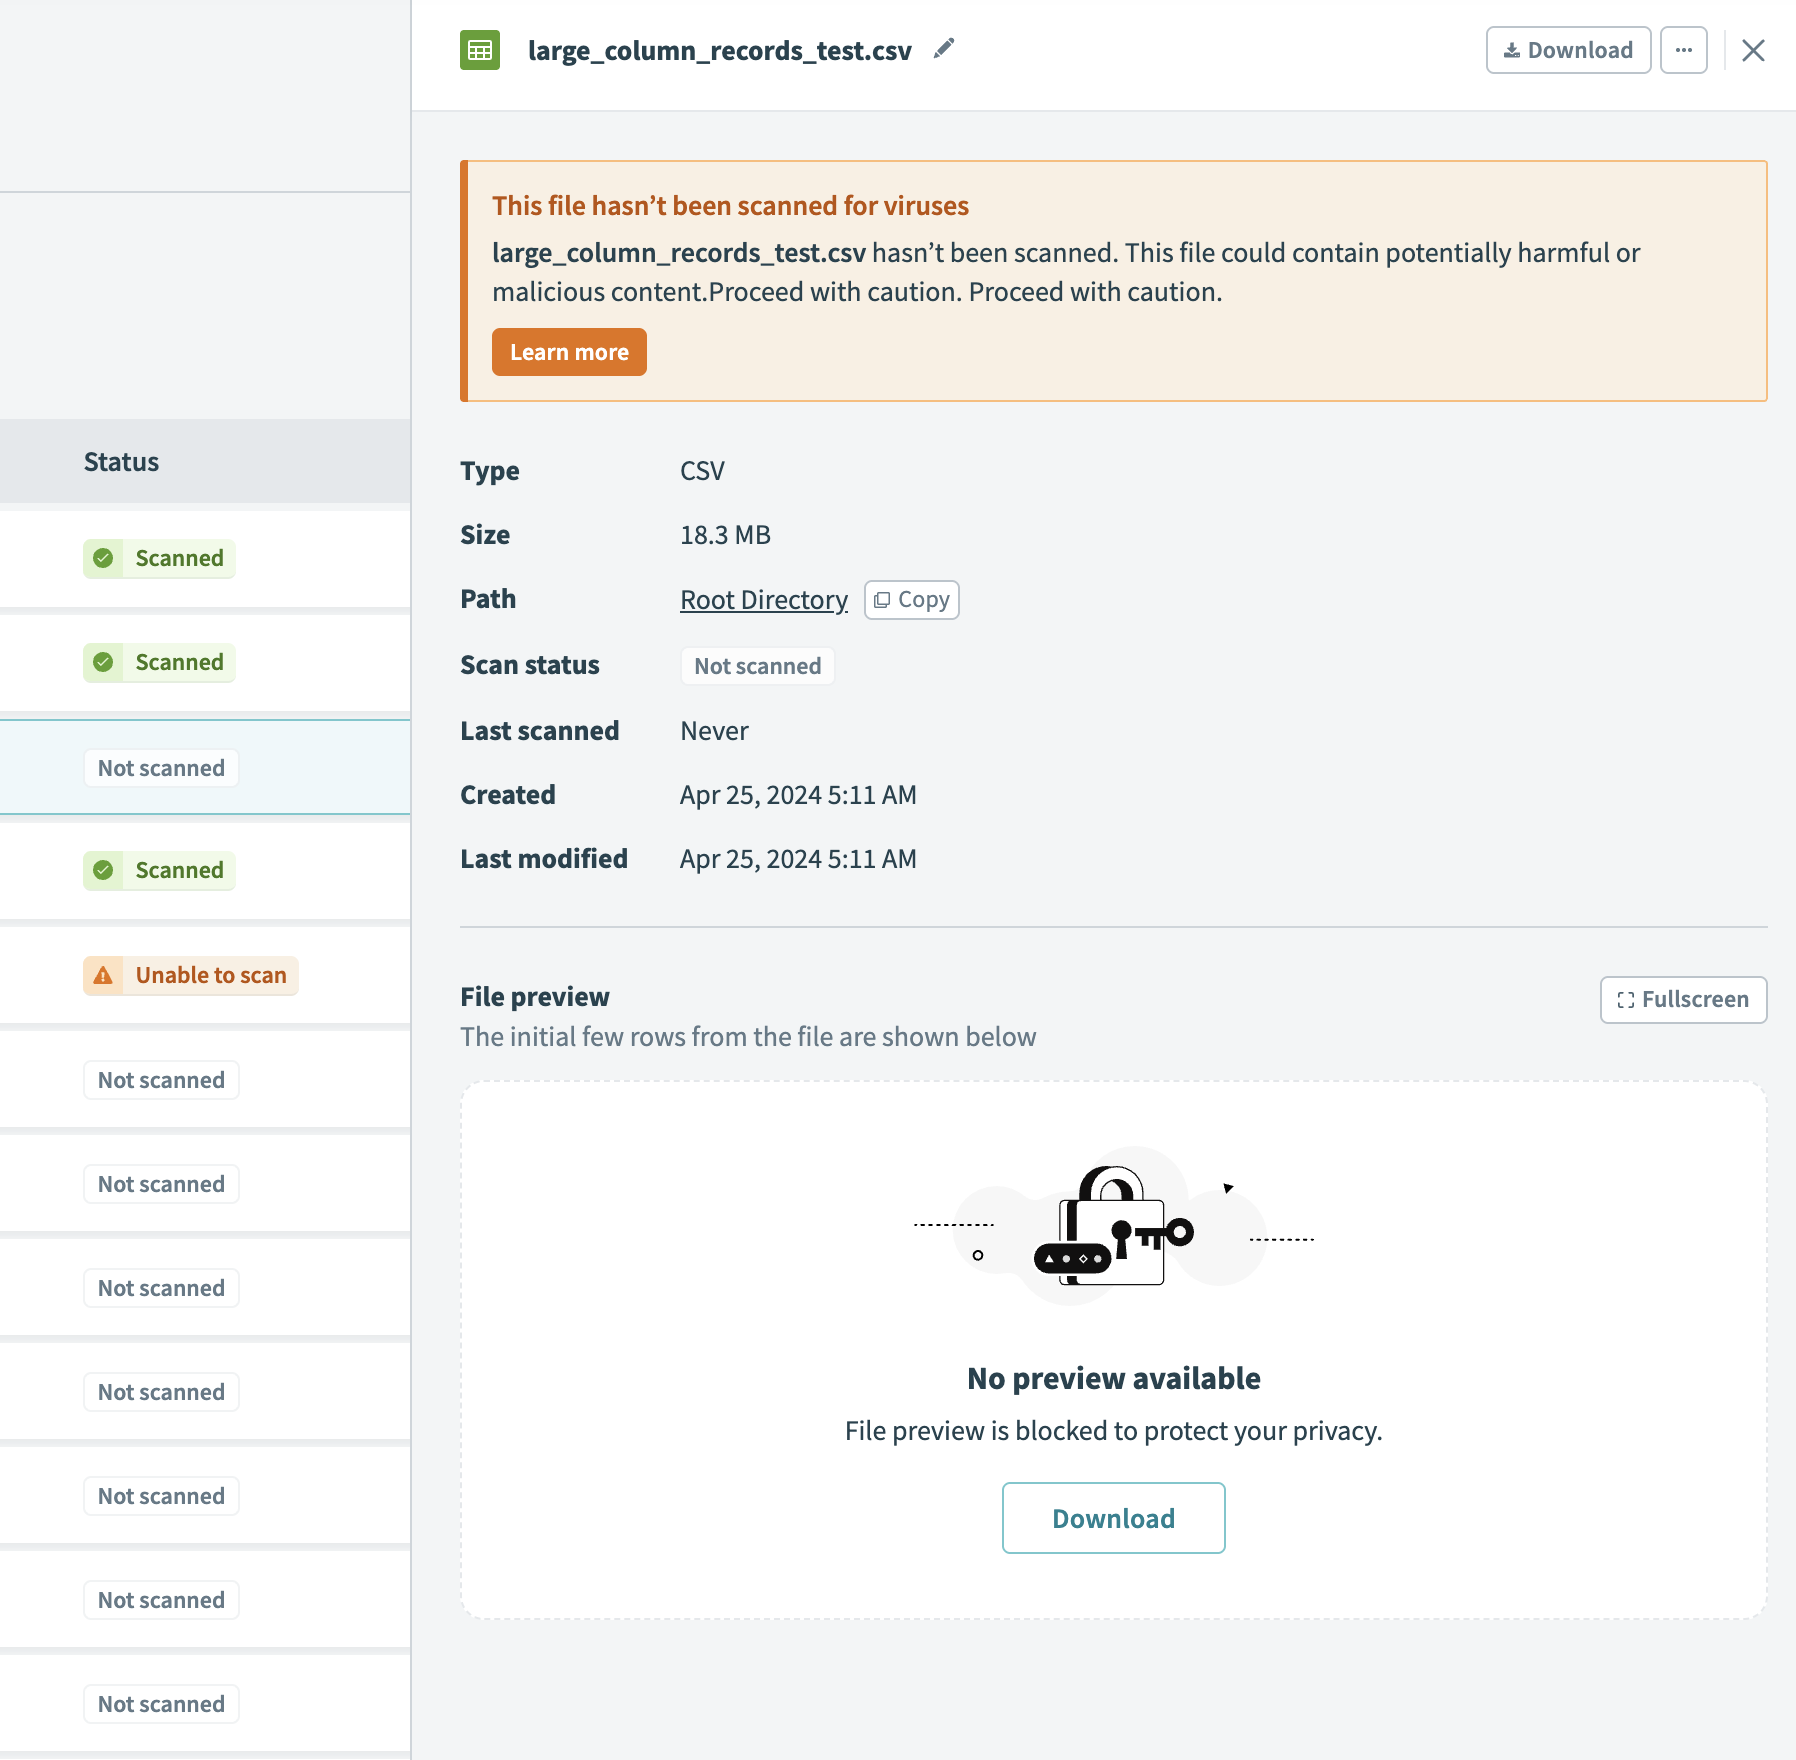
Scan preview
The file preview panel displays the scan status with the file's metadata. When a file has the Not scanned, Unable to scan, or Malicious status, the file preview is blocked. Refer to the Preview a file and its metadata section for more information on preview behavior.
Scan limits
FileStorage scans files up to 100 MB. Files that exceed this limit are marked as Unable to scan and display a warning before you download them.
Malicious files
FileStorage marks files as Malicious when the scan detects threats. The FileStorage UI blocks the file preview and displays a warning before you download the file. Workato doesn't prevent recipes from processing files marked as Malicious, and doesn't delete these files automatically. Review scan statuses in the FileStorage UI and delete malicious files to prevent recipes from processing them.
Role-based access control in the FileStorage UI
Workato restricts access to the FileStorage UI using role-based access control. This is in contrast to the FileStorage connector, where all users in a workspace can access all FileStorage files and directories in the workspace.
To view or edit the permissions for a role, navigate to Workspace admin > Access control > Collaborator roles. Select the desired role, and then select Platform tools.
The following permissions are available in the FileStorage UI:
Full access
View and create files and directories
View
View files and directories
Create
Create files and directories
System and custom roles have the following permissions:
Environment admin and Environment manager roles
All permissions enabled
Member role
No permissions enabled
Legacy Admin and Analyst system roles
All permissions enabled
Legacy Operator system role
No permissions enabled
Custom roles
No permissions enabled by default; any permission can be assigned
Last updated: