Sample use case - Data validation and cleansing
Data cleansing and validation is key to ensure the right set of data is added to your business applications. Often, the incoming data from the source might not be accurate for a variety of reasons and must be validated, standardized, and formatted to meet the constraints at the destination end, before it is sent downstream.
SQL Transformations provides a variety of functions that allow users to:
Validate and cleanse data
SQL Transformations supports pattern matching and checking validity of emails and phone numbers, trimming and removing unwanted spaces or special characters in certain columns, and more.
Standardization
SQL Transformations can add country or area codes to phone numbers, split or combine different parts of names, ensure that provided zipcodes are valid and more.
Conversion
Round integers and decimals to the nearest values, convert date/time from one format to another, replace null values with certain default values, and more.
Sample recipe: Extract leads from on-prem source, validate and cleanse the data before loading to Marketo
Consider the following scenario:
A company is running active online and offline marketing campaigns that result in generating large volume of leads. The leads are accumulated together and stored as a CSV file in an on-prem system. The company plans to extract the leads, ensuring that they pass basic validation logic and send the filtered leads in bulk to Marketo.
Because the lead information is quite large (About 100K records), typically they need to use Workato and store all the leads in an external database, run queries to validate the leads. Then, they must fetch and filter the cleansed leads back into Workato and then load them Marketo.
This is quite cumbersome and creates dependency on an external database system.
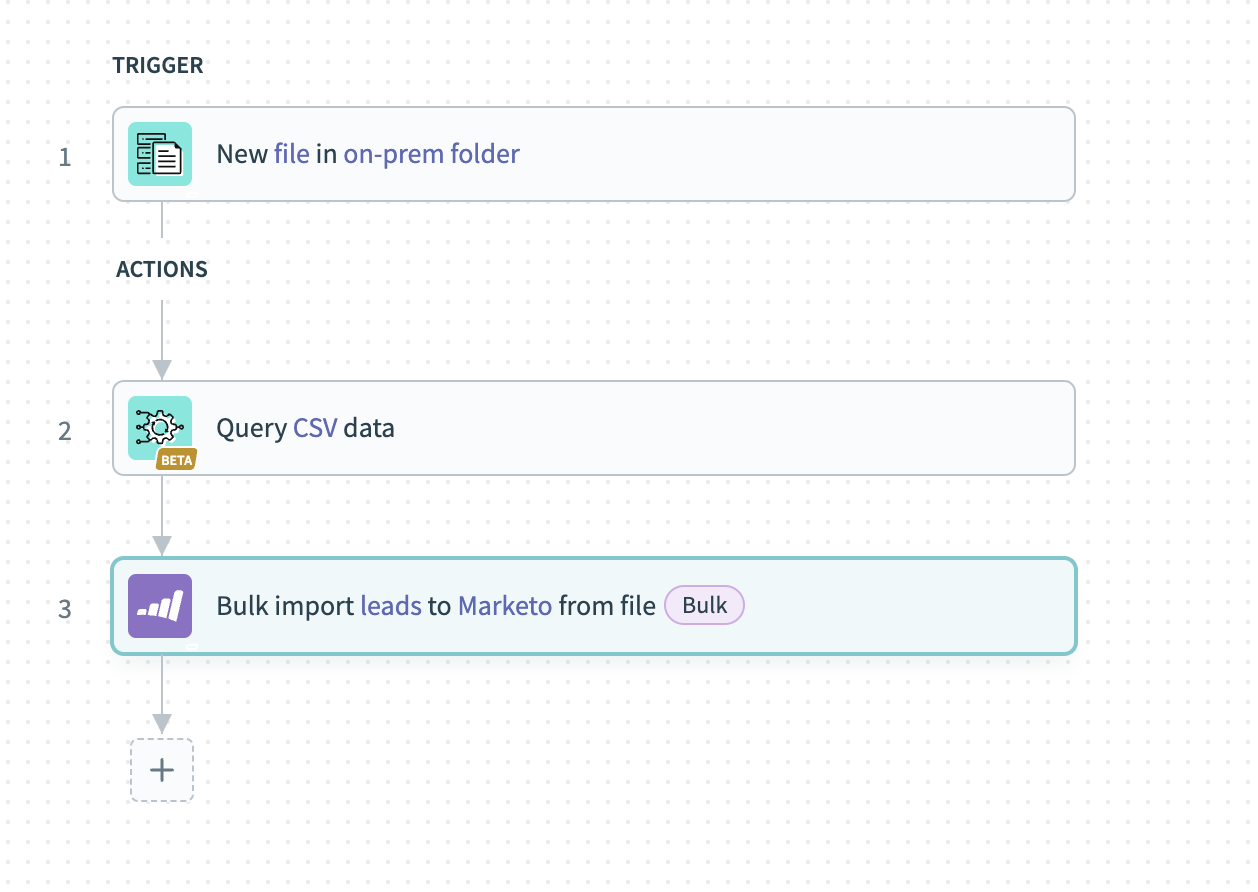
With SQL Transformations, the same workflow can be achieved in few simple steps!
In the trigger, set up the source of the file, which is the on-prem system, and configure it to look for new incoming file.
When the file is available, fetch it and store it in Workato FileStorage system. This serves as a backup of the file within Workato, which you can reuse if the load fails for some reason.
Next, we set up the Query CSV action from the SQL Transformations connector, which validates and filters the leads to produce the cleansed data.
Send the data as a CSV file to Marketo.
How to leverage SQL Transformations for data validation and cleansing
This section describes how to set up the Query CSV action, enabling you to leverage SQL Transformations for data validation and cleansing.
Follow along
See this recipe link to follow along and modify a sample recipe to suit your own workflow.
Data Source setup
Connect the different data sources on which SQL transformations performs the query. Here we have two data sources.
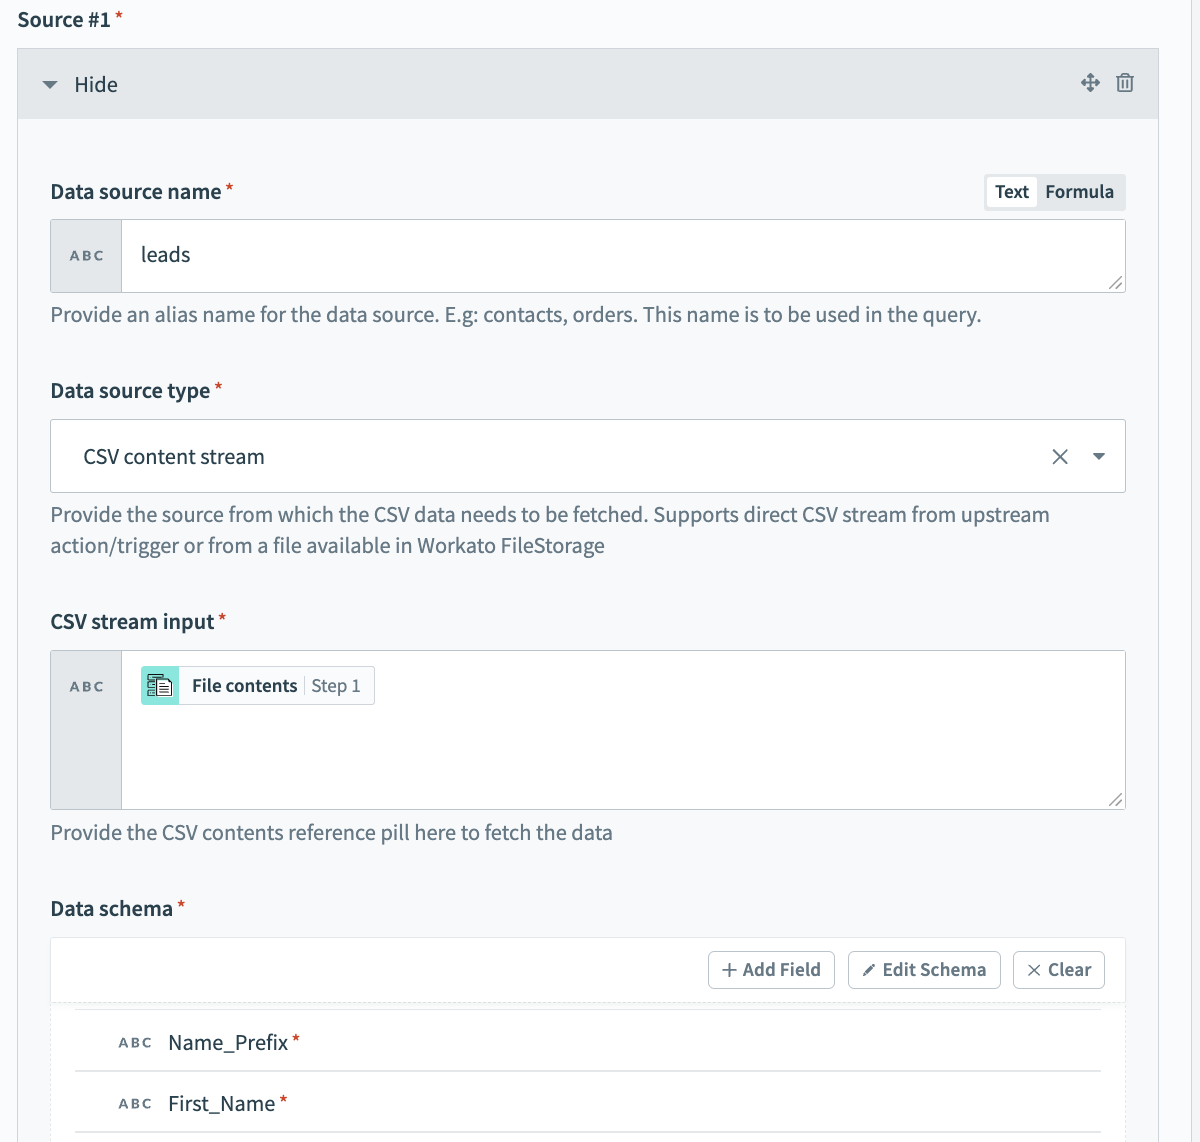
To connect Source #1, fill in the following fields. In our example, Source #1 is the incoming extract from an on-prem system.
Data source name
Give a meaningful name for the Data source name, for example leads.
Data source type
Select the Data source type. In our example, this is CSV content stream because the CSV data comes in from the upstream on-prem system.
CSV stream input
After you set the data source as CSV content stream, you can now set the CSV stream input. This is where you pass the file contents coming from the on-prem files trigger.
Data schema
Set the Data schema. You can do this easily by importing a CSV file containing a few sample contacts data.
 Connect Source #1
Configure CSV-specific options. These include the following fields:
Ignore CSV header row
This allow users to specify whether the incoming data has a heading column that must be ignored and not considered as part of the data.
Column delimiter
Select the delimiter used in the CSV file to separate columns.. Available options include a , (comma), ; (semicolon), and more.
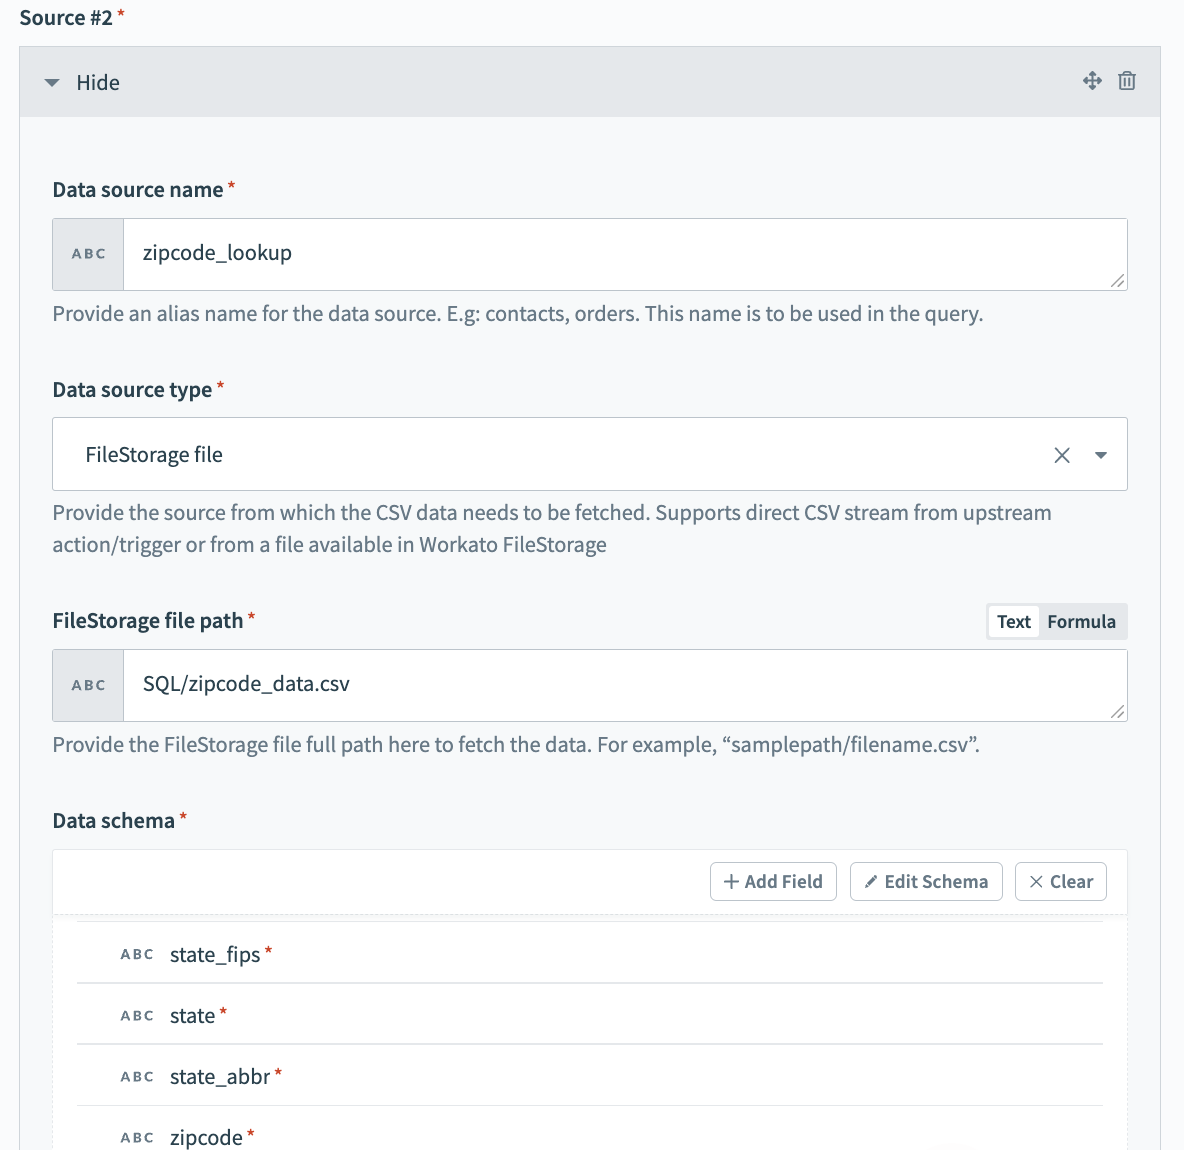
To connect Source #2, fill in the following fields.
Data source name
Give a meaningful name for the Data source name, for example zipcode_lookup.
Data source type
Select the Data source type. In our example, this is FileStorage file. Because we can reuse this data quite often and it does not change much, it is easy to store and handle this data using FileStorage, Workato's own internal persistent file storage system.
CSV stream input
Provide the CSV reference datapill to fetch the data. Our example uses contents from a Google drive download action.
Data schema
Set the Data schema. You can do this easily by importing a CSV file containing a few sample contacts data.
 Connect Source #2
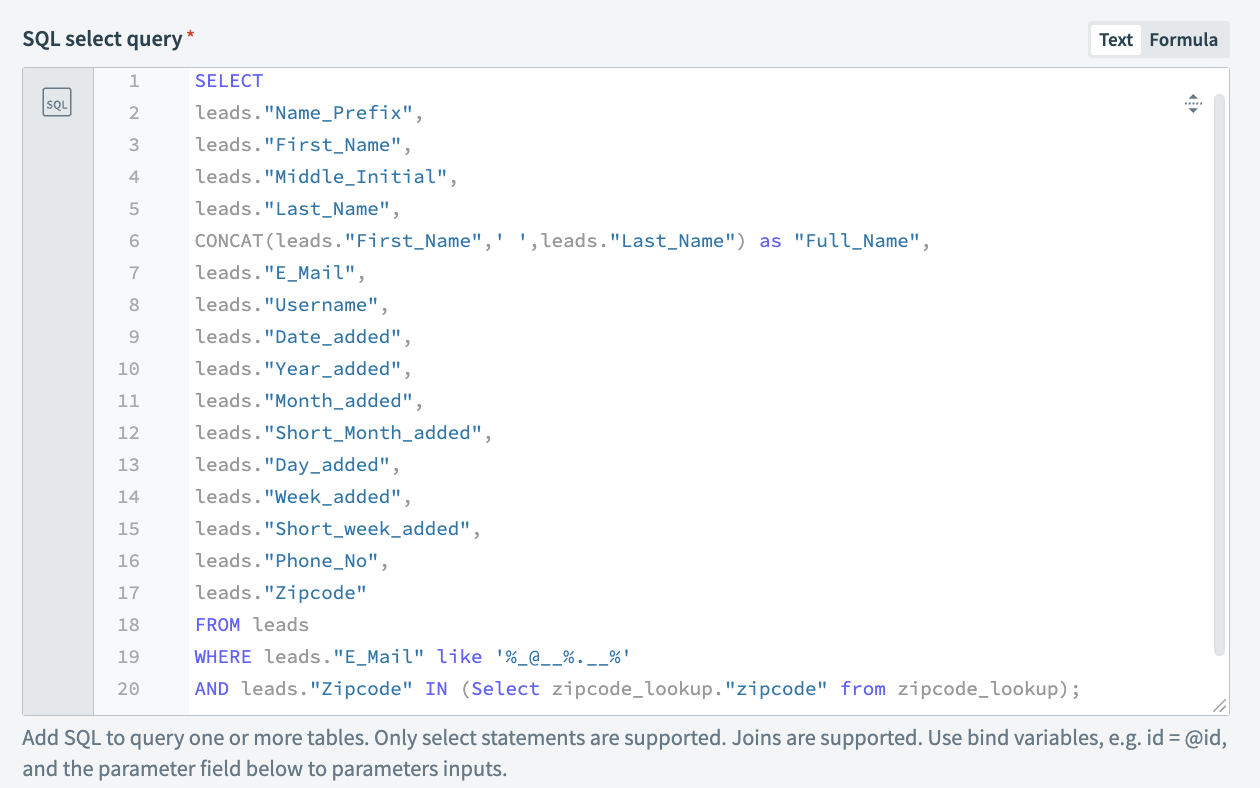
Query setup
Set up the query that works on the data sources and produces the transformed output. In our example, our query standardizes full names by concatenating first and last names, checks whether the email ID provided follows a specific pattern, and by joining with the zipcode lookup file, we are also validating if the zipcode provided is a valid one.
Output setup
Finally, we define the format of the output. Because we plan to send the cleansed leads to Marketo, we choose the output type as CSV contents stream. This means that we can pass the CSV contents output datapill from Query CSV data in the file input section of the Marketo bulk action, and the contents are streamed automatically from Query CSV action to Marketo. Also, similar to data source setup, here we have the options to choose what delimiter to use in the output CSV content, and whether to include column header or not.
Fill in the following fields:
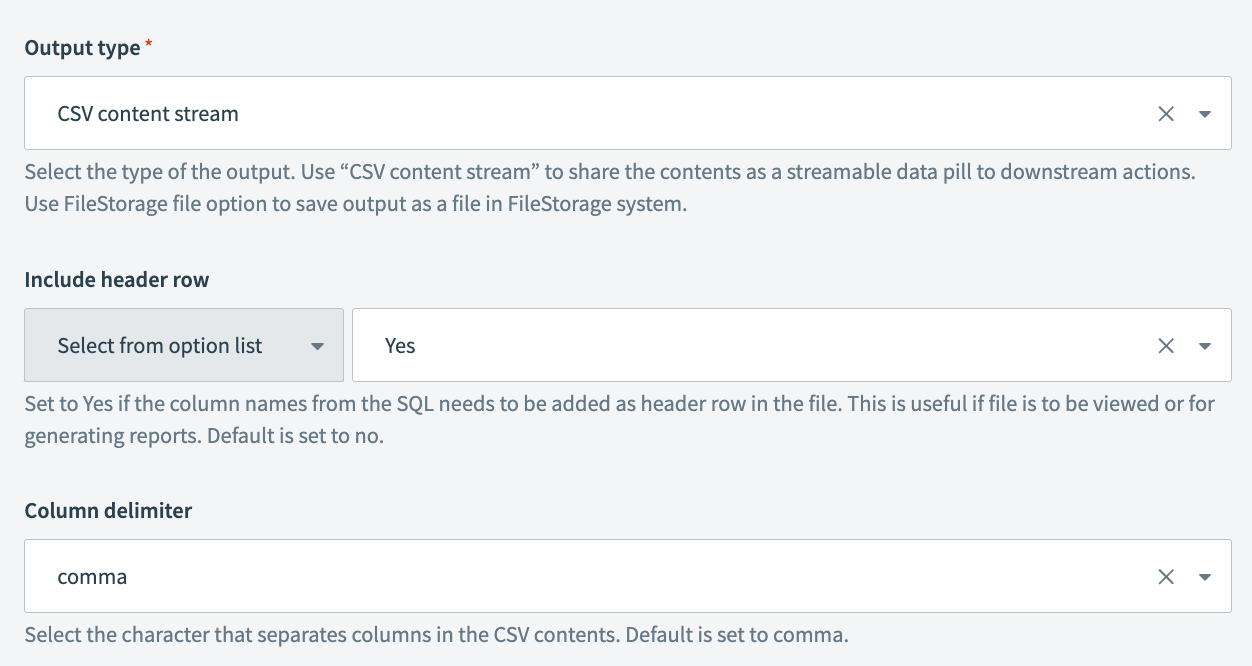
Output type
Select the type of the output. Use CSV content stream to share the contents as a streamable datapill to downstream actions.
Include header row
Set to Yes if the column names from the data must be added as header rows in the file. This is useful if you plan to use the file for generating reports. The default value is No.
Column delimiter
Select the delimiter used in the CSV file to separate columns. Available options include a , (comma), ; (semicolon), and more.
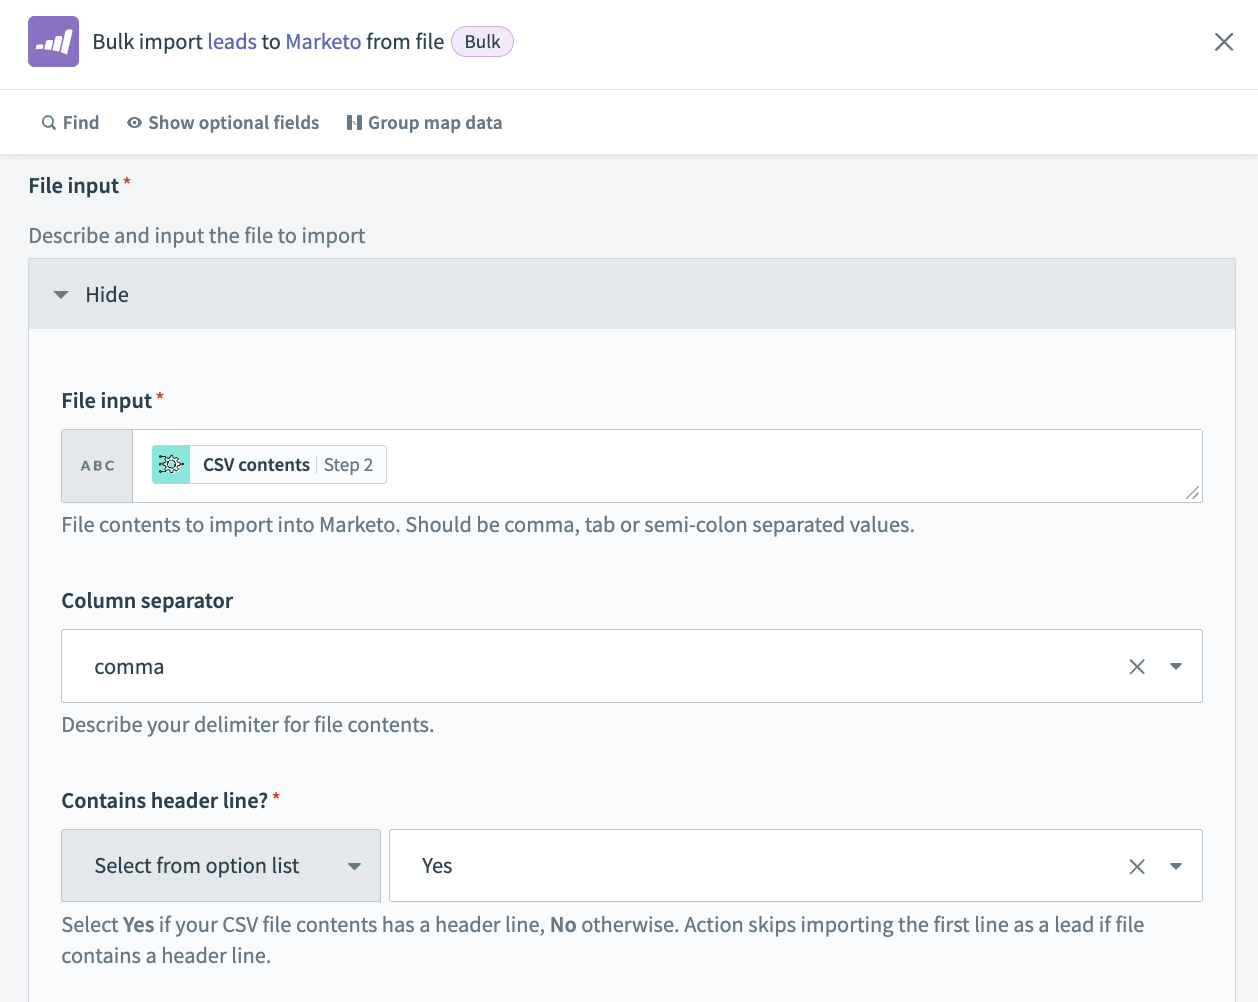
Select the Bulk import leads to Marketo from file action.
File input
File contents to import into Marketo. Map in the CSV contents from Step 2.
Column separator
Select the delimiter used in the CSV file to separate columns. Available options include a , (comma), ; (semicolon), and more.
Contains header line?
Select Yes if your CSV contents contains a header line. Otherwise, select No. The action skips importing the first line as a lead if the file contains a header line.
Read next
Sample use cases
To view more sample use cases, read the following guides:
Last updated: