# Embedding Workato implementation guide
Workato’s embedding options allow you to integrate powerful tools into your platform. This enables you to deliver a customized and seamless user experience for building, managing, and monitoring integrations.
You can embed Workato into your application's UI by constructing a direct link URL and embedding it within an iframe. Workato provides two types of iframes for this purpose:
# Full page iframes
Full page iframes enable you to embed any Workato page by specifying a direct URL path to the desired page within the iframe. This method enables you to display the page's content without the Workato navigation bar.
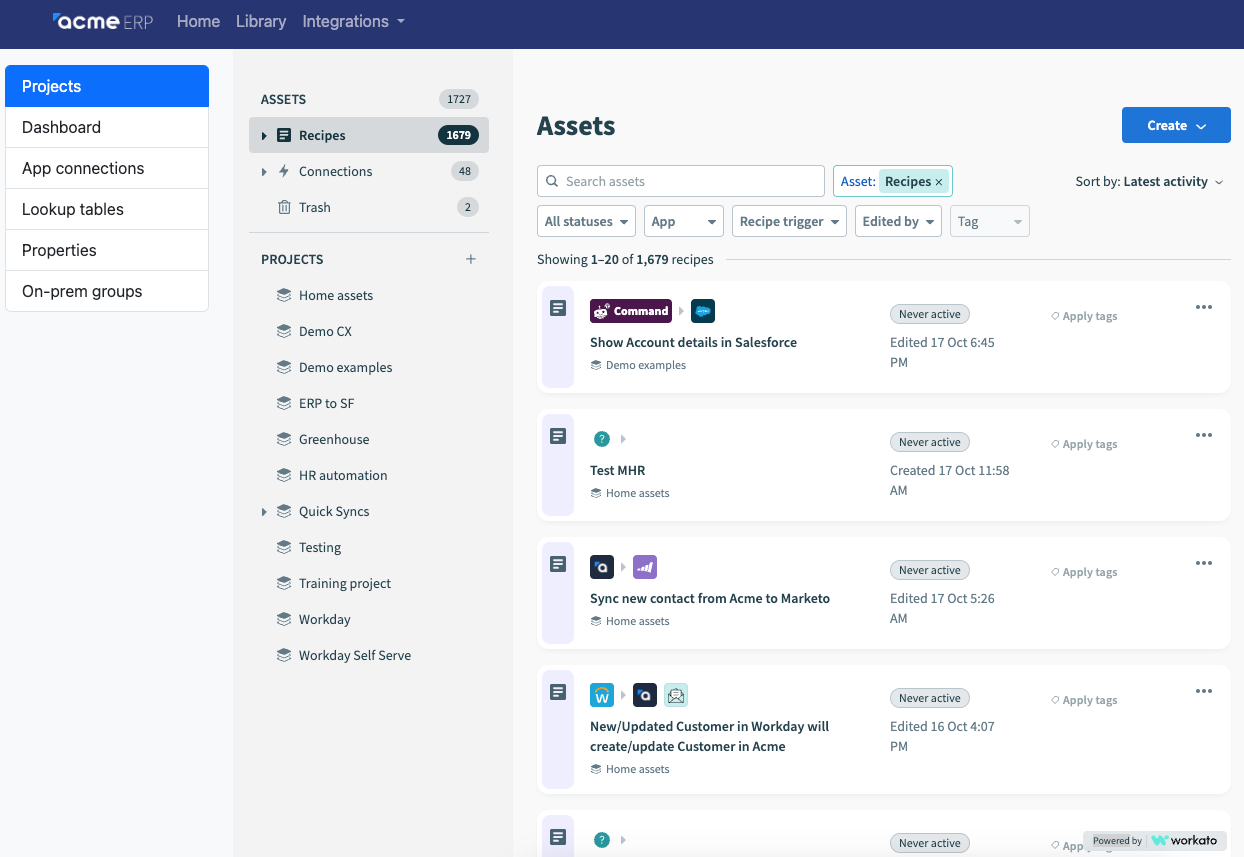 Full page
 iframe of Workato’s Projects page within Acme ERP
# Widget iframes
Widget iframes enable you to embed specific, function-focused widgets that integrate seamlessly into your application. You can choose from the following widget types:
# Connection widget
The connection widget allows you to securely collect credentials from your customers for any Workato connector directly within your product. Use this widget as part of a Managed Services offering or within a larger integration setup journey on your platform.
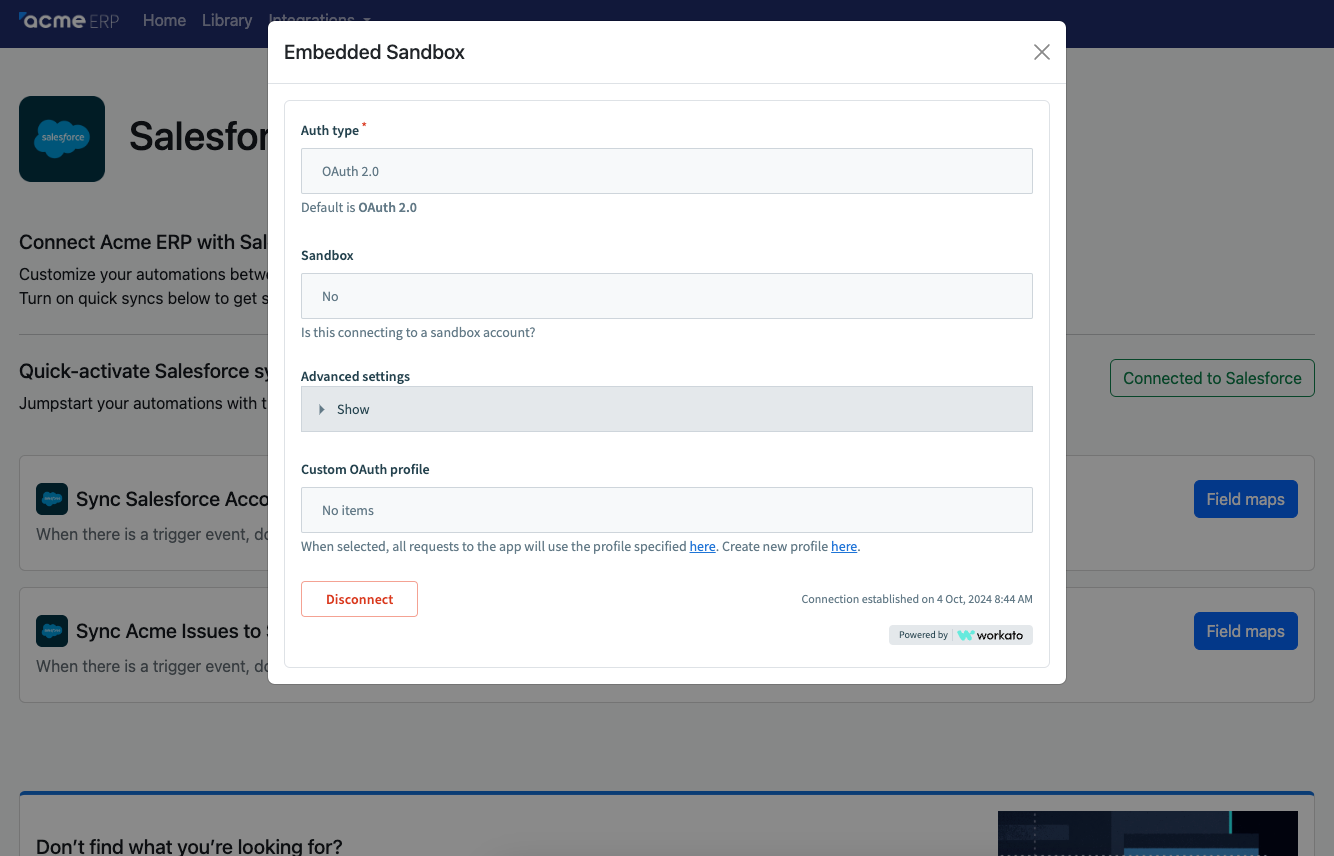 Connection widget of Salesforce connector within Acme ERP
# Error notifications in the connection widget
The connection widget displays the following notifications when specific issues occur:
Connection lost
Appears when the connection becomes invalid due to modified credentials or insufficient permissions. Ensure that you have the necessary permissions and verify your connection credentials.
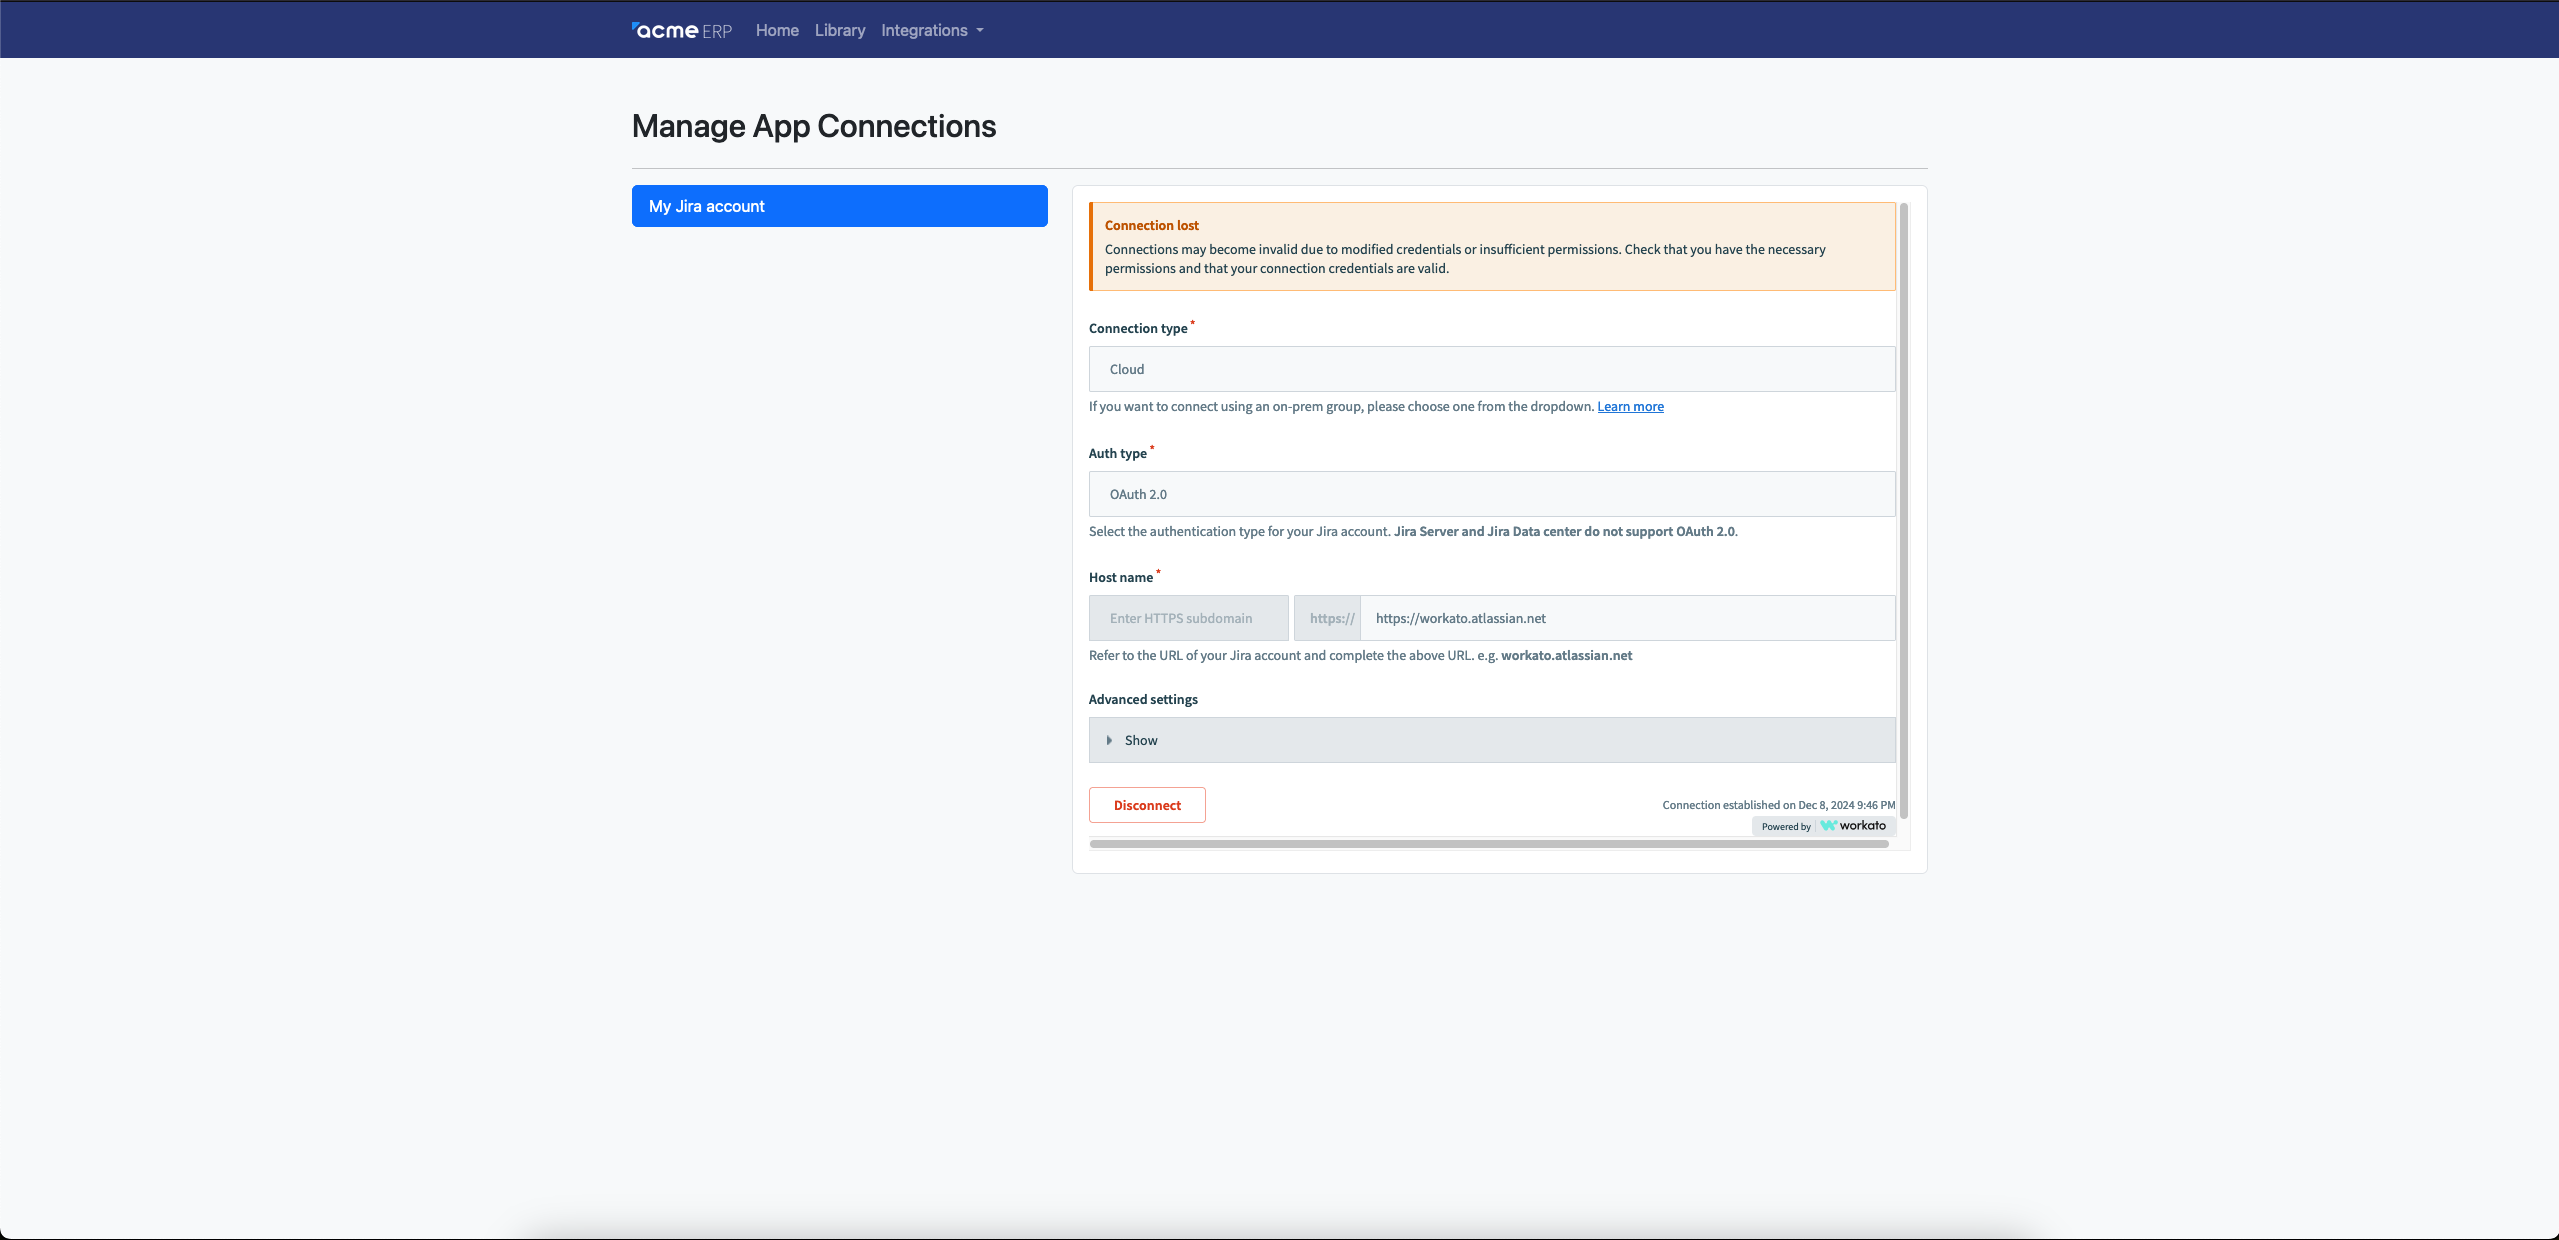 Connection lost
Audit log replication connections
Indicates that changes to the connection may affect the streaming of your audit log data.
External secrets manager
Indicates that changes to the connection may impact the use of secrets stored in your external provider.
# Customize the connection widget
You can customize the connection widget to secure sensitive information, prevent changes to pre-configured settings, and pre-fill field values.
To apply these customizations, pass the input_schema_ui_extensions object when calling the Create a connection or Update a connection API. This schema lets you lock or hide fields, including nested properties. The widget applies these settings automatically during render.
The following example request demonstrates a customized connection configuration:
curl -X POST https://www.workato.com/api/managed_users/:managed_user_id/connections \
  -H 'Authorization: Bearer <api_token>' \
  -H 'Content-Type: application/json' \
  -d '{
    "provider": "databricks",
    "name": "My databricks connection",
    "folder_id": 147,
    "input": {
      "url": "http://oem.databricks.com",
      "password": "Testpwd1234",
      "profile": "Test Profile"
    },
    "input_schema_ui_extensions": {
      "url": {
        "locked": true
      },
      "password": {
        "hidden": true
      },
      "poolingx": {
        "properties": {
          "minSize": {
            "locked": true
          }
        }
      }
    }
  }'
SCHEMA RULES
You can't lock or hide a required field if it doesn't have a value. For array fields, apply customization at the array level only. You can't apply different settings to individual array items.
After you create the connection, embed the widget using the returned connection id. The widget renders with the customized field behavior defined in the connection.
# Recipe widget
The recipe widget enables you to embed a focused, streamlined view of an individual recipe page. This widget removes non-essential elements such as top navigation and side panels while preserving the core tabs for recipes, jobs, and versions, delivering a seamless build experience within your application.
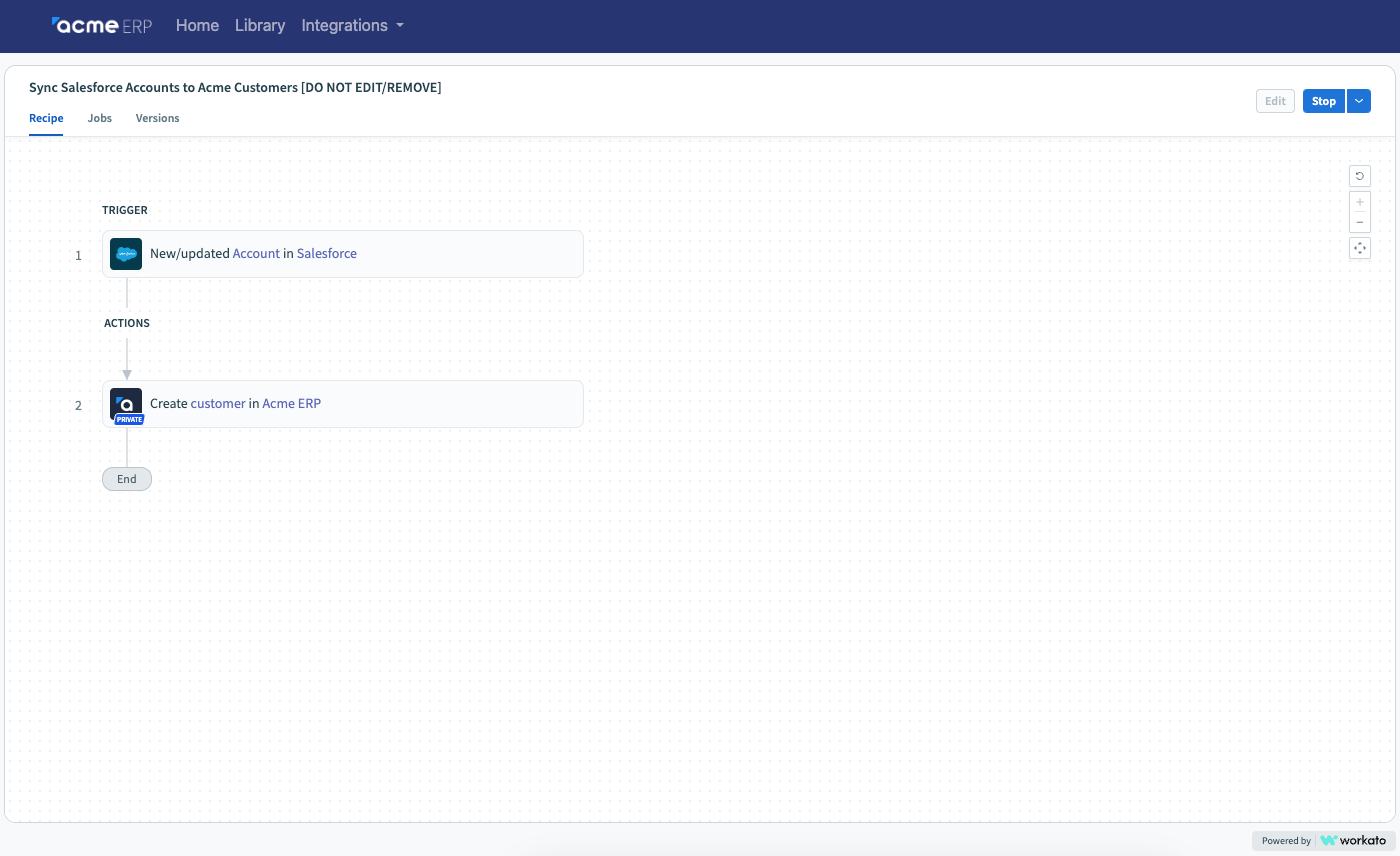 Recipe widget of individual recipe within Acme ERP
# Dynamic field mapping widget
The dynamic field mapping feature lets you map fields from source systems to a destination step in a recipe without modifications to the core recipe logic. This widget provides a structured interface to manage field relationships inside embedded integrations.
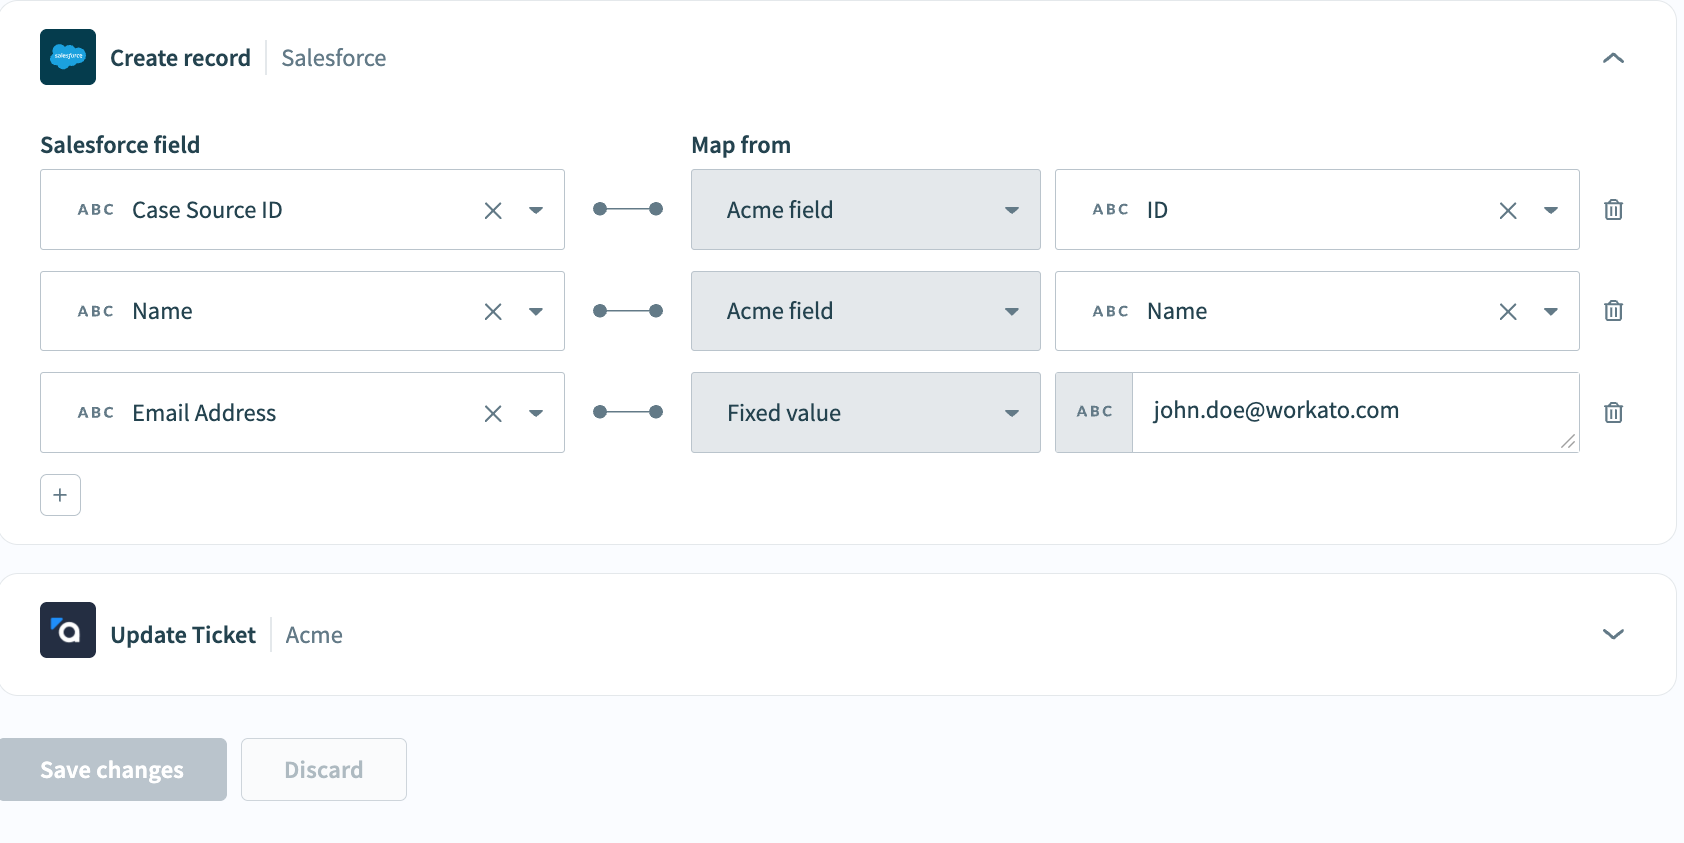 Dynamic field mapping widget in Acme ERP
# Embedding guidelines
Embedding full page and widget iframes follows the same implementation steps.
UNIQUE URL REQUIREMENTS
Each type of iframe points to a unique URL depending on the content you embed.
Workato’s iframes enable you to embed your customers’ workspaces into your product’s UI, but embedding your admin workspace is not supported.
To reflect specific user permissions in an embedded iframe, include a customer user ID with a custom role in the JWT. This ensures the iframe adheres to the roles and permissions assigned to the user. For example, you can configure a user to view a recipe without being able to edit it. This approach enables you to provide a customized, permission-sensitive experience for each user.
This implementation guide includes the following sections:
CUSTOMIZATION
Embedded supports customization, enabling you to customize Workato’s specific style properties using the theme editor yourself. Available style changes include brand color, font, and margins.
Contact your Customer Success Representative for more extensive customization requests.
# Prerequisites
Ensure you have the following prerequisites before embedding Workato:
JSON Web Token (JWT)
Required. Generate a JWT to facilitate secure access to connections in Workato. JWTs authenticate users and provide verified access to applications and resources.
Origin
Required. The origin URL (
<url_schema>://<url_host>) is the default domain where you embed the Workatoiframe. In specific cases, you must include the origin URL in the JWT payload. This enables the parent window to receive messages through PostMessages API. Provide your Workato Success Representative with the origin URL. For example:https://vendor.com.Embedding URL prefix
Required for full page iframes. Select an embedding path prefix for your URLs in the format
<embedding_url_prefix>/<workato_url>. For example, if your prefix is/integrationand the Workato URL is/foo?a=1#hash, your vendor URL is/integration/foo?a=1#hash.Workato path
Required. Define the path to the Workato resource you plan to embed in your platform.
Data center
Required. Construct your direct link URL based on the data center hosting your Workato account. Refer to the data center page for more details.
# Construct a direct link URL
To embed Workato content, start by creating a direct link URL. The URL format varies based on the Data Center where your Workato account is hosted and the type of iframe you are embedding. Ensure to use the correct base URL for your data center.
# Base URLS by data center
The following base URLs correspond to each Workato Data Center. Choose the base URL that matches your data center location:
- Workato accounts hosted in the US Data Center:
https://app.workato.com - Workato accounts hosted in the EU Data Center:
https://app.eu.workato.com - Workato accounts hosted in the JP Data Center:
https://app.jp.workato.com - Workato accounts hosted in the SG Data Center:
https://app.sg.workato.com - Workato accounts hosted in the AU Data Center:
https://app.au.workato.com - Workato accounts hosted in the IL Data Center:
https://app.il.workato.com
# Construct the URL by iframe type
After identifying the correct base URL, complete the URL structure for the specific iframe type using the following formats:
# Full page iframe
Use the following URL structure to embed a full page:
https://<base_url>/direct_link?workato_dl_path=<workato_path>&workato_dl_token=<jwt_token>
REPLACE PLACEHOLDER URL VALUES
Replace the placeholders in the URL with the following:
<base_url>: Use your specific data center URL.<workato_path>: Set this parameter to the path of the Workato page you plan to embed for that specific customer workspace. For example,/?fid=19769006#assets.<jwt_token>: Use your JWT. Refer to the Generate a JWT page for more information.
# Connection widget
Use the following URL structure to embed a connection widget:
https://<base_url>/direct_link/embedded/connections/<connection_id>?workato_dl_token=<jwt_token>
REPLACE PLACEHOLDER URL VALUES
Replace the placeholders in the URL with the following:
<base_url>: Use your specific data center URL.<connection_id>: Set this parameter to the ID of the connection you plan to render for the specific customer workspace.<jwt_token>: Use your JWT. Refer to the Generate a JWT page for more information.
# Recipe widget
Use the following URL structure to embed a recipe widget:
https://<base_url>/direct_link/embedded/recipes/<recipe_id>?workato_dl_token=<jwt_token>
REPLACE PLACEHOLDER URL VALUES
Replace the placeholders in the URL with the following:
<base_url>: Use your specific data center URL.<recipe_id>: Set this parameter to the ID of the recipe you plan to render for the specific customer workspace.<jwt_token>: Use your JWT. Refer to the Generate a JWT page for more information.
# Dynamic field mapping widget
Use the following URL structure to embed a dynamic field mapping widget:
https://<base_url>/embedded/recipes/<recipe_id>/field_maps?workato_dl_token=<jwt_token>
REPLACE PLACEHOLDER URL VALUES
Replace the placeholders in the URL with the following:
<base_url>: Use your specific data center URL.<recipe_id>: Set this parameter to the ID of the recipe you plan to render for the specific customer workspace.<jwt_token>: Use your JWT. Refer to the Generate a JWT page for more information.
# Embed the URL in an iframe
After you generate the correct direct link URL, embed the URL in an iframe in your application using the following format:
<iframe src="https://<base_url>/direct_link?workato_dl_path=<workato_path>&workato_dl_token=<jwt_token>"></iframe>
# Communication between apps
The iframe and your partner application need to communicate securely to ensure smooth interactions. Workato uses the PostMessage API (opens new window) to facilitate cross-origin communication between your app and the embedded iframe.
Refer to the following message lists to implement or troubleshoot communication between your application and the iframe:
View EmbeddingWorkatoMessage (opens new window) for the complete list of messages that Workato sends to your web app.
View EmbeddingVendorMessage (opens new window) for the list of messages that your web app can send to Workato.
Use the Workato Embedding Client to streamline communication between your app and the embedded iframe. This client provides helper methods to send and receive messages efficiently.
EMBEDDING CLIENT LIMITATION
The Workato Embedding Client currently only supports communication with Workato’s full page iframes, not widgets.
# Supported PostMessages for connection widget
Workato supports the following two PostMessages for the connection widget only, enabling you to make dynamic adjustments and facilitate communication.
# heightChange
The heightChange event adjusts the height of the content, allowing the iframe to resize to fit your UI.
LIMITATION
We do not recommend using the heightChange event handler with full page iframes, as they are typically designed to span the full height of the browser window or iframe.
Payload:
{
   "height": number
}
Sample PostMessage:
{
    "wk": true,
    "type": "heightChange",
    "payload": {
        "height": 467
    }
}
# connectionStatusChange
The connectionStatusChange event reports any changes in the connection status. You can use this event to trigger workflows, such as starting a recipe or calling external APIs, when the connection status updates.
Payload:
{
  "id": number,
  "provider": string,
  "connected": boolean,
  "error": string
}
Sample PostMessage:
{
    "wk": true,
    "type": "connectionStatusChange",
    "payload": {
        "id": 453799,
        "provider": "google_drive",
        "connected": false
    }
}
# error
The error event reports an error message from the iframe.
Payload:
{
  "message": string
}
Sample PostMessage:
{
  "wk": true,
  "type": "error",
  "payload": {
    "type": "FatalEmbeddingError",
    "message": "Fatal embedding error: sub_missing",
    "details": {
      "reason": "sub_missing"
    }
  }
}
# Example of supported PostMessages
The following example demonstrates how to handle and process supported PostMessages:
<!DOCTYPE html>
<html>
  <head>
    <meta charset="UTF-8" />
    <script>
      window.addEventListener('message', receiveMessage);
      function receiveMessage(event) {
        var data = JSON.parse(event.data);

        switch (data.type) {
          case 'heightChange':
            document.getElementById('workatoId').style.height = data.payload.height + 'px';
            break;
          case 'connectionStatusChange':
            var message = data.error || (data.payload.connected ? 'Connected' : 'Disconnected');
            document.getElementById('statusId').innerText = message;
            break;
          case 'error':
            console.log(data.payload.message);
        }
      }
    </script>
  </head>
  <body>
    <h4>Status: <span id="statusId"></span></h4>
    <iframe id="workatoId" src="https://www.workato.com/direct_link/embedded/connections/<connection_id>?workato_dl_token=<token>" style="width: 500px; height: 150px; border: 0"></iframe>
  </body>
</html>
# Workato Embedding Client
The Workato Embedding Client script enables streamlined communication between your web app and the embedded Workato platform. It provides helper methods to synchronize the embedded iframe and URLs seamlessly.
WORKATO EMBEDDING CLIENT SCRIPT REQUIRED BEFORE IFRAME
Inject the Workato Embedding Client script before embedding any Workato full page iframe. Ensure the script loads synchronously so that a global Workato object is created, which you can then configure and use for helper methods.
Complete the following steps to insert the Workato Embedding Client into your web app:
Inject the following script on every page where you embed a full page Workato iframe:
<script src="https://embedding.workato.com/r/embedding-client.js">
DATA CENTER
Select the appropriate URL based on your Workato account’s data center. The data center identifier appears at the end of the URL before .js:
- Workato accounts hosted in the US Data Center:
https://embedding.workato.com/r/embedding-client.js - Workato accounts hosted in the EU Data Center:
https://embedding.workato.com/r/embedding-client-eu.js - Workato accounts hosted in the SG Data Center:
https://embedding.workato.com/r/embedding-client-sg.js - Workato accounts hosted in the JP Data Center:
https://embedding.workato.com/r/embedding-client-jp.js - Workato accounts hosted in the AU Data Center:
https://embedding.workato.com/r/embedding-client-au.js - Workato accounts hosted in the IL Data Center:
https://embedding.workato.com/r/embedding-client-il.js
This script creates a global Workato object that is an instance of the [[EmbeddingClient]] class.
Insert the following configuration script after the Embedding Client script to set up your Workato integration:
<script>
  Workato.configure({
    // Value of `Embedding URL prefix` parameter
    embeddingUrlPrefix: '/integration'
  });
</script>
BEST PRACTICE
- Insert this script before embedding any Workato
iframe. - Do not use
asyncordeferattributes as the script loads synchronously.
# Available methods
The Workato Embedding Client script enables you to use all properties and methods of the EmbeddingClient class, including the following key methods:
handleNavigation
Use the handleNavigation (opens new window) method to synchronize the Workato URL in the embedded
iframewith the partner web app's current URL.generateIframeURL
Use the generateIframeURL (opens new window) method to generate a value for the
iframe's src attribute.
Refer to the EmbeddingClient (opens new window) documentation for additional helper methods.
Last updated: 9/30/2025, 8:42:03 PM