Use IAM role-based authentication for AWS Services
AWS IAM role authentication allows you to provide a dedicated role in your AWS instance for Workato to use. By provisioning a dedicated IAM profile, the owner of the AWS instance can grant Workato access to AWS resources without sharing AWS security credentials. This also helps to maintain permission boundaries, including controlled access to specific AWS services and actions that are permitted by the third-party application (for example, Workato). When configuring connections using IAM role-based authentication, the external ID's used can be scoped to either the workspace or project level.
Configuring the IAM role using external ID's scoped at the project level allows you to give individual projects more granular access to your AWS resources. For example, only allowing Amazon SQS access to your "DevOps" project instead of being accessible to all projects in your workspace.
Supported connectors
We support IAM role-based authentication for the following AWS Services and universal connectors:
- Amazon Lex
- Amazon S3
- Amazon SES
- AWS Lambda
- AWS SQS
- AWS SNS
- Cloud Watch
- HTTP Universal Connector
Prerequisites
You must have the following:
- In Amazon Web Services (AWS):
- Permissions that allow you to create and modify IAM permissions policies
- Permissions that allow you to create and modify IAM roles
Select the scope of IAM External ID
Sign in to Workato.
Go to Workspace admin > Settings > Amazon Web Services IAM.
Use the External ID scope drop-down menu to select either Single external ID for the workspace or Separate external ID for each project.
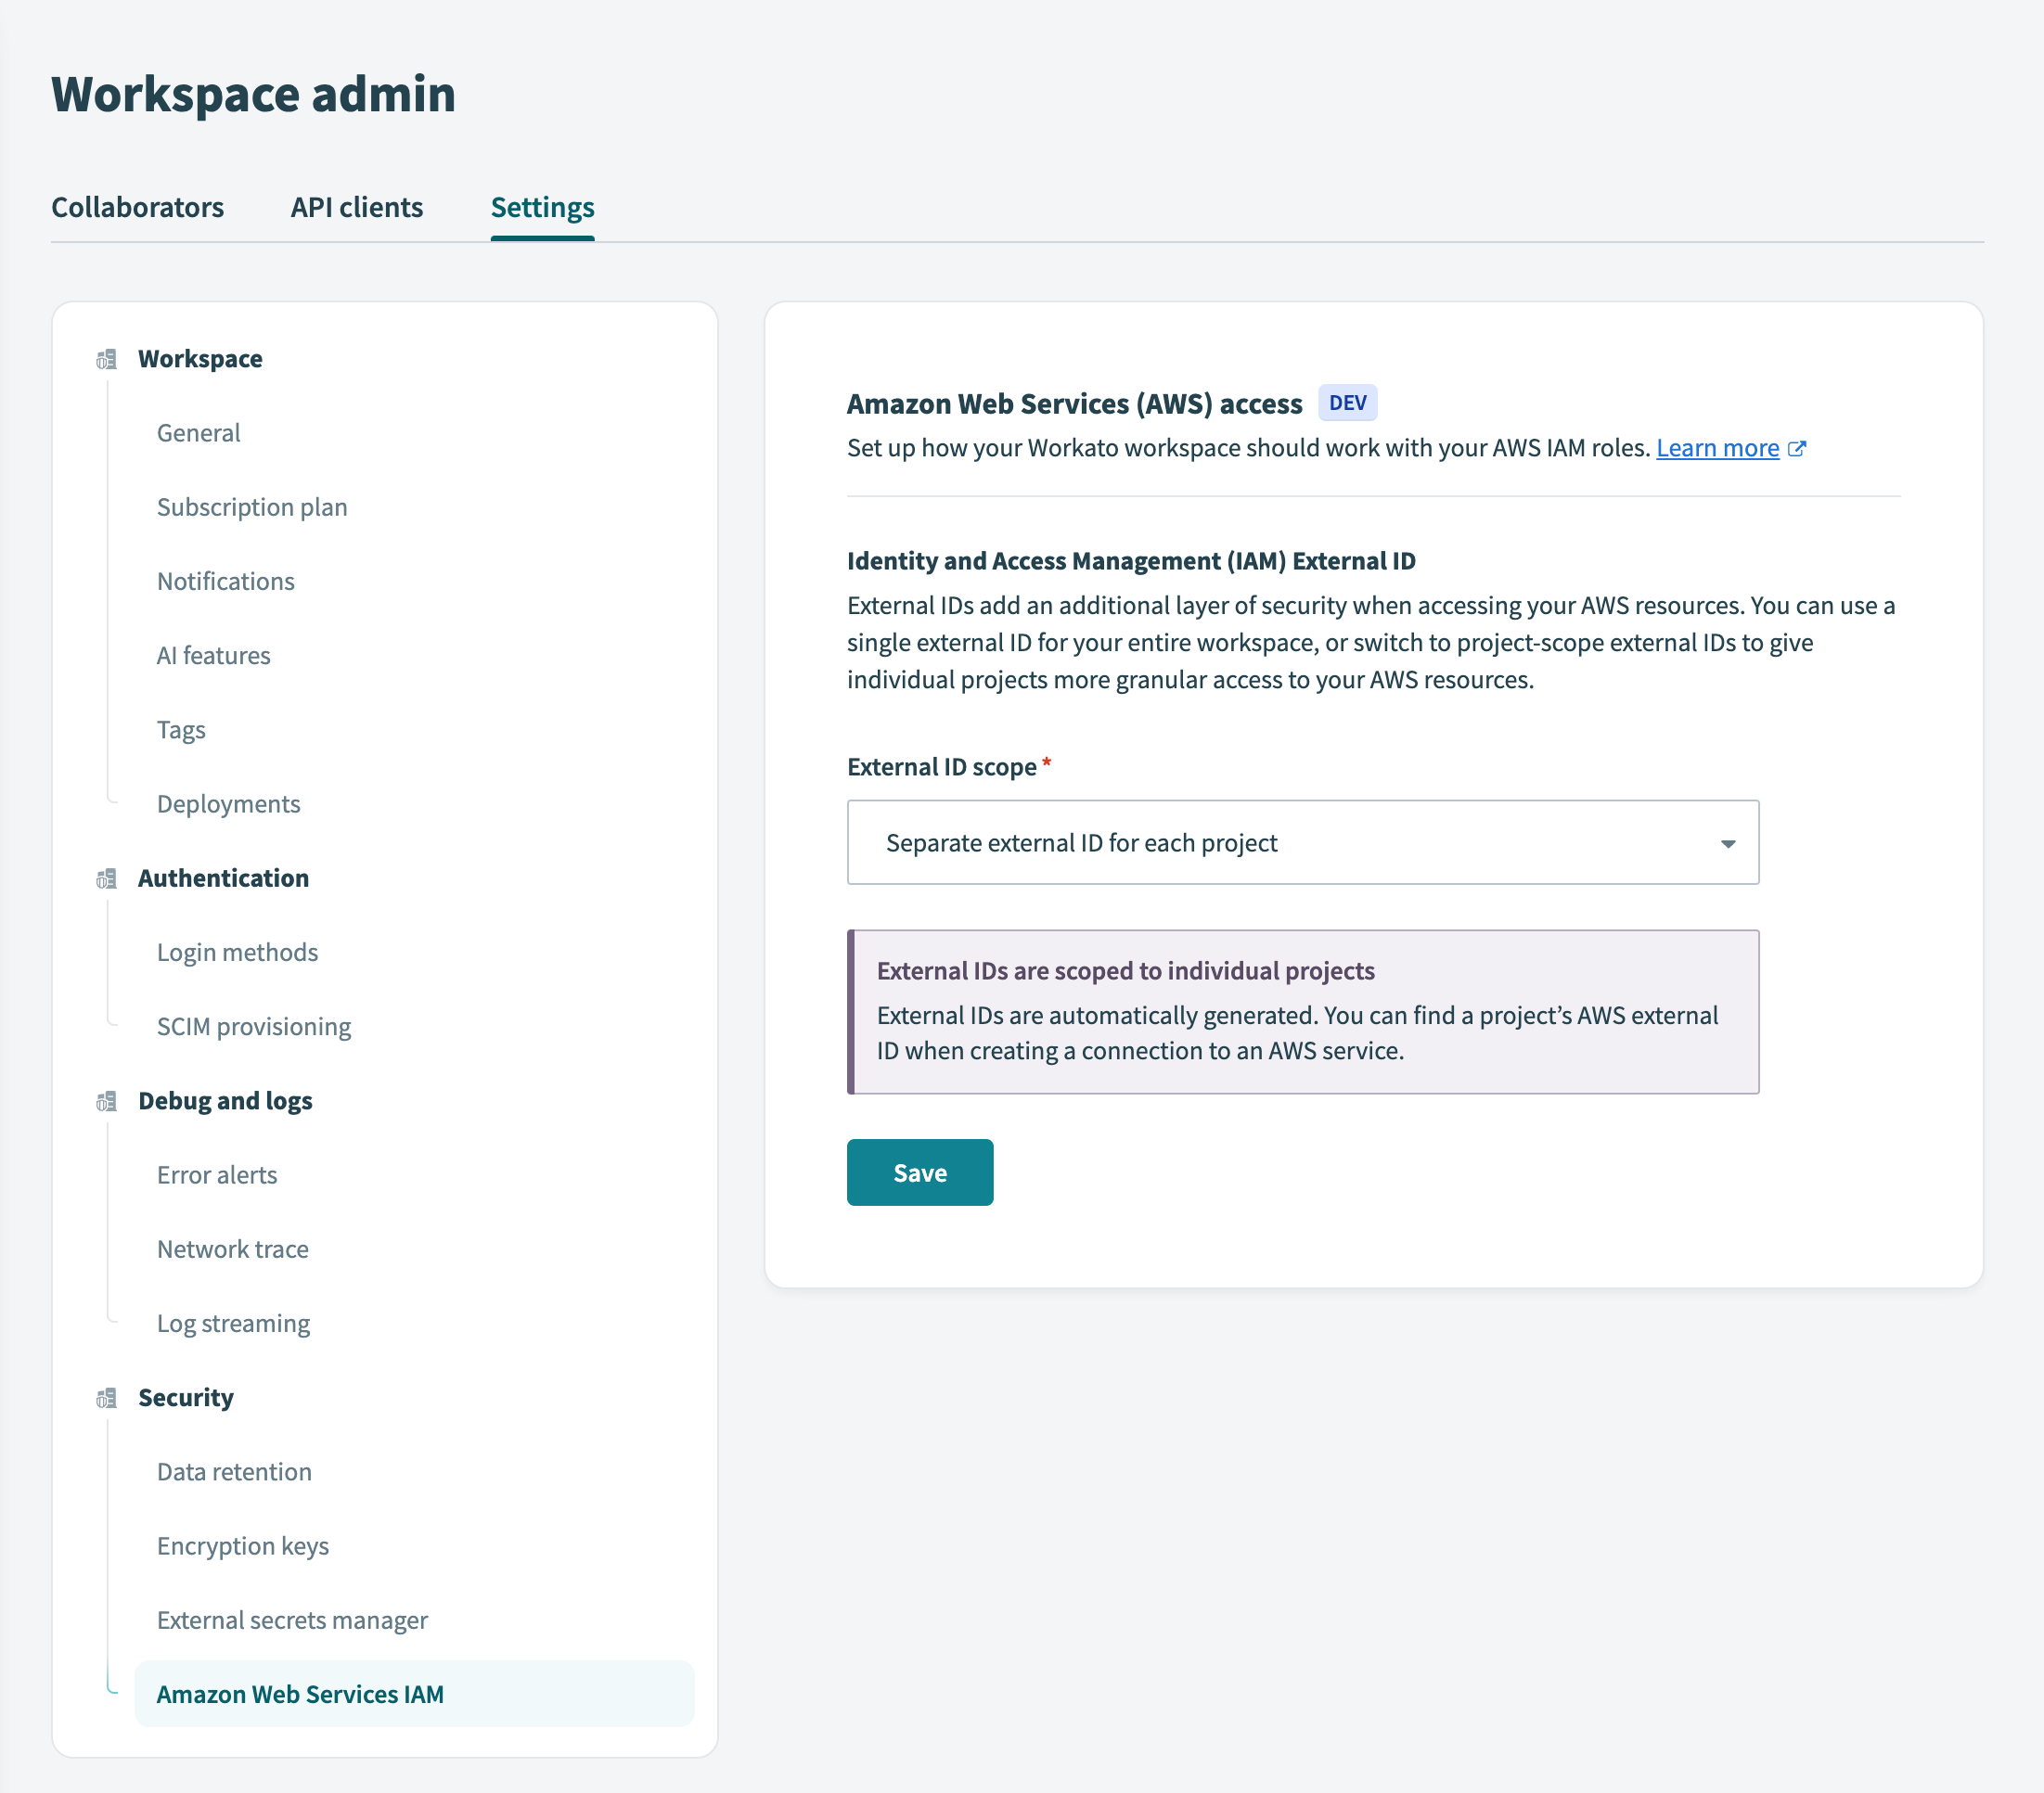 External scope
If you have existing connection credentials that use the workspace’s external ID, Workato prompts you to confirm your selection by displaying a list of active connections for which you must update the IAM roles. The reverse is true if you are switching from multiple project-level external ID's to a single external ID for the workspace.
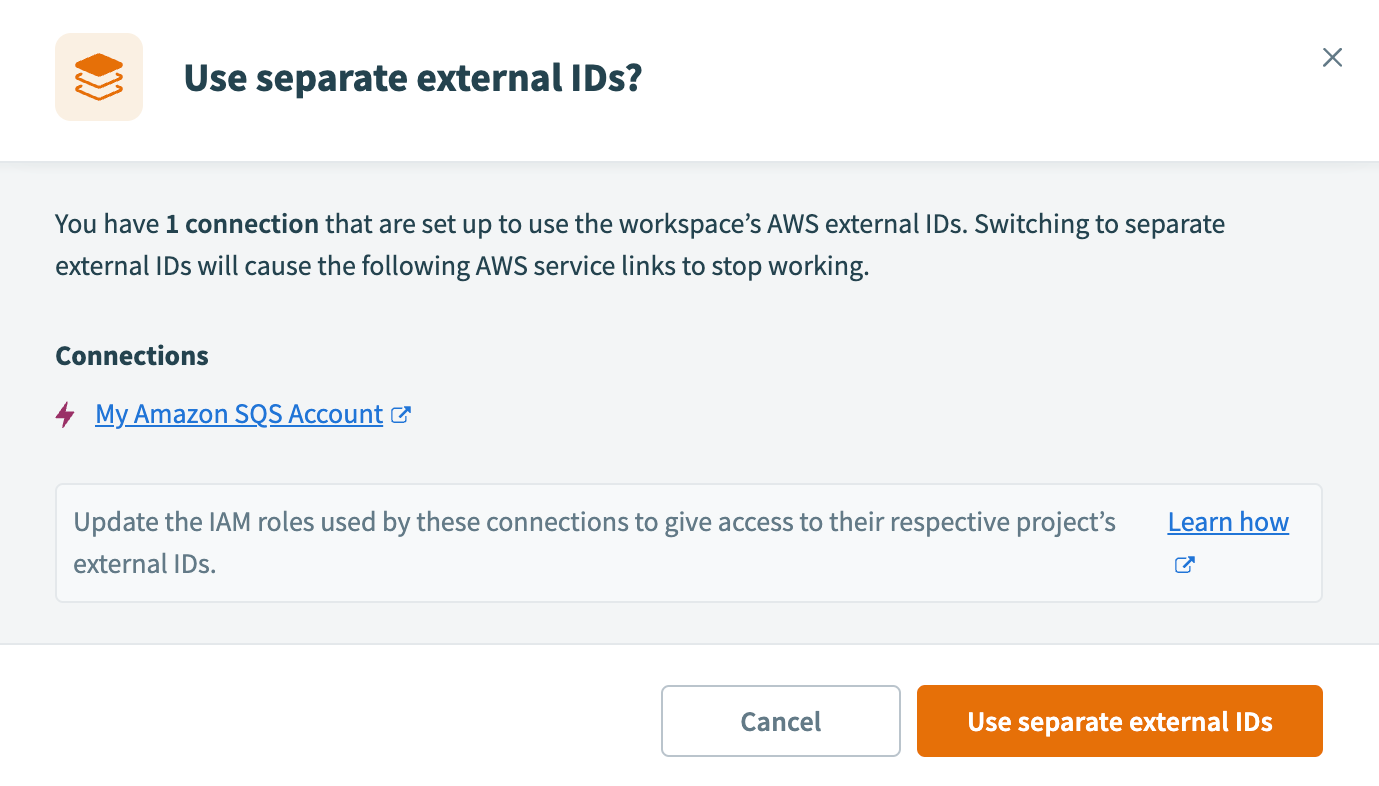 Confirm external ID selection
Click Use separate external IDs or Use single external ID to confirm your selection.
Create an IAM role
To create an IAM role:
Navigate to the AWS Console and select Security Credentials.
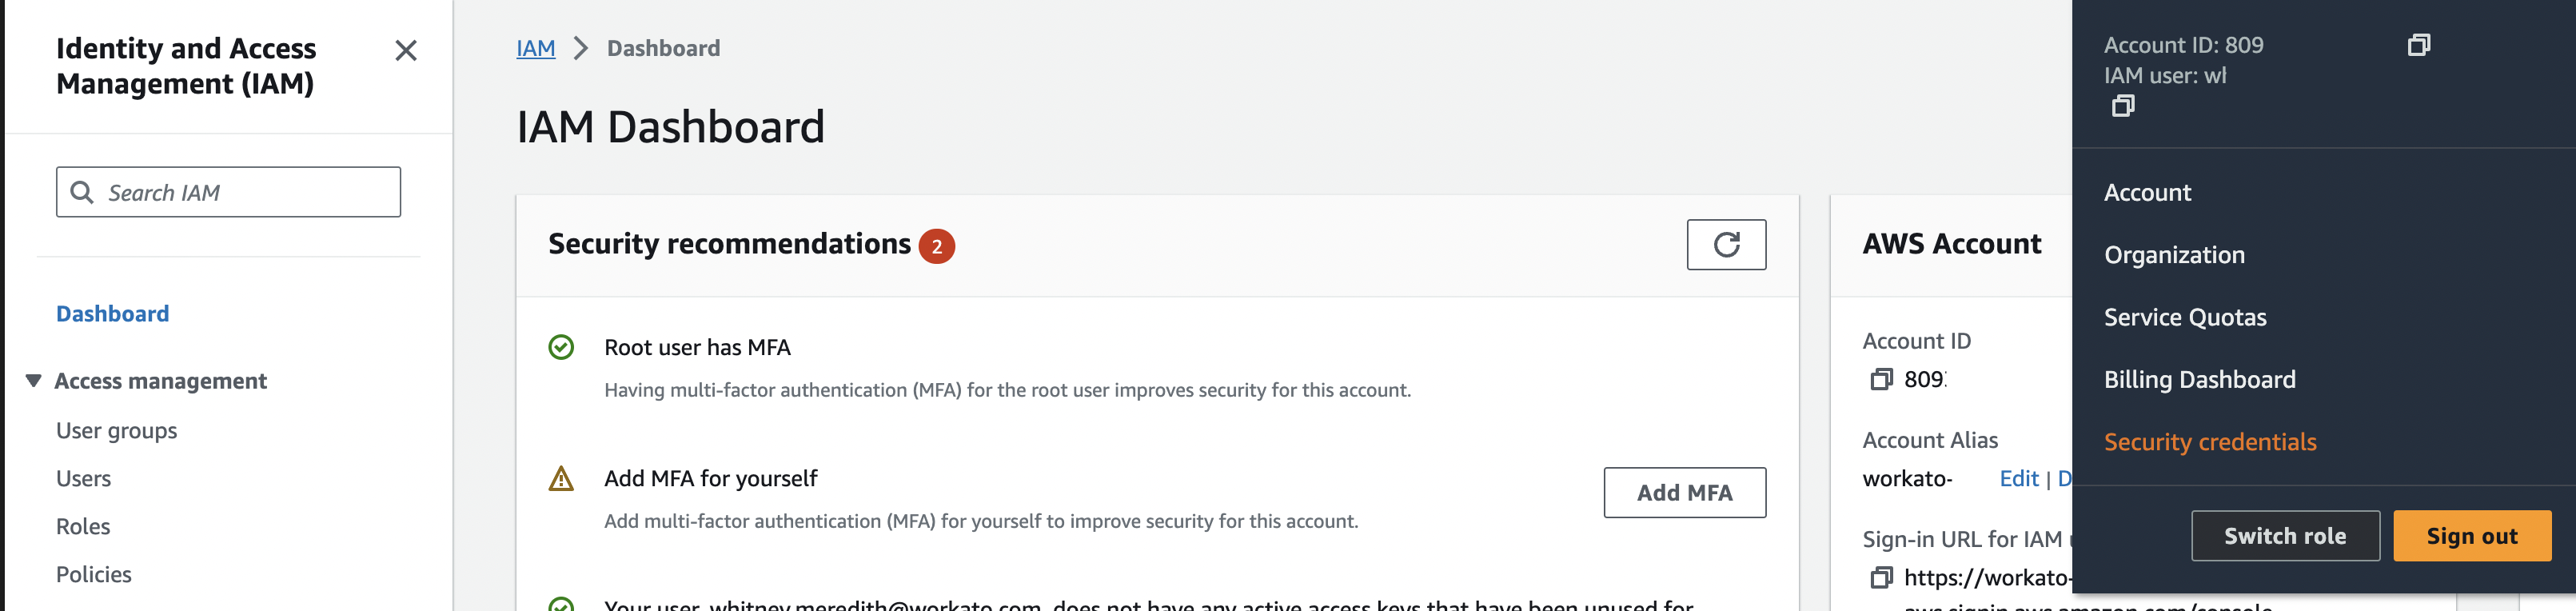 Security credentials
Select Roles > Create role.
 Create role
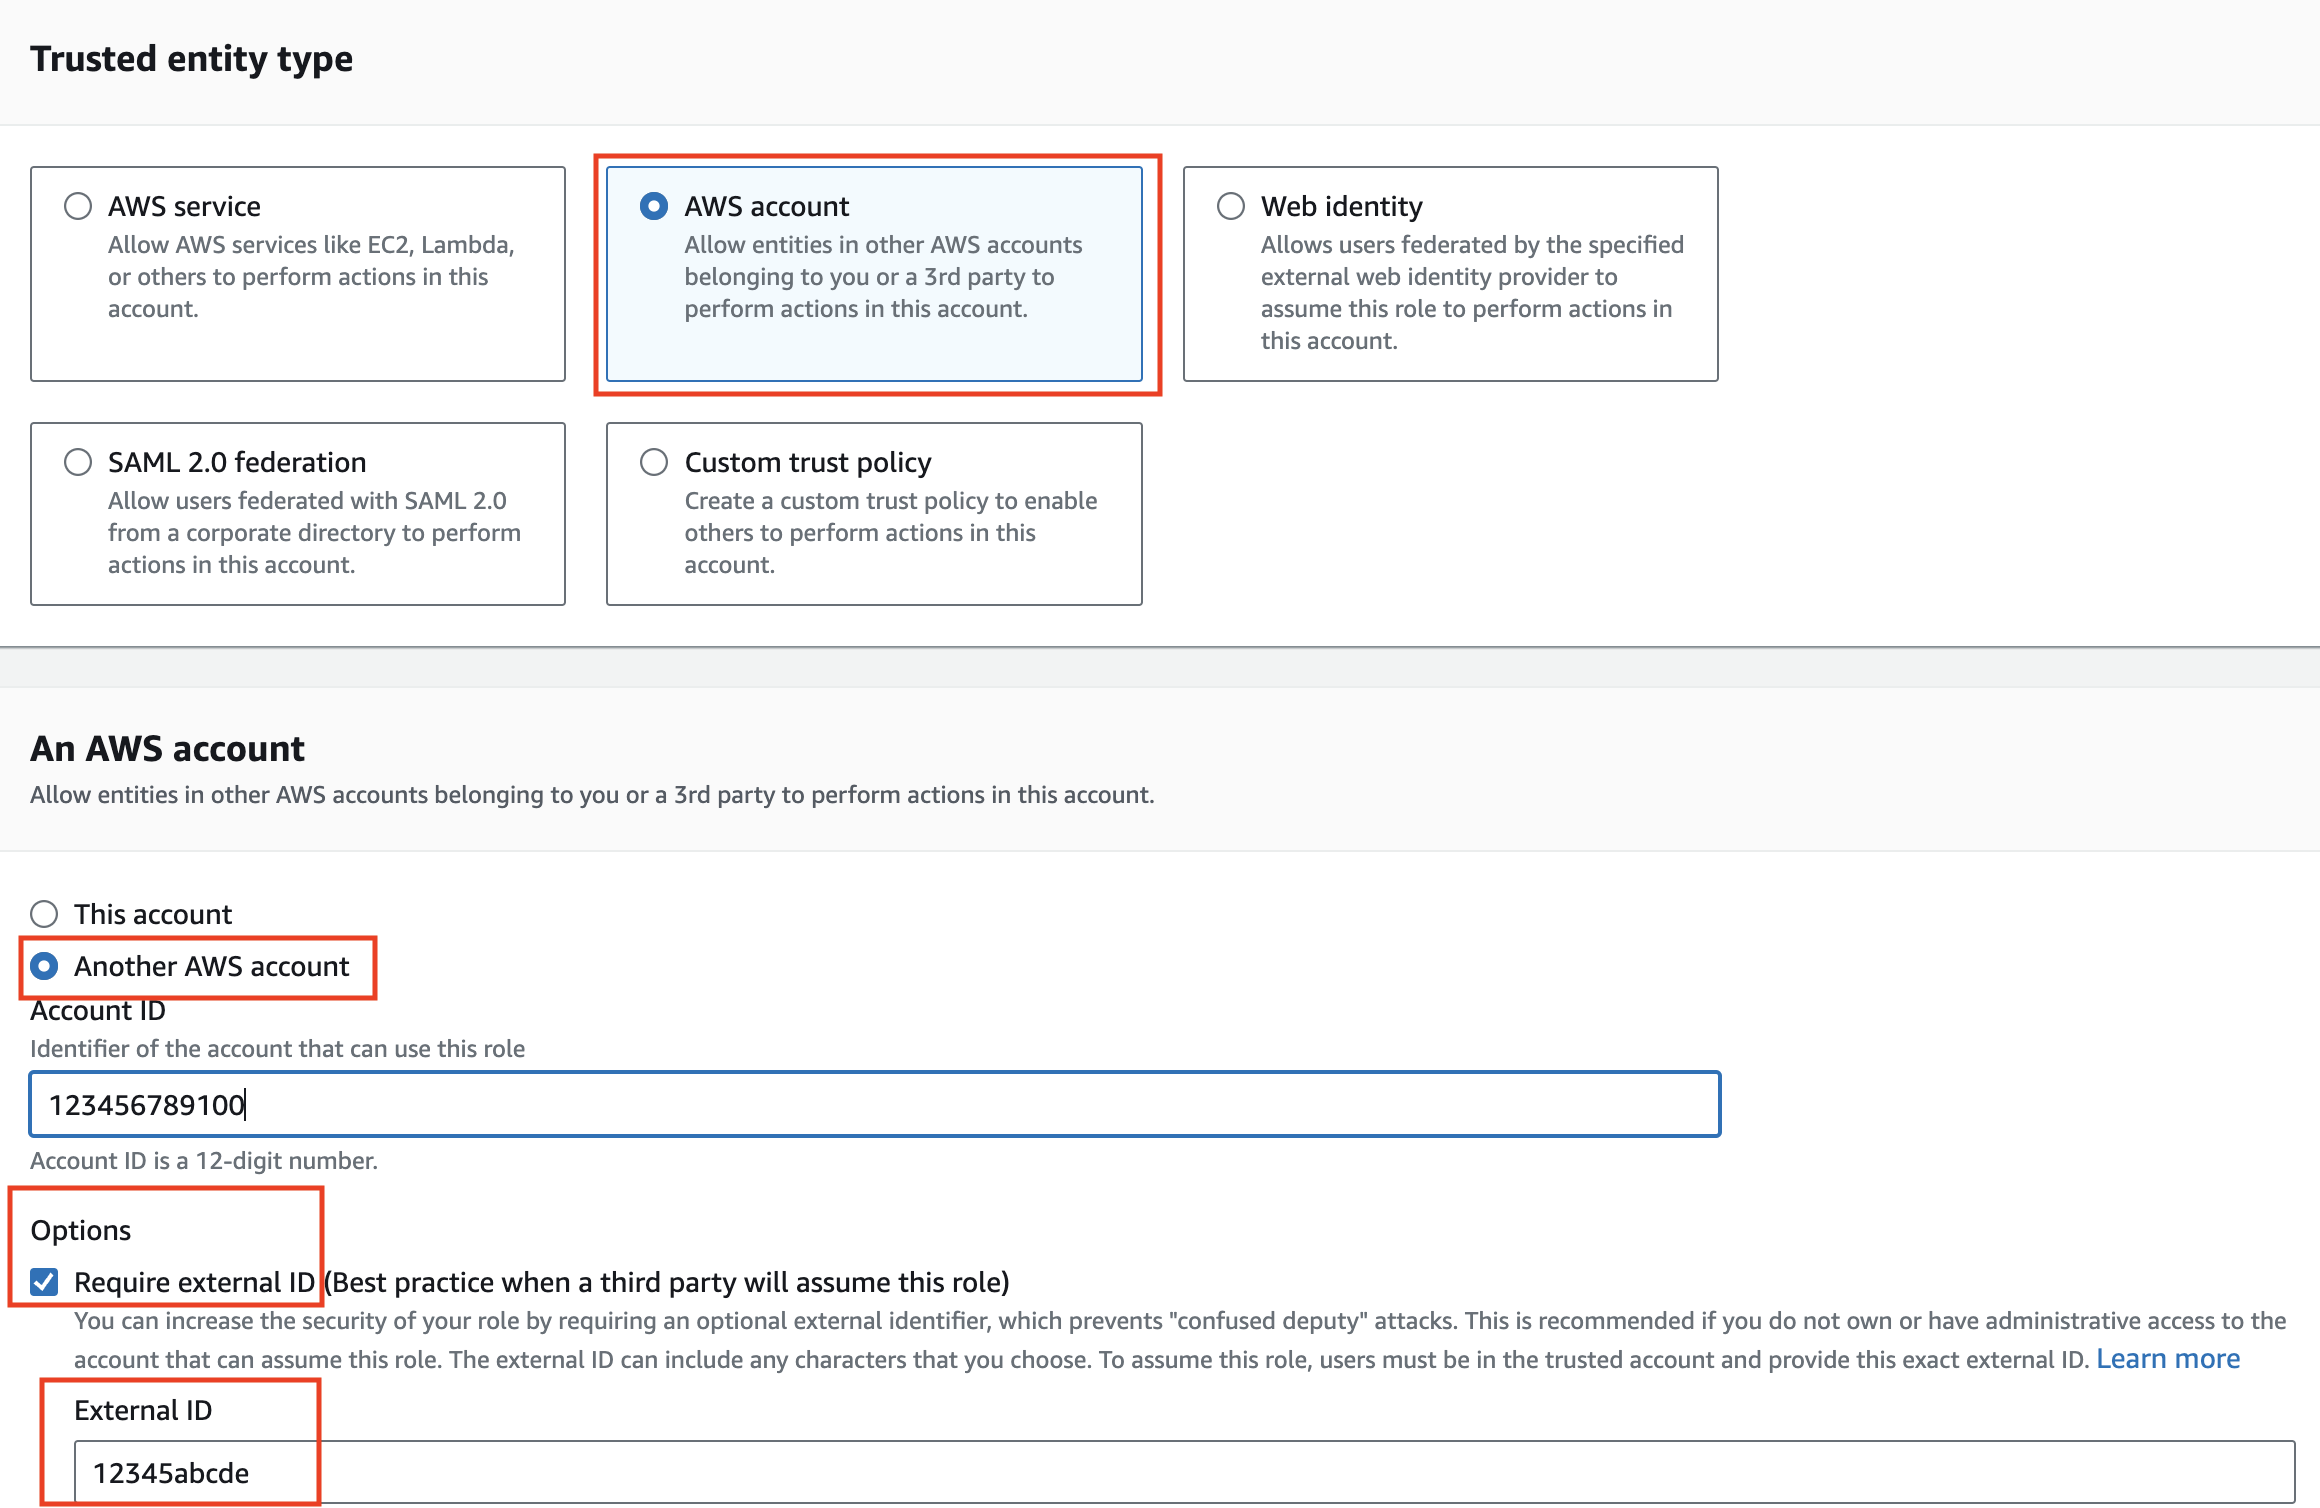
Select AWS account under Trusted entity type.
Select Another AWS account and enter the Workato AWS account ID: 353360065216.
Select the Require external ID check box and provide the Workato-generated External ID.
- Every Workato user will have a unique External ID (for example,
workato-user-84762). If you would like more granular control of how AWS is used in Workato, you may choose to configure the connection at the project level by changing the scope of the external ID. Refer to secrets management for more information.
 Amazon account ID
FIND YOUR WORKATO EXTERNAL ID
To find the external ID in Workato:
Sign in to Workato.
Go to Workspace admin > Settings > Amazon Web Services IAM.
If you have switched the scope of external IDs from workspace level to project level or vice versa, you are required to update the external IDs for the role in order for your AWS connection in Workato to be valid. You may do so by selecting "Trust relationships" and changing the value of the accepted external ID. For example, replacing the external ID value from workato_iam_external_id_12345 to a project level scoped external ID like workato_iam_external_id_12345_6789.
Select appropriate permissions for Workato to run automated workflows in your account.
Provide a Role name and Description for the IAM role.
- Workato recommends that role name avoids using a non-guessable
resource-idin the ARN and does not include the external ID.
Optional. At the Select trusted entities step, click Edit to add or edit policies for trusted entities.
Optional. At the Add permissions step, click Edit to add or edit permissions.
Optional. If you are using object tags, select an appropriate tag for this IAM role.
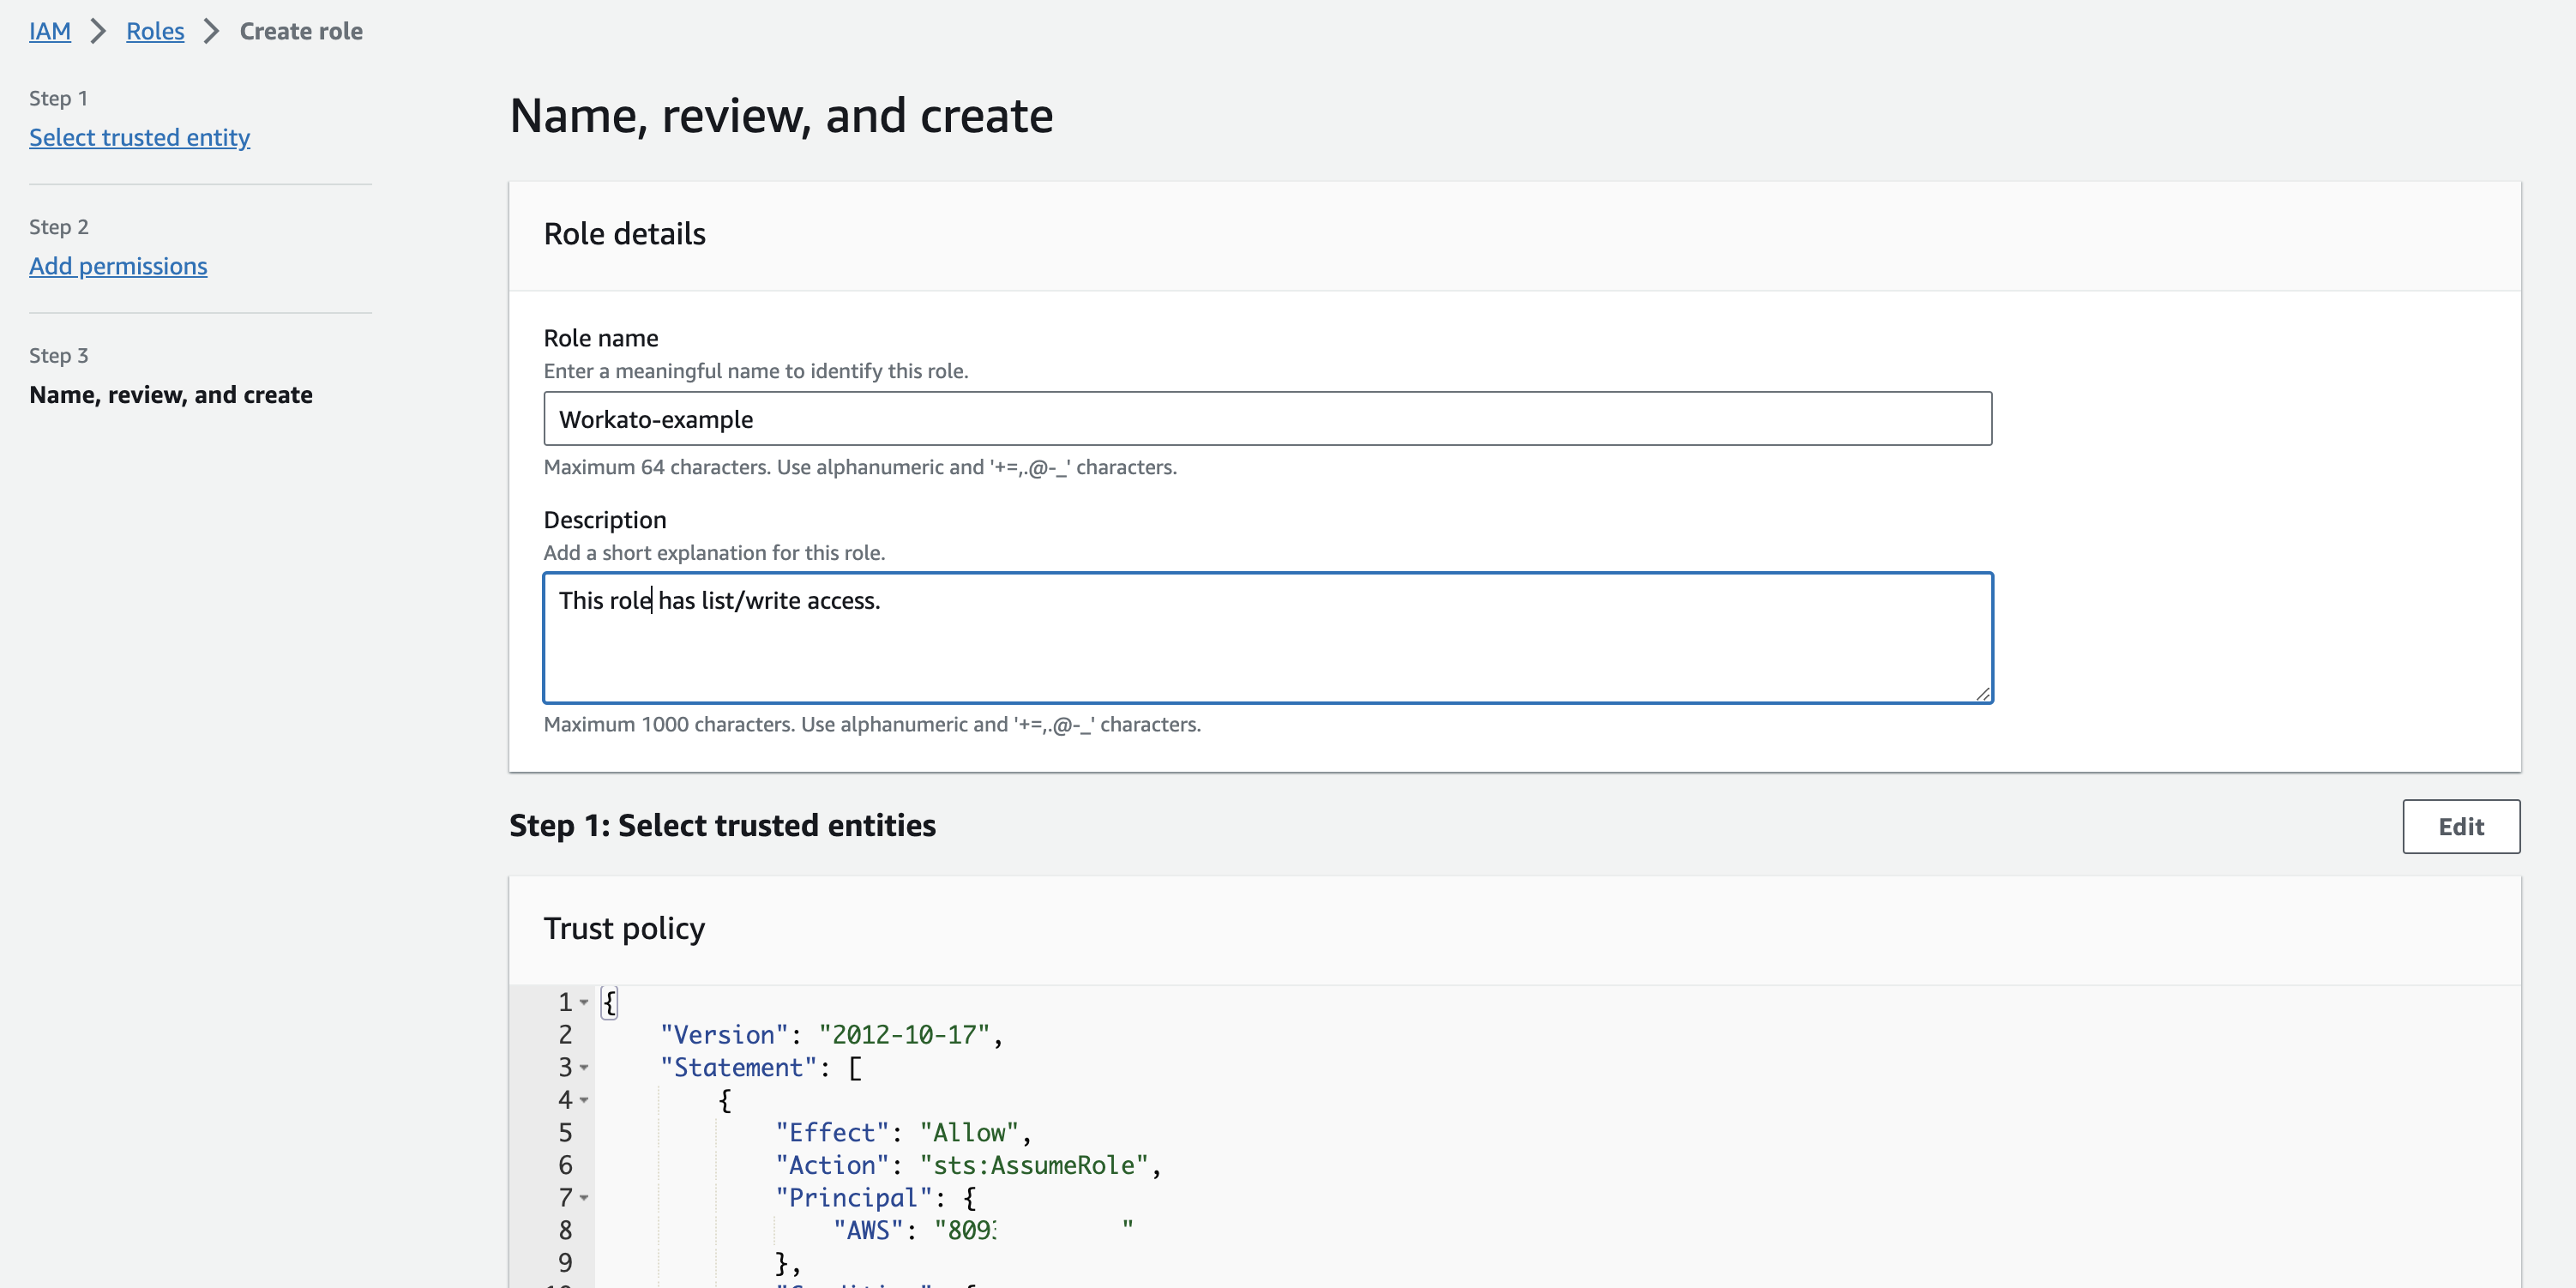 Review and create role
Click Create role.
Create an IAM permissions policy
Navigate to the AWS Console and open the IAM console.
Select Access management > Policies.
Click Create Policy.
Find and select the AWS service that you plan to allow Workato to access.
Select the necessary permissions in the Actions field.
Specify the resources to which you plan to allow the role access to.
BEST PRACTICE
Workato recommends that you grant access to specific resources. Refer to Amazon's documentation for more info about using condition keys to accomplish granting minimal permissions.
The page should look similar to the following:
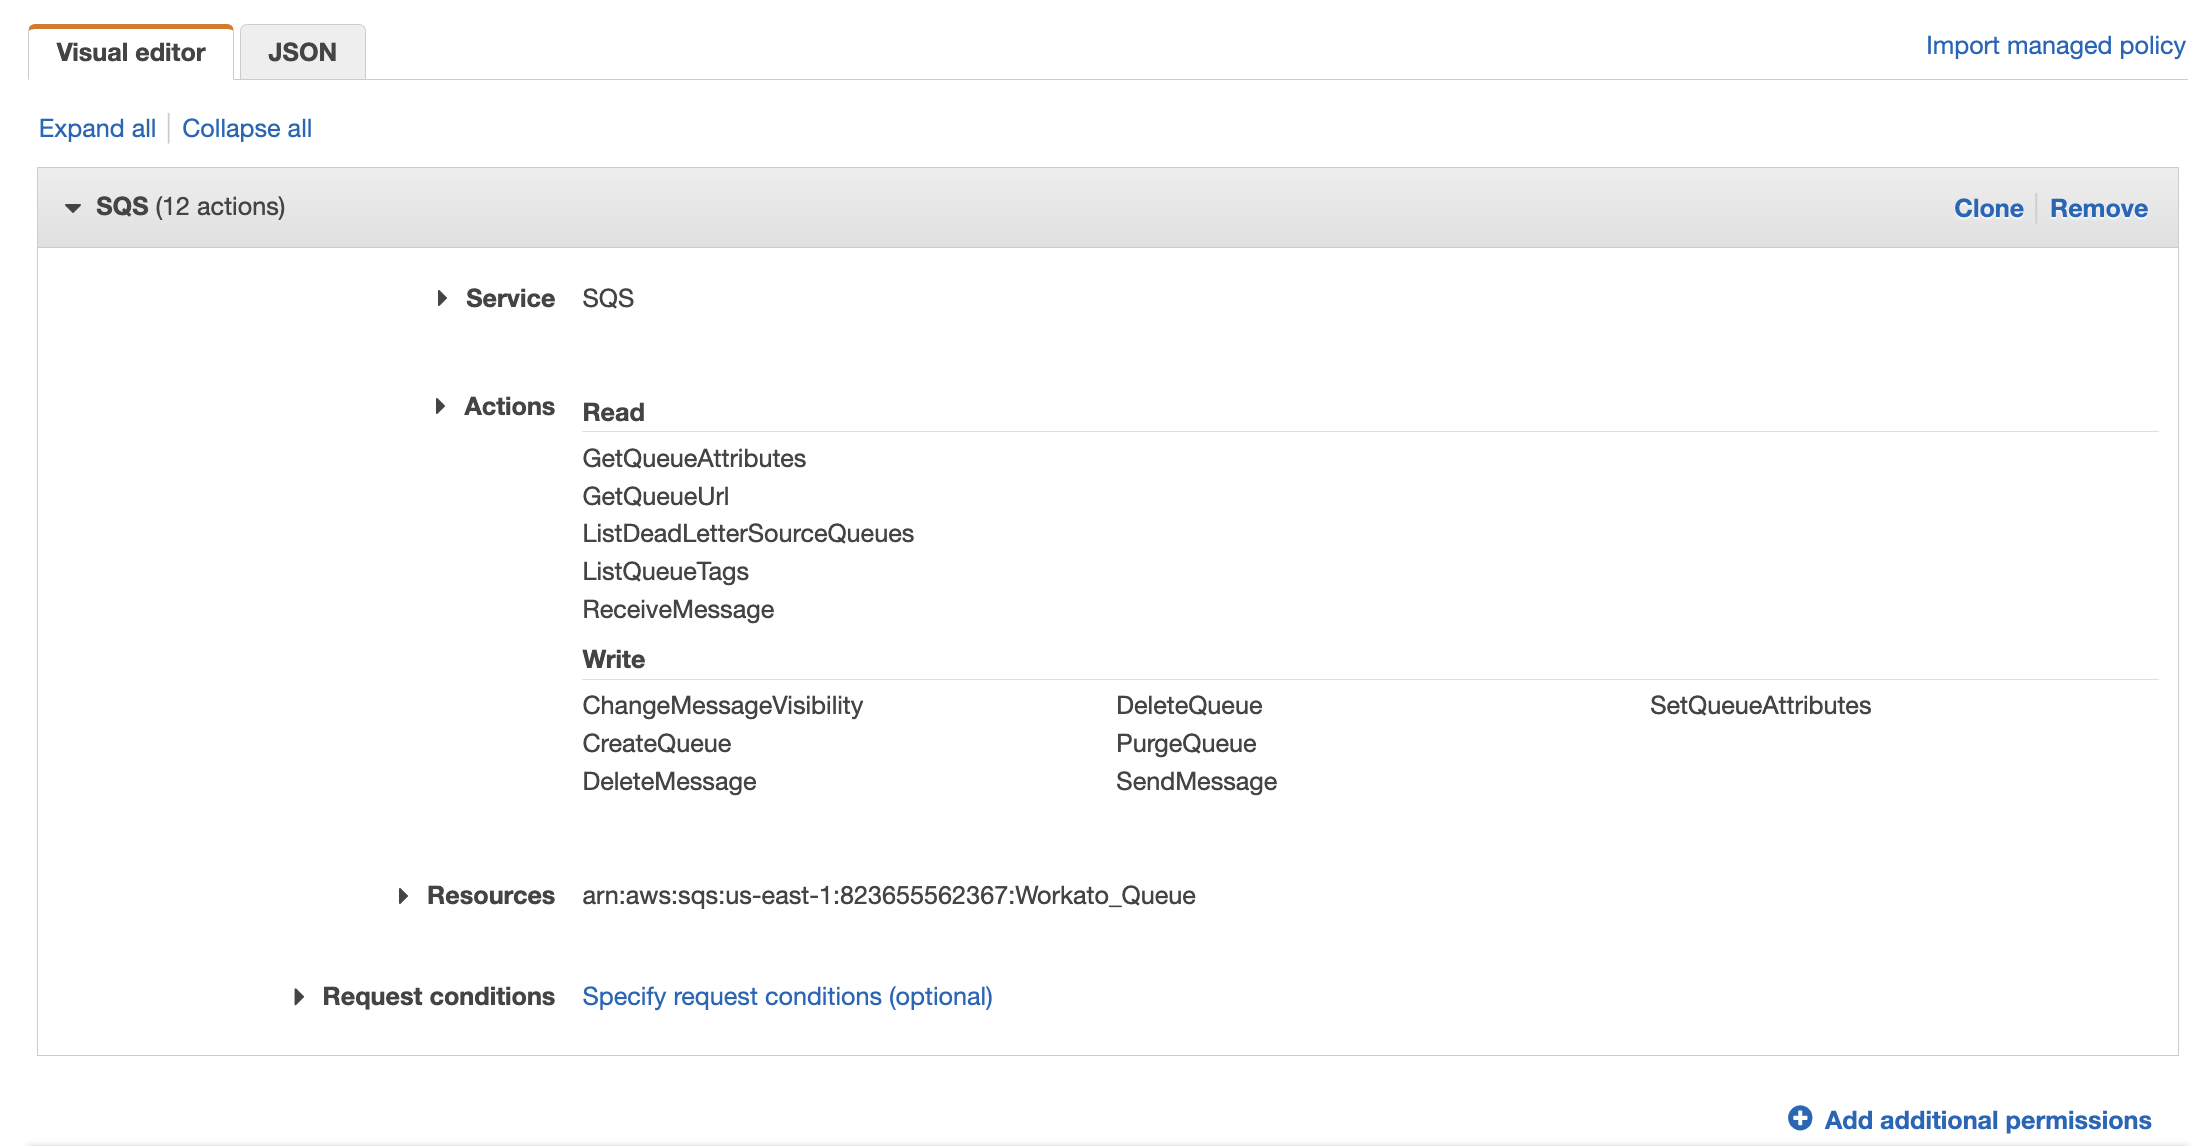
Click Next until you reach the Review policy page.
Enter the Name for the policy.
Click Create policy when finished.
Retrieve IAM role ARN
To retrieve the Role ARN required for the connection setup:
Navigate to the AWS Console > My Security Credentials > Roles.
Security credentials
Use the search box to locate the IAM role with ARN you plan to use for the connection and then select the role to view the summary.
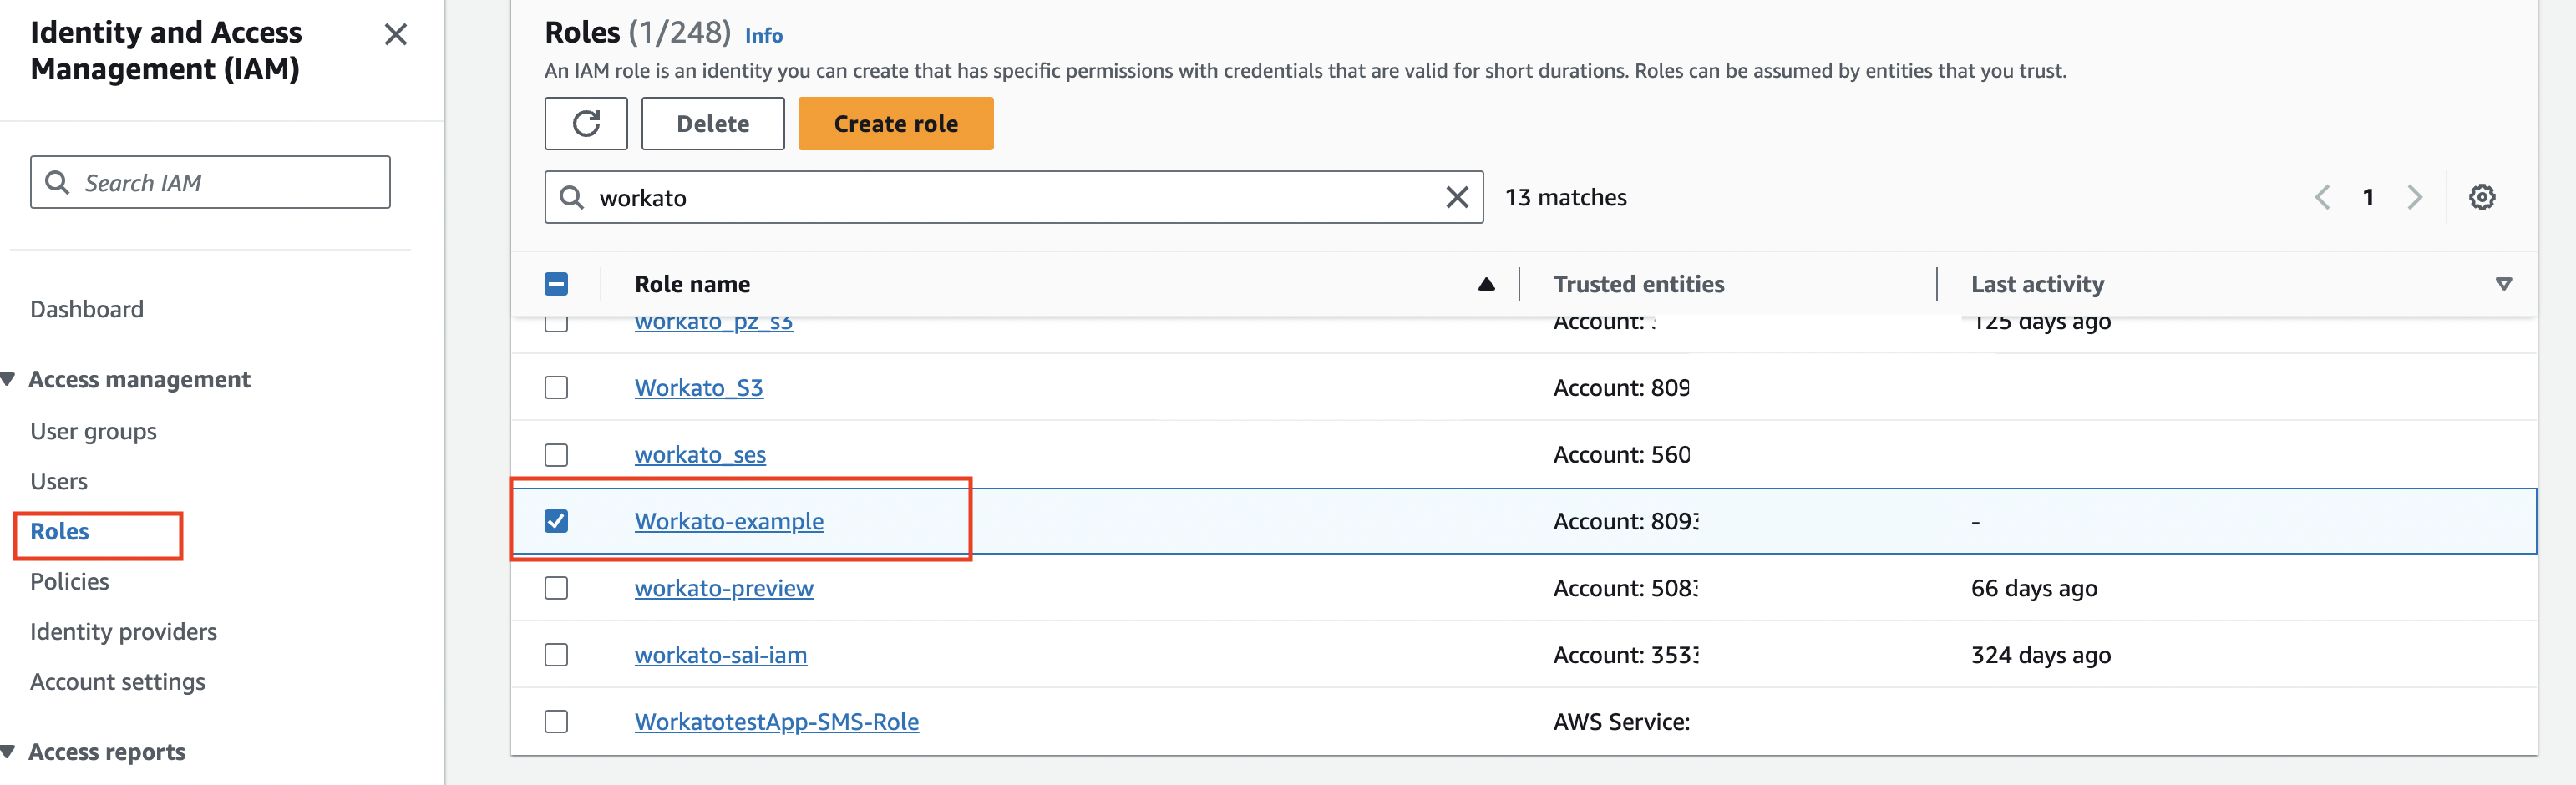 Select IAM role
Copy the Role ARN. You must use this in the connection setup when creating an Amazon connection in Workato.
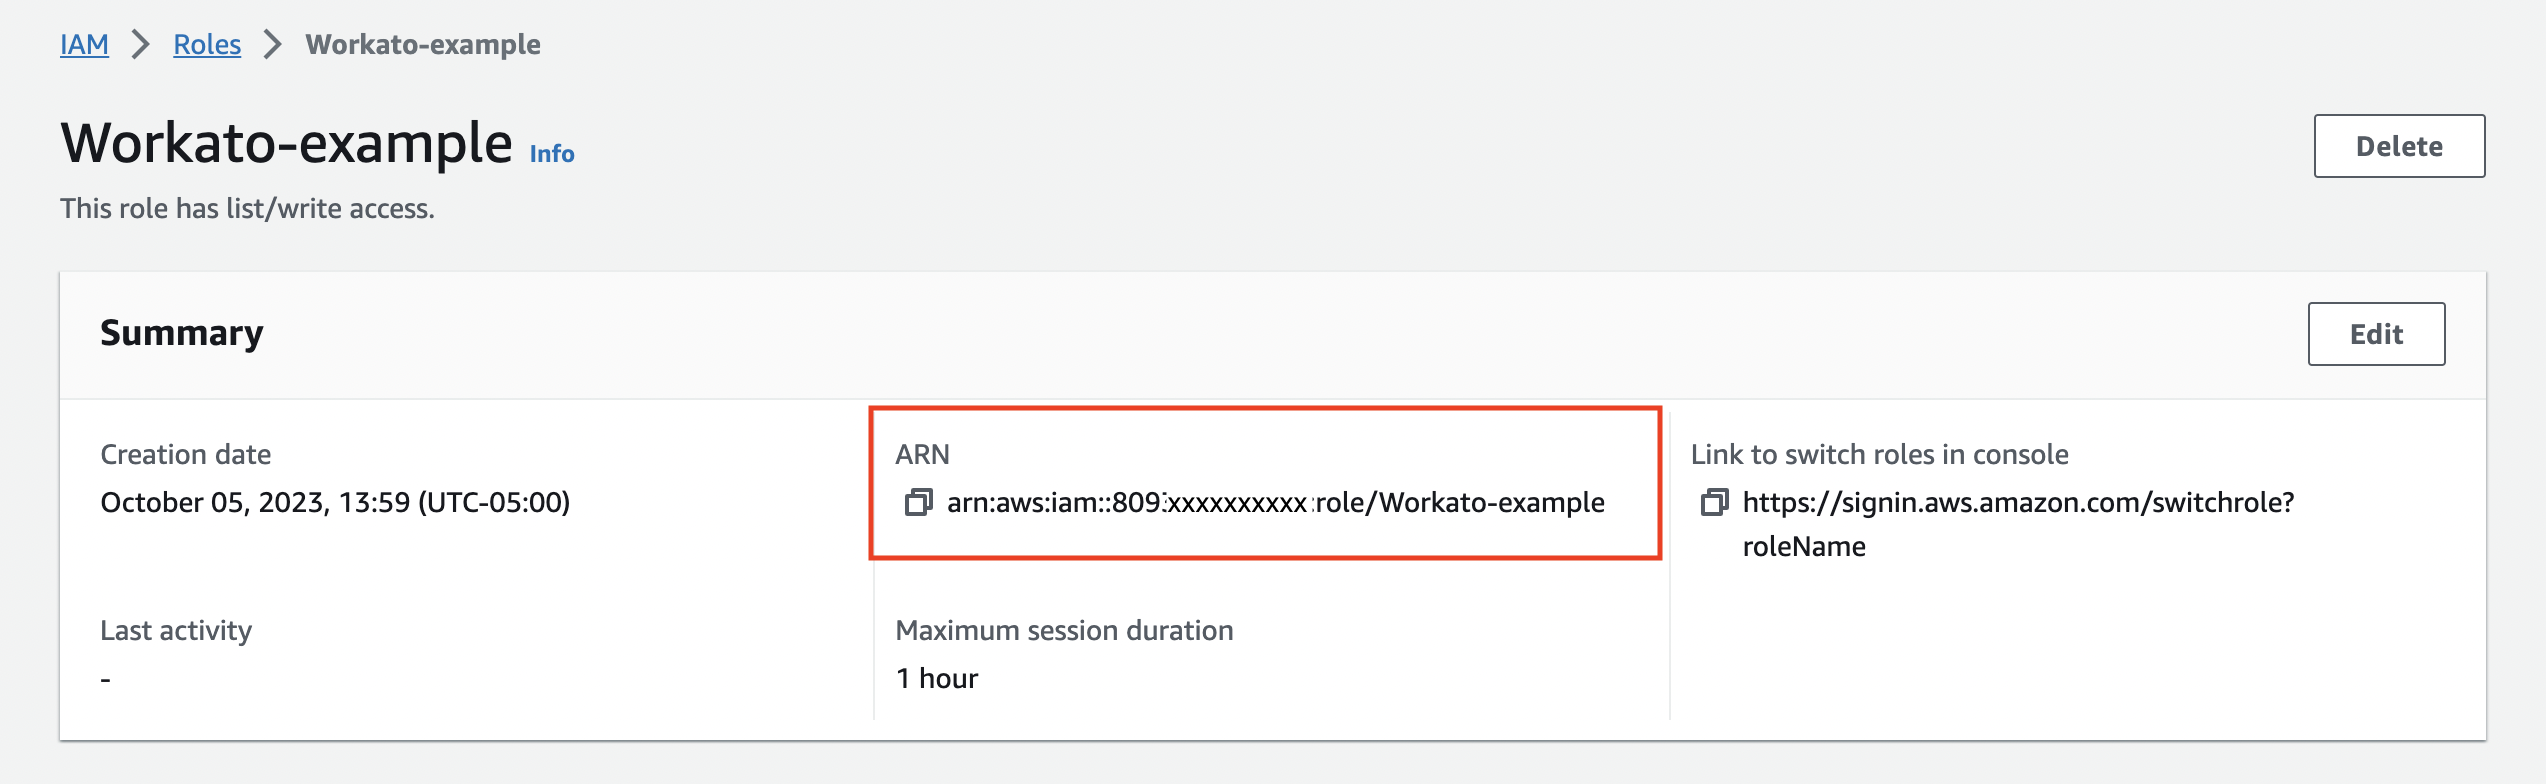 Copy role ARN
Add the Role ARN in Workato
Sign in to Workato.
Go the Connections tab and click Create > Connection or press C twice.
Search for and select a supported connector on the New connection page.
Enter a name for your connection in the Connection name field.
Use the Location drop-down menu to select the project or folder where you plan to store the connection.
Select IAM role from the Authorization type drop-down menu.
Paste the ARN value in the IAM Role ARN field and complete any other required fields for the AWS service, for example Region.
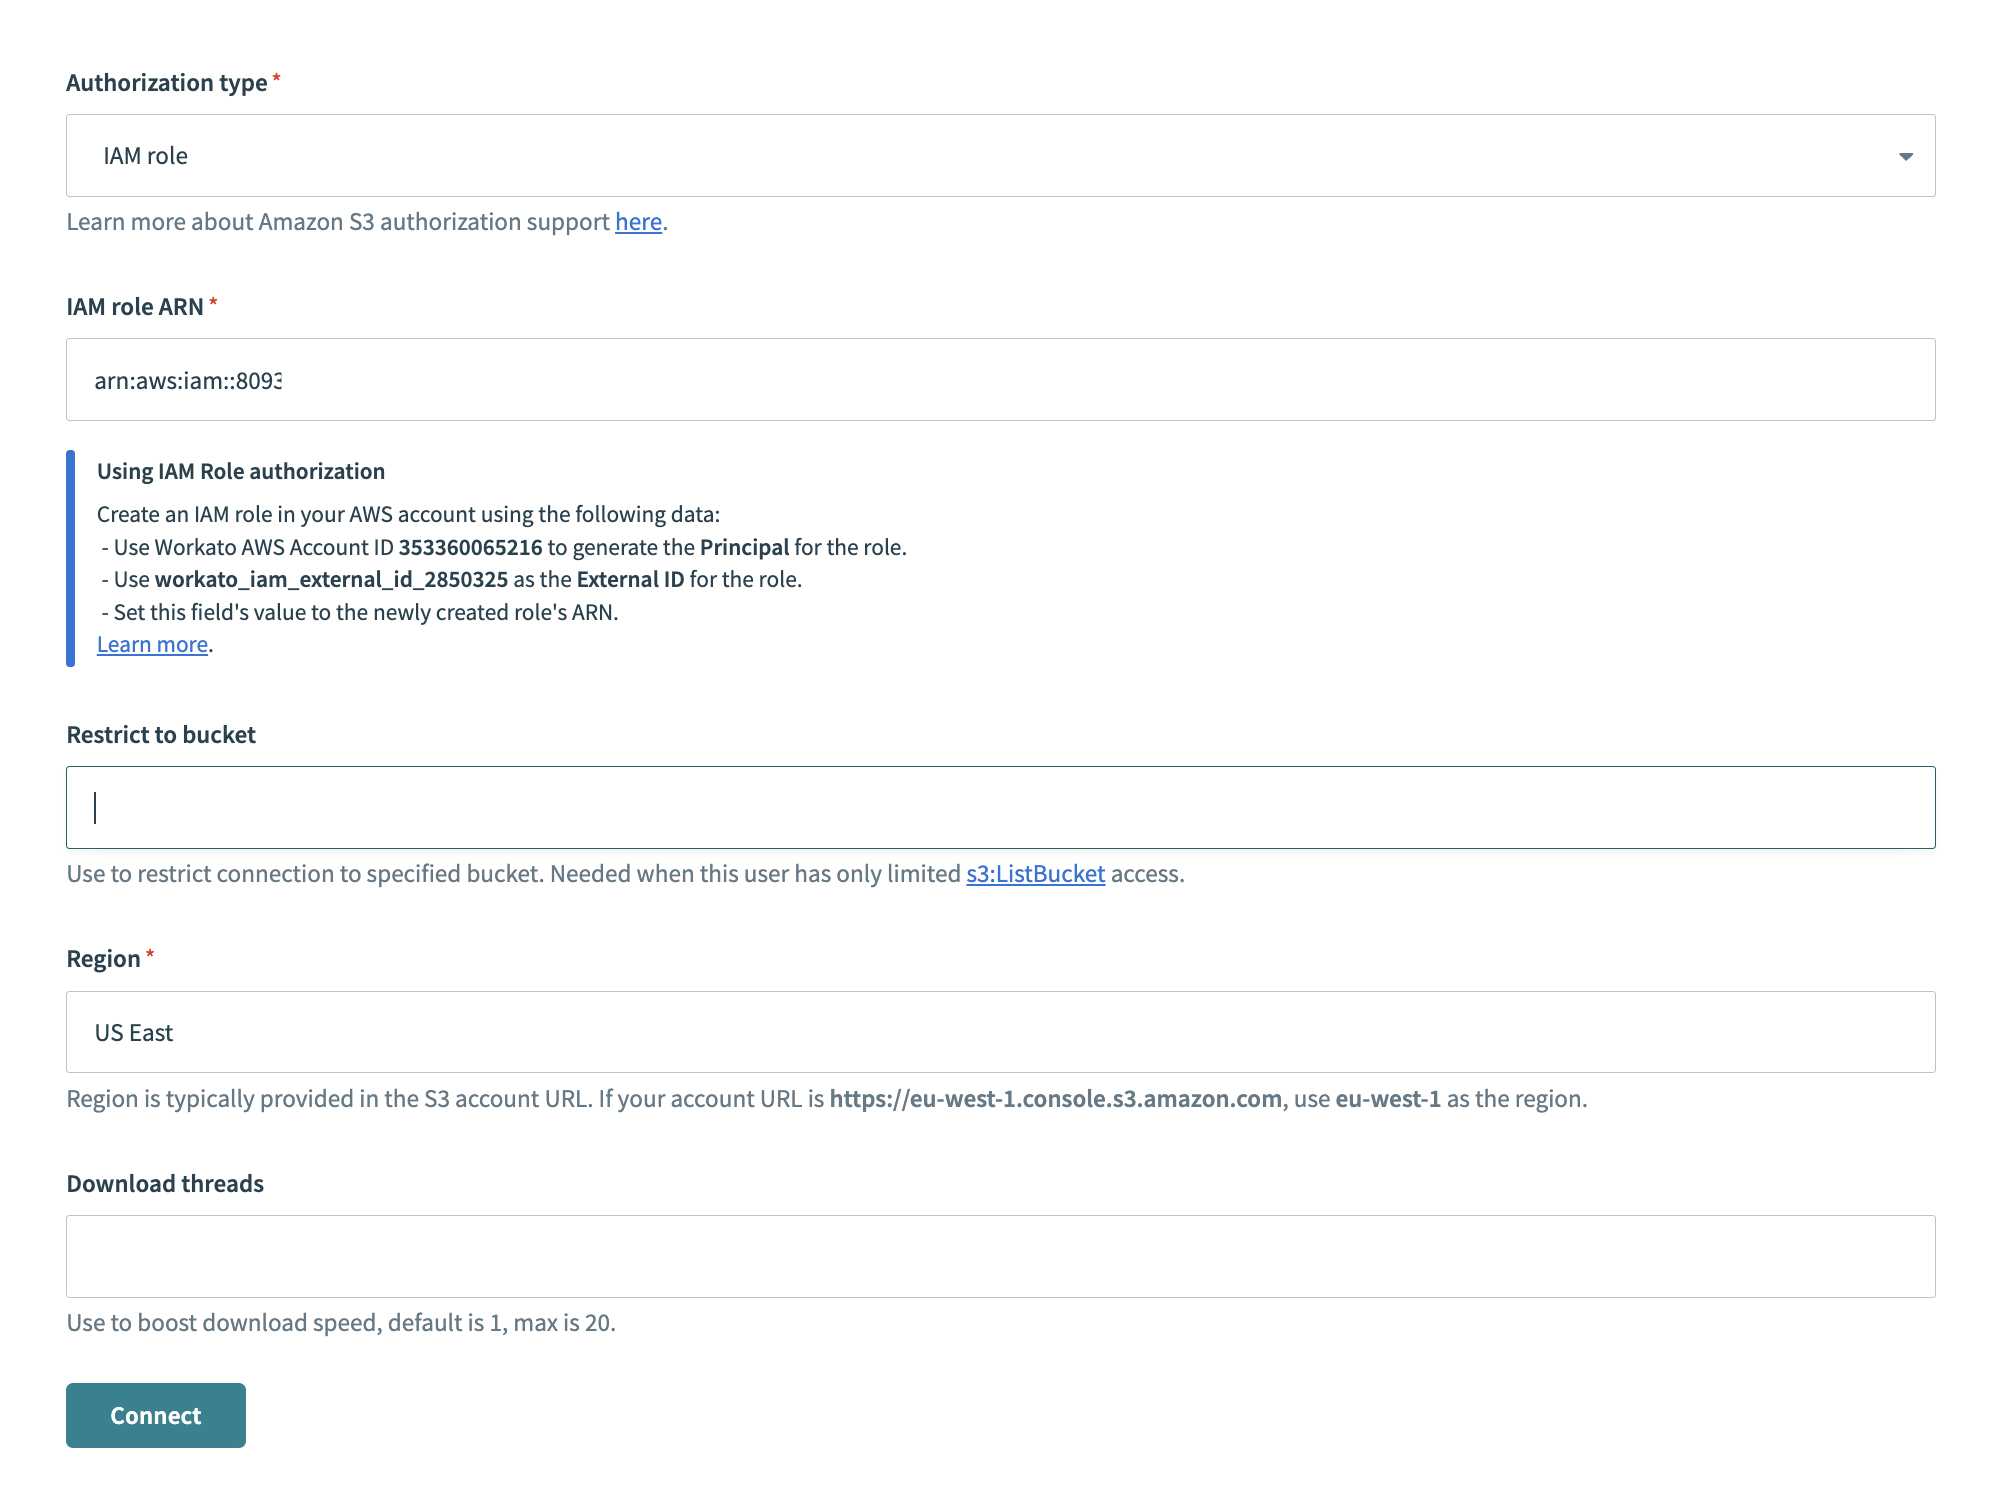
Click Connect.
Last updated: