Set up AWS Secrets Manager for projects
As an alternative to an individual secret for each user, you can manage access at the level of the project.
You must change secrets manager settings so that connections in the project can use the specified role in the project settings. Customers can then create project-specific IAM roles to limit the use of secrets to connections within the project.
WARNING
Switching to project-specific secrets management causes all previously configured external secrets references to stop working. Projects that use secrets stored in AWS Secrets Manager must be set up individually in Project settings.
INFO
In the example used in this article, we chose to demonstrate a simple example of configuring the AWS external role ID without changing the IAM permissions policy.
If your organization requires different roles scoped to different access permissions, we recommend that you configure these new permissions by setting the scope to specific secret resources. This enables you to have more granular control over which connection credentials to use in each project.
After your AWS Secrets Manager successfully connects to Workato, you can start using secrets when configuring connections.
Prerequisites
To complete the steps in this guide, you must have the following:
- Permissions that allow you to create and modify IAM permissions policies
- Permissions that allow you to create and modify IAM roles
Select the scope for secrets management
Sign in to Workato.
Go to Workspace admin > Settings > External secrets manager.
Click the Use external secrets manager toggle.
Select the Set up secrets management for each project individually option from the Scope drop-down menu.
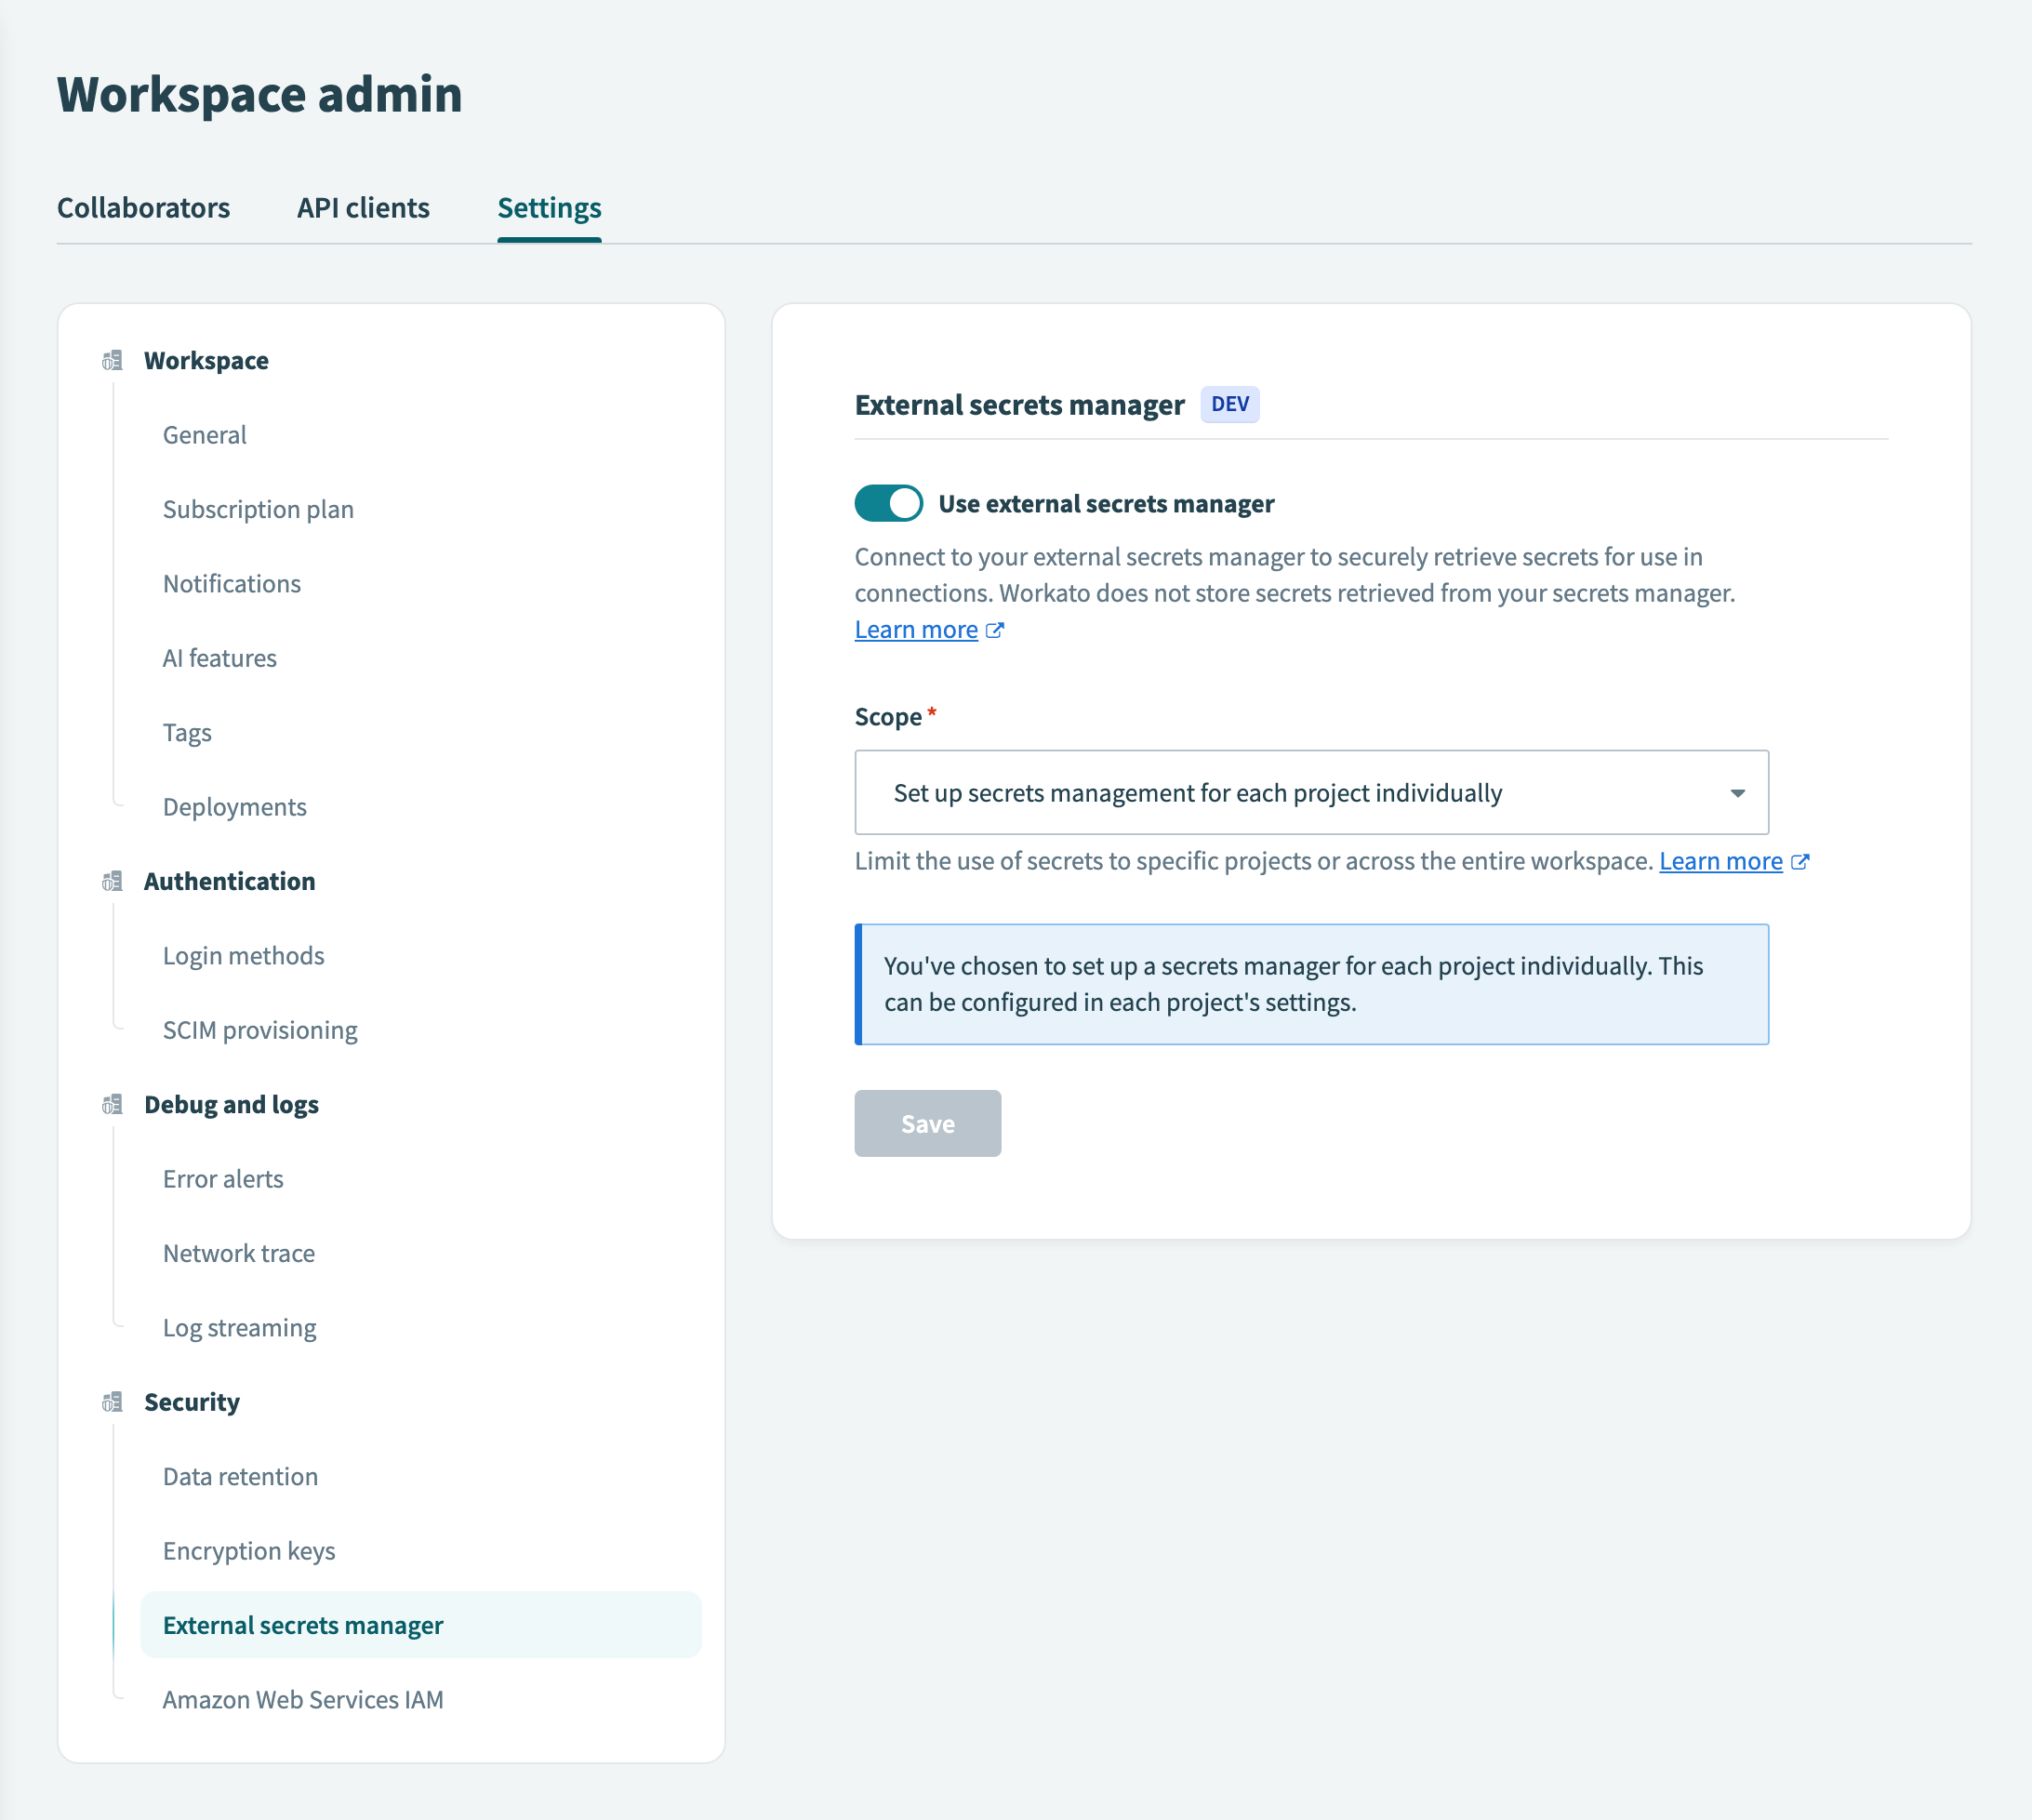
Click Save.
If you switch secrets management scopes, Workato notifies you that existing external secret references scoped to the project level will no longer function.
To proceed with switching from workspace-level to project-level secrets management, select the checkbox to acknowledge the impact and click Use project-specific secrets.
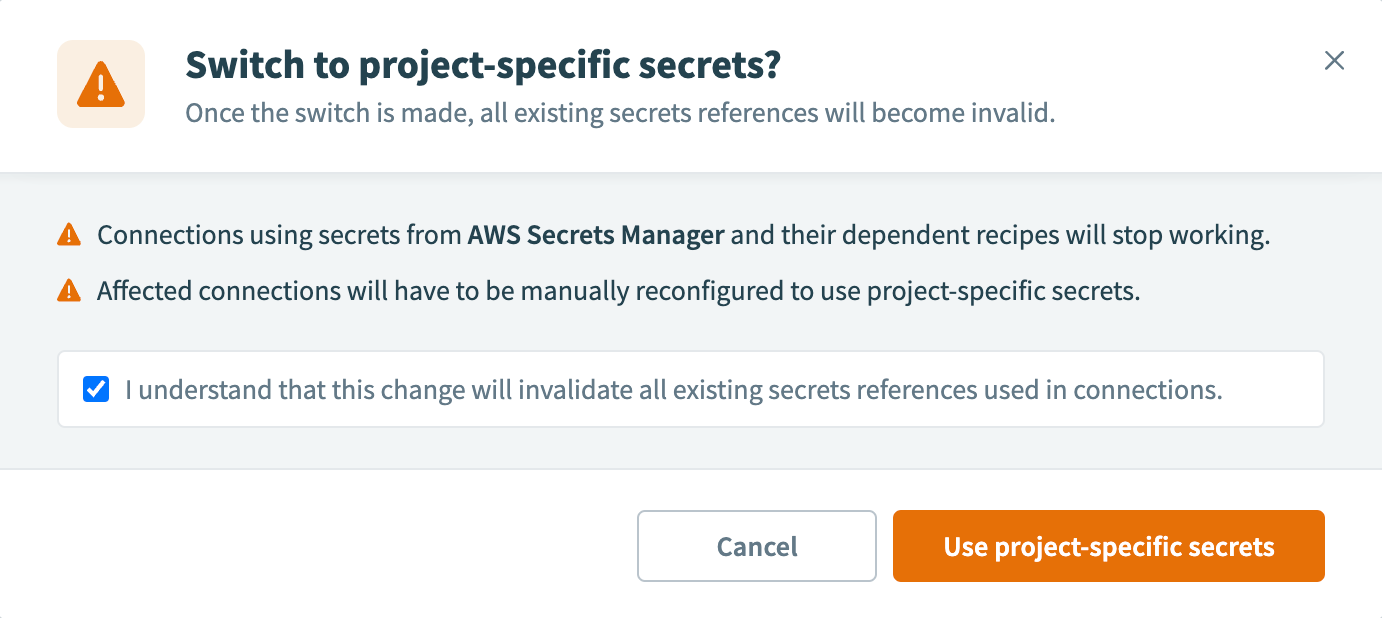
Note that you must now set up secrets in each project individually.
Select the project
Go to Projects and select the project that you plan to configure with secrets management.
Click Settings, then click Secrets management.
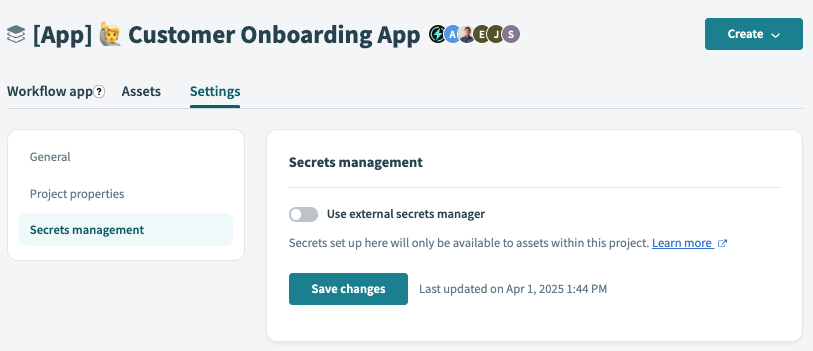
Click the Use external secrets manager toggle.
Select the AWS Secrets Manager option from the Which secrets manager do you want to use? drop-down menu.
Choose a guide for next steps in the process:
- Create a new permission policy and role in AWS
- Add the role to your Workato account

Select the AWS Account ID and external ID
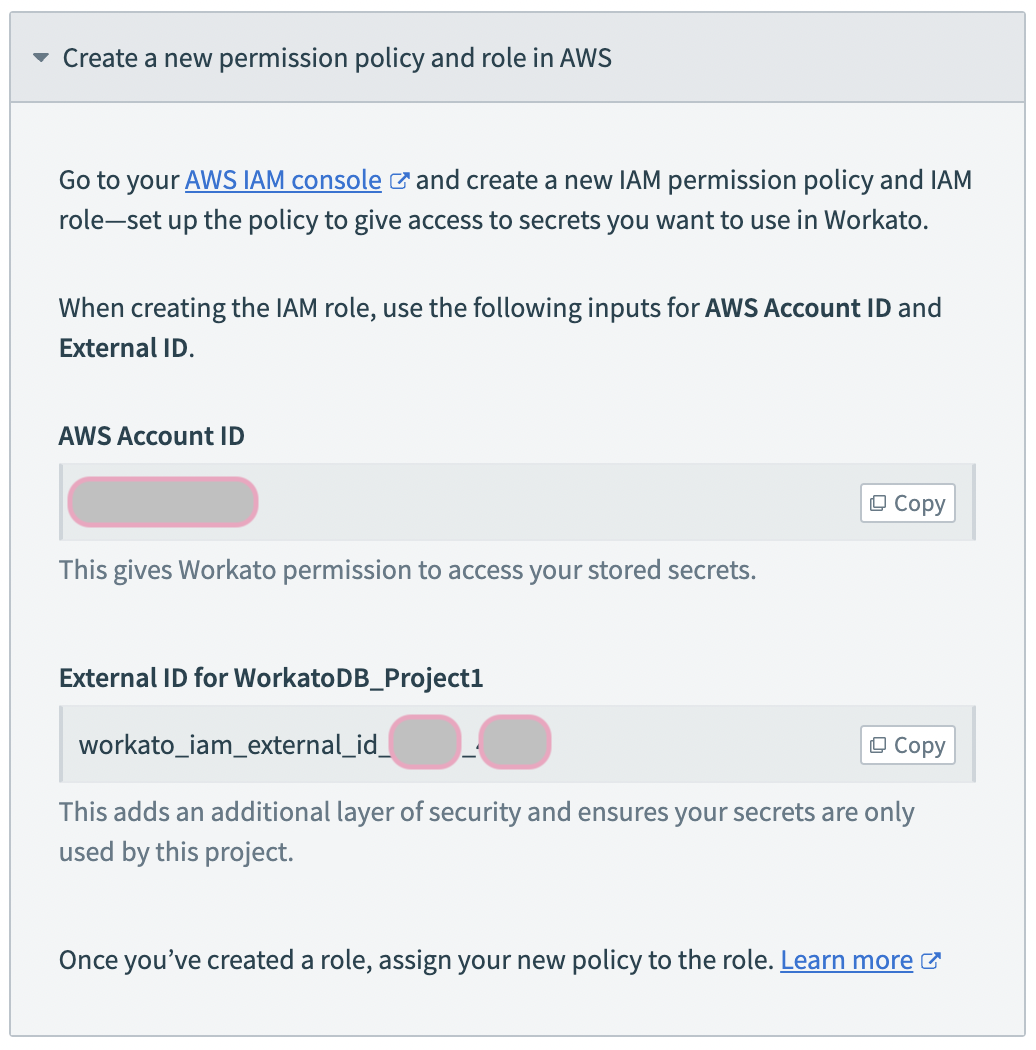
In the Create a new permission policy and role in AWS guide detail, Workato displays the IAM details. Note them to use in the following steps:
- AWS Account ID
- Copy the AWS Account ID value, to use in ongoing configuration of the secrets manager.
- External ID for ProjectName
- Copy the value, to use in ongoing configuration of the secrets manager.
- Here, we configure access to the project WorkatoDB_Project1.
- The value should be of the form
workato_iam_external_id__, whereis the ID of the Workato workspace, andis the ID of the project.
Create an AWS IAM role for your Workato project
Refer to the IAM role-based authentication for AWS for instructions on how to create an IAM role for Workato and an IAM permissions policy (if needed).
Retrieve and add the role ARN in Workato
You must complete the following steps to finalize the setup:
Last updated: