Set up HashiCorp Vault secrets engines for projects
Switching to project-specific secrets management causes all previously configured external secret references to stop working.
Prerequisites
To complete the steps in this guide, you must have the following:
- HashiCorp Vault Key-value (KV) secrets engine version 1 or 2.
- An account with AppRole auth method enabled.
- One or more AppRoles configured.
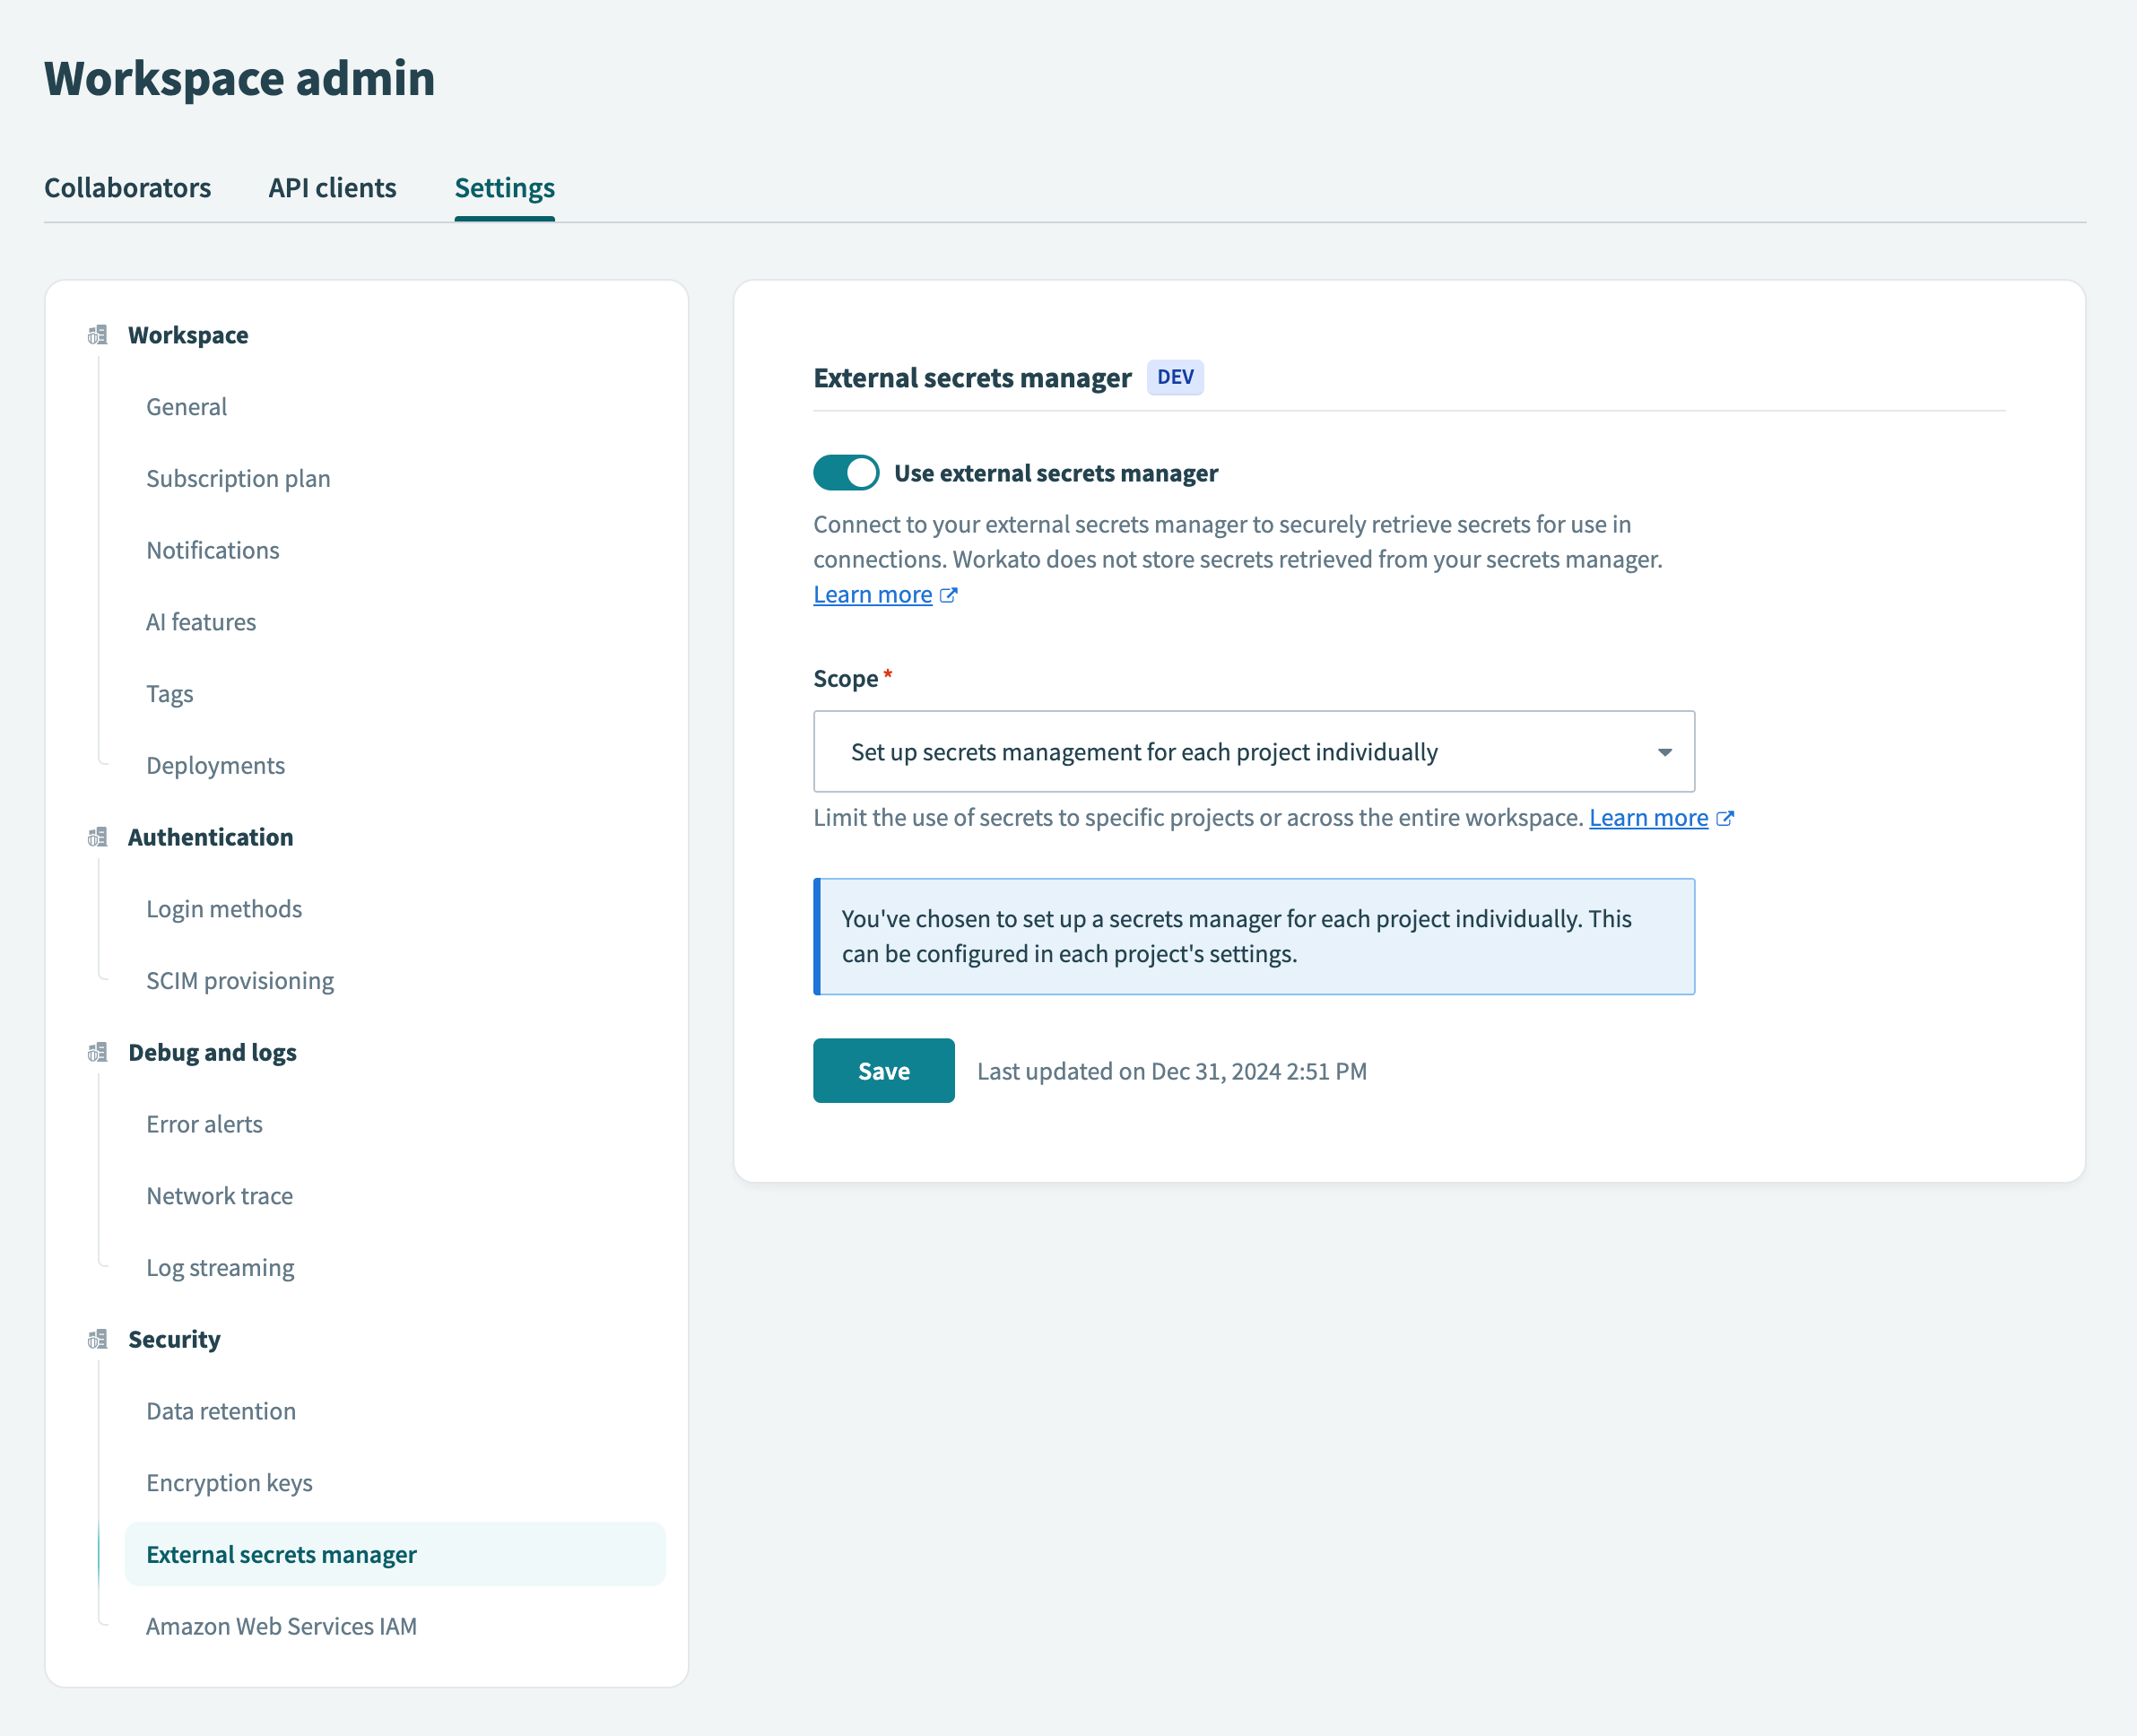
Select the scope for secrets management
Sign in to Workato.
Navigate to Workspace admin > Settings > External secrets manager.
Select the Set up secrets management for each project individually option from the Scope drop-down menu.
 Select project-level secrets management
Click Save.
If you switch secrets management scopes, Workato notifies you that existing external secret references scoped to the project level will no longer function.
To proceed with switching from workspace-level to project-level secrets management, select the checkbox to acknowledge the impact and click Use project-specific secrets.
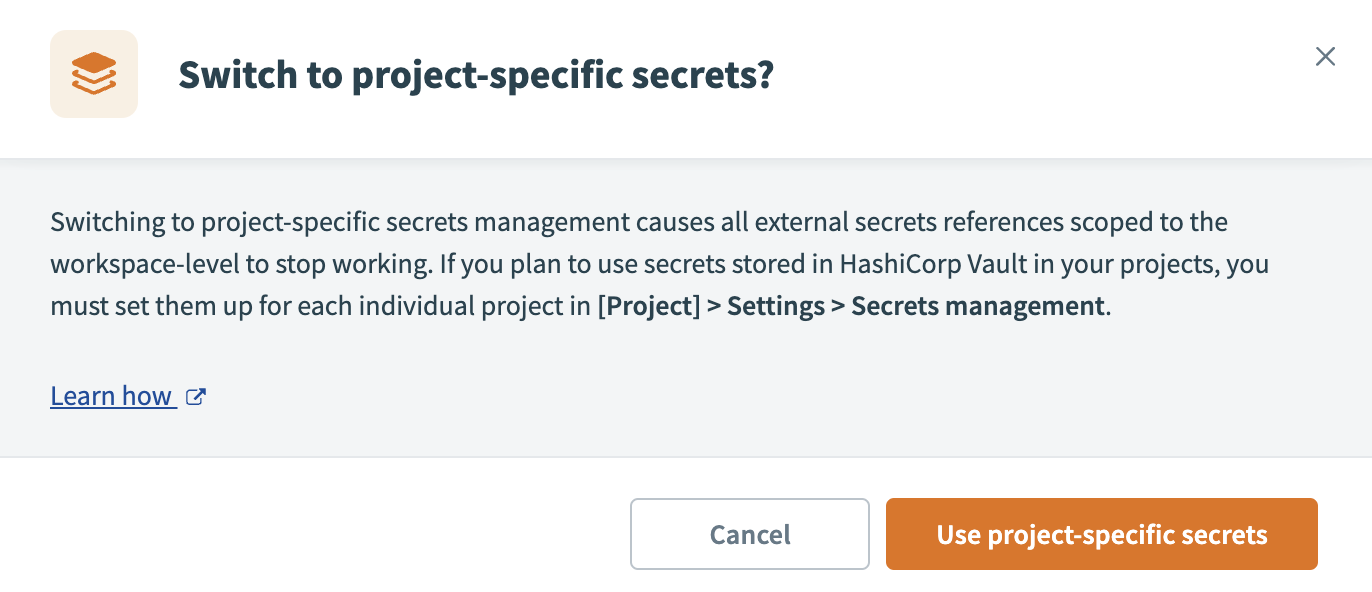 Use project-specific secrets
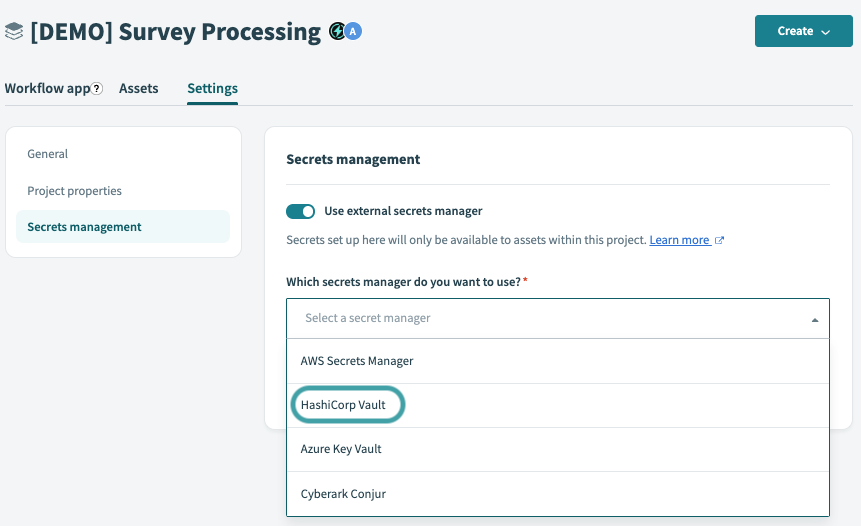
Select the project
In Workato, navigate to your projects.
Select the project that you plan to configure with secrets management.
In the project, navigate to Settings > External secrets manager.
Select HashiCorp Vault from the Which secrets manager do you want to use? drop-down menu.
Configure the connection in Workato
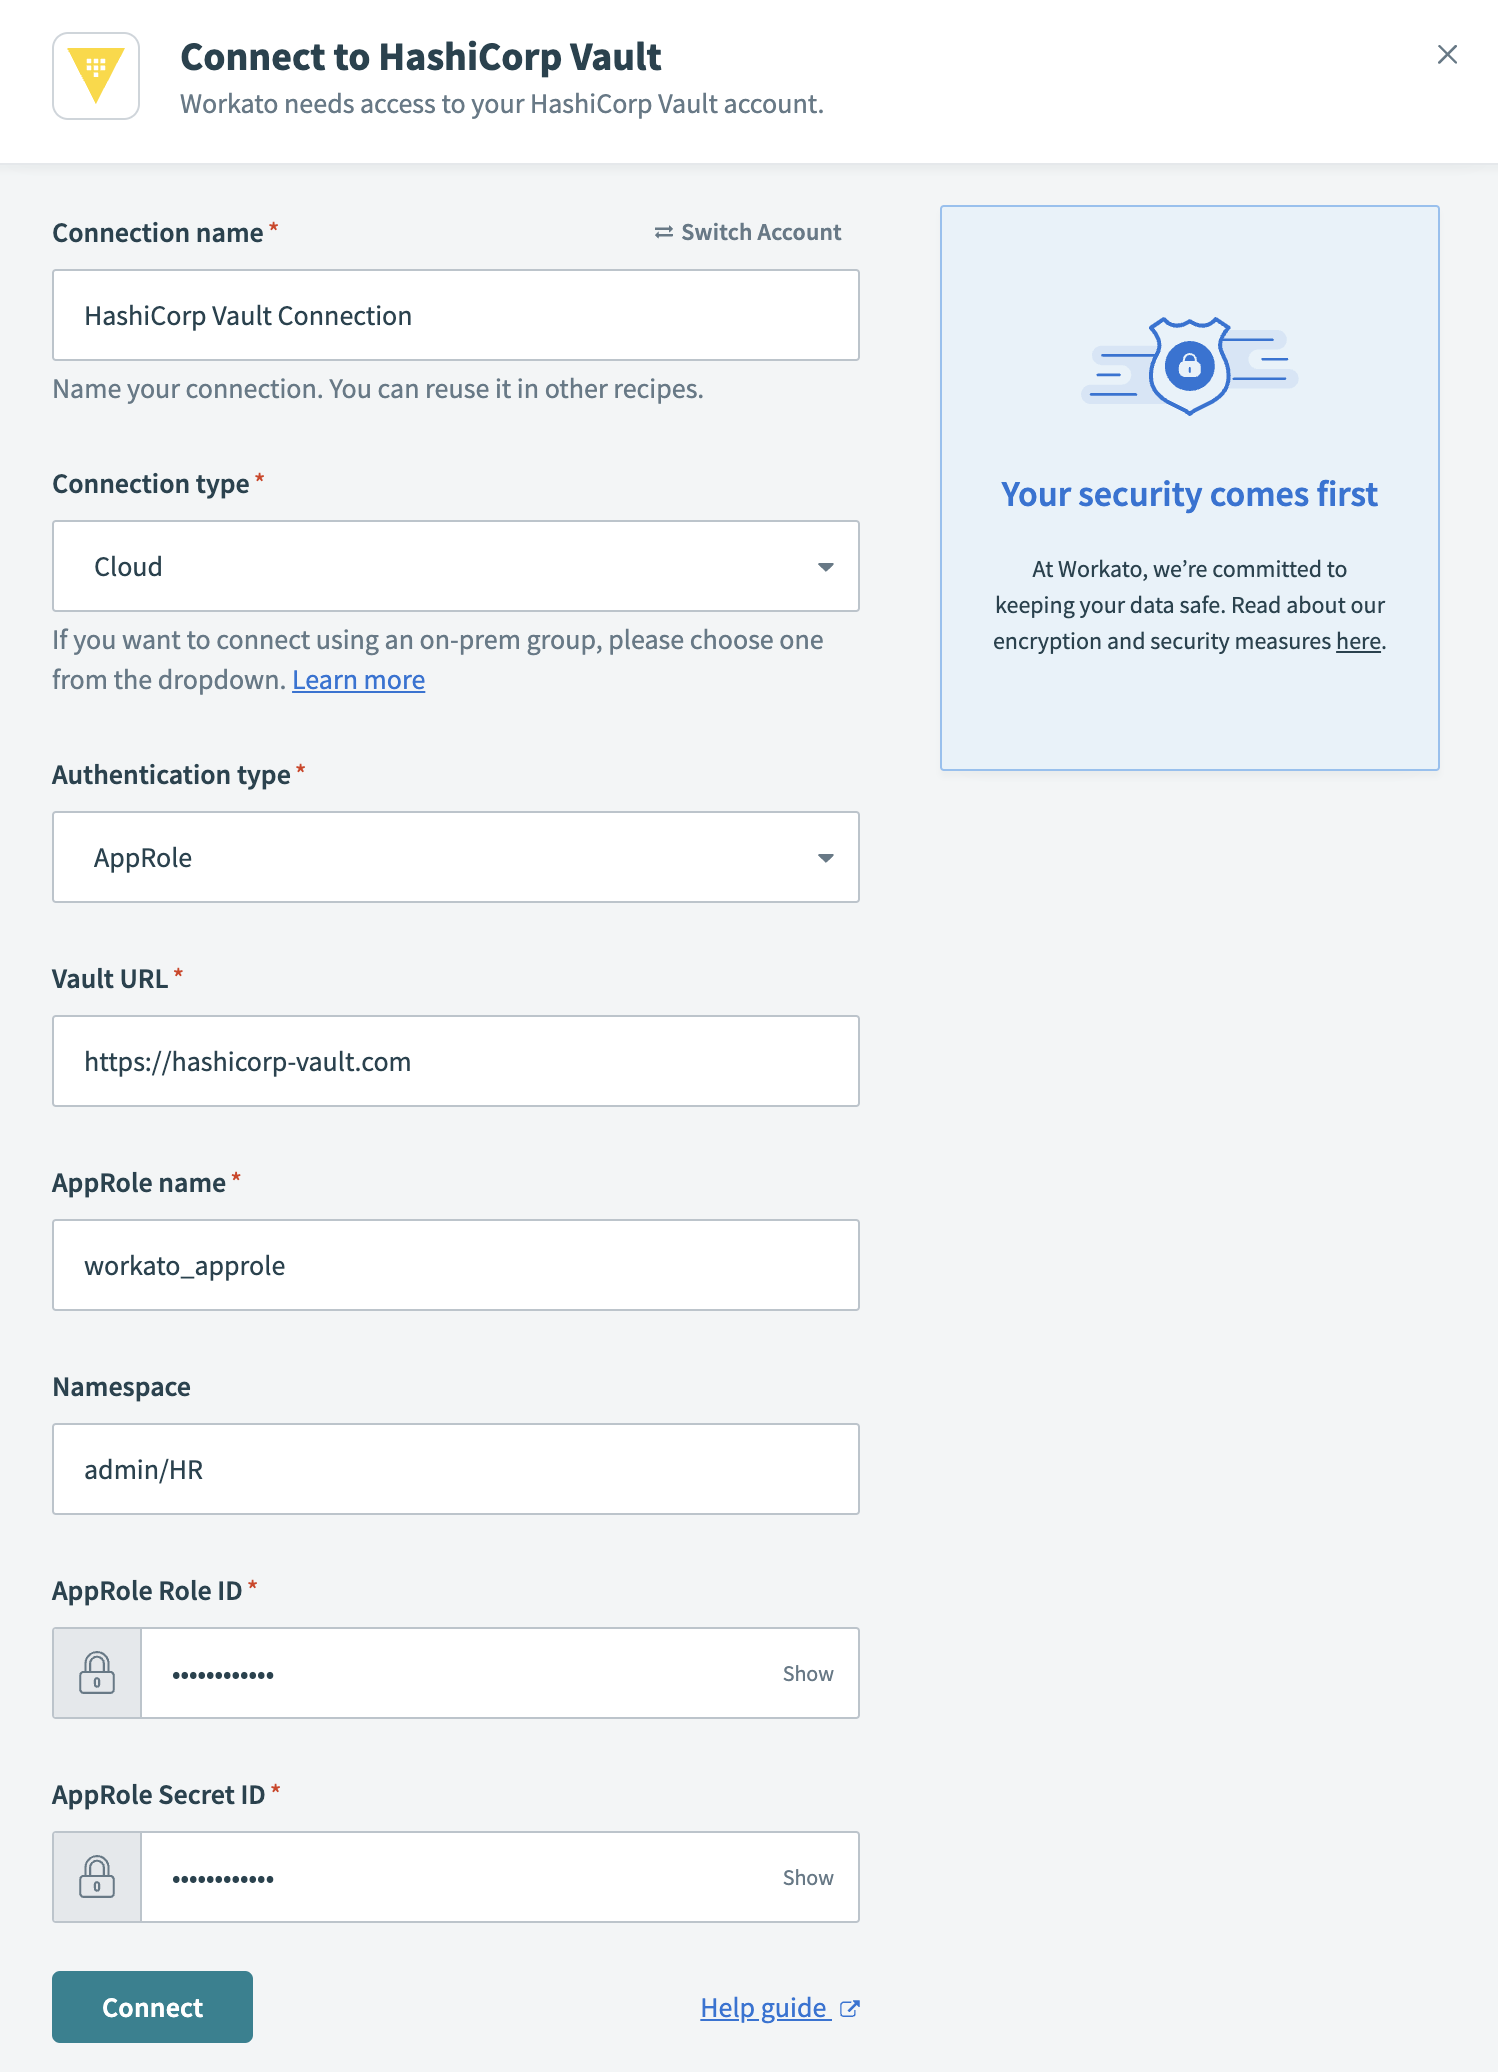 Connect to HashiCorp Vault
- Connection name
- Name your HashiCorp Vault connection.
- Connection type
- To connect to HashiCorp Vault using an on-prem group, select the group name from the drop-down menu. Otherwise, to use a direct connection, select Cloud.
- Authentication type
- Select AppRole from the drop-down.
- Vault URL
- Enter the Vault URL of your Hashicorp Vault instance. It should follow this form
https://<instance_name>.<company_name>.com:123.instance_name
The name of your HashiCorp Vault instance.
company_name
The name of your organization.
Namespace
Optional. The name of the namespace that contains the secret(s) you plan to use in Workato. Namespaces are a set of features that enable you to define granular control and secrets management within your organization.
In our example, we grant Workato access to the
admin/HRnamespace.
- AppRole name
- The AppRole you plan to use. An AppRole is a set of Vault policies and login constraints that determines which secrets you can access.
Obtain the AppRole ID and AppRole Secret ID from HashiCorp Vault
AppRole is a login credential split into two parts- the AppRole ID and AppRole Secret ID. You must obtain both to authenticate to Workato. The AppRole ID can be considered similar to a username- its value remains constant and associated with its corresponding AppRole. On the contrary, the AppRole Secret ID is similar to a password or unique key and you can prompt HashiCorp Vault to refresh this credential, if needed.
In HashiCorp Vault click >_ to open the control panel.
![]() Open the control panel
Open the control panel
Enter the following command:
vault read auth/<approle_name>/role/<role_name>/role-idapprole_name
The AppRole you have configured in HashiCorp Vault.
role_name
The name of the role (Workato) you plan to connect to.
Example:
vault read auth/workato_approle/role/workato/role-idHashiCorp Vault returns the AppRole ID unique to your AppRole:
Key     Value
role_id 12a3bc45-6de7-8910-11fg-h4ij12XXXXXXCopy and paste this value into the AppRole ID field in Workato.
Obtain the AppRole Secret ID by entering the following command to the control panel in HashiCorp Vault:
vault write -force auth/<approle_name>/role/<role_name>/secret-idExample:
vault write -force auth/workato_approle/role/workato/secret-idHashiCorp Vault generates an AppRole Secret ID for your AppRole:
Key                 Value
secret_id           ed0a642f-2acf-c2da-232f-1b2130XXXXXX
secret_id_accessor a240a31f-270a-4765-64bd-94ba1fXXXXXXCopy and paste the secret_id value into the AppRole Secret ID field in Workato.
Click Connect.
FURTHER READING
Last updated: