# Example use case: Translation app
This example demonstrates how to create a simple page powered by Run recipe and Reset/reload components actions and variables. This app enables end-users to translate documents into any target language using AI by Workato.
EXAMPLE USE CASE
This guide uses a translation use case and is intended to serve as an example. Recipe modifications, such as trigger, action, and conditional logic configuration, may require additional customizations to suit your specific requirements.
# Prerequisites
- AI by Workato
- Workflow apps with the Run recipe and Reset/reload components actions enabled
Creating a translation app consists of the following steps:
- Create a new app
- Design your app
- Enable actions
- Configure your recipe
- Surface recipe output in page components
- Publish your app
You can also start with an existing Workflow app. If you have an existing app where you want to enable run recipe and reset/reload components actions, proceed to Enable actions.
# Create a new app
Create a new app
Complete the following steps to create a new app:
Go to Platform > Workflow apps.
Click + New app.
Go to the Project name field and provide a unique name for the project.
Go to the App name field and type a unique name for the application. This name is visible to the end-users of your app.
Deselect the Submit requests and Review requests options.
Click Create project.
# Design your app
Design your app
Go to your new app and click Create page.
Go to the Page name field and type a unique name for the page.
Modify existing page components:
Click the text component at the top of the page and go to the properties panel to customize the app title and supporting text.
Click the Name component and click the Delete icon to remove it from your page.
Click the Description component, go to the Properties panel and type Text to translate in the Label field.
Mark this component as Required.
Customize the color, image, and resize the main container as necessary.
Add a component that enables app users to specify their text’s original language:
Go to the Page components panel and select a Single-select component. Drag and drop it onto your page.
Go to the Component properties panel and select Manual as the source and provide a list of Options.
Leave this field as Optional.
Go to the Hint field and type Leave blank to let the app detect the original language automatically.
Add a component that requires app users to select a target language:
Go to the Page components panel and select a Single-select component. Drag and drop it onto your page.
Go to the Component properties panel, select Manual as the source, and provide a list of languages as options.
Mark this field as Required.
Add a component that requires app users to select an output format for the translated text:
Go to the Page components panel and select a Single-select component. Drag and drop it onto your page.
Go to the Component properties panel, select Manual as the source, and provide a list of options. In this example, we are providing html, markdown, and plain text.
Add a container to your page that will hold the translated text:
Go to the Page components panel and select a container.
Drag and drop it onto your page.
Go to the Page components panel and select a text component. Drag and drop it onto your page.
Go to the Component properties panel and type Translated text in the Text field.
Go to the Page components panel and select a text component. Drag and drop it onto your page.
Leave this component blank for now.
Go to the Page components panel and select a button component. Drag and drop it onto your page.
Go to the Component properties panel > Design and type Reset in the Label field.
Click the Action tab.
Go to the Action menu and select Reset components’ value.
Go to the Components field and select the component values you plan to clear, for example, Page.
Your configuration should look as follows:
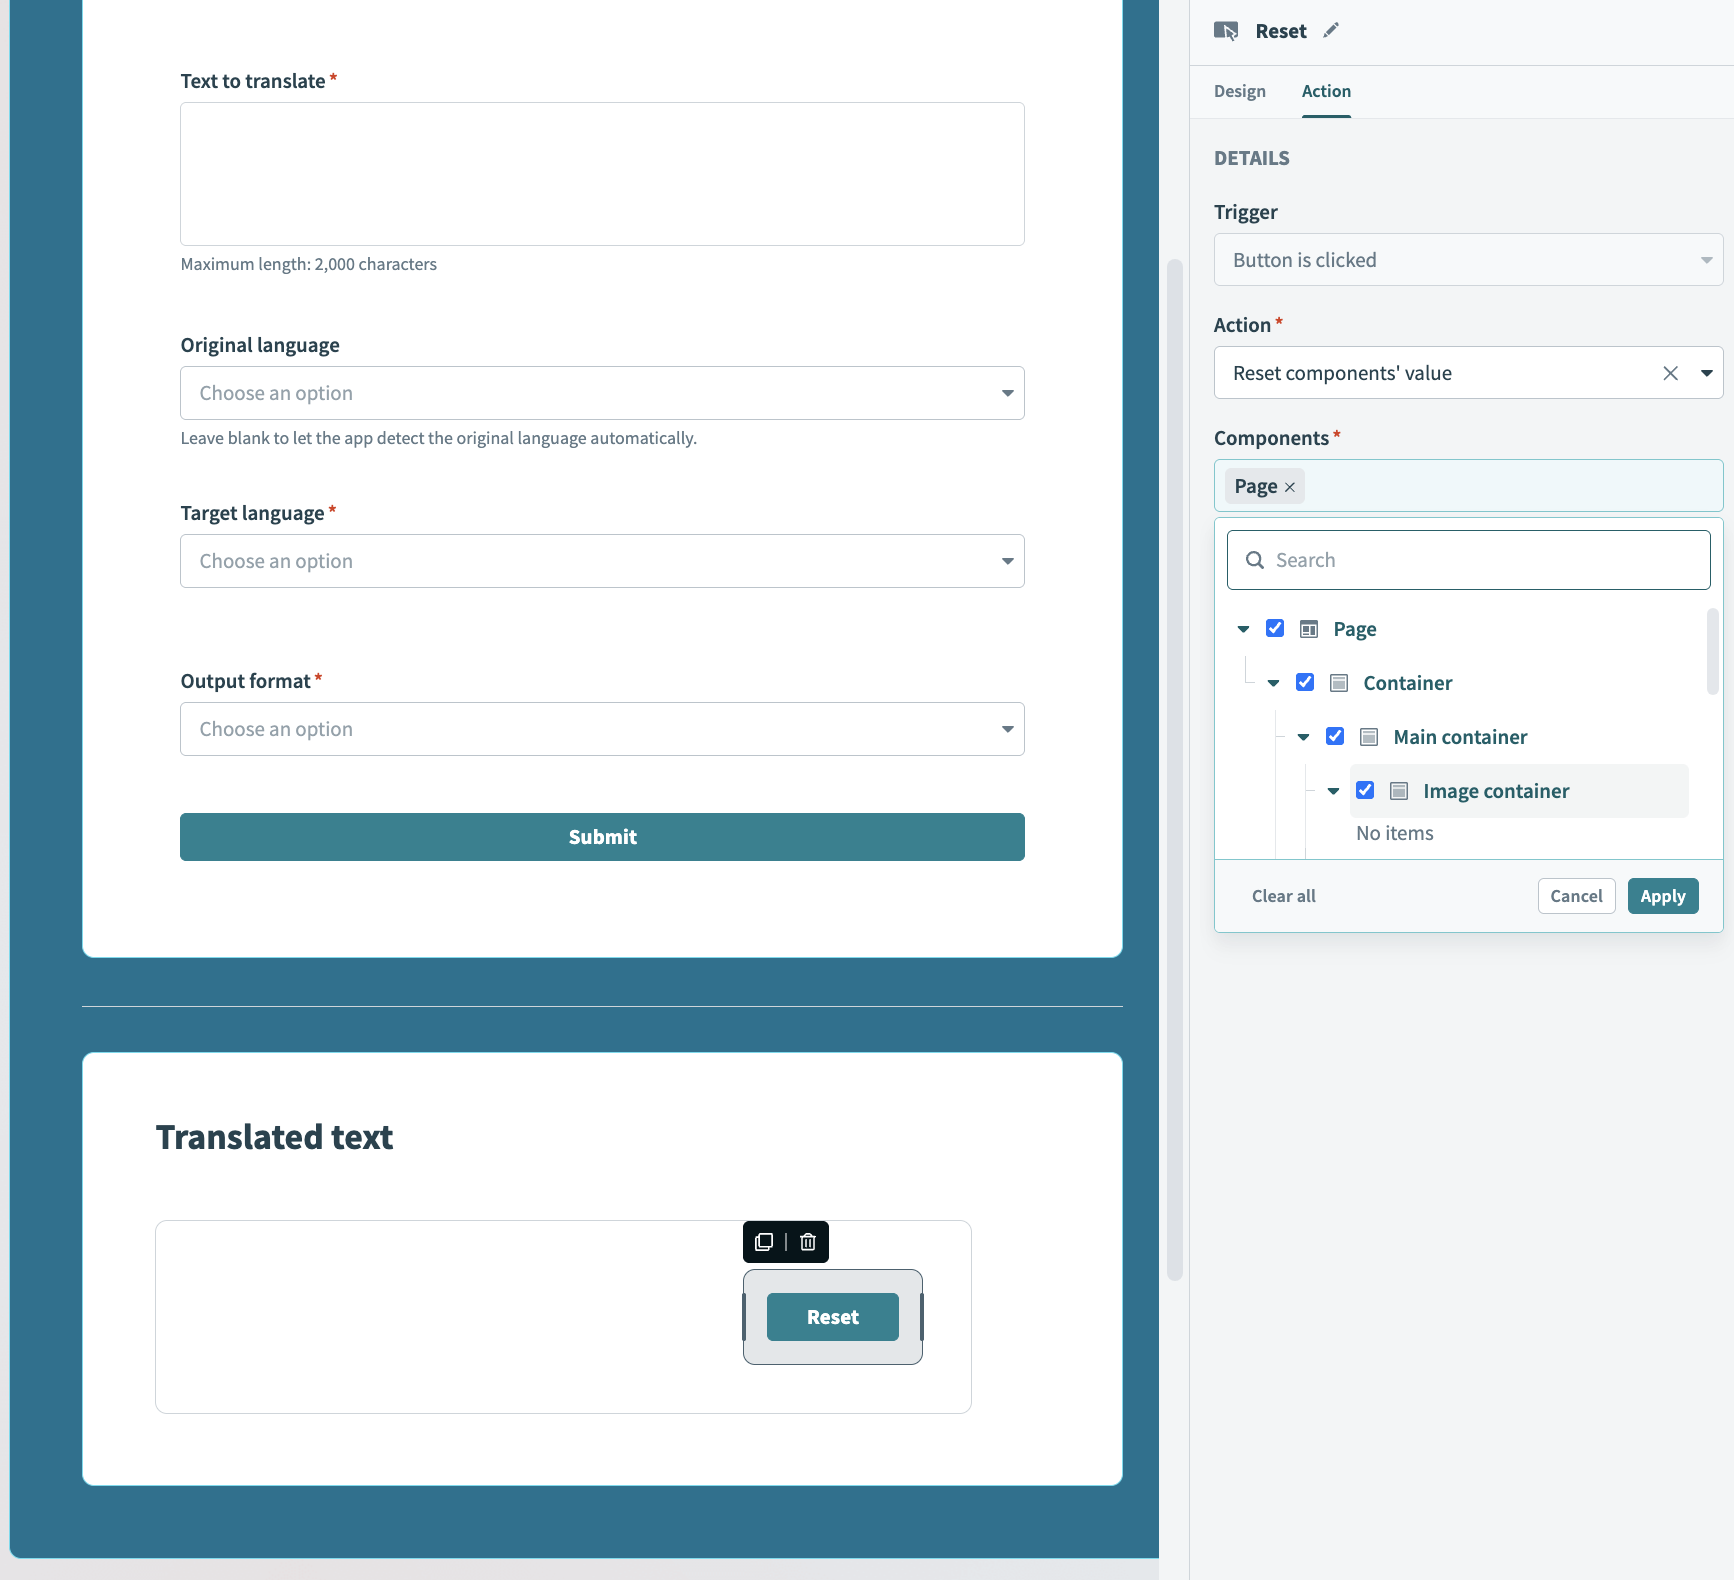 Reset button configuration
Click Preview to preview your app’s appearance.
Click Save.
# Enable actions
In this example, we plan to enable the following functionality for our application:
- When users click Submit, a recipe runs that translates their original text into the target language they specify.
- This recipe returns the translated text to the application.
- Users can click a Reset button to reset values for all page components, enabling them to translate a new text.
Enabling the Run recipe action requires working in the page editor and the recipe editor.
Complete the following steps to enable action when users click Submit:
Select the Submit button.
Go to the Properties panel > Action.
Use the Action drop-down menu to select Run recipe.
Use the Recipe drop-down menu to click Create recipe. This opens the Set up your recipe page in a new browser tab.
# Configure your recipe
Customizing this recipe consists of modifying the trigger, adding additional recipe steps, and returning data to page components.
Complete the following steps to set up your recipe:
Go to the Name field and provide a unique name for your recipe that distinguishes its purpose.
Select a location for your recipe. The recipe must be contained within the same project as your Workflow app.
Click Start building.
Workato generates a recipe pre-configured with the New component event (real-time) trigger and the Return data to component action:
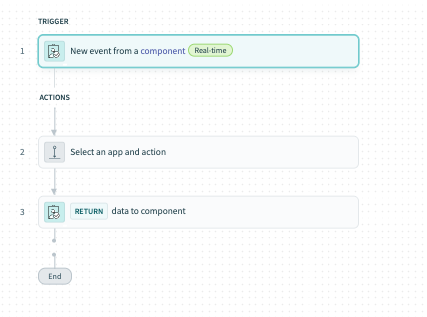 Recipe outline
Modify the New component or drop-down event trigger
Select the New component or drop-down event trigger.
Go to the Setup tab.
Go to Input parameters and click + Add field.
Go to the Name field and provide a unique name for this parameter.
Go to the Label field and provide a unique name for this parameter, such as target language.
Go to the Data type field and select String.
Go to the Optional field and select Yes or No. When No, users must provide input for this parameter in the corresponding Workflow apps field.
Optional. Go to the Hint field and provide a hint to help users fill out this field.
Your configuration should look as follows:
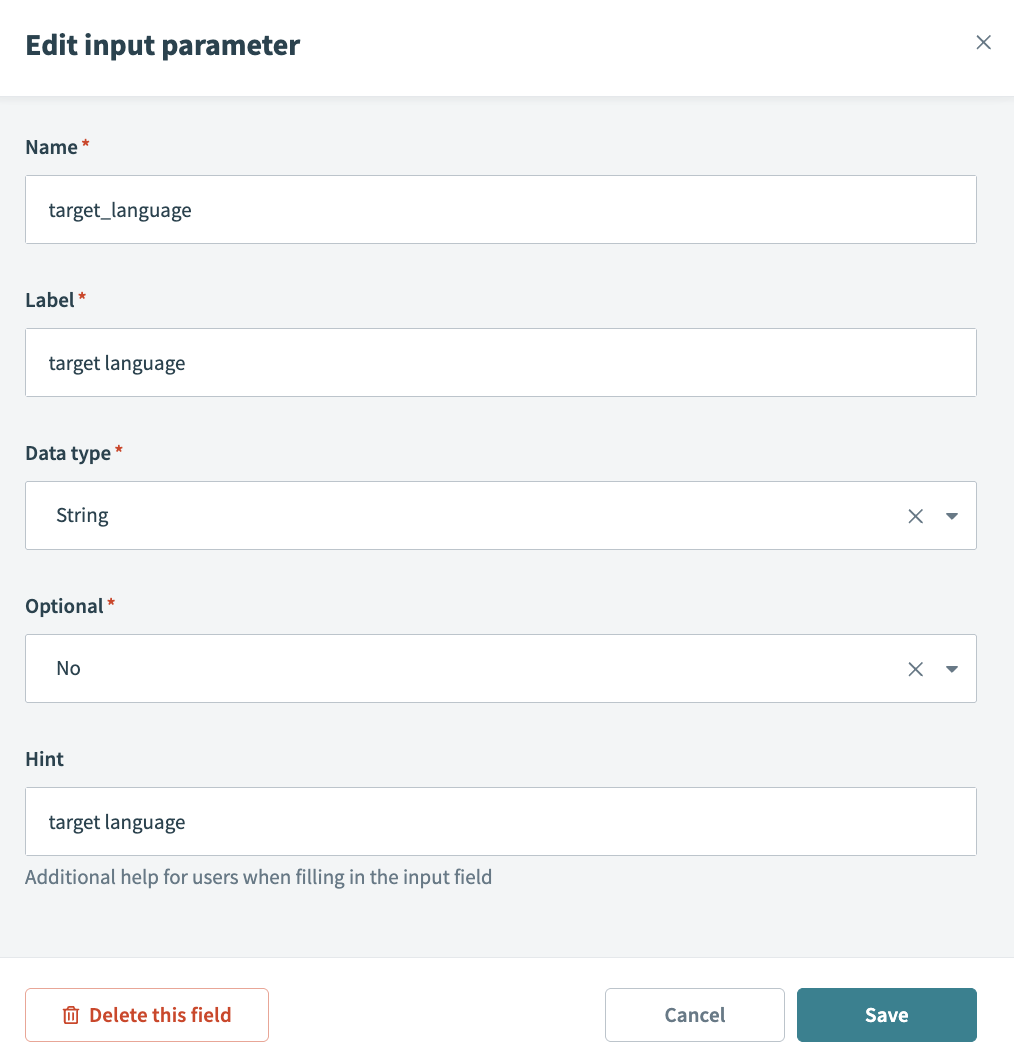 Input parameter configuration
Create the following additional input parameters:
| Parameter name | Label | Data type | Optional |
|---|---|---|---|
| source_text | Source text | String | No |
| output_format | Output format | String | Yes |
Go to Output schema and click + Add field. This portion of the configuration enables you to define the type of data you plan to return to your app.
Go to the Name field and provide a unique name for this parameter, such as translated_text.
Go to the Label field and provide a unique name for this parameter, such as translated text.
Go to the Data type field and select String.
Go to the Optional field and select Yes or No. When No, users must provide input for this parameter in the corresponding Workflow apps field, and this field should also be marked as required.
Optional. Go to the Hint field and provide a hint to help users fill out this field.
Add additional recipe steps
Add an additional recipe step to get data from other applications and return it to your app. This step uses AI by Workato to translate text.
Click Step 2.
Search for and select AI by Workato as your app.
Select the Translate text action.
Go to the Output language field and map in the Target language Step 1 datapill.
Go to the Source text field, type Translate the following into, and map in the Output format Step 1 and Source Text Step 1 datapills.
Your configuration should look as follows:
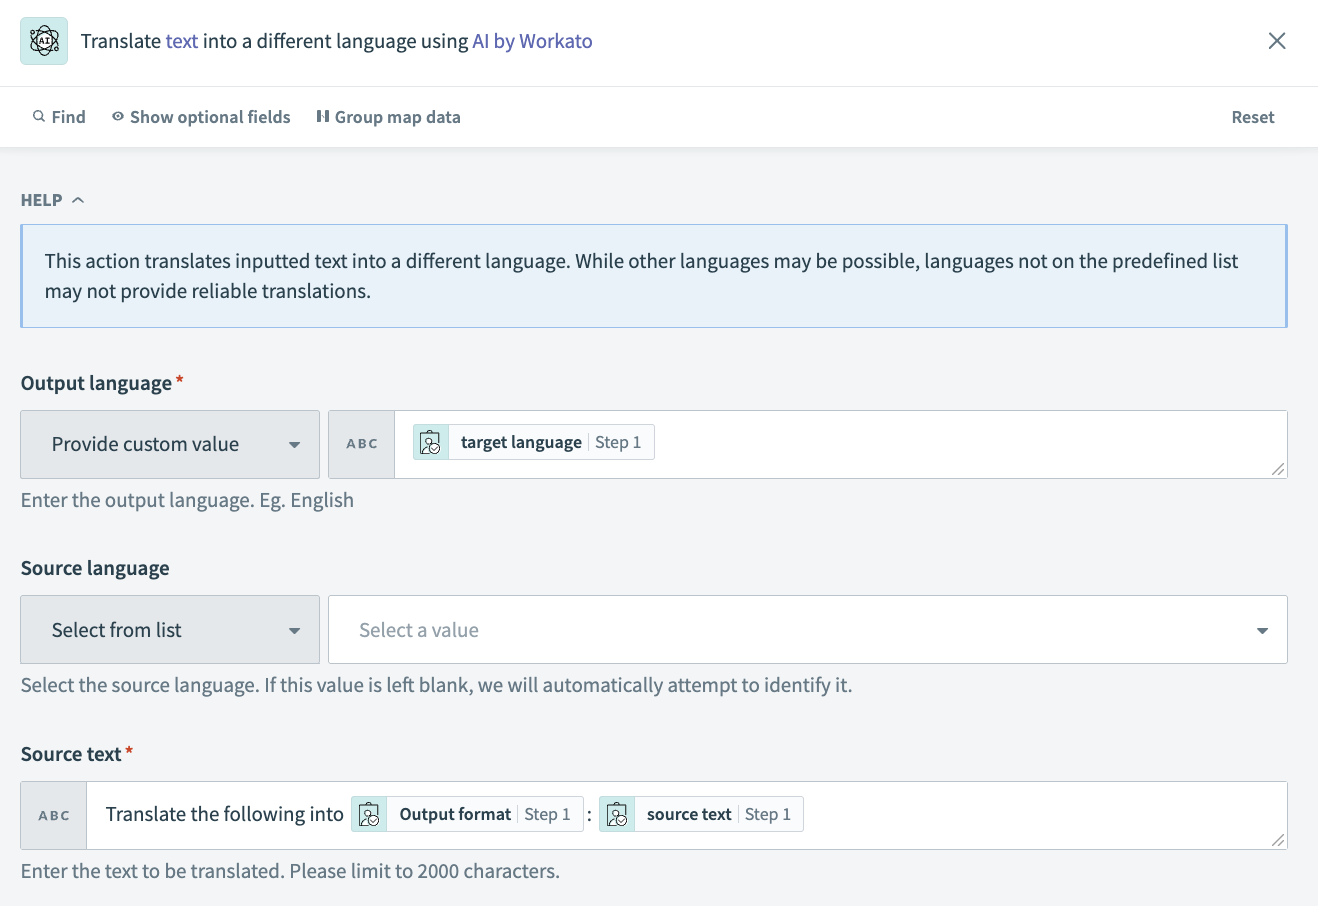 Datapill mapping
Modify the return data to component action
Complete the following steps to return the translated text to your page:
Select the Return data to component action.
Go to the Consider action as successful field and select Yes.
Go to the Translated text field and map in the Translated text Step 2 datapill.
Optional. Go to the Successful toast message field and provide a custom success message. Otherwise, no successful message is displayed.
Click Save and Exit.
Click Start recipe.
Your completed recipe should look as follows:
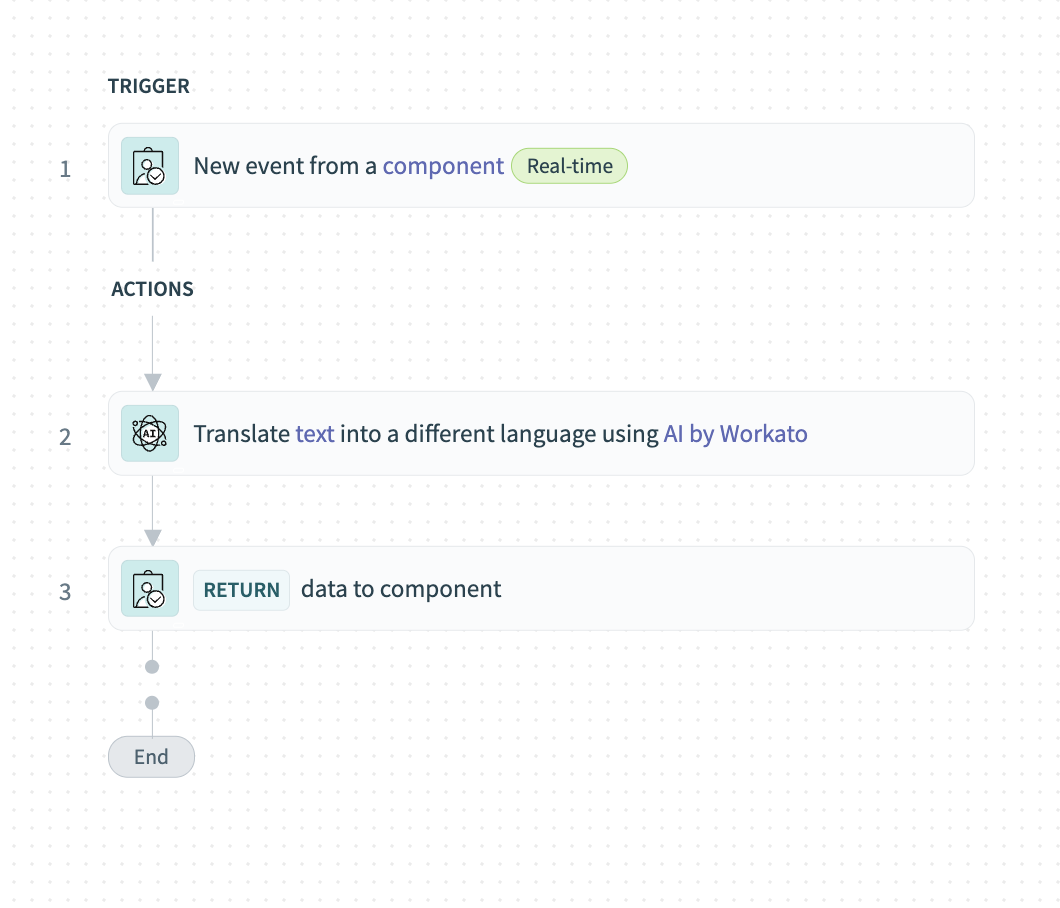 Completed recipe
# Surface recipe output in page components
Return to the page editor to surface translated text in page components.
Complete the following steps to finalize your app:
Create a page variable
Click the page canvas.
Go to Properties panel > Design.
Click + Add variable.
Go to the Name field and type a unique name for your variable, such as translated text.
Go to the Data type field and select String.
Optional. Provide a default value for your variable, such as <null>.
Click Done.
Your configuration should look as follows:
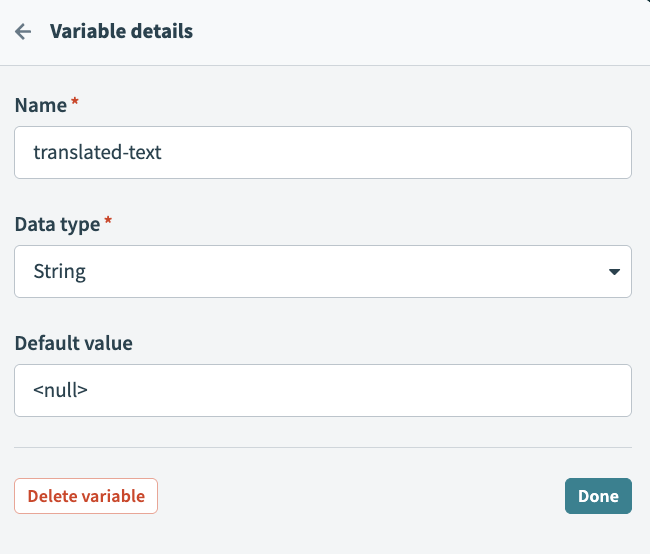 Create a variable
Map in datapills
Click the Submit button to select it and go to the Component properties panel.
Go to the source text field and map in the Value Text to translate datapill.
Go to the Target language field and map in the Selected value Target language datapill.
Go to the Output format field and map in the Selected value Output format datapill.
Your configuration should look as follows:
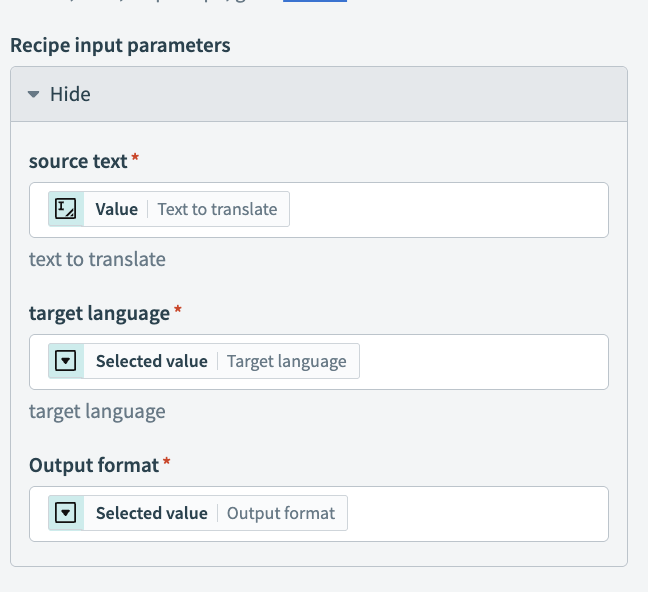 Map in input parameters
Configure a variable
This variable is used to return the translated text to your app.
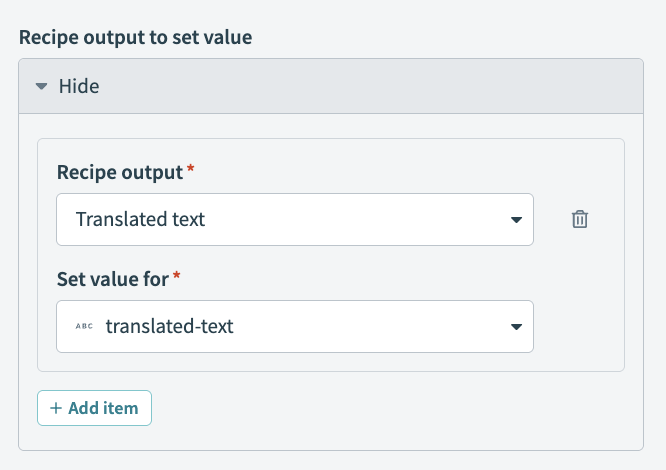
Go to the Recipe output to set value > Recipe output field and select translated-text. This is the output field you defined in your recipe.
Go to the Set value for field and select the translated-text variable.
Your configuration should look as follows:
 Use recipe output to set variable values
Map your variable into a component
This variable will contain the translated text.
Go to the Translated text container.
Select the Text component.
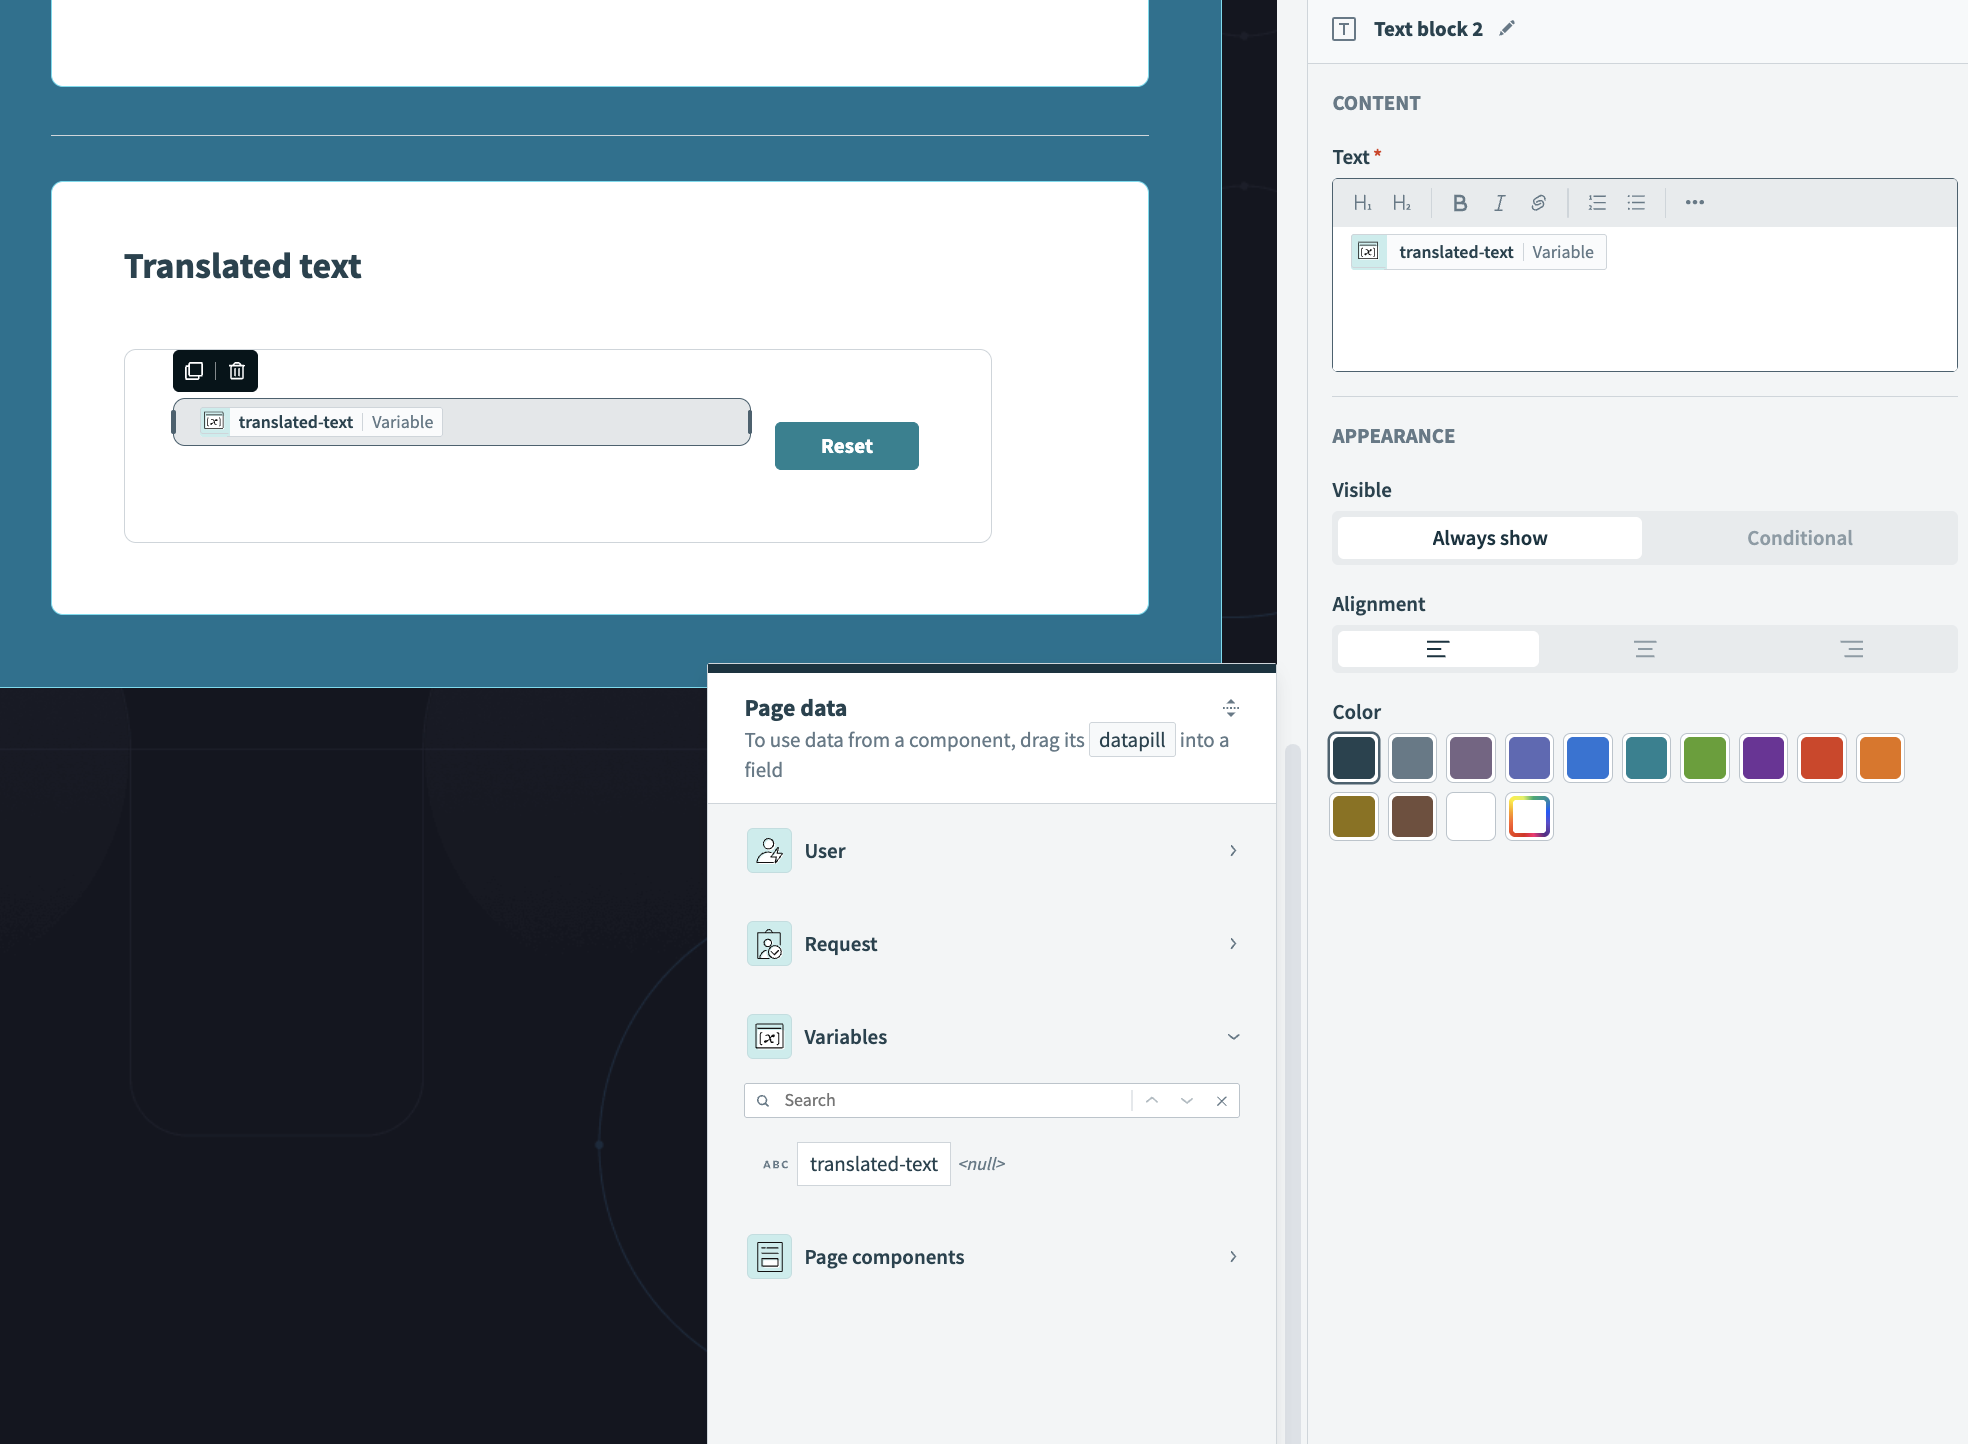
Go to the Properties panel > Text.
Map in the Translated-text datapill from the Page data module.
Your configuration should look as follows:
 Variable configuration
Click Save and Exit.
# Publish your app
Complete the following steps to publish your app:
Go to the project that contains your app.
Click Go live.
One or more user groups must be added to your app before you can publish it.
Last updated: 12/17/2025, 8:51:56 PM