# Set up the Workflow apps portal
You can configure the Workflow apps portal in Workato by navigating to Platform > Workflow apps portal > Settings. The Settings tab has three sections:
# General
VIRTUAL PRIVATE WORKATO (VPW) CUSTOMERS
This feature requires configuration steps that are specific to your Virtual Private Workato (VPW) instance. If you are a VPW customer, refer to your VPW private documentation for the configuration details for your instances.
This section enables you to set up the Portal name and customize the Portal URL by choosing a unique URL prefix.
Portal name
Business name of your Workflow apps portal. Workato displays the portal name in the App portal and email notifications.
Portal URL
Customize the URL prefix. The data center you use determines where the Workflow apps portal is hosted. Example:
https://acme.workato.appUS Data Center:
workato.appEU Data Center:
eu.workato.appSG Data Center:
sg.workato.appJP Data Center:
jp.workato.appAU Data Center:
au.workato.appIL Data Center:
il.workato.app
# Branding
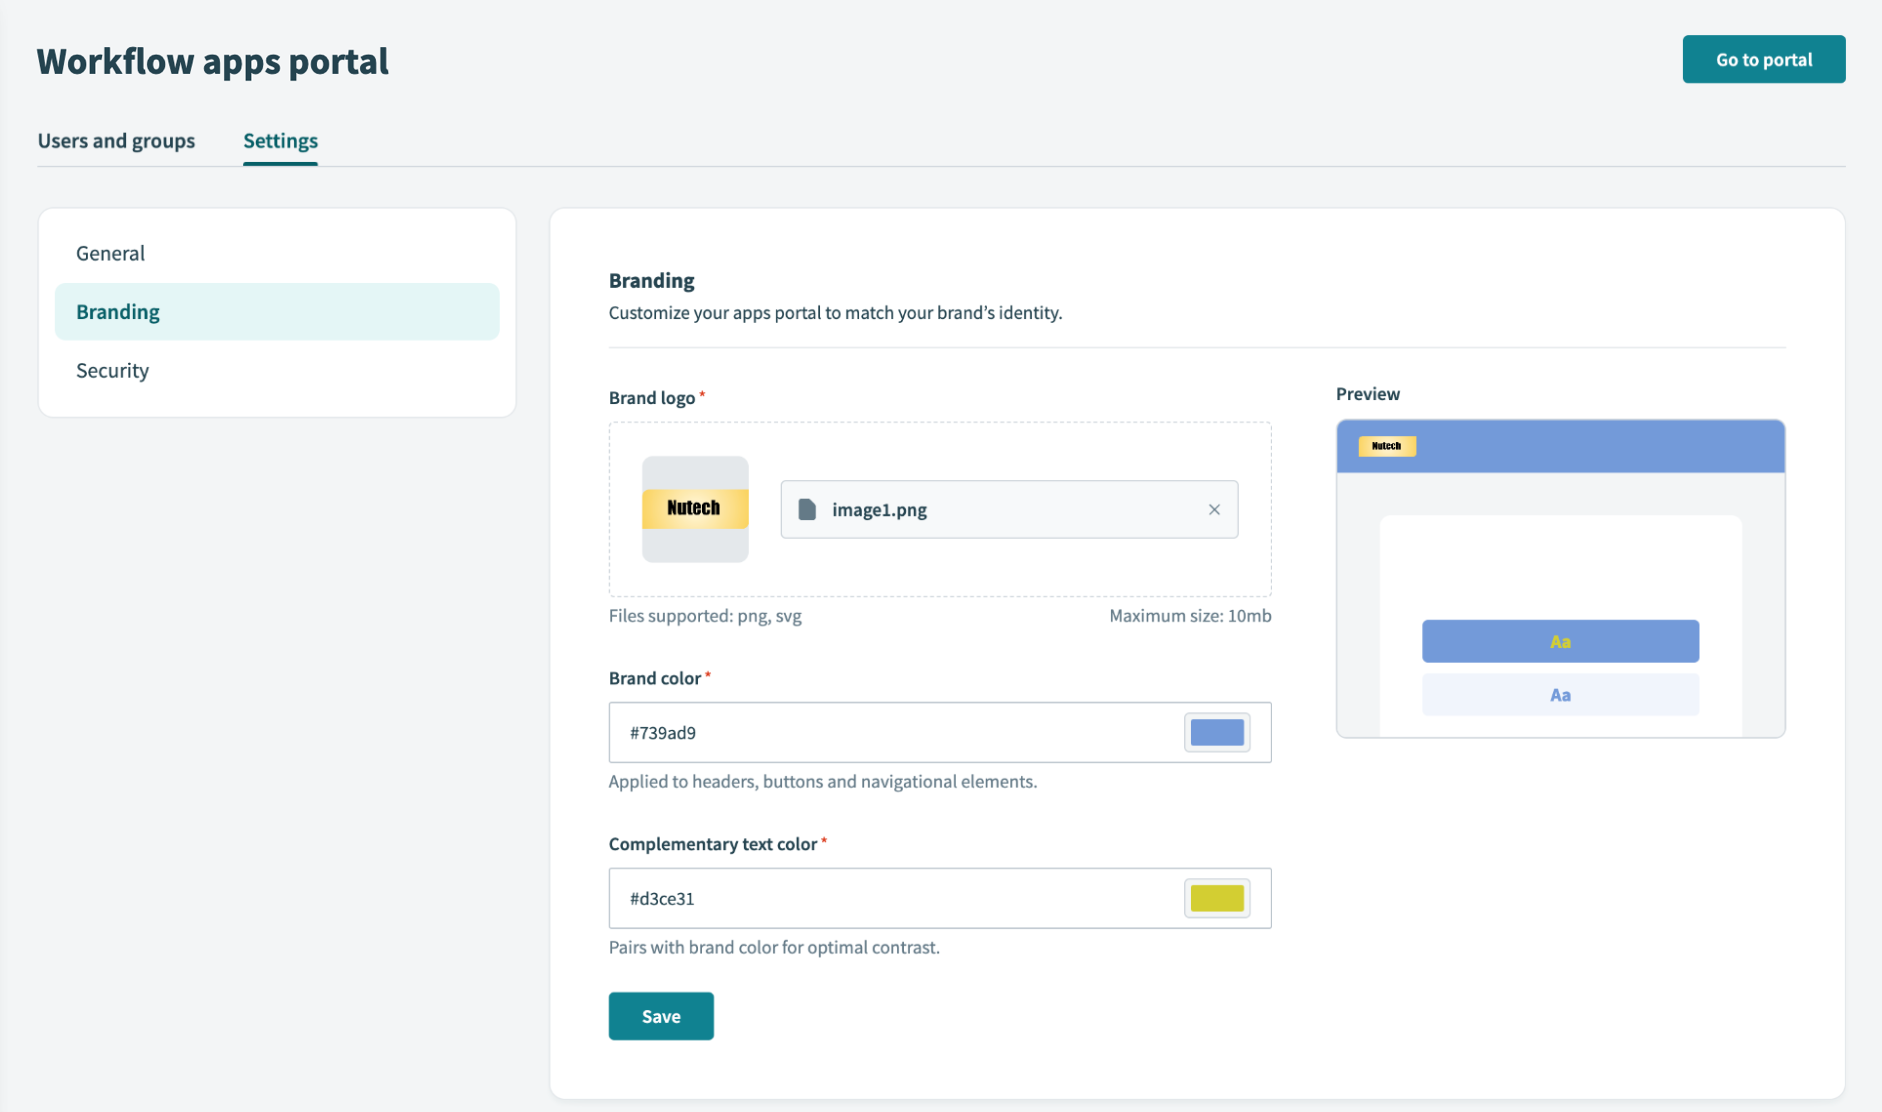
This section enables you to customize the Workflow apps portal to include your brand logo and change the branding colors to match your organization.
Brand logo
Supports PNG and SVG file types.
- Maximum size:
- 10 mb.
Brand color
Choose a color for the headers, buttons, and navigational elements. You can enter a hex color code or use the color picker.
- Sample value:
- #739ad9
Complementary text color
Pair a complementary color with the brand color to optimize contrast. You can enter a hex color code or use the color picker.
- Sample value:
- #d3ce31
# Preview
The Preview feature enables you to preview how the Brand color, Complementary text color, and Brand logo work together before implementing them in your Workflow apps portal.
The preview is static and contained within the Settings interface.
 Preview your branding choices for the Workflow apps portal
# Security
The security section enables you to set up authentication for the portal and control whether portal pages can be embedded in external websites.
# Authentication
Workato supports the following authentication schemes:
- Password authentication
- SAML-based SSO
 Set up security settings for the Workflow apps portal
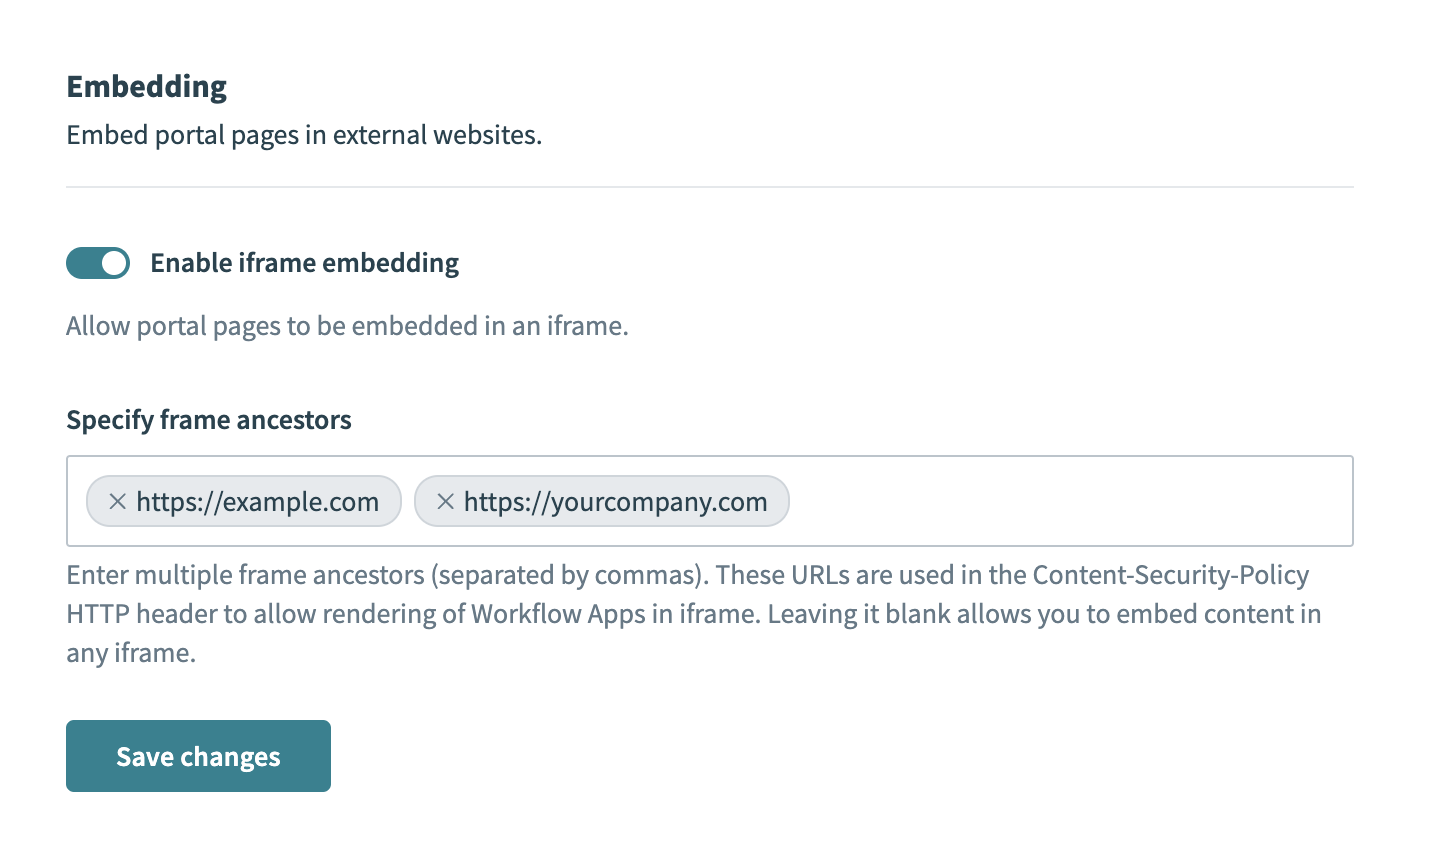
# Embedding
You can embed portal pages into your organization's internal portals, Salesforce, and more.
Toggle Enable iframe embedding to allow embedding your portal pages in an iframe. From here, you can enable embedding your portal pages in any iframe, or only within domains you specify.
If you plan to limit embedding your portal pages only to specific domains, you can specify one or more URLs in the Specify frame ancestors field. These URLs are used in the Content-Security-Policy HTTP header to allow rendering of Workflow apps in an iframe.
Alternatively, leave this field blank to allow embedding pages in any iframe.
 Enable embedding
# Customize portal for embedding
When you embed portal pages within external sites, you can customize the portal's appearance by hiding the top banner and customizing the padding on all sides by appending specific query parameters to your portal URL.
These parameters are URL-encoded JSON in the following format:
Example:
{"showHeader": false, "layoutPadding": "0 10px 10px 0"}
showHeader
Boolean (true/false) value. Set to
falseto hide the top header of the portal.layoutPadding
Determine the padding of the portal on all sides. In the preceding example, the top padding is
0, the right is10px, the bottom is10px, and the left is0.
The following demonstrates how to generate the parameter value in your browser console:
encodeURIComponent(JSON.stringify({"showHeader": false, "layoutPadding": "0 10px 10px 0"}))
Which results in the following parameter. Append this to your portal URL:
?embedding_params=%7B%22showHeader%22%3Afalse%2C%22layoutPadding%22%3A%220%200%200%200%22%7D
Altogether, it looks something like this:
<iframe src="https://mycompany.workato.app/app-name/?embedding_params=%7B%22showHeader%22%3Afalse%2C%22layoutPadding%22%3A%220%200%200%200%22%7D"></iframe>
Last updated: 5/28/2025, 6:54:02 PM