Managed workspace
In Workato, we build automations inside workspaces. While projects help to organize the automations by related use cases, workspaces organize recipes and other assets into meaningful groups for every department, level of business, or organization unit.
Each Workspace maintains a level of independence, to reflect the actual business practices for each unit of your organization.
A managed workspace exists within the Automation HQ framework, and represents a department, line of business, or organization unit, where collaborators can build automations.
Managed workspaces have the same attributes, functionality, and enablements as the workspaces that are not directly managed by Automation HQ. Each managed workspace has:
- Lifecycle independence
- Workspaces have their own set of environments (Lifecycle).
- Operational independence
- Workspaces automatically get the capabilities, features, shared connectors, and assets within the HQ Workspace. Additionally, they can have their own projects, recipes, connections, properties, and other assets. Each workspace has a dashboard to monitor issues and control usage, and can independently configure notification settings and everything necessary for creating automations and operational management.
- Users, roles, and permissions
- Invite a different set of collaborators to each workspace, and assign them to appropriate user roles for each workspace.
In Automation HQ, we have a high-level management view of workspaces. Moderators can define limits for each workspace, set up centralized audit log streaming, control available applications and shared connectors, and so on. However, general workspace operations take place directly inside the workspace itself. See Workspace.
To create a workspace in Automation HQ, see Create Managed Workspace.
Workspace sections in Automation HQ
Operations
View critical information about automation in this workspace.
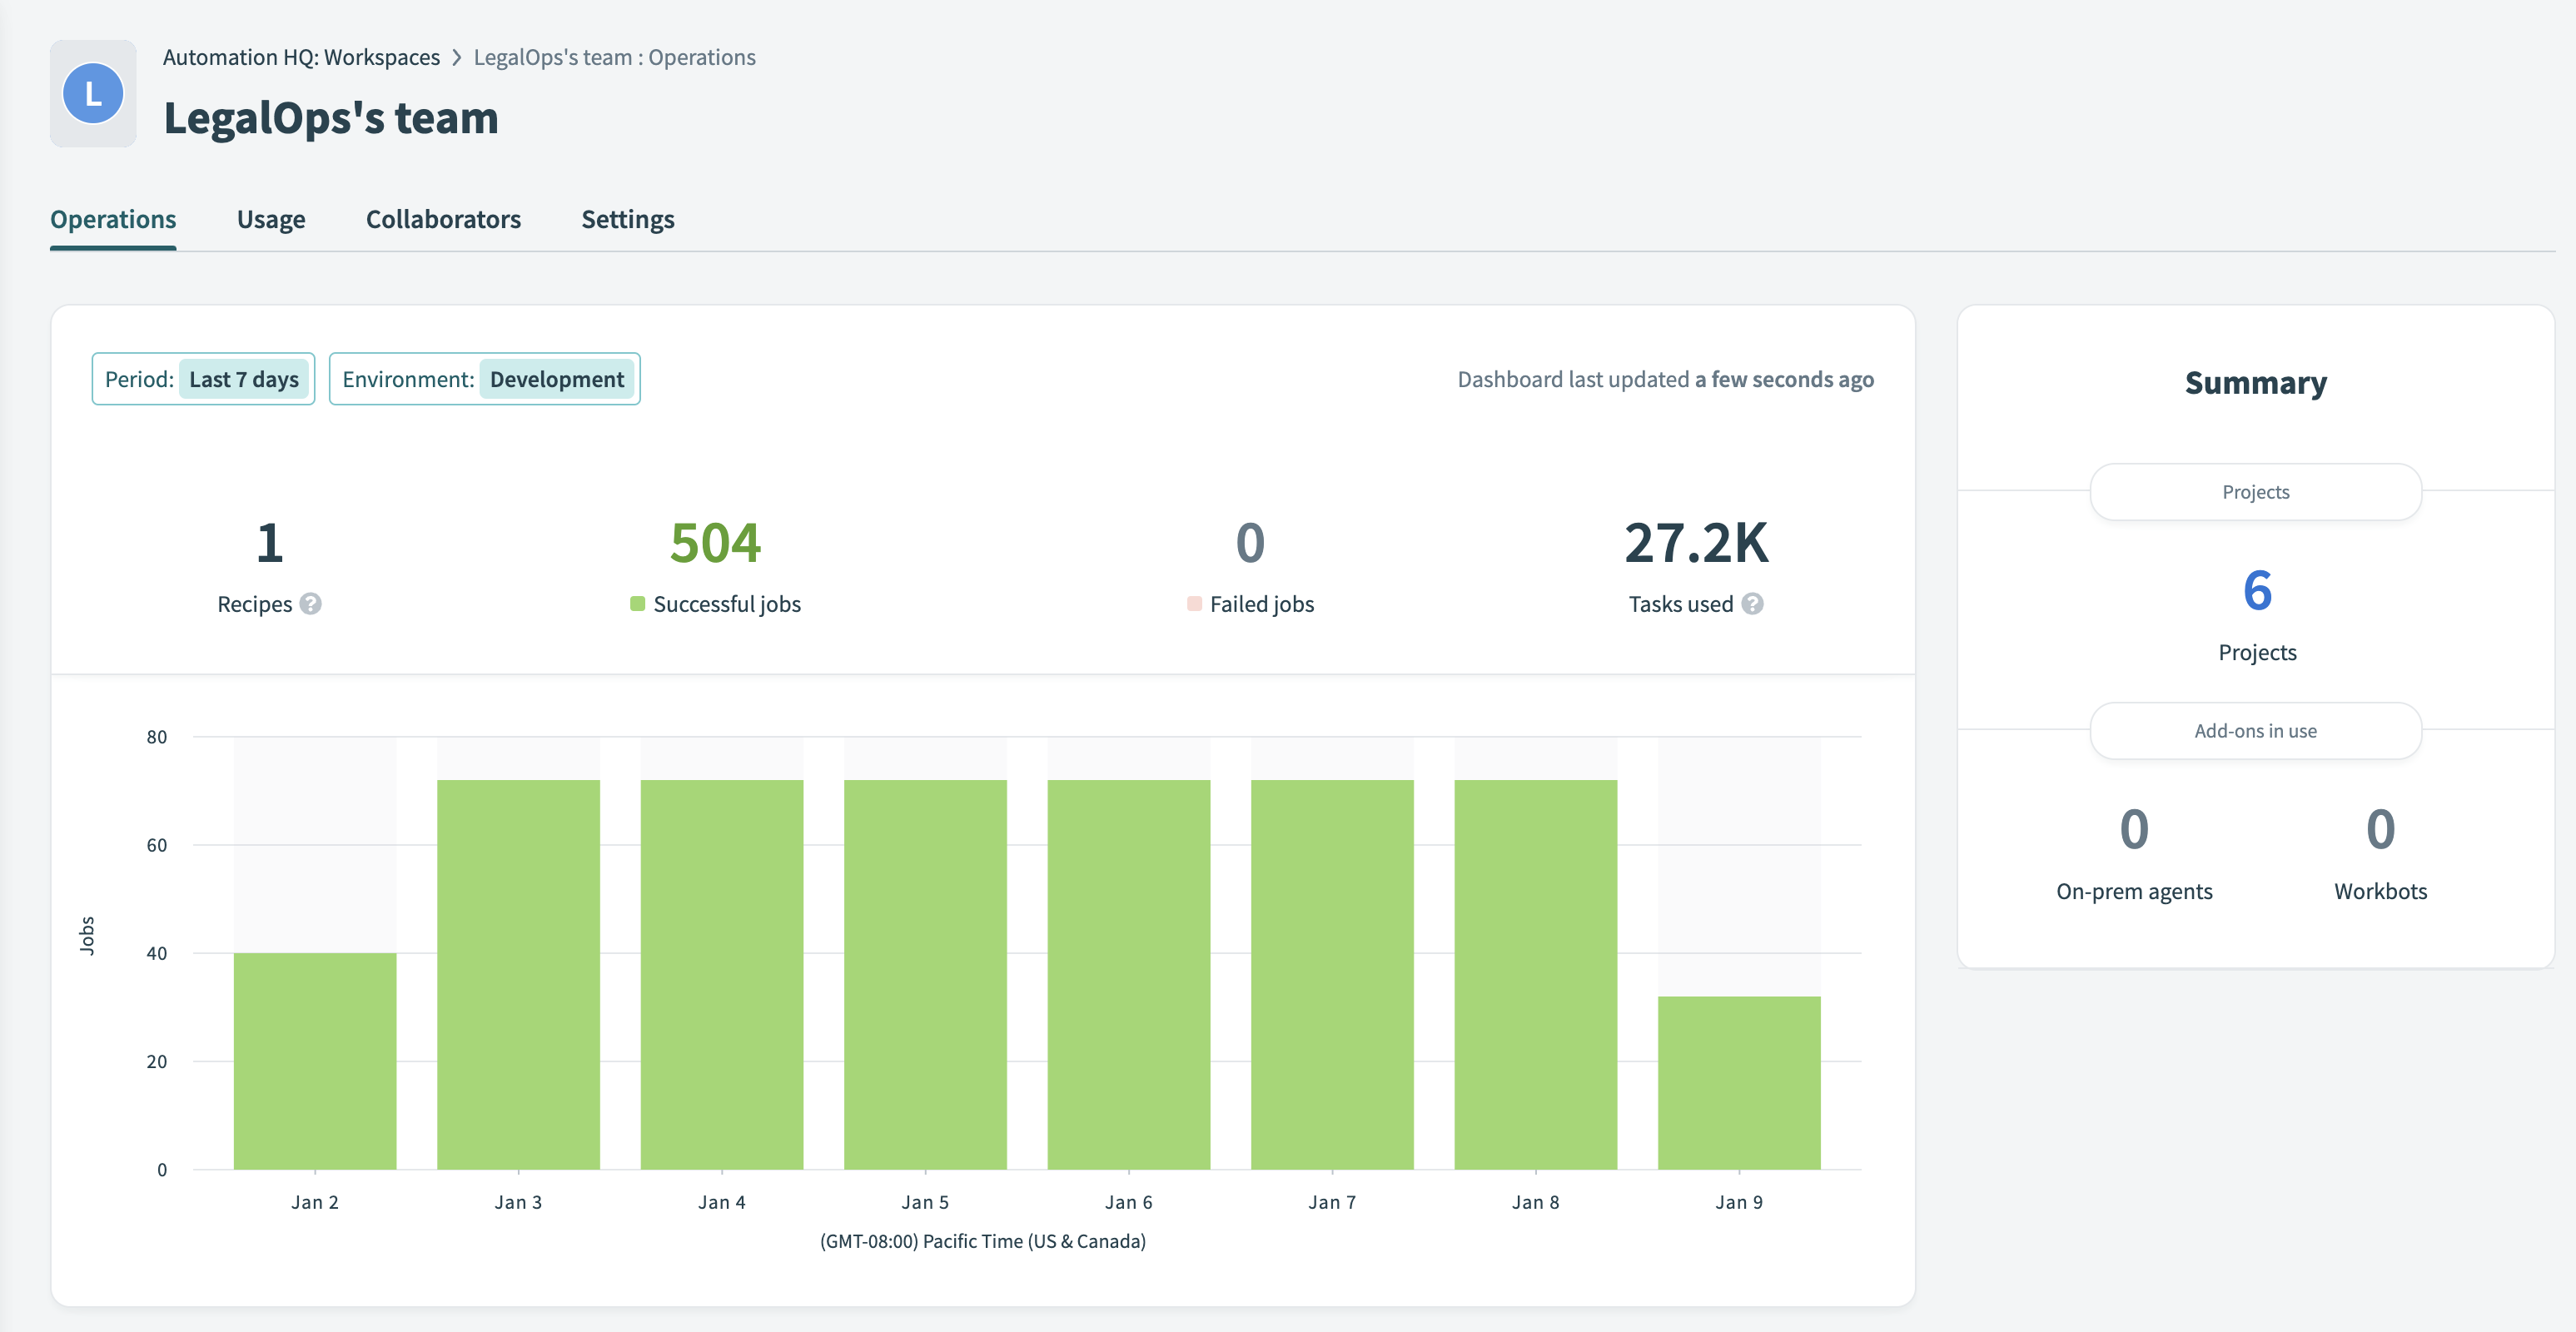
Activity report
The activity report provides the following metrics:
- Environment
- Toggle between viewing the metrics for the Development, Test, and Production environments.
- Period
- Select the dimensions of the graph's horizontal access by choosing between Last hour, Last 24 hours, Last 7 days (default), Last 30 days, or specify a Custom range using a calendar selector.
- KPIs
- The key indicators for the workspace include the number of Recipes, Successful jobs, Failed jobs, and Tasks used for the specified Environment and Period.
- Graph
- The stacked bar chart plots both successful and failed Jobs for the selected time period, at an appropriate fractional period of time. For example, if the Period is "Last hour", the graph produces a measurement for each 5-minute interval. The chart also specifies the global time zone of these operations.
Summary
The summary provides visibility into the number of Projects, On-prem agents, and Workbots in the specified workspace environment.
Connected apps
This report communicates the names of apps connected to the workspace, and the number of connections for each app.
Usage
View usage in this workspace across time and across all environments.
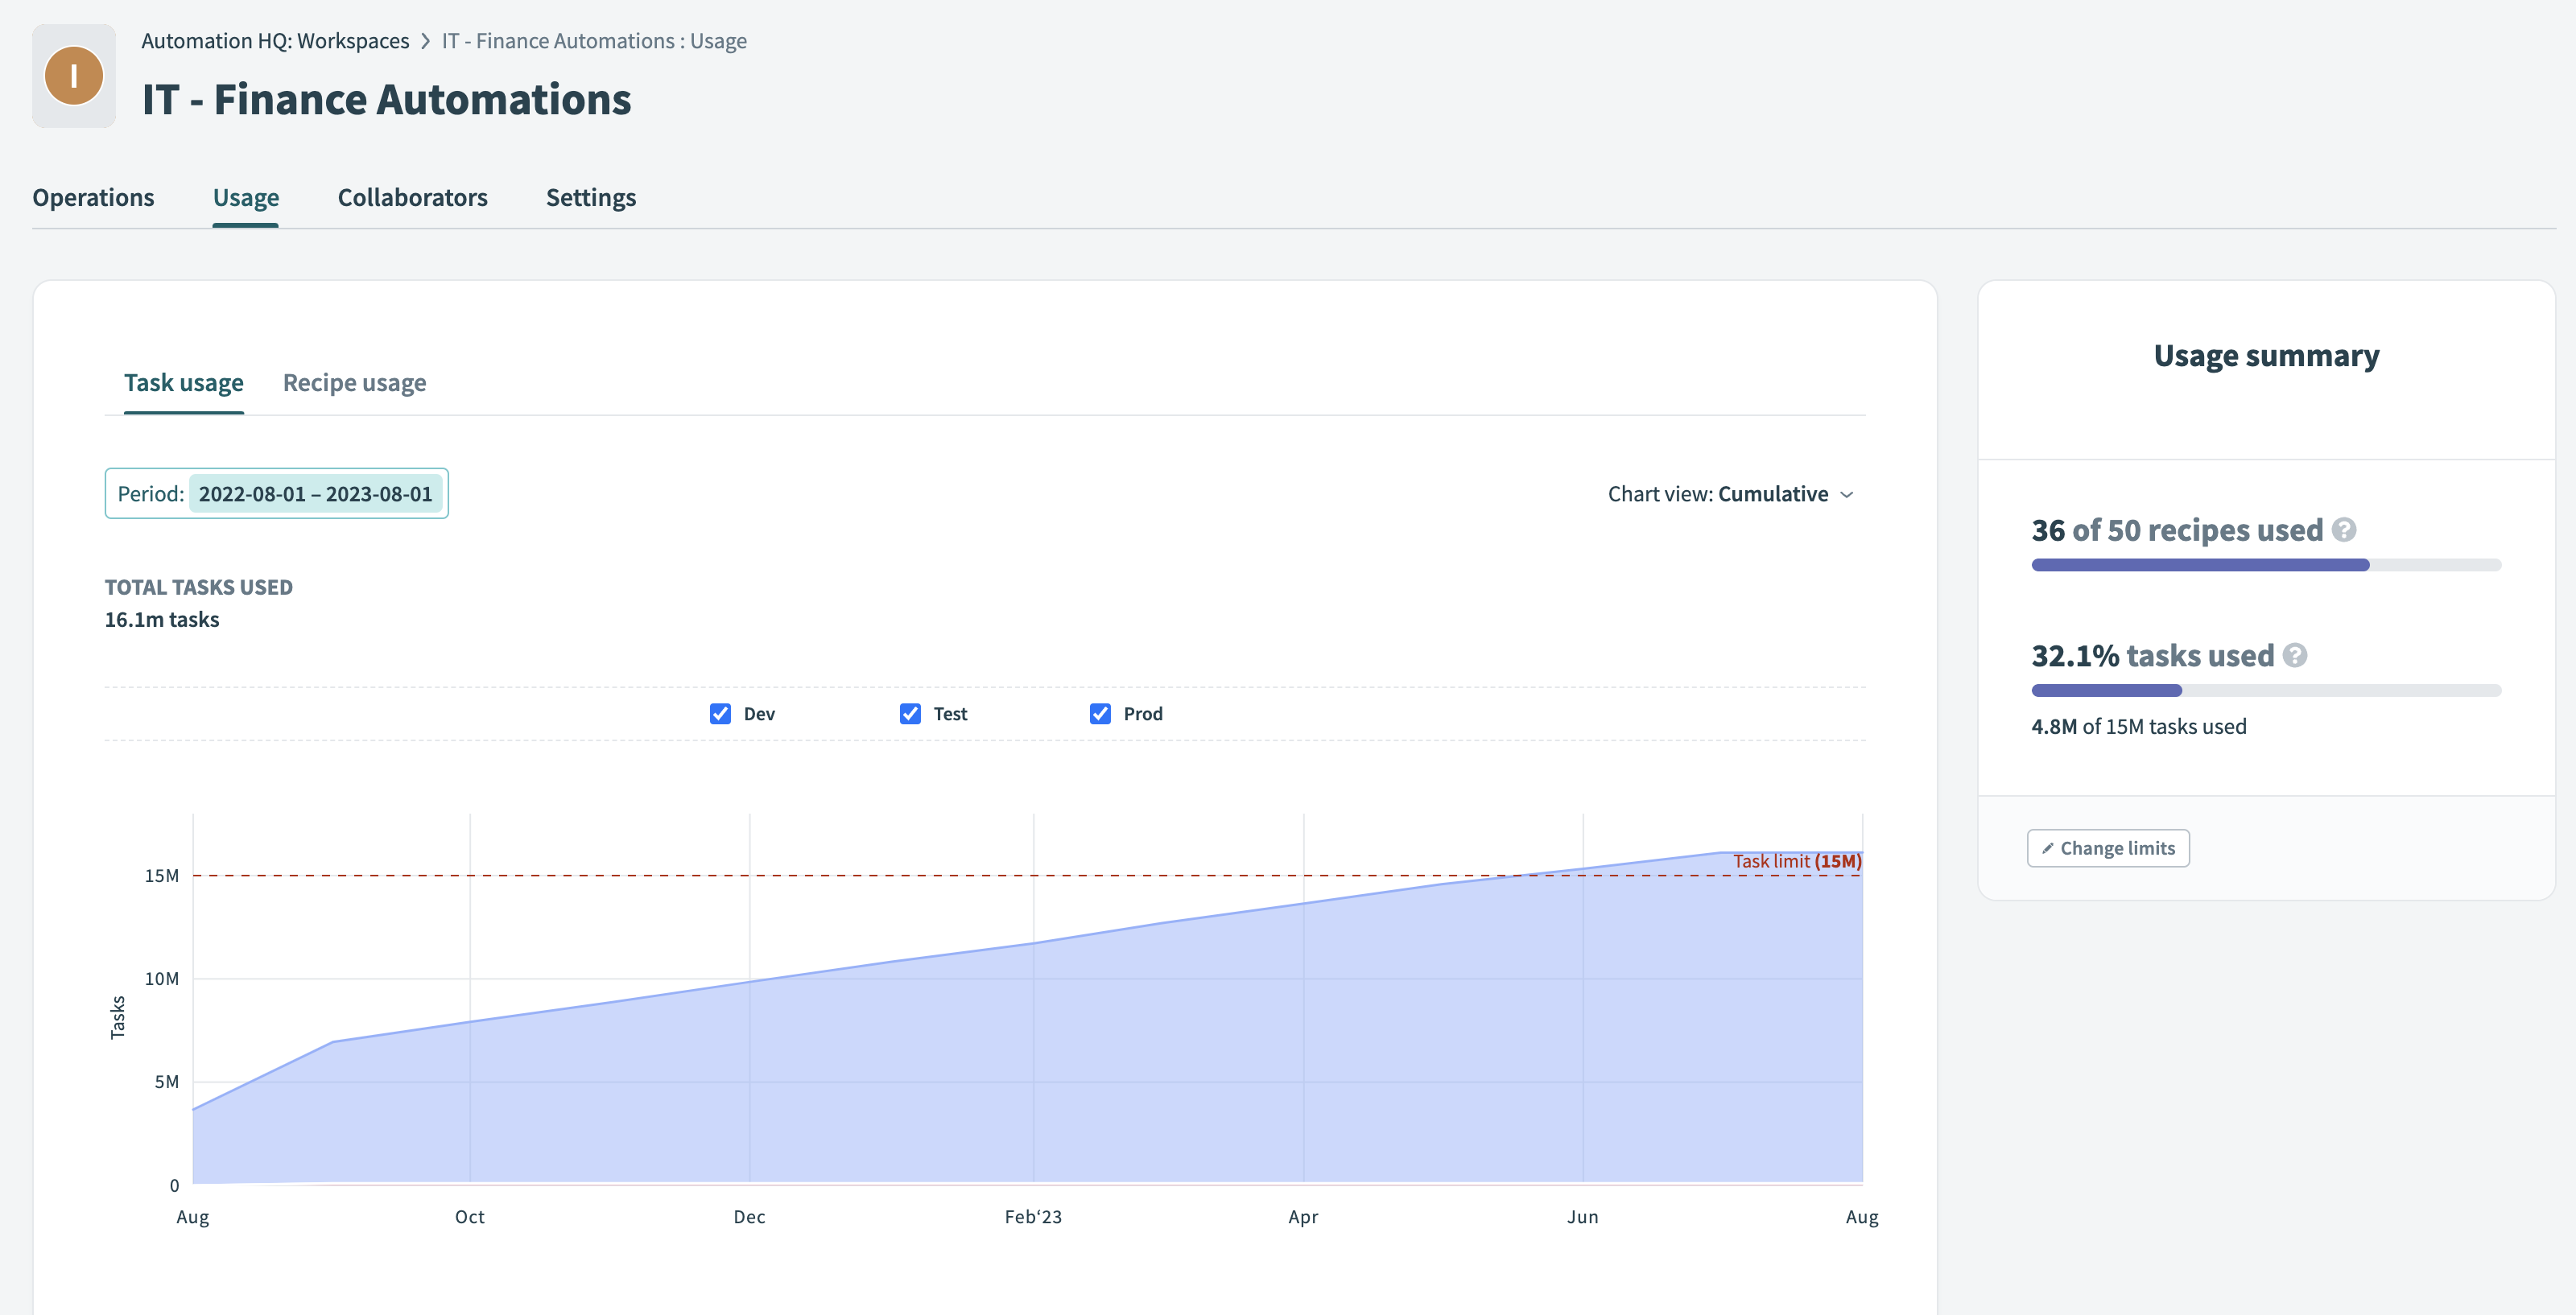
Plan usage
The plan usage report incorporates the following metrics:
- Data
- The plan reports data either as Tasks (default), or as Recipes.You can easily toggle between the two options.
- Period
- Select the dimensions of the graph's horizontal access by choosing between the available time periods.
- Environment
- By default, the chart shows usage across all environments. You can select to show data from 1 to 3 (all) environments: Development, Test, and Production.
- Chart view
- A Cumulative chart plots usage as stacked areas, by default. Alternatively, you can switch to Monthly column views.
Summary
The summary for usage includes the following bar indicators:
- Recipes
- Count of recipes as a portion of the allowed plan, with the corresponding bar indicator.
- Tasks
- A percentage of tasks used as a portion of the allowed plan, with the corresponding bar indicator.
- Change limits
- Depending on your role and permissions, you may see an option to change limits. See Usage limits.
Collaborators
See who is part of this workspace.
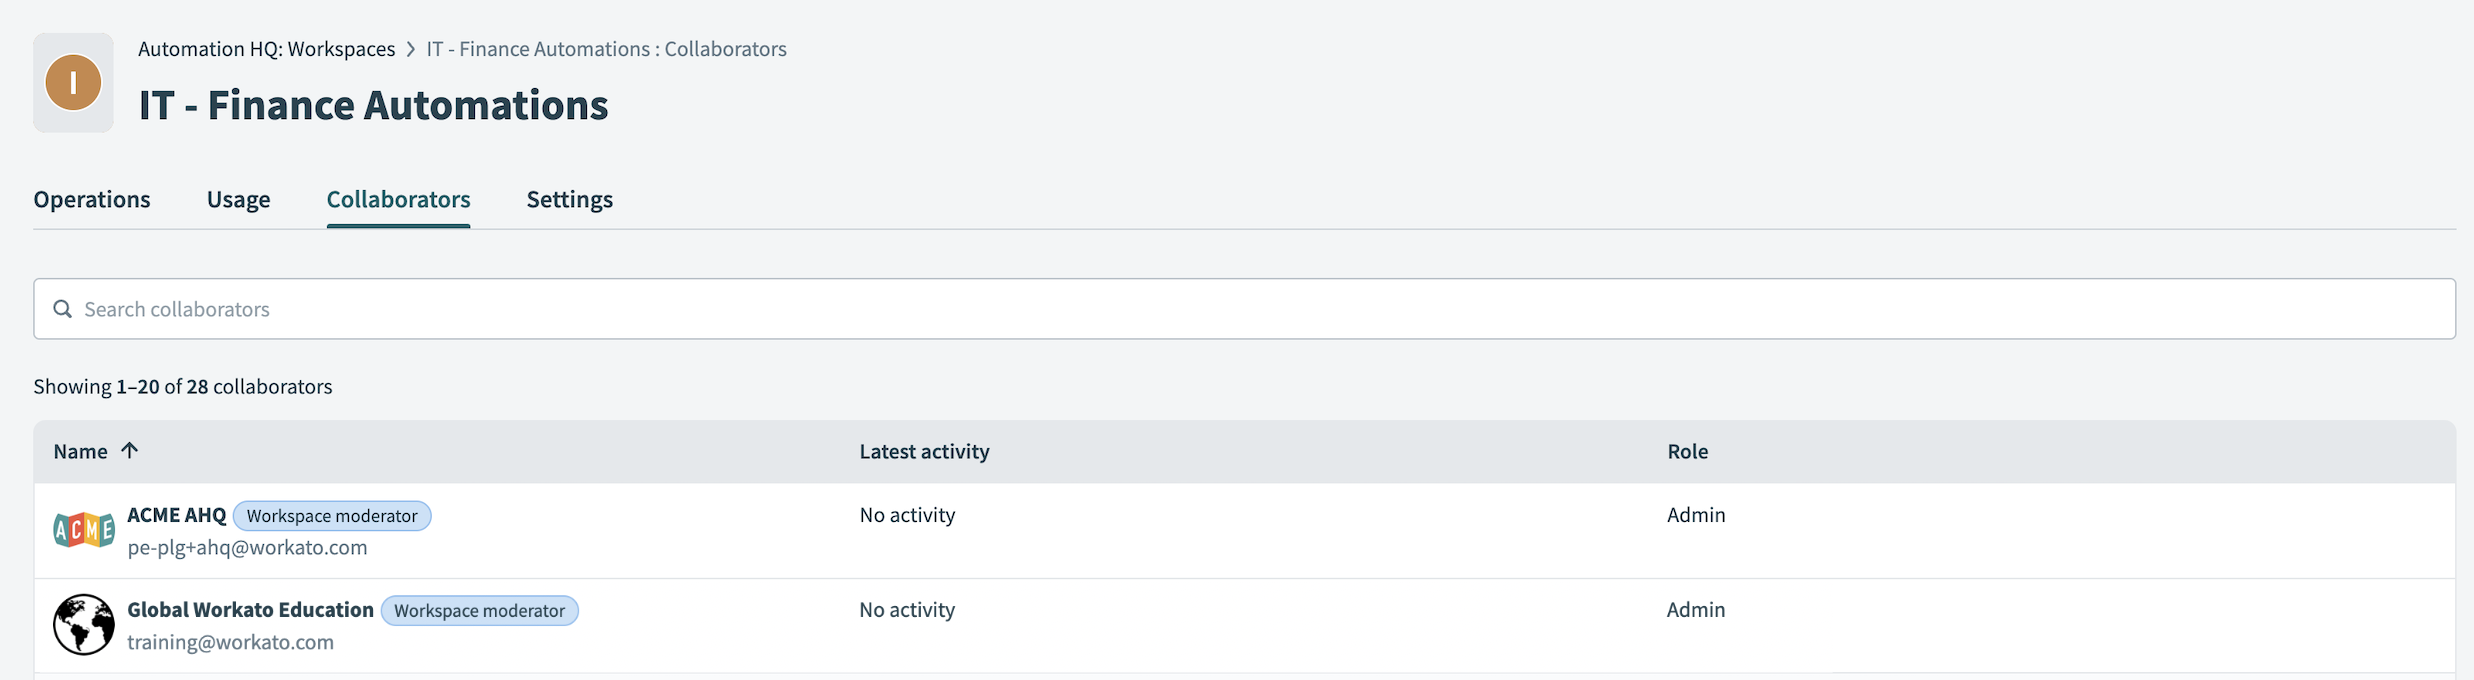 Collaborators of the workspace
- Search
- You can search for collaborators by name, e-mail address, or role. For example, enter "Admin" if you have to reach an administrator for assistance, and then select the person who appears logged in.
- Name
- All collaborators in the workspace appear here, with their email addresses. Some carry the "Workato moderator" tag, and some added their photo to their profile.
- Latest activity
- Latest activity for each collaborator includes their status (No activity, Accepted team invitation, Logged in, and Logged out). It also includes the timestamp or relative time period.
- Role
- Each collaborator has an assigned Role; these can be configured.
Settings
Usage limits
You can allocate your organization's usage, concurrency, and OPA capacity across managed workspaces. Every workspace draws from the same organization-wide pool, so a larger allocation for one workspace leaves less for others. The total you allocate across all workspaces can't exceed what your organization has provisioned. This limits what you can assign, not what a workspace actually consumes.
Complete the following steps to update a usage limit:
Go to Automation HQ > Workspaces.
Select a managed workspace and go to Settings > Usage limits.
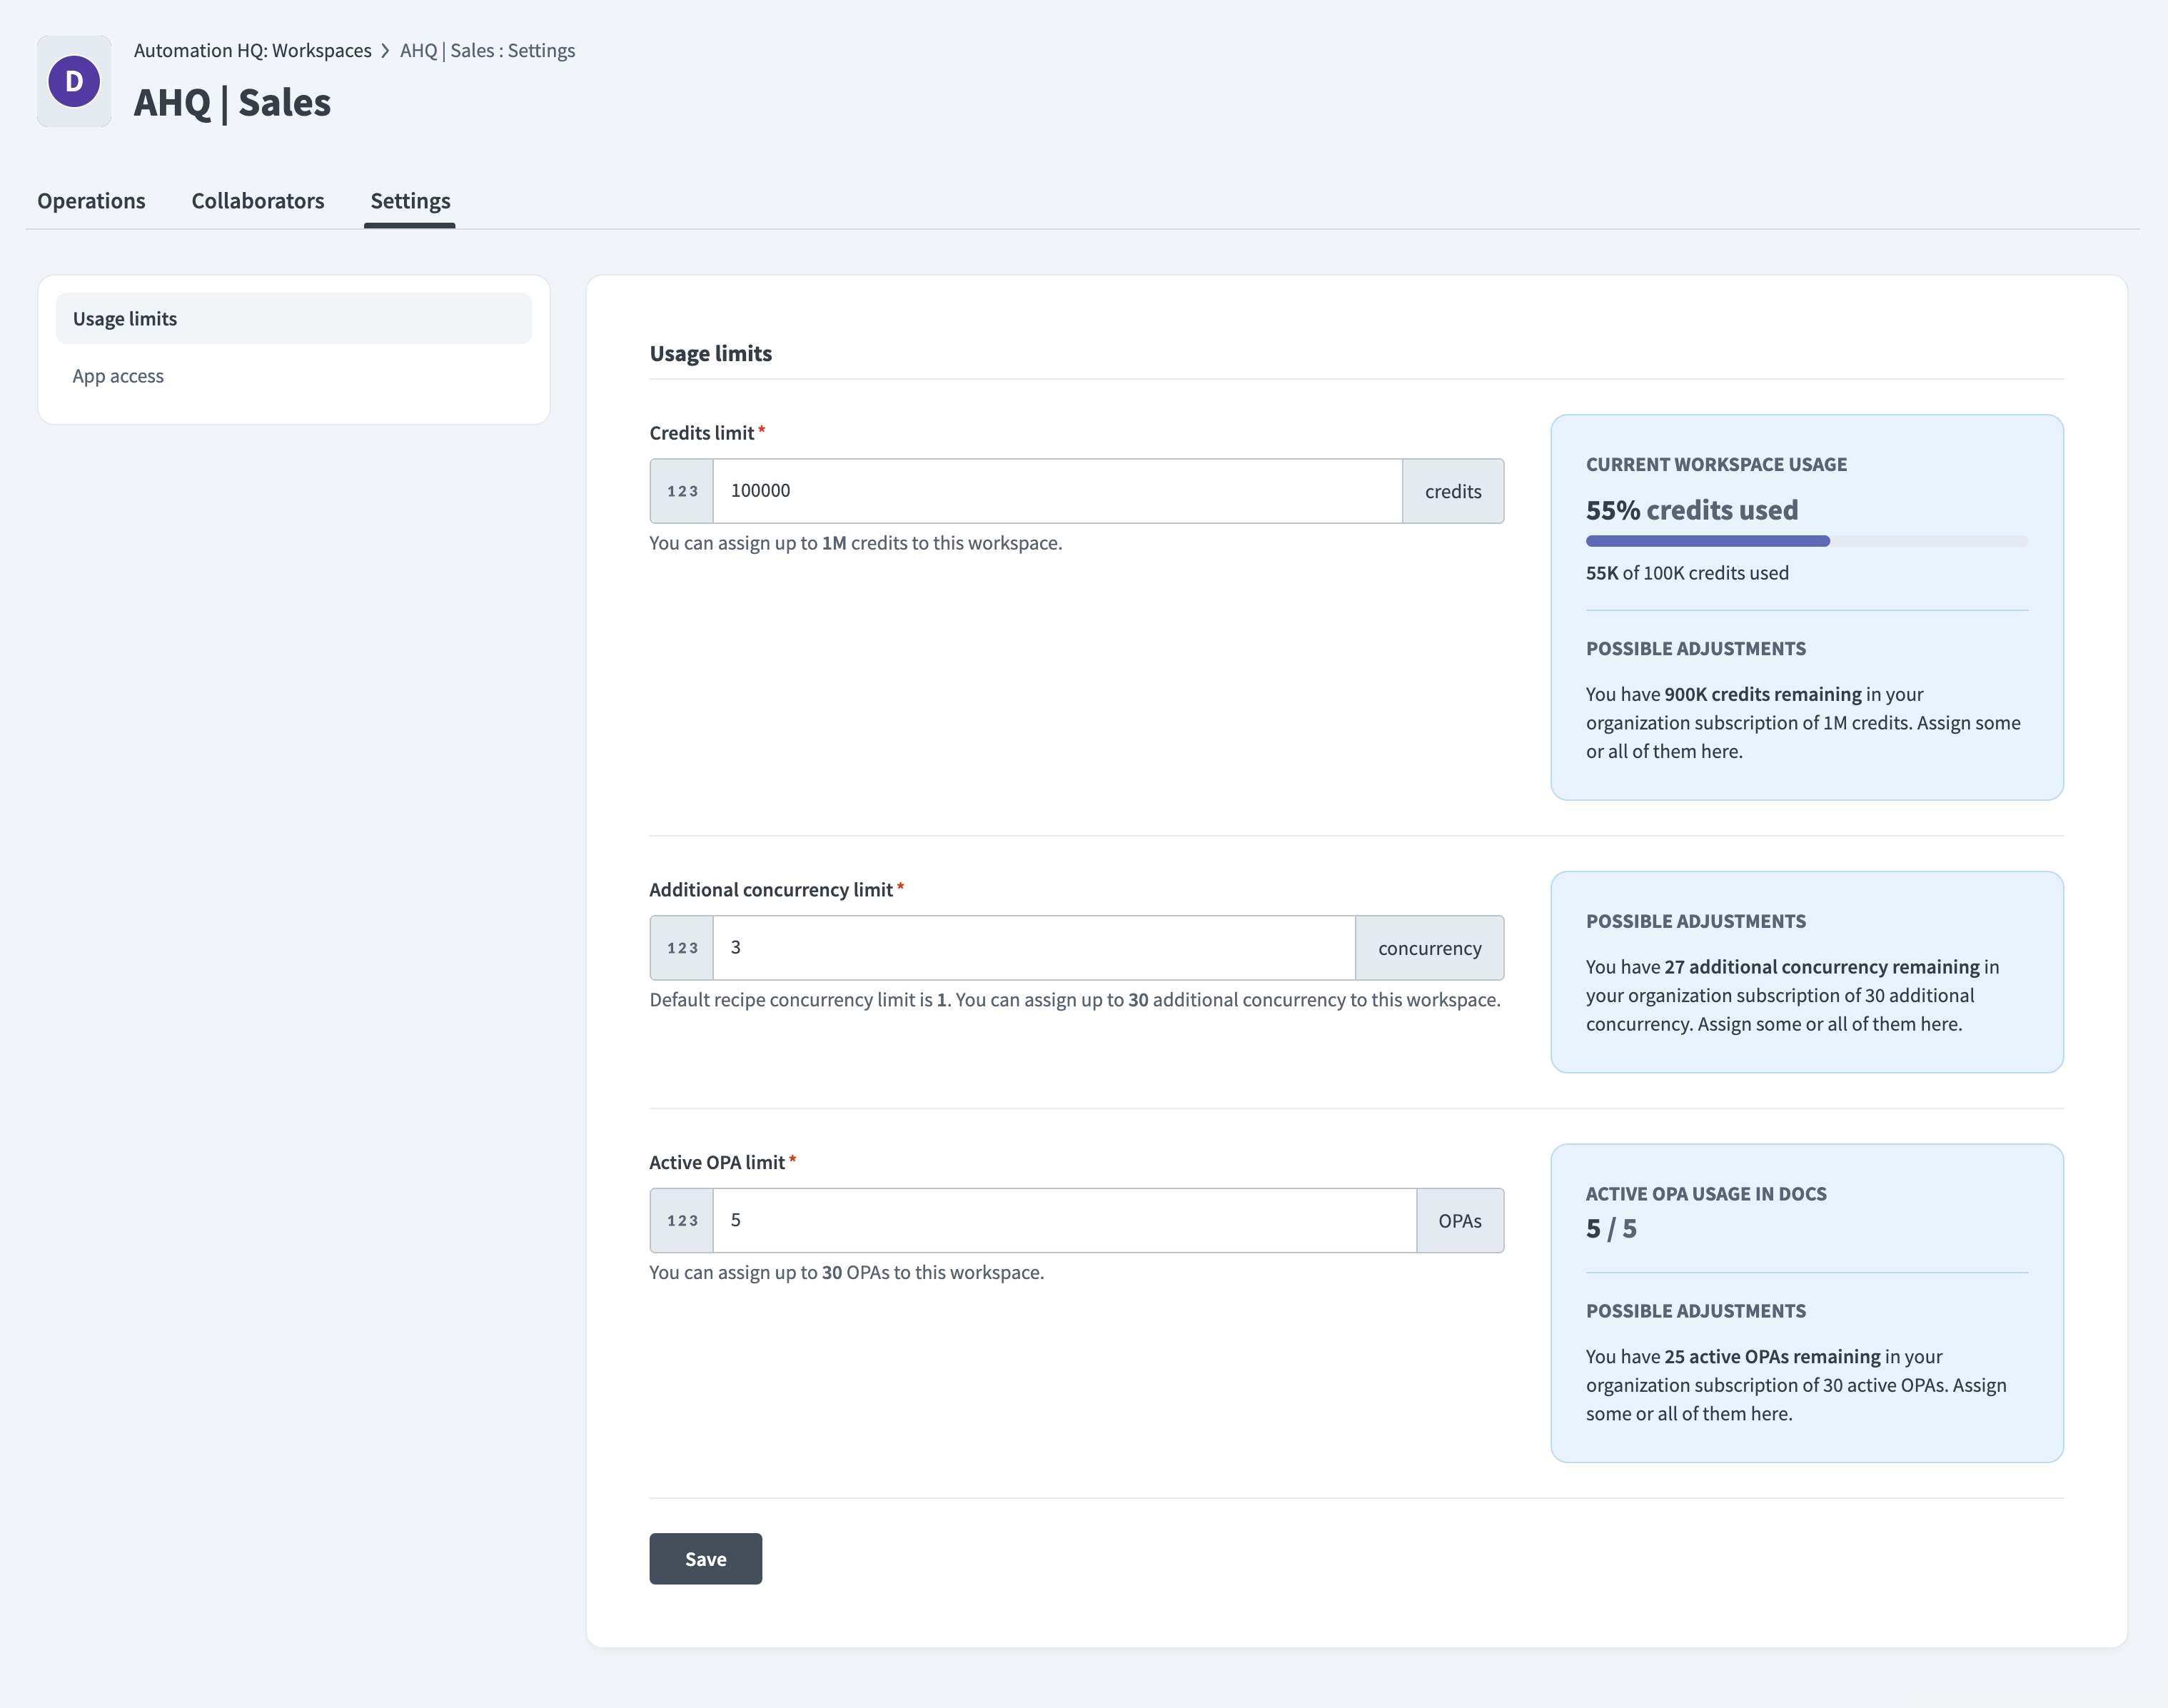 The Usage limits page in a managed workspace's settings
Enter a new value in the relevant field.
Billable recipe limit
The number of active (billable) recipes allocated to this workspace.
Task limit
The number of tasks allocated to this workspace. Actual usage can exceed this allocation.
Credits limit
The number of credits allocated to this workspace.
Additional concurrency limit
The number of concurrent recipe jobs this workspace can run beyond the default of 1.
Active OPA limit
The maximum number of active on-prem agents (OPAs) this workspace can use.
Click Save.
Control Applications
In the App access central interface, you can see the apps that your workspace can access; they appear with their proper names and company logos.
Decide what applications the users in the managed workspace can access when you restrict access to an allowed list of applications. Shared custom connectors also appear here.
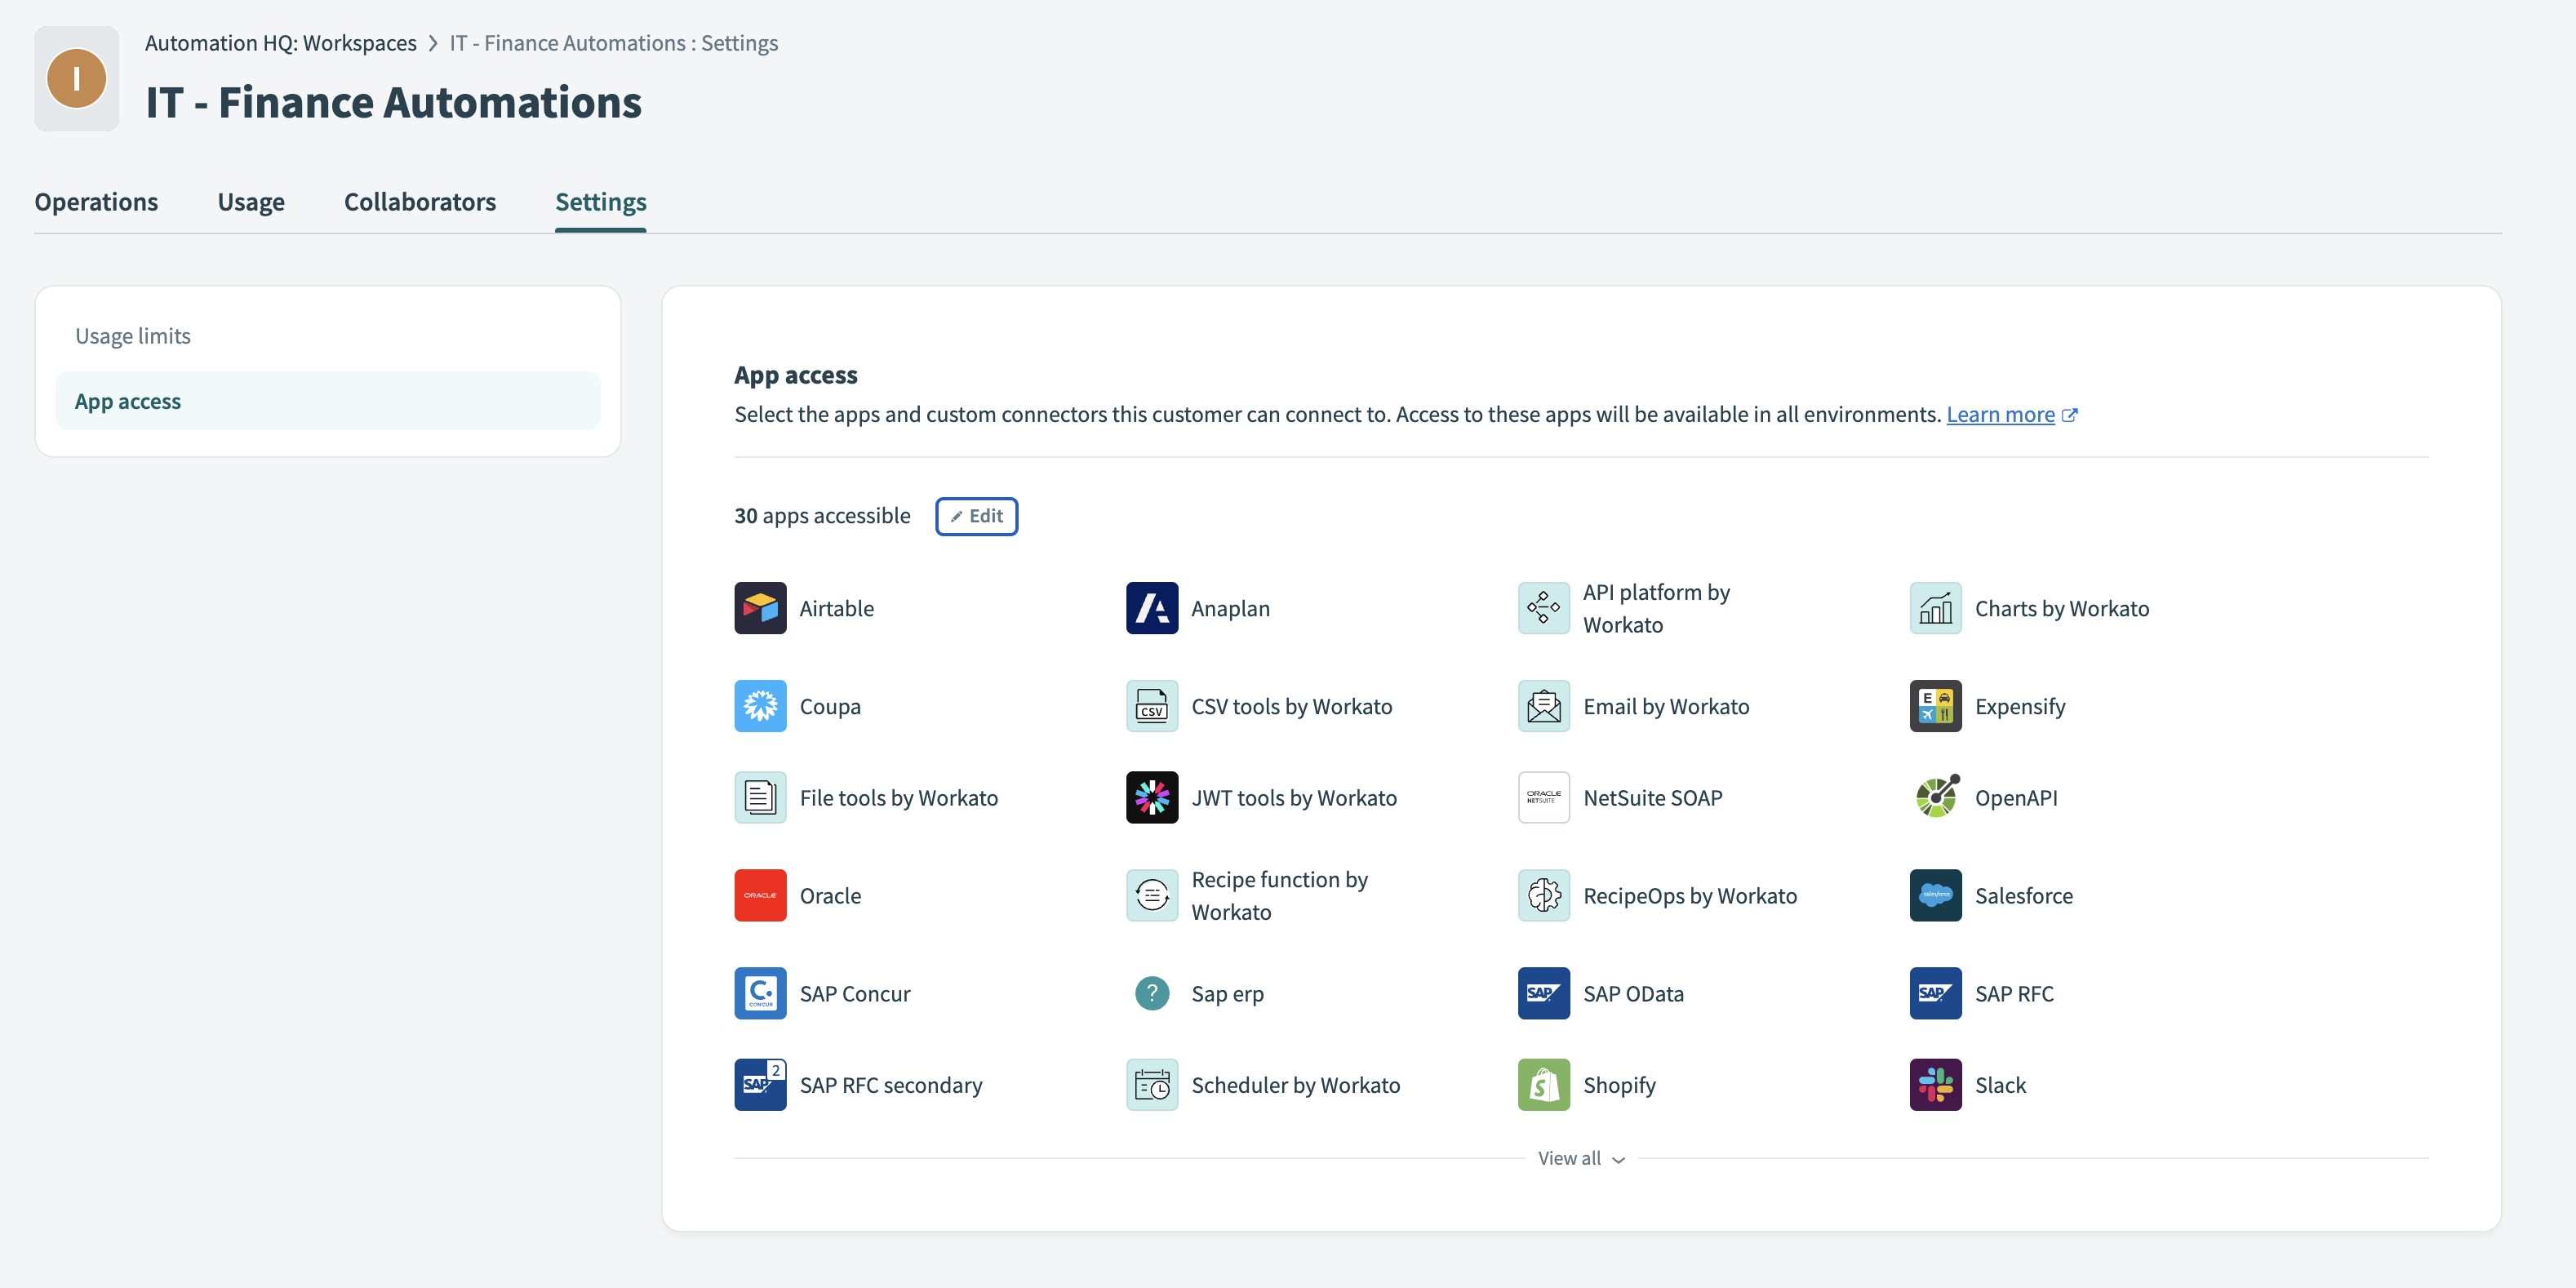 App access: Apps you can use in this workspace
Changing app access
To change app access, follow these steps:
Navigate to the Settings interface for the workspace, and select the App access screen.
Click Edit.
In the Edit access to apps modal, select new apps, or deselect currently selected apps.
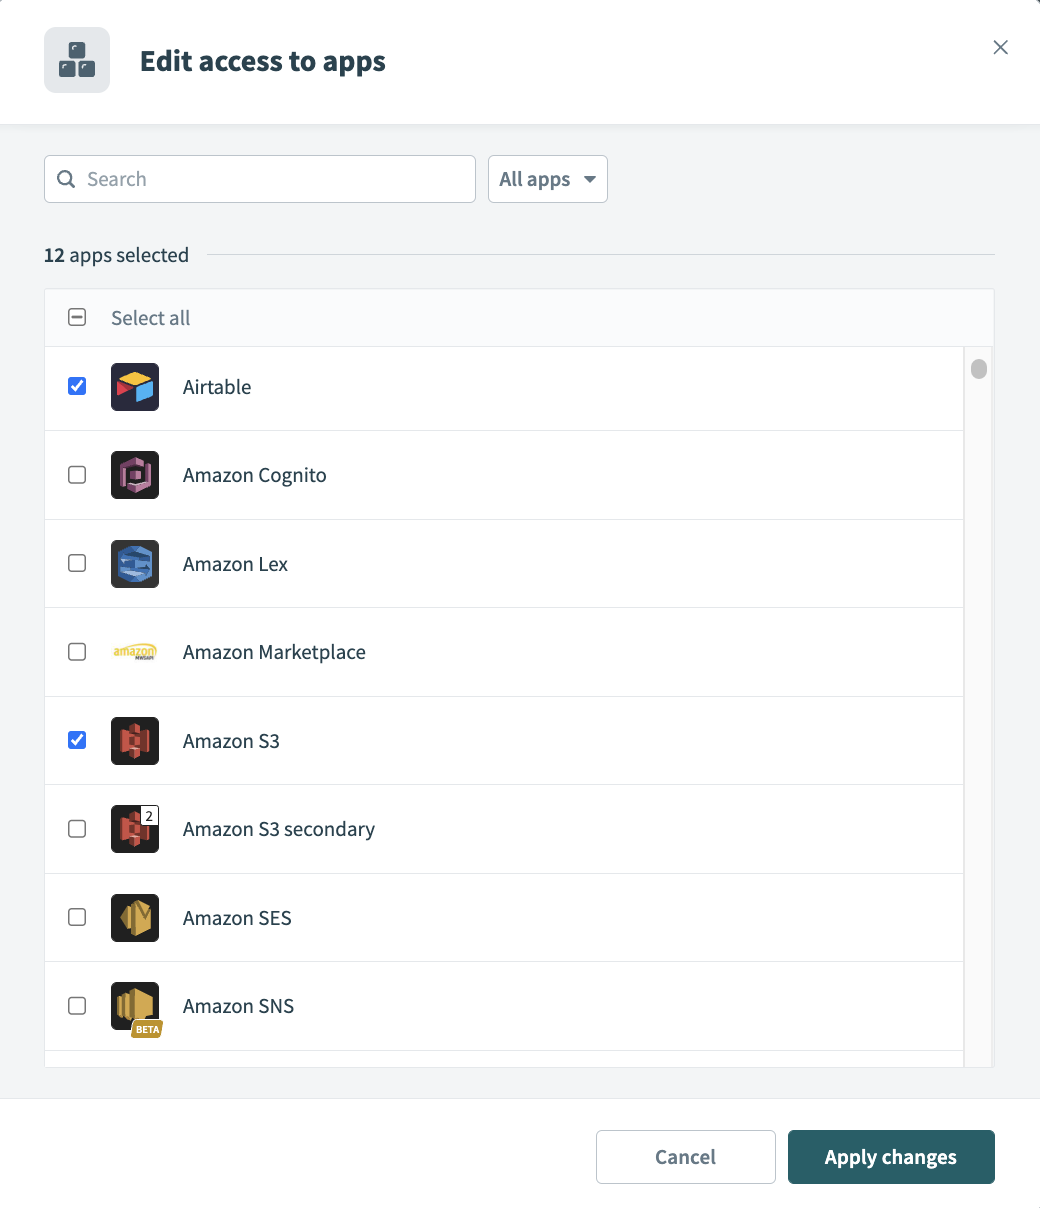 Edit access to apps
Click Apply changes.
The system confirms the change.
Notice the change in the display of accessible apps.
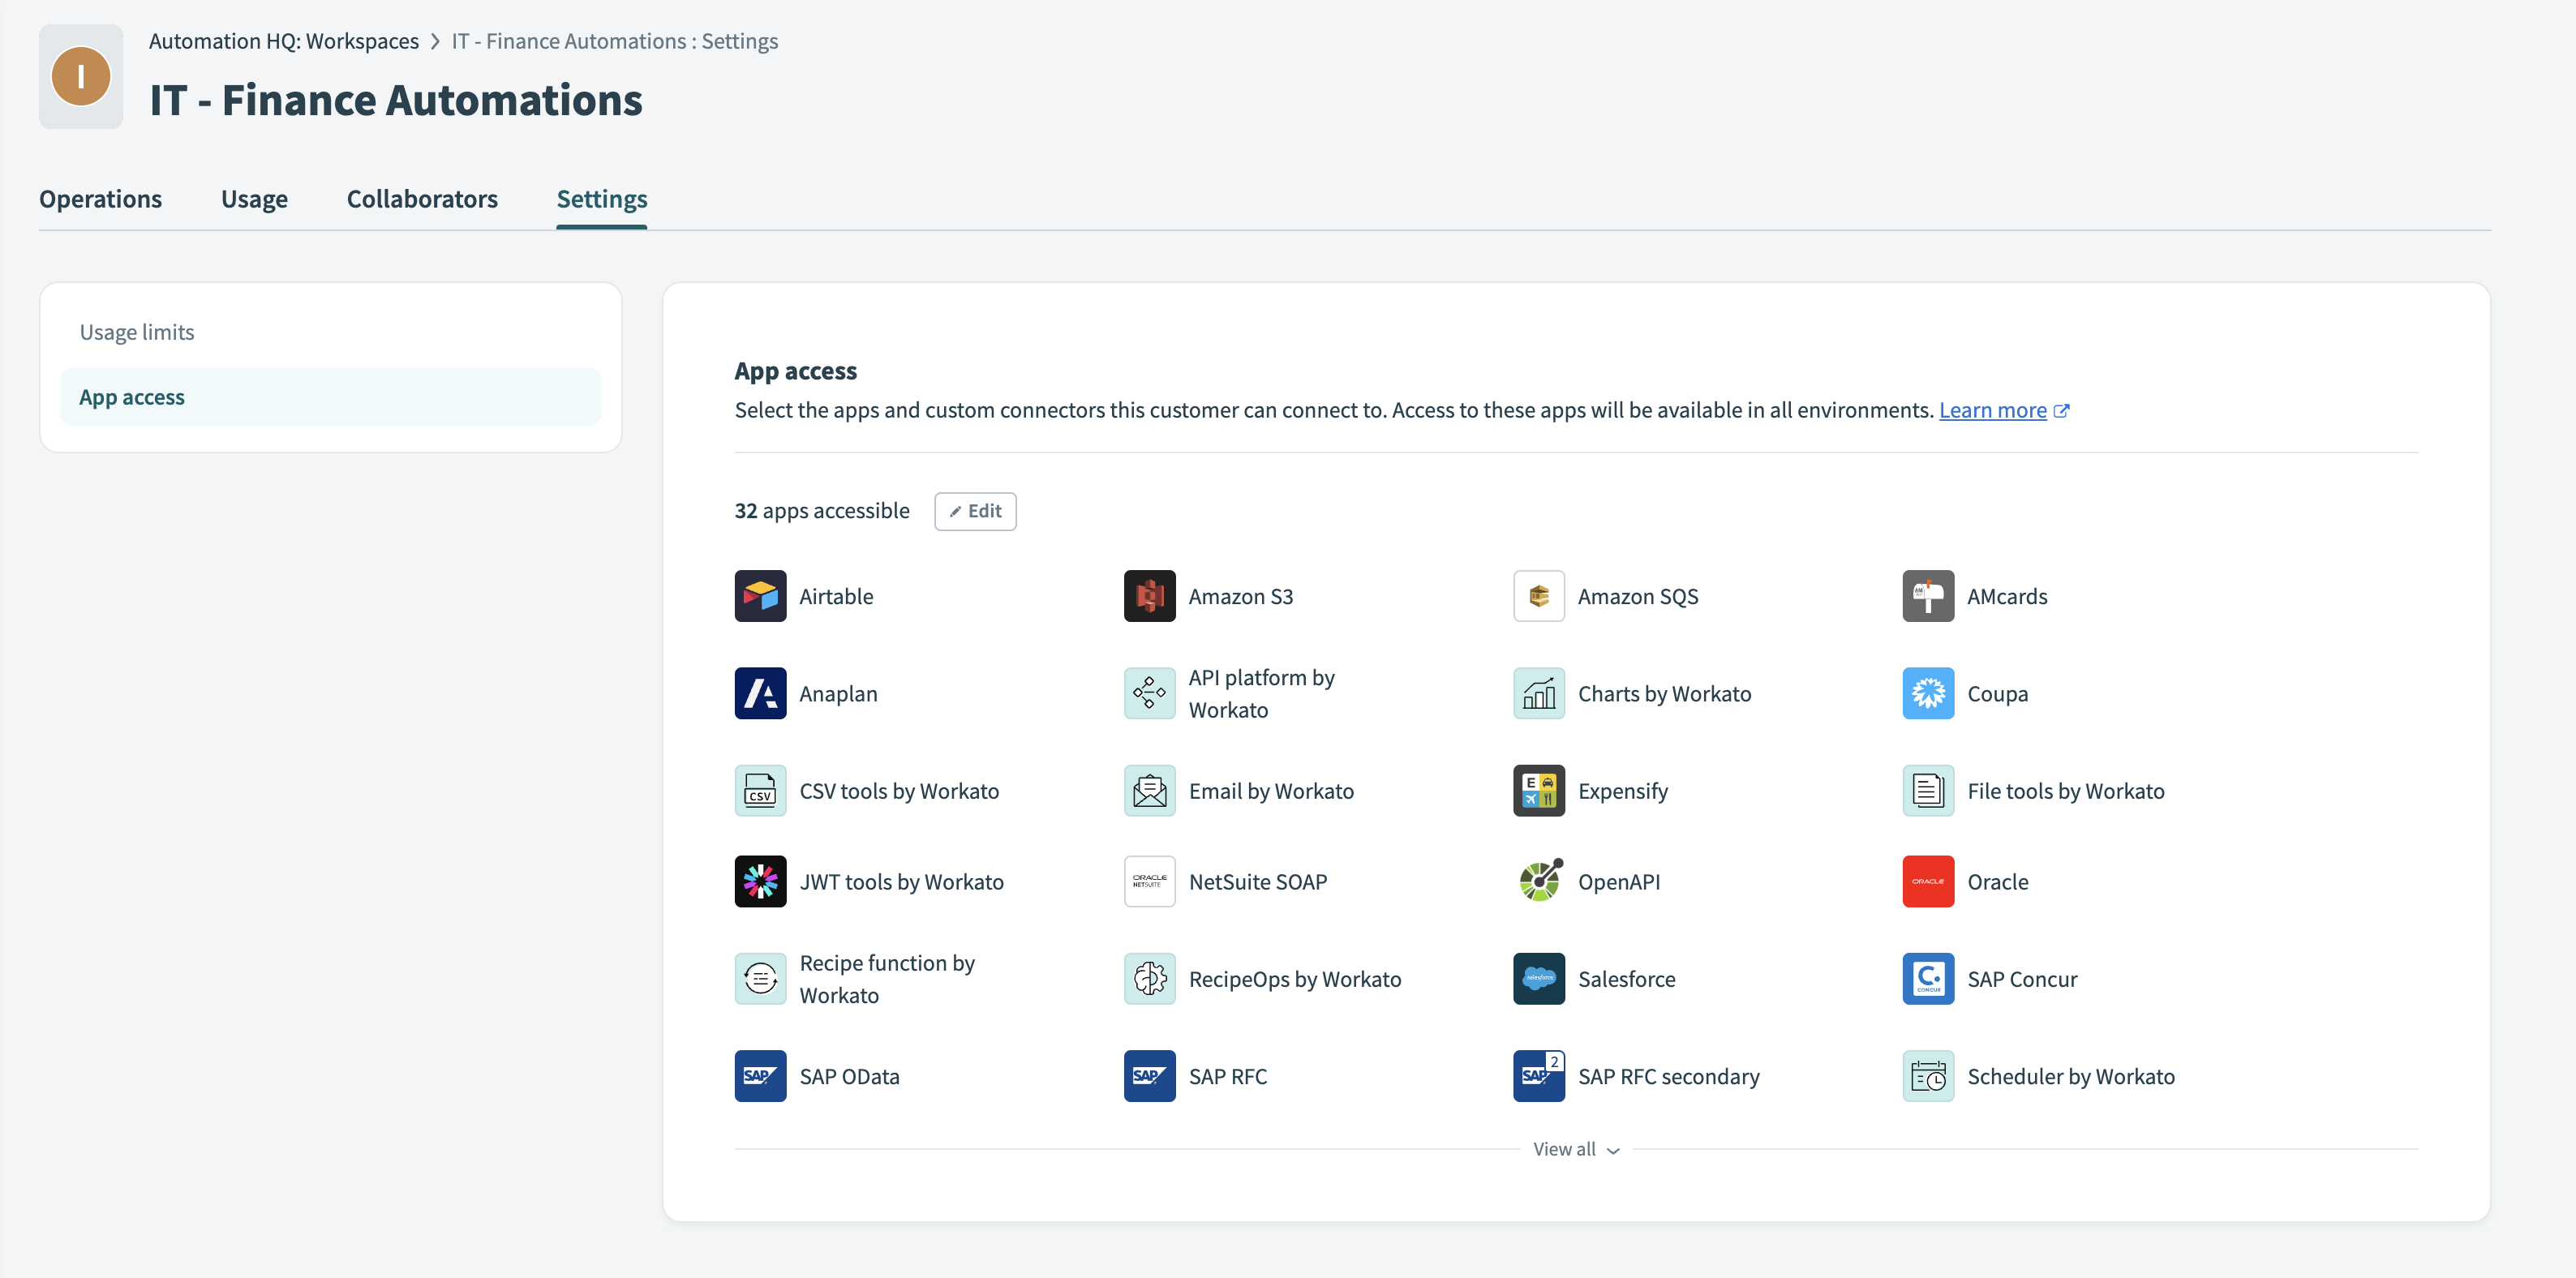 App access: new applications
Last updated: