Configure a new API proxy endpoint
Complete the following steps to configure a new API proxy endpoint:
Prerequisites
Before creating a new API proxy endpoint, ensure that you complete the following prerequisites:
- Create an HTTP connection to enable Workato to forward requests to the external API.
- Create an API proxy collection to organize related endpoints.
- Review the endpoint path guidelines to ensure consistent and valid path configurations.
Create the endpoint
Complete the following steps to create a proxy endpoint:
Go to Platform > API platform > API collections and select the API proxy collection for which you plan to create the new endpoint.
Select + New endpoint.
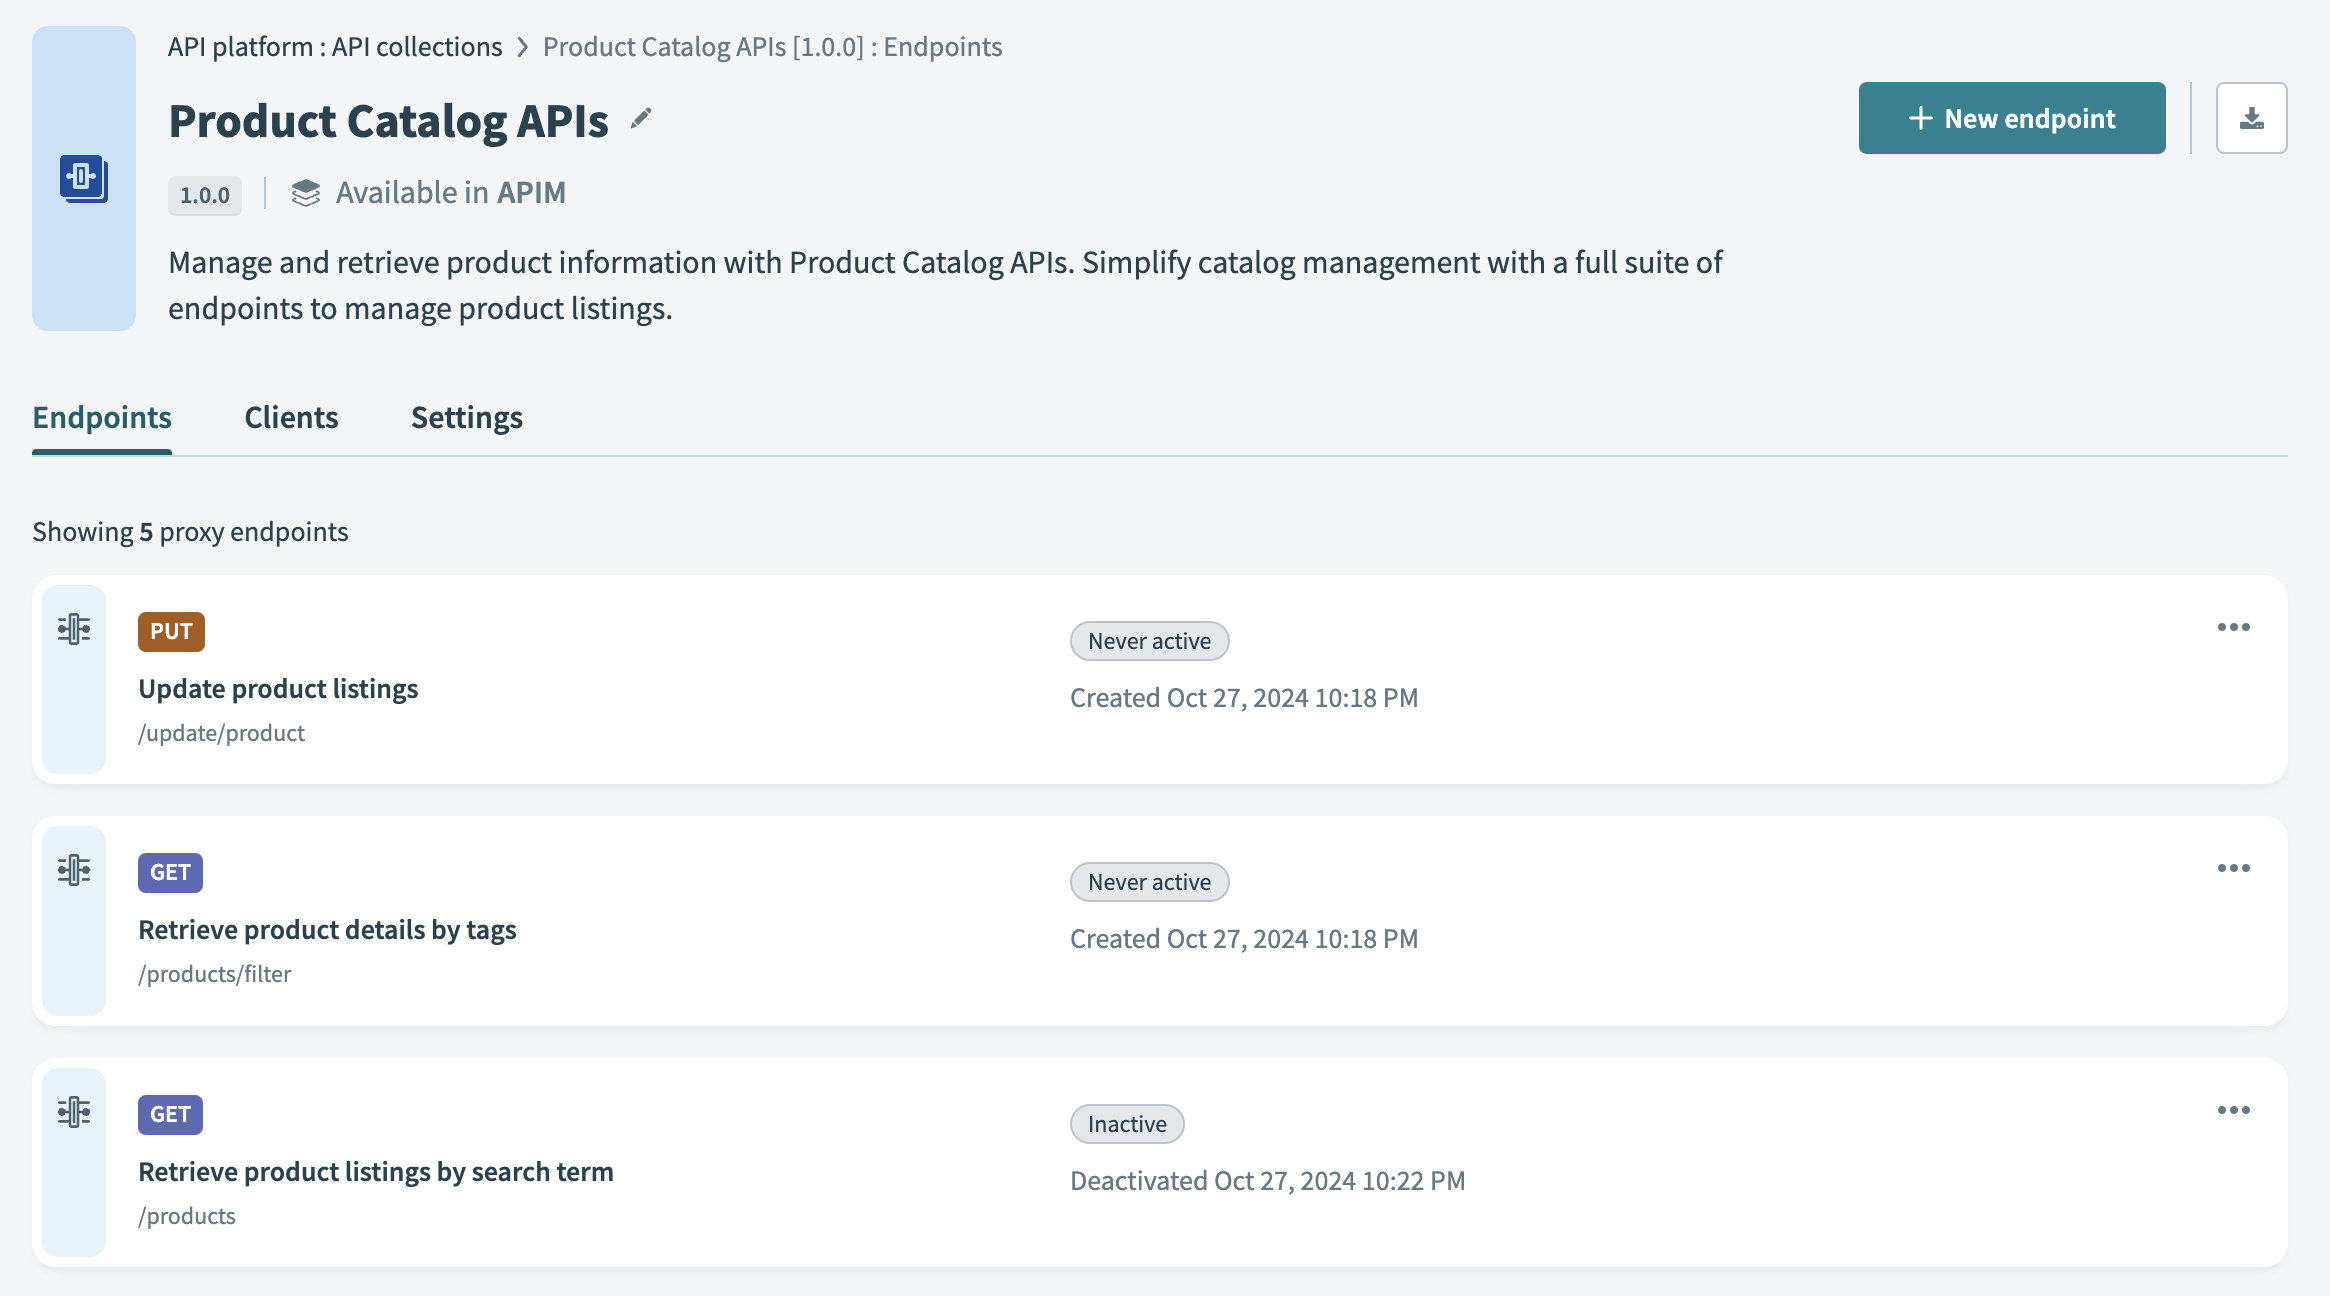 Select + New endpoint
Fill in the following fields:
HTTP method
Select the HTTP method to use for the endpoint.
Endpoint name
Enter a descriptive name for the endpoint.
Endpoint path
Enter the endpoint path, which can include path parameters. Ensure the endpoint path follows the endpoint path guidelines.
Endpoint description
Enter a description for the endpoint.
Request timeout
Enter the request timeout duration: 30 seconds (default), 240 seconds (maximum).
Keep base URL
Toggle whether to forward requests directly to the connection's base URL without appending the endpoint path.
Cache response
Click the Cache response toggle to enable caching. This option is available only for GET methods.
Time-to-live period
Required. Enter the duration in seconds for storing a response in the cache before it refreshes or deletes. The default value is 600 seconds and the maximum value is 3600 seconds.
Cache key parameters
Optional. Define additional parameters to include in the cache key if required. The cache key always starts with the endpoint URL. For more information, see API endpoint caching.
Select Add endpoint. The new proxy endpoint appears on the API collection page.
Click ••• (ellipsis) next to the endpoint to rename, activate, or delete it.
View the proxy endpoint
Select an API endpoint in the API collection overview to view its details. You can also download these details in the OpenAPI 2.0 specification from the API collection overview.
A proxy-based endpoint includes the following tabs:
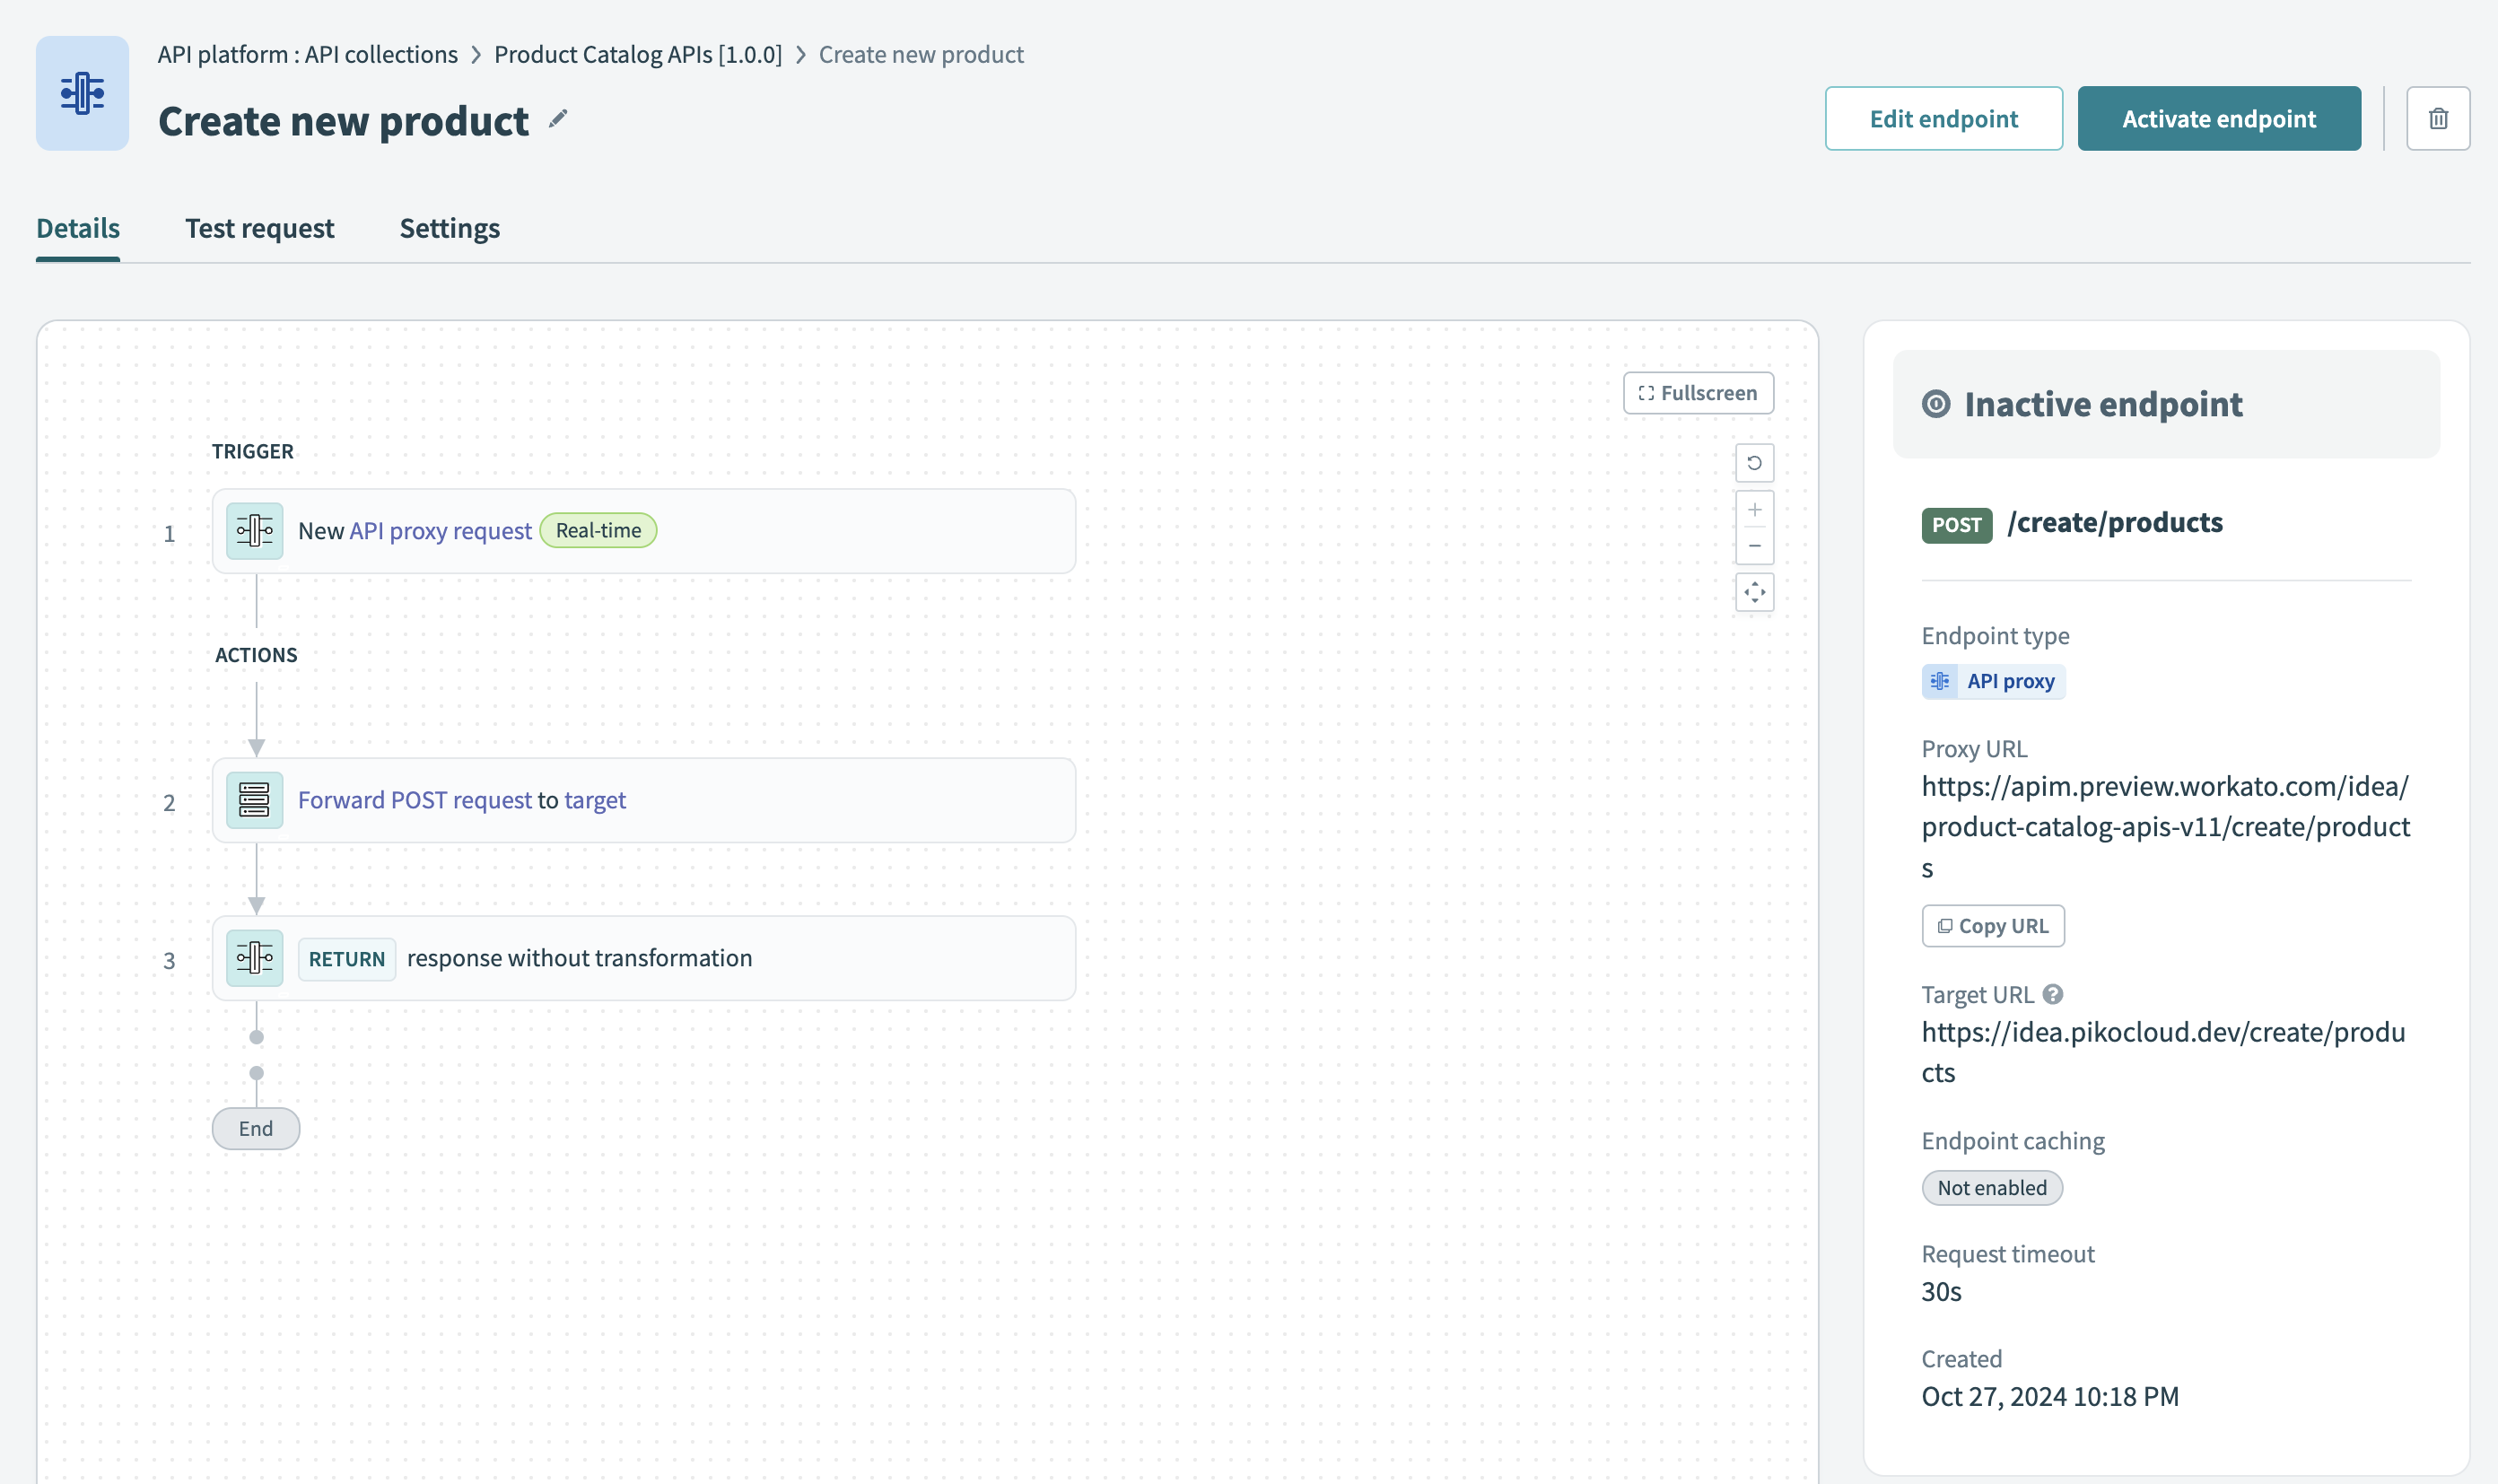 View a proxy-based endpoint's Details tab
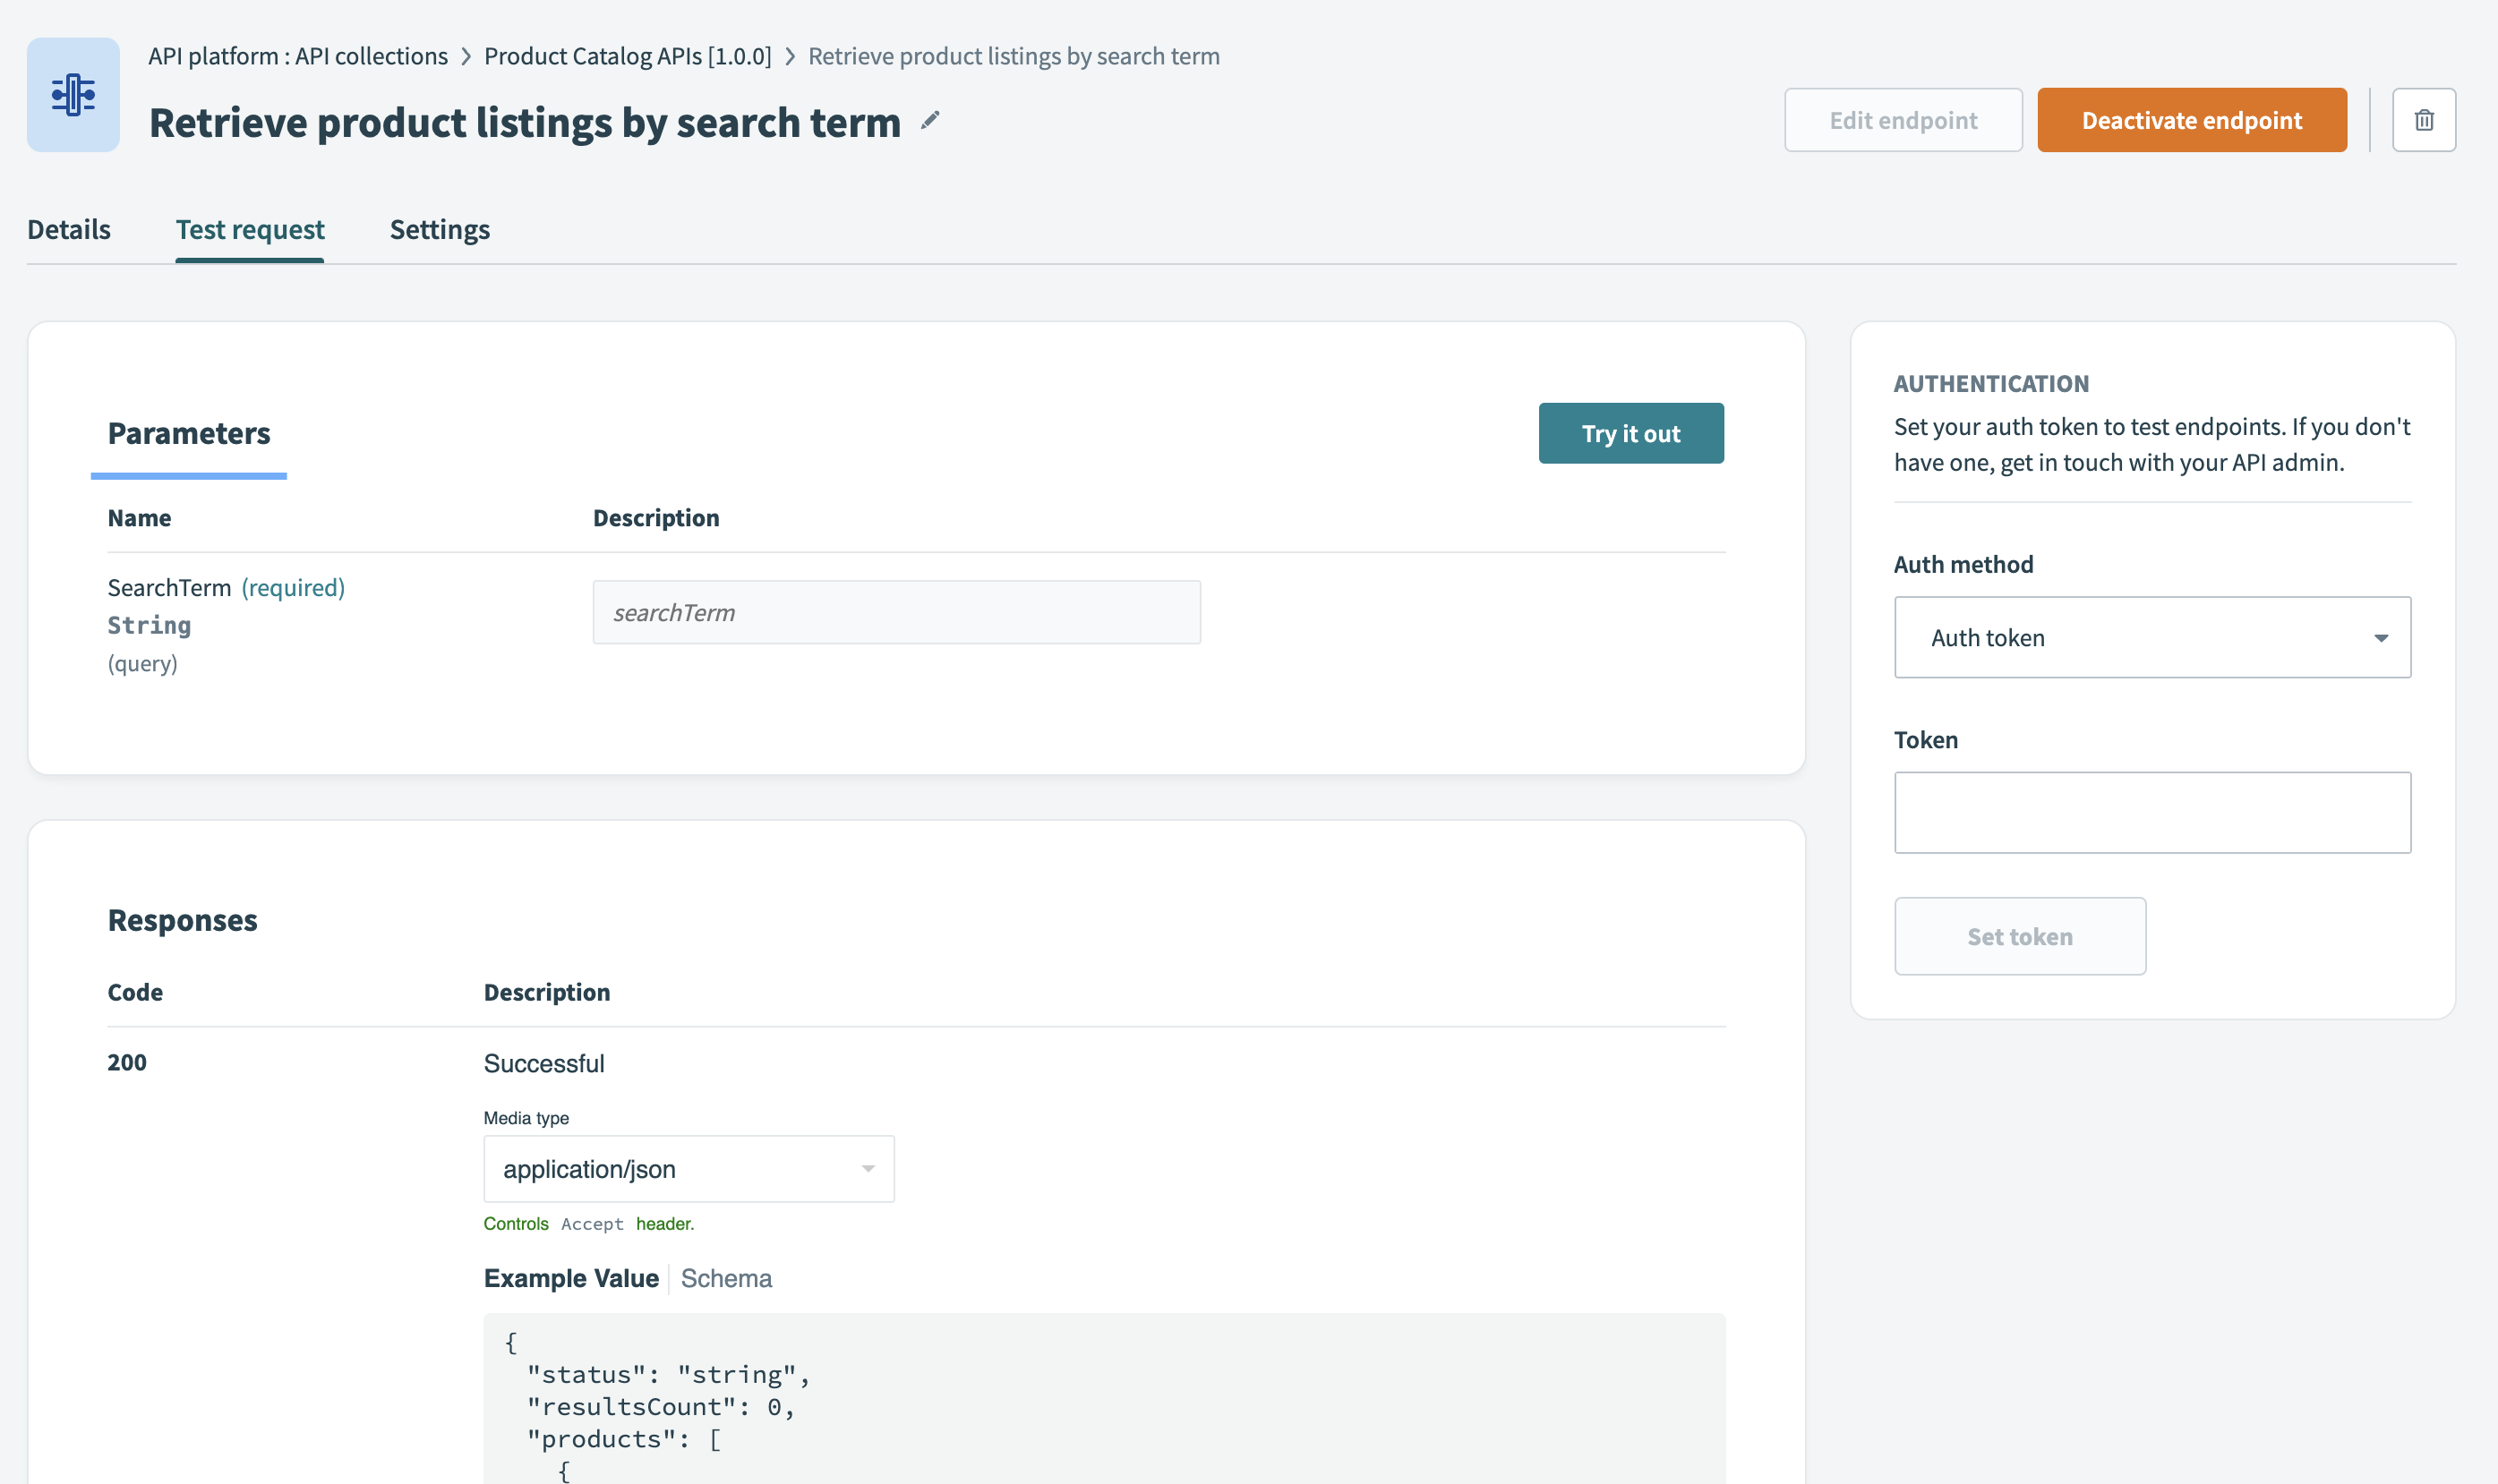 View a proxy-based endpoint's Test tab
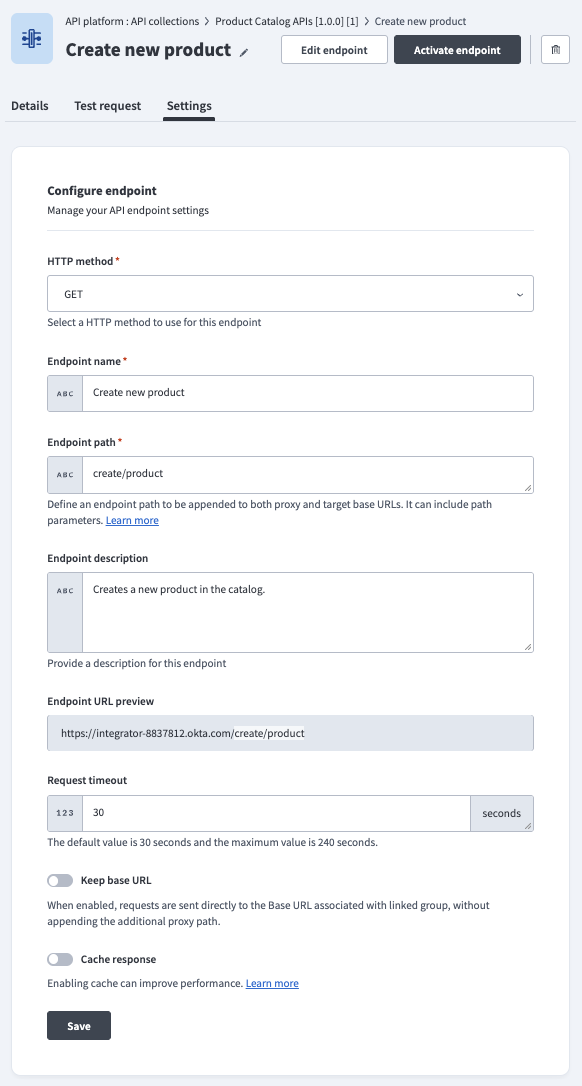 View a proxy-based endpoint's Settings tab
Configure the schema
IMPORT OPENAPI SPEC FOR AUTOMATIC SETUP
To automatically configure the endpoint schema, select Import OpenAPI specification when creating a new API proxy collection. Workato will populate the schema for each endpoint in the collection.
If you created an endpoint manually or selected Manual configuration when setting up the API proxy collection, configure the schema and headers in the New API proxy request trigger.
Complete the following steps to configure the schema:
Open the New API proxy request trigger from your proxy workflow.
Expand the Request section and configure the following fields:
Request body
Define the schema for the body of incoming requests. This applies to HTTP methods like POST, PUT, or PATCH. You can either paste a sample JSON payload or add fields manually.
Request query parameters
Describe one or more request query parameters.
Request headers
Add any required headers to the request.
Expand the Response schema section and configure the following fields:
Response content type
Required. Specify the format of the response, such as JSON or XML.
Response headers
Specify any headers that you plan to include in the HTTP response.
Responses
Required. Specify at least one HTTP status code, such as
200 - OK, and describe the expected response body schema. Click Use JSON to paste or upload example JSON output, or manually define fields in the response body.
Click Save to apply your changes.
Your schema configuration is complete. To learn how to test your new proxy endpoint, see Test a proxy endpoint.
Last updated: