# API collections
An API collection consists of API endpoints with a common access pattern, so that they can be managed together. For example, a set of Salesforce endpoints that will be called by recipes used by the Sales team should be grouped together into an API collection.
The API collections page displays all API collections within a workspace. Go to Platform > API platform > API collections to access the API collections page.
A collection can include either API proxy endpoints, API recipe endpoints, or AI gateway endpoints. Collections containing API proxy endpoints have an API proxy label.
SUMMARY
- API collections in Workato are groups of endpoints with a common access pattern.
- Collections contain either API recipe endpoints, which are endpoints built from API recipes ("build your own backend"), API proxy endpoints, which forward requests to an API backend ("bring your own backend"), or AI gateway endpoints, which are endpoints exposed to LLMs and GPTs, enabling AI applications to take actions on your behalf.
- Workato offers machine-readable documentation (OpenAPI v3.0) for endpoints in an API collection. The documentation can then be synced to Postman.
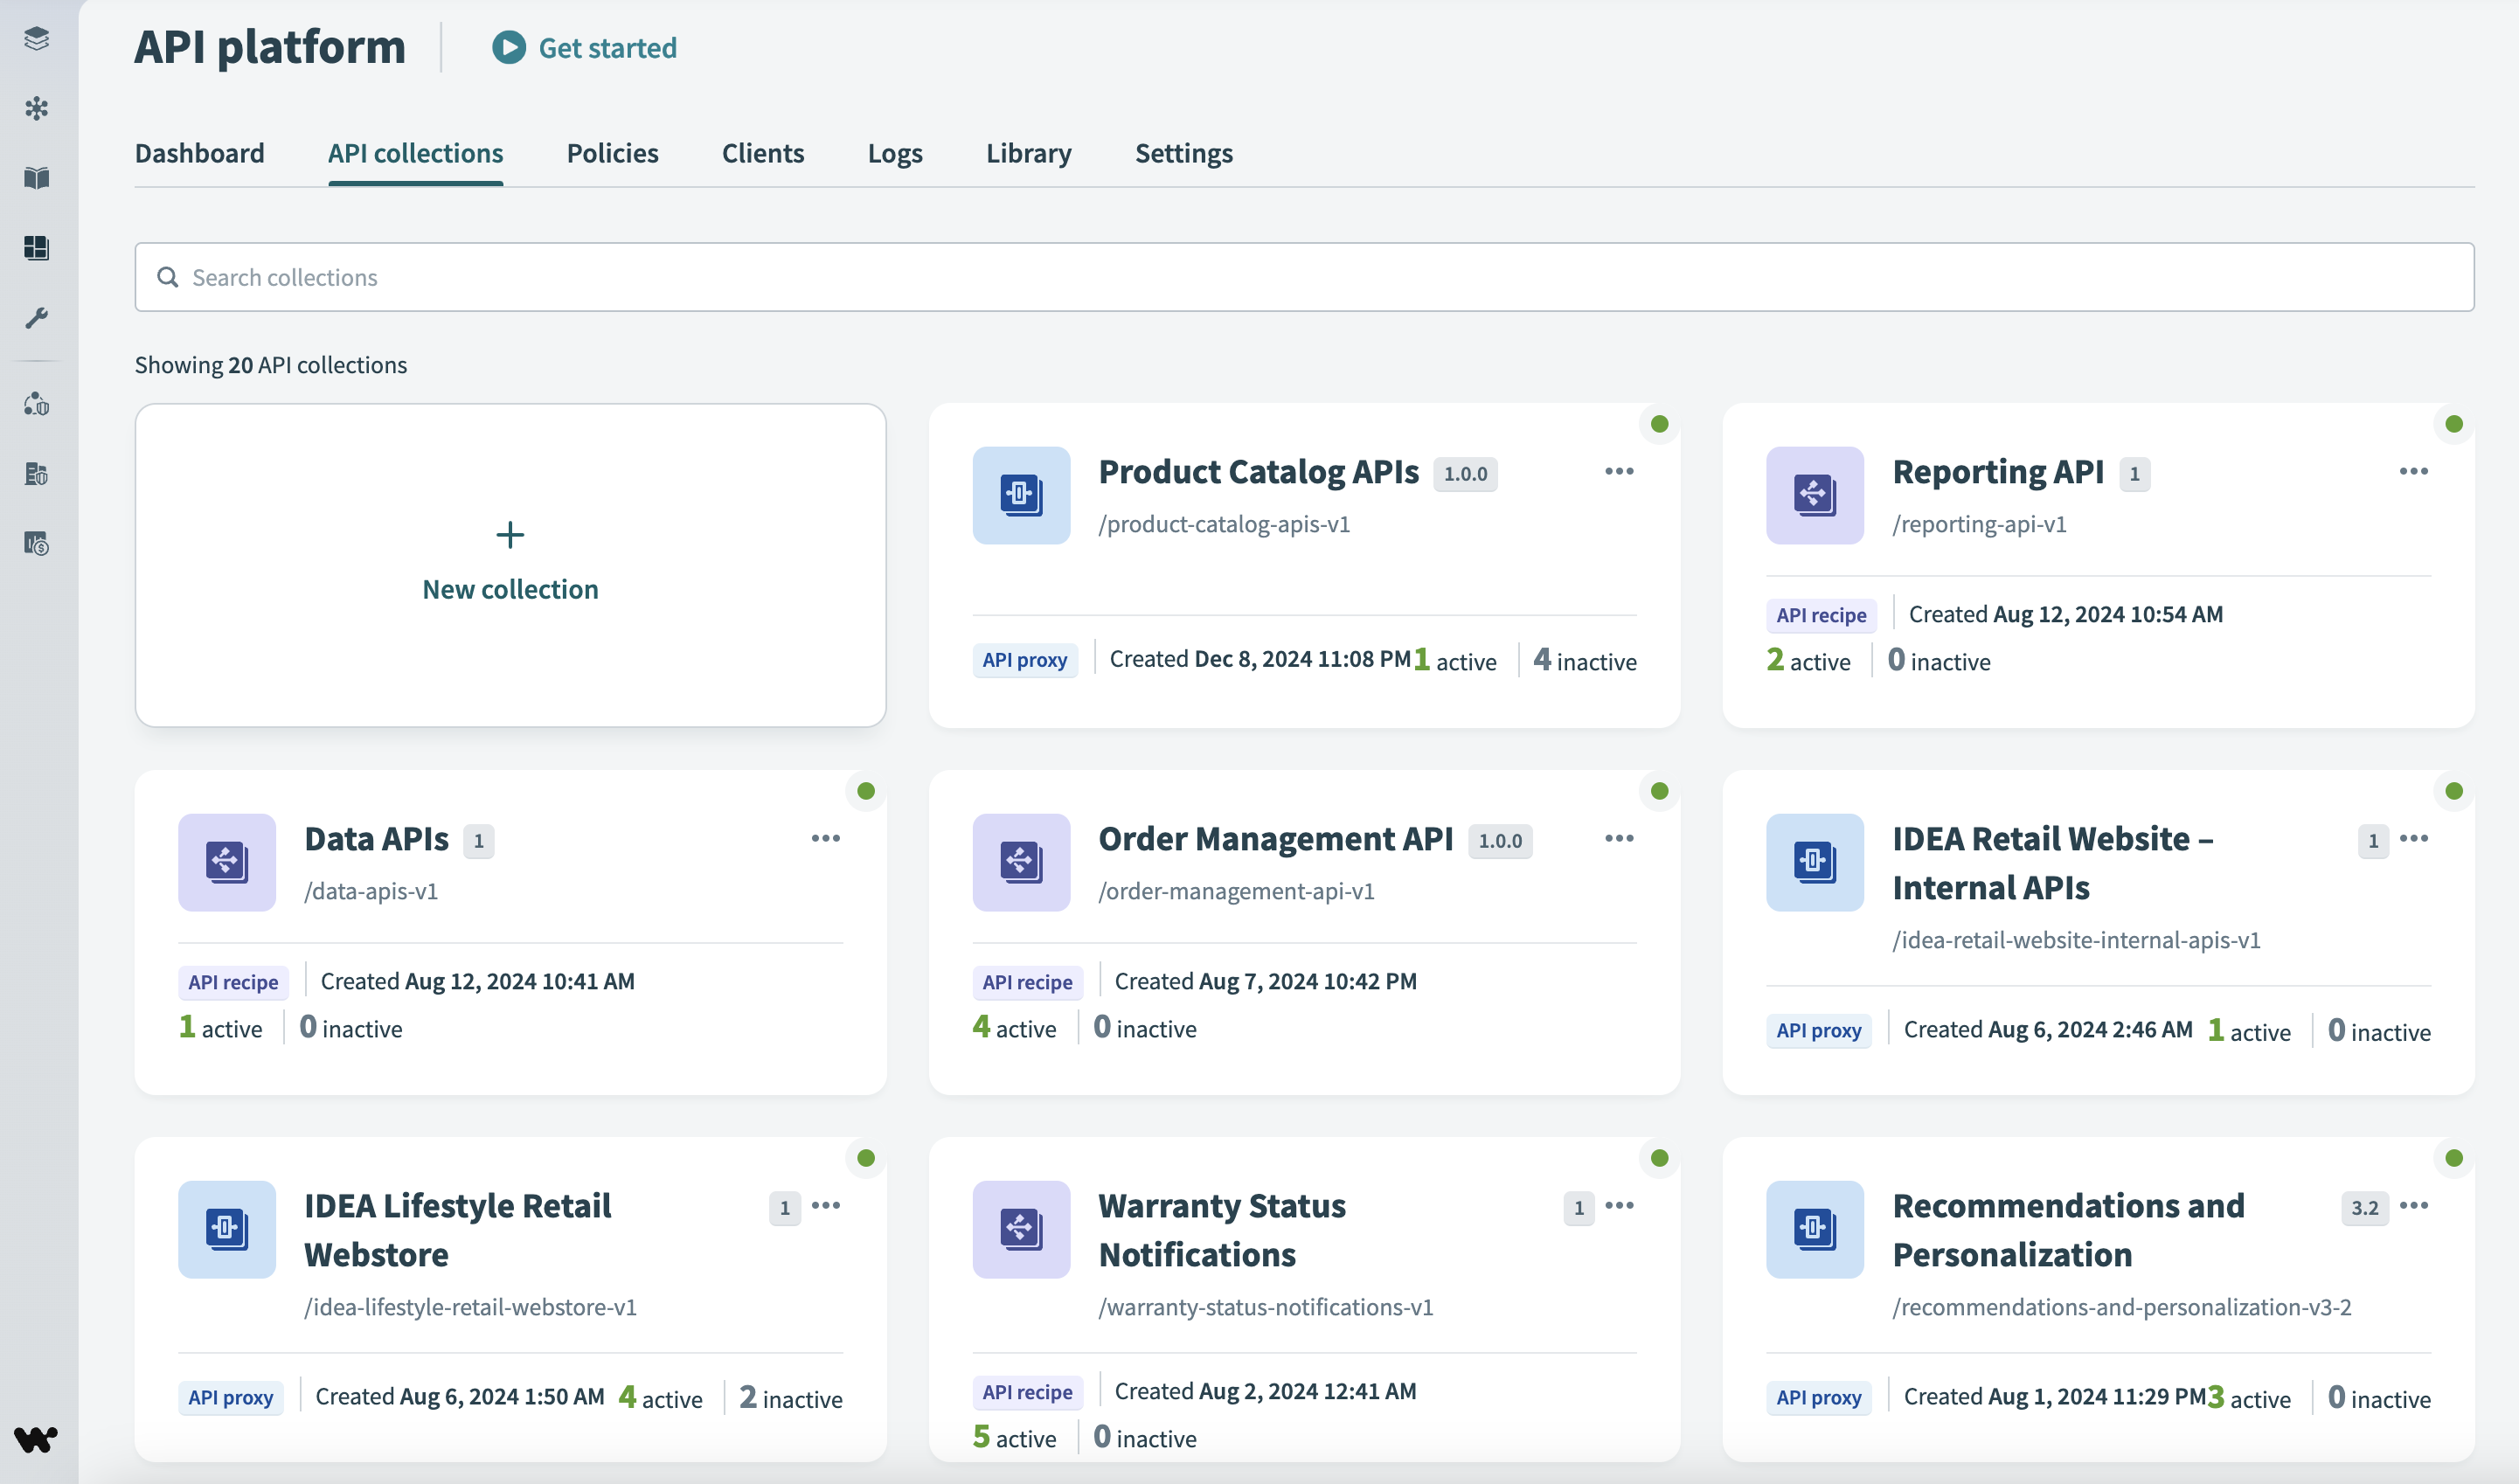 API collections page
# Collection types
There are three types of API collections:
# Choose a collection type
The type of collection you choose to create depends on your use case.
Choose an API proxy collection when you want to bring your own backend. When a proxy endpoint receives an incoming request, Workato simply forwards the request to your existing API backend.
API proxy collections are ideal in this scenario for the following reasons:
- API proxy collections are optimized for high-volume, low-cost jobs.
- Proxy jobs are executed with minimal latency.
- Proxy requests are not subject to concurrency limits.
- With API proxy collections, customization options are limited since the main function is to forward requests.
Choose an API recipe collection when you plan to build your own backend. To do this, you must create an API recipe containing the required logic to fetch and/or process data from other sources (such as external APIs). For example, your recipe could use the Salesforce API to search for opportunities that match a particular name, and if the search returns no matches, it could then create the opportunity according to a specific configuration.
API recipe collections are ideal in this scenario for the following reasons:
- API recipe collections are optimized for high-value jobs.
- API recipes jobs are subject to a concurrency limit.
- API recipe collections provide the flexibility to highly customize how you fetch and process data.
Choose an AI gateway collection if you plan to expose endpoints to LLMs, GPTs, or other AI applications. This exposure enables AI applications to take actions on your behalf.
AI gateway collections are ideal in this scenario for the following reasons:
- AI gateway collections allow you to specify an authorization mechanism between Workato and the AI agent to keep your requests secure.
- AI gateway collections allow you to upload you OpenAPI Specification (OAS) from Workato to prevent additional processing for your AI agents.
The right balance of recipe-based, proxy-based, and AI-based collections can help you optimize your API platform (opens new window) usage.
# API proxy collections
An API proxy collection is a collection of proxy endpoints. Each endpoint acts as an intermediary between an API client and API server. When you send a request to a proxy endpoint, Workato forwards that request to an endpoint within the backend API.
You can use proxy endpoints to add a layer of security and control to an internal API. Your teammates and external collaborators send requests to the secure proxy endpoint instead of directly to your backend API. This also allows you to benefit from the API Platform's monitoring and access control features.
COLLECTION TYPES
If you're uncertain whether an API recipe collection, API proxy collection, or an AI gateway collection best fits your use case refer to our guide on Choosing a collection type for more information.
# Prerequisites for API proxy collections
- Create a project or select an existing project.
- Create an HTTP connection to forward requests to in the project in you plan to use.
# Create an API proxy collection
Sign in to your Workato account.
Go to Platform > API platform > API collections.
Select New collection.
Use Choose collection type to select API proxy collection.
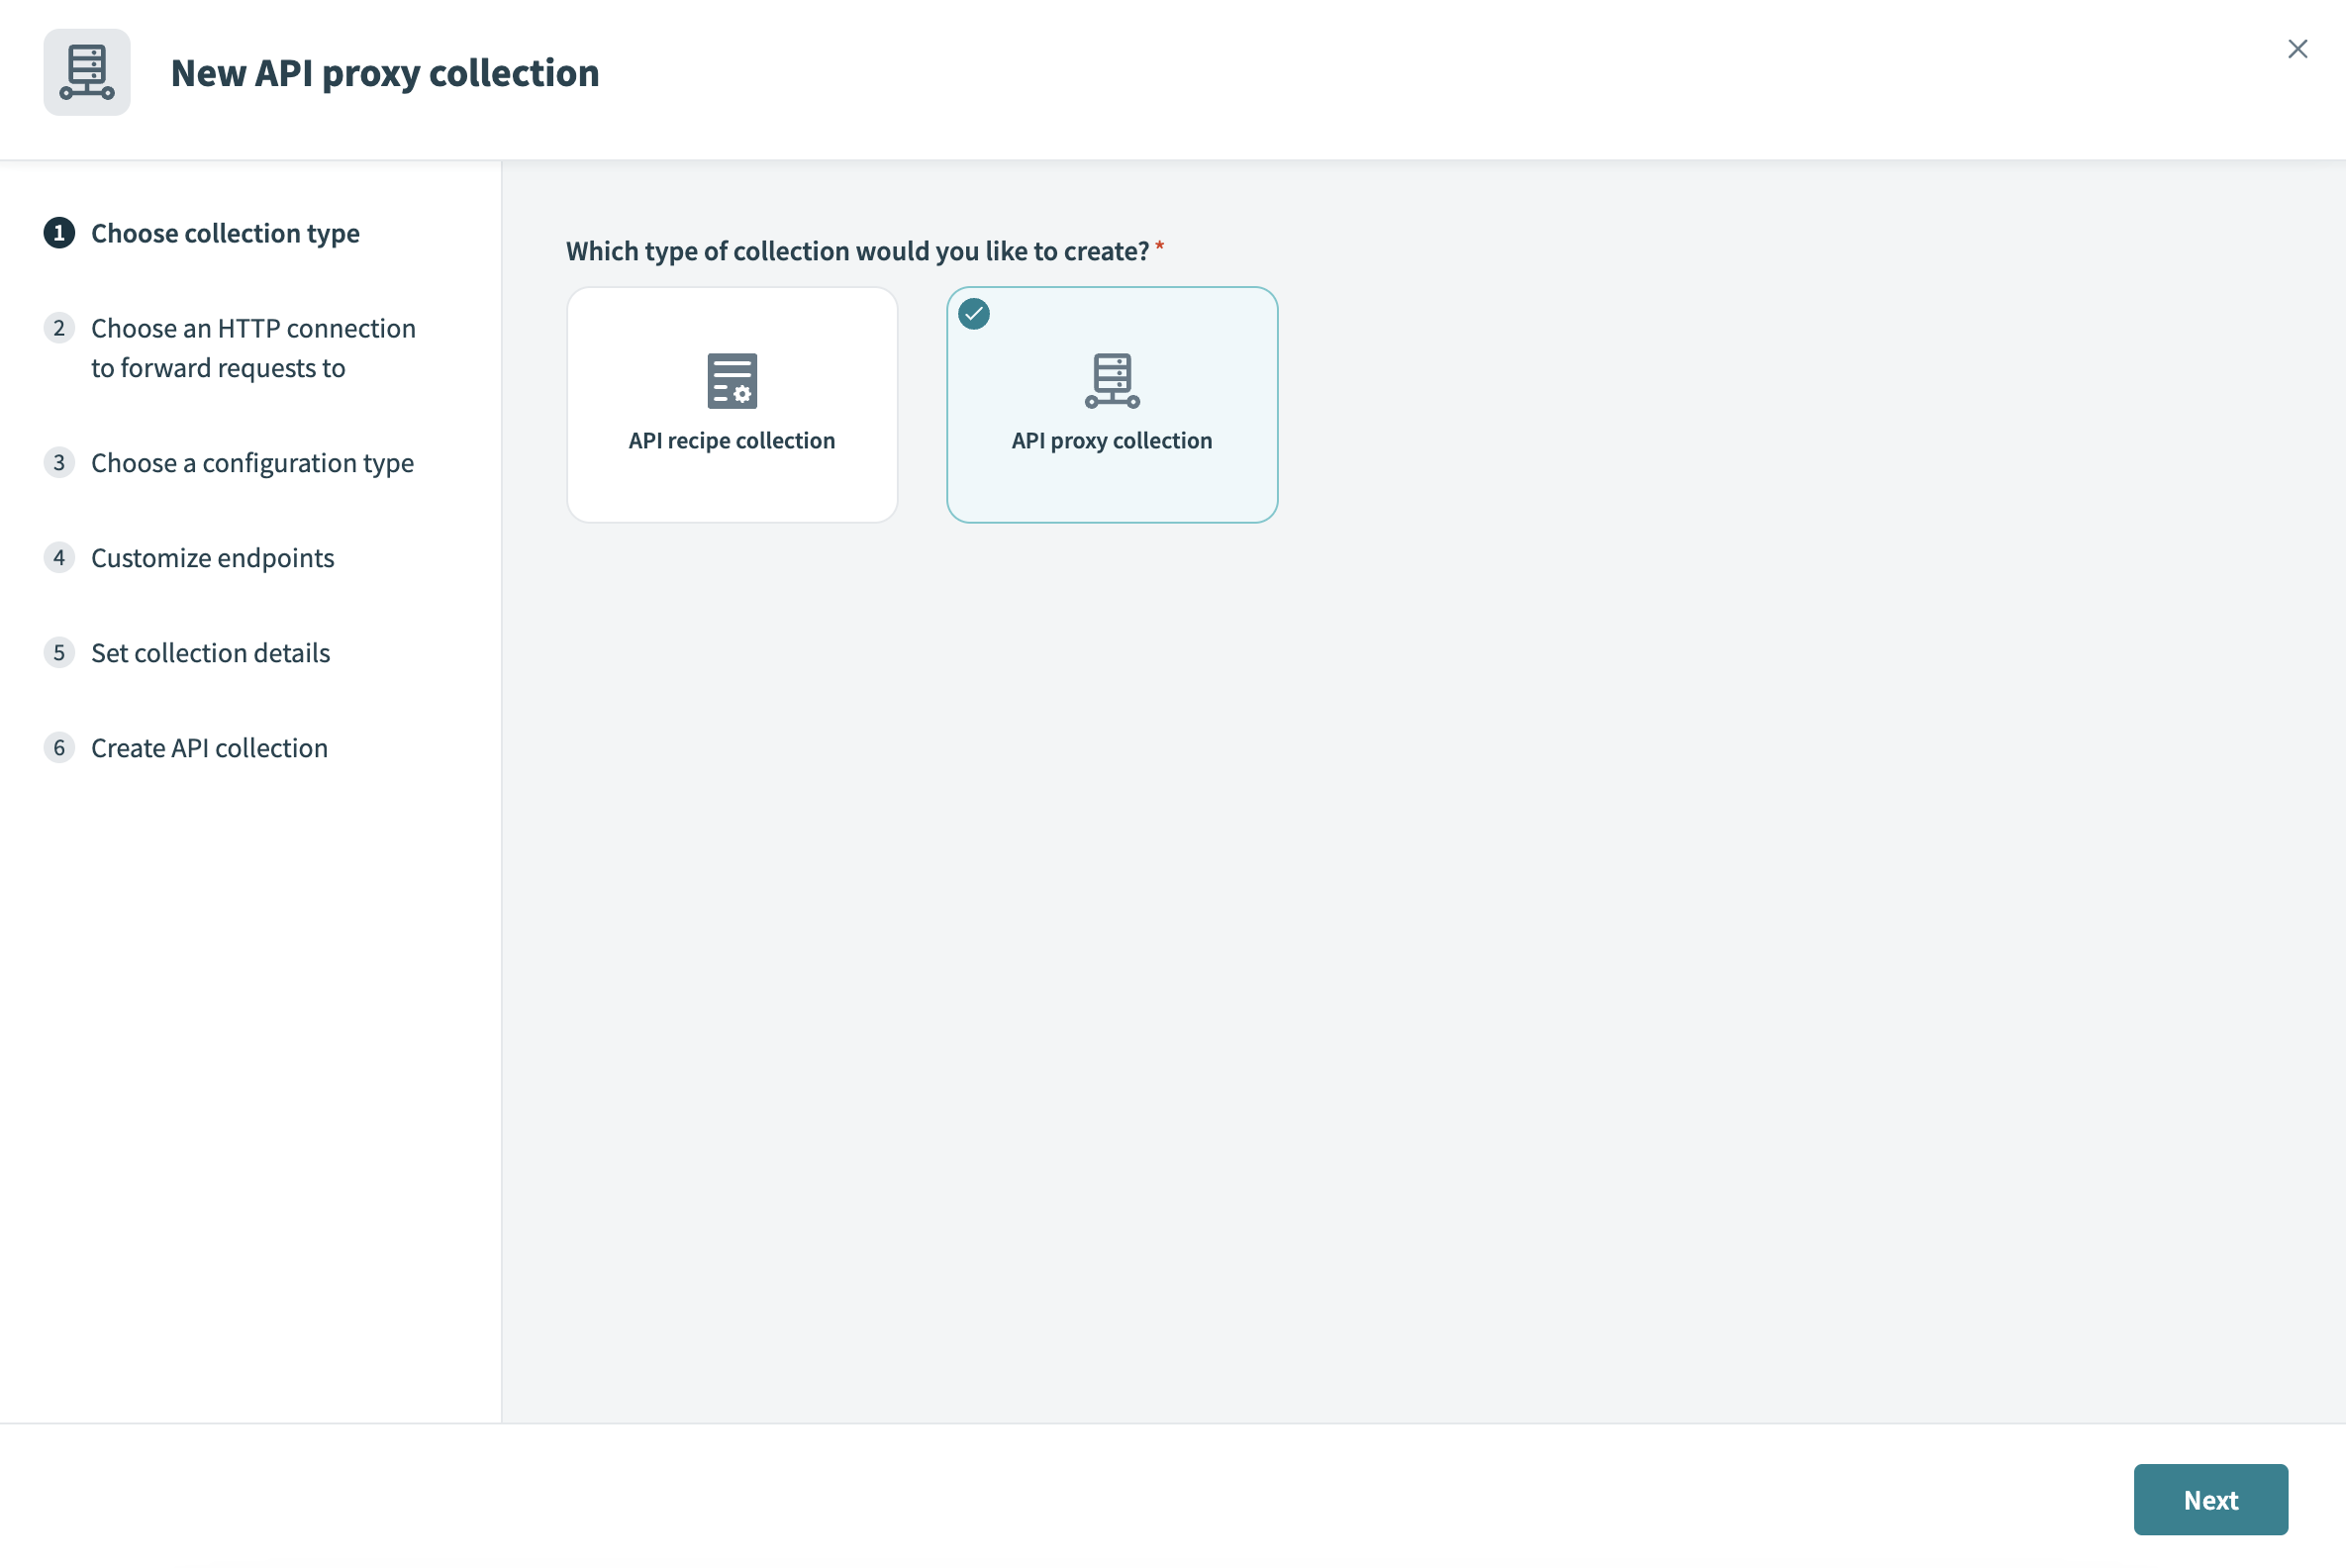 Select API proxy collection
Use Choose an HTTP connection to forward requests to to select an existing HTTP connection from the list or create a new one. You can select Details to view a connection's configuration.
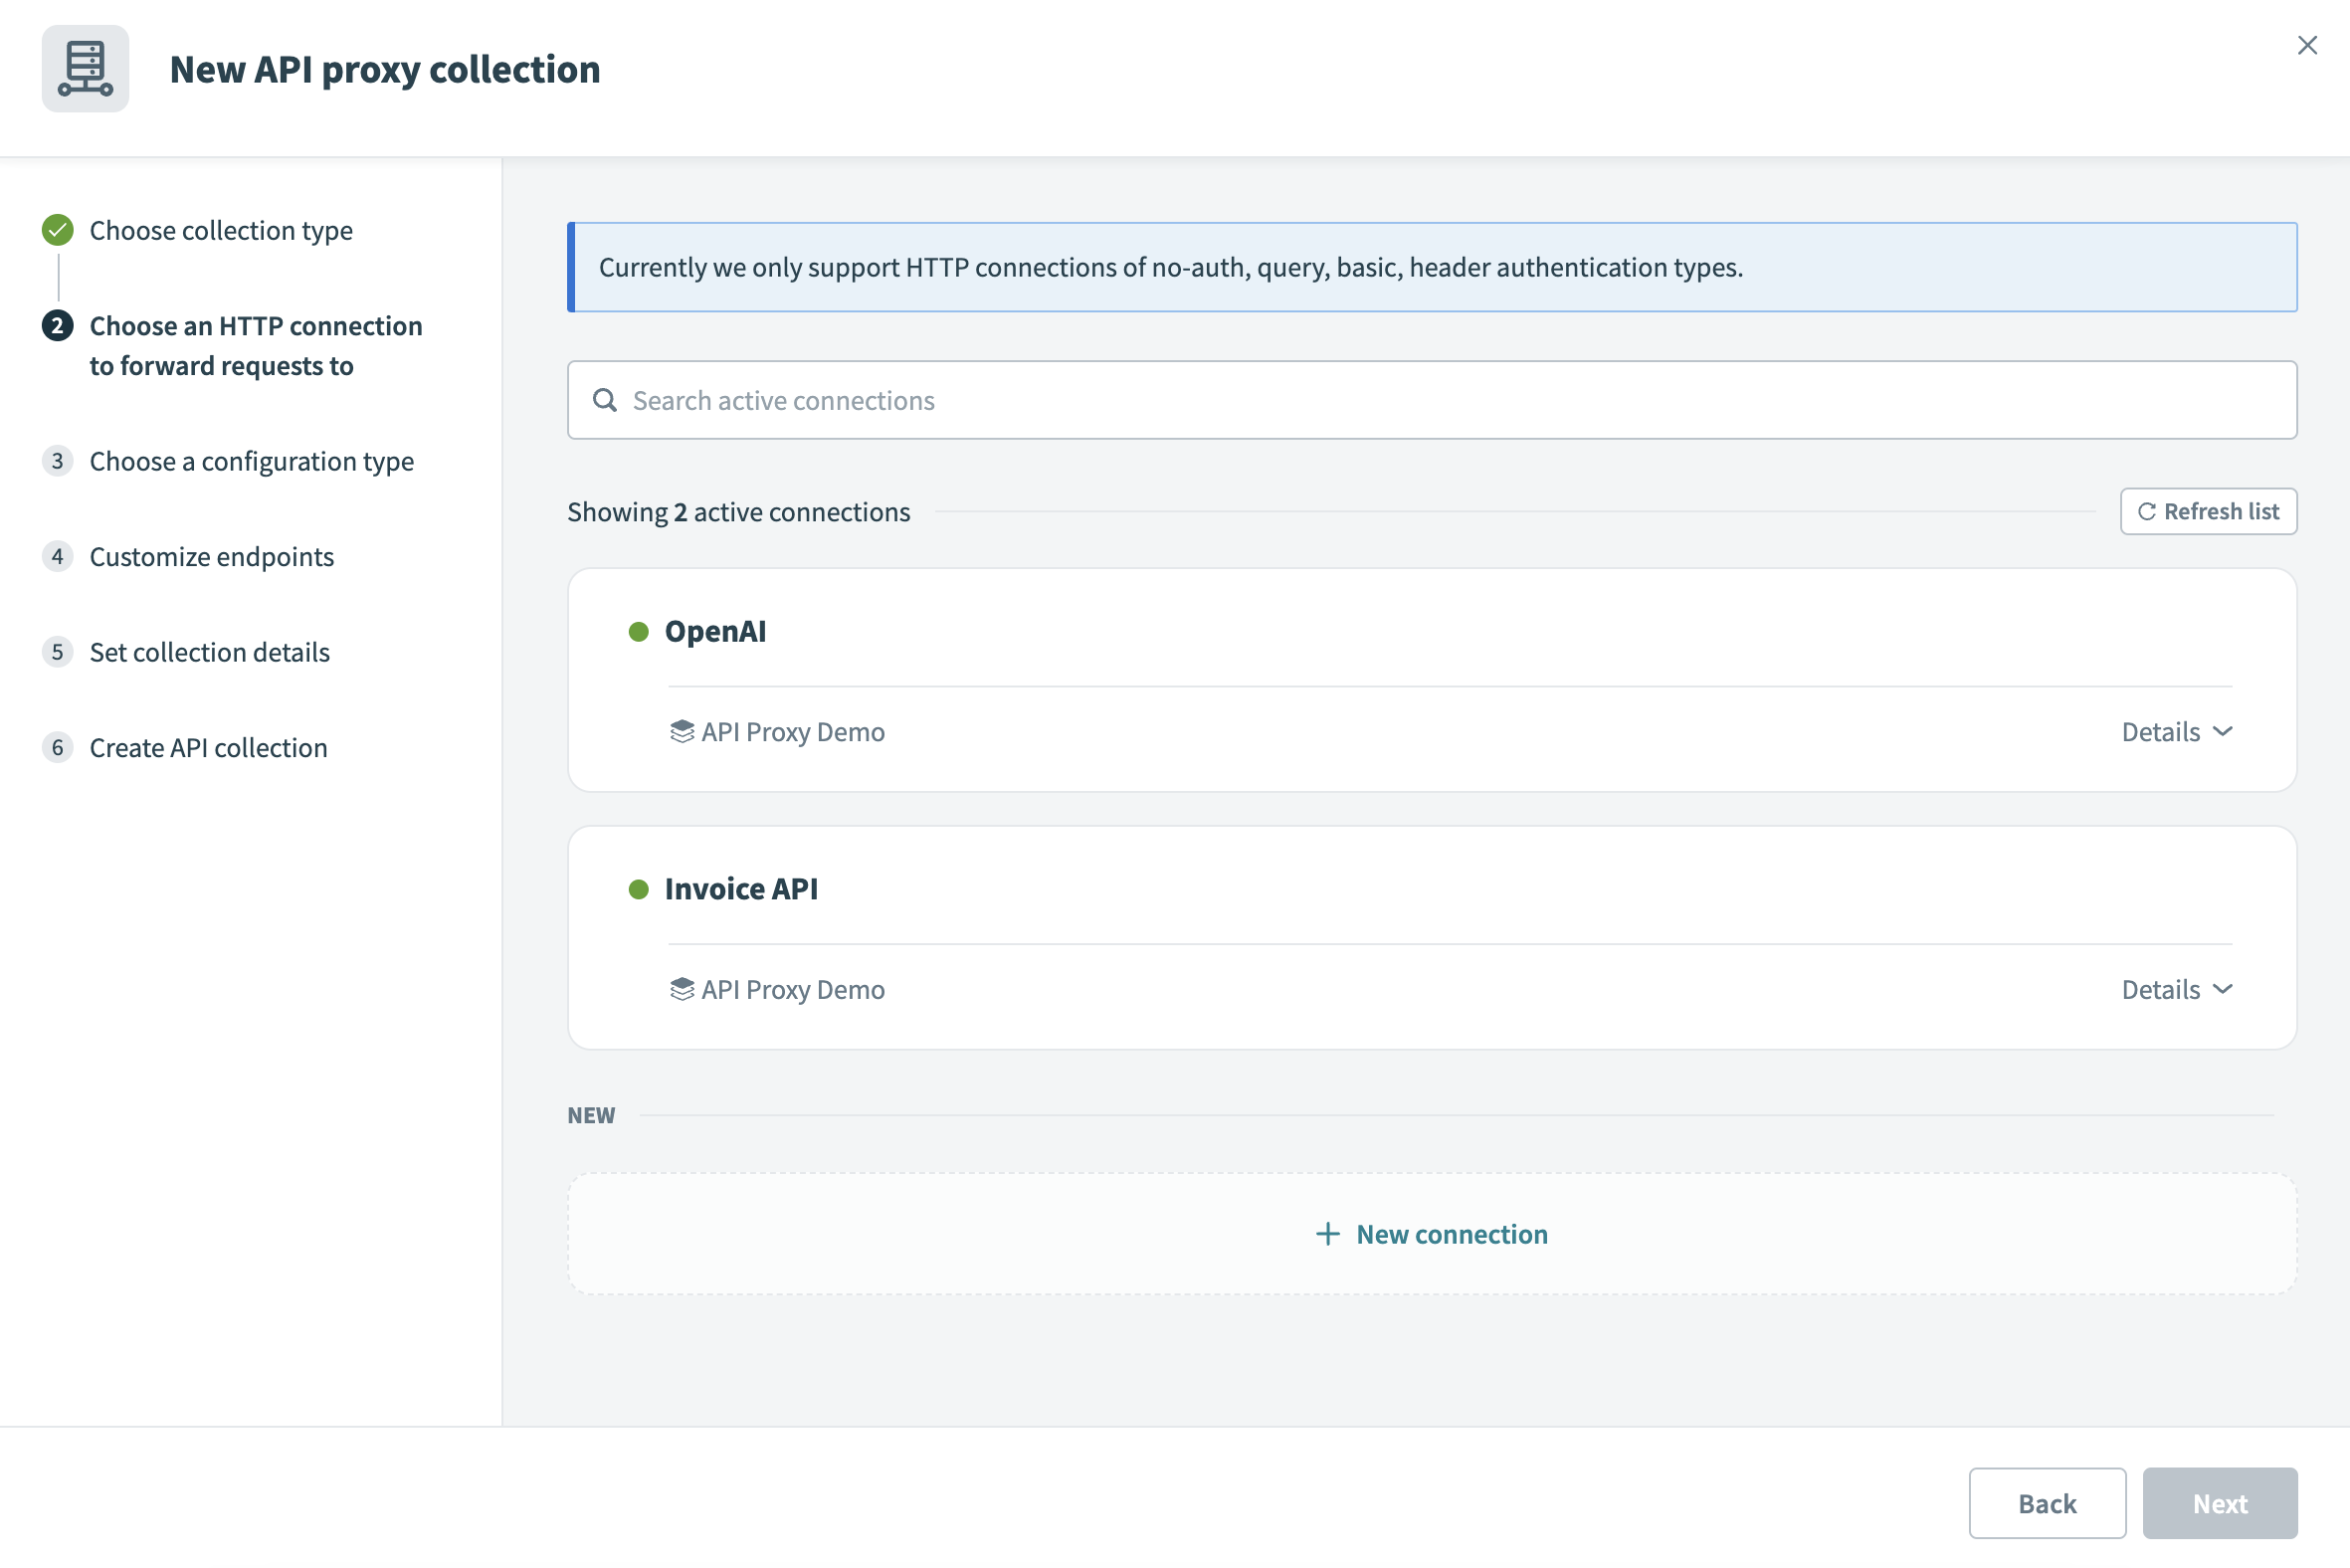 Choose HTTP connection to forward requests to
SUPPORTED AUTHENTICATION TYPES
API proxy collections support the following HTTP connection authentication types:
- No auth
- Query
- Basic
- Header
- OAuth 2.0 (Client credentials grant)
If you choose a connection with an unsupported authentication type, Workato displays an Unsupported authentication type error message.
Use Choose a configuration type to specify the configuration you plan to use in your proxy collection:
Import OpenAPI Specification
Upload a JSON or UTF-8 encoded YAML OpenAPI 3.0 (opens new window) specification file, or enter the URL of the specification. Workato uses the OpenAPI specification to automatically set up the schema for the endpoints you add in the next step. Note that we currently do not support time values. For example,
2024-07-18T10:00:00Zmust be changed to"2024-07-18T10:00:00Z".Manual configuration
Workato creates an empty collection to which you can add endpoints later. For details, see Configure the schema.
Only if you imported an OpenAPI specification: Go to Customize endpoints and select the checkbox next to each endpoint you plan to add to the collection. You can select Edit details next to an endpoint to configure the following information:
Endpoint name
Enter a descriptive name for the proxy endpoint.
Endpoint path
Define an endpoint path to be appended to both proxy and target base URLs. It can include path parameters. Ensure that the endpoint path conforms to these guidelines.
HTTP method
Select the HTTP method to use for the endpoint.
Request timeout
Only required when you toggle Customize timeout. Customize the time that a request is given to complete. The default value is 30 seconds and the maximum value is 240 seconds.
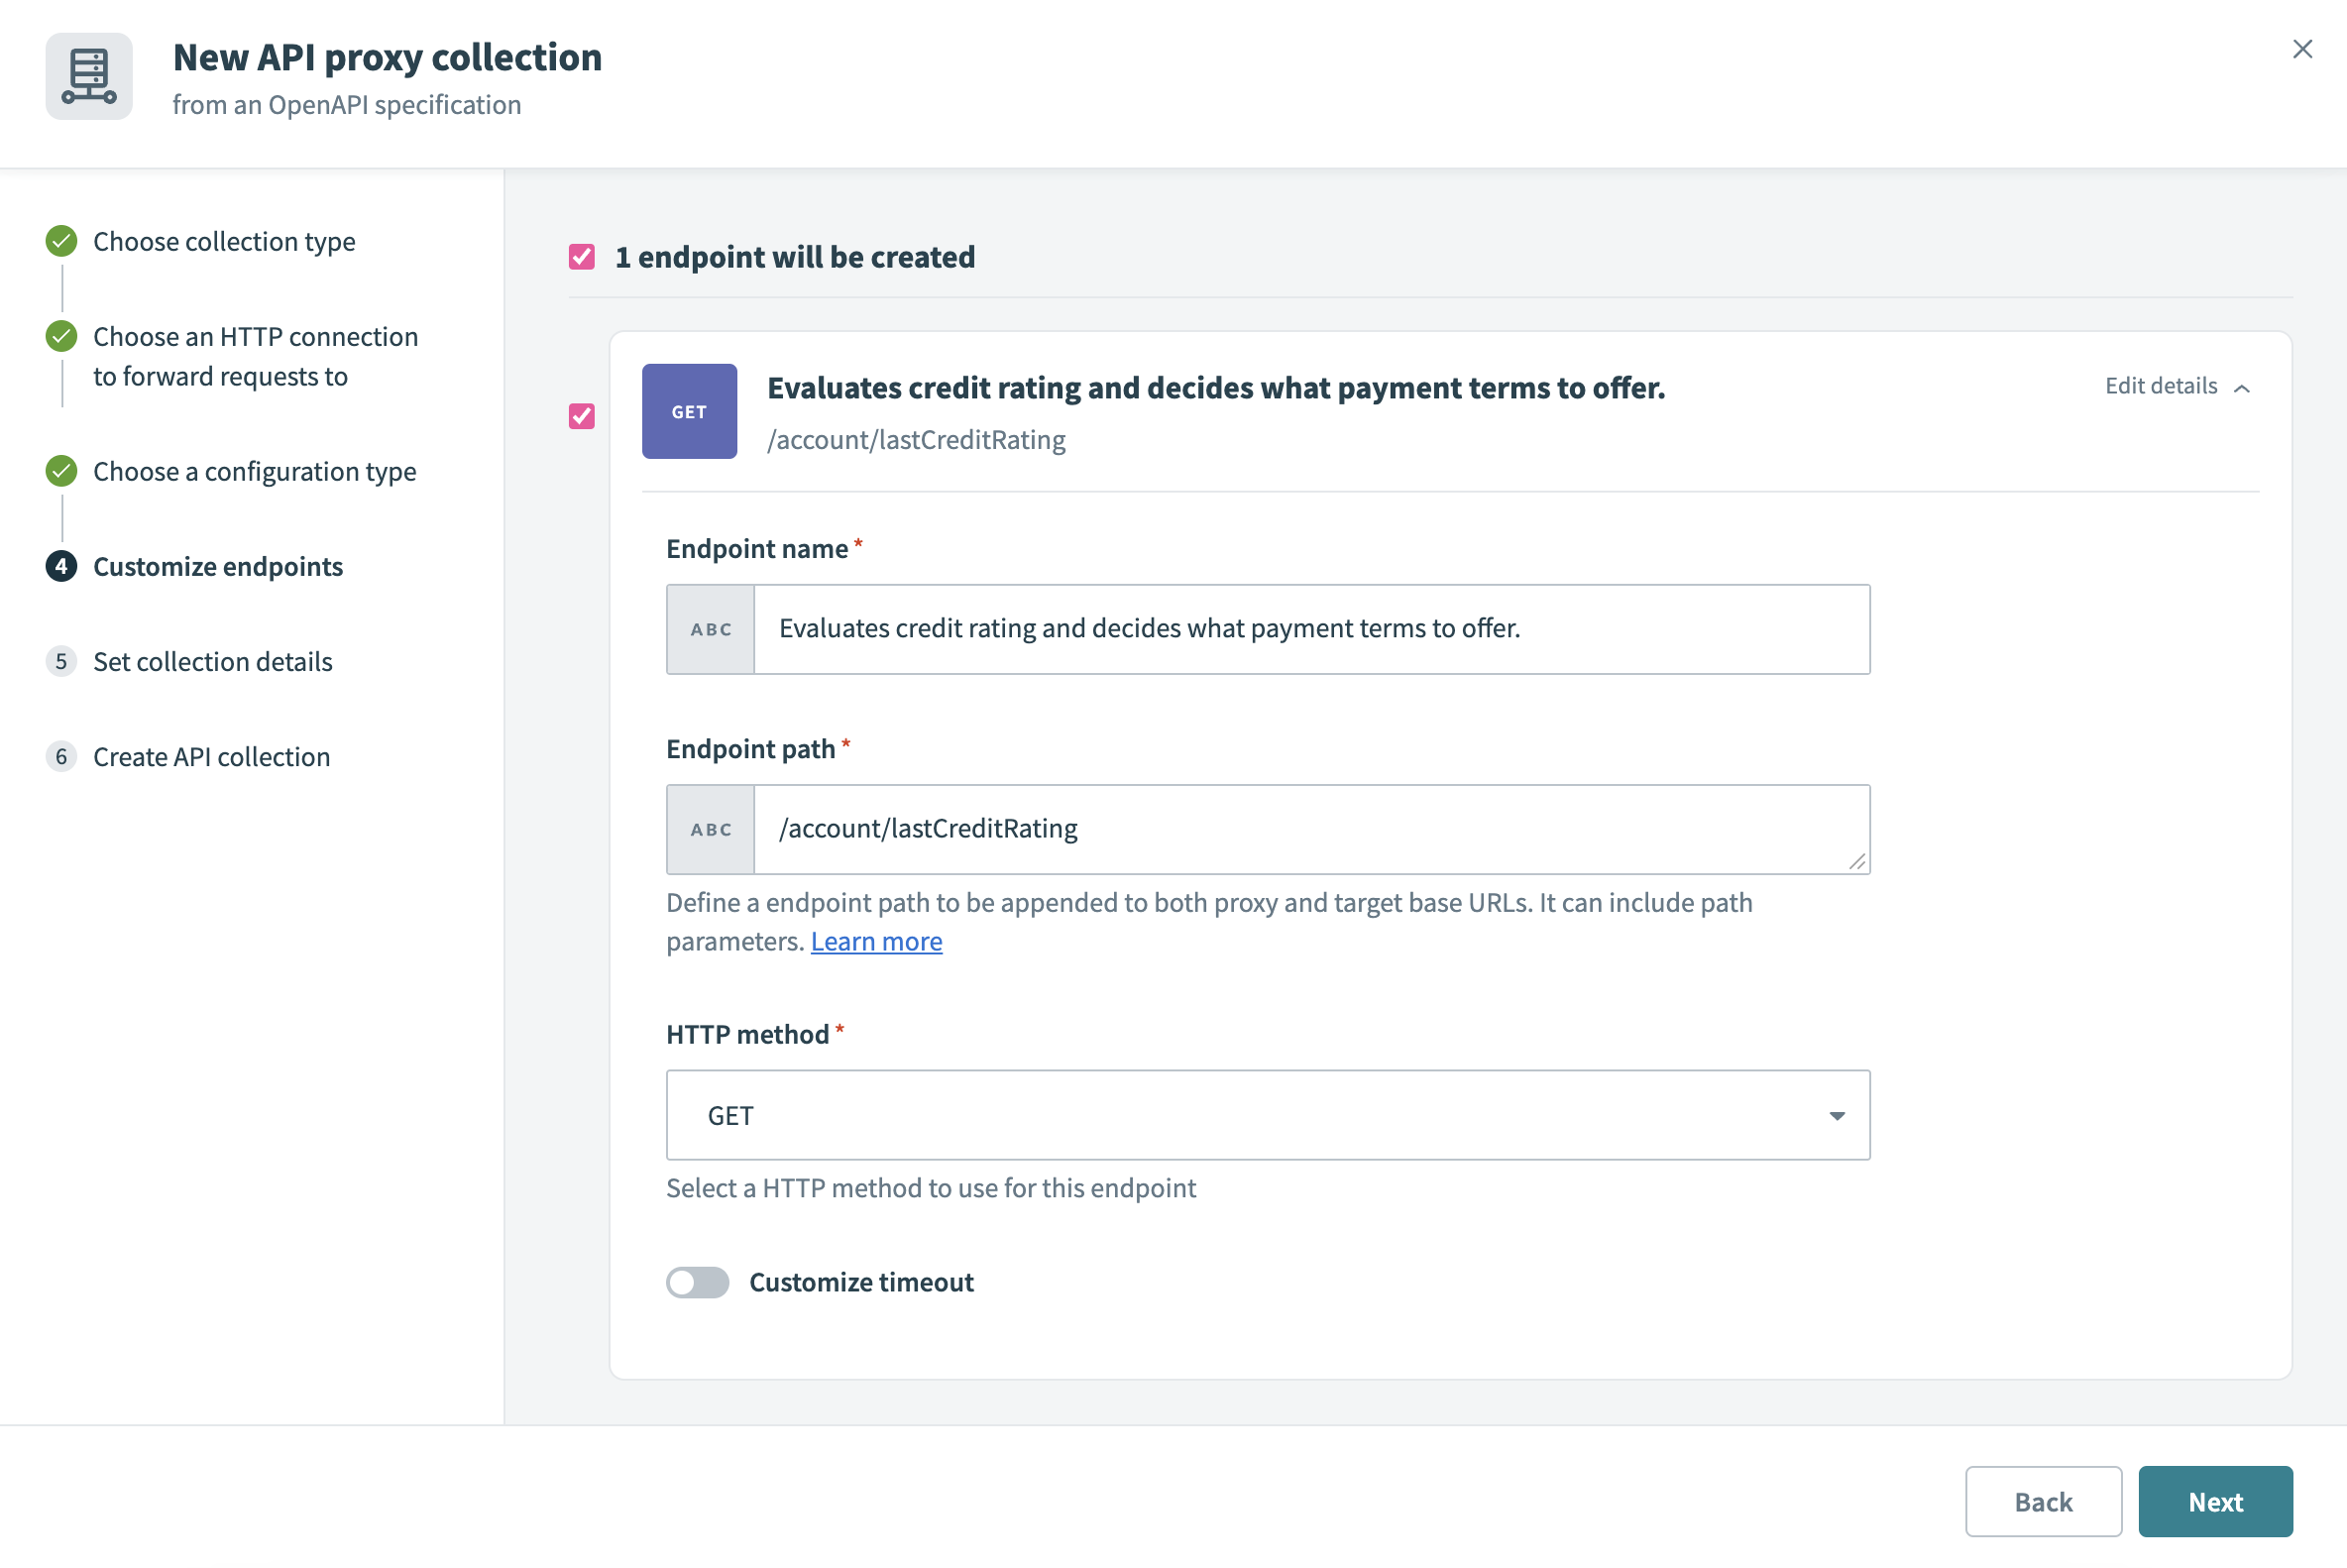 Customize API proxy collection endpoints
Go to Set collection details and enter the following information:
Project
The API collection is only available to members who have access to the specified project.
Collection name
Enter a descriptive name for the API collection.
Version
API collections are versioned using a unique 1-10 character version identifier. Collections with the same name but different versions are distinct objects.
Description (optional)
Enter a short description of the API collection.
Select Create collection. Workato creates the collection and shows the number of endpoints added.
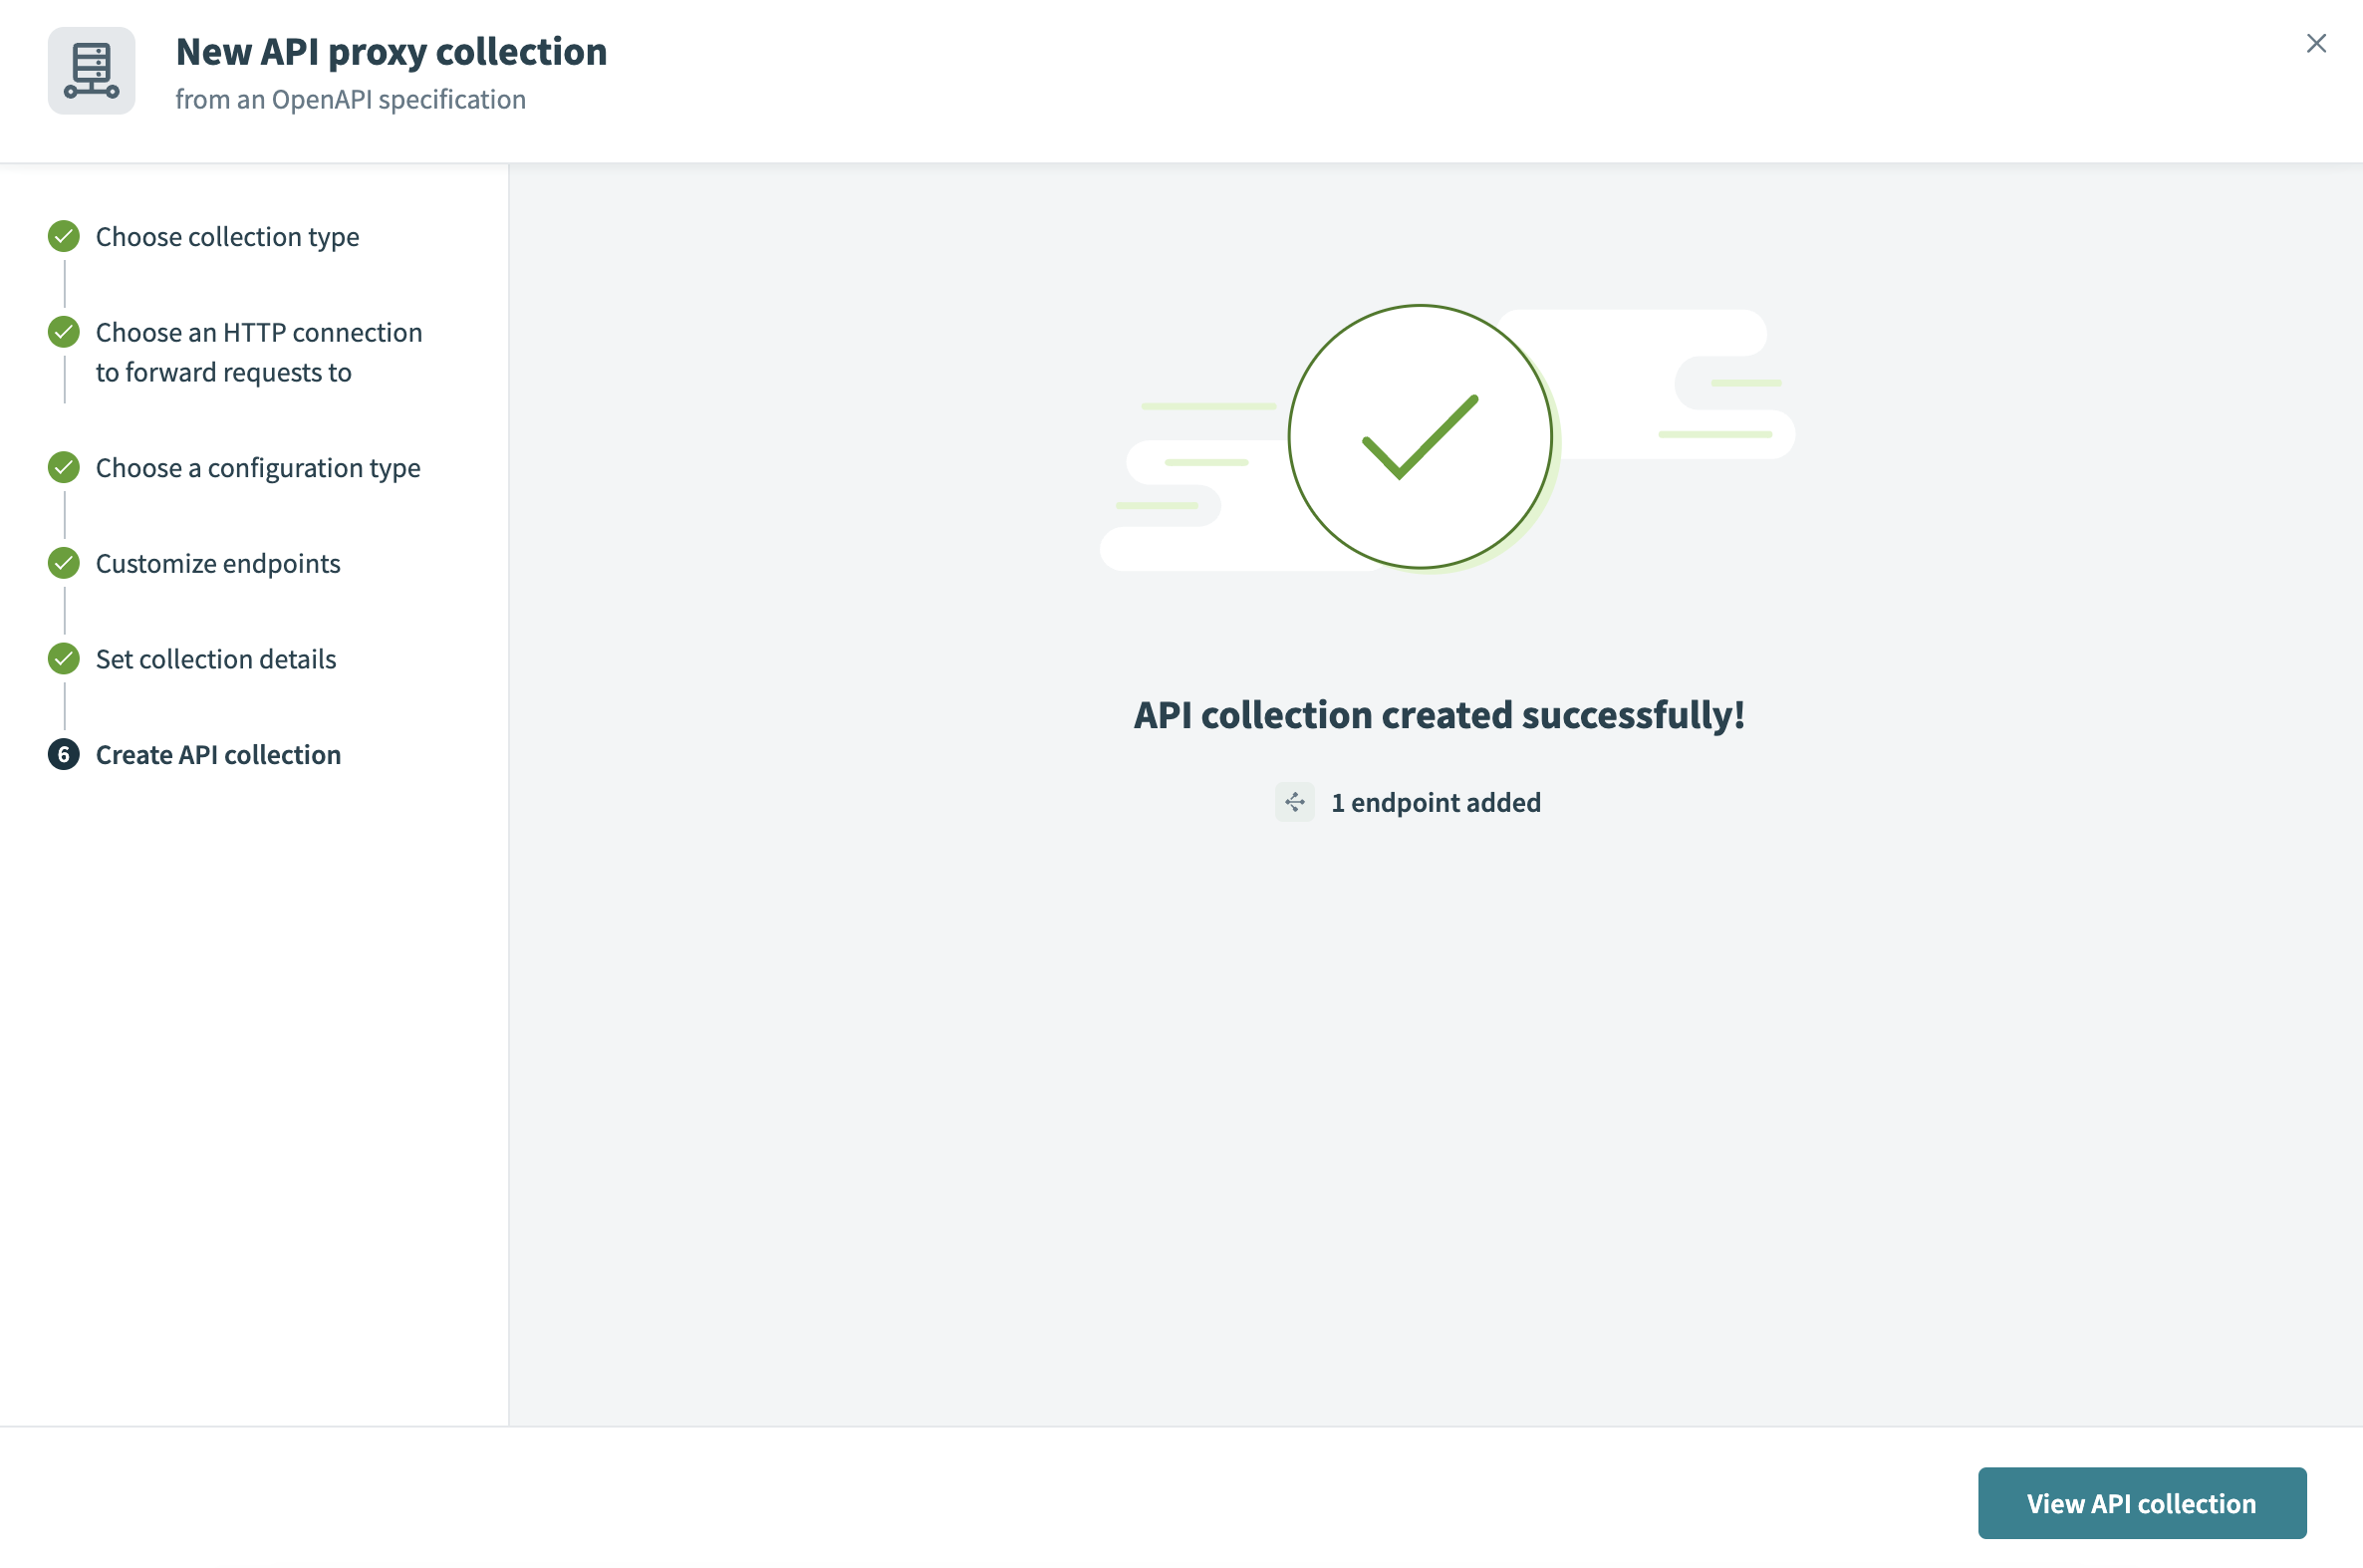 Create API proxy collection
Select View API collection.
Toggle the Inactive button to activate the endpoints you plan to use in your new collection.
NEW ENDPOINTS INACTIVE BY DEFAULT
All new endpoints are inactive by default. You must activate an endpoint to allow other recipes or apps to call it.
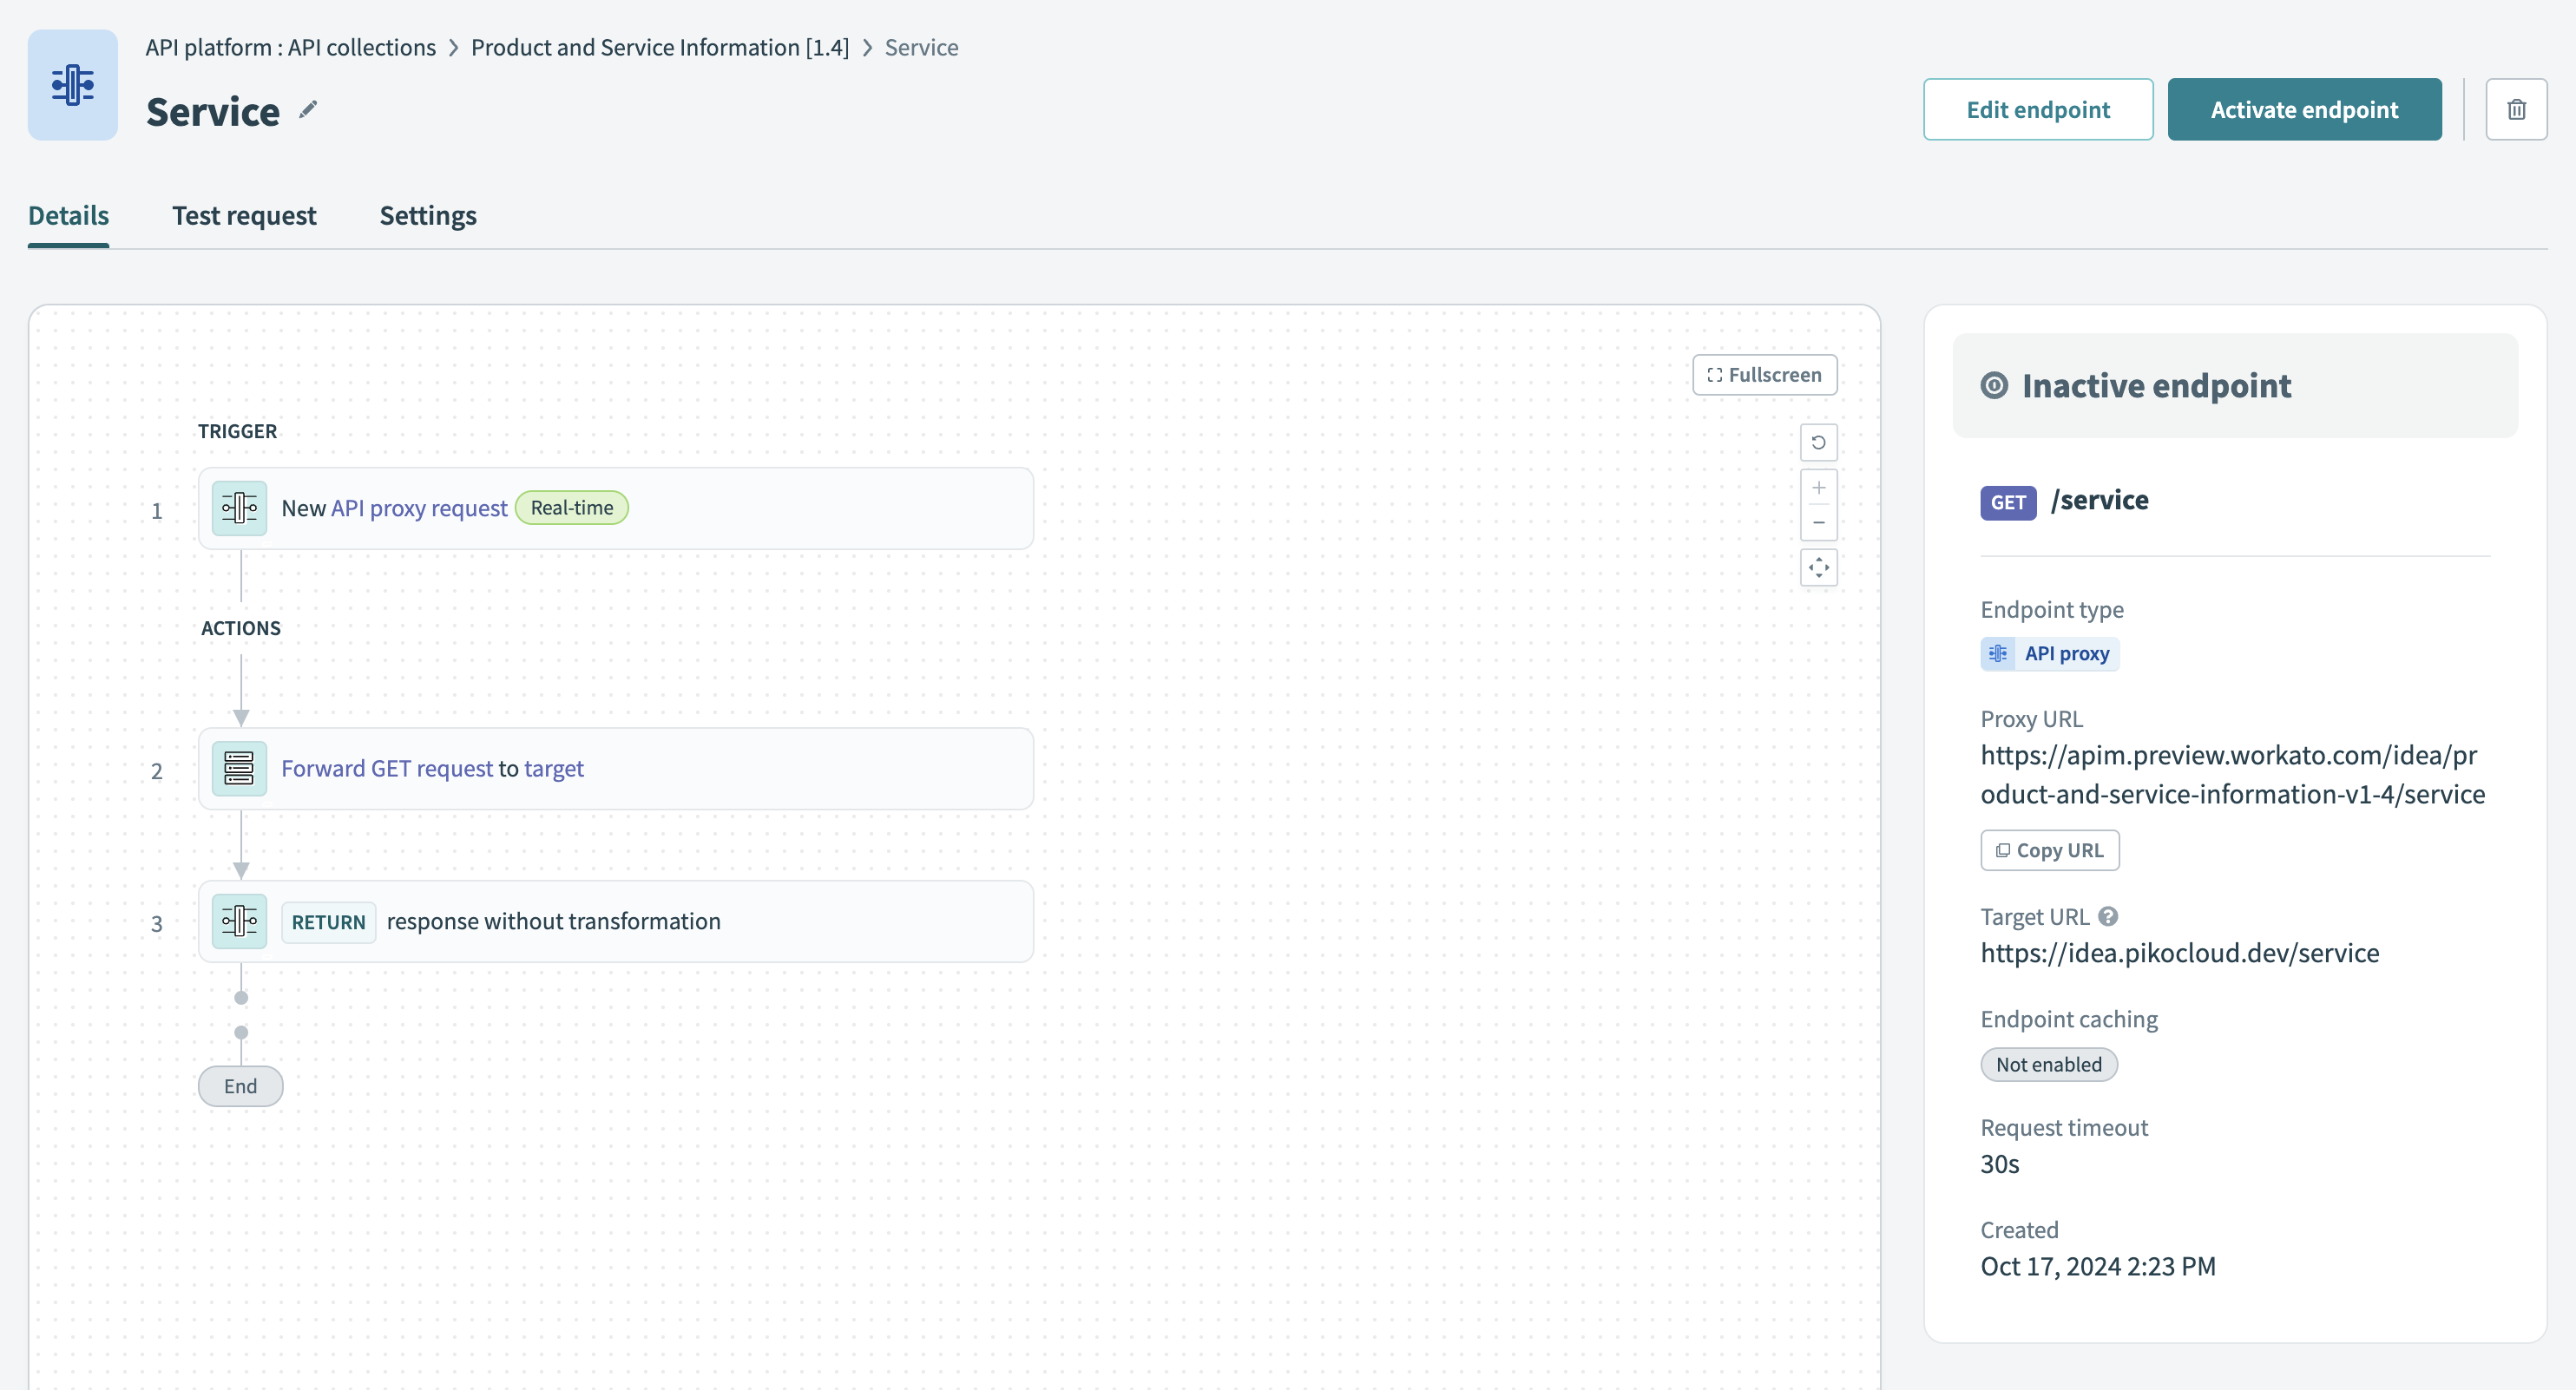 Activate API proxy endpoint in a collection
Refer to Activating or deactivating an endpoint for more information about activating endpoints.
Enable specific users or apps to access this collection by assigning this collection to a client's access profile. Learn how to create a new access profile.
# API recipe collection
An API recipe collection is a set of endpoints that are each built from an individual API recipe. One recipe corresponds to one endpoint.
With a collection of API recipes, you can make powerful API endpoints available to internal users (such as other team members) and external users (such as your organization's end users, even if they don't have a Workato account). You can also configure other recipes in your workspace to use API recipe collections.
By grouping related API recipe endpoints into a collection, you can easily manage access to the endpoints.
COLLECTION TYPES
If you're uncertain whether an API recipe collection, API proxy collection, or an AI gateway collection best fits your use case refer to our guide on Choosing a collection type for more information.
# Prerequisites for API recipe collections
- Create a project or select an existing project.
- Create a folder in the project and add one or more API recipes to it. New API recipes added to the folder are included in the collection automatically. We recommend that you organize related API recipes together.
# Create an API recipe collection
Sign in to your Workato account.
Go to Platform > API platform > API collections.
Select New collection.
Use Choose collection type to select API recipe collection.
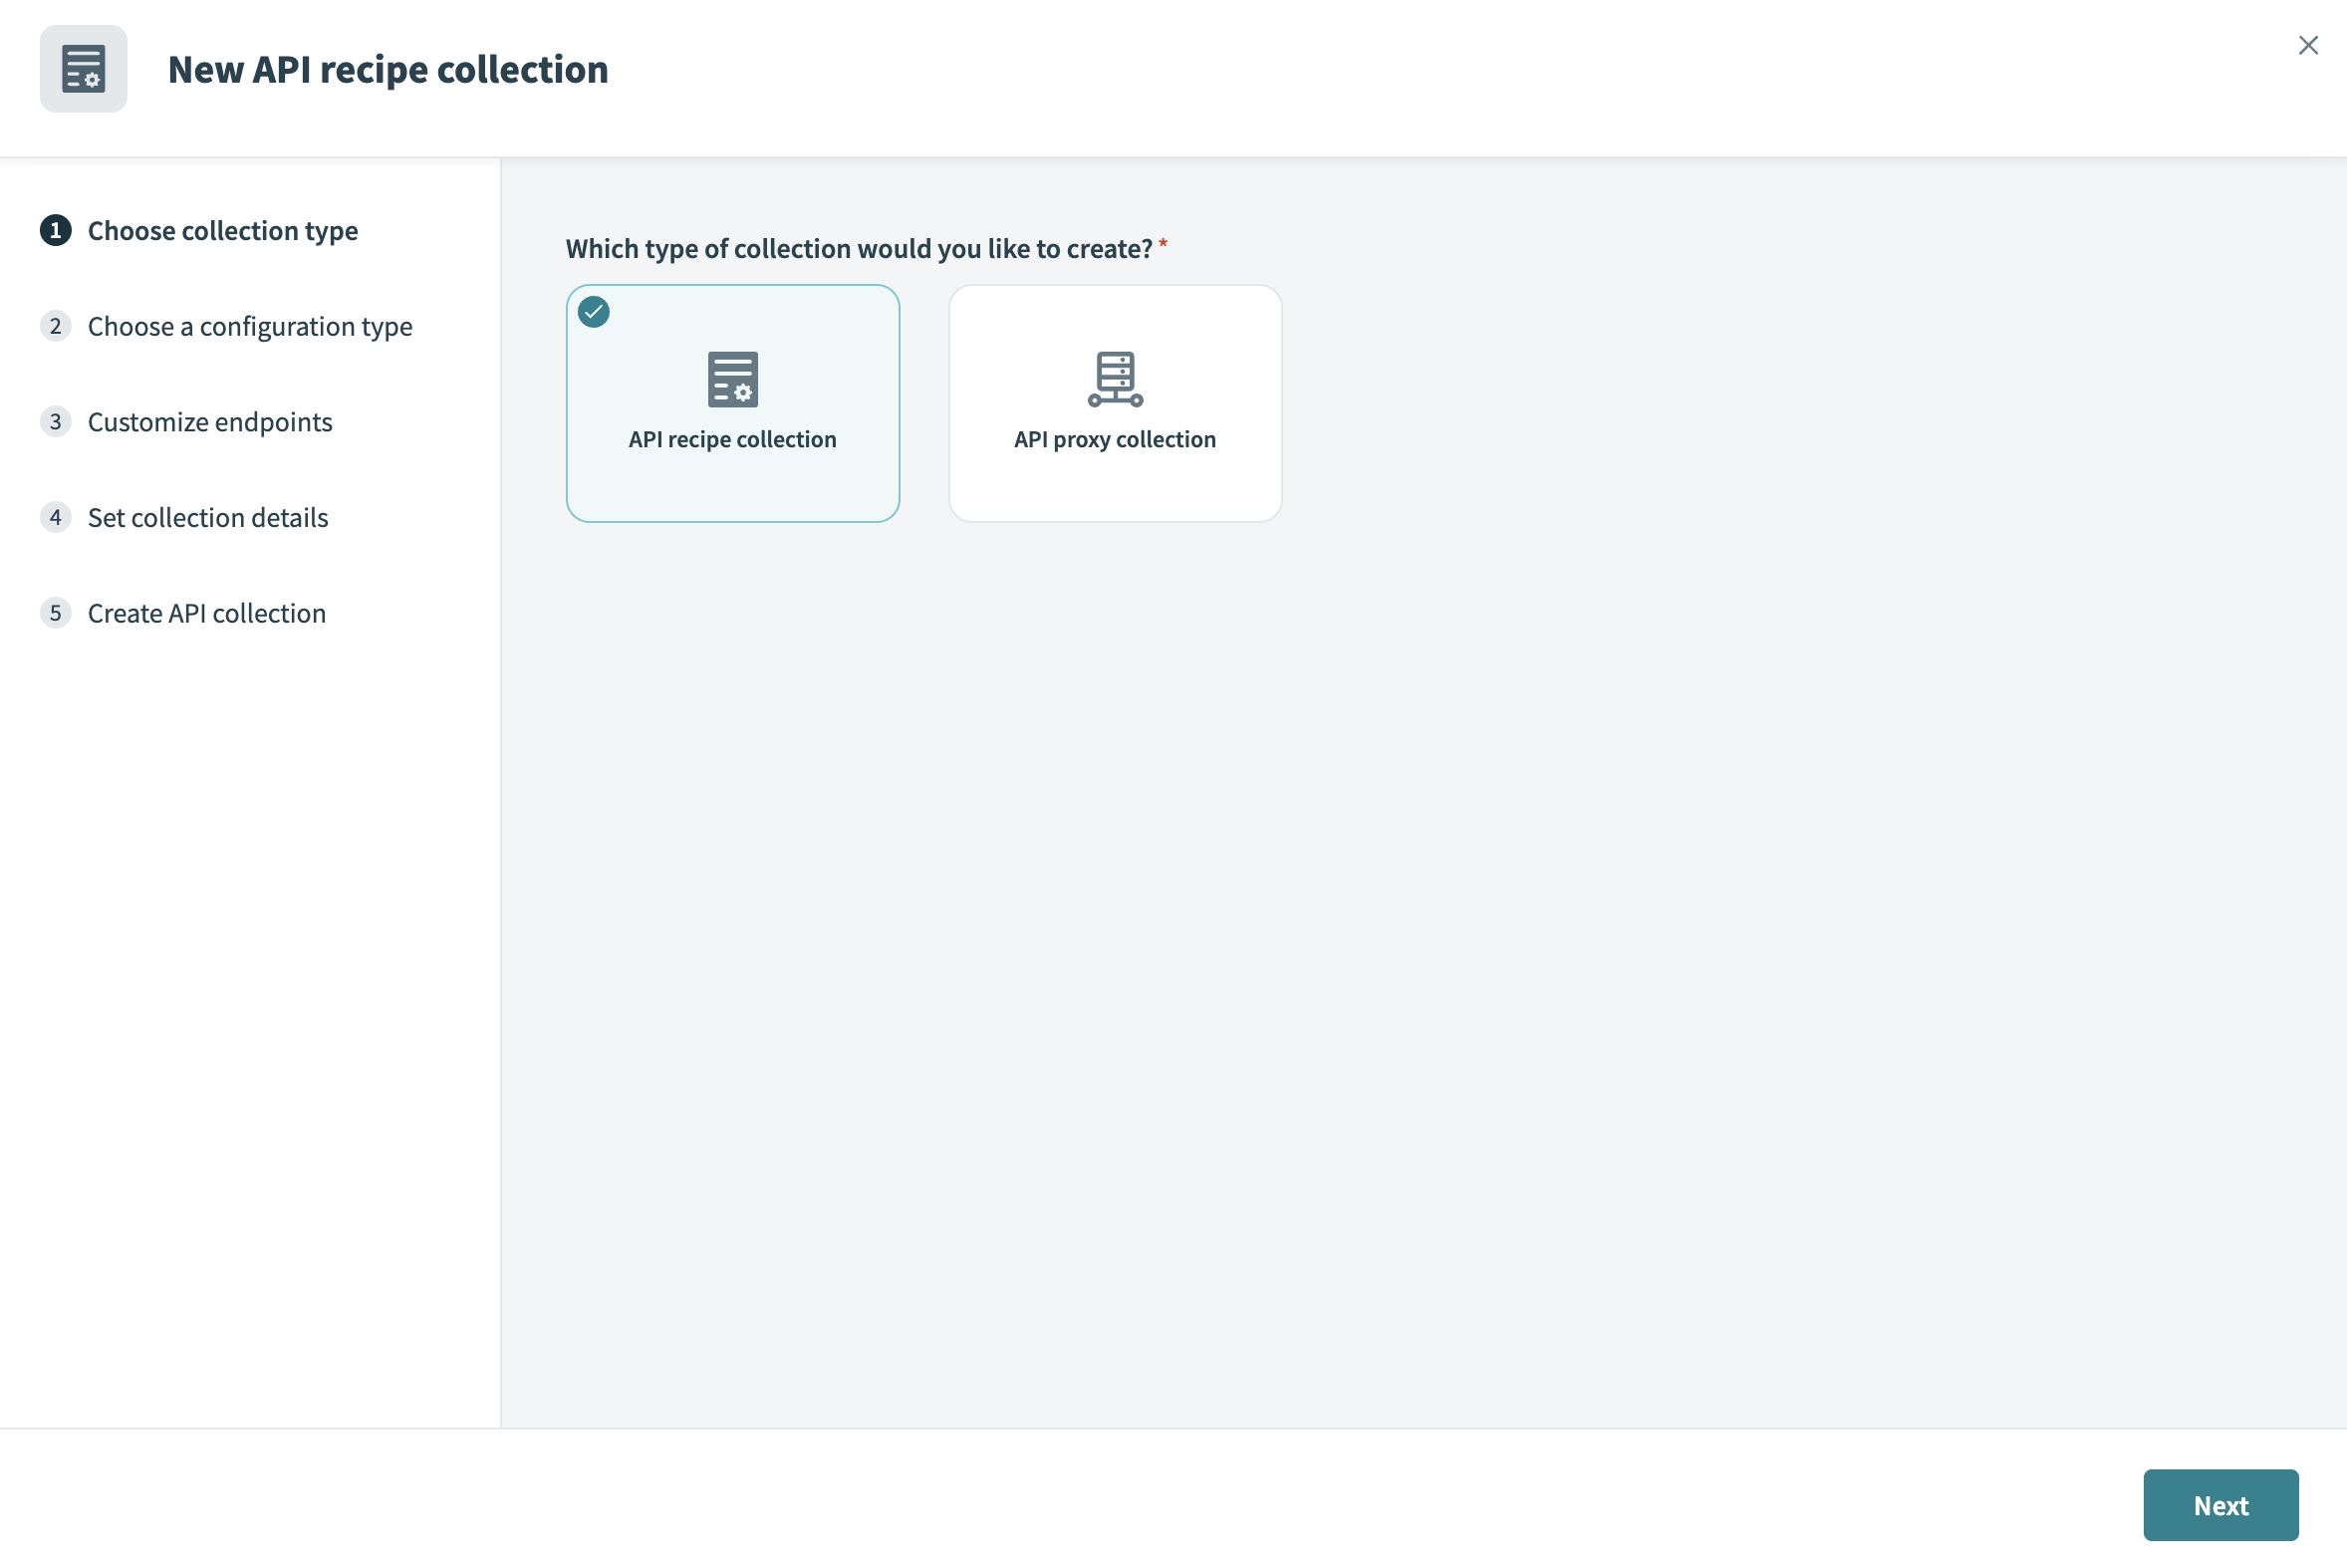 Select API recipe collection
Use Choose a configuration type to specify the configuration you plan to use for your recipe collection:
Use existing recipes
Select the recipe folder from the picklist. API recipes in this folder are linked to a new endpoint.
Import OpenAPI Specification
Upload a JSON or UTF-8 encoded YAML OpenAPI 3.0 (opens new window) specification file, or enter the URL of the specification. Note that we currently do not support time values. For example,
2024-07-18T10:00:00Zmust be changed to"2024-07-18T10:00:00Z".
Go to Customize endpoints and select the checkbox for each endpoint you plan to add to the collection. You can select Edit details next to an endpoint to configure the following information:
Endpoint name
Enter a descriptive name for the recipe endpoint.
Endpoint path
Define a path for this endpoint. It can include path parameters. Ensure the endpoint path conforms to these guidelines.
HTTP method
Select the HTTP method to use for the endpoint.
Time-to-live period
Only required when you toggle Cache response. Specify the time in seconds that a response is stored in cache before it is refreshed or deleted. The maximum is 3600 seconds.
Request timeout
Only required when you toggle Customize timeout. Customize the time that a request is given to complete. The default value is 30 seconds and the maximum value is 240 seconds.
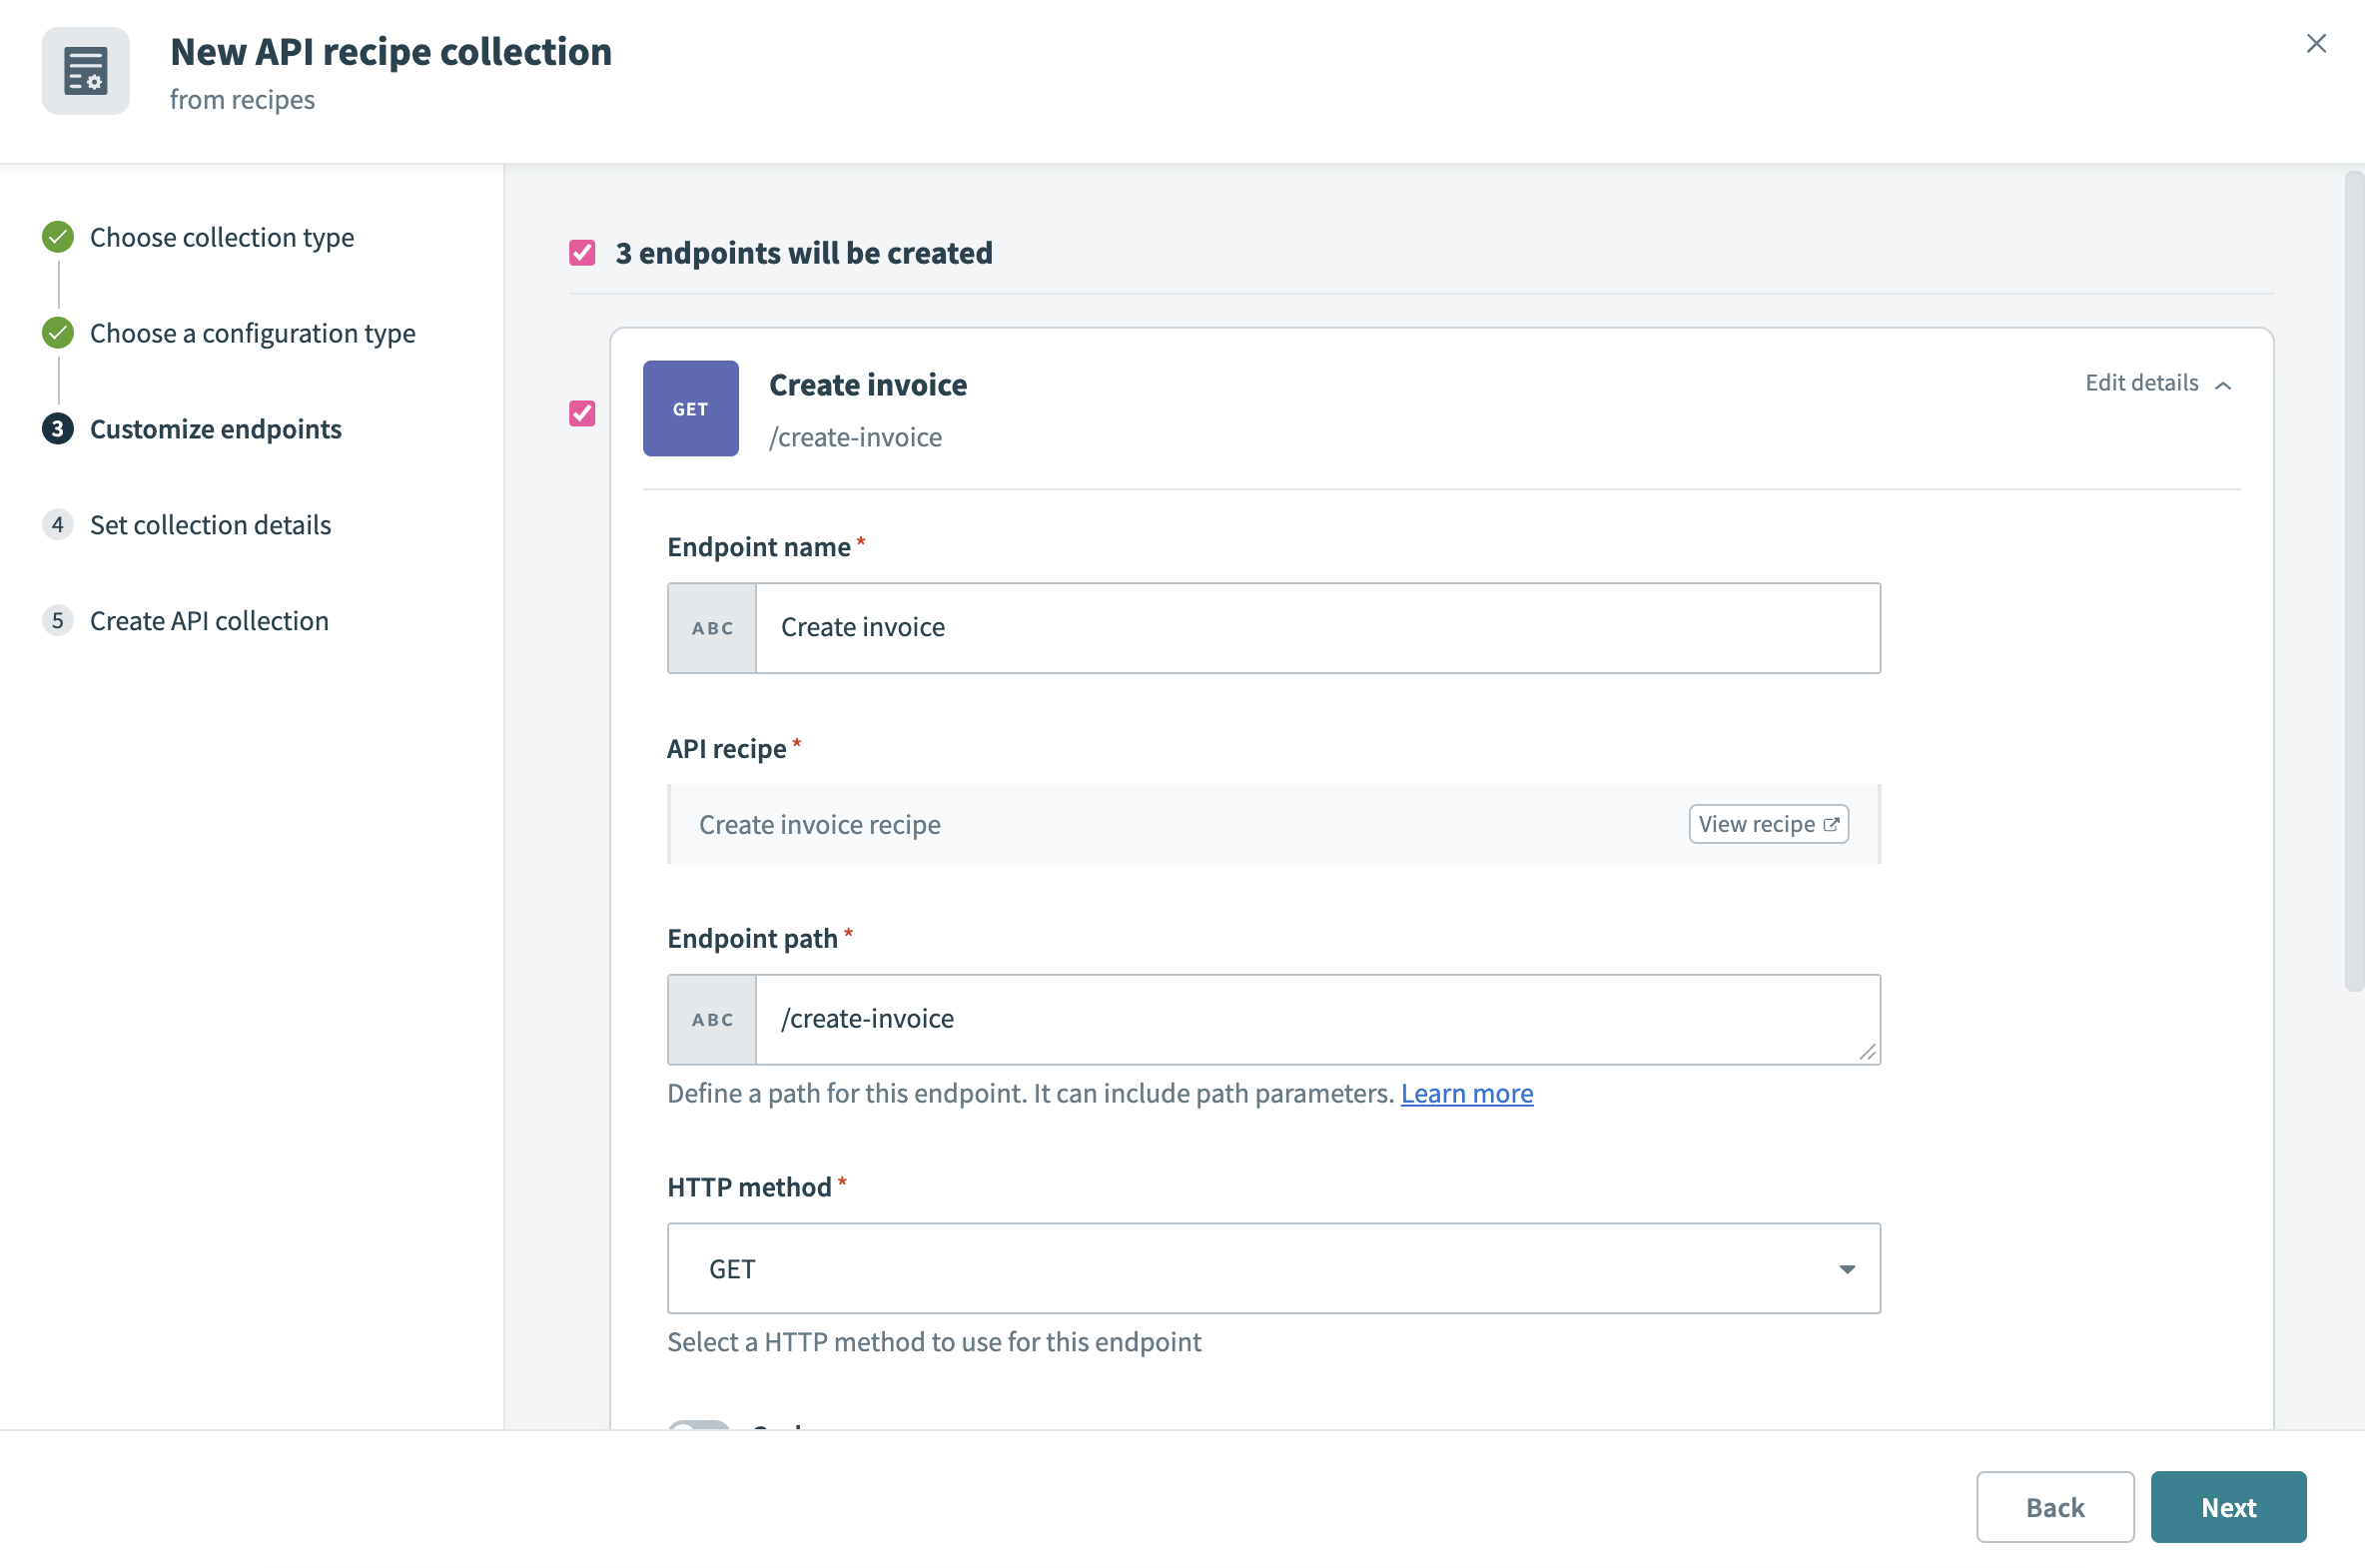 Customize API recipe collection endpoints
Go to Set collection details and enter the following information:
Collection name
Enter a descriptive name for the API collection.
Version
API collections are versioned using a unique 1-10 character version identifier. Collections with the same name but different versions are distinct objects.
Description (optional)
Enter a short description of the API collection.
Select Create collection. Workato creates the collection and shows the number of endpoints added.
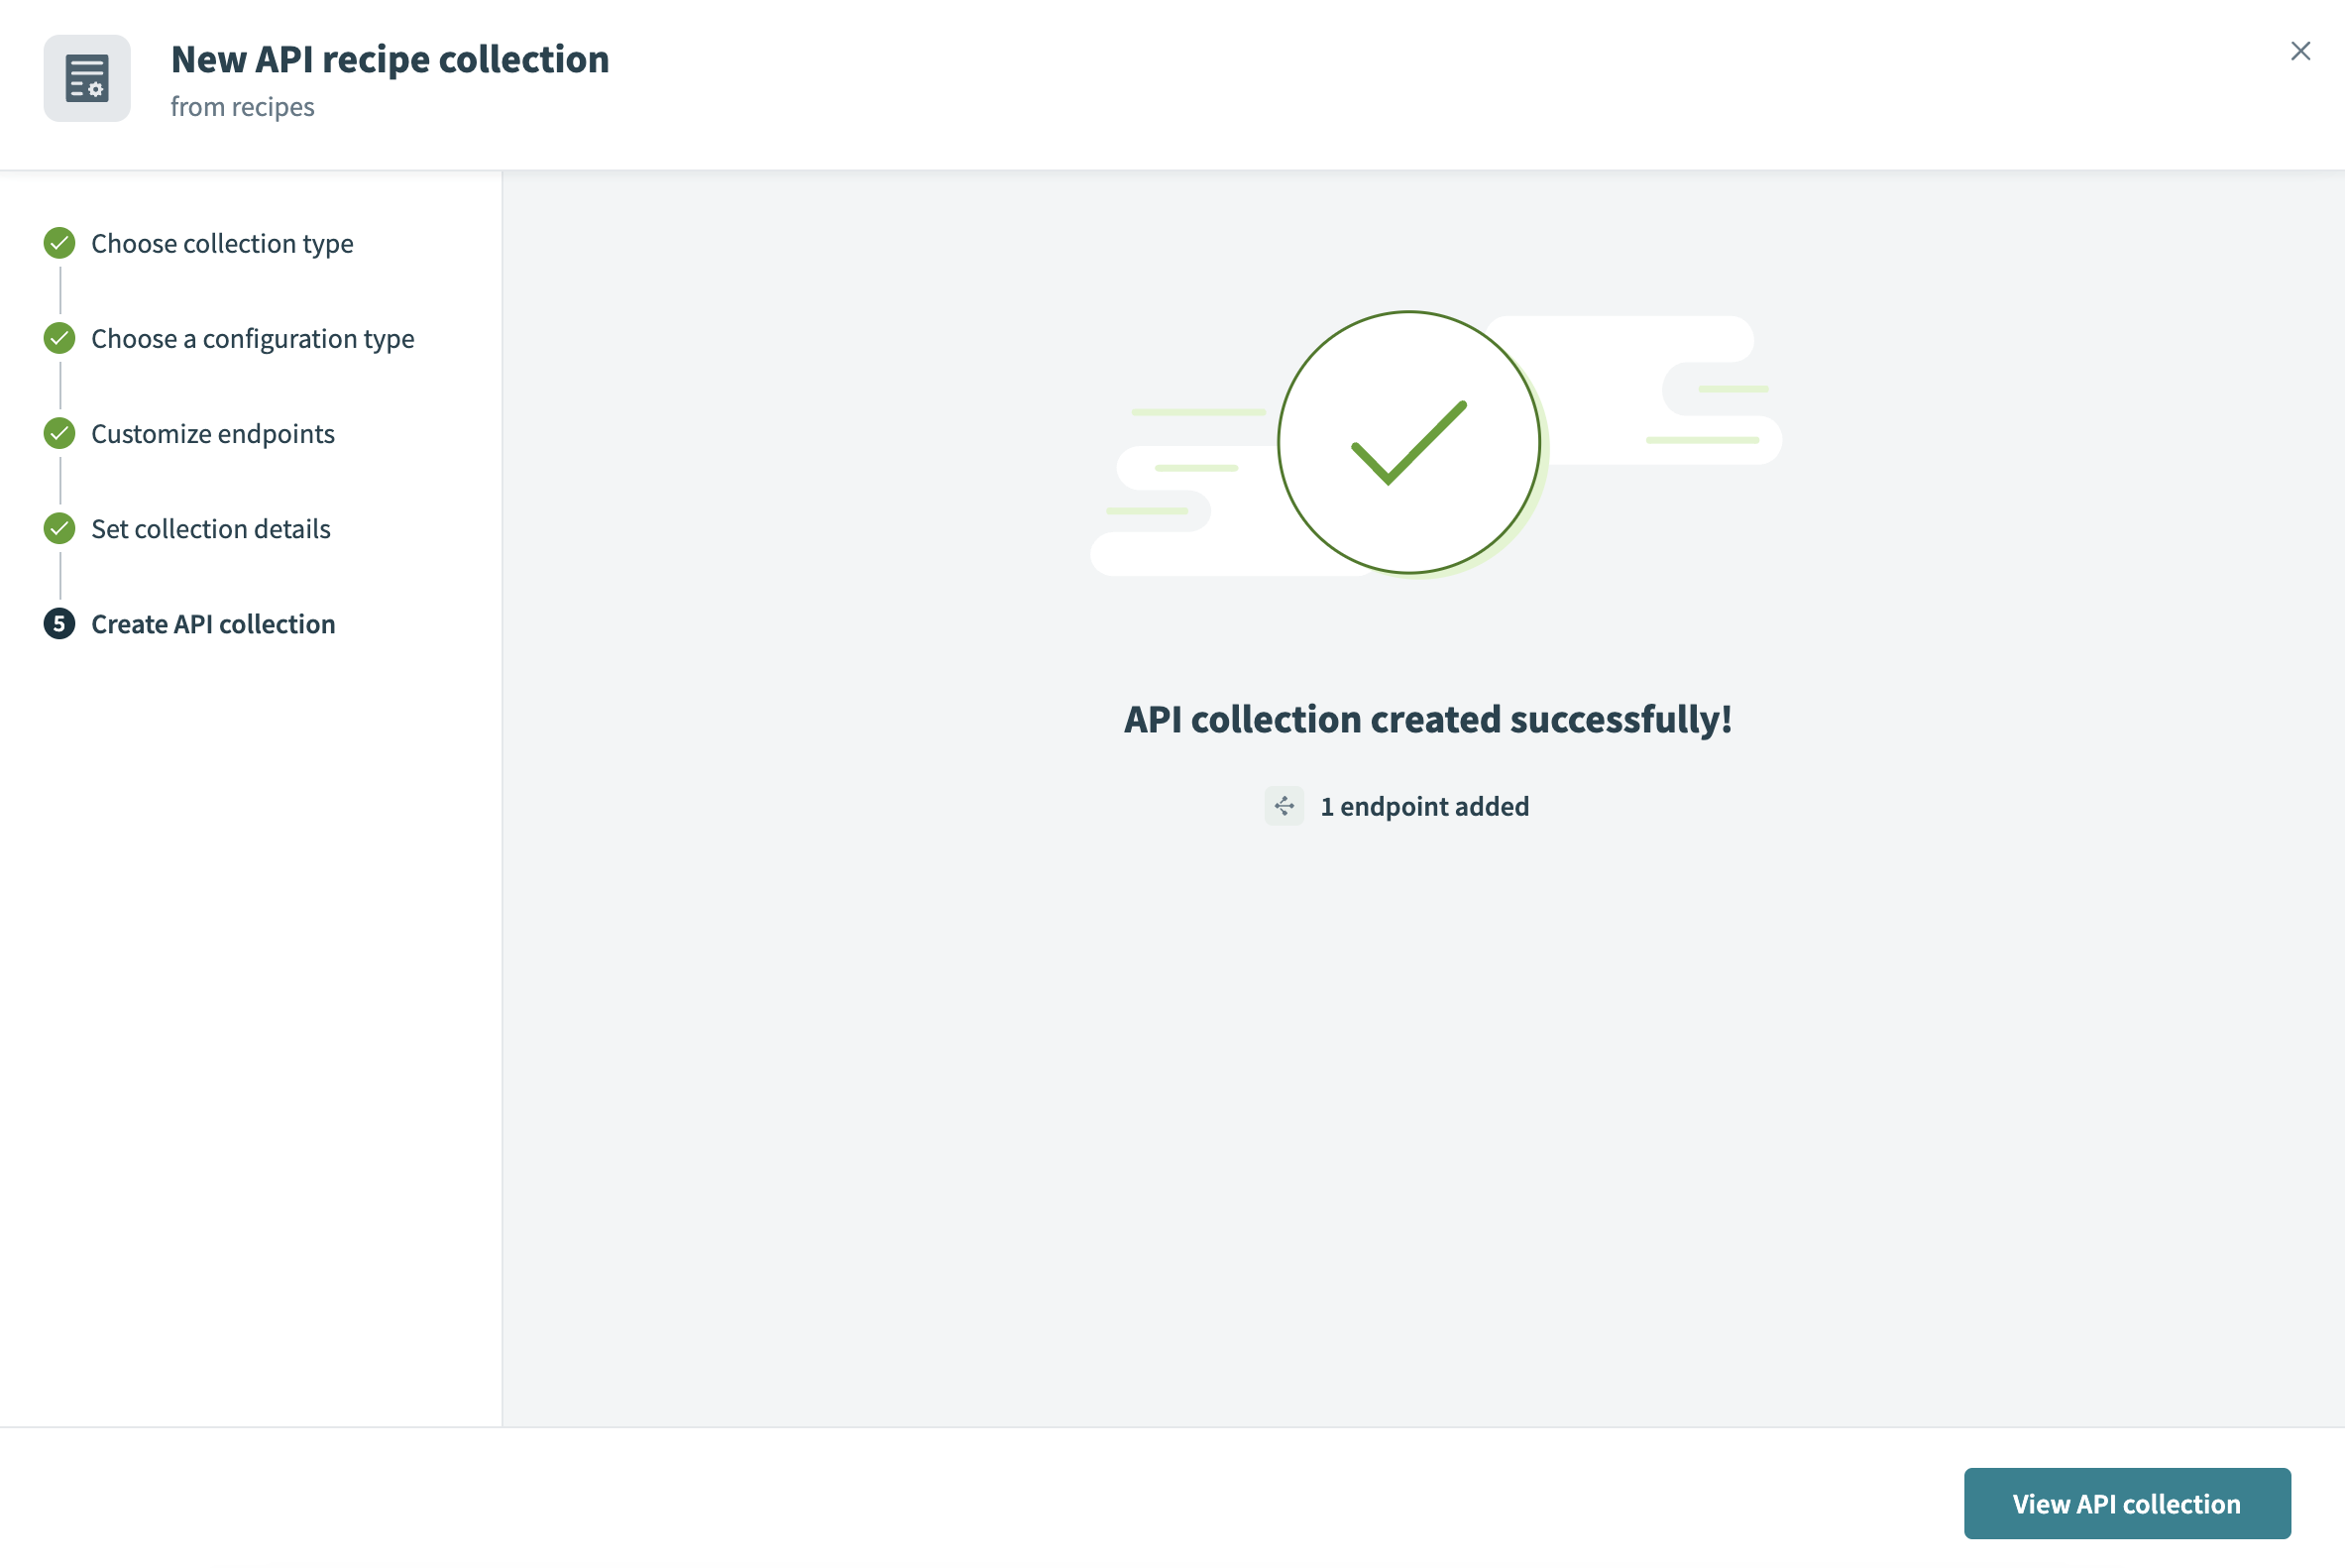 Create API recipe collection
Select View API collection.
Toggle the Inactive button to activate the endpoints you plan to use in your new collection.
NEW ENDPOINTS INACTIVE BY DEFAULT
All new endpoints are inactive by default. You must activate an endpoint to allow other recipes or apps to call it.
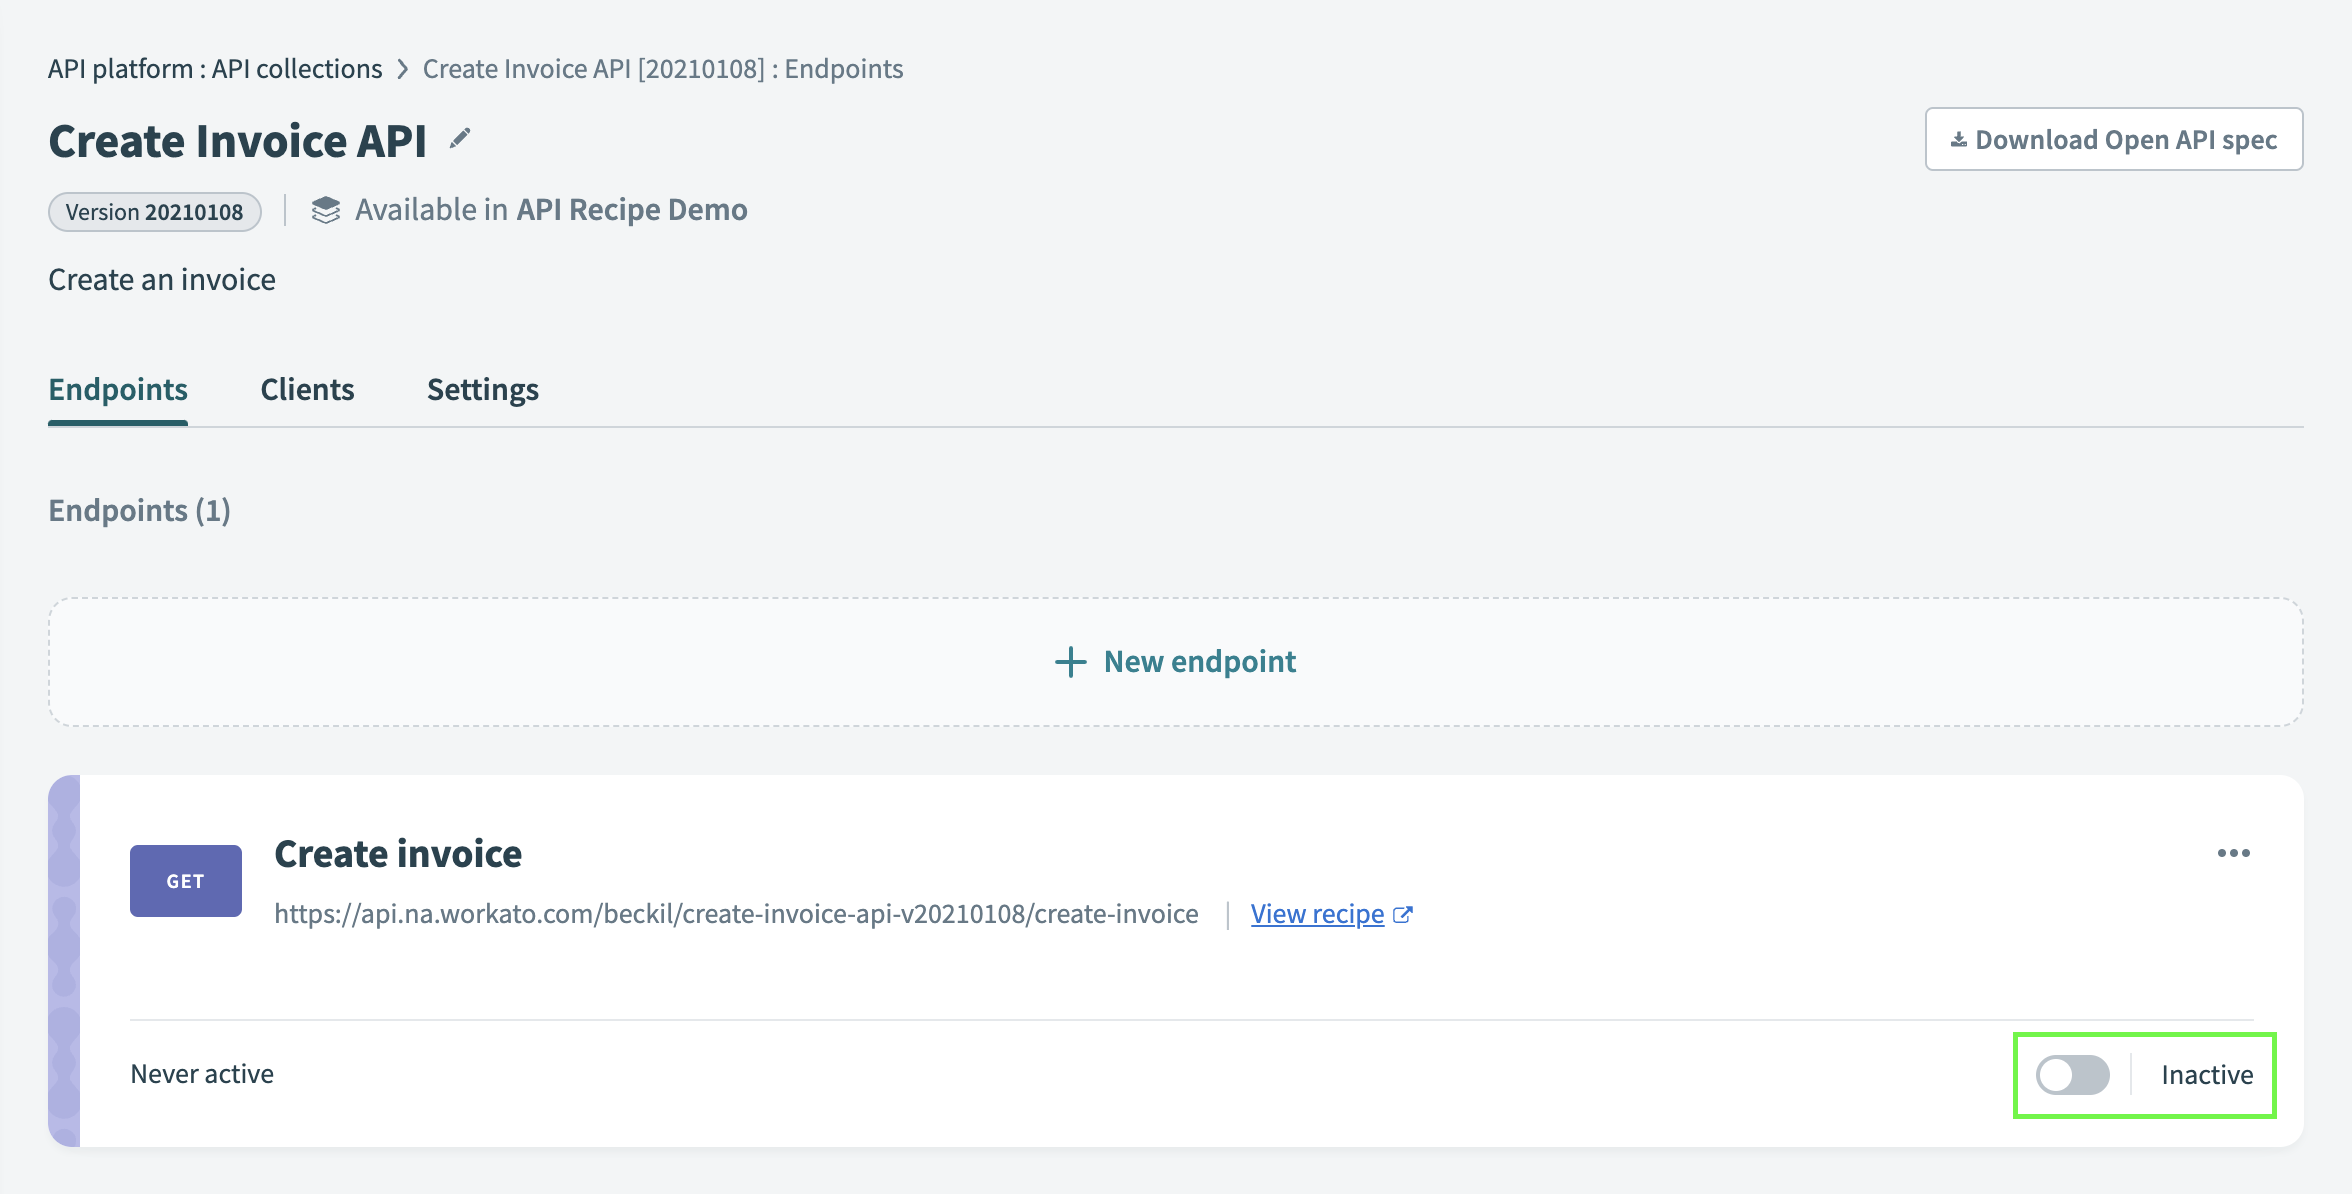 Activate API endpoint in a collection
Refer to Activating or deactivating an endpoint for more information about activating endpoints.
Enable specific users or apps to access this collection by assigning the collection to a client's access profile. Learn how to create a new access profile.
# AI gateway collection
An AI gateway collection is a collection of exposed endpoints dedicated for use with LLMs, GPTs, or other AI applications. This exposure enables AI applications to take actions on your behalf. Refer to AI gateway for more information.
COLLECTION TYPES
If you're uncertain whether an API recipe collection, API proxy collection, or an AI gateway collection best fits your use case refer to our guide on Choosing a collection type for more information.
# Prerequisites AI gateway collections
- Create a project or select an existing project.
# Create an AI gateway collection
Sign in to your Workato account.
Go to Platform > API platform > API collections.
Click + New collection.
Select AI gateway collection in the What type of collection would you like to create? field.
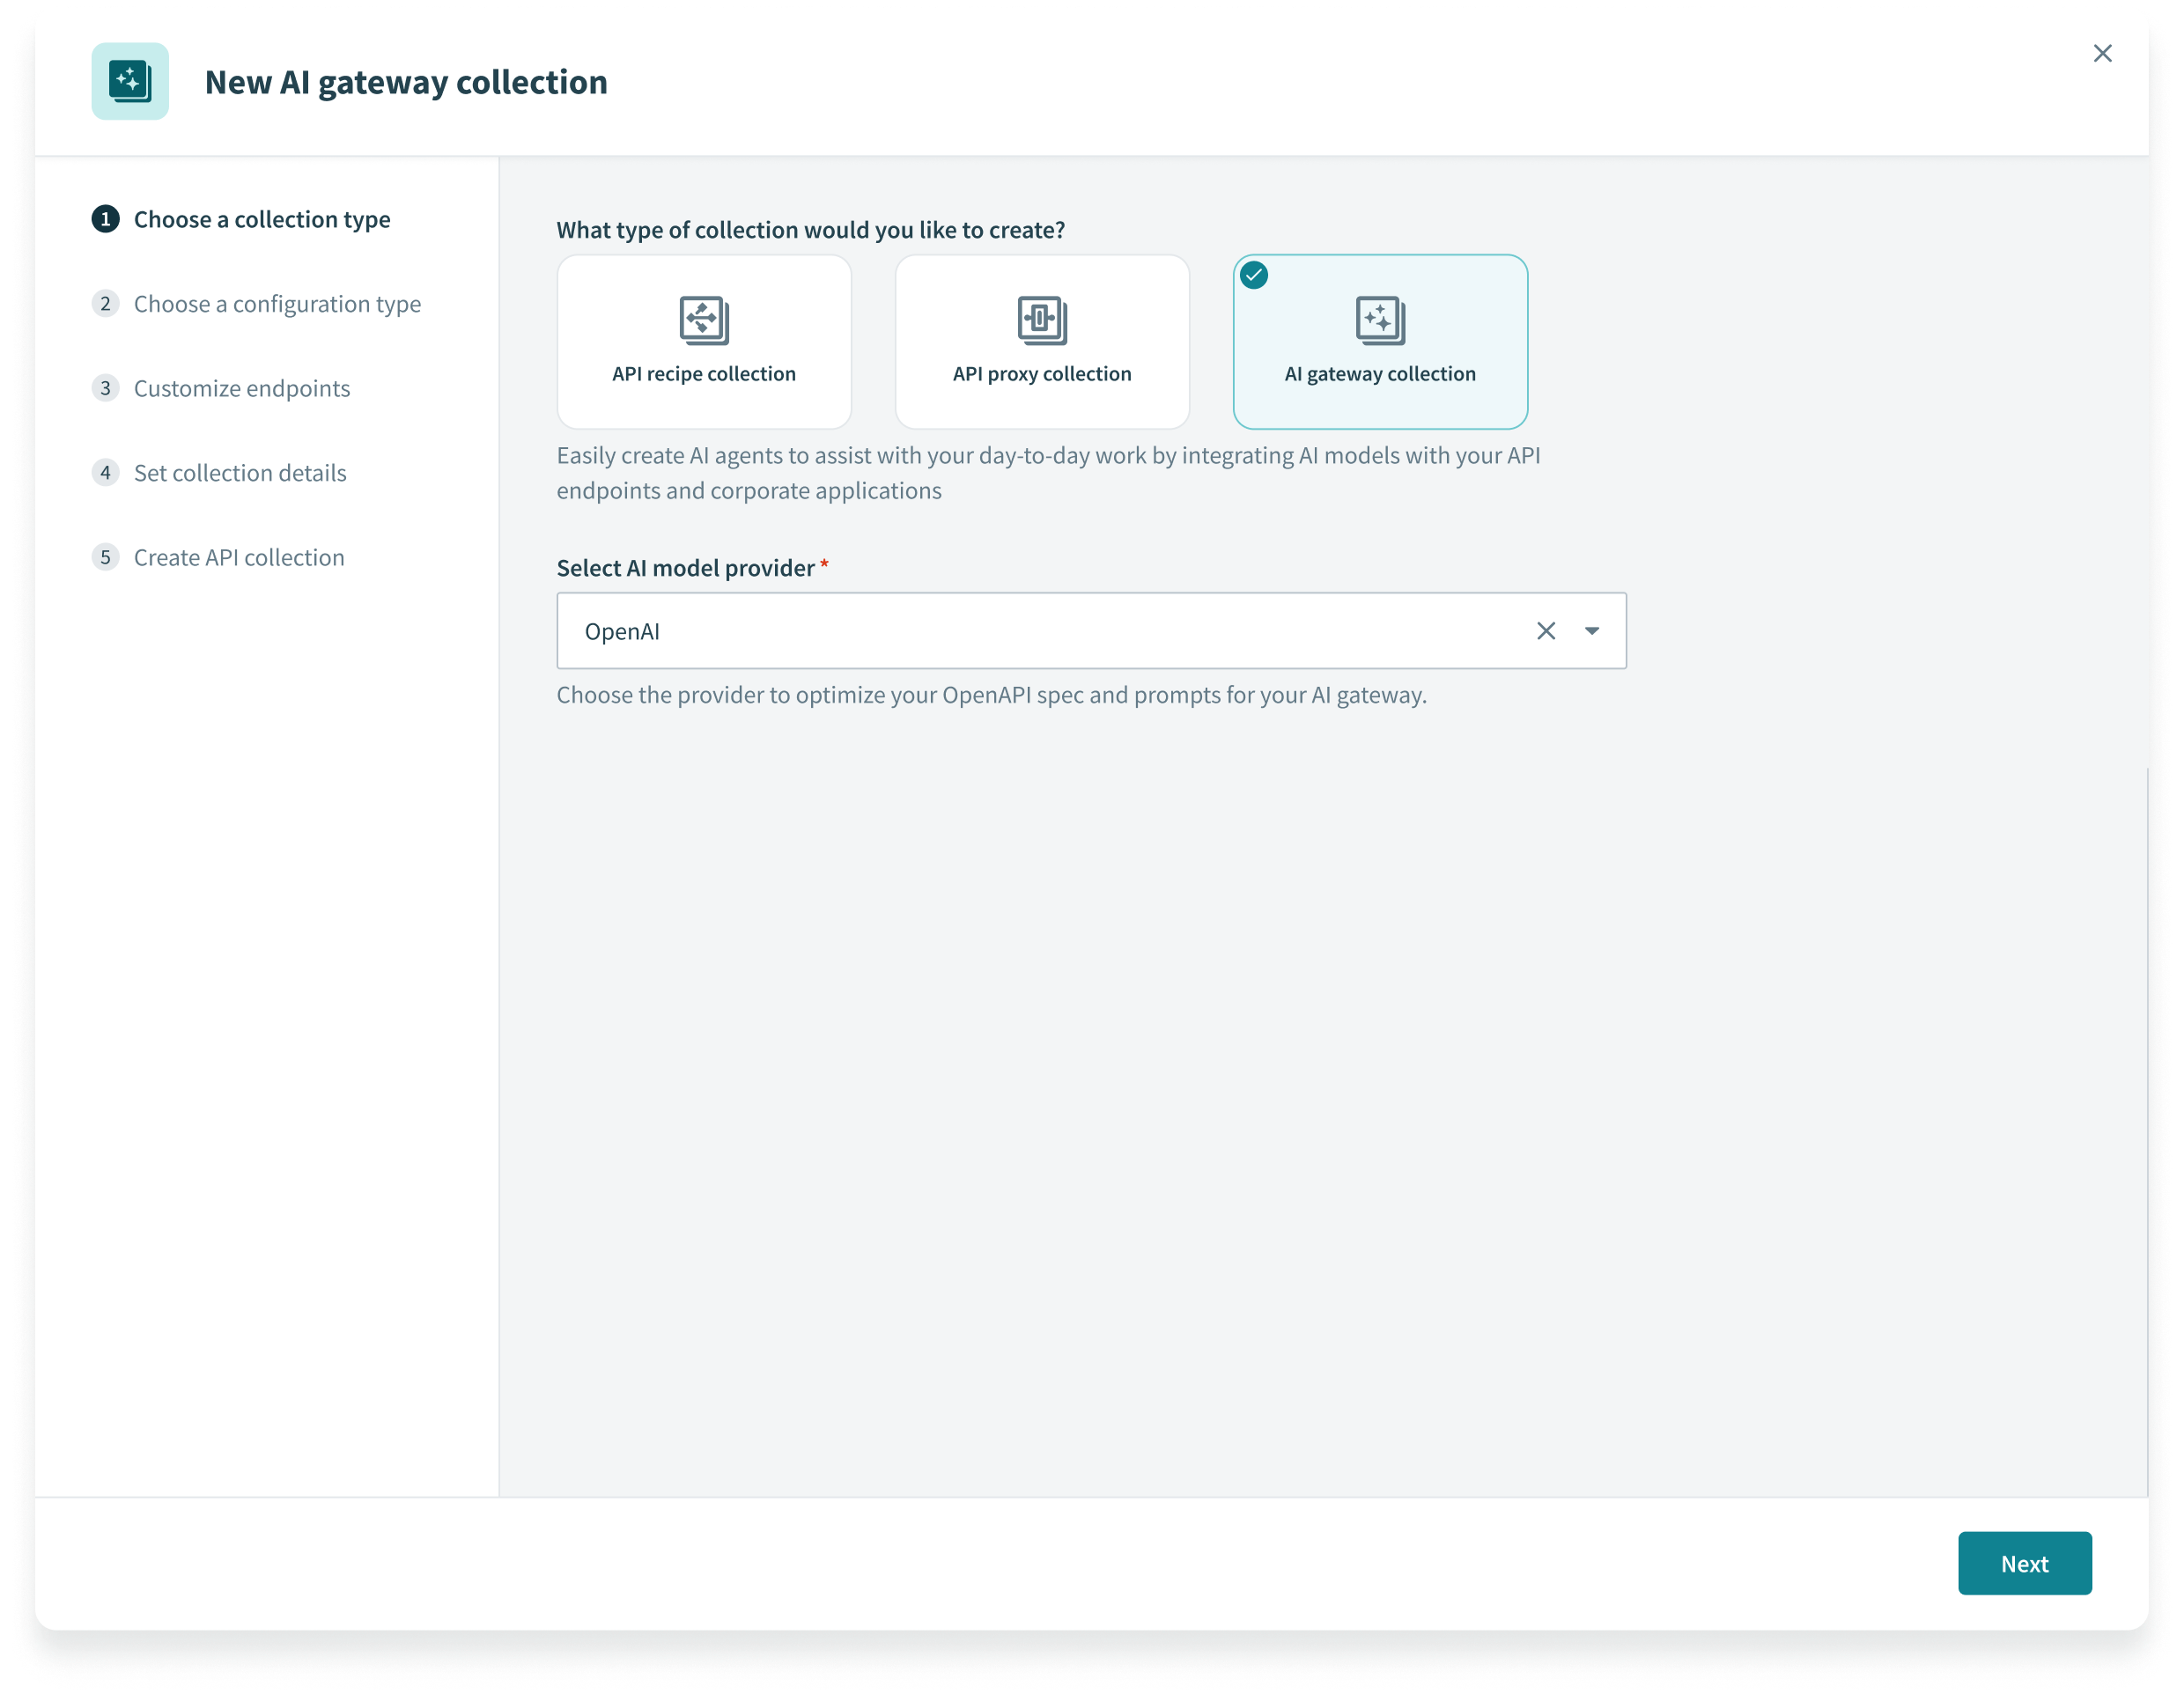 Select AI gateway collection
Choose a provider in the Select AI model provider field to optimize your OpenAPI spec and prompts for your AI gateway.
Use Choose a configuration type to specify the configuration you plan to use for your recipe collection:
Use existing recipes
Select the recipe folder from the drop-down menu. API recipes in this folder are linked to a new endpoint.
Import OpenAPI Specification
Upload a JSON or YAML OpenAPI 3.0 (opens new window) specification file, or enter the URL of the specification.
 Choose your configuration type
Only if you imported an OpenAPI specification: Go to Customize endpoints and select the checkbox next to each endpoint you plan to add to the collection. You can select Edit details next to an endpoint to configure the following information:
Endpoint name
Enter a descriptive name for the AI endpoint.
Endpoint path
Define an endpoint path to be appended to both the AI and target base URLs. It can include path parameters. Ensure that the endpoint path conforms to these guidelines.
HTTP method
Select the HTTP method to use for the endpoint.
Request timeout
Only required when you toggle Customize timeout. Customize the time that a request is given to complete. The default value is 30 seconds and the maximum value is 240 seconds.
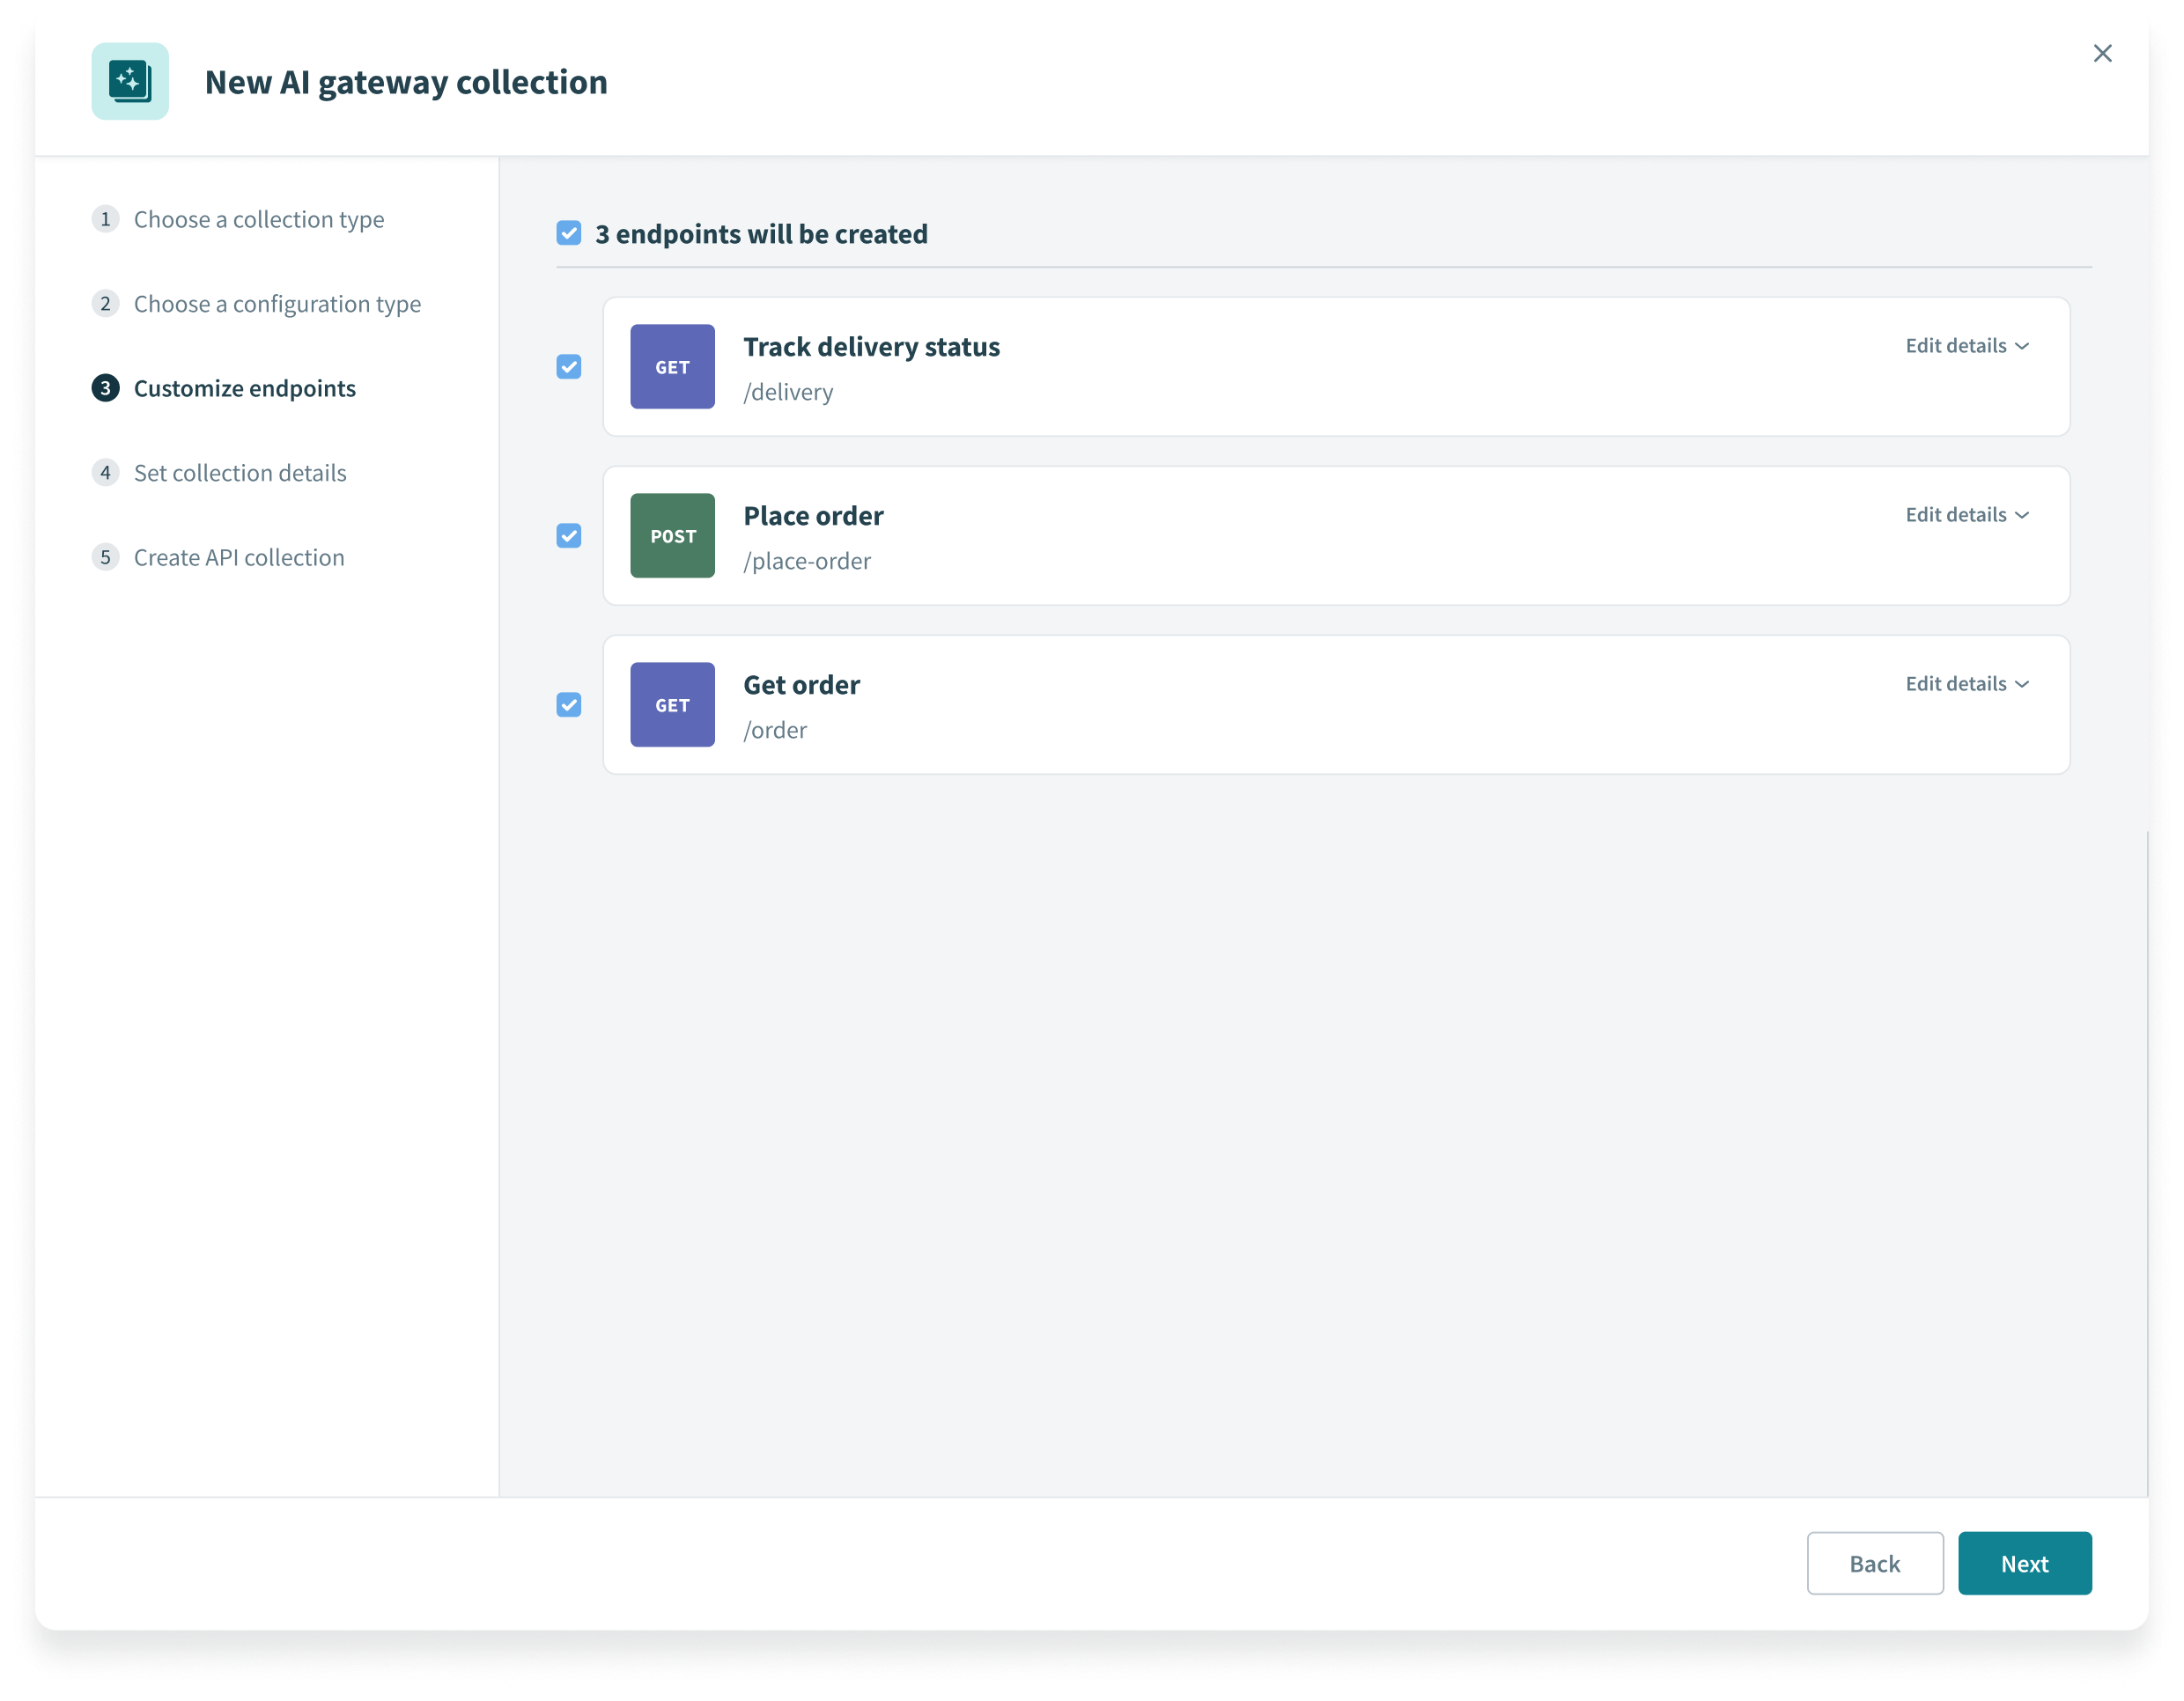 Customize AI gateway collection endpoints
Go to Set collection details and enter the following information:
Collection name
Enter a descriptive name for the AI gateway collection.
Version
AI gateway collections are versioned using a unique 1-10 character version identifier. Collections with the same name but different versions are distinct objects.
Description (optional)
Enter a short description of the AI gateway collection.
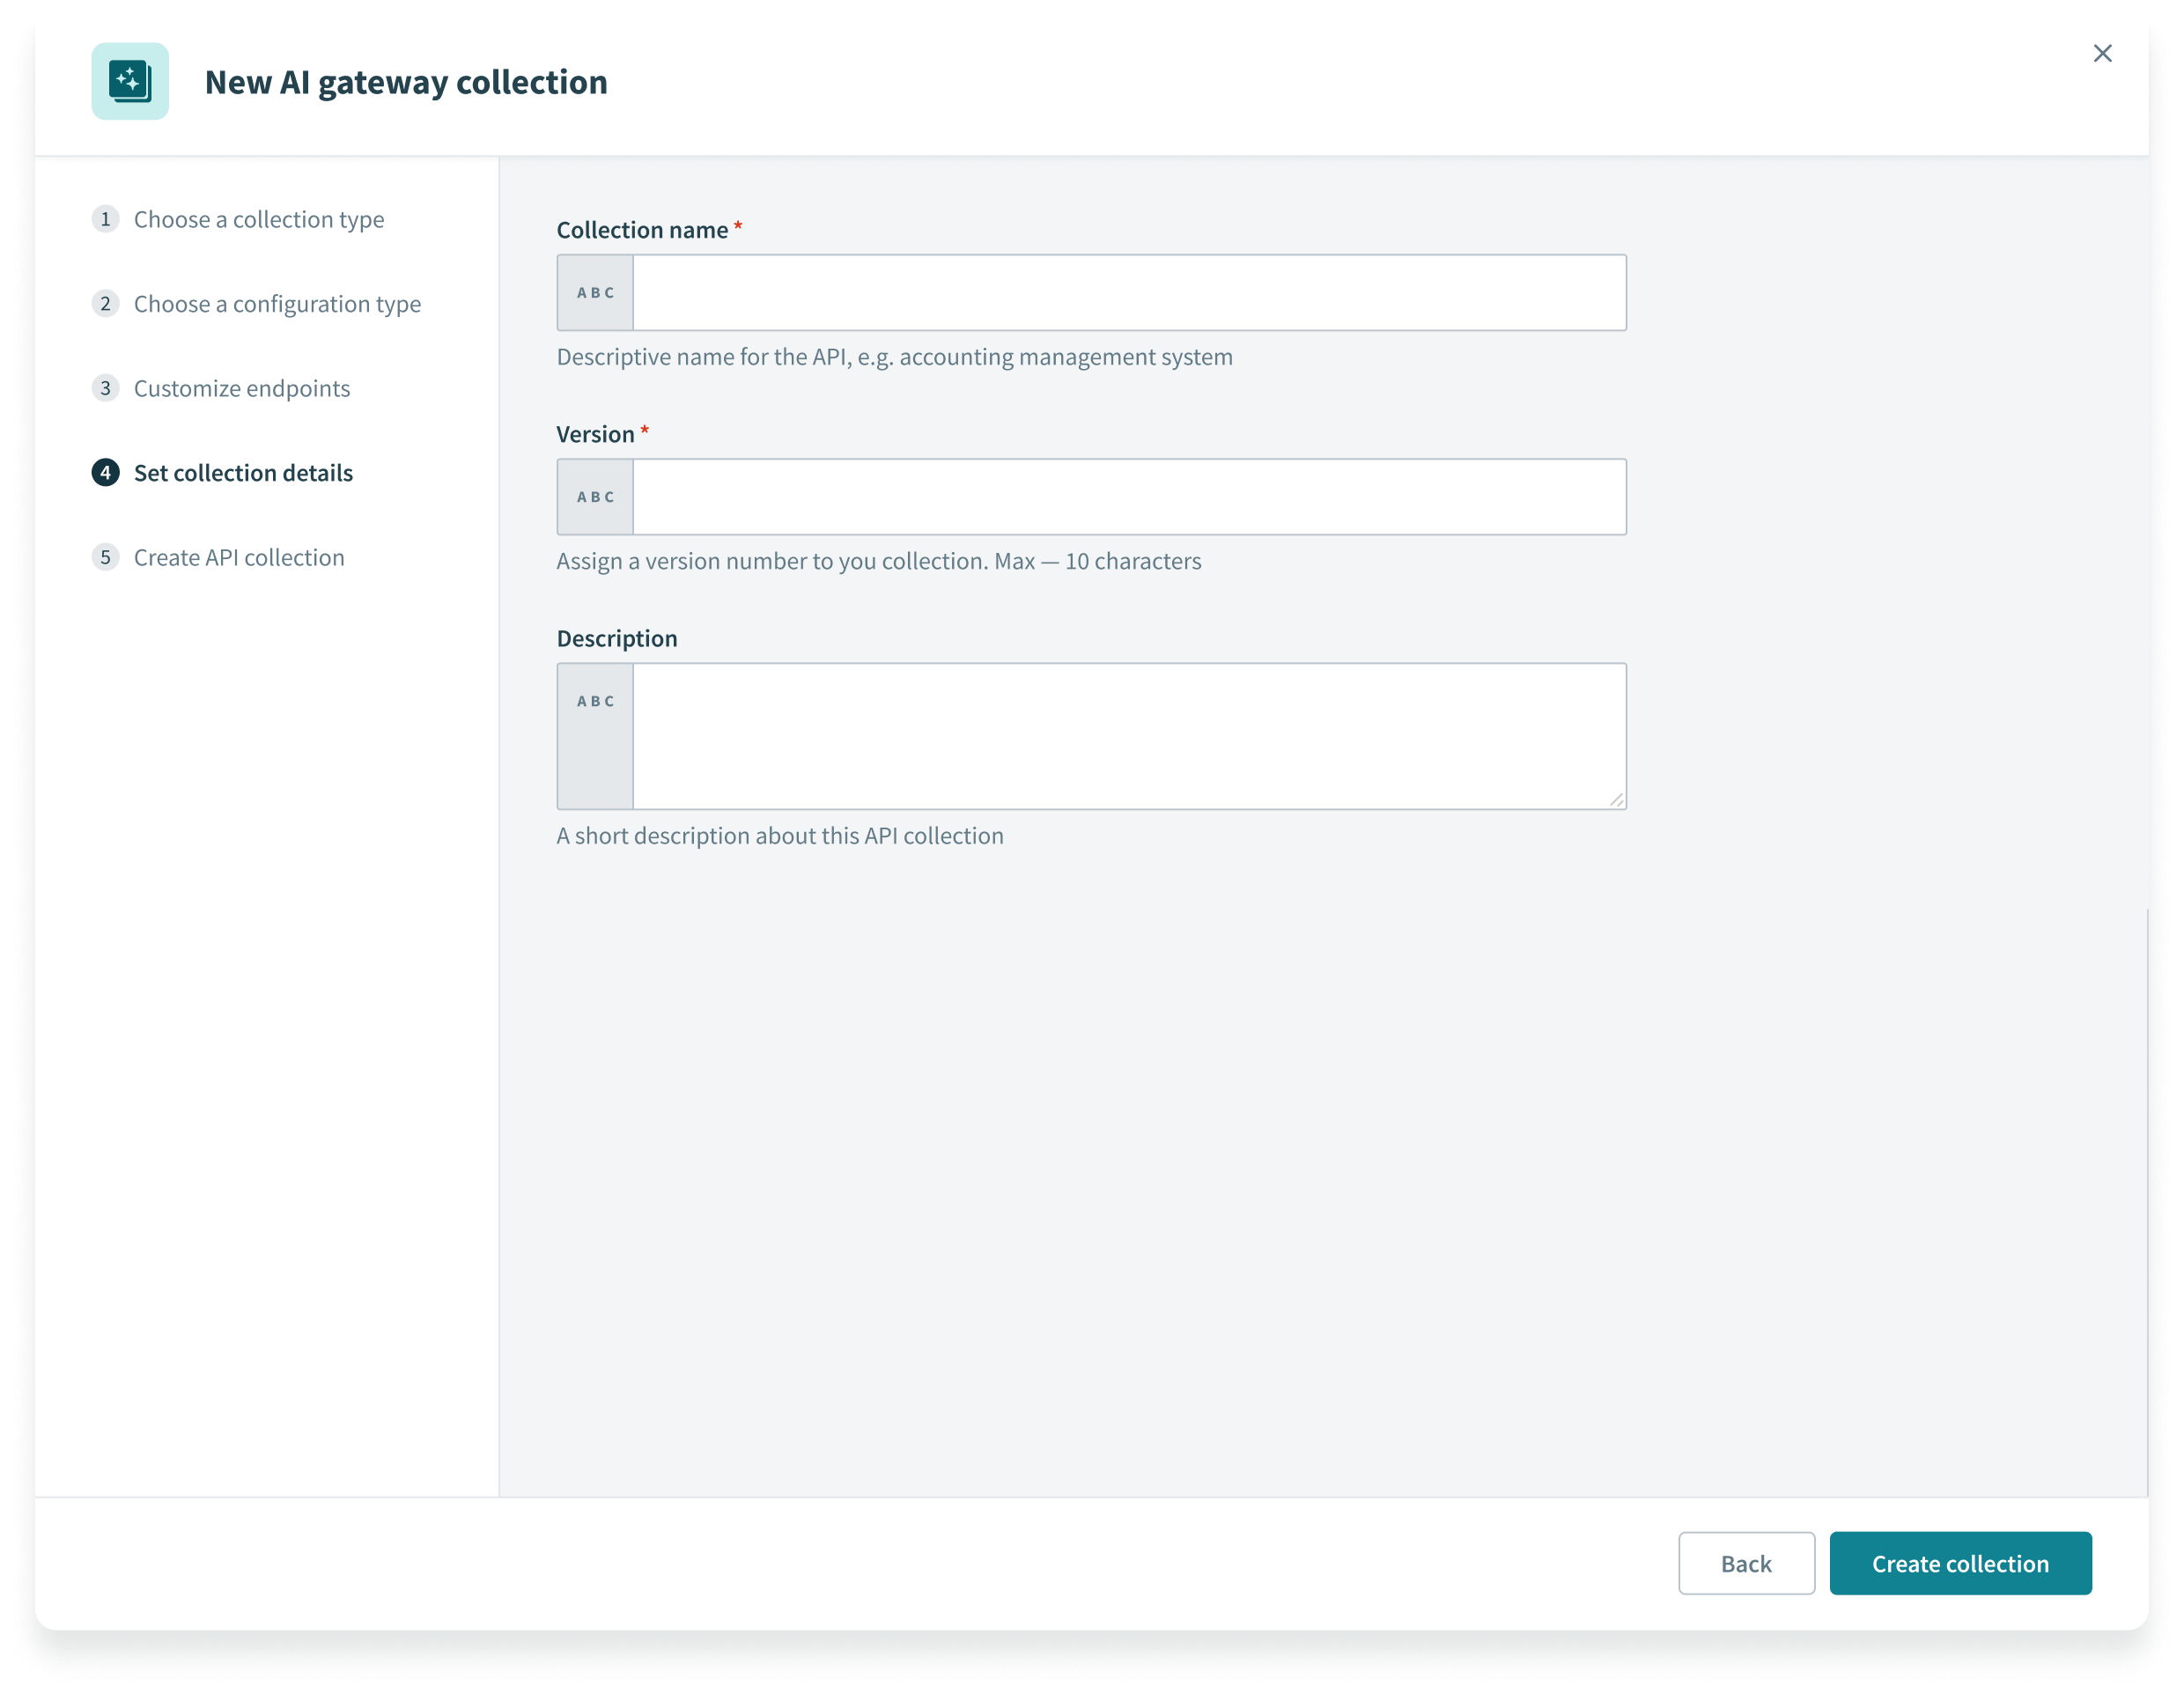 Set collection details
Click Create collection.
Select a Next steps link or click View API gateway.
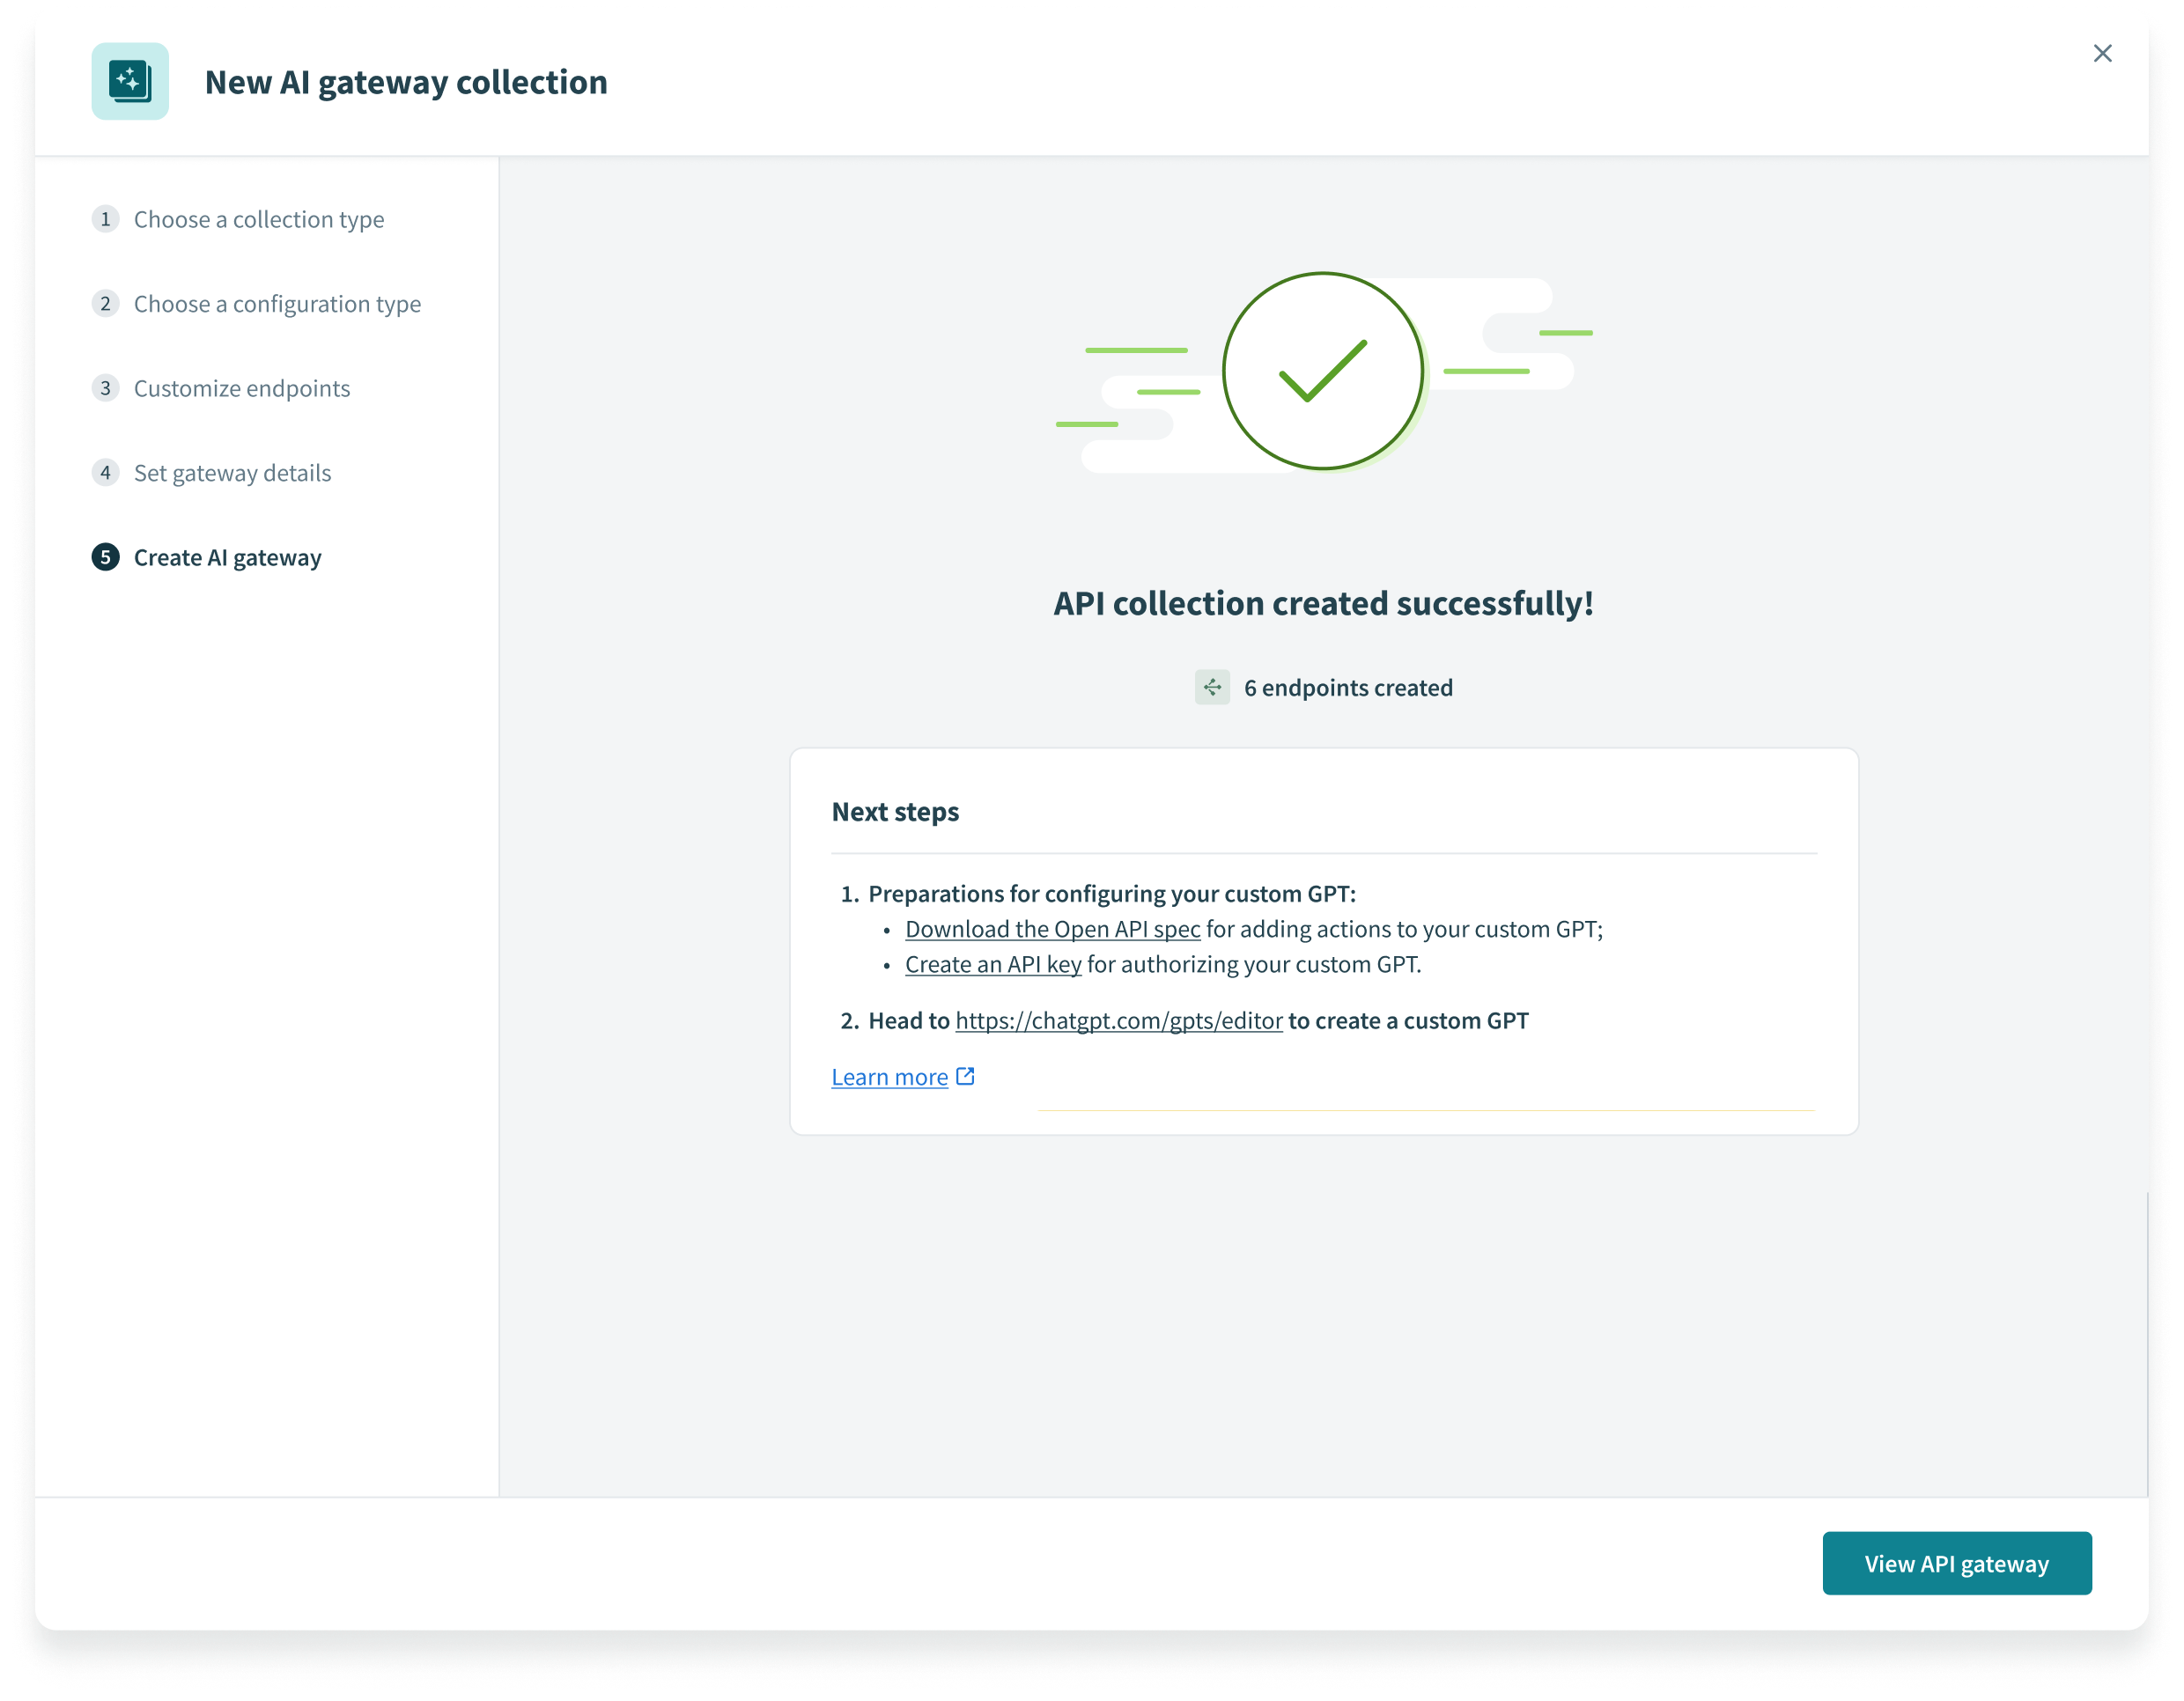 View API gateway
# Edit an API collection
You can access and edit an API collection after you create it. Complete the following steps to edit an API collection:
Sign in to your Workato account.
Go to Platform > API platform.
Select the API collection you plan to edit. This opens the API collection overview page.
# Configure collection settings
Complete the following steps to configure options for an API recipe collection, API proxy collection, or AI gateway collection:
Go to Platform > API platform > API collections and select the API collection you plan to edit.
Click the Settings tab and then select one of the following interfaces:
# Collection settings
Keep your collections organized by assigning version tags and descriptions.
Version number
API collections are versioned using a unique 1-10 character version identifier. Collections with the same name but different versions are distinct objects.
Description
A short description of the collection.
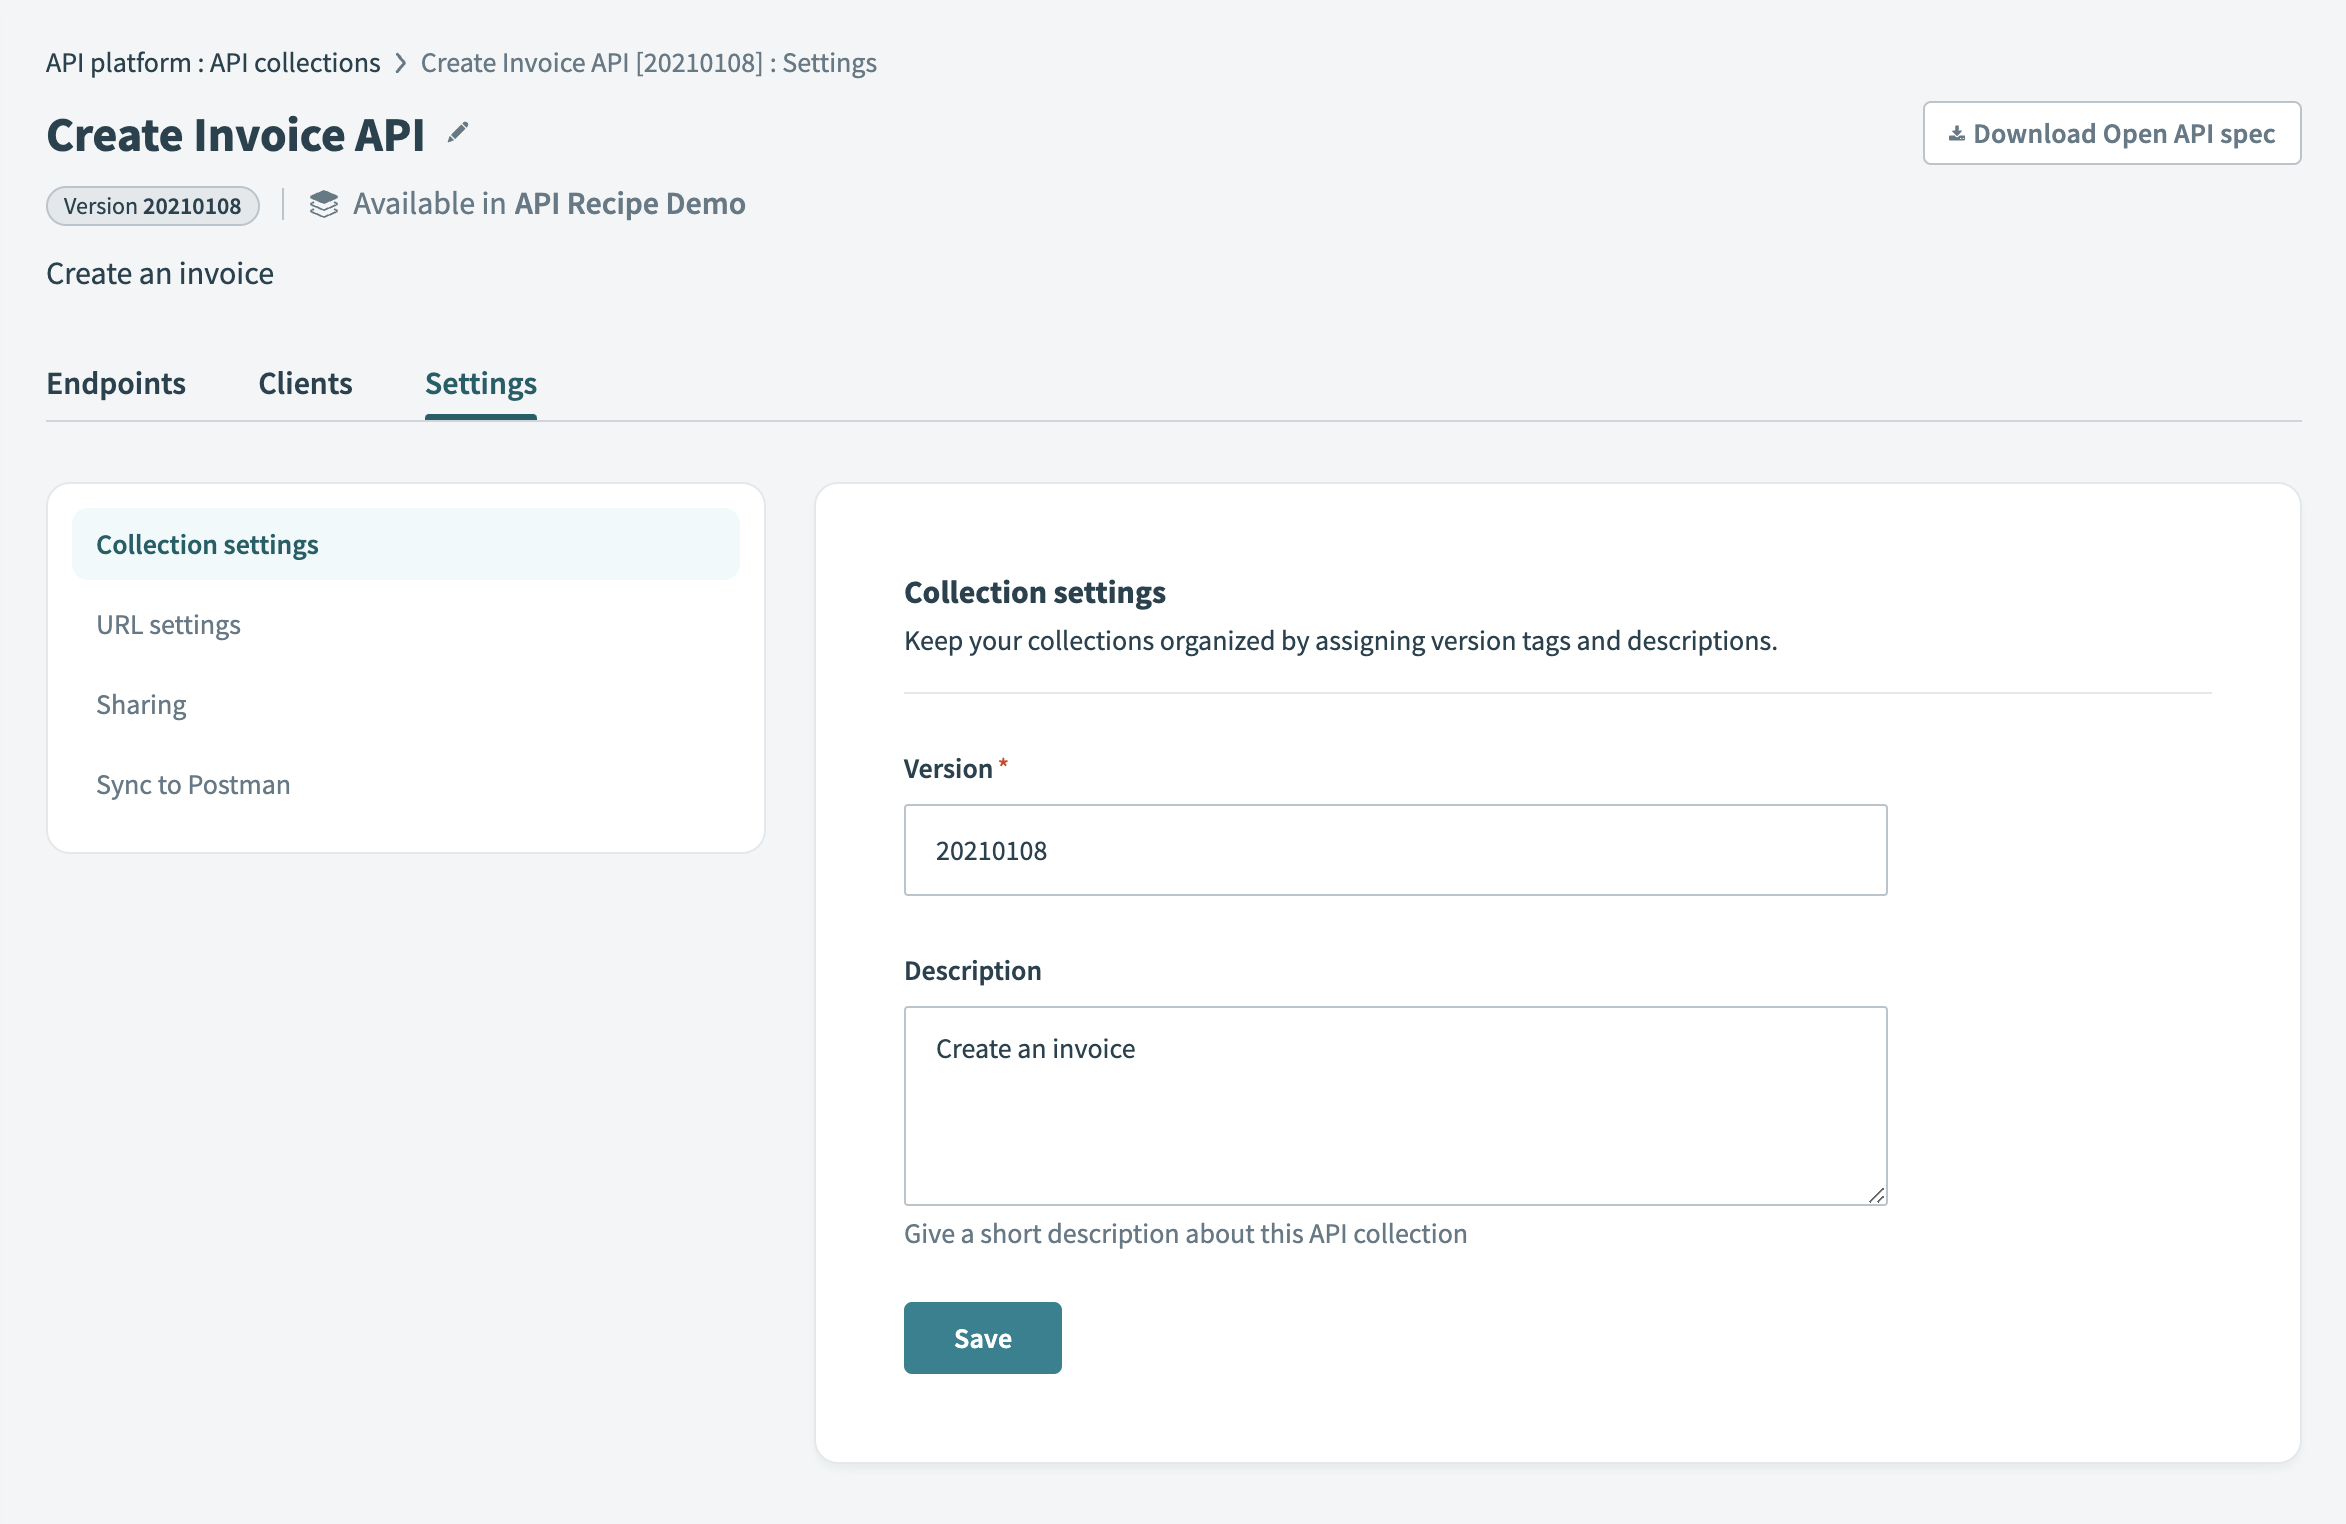 API collection settings tab
# URL settings
Customize the URL and path for this API collection. Available settings differ according to the type of collection.
OAUTH2 RESERVED NAMESPACE
oauth2 is a reserved namespace. A collection path cannot begin with oauth2.
API PROXY COLLECTION
Collection path
Customize the URL path specific to this API proxy collection. The path is updated in the Proxy URL preview as you type.
For example, you can use this field to differentiate collections for sales, marketing, or HR.
Note that the domain and path prefix are configured through the API Platform's Settings tab, not the collection settings.Target HTTP connection
Select Switch to choose a different HTTP connection. The Target URL preview is updated accordingly.
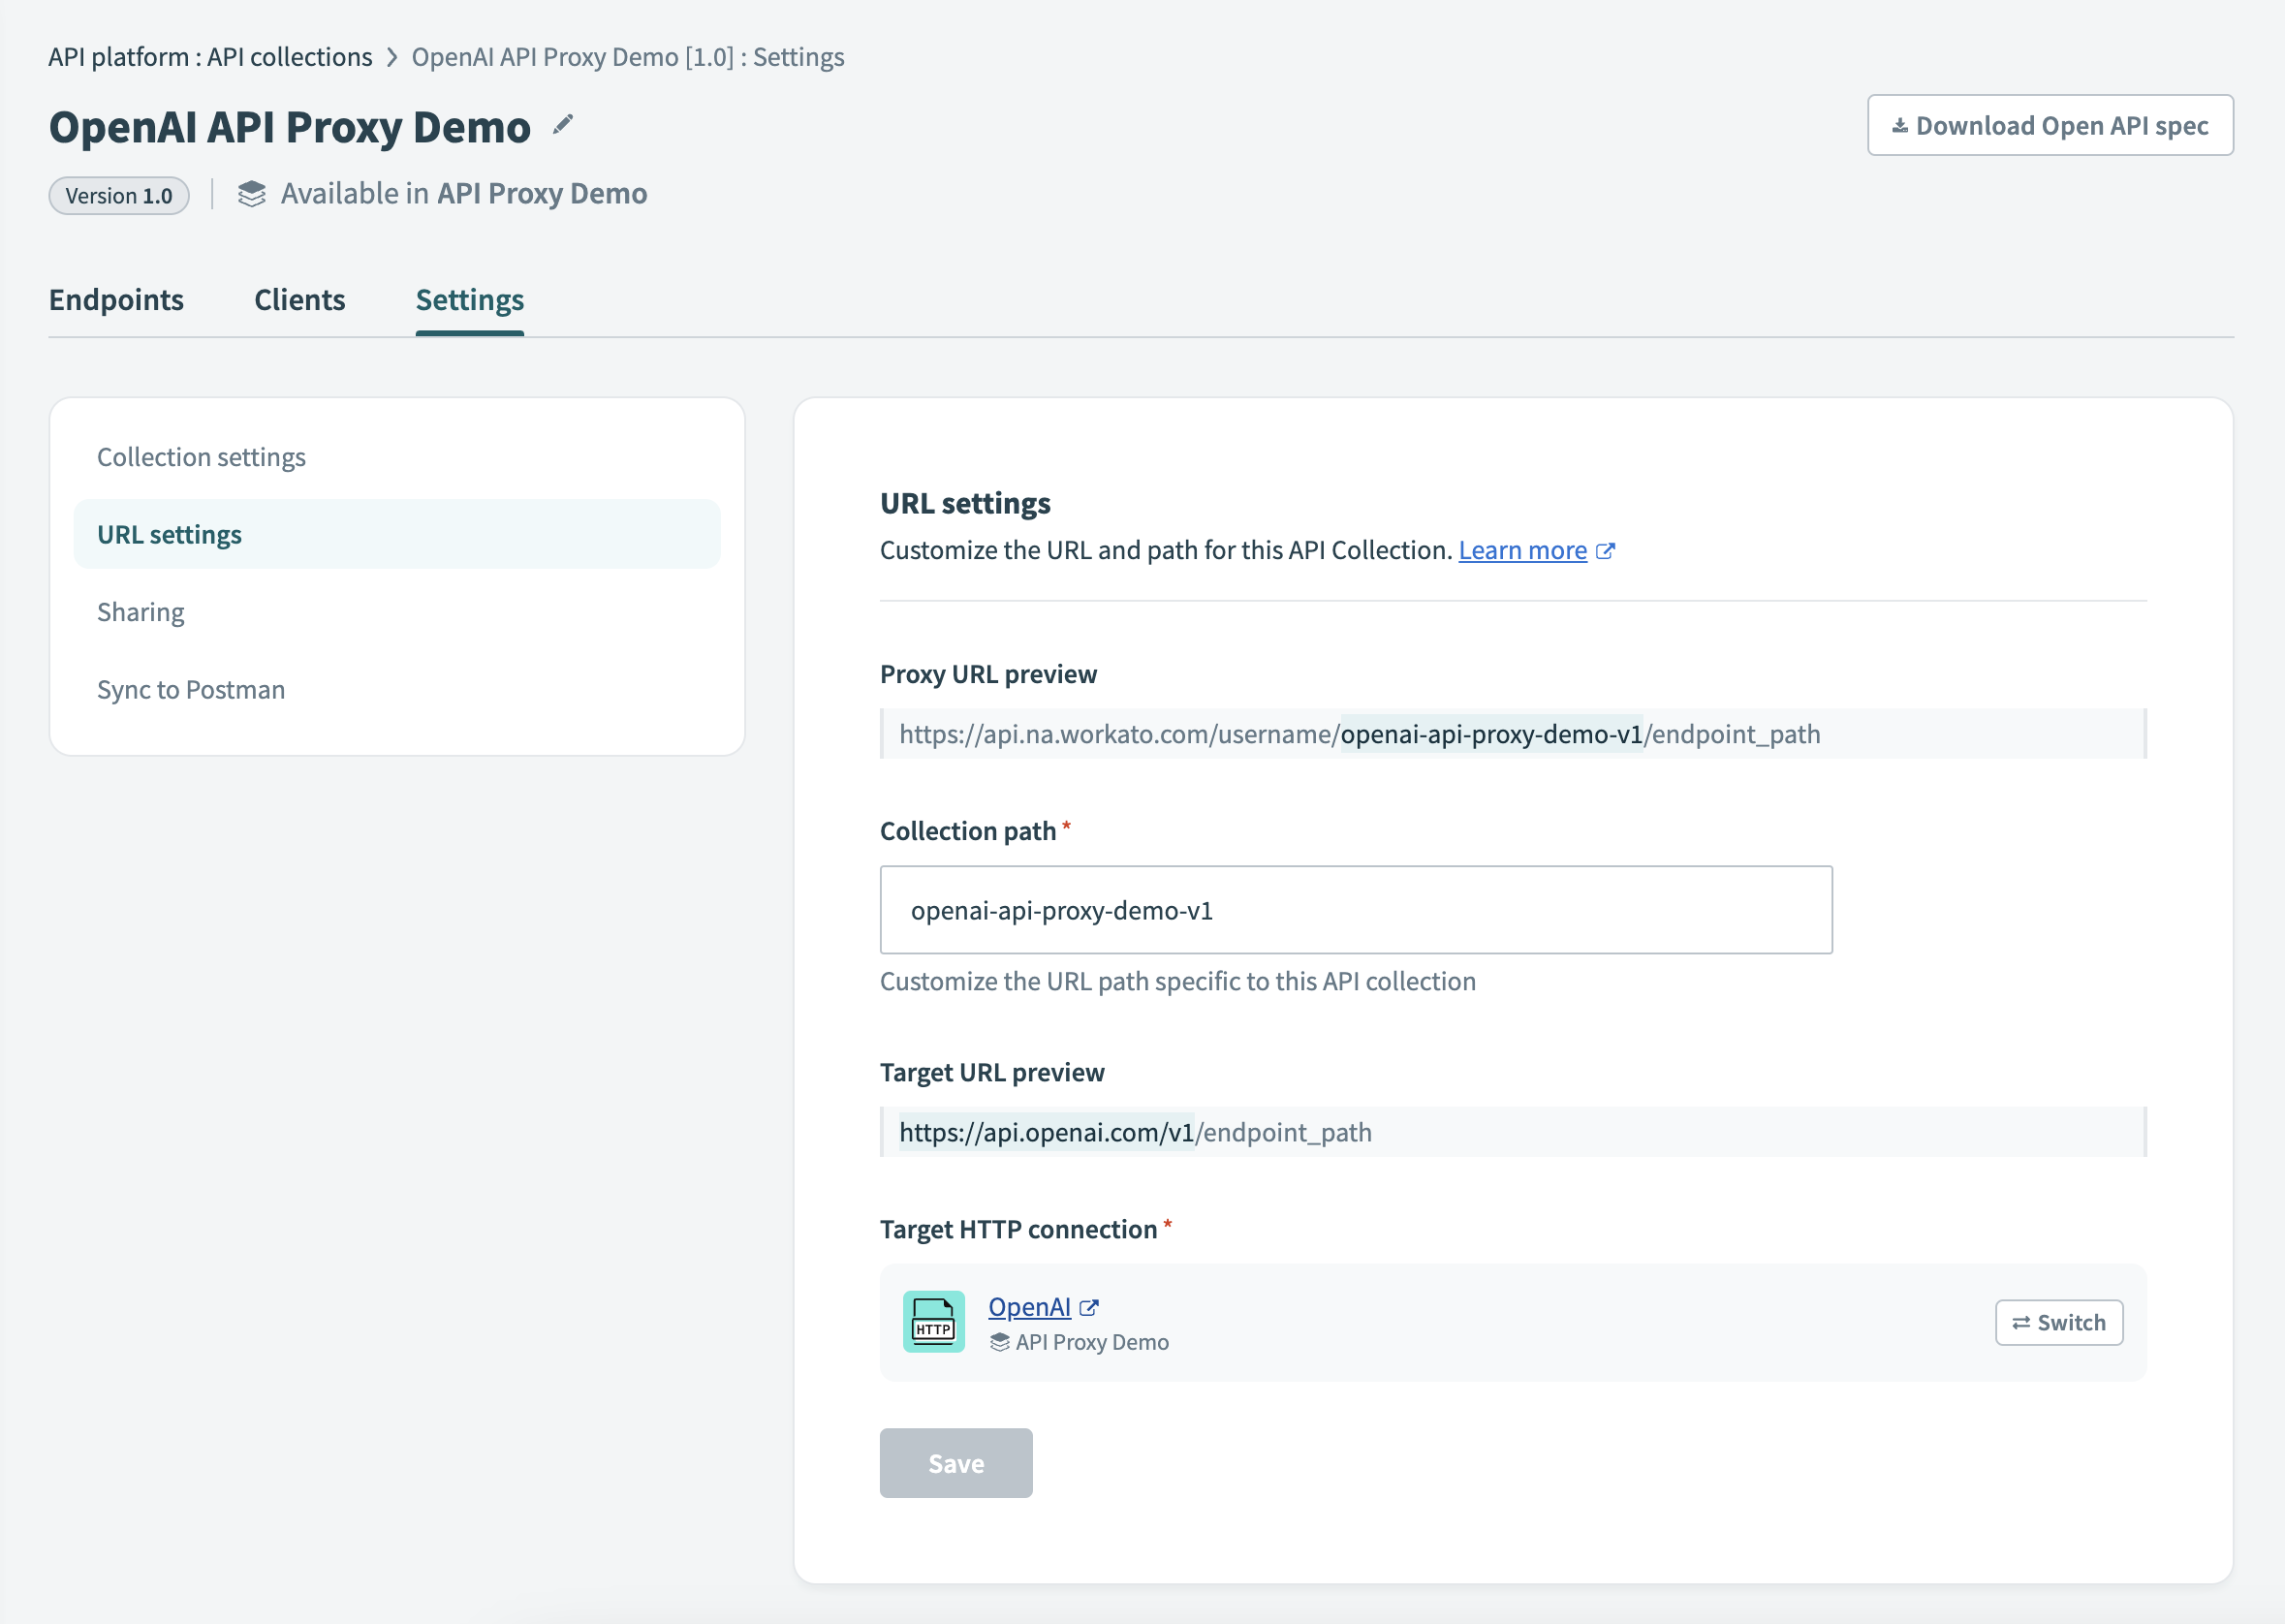 API proxy collection URL settings
API RECIPE COLLECTION
- Collection path
- Customize the URL path specific to this API recipe collection. For example, you can use this field to differentiate collections for sales, marketing, or HR.
Note that the domain and path prefix are configured through the API Platform's Settings tab, not the collection settings.
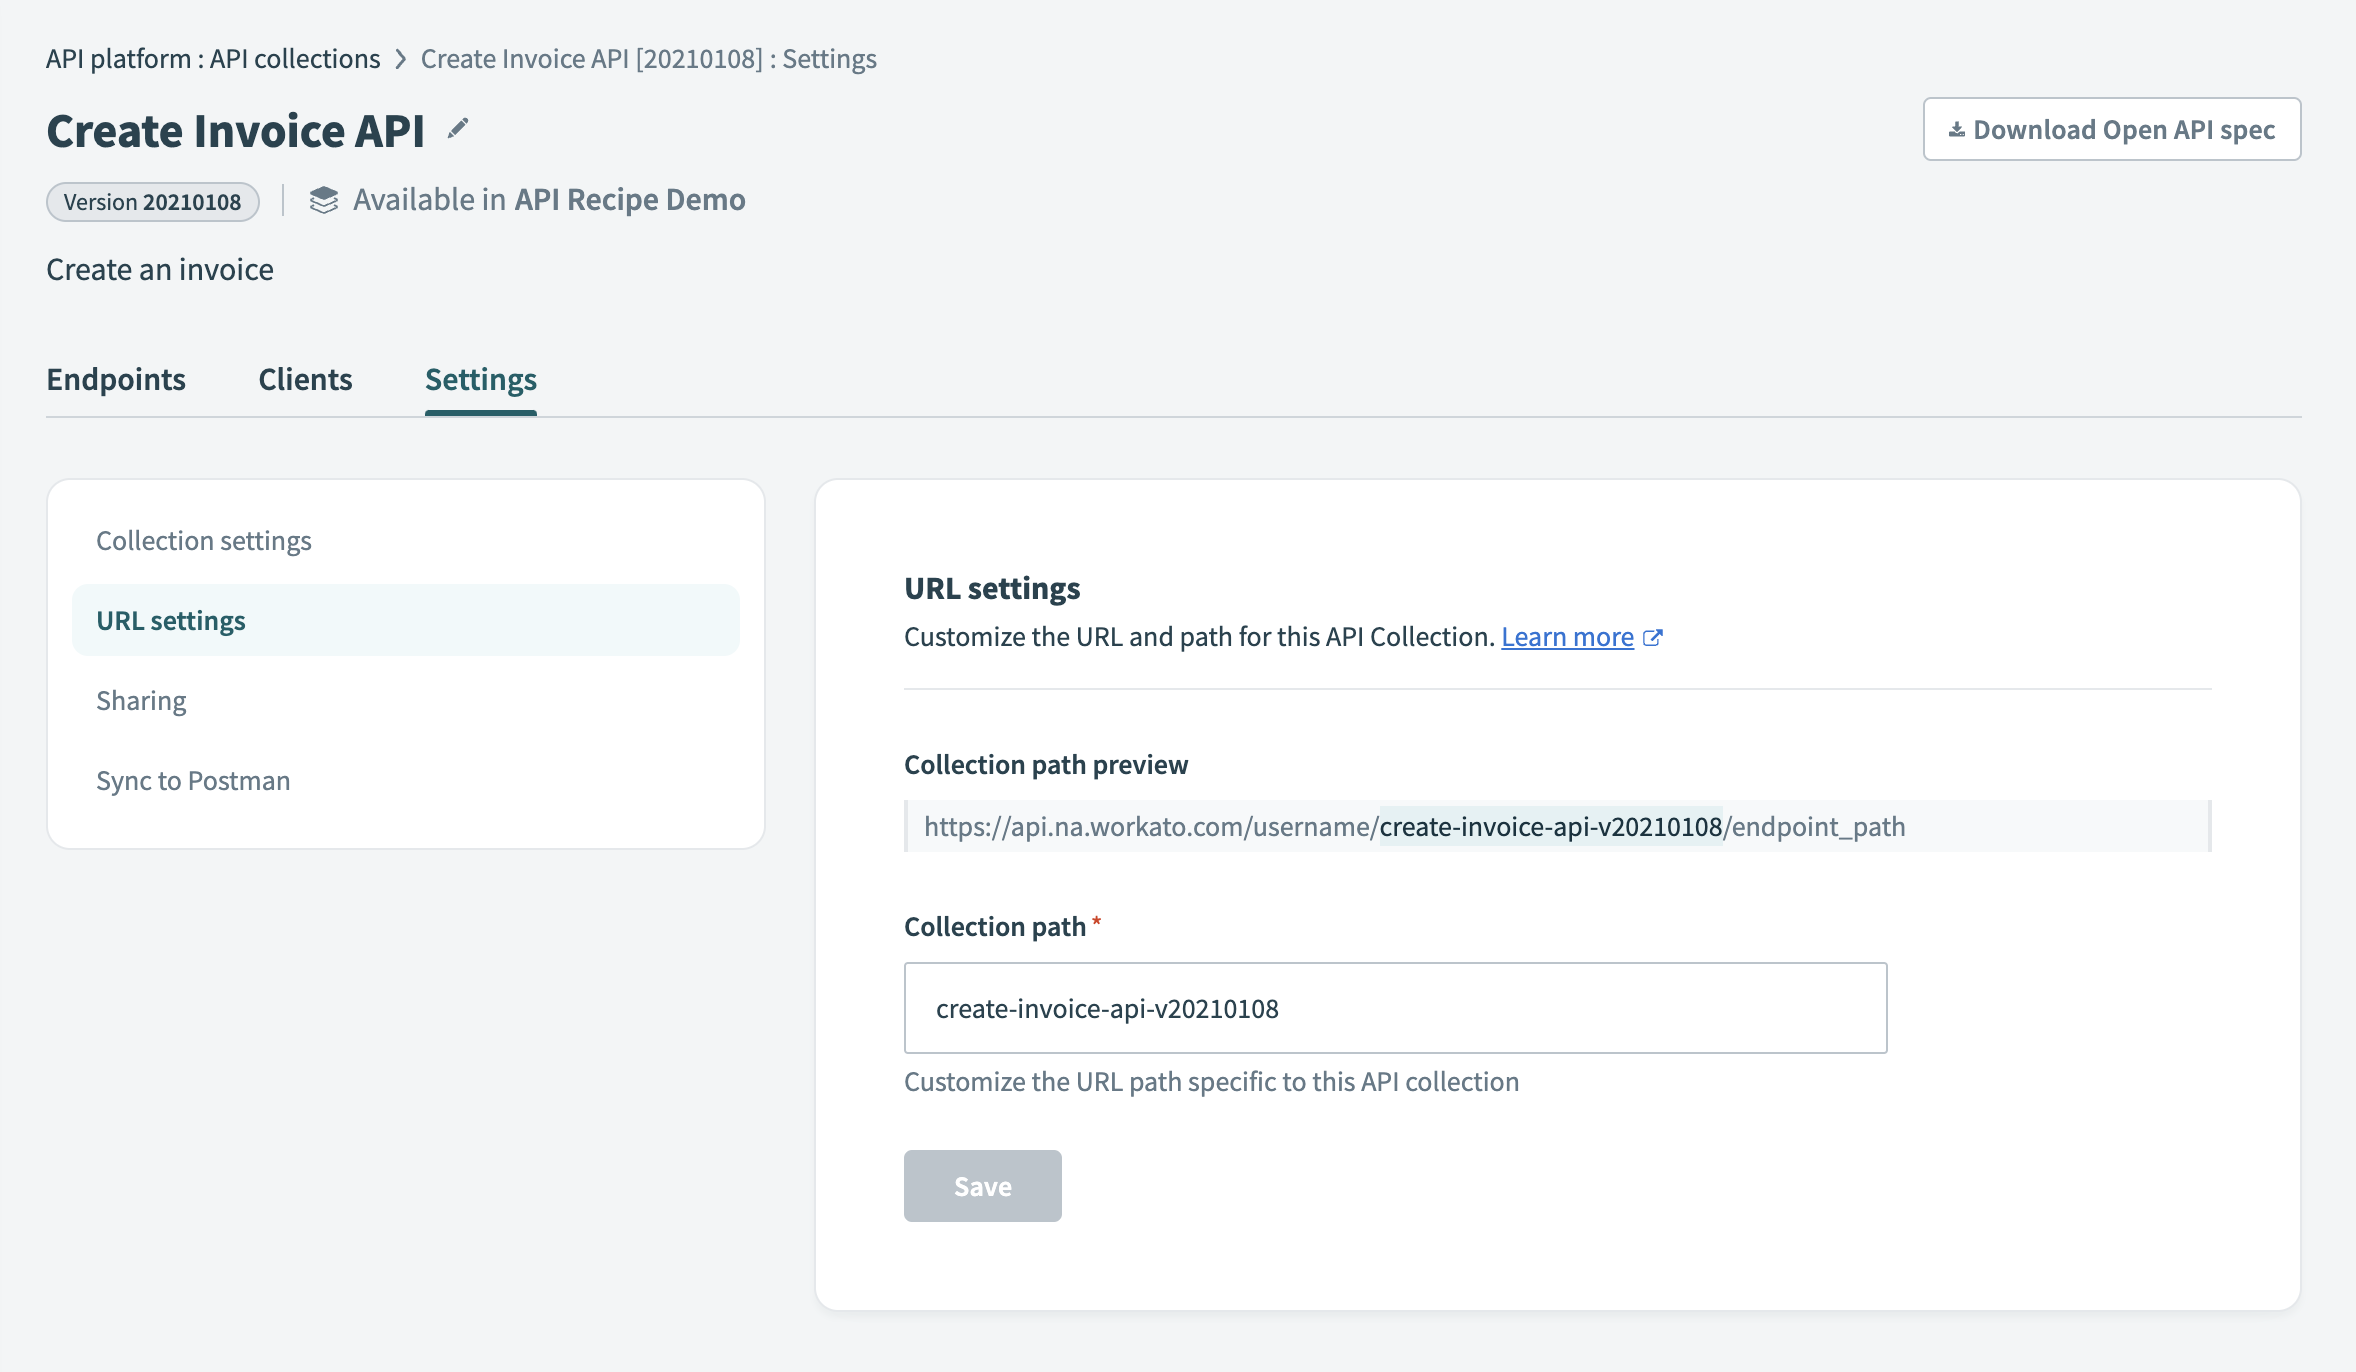 API recipe collection URL settings
# Sharing
New collections are hidden from the API library by default. The UI displays the message Hidden from this workspace's API library:
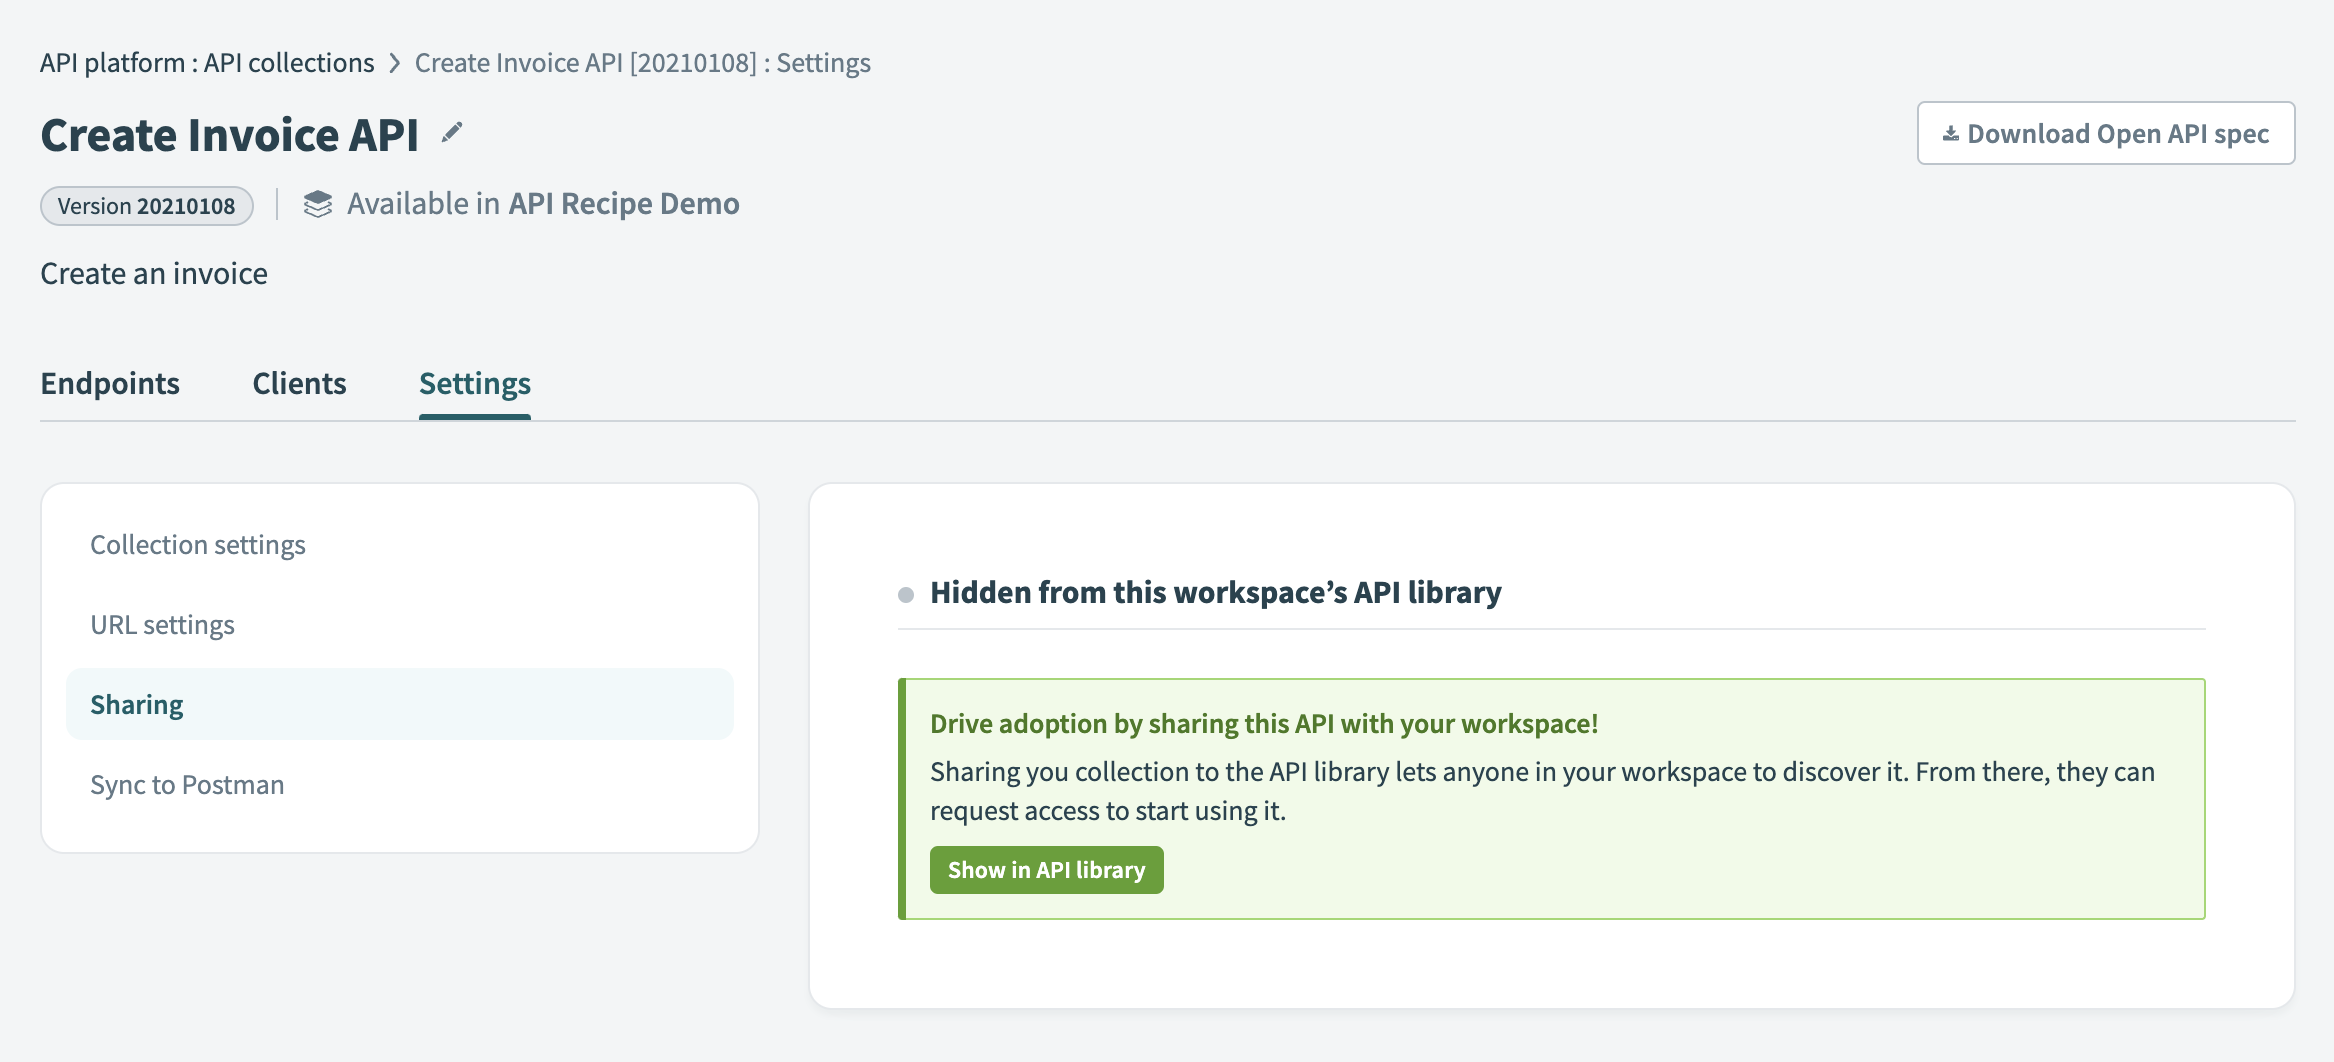 API collection is hidden from the API library
Select Show in API library to allow everyone in your workspace to find the collection and request access to use it. The UI displays the message Discoverable in this workspace's API library and includes a list of the users who can see the collection when you enable this feature.
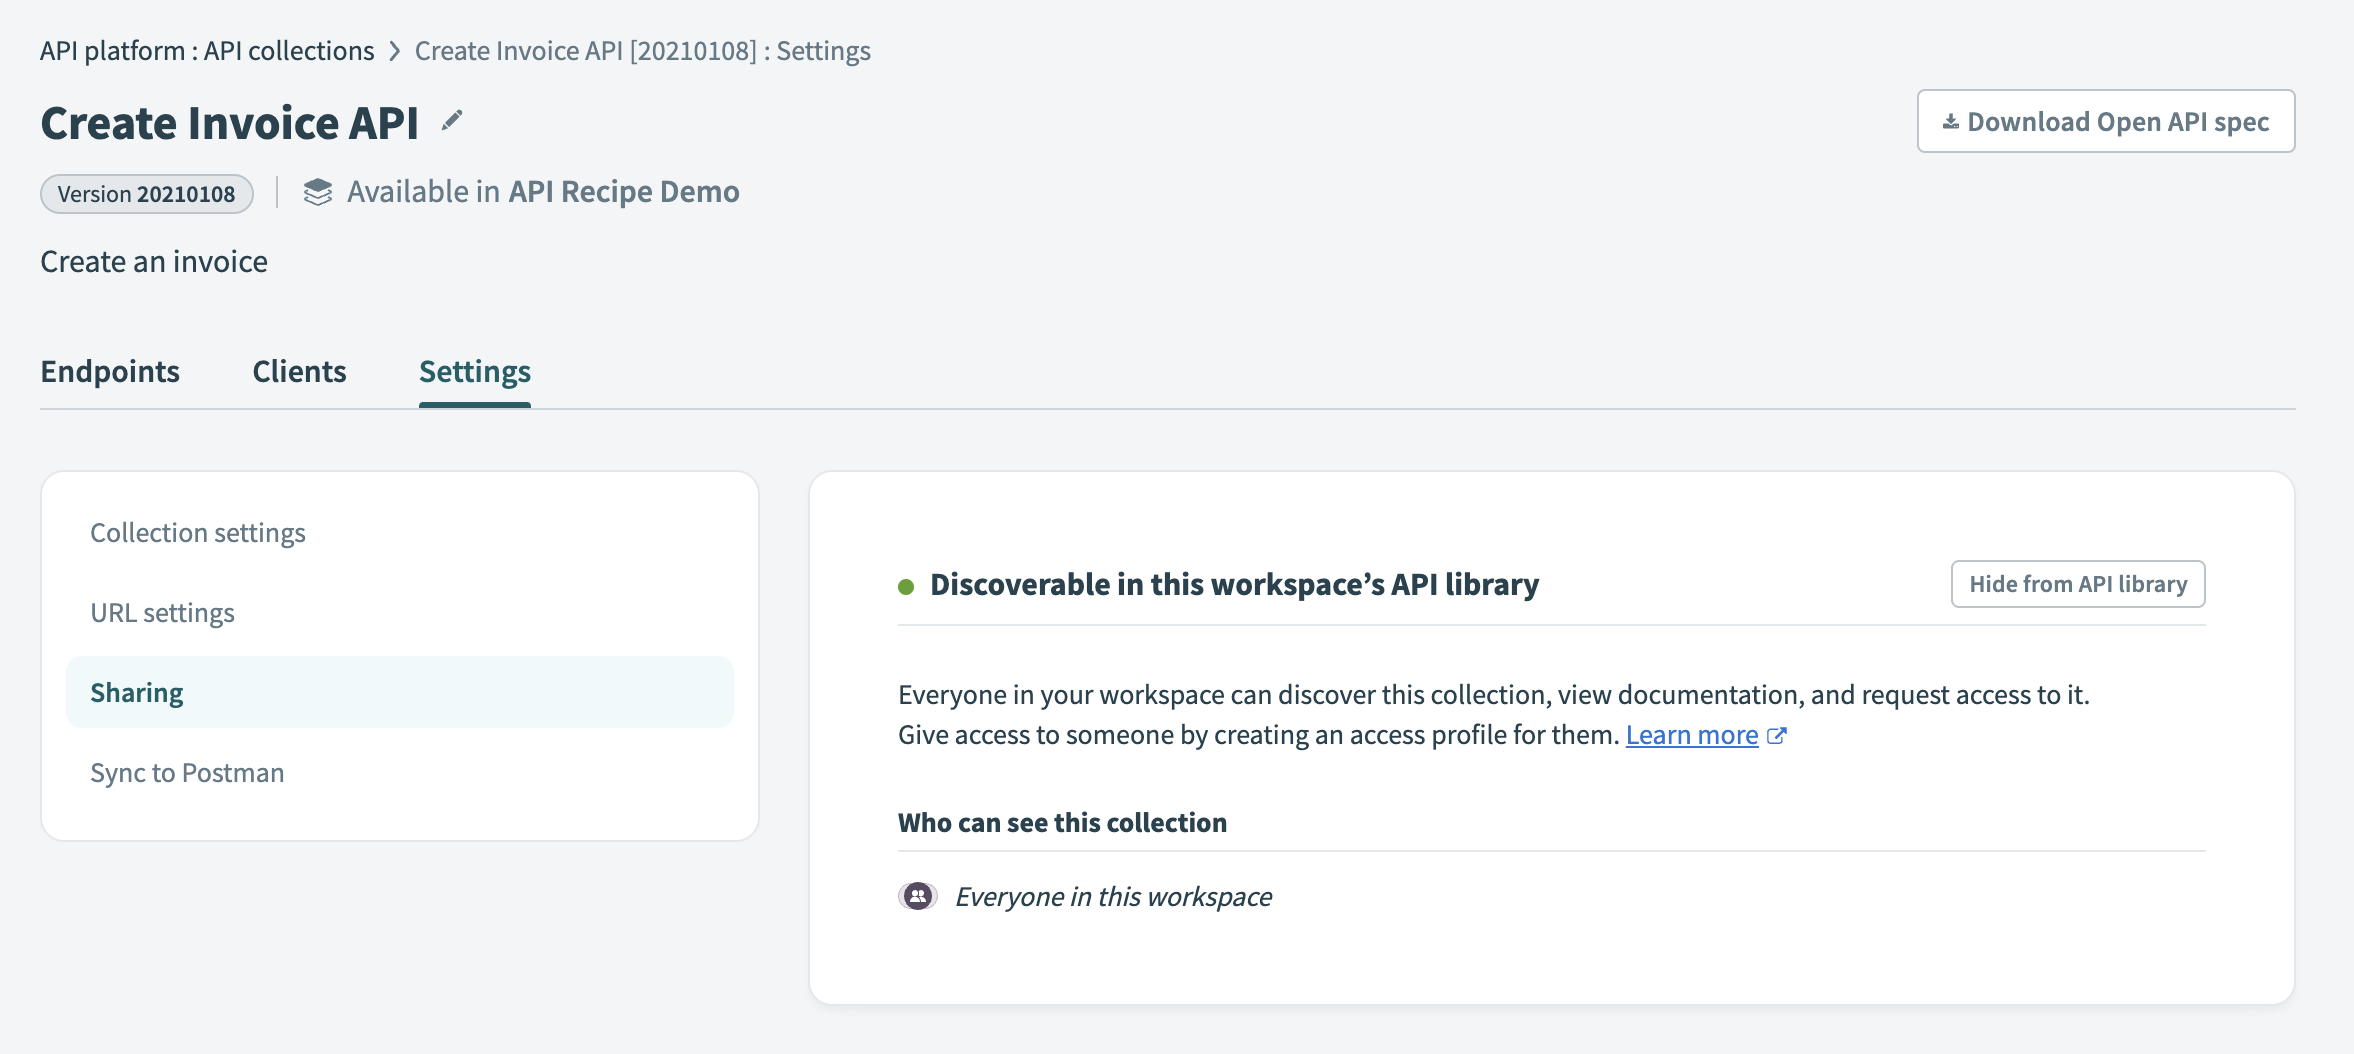 API collection is discoverable in the API library
Select Hide from API library to hide the collection again.
# Sync to Postman
You can make your API collection available beyond the original client after your API collection is successfully deployed and live. Increase the visibility of any API collection by syncing it to your Postman (opens new window) workspace. You can use the Postman internal and external portals to drive adoption.
Open the API collection that you plan to sync.
Navigate to Settings tab > Sync to Postman to get started.
Select an existing Postman connection or create a new one to connect your Postman instance and workspace.
Configure the location where you plan to store your API collection in Postman:
- You can create a new API by selecting New API in Postman.
- You can save this API collection in an existing Postman API.
SAVE API collection IN AN EXISTING POSTMAN API
If you save this API collection into an existing Postman API, you must provide a version name. Workato recommends that you give this a distinct version name. You may choose to overwrite an existing version.
Click Sync API collection to complete the sync.
Workato automatically sends the OpenAPI Specification of this API collection to Postman and saves it as a new or existing version of the chosen API in Postman. You can now configure this API version for publishing in Postman to your developer community.
You can click Refresh sync to update the Postman API with the latest version of the API collection when the API is updated in Workato.
# Machine-readable documentation (OpenAPI)
Video guide: How to build APIs faster with OpenAPI
The API collection page has a link in the upper-right corner labeled Download OpenAPI spec. The link gives you access to a downloadable file that contains documentation for all the endpoints within the collection, in a format that can be used by tools such as Postman. This format is called OpenAPI, also known as Swagger.
Workato supports exporting specifications in OpenAPI version 3.0 (opens new window) by default. However, to ensure backward compatibility, Workato also supports exporting specifications in OpenAPI version 2.0 (opens new window). To export a specification in version 2.0, add the query parameter oas_ver=2 to the download URL. For example:
https://app.workato.com/doc/service/collection-name/swagger?api_group_id=123456&token=token-value&oas_ver=2
Last updated: 10/14/2025, 4:38:57 PM
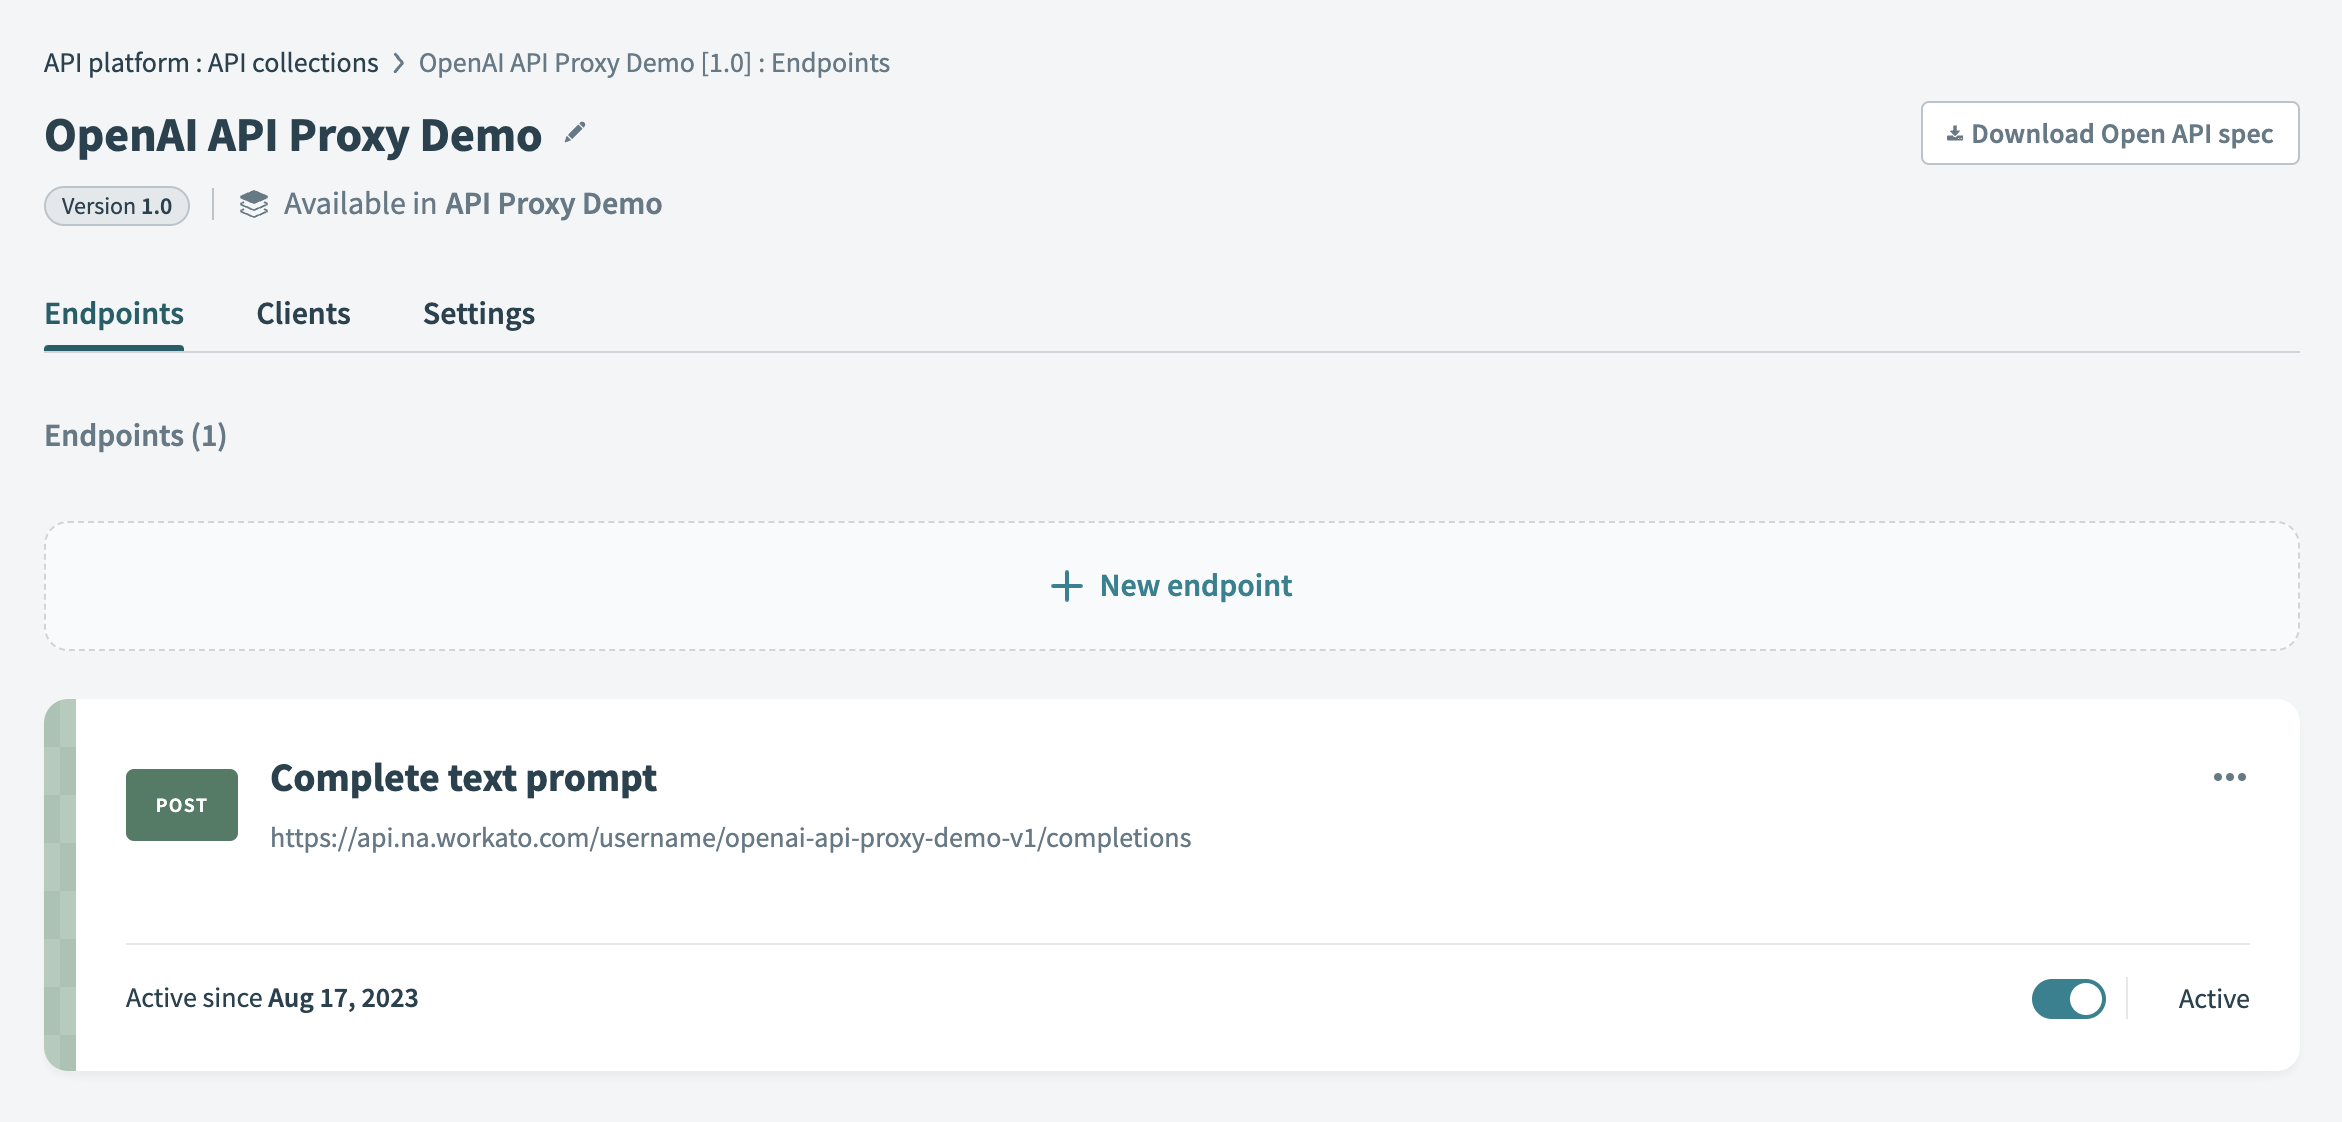 API collection Overview page