API endpoints
The API Platform enables you to manage and expose two types of API endpoints:
Recipe-based endpoints
Recipe-based endpoints connect external systems with API recipes. API recipes are internal workflows composed of triggers and actions that automate tasks such as data retrieval, processing, and updates. Recipe-based endpoints securely expose API recipes to external applications, supporting complex business processes without requiring extensive DevOps resources.
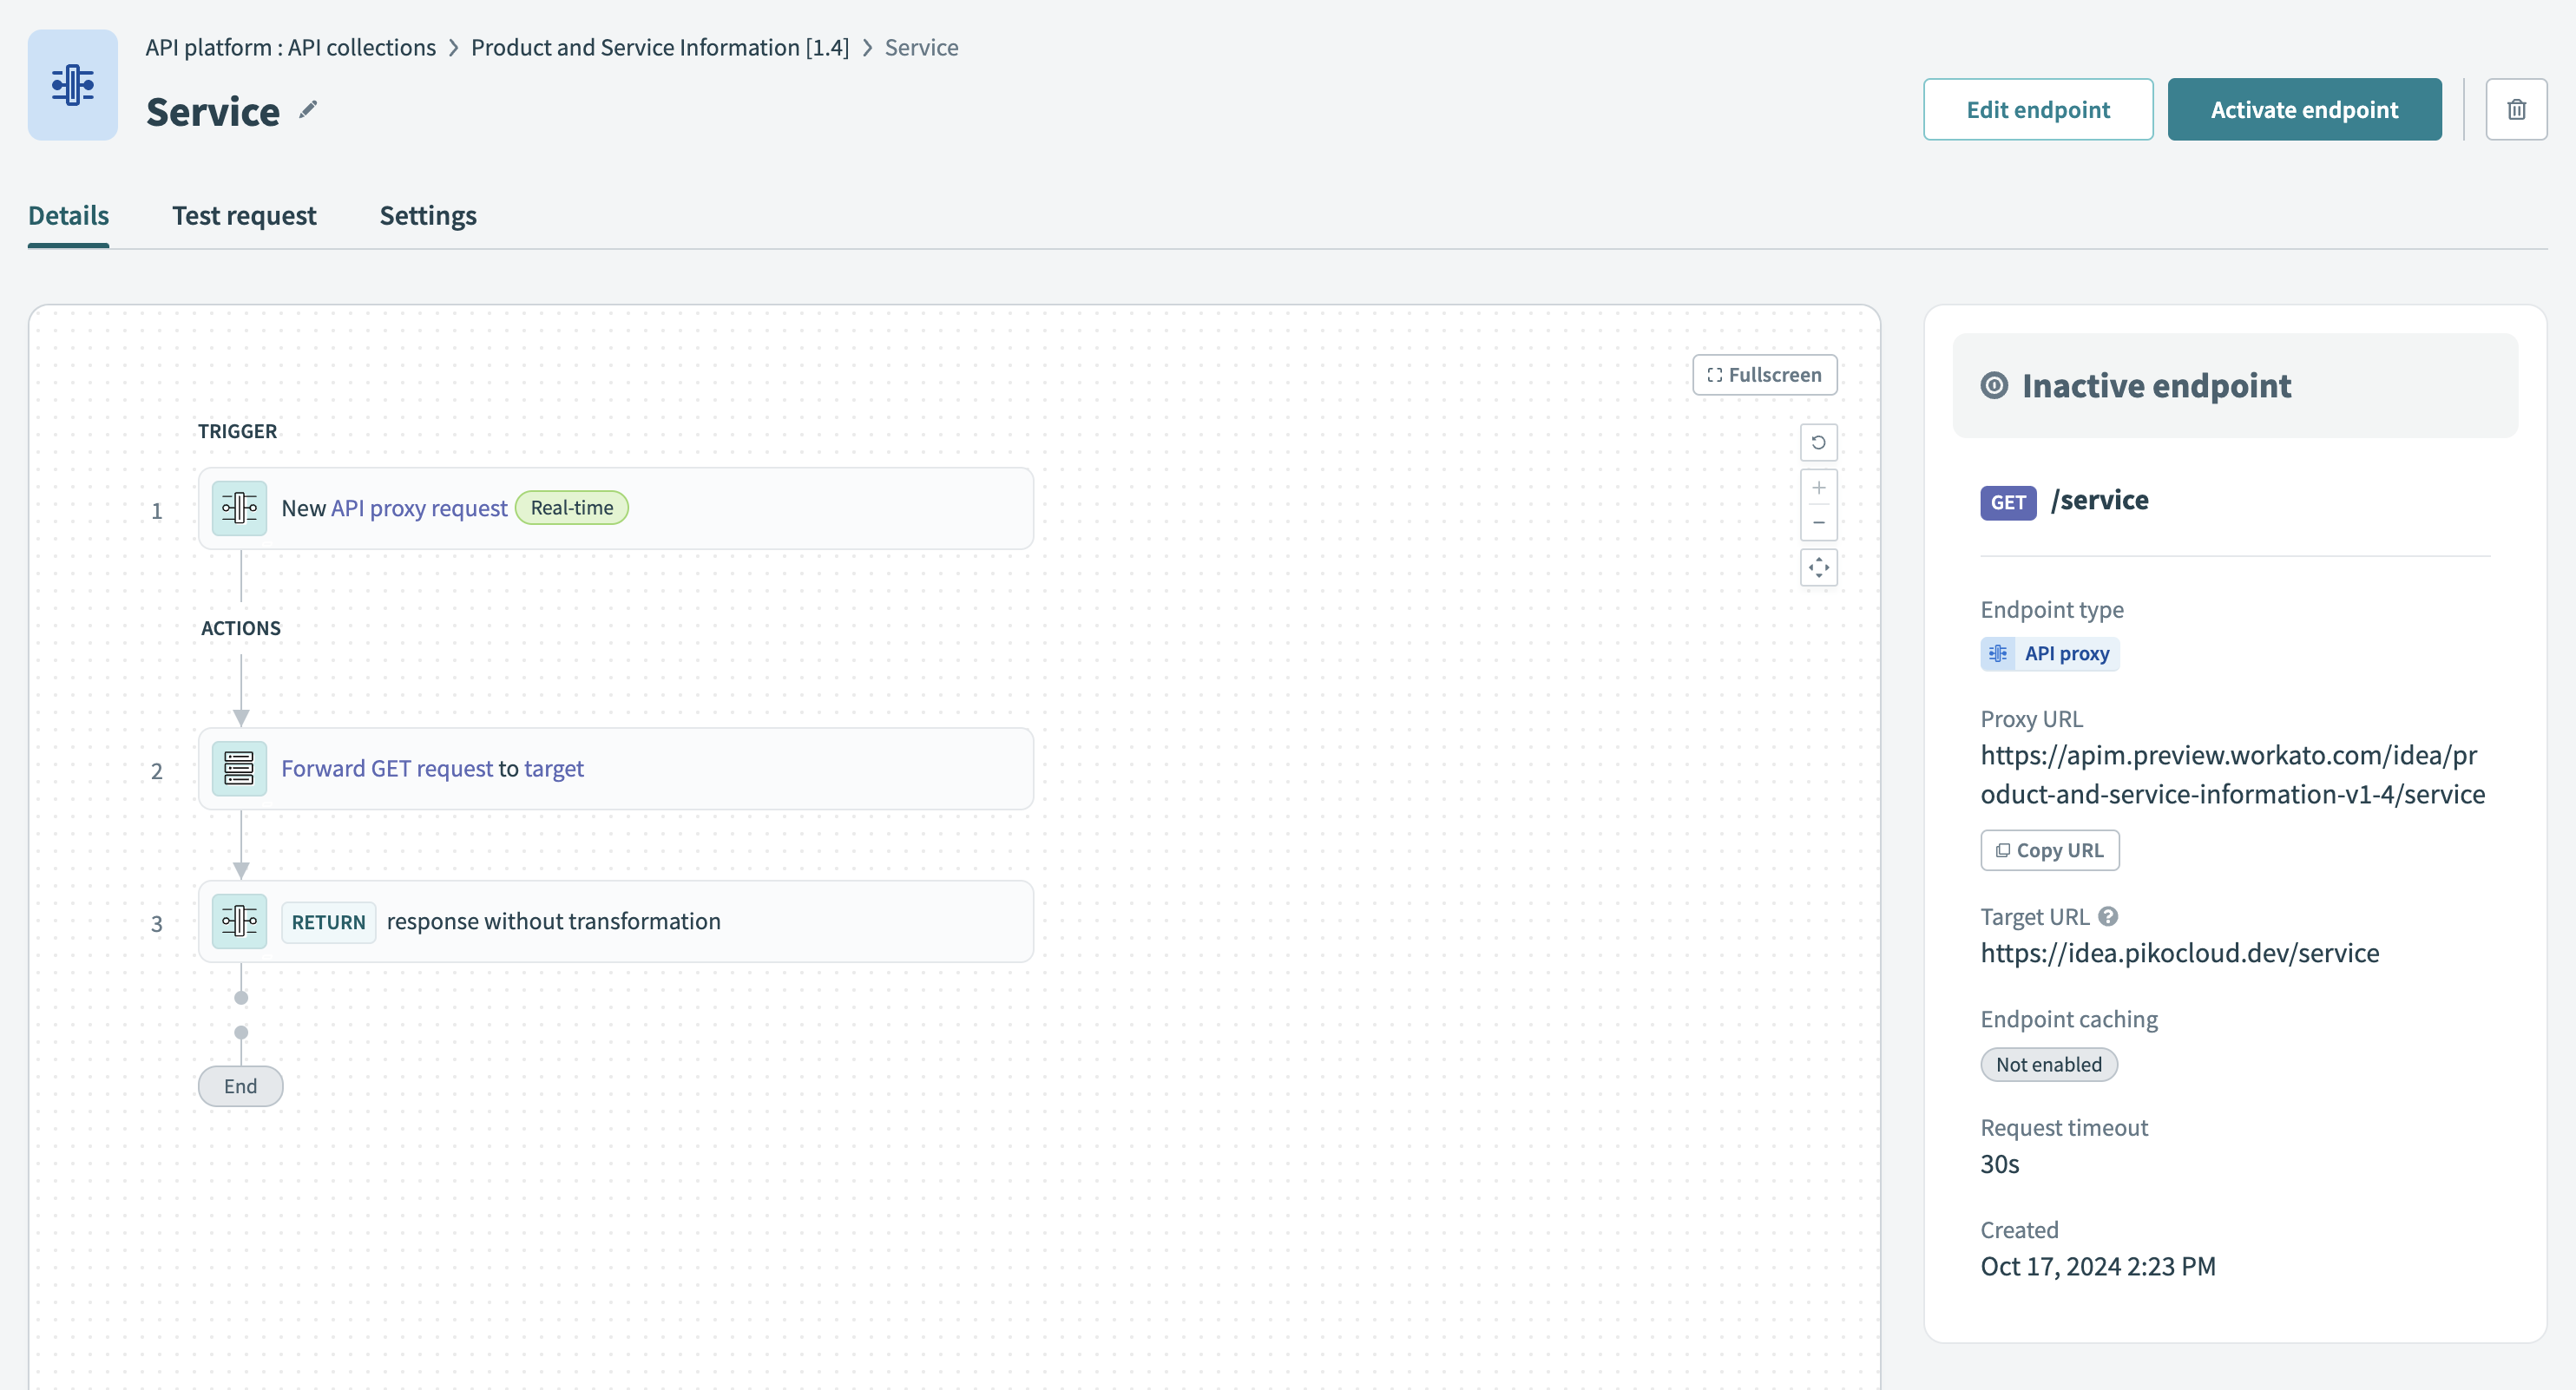
Proxy-based endpoints
Proxy-based endpoints securely expose your APIs through Workato’s API gateway. These API proxies can handle high-volume traffic—up to 10,000 requests per second—offering a scalable solution to centralize and secure external API interactions.
You can organize both types of endpoints into API collections to group related APIs, maintain consistent configurations, and simplify access management.
ENDPOINT TYPES
You can't mix endpoint types within a collection. API recipe collections can only contain recipe-based endpoints, and API proxy collections can only contain proxy-based endpoints.
Setting up and managing API endpoints
To set up, manage, and test your API endpoints, refer to the following guides:
- Configure a new endpoint: Choose either a recipe-based or proxy-based endpoint, depending on your requirements. Ensure you follow the configuration steps for the specific endpoint type.
- Define path parameters with path templating: Add flexibility to endpoint URLs by using dynamic path parameters.
- Follow endpoint path guidelines: Ensure each endpoint’s path is unique, consistent, and easy to understand.
- Activate or deactivate the endpoint: Control access to each endpoint by setting it to active or inactive.
- Test the endpoint: Verify functionality before going live. Recipe endpoints require an active recipe, and proxy endpoints can be tested immediately.
- Enable caching: For performance optimization, enable caching on GET requests to reduce duplicate calls and speed up response times.
Configure a new endpoint
To create and configure an API endpoint, refer to the relevant guide for each endpoint type:
API ENDPOINT TYPES
For more information about API proxy and recipe endpoints, as well as guidance on selecting the right option, refer to API collection types.
Schema validation
For recipe-based endpoints, you can enforce data integrity by validating incoming requests against a predefined schema. Learn more about schema validation.
Activating or deactivating an endpoint
Endpoints can be either Active or Inactive:
| State | Description |
|---|---|
| Active | Active endpoints are callable through API requests. For recipe-based endpoints, the associated recipe must be running before the endpoint can be set to Active. |
| Inactive | Inactive endpoints cannot be accessed remotely, and the API gateway rejects any calls. However, recipes associated with inactive endpoints continue to run in the background. |
You can control whether an endpoint is callable through API requests by clicking the Activate endpoint or Deactivate endpoint button on the Details tab of the endpoint configuration page. Newly created or added endpoints are Inactive by default.
 Activate API proxy endpoint in a collection
DELETING ENDPOINTS
Deleting an endpoint removes it from the collection and makes it inaccessible to any clients previously granted access to it through the collection.
While both recipe and proxy endpoints have an active/inactive state, their activation requirements differ:
- Recipe endpoints must be activated before they can be tested or accessed through API requests.
- Proxy endpoints can be tested without activation but must be activated for external clients to call them.
Path templating
Path templating enables you to specify resource identifiers in the URL path using path parameters. When an API request is made, the values in the path parameters are either:
- Passed to the associated datapills in an API recipe (for recipe-based endpoints).
- Forwarded to the target URL (for proxy-based endpoints).
FEATURE AVAILABILITY
Path templating is only available for collections with API prefixes enabled.
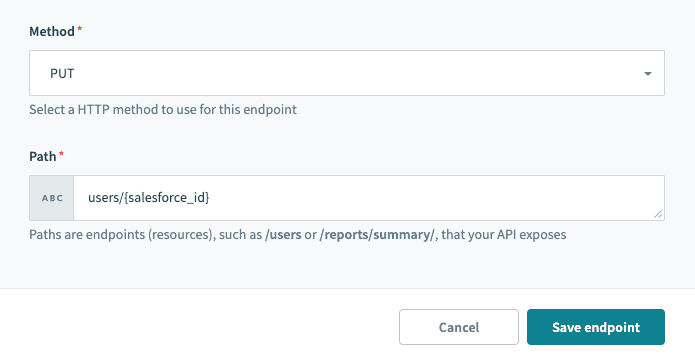
When using recipe-based endpoints, we recommend that you first configure the datapills in the New API request trigger, then configure the endpoint path parameters.
Use curly braces {} to mark parts of the URL as a path parameter. For example: users/{salesforce_id}
 URL path templating
Endpoint path guidelines
Use the following guidelines when configuring proxy and recipe endpoint paths:
- Include one or more segments in an endpoint path, separated by a
/.- For example, use
users/{user_id}to specify a user's endpoint.
- For example, use
- Ensure each segment is either a static path (
users) or a parameter ({user_id}). - Use alphanumeric or
_characters for path parameter names to match datapill naming conventions. - Avoid using multiple parameters with the same name in an endpoint path.
- Enter new or updated endpoint paths with the intended casing, as they are case-sensitive and preserved exactly. For example,
/Path123/remainsPath123/. - Ensure each endpoint has a unique method and path combination.
- For example, do not create
/user/{id}if/user/{ID}exists in the same collection, unless their HTTP methods differ. - Similarly, do not create
/user/{id}if/user/{user_id}exists in the same collection, unless their HTTP methods differ.- Path matching is performed from left to right, with static segments taking priority over parameterized segments.
- For example, do not create
WARNING
Changing an endpoint used by a recipe or API client may require you to update the corresponding recipe or script to prevent errors.
Example
If the API endpoint requires a salesforce_id, you can use a path parameter to provide the Salesforce id (5003000000D8cuI).
curl -X PUT 'https://apim.workato.com/api-collection/users/5003000000D8cuI' \
    -d '{"Email": "[email protected]","displayName": "Matt Jones","BillingCity": "San Francisco"}'
The recipe trigger returns the following output:
{
    "request": {
        "salesforce_id" : "5003000000D8cuI",
        "Email": "[email protected]",
        "displayName": "Matt Jones",
        "BillingCity": "San Francisco"
    },
    "Context": {+}
}
OVERLAPPING KEYS
If the same namespace exists in the path parameter, query parameter, or request body, the path parameter value takes precedence.
When you send the following API request, the salesforce_id datapill will take the value of the path parameter (5003000000D8cuI) instead of the value supplied in the request body (068D00000000pgOIAQ):
curl -X PUT 'https://apim.workato.com/api-collection/users/5003000000D8cuI' \
-d '{"salesforce_id" : "068D00000000pgOIAQ","Email": "[email protected]","displayName": "Matt Jones","BillingCity": "San Francisco"}'Last updated: