Snowflake
Snowflake is a relational ANSI SQL data warehouse built for the cloud. Its unique architecture enables faster performance, ease of use, and greater flexibility than traditional data warehouses.
SUMMARY
- To connect to Snowflake on Workato, you can use OAuth 2.0 or key-pair authentication.
- You must allowlist Workato IP addresses if your Snowflake instance has network policies that restrict access based on IP address.
- The Snowflake connector supports operations such as SELECT, INSERT, UPDATE, and DELETE.
- Create custom roles to restrict Workato's access to only the Snowflake objects you want to build recipes with.
- You can use parameters in conjunction with
WHEREconditions for security against SQL injection.
USERNAME/PASSWORD AUTHENTICATION DEPRECATION
Snowflake plans to deprecate single-factor password authentication for users by October 2026. Refer to Snowflake's official deprecation announcement for more information.
We strongly encourage you to migrate all existing Username/Password connections to OAuth 2.0 or Key-pair authentication before this date. Existing Username/Password connections will remain operational until the deprecation date.
Use cases
Integrate Snowflake with your existing apps to build powerful data workflows. You can automate data validation, improve lead tracking, and enhance decision-making with the Snowflake connector. Explore our use cases to discover how you can streamline your Snowflake processes:
- Validate Salesforce contact information with JavaScript and upsert the data to Snowflake.
- Create Salesforce tasks and Snowflake rows from Marketo lead activity.
Connection setup
The Snowflake connector supports the following authentication types:
OAuth 2.0 authentication
You must create a custom integration and generate a client ID and secret in Snowflake to use OAuth 2.0 authentication.
Snowflake setup for OAuth 2.0 authentication
Complete the following steps to create a custom integration and retrieve client credentials in Snowflake:
Run the following SQL command in Snowflake to register a custom OAuth integration:
CREATE SECURITY INTEGRATION WORKATO_OAUTH
  TYPE = OAUTH
  ENABLED = TRUE
  OAUTH_CLIENT = CUSTOM
  OAUTH_CLIENT_TYPE = CONFIDENTIAL
  OAUTH_REDIRECT_URI = 'https://www.workato.com/oauth/callback'
  OAUTH_ISSUE_REFRESH_TOKENS = TRUE;
REQUIRED PRIVILEGE
Use the ACCOUNTADMIN role or a role with the global CREATE INTEGRATION privilege to run this command.
Run the following command to retrieve your client credentials:
SELECT SYSTEM$SHOW_OAUTH_CLIENT_SECRETS('WORKATO_OAUTH');Refer to the Snowflake Configure Snowflake OAuth for custom clients guide for more information.
Copy and save the Client ID and Client secret for use in Workato.
Connect to Snowflake with OAuth 2.0 authentication
Complete the following steps to set up an OAuth 2.0 authentication connection to Snowflake in Workato:
Click Create > Connection or press C twice.
Search for Snowflake and select it as your app.
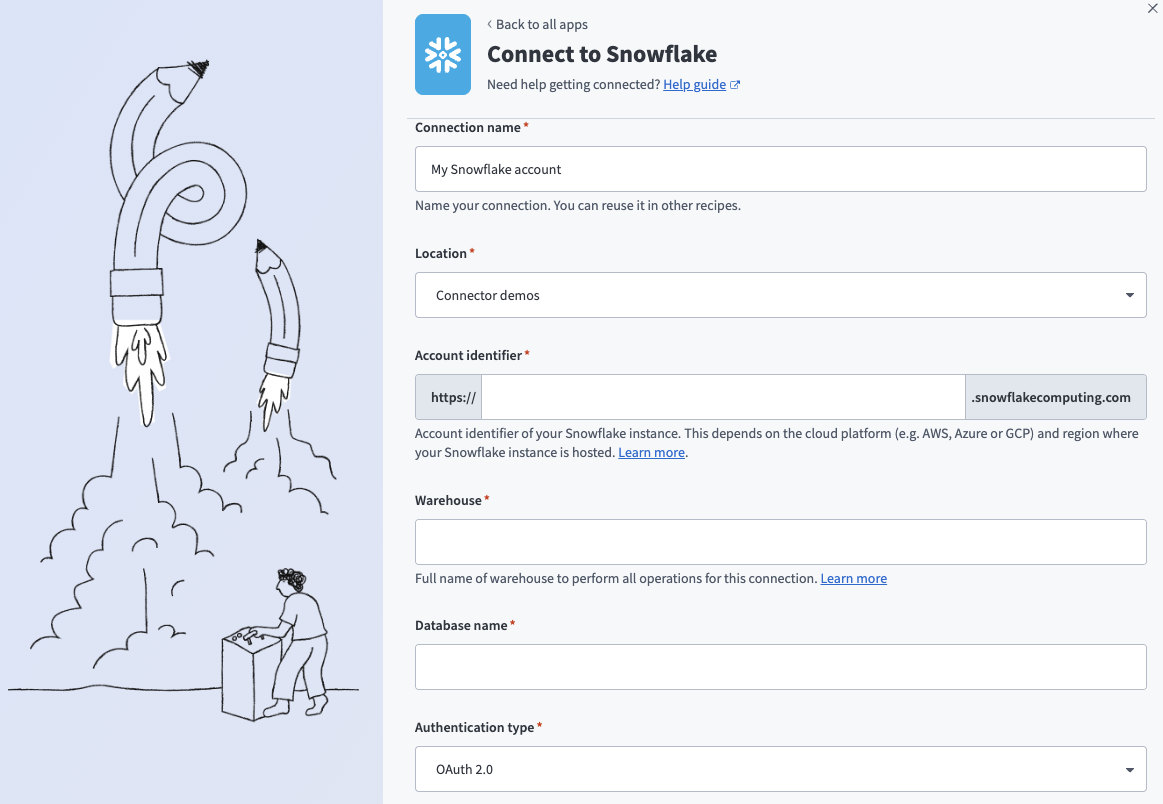
Enter a name for your connection in the Connection name field.
 Snowflake OAuth 2.0 connection
Use the Location drop-down menu to select the project where you plan to store the connection.
Enter the Snowflake instance Account identifier in one of the supported formats:
- Account name:
https://{org_name}-{account_name} - Connection name:
https://{org_name}-{connection_name} - Account locator:
https://{account_locator}.{region}.{cloud}
Refer to the Snowflake Connecting to your accounts guide for more information.
ACCOUNT LOCATOR FORMAT
Certain locations require you to include the {region} and {cloud} in your account locator URL. For example:
- AWS US West (Oregon):
your-account-locator - AWS US East (Ohio):
your-account-locator.us-east-2 - Azure West Europe:
your-account-locator.west-europe.azure
Refer to the Snowflake Using an account locator as an identifier guide for more information.
Enter the Warehouse name to define the compute resources for this connection. Refer to Warehouse considerations for more information.
Enter the Database name for the target Snowflake database.
Use the Authentication type drop-down menu to select OAuth 2.0.
Enter the Client ID and Client secret. Refer to Snowflake setup for OAuth 2.0 authentication for information on how to retrieve these credentials.
Optional. Specify a Role for authentication. This role must be an existing role assigned to the user. If left blank, Snowflake uses the default role assigned to the user.
Optional. Enter the Schema. If left blank, the default schema is public.
Optional. Set the Use improved datetime handling (Recommended) to Yes to ensure correct timezone handling for timestamps.
Optional. Define the Database timezone to apply to timestamps without an assigned timezone. Defaults to your workspace's timezone if left blank.
Click Connect.
Click Allow to provision access to Workato.
Key-pair authentication
Use key-pair authentication to connect to Snowflake without a password. This method uses a client-generated RSA key pair and provides strong security. You must use a command-line tool to generate the key pair.
Snowflake setup for key-pair authentication
Complete the following steps to create a key pair in Snowflake:
Run one of the following commands in a terminal to generate a private key.
PRIVATE KEY PASSPHRASE
If you generate an encrypted private key, you must enter the Private key passphrase when you configure the connection in Workato.
Copy and save the PRIVATE KEY for use in Workato. Copy everything from -----BEGIN PRIVATE KEY----- to -----END PRIVATE KEY-----.
Run the following command to create a public key from the private key. OpenSSL prompts you for the passphrase if you generated an encrypted private key.
openssl rsa -in rsa_key.p8 -pubout -out rsa_key.pubCopy and save the PUBLIC KEY for use in the next step.
Refer to the Snowflake Key-pair authentication and key-pair rotation guide for more information.
Run the following SQL command in a Snowflake worksheet to assign the public key to your Snowflake user:
ALTER USER <USERNAME> SET RSA_PUBLIC_KEY='<PUBLIC_KEY>';Replace <USERNAME> with your Snowflake user and <PUBLIC_KEY> with the key content. Exclude the -----BEGIN PUBLIC KEY----- and -----END PUBLIC KEY----- lines.
ROLE REQUIREMENT
You must have the SYSADMIN or SECURITYADMIN role to run this command.
Connect to Snowflake with key-pair authentication
Complete the following steps to set up a key-pair authentication connection to Snowflake in Workato:
Click Create > Connection or press C twice.
Search for Snowflake and select it as your app.
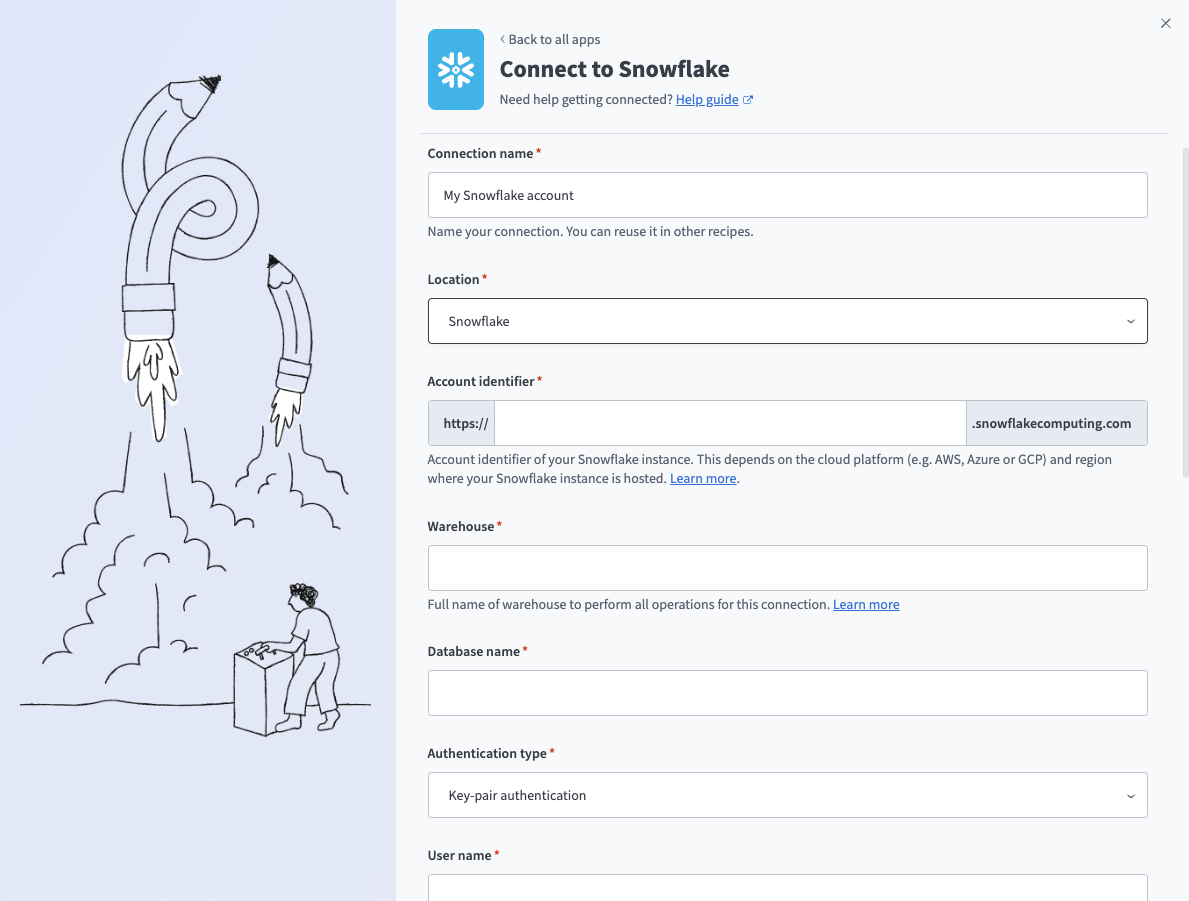
Enter a name for your connection in the Connection name field.
 Snowflake key-pair connection
Use the Location drop-down menu to select the project where you plan to store the connection.
Enter the Snowflake instance Account identifier in one of the supported formats:
- Account name:
https://{org_name}-{account_name} - Connection name:
https://{org_name}-{connection_name} - Account locator:
https://{account_locator}.{region}.{cloud}
Refer to the Snowflake Connecting to your accounts guide for more information.
ACCOUNT LOCATOR FORMAT
Certain locations require you to include the {region} and {cloud} in your account locator URL. For example:
- AWS US West (Oregon):
your-account-locator - AWS US East (Ohio):
your-account-locator.us-east-2 - Azure West Europe:
your-account-locator.west-europe.azure
Refer to the Snowflake Using an account locator as an identifier guide for more information.
Enter the Warehouse name to define the compute resources for this connection. Refer to Warehouse considerations for more information.
Enter the Database name for the target Snowflake database.
Use the Authentication type drop-down menu to select Key-pair authentication.
Enter the User name and Private key. Refer to Snowflake setup for key-pair authentication for information on how to retrieve these credentials.
Optional. Enter the Private key passphrase if you generated an encrypted private key.
Optional. Specify a Role for authentication. This role must be an existing role assigned to the user. If left blank, Snowflake uses the default role assigned to the user.
Optional. Enter the Schema. If left blank, the default schema is public.
Optional. Set the Use improved datetime handling (Recommended) to Yes to ensure correct timezone handling for timestamps.
Optional. Define the Database timezone to apply to timestamps without an assigned timezone. Defaults to your workspace's timezone if left blank.
Click Connect.
Warehouse considerations
Snowflake uses per-second billing for all compute (loading, transforming, and querying), with a 60-second minimum each time a warehouse starts. Select warehouse properties based on query frequency, time between queries, number of concurrent active recipes, and query complexity.
Warehouse size
An X-Small warehouse is sufficient for most use cases. Larger warehouses complete queries faster at the same credit cost, making them better suited for long or complex queries where timeouts are a concern.
Multi-cluster warehouses
Multi-cluster warehouses with auto-scale enabled handle temporary load fluctuations by creating additional warehouses of the same size as needed. Use a multi-cluster warehouse if you expect concurrent jobs or jobs with large queries. Refer to the Snowflake Multi-cluster warehouses guide for more information.
Auto-suspend and auto-resume
Warehouses used in the connection must have auto-resume enabled — recipe jobs fail when attempting to run on a suspended warehouse.
You can configure a warehouse to auto-suspend after a period of inactivity based on your business needs. Keep in mind that warehouses maintain a cache of table data that improves query performance, but this cache is cleared on suspension. As a result, initial queries after auto-resume are slower. Use cases with frequent queries and minimal downtime between them benefit from a longer auto-suspend period.
Database timezone
Snowflake TIMESTAMP_NTZ data type stores "wallclock" time without timezone information, which can cause issues when integrating with external systems. When sending or reading data from these columns, the values must be converted to a default timezone for other applications to process accurately. To address this, select the timezone your database operates in — this applies only to TIMESTAMP_NTZ columns. Columns with explicit timezone values are unaffected.
DEFAULT TIMEZONE
Your workspace's timezone is used by default when the database timezone isn't specified.
- Writing timestamp values to TIMESTAMP_NTZ: Timestamp values are converted to the specified timezone (including DST offset where applicable) before storing only the wallclock value.
- Reading timestamps from TIMESTAMP_NTZ: Timestamp values are assigned the selected timezone and processed as timezone-aware timestamps, with DST offset applied where applicable.
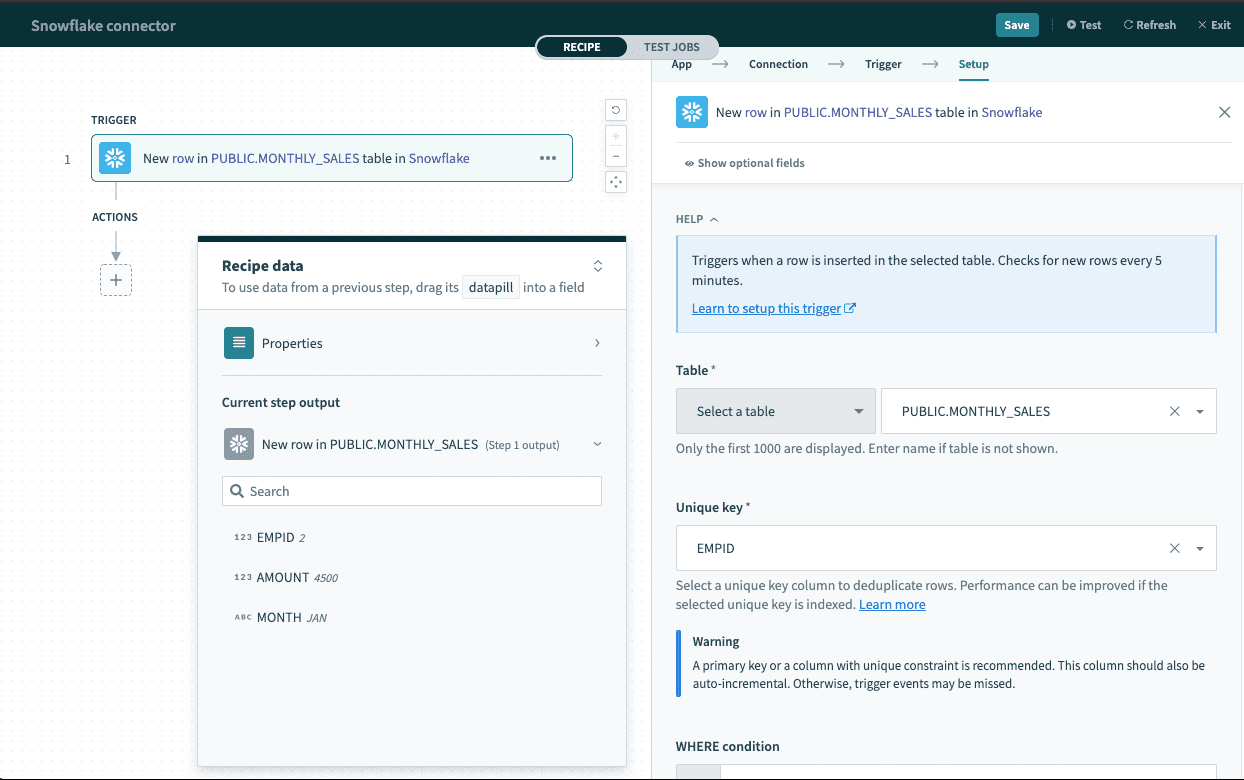
Table and view
The Snowflake connector works with all tables and views available to the username used to establish the connection. These are available in drop-down menus in each trigger/action, or you can provide the exact name.
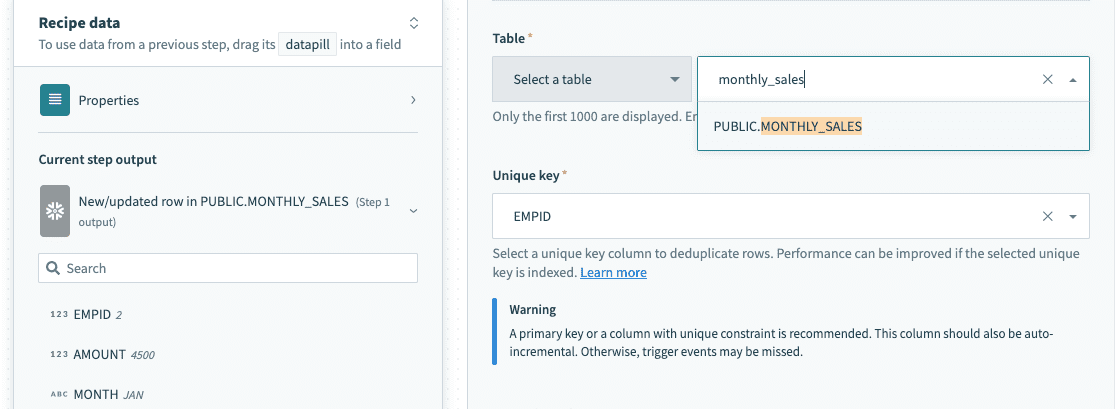 Select a table/view from the drop-down menu
 Provide exact table/view name in a text field
Single row and batch of rows
The Snowflake connector supports reading and writing data as a single row or in batches. Batch triggers and actions require a batch size between 1 and 100, and return a list datapill (an array of rows) rather than a single row output.
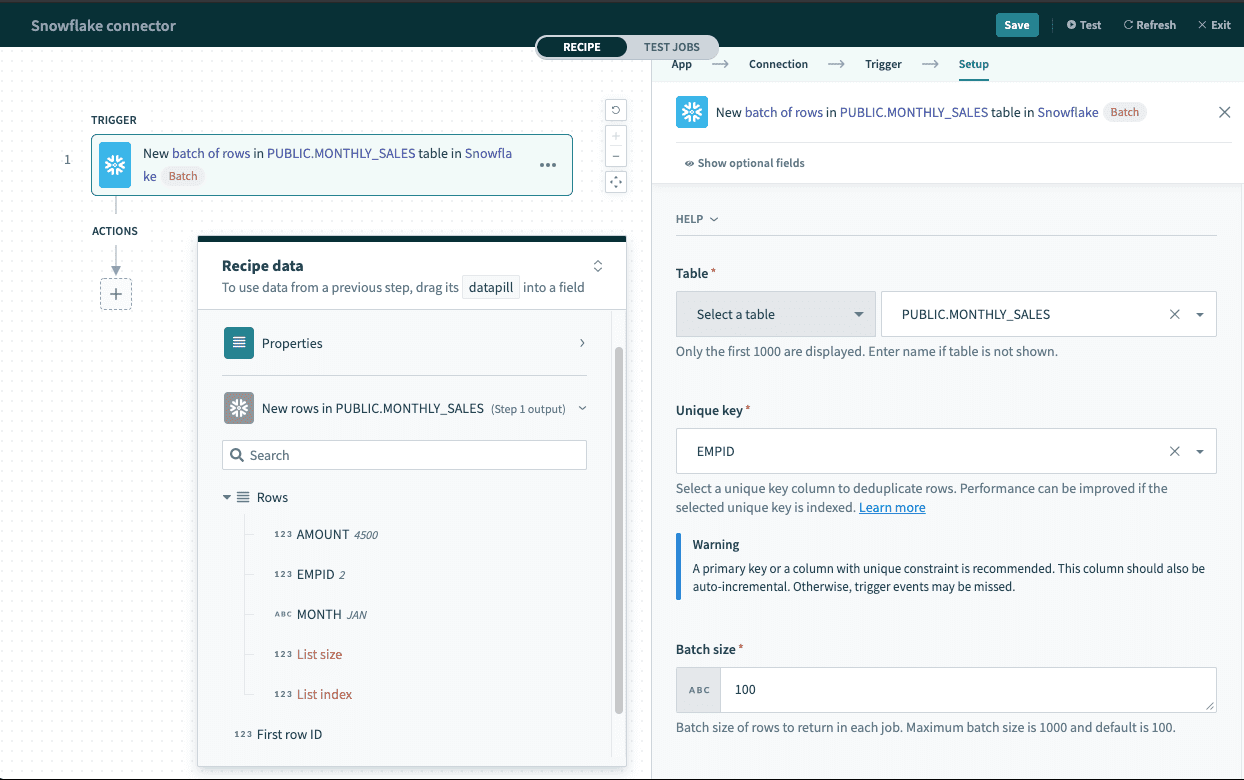 Batch trigger output
List datapill
The Rows datapill indicates that the output is a list containing data for each row in that batch.
Single-row triggers return an output datatree for mapping individual row data, while batch triggers return a list datapill that must be handled differently.
 Single row output
Map the Rows datapill into the source list with batch-compatible operations, such as the Salesforce Create objects in bulk action. Refer to Work with lists in Workato for more information.
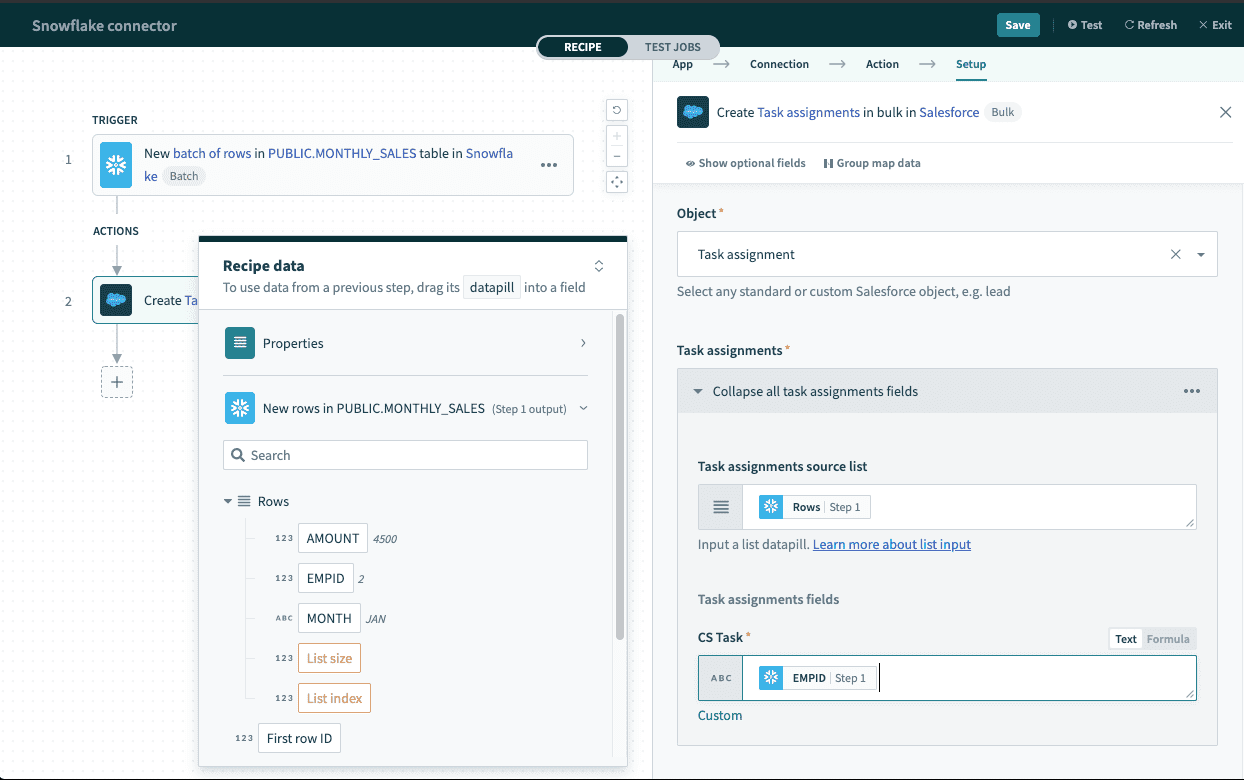 Using batch trigger output
WHERE condition
Use this input field to filter and identify rows to perform an action on. It's used in multiple triggers and actions in the following ways:
- Filter rows to be picked up in triggers
- Filter rows in Select rows action
- Filter rows to be deleted in Delete rows action
TIP
The following examples showcase how to use WHERE conditions directly with user input. For added security, use WHERE conditions with parameters to prevent SQL injection. Refer to Use parameters for more information.
Use this clause as a WHERE statement in each request. This should follow basic SQL syntax.
Simple statements
String values must be enclosed in single quotes ('') and columns used must exist in the table/view.
A simple WHERE condition to filter rows based on values in a single column looks like this.
email = '[email protected]'If used in a Select rows action, this WHERE condition returns all rows that have the value '[email protected]' in the email column. Wrap datapills with single quotes in your inputs.
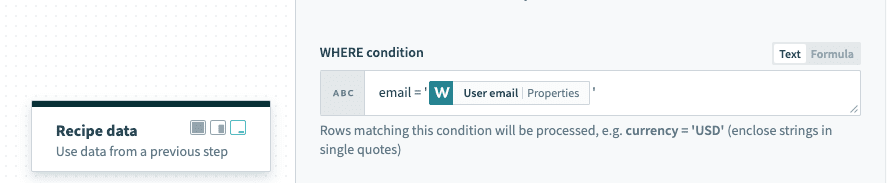 Using datapills wrapped with single quotes in
 WHERE condition
If your column contains spaces, use the column identifier — double quotes (""). For example, currency code must be enclosed in double quotes to be used as an identifier.
"email address" = '[email protected]'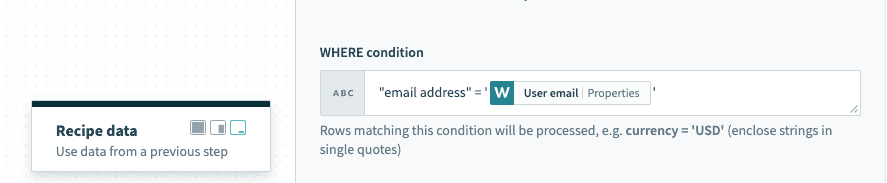
WHERE condition with column identifier enclosed with double quotes
Complex statements
The WHERE condition can also contain subqueries. The following example selects active users from the USERS table.
ID IN(SELECT USER_ID FROM USERS WHERE ACTIVE = TRUE)When used in a Select rows action, this selects all rows from your main query that are related to rows in the USERS table and are active (ACTIVE = TRUE).
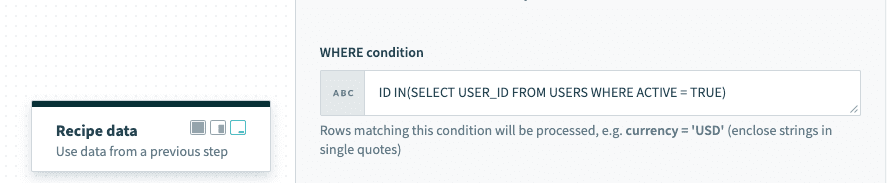 Using subquery in WHERE condition
Use Parameters
Use parameters in conjunction with WHERE conditions to add an additional layer of security against SQL injection. To use parameters in your WHERE conditions, you first need to declare bind variables in your input. Bind parameters must be declared in the form :bind_variable where the variable name is preceded with a :. When this is done, declare the parameter in the following section using the exact name you've given.
TIP
Bind variables should only be used in place of column values and not column names.
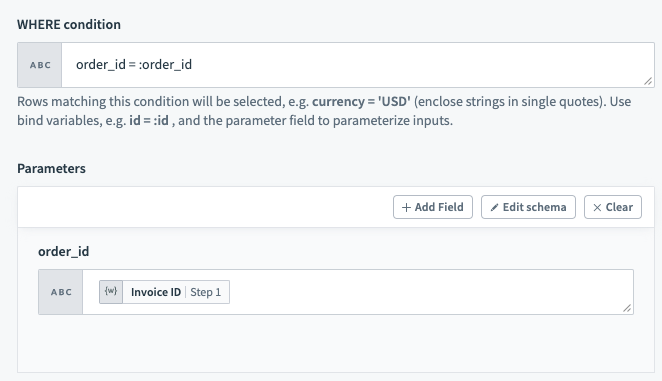
WHERE condition with bind variable
You can provide any number of bind variables, and each one should have a unique name. Workato distinguishes bind variables from column names and static values by ignoring any : inside single quotes ('), double quotes (") and square brackets ([]).
Special characters
When column names are defined with special characters, datapills for such columns aren't mapped correctly to the original column and return null. The most commonly used special characters are whitespace and -. Examples of these definitions are "column name" and "column-name".
The following workarounds are available for these situations.
Workaround 1
Use an appropriate alias in the SQL statement. Datapills are mapped correctly to the alias.
SELECT ID, NAME
"whitespace column" as whitespace_column,
"dashed-column" as dashed_column
FROM CUSTOMERS
Workaround 2
Access the value directly using the row index and column name.
 Accessing data via row index and column name
Last updated: