Getting Started with the SDK Gem
In this guide, we'll show you how to:
- Install and run the SDK gem
- Create a new connector project
- Set up testing for your connector
- Push your local connector to your Workato workspace
Prerequisites
To complete this tutorial, you'll need:
A Ruby version manager. Depending on your operating system, you'll need to install a version of Ruby or a Ruby version manager.
For Mac users, you can use RVM (Ruby Version Manager) or another manager of your choice.
For Windows users, you can use Ruby Installer.
Refer to the Ruby installation documentation for more information.
A supported version of Ruby. We prefer
2.7.X, but you can use versions3.0.Xor3.1.X. If you don't have Ruby installed, follow these instructions to install it.You can verify your Ruby version by running the following command, or the appropriate command for your Ruby version manager (for example:
rvm current):shell$ ruby -v ruby 2.7.XThis command returns the version of Ruby currently installed on your computer. In this example, we're using
2.7.X.
Step 1: Install and run the SDK Gem
Complete the following steps to install SDK gem using the command line (CLI):
Run the following command to install the gem from rubygems.org:
$ gem install workato-connector-sdkVerify that your gem is correctly installed by typing in the command workato in your terminal.
$ workato

Commands:
  workato edit <PATH>            # Edit encrypted file, e.g. settings.yaml.enc
  workato exec <PATH>            # Execute connector defined block
  workato generate <SUBCOMMAND>  # Generates code from template
  workato help [COMMAND]         # Describe available commands or one specific command
  workato new <CONNECTOR_PATH>   # Inits new connector folder
  workato push <FOLDER>          # Upload and release connector's code

Options:
  [--verbose], [--no-verbose]
WINDOWS USERS ADDITIONAL INSTALLATION STEP
If you use Windows, you may need to install tzinfo-data gem by running the command gem install tzinfo-data.
Optional. Run gem which to check the exact location of the gem:
$ gem which workato-connector-sdkAdditionally, you can use the workato command to view the commands that are available during development. Find out more about individual keys by running workato help edit.
Step 2: Create a new connector project
Now that you're all set up, let's dive into the exciting stuff: Making connectors.
Create a new connector project using the workato new command, replacing <PATH> with the path you'd like to use for the project:
$ workato new <PATH>This creates the project in the directory you're currently in.
Complete the prompts about HTTP mocking behavior:
Please select default HTTP mocking behavior suitable for your project?

1 - secure. Cause an error to be raised for any unknown requests, all request recordings are encrypted.
            To record a new cassette you need set VCR_RECORD_MODE environment variable

            Example: VCR_RECORD_MODE=once bundle exec rspec spec/actions/test_action_spec.rb

2 - simple. Record new interaction if it is a new request, requests are stored as plain text and expose secret tokens.
Enter your choice using 1 or 2:
1 - secure- Recommended. All HTTP requests are encrypted and recorded via VCR to ensure stability. We'll also provide you with an easy way to encrypt the recordings so credentials are not stored in plain text.2 - simple- All HTTP requests are stored in plain text.
Refer to the project directory reference for more info about the files the workato new command creates.
Step 3: Build and test your connector
In this step, you'll build and test your connector. As how and what you build is up to you, we're only going to cover testing in this section:
Step 3.1: Provide test credentials
Credentials are stored in your project's settings.yaml.enc or settings.yaml file.
Run the workato edit command and replace <EDITOR> with your preferred editor if you opted to encrypt your files:
Example - Mac users
$ EDITOR="<EDITOR>" workato edit settings.yaml.encExample - Windows users
$ set EDITOR=notepad
$ workato edit settings.yaml.enc
When you run this command for the first time, the settings.yaml.enc and master.key files will be created.
Go to your project's settings.yaml.enc or settings.yaml file and add your credentials.
We're going to use a single set of credentials for this example, so we can define them at the root level:
## settings.yaml.enc

api_key: [api_key]
domain: [domain]
Refer to the settings file reference for more info, including how to provide multiple sets of credentials.
Add master.key to your project's .gitignore or other similar file(s) if committing your project. This prevents your credentials from being checked into a repository, where anyone might have access to them.
Step 3.2: Test the connector
Test your connector's connection, triggers, or actions with workato exec. This executes a connector's lambda block at the PATH you provide.
For example:
# Executes the execute block of the new_record action
$ workato exec actions.new_record.execute

# Invokes a polling trigger for the updated_record trigger
$ workato exec triggers.updated_record.poll

# Executes the get_record method with parameters from input.json
$ workato exec methods.get_record --args=input.json
Check out the Running test lambda on CLI guide and for a detailed look testing on the CLI.
Step 4: Push to your Workato workspace
You can push your connector code from your local environment to your Workato workspace when you're ready. Pushing to your Workato workspace allows you to test the functionality and UX of your connector to ensure you can iterate quickly. Complete the following steps to push your connector code to your Workato workspace:
Run the workato push command:
$ workato pushTest in your Workato workspace. You can make changes locally and push to your Workato workspace as needed. You must supply your workspace's api-token and api-email for authorization.
API CLIENT PERMISSIONS
This command requires you to assign a Client role to the API client with the Get details permission enabled.
ENABLE THE GET DETAILS PERMISSION
Enable permissions for your API client if you haven't done so already by going to Workspace admin > API Clients > Client roles.
Edit an existing client role or create a new one.
Go to Admin > Workspace details > Get details.
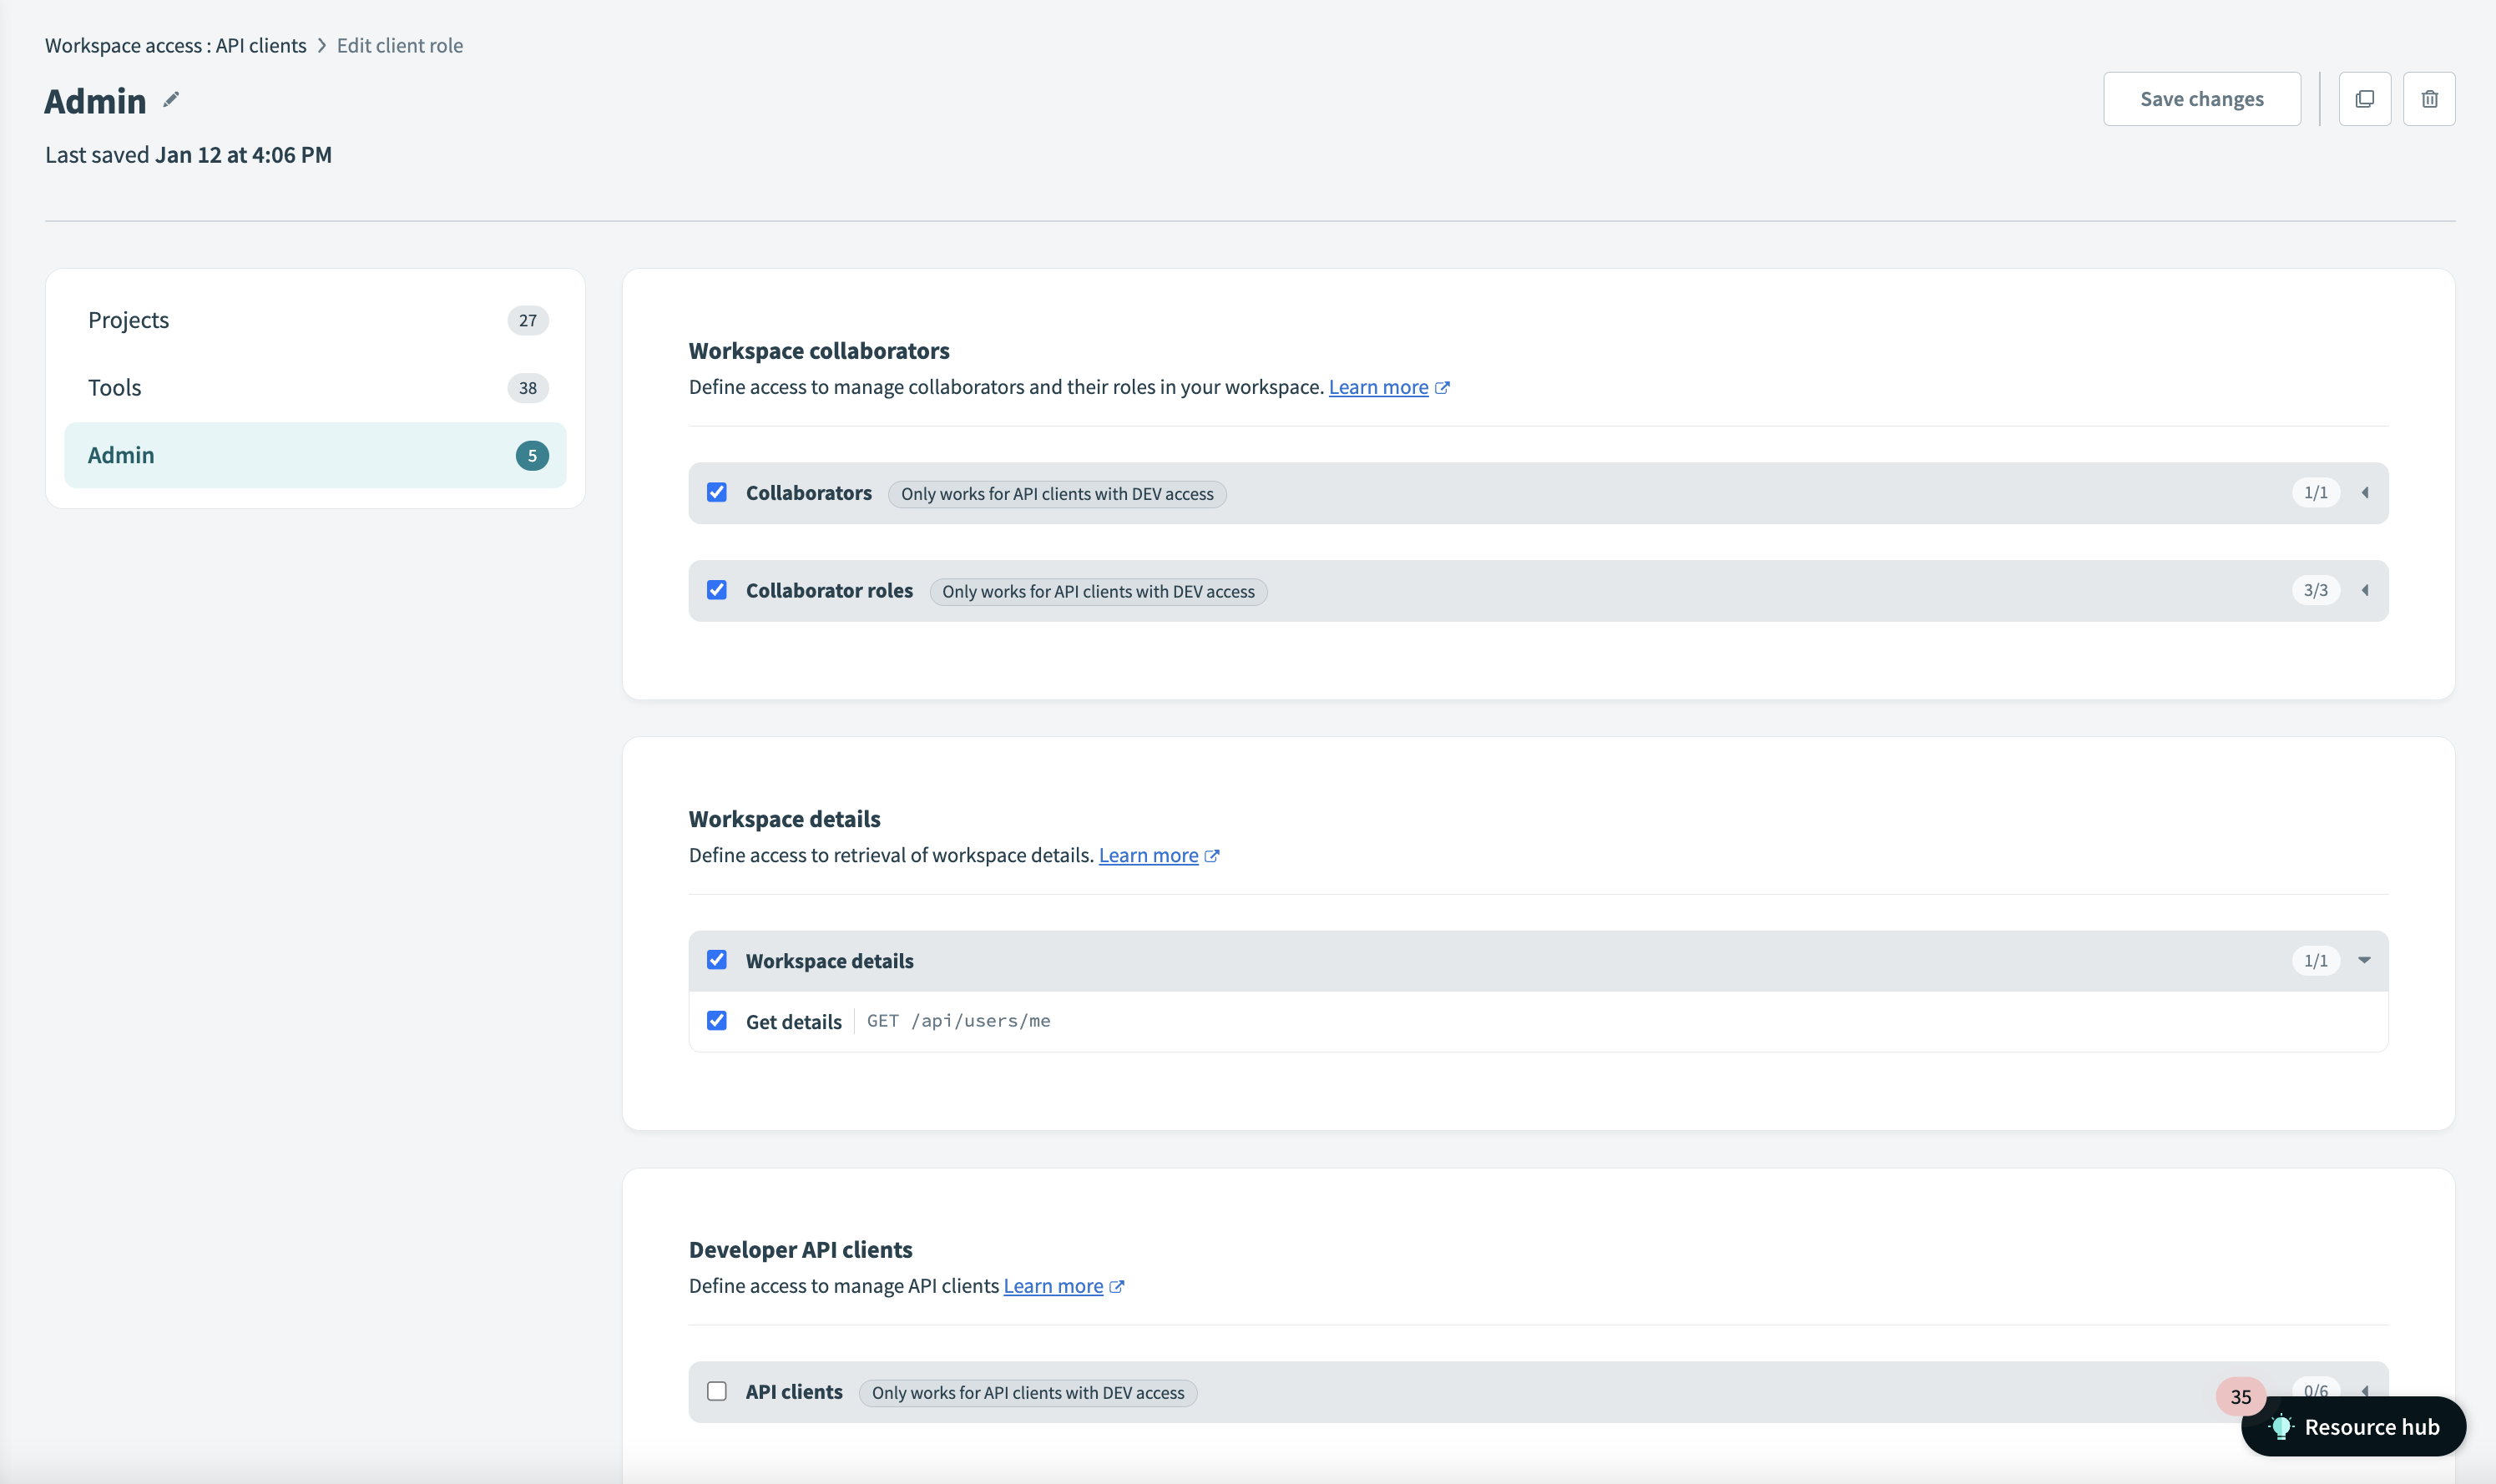 Enable the Get details permission
Step 5: Run RSpec tests for your connector
You can use unit testing to ensure that each iteration of your connector is performing as expected. Learn more about writing test your connectors. Complete the following steps to run RSpec tests:
Ensure that your project structure is set up.
Open your CLI, go to your home directory, and run the following command:
bundle exec rspecRSpec runs all spec files in your spec folder by default. You can run only specific tests at a time by running the following command, changing the line number (16) for your testing requirements:
# Runs the test(s) at line 16 of your spec file.
$ bundle exec rspec ./spec/connector_spec.rb:16
ENSURE RSPEC GEM VERSION MATCHES YOUR GEMFILE
You can use the command rspec in place of bundle exec rspec, however, using bundle exec rspec ensures that the rspec Gem version you use for tests matches the version specified in your Gemfile.
5.1 Configure VCR
The Workato SDK Gem works with RSpec and VCR to provide you a way to write unit tests, store HTTP interactions (requests and responses) so that you can continue to run these unit tests without constantly having to send the request to the API. This also has the benefit of replaying the same responses so you needn't have to worry about changes of the actual data in the Application.
When you generate a project using Workato, these settings are automatically generated for you in the spec_helper.rb with some default VCR configurations. These VCR recordings also depend on your chosen security settings when you first set up the project. If you selected secure, your VCR recordings would be encrypted using your master.key.
Learn more about using VCR.
What's next?
- Learn about developing connector actions, triggers, and methods
- Set up CI/CD for your project on GitHub
- Learn more about running lambda tests
Last updated: