How-to Guide - OAuth 2.0 Client Credentials Authentication
The OAuth 2.0 Client Credentials flow is traditionally a way for server to server authentication. This allows you to build a connector that can authenticate as the Workato server which communicates to your target API server.
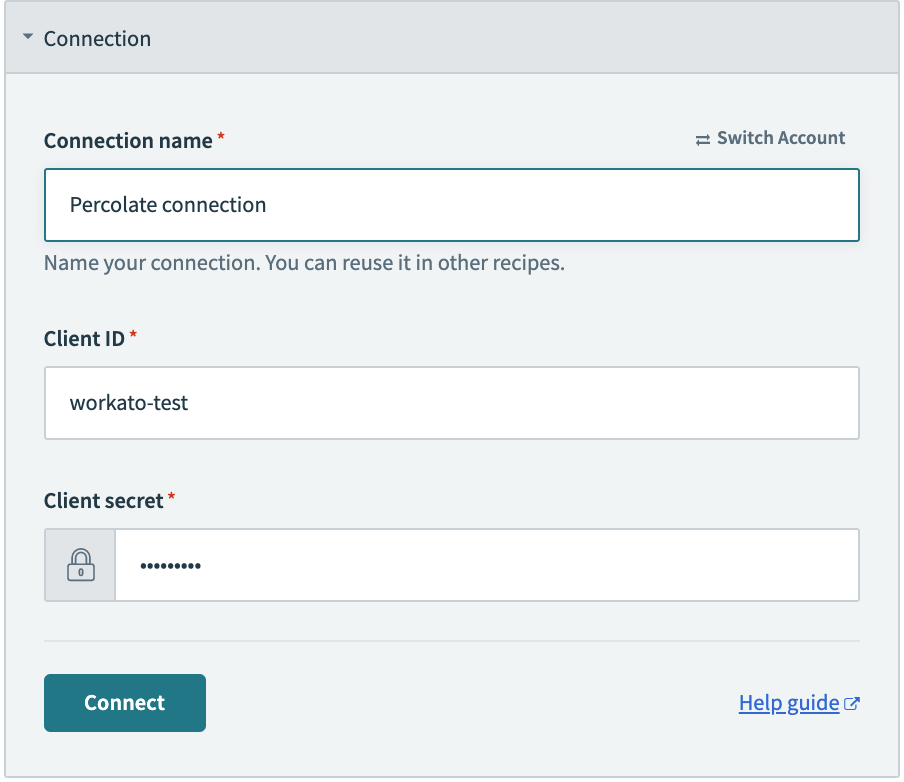
Sample Connector - Percolate
{
  title: 'My Percolate connector',

  connection: {
    fields: [
      {
        name: 'client_id',
        optional: false,
      },
      {
        name: 'client_secret',
        control_type: 'password',
        optional: false,
      }
    ],

    authorization: {
      type: 'custom_auth', #Set to custom_auth

      acquire: lambda do |connection|
        hash = ("#{connection['client_id']}:#{connection['client_secret']}").base64.gsub("\n", '')
          # Token URL
        response = post('https://percolate.com/auth/v5/token/').
                      payload(grant_type: 'client_credentials').
                      headers(Authorization: "Basic " + hash).
                      request_format_www_form_urlencoded

        {
          access_token: response["access_token"],
          refresh_token: response["refresh_token"]
        }
      end,

      detect_on: [401, 403],

      refresh_on: [401, 403],

      apply: lambda do |connection|
        headers("Authorization": "Bearer #{connection['access_token']}")
      end
    },

    base_uri: lambda do |connection|
      'https://percolate.com'
    end

  },

  test: lambda do |connection|
    get('/api/v5/me')
  end,

  #More connector code here
}- Refer to the full Percolate connector code for a complete example.
- Check out the Percolate API
Step 1 - Defining Connection fields
This component tells Workato what fields to show to a user trying to establish a connection. In the case of Client Credentials Authentication, you would need the Client ID and Client Secret that the user has generated in Percolate.
| Information needed | Description |
|---|---|
| Client ID | This is the public ID of the OAuth app that should be tied to Workato. This might mean signing Workato up as a verified application in the application |
| Client secret | This is the matching private key that the API will verify along with the Client ID. This might mean signing Workato up as a verified application in the application. Never share your client secret with others |
This is done in the fields key, which accepts an array of hashes. Each hash in this array corresponds to a separate input field.
    fields: [
      {
        name: 'client_id',
        optional: false,
      },
      {
        name: 'client_secret',
        control_type: 'password',
        optional: false,
      }
    ],
TIP
When defining fields, you need to at least provide the name key. Additional attributes like optional, hint and control_type allow you to customize other aspects of these fields. For sensitive information like Client Secrets, remember to use the control_type as password.
Refer to Connection fields for more information on defining input fields in Workato.
Step 2 - Defining the authorization type
This component tells Workato what type of authentication type this connection should use. This is handled through your type key in the authorization object. For Client Credentials authentication, you should use custom_auth.
type: 'custom_auth'Step 3 - Acquiring the access token
The next step is to define what this connector should do to retrieve an access token. This is done in the acquire lambda function.
      acquire: lambda do |connection|
        hash = ("client:#{connection['client_id']}:#{connection['client_secret']}").base64.gsub("\n", '')
        response = post('https://percolate.com/auth/v5/token/'). # Token URL
                      payload(grant_type: 'client_credentials').
                      headers(Authorization: "Basic " + hash).
                      request_format_www_form_urlencoded

        {
          access_token: response["access_token"]
        }
      end,
In the acquire key, we pass in the client_id and client_secret which were input fields defined in the fields key. These values are available via the argument to the lambda function - connection. We pass them as headers and in BASE-64 String encoding. Note that the body of the request must be sent with request_format_www_form_urlencoded as per Percolates requirements. This request is then sent to Percolate's Token URL.
Upon receiving a the request, the API returns a JSON response.
{
  "access_token": "my-authentication-token",
  "token_type": "bearer",
  "expires_in": "seconds-until-expiration",
  "error": "optional-error-message"
}
The output of the acquire lambda function is expected to be an object which is merged into the original connection object. For example:
# Original Connection hash
{
  client_id: "abcd1234",
  client_secret: "secretClientSecret"
}

# After acquire key is executed
{
  client_id: "abcd1234",
  client_secret: "secretClientSecret",
  access_token: "my-authentication-token"
}
Step 4 - Applying the access token to subsequent HTTP requests
Next, you need to tell Workato how to make use of the access token it has retrieved from Percolate. This is done in the apply key where you can reference the access token now stored in the connection argument. Any instructions you introduce in the apply key are subsequently applied to all HTTP requests this connector sends after connection is established.
    apply: lambda do |connection|
      headers("Authorization": "Bearer #{connection['access_token']}")
    end
In this example, we have defined the access token (connection['access_token']) to be added to the headers of any request. For every HTTP request sent, the headers will contain Authorization: Bearer XXX where XXX is the access token stored in the connection hash.
Step 5 - Defining token refresh behavior
There may be situations in which the API expires the access token after a prescribed amount of time. In these cases, you would need to define refresh_on signals to let Workato know when to retrieve a new access_token from the OAuth server. refresh_on accepts an array which may contain HTTP response codes or regex strings.
If an HTTP request in the connector receives any of the HTTP response codes, it will attempt to retrieve a new access token. Likewise, if the contents of the body payload matches any of the defined regex strings, it will retrieve a new access token.
In the example using type: custom_auth, it will execute the code in the acquire key.
refresh_on: [401, 403],When the acquire lambda is run again, this is the expected response from Percolate.
{
  "access_token": "my-NEW-authentication-token",
  "token_type": "bearer",
  "expires_in": "seconds-until-expiration",
  "error": "optional-error-message"
}
The expected output of the acquire lambda function is a hash which is merged into the original connection hash. For example:
# Original Connection hash
{
  client_id: "abcd1234",
  client_secret: "secretClientSecret",
  access_token: "my-authentication-token"
}

# After acquire lambda is executed
{
  client_id: "abcd1234",
  client_secret: "secretClientSecret",
  access_token: "my-NEW-authentication-token"
}
Step 6 - Setting the API's base URI
This component tells Workato what the base URL of the API is. This key is optional but allows you to provide only relative paths in the rest of your connector when defining HTTP requests. Refer to base URI configuration for more information on configuring your base_uri.
    base_uri: lambda do |connection|
      'https://percolate.com'
    end
TIP
This lambda function also has access to the connection argument. This is especially useful if the base URI of the API might change based on the user's instance. The connection argument can be accessed in the following format:
    base_uri: lambda do |connection|
      "https://#{connection['domain'].com/api}"
    end
Step 7 - Testing the connection
Now that we have defined the fields we need to collect from an end user and what to do with the inputs from those fields, we now need a way to test this connection. This is handled in the test key.
    test: lambda do
      get('/api/v5/me')
    end,
In this block, you need to provide an endpoint that allows us to send a sample request using the new credentials we just received. If we receive a 200 OK HTTP response, we show the connection as Successful. In the example above, we are sending a GET request to the /api/v5/me endpoint and expecting a 200 response if the API key is valid.
Connections SDK reference
To be more familiar with the available keys within the connection key and their parameters, check out our SDK reference.
Last updated: