Share a connector
You can share your connector with other users in the Share tab after you build your custom connector. You can share your connector as open-source or closed-source using a link or through the community library.
Released versions and shared versions
| Version type | Description |
|---|---|
| Released version | Determines which connector version your recipes use. All recipes that use this connector update immediately when you release a new version. |
| Shared version | Determines which connector version other users install. Users who installed your connector can choose to update their connectors, including child connectors, when you share a new version. |
Open-source and closed-source connectors
You can share your connector as open-source or closed-source. An open-source connector makes the connector's source code available for anyone to view, modify, and distribute. A closed-source connector keeps its source code private. Users can't view, modify, or distribute the source code after installation.
FEATURE AVAILABILITY
Closed code source connector sharing is subject to the following limitations:
- Collaborating workspaces must use the same data center as the custom connector's developer. Refer to Share data between regions for more information on cross-region collaboration.
- Partners must be given access to this feature. Contact your Customer Success Representative to learn more.
Switch between open-source and closed-source
Switching your connector between open-source and closed-source changes its visibility, sharing behavior, and source code access.
Complete the following steps to switch your connector between open-source and closed-source:
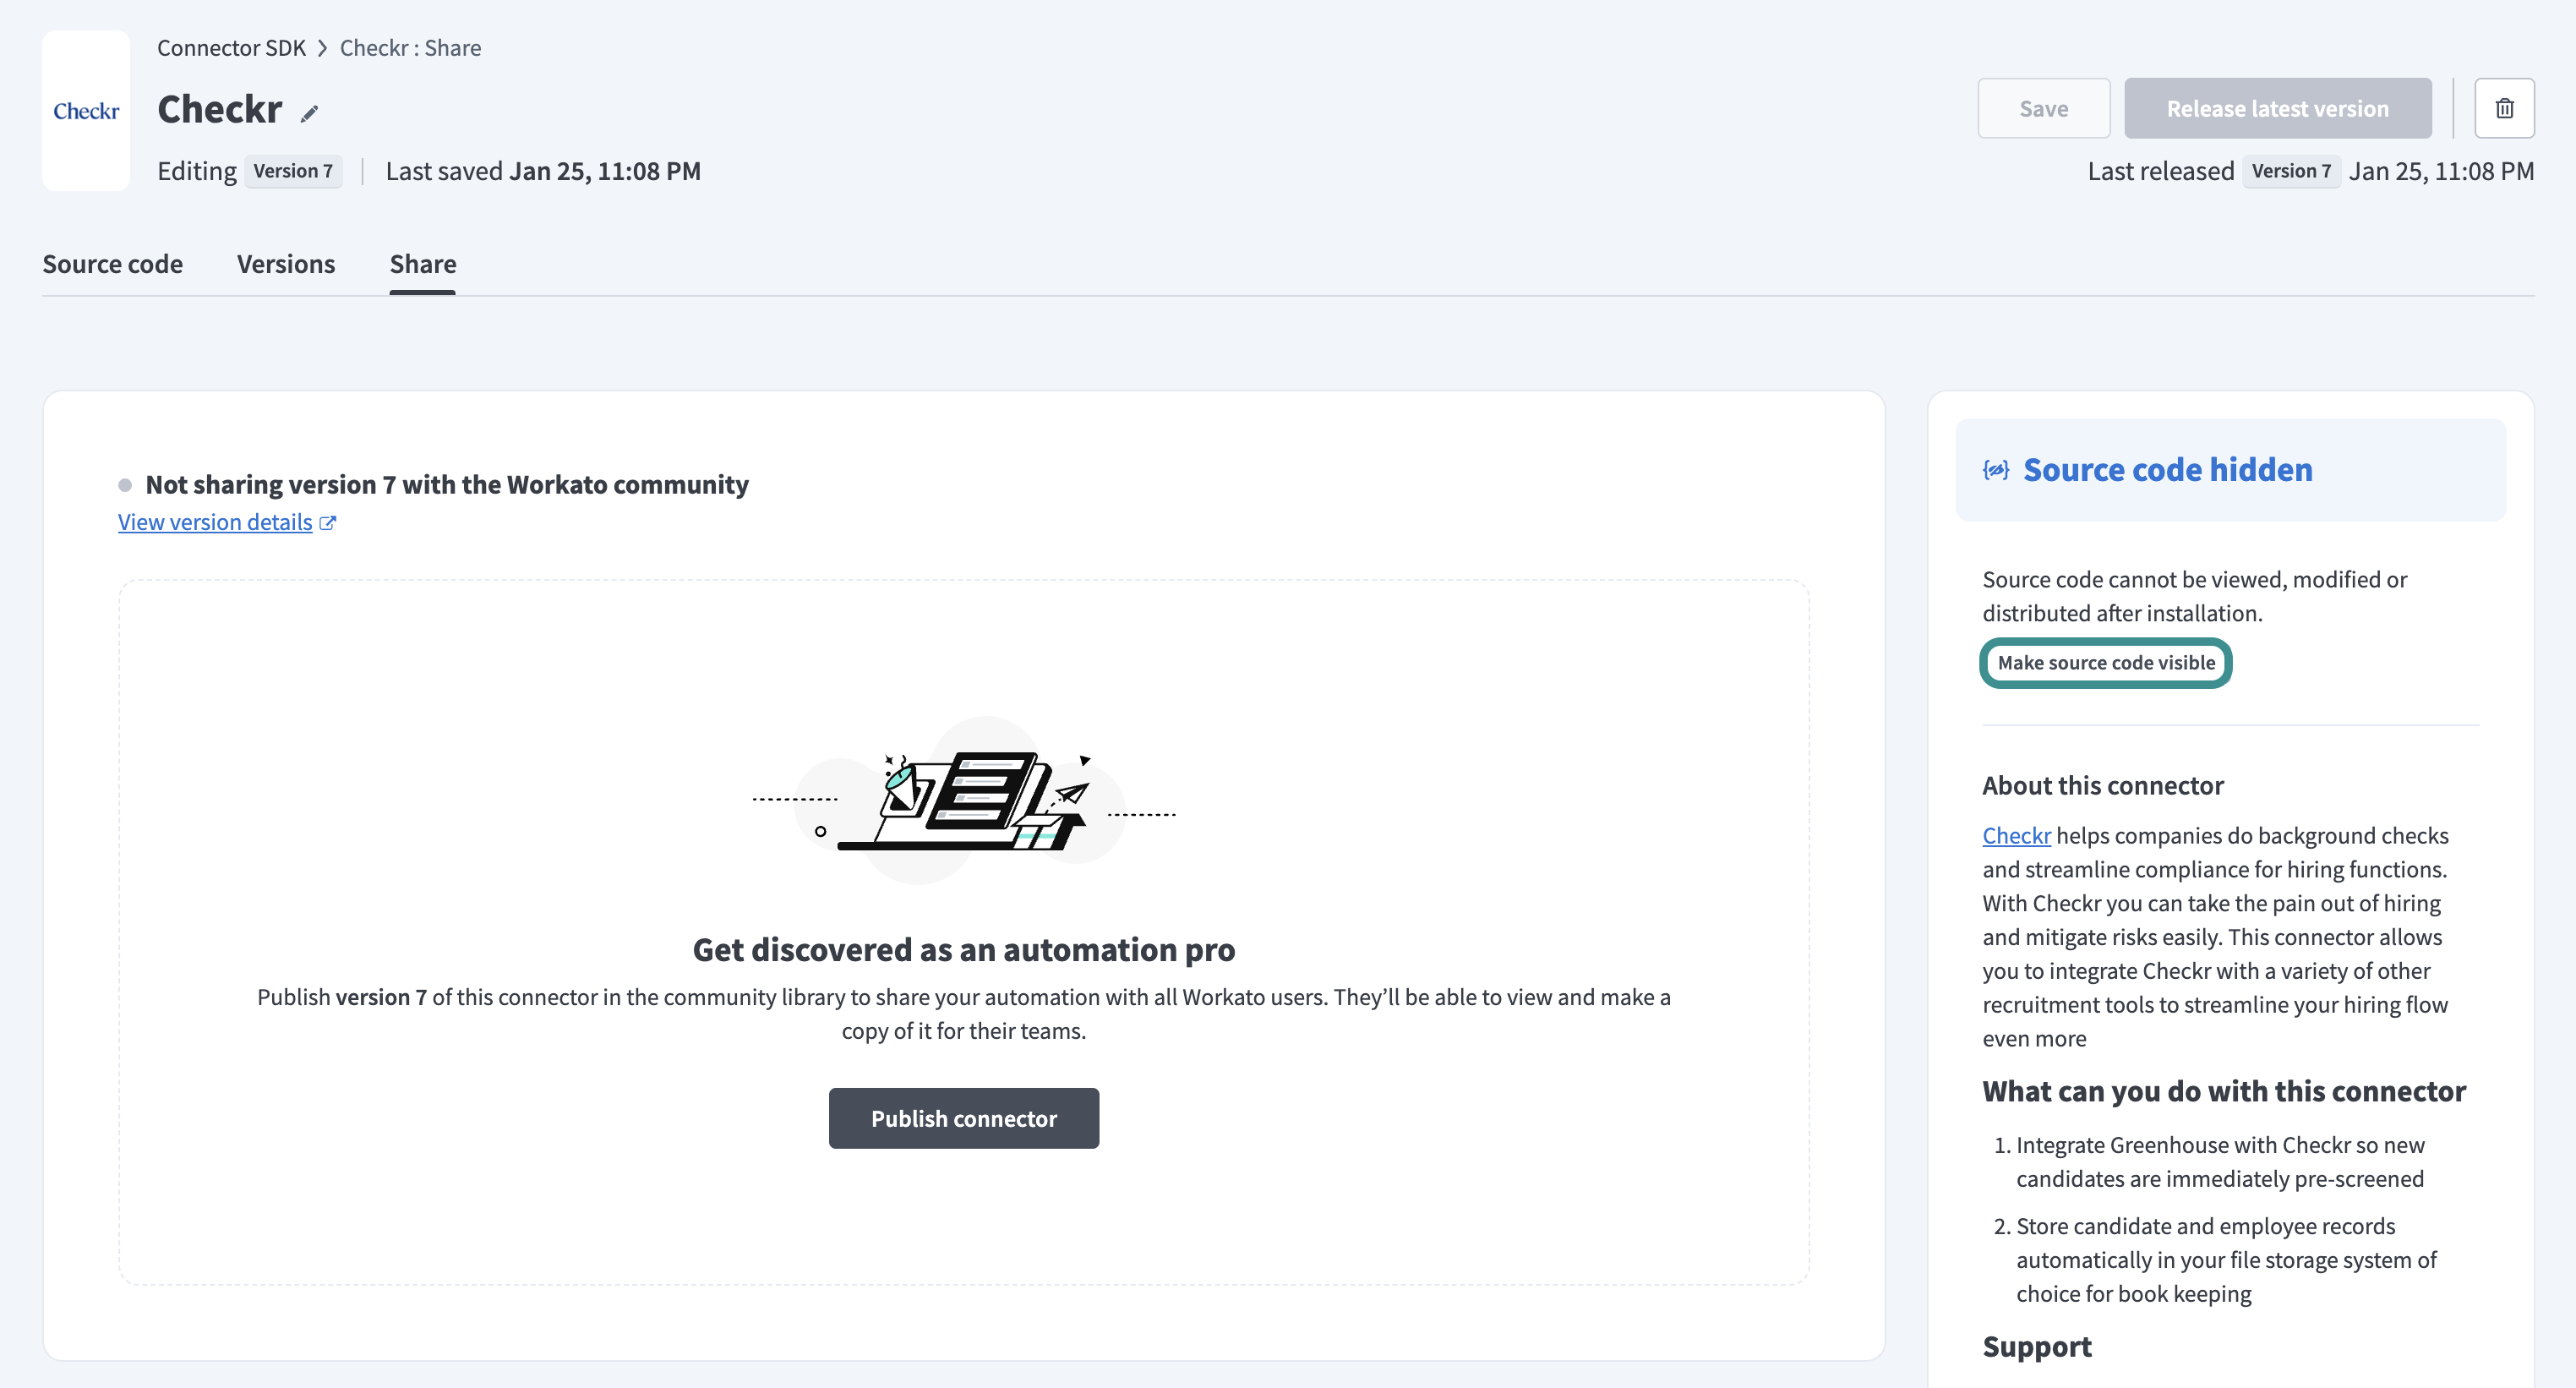
Go to the Share tab of the connector you plan to modify.
Click Make source code hidden or Make source code visible.
 Change source code button
Click Update connector.
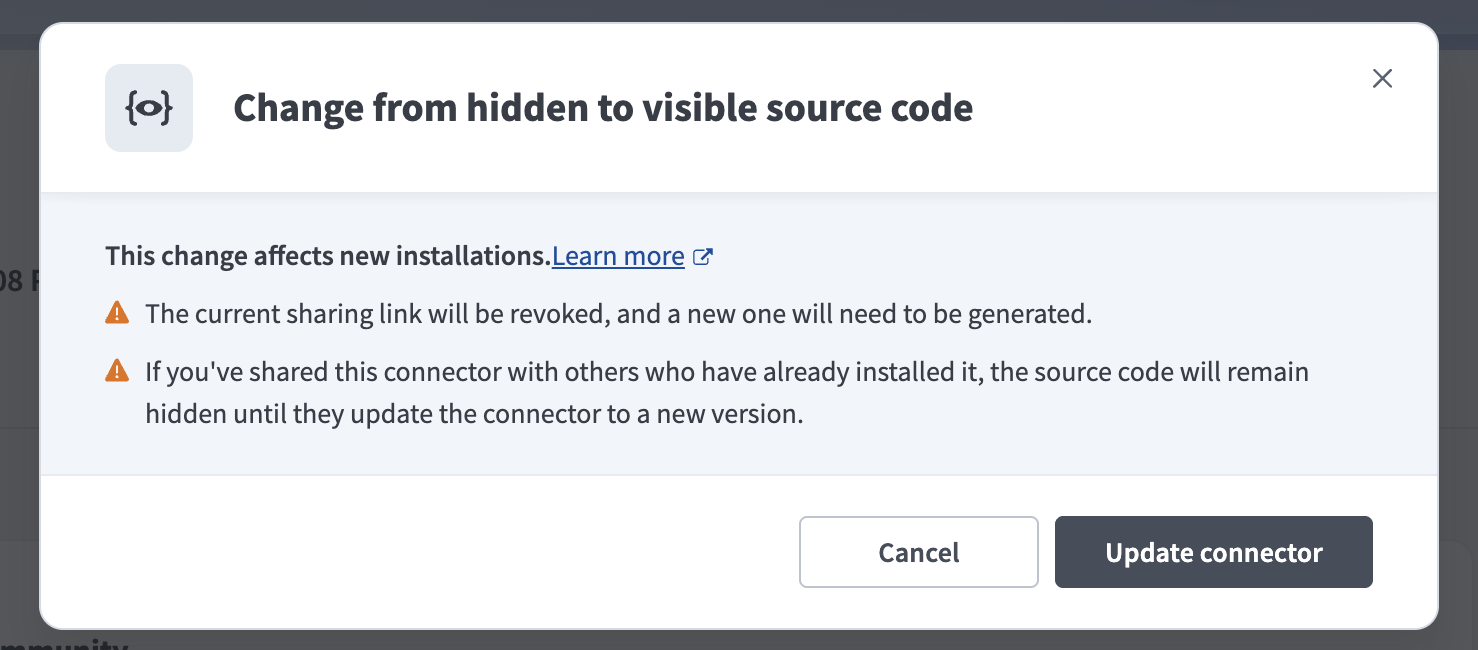 Click Update connector
Share a connector with a link
You can use a shareable link to distribute your connector directly to specific workspaces.
Complete the following steps to generate a shareable link:
Go to Tools > Connector SDK, select the connector you plan to share, and open the Share tab.
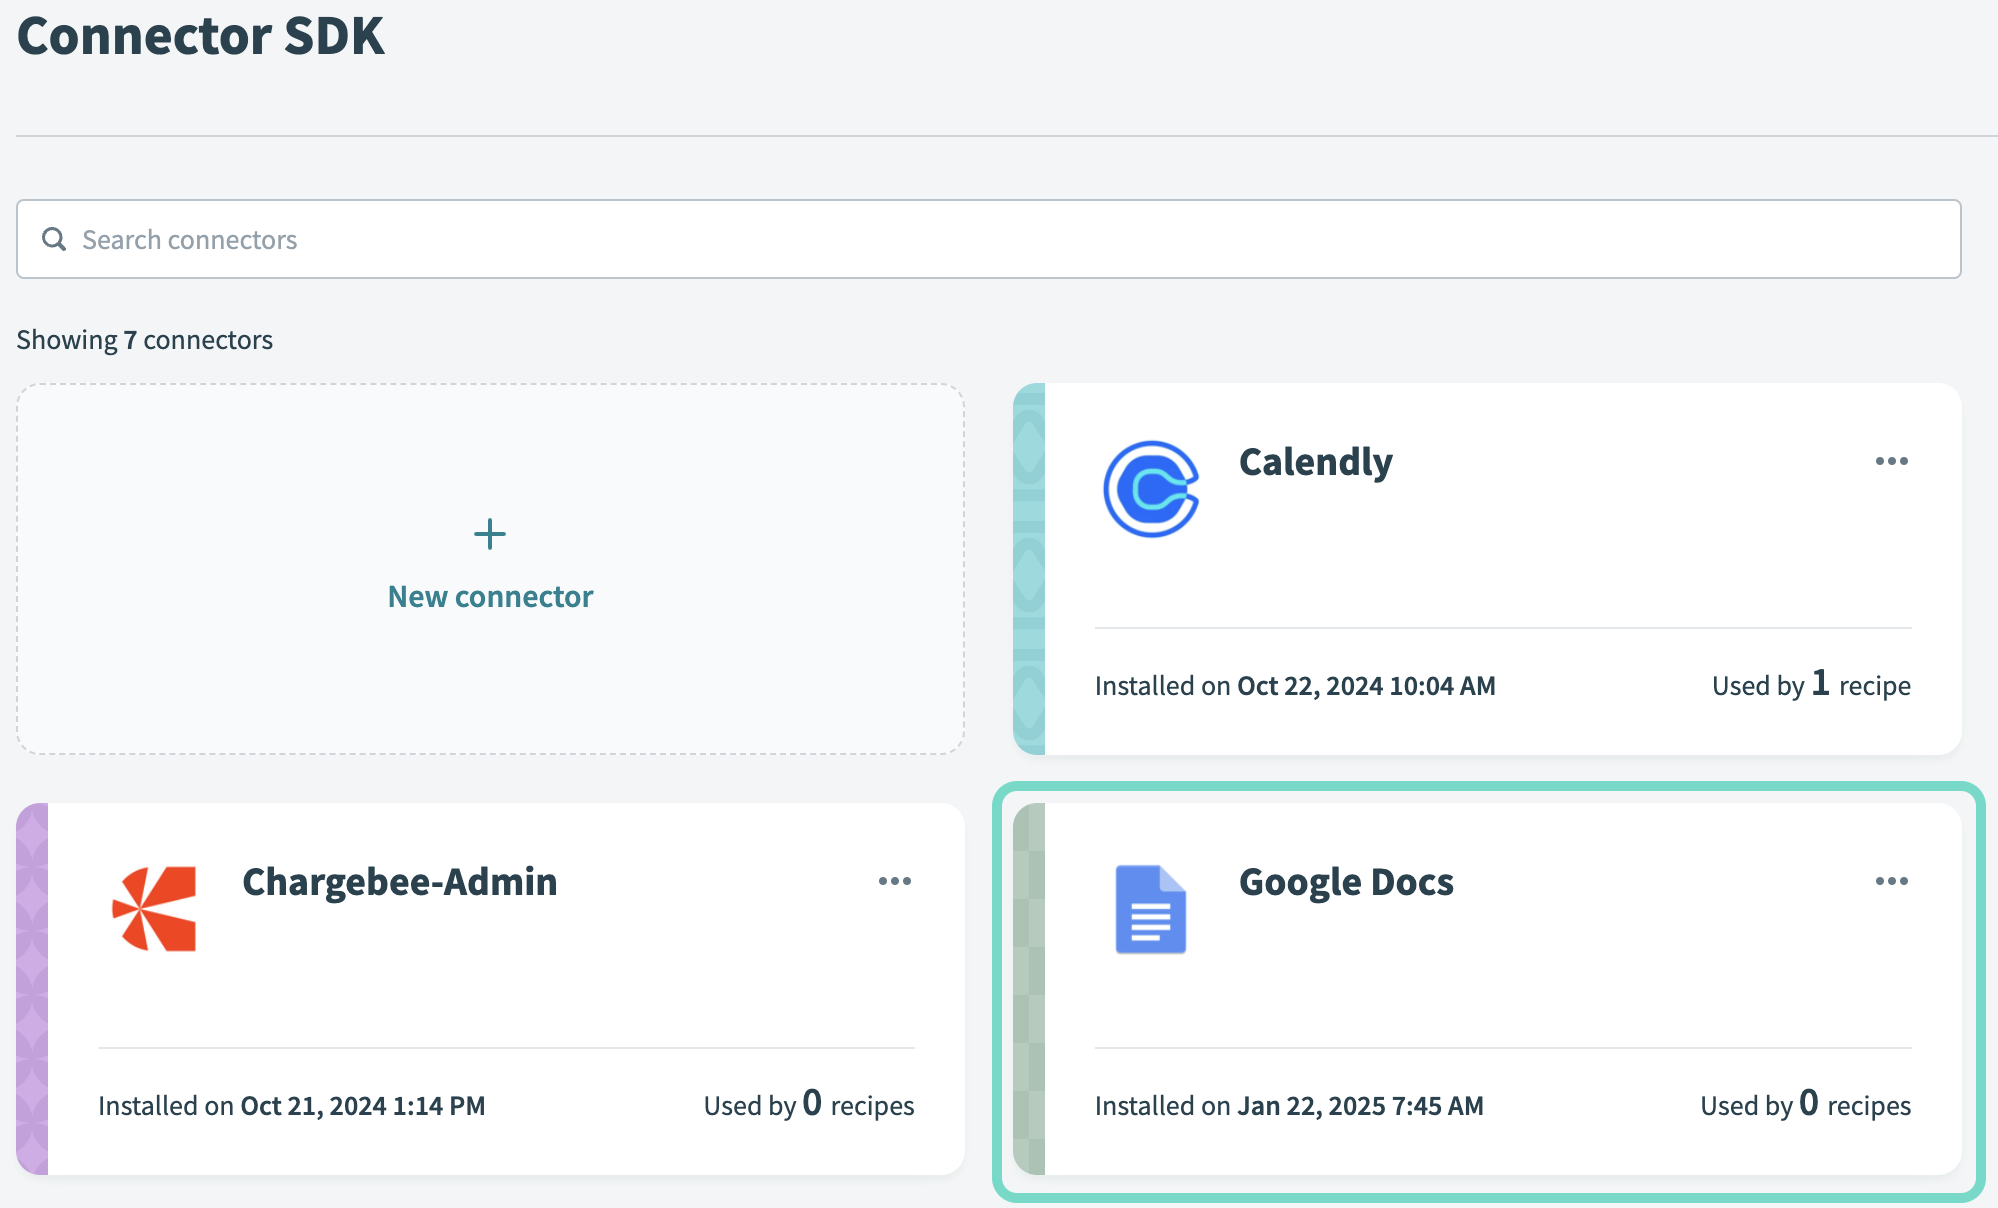 Select a connector
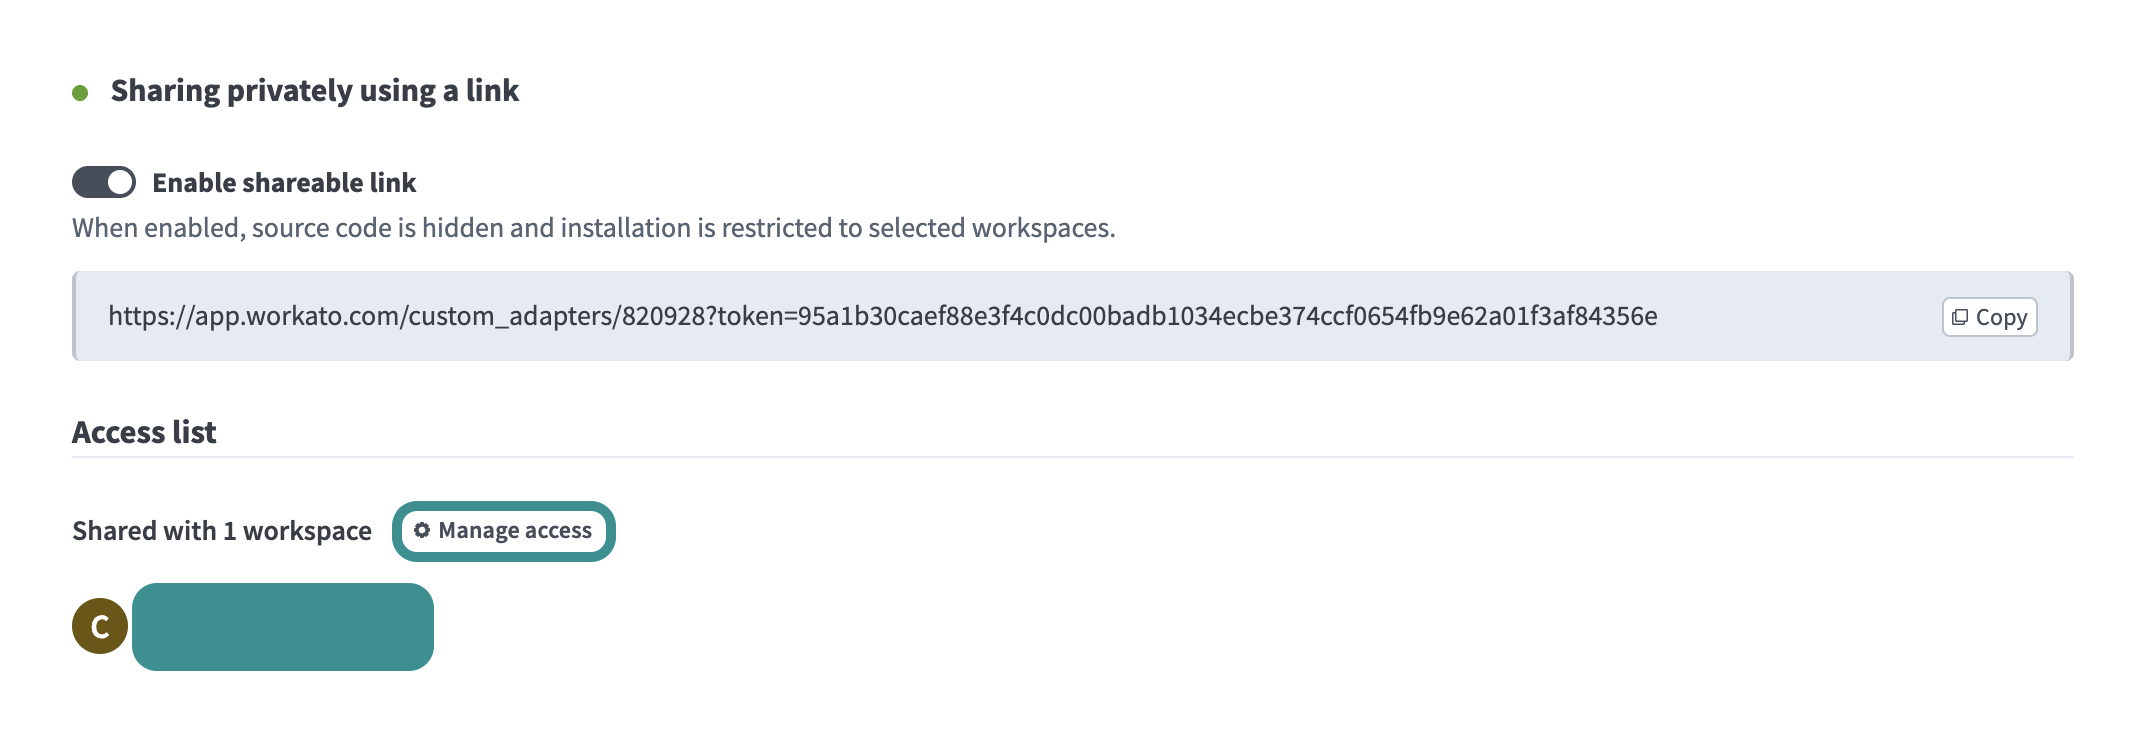
Click the Enable shareable link toggle.
Copy the generated link and share it with the appropriate workspaces.
The behavior of the shareable link depends on whether your connector is open-source or closed-source. Refer to Open-source and closed-source connectors for more details.
Manage closed-source connector access
This section applies only to closed-source connectors that you share using a link. Refer to Open-source and closed-source connectors for an overview of closed-source behavior.
Complete the following steps to manage access to your closed-source connector:
Go to Tools > Connector SDK.
Select the connector you plan to manage, then go to the Share tab.
Select a connector
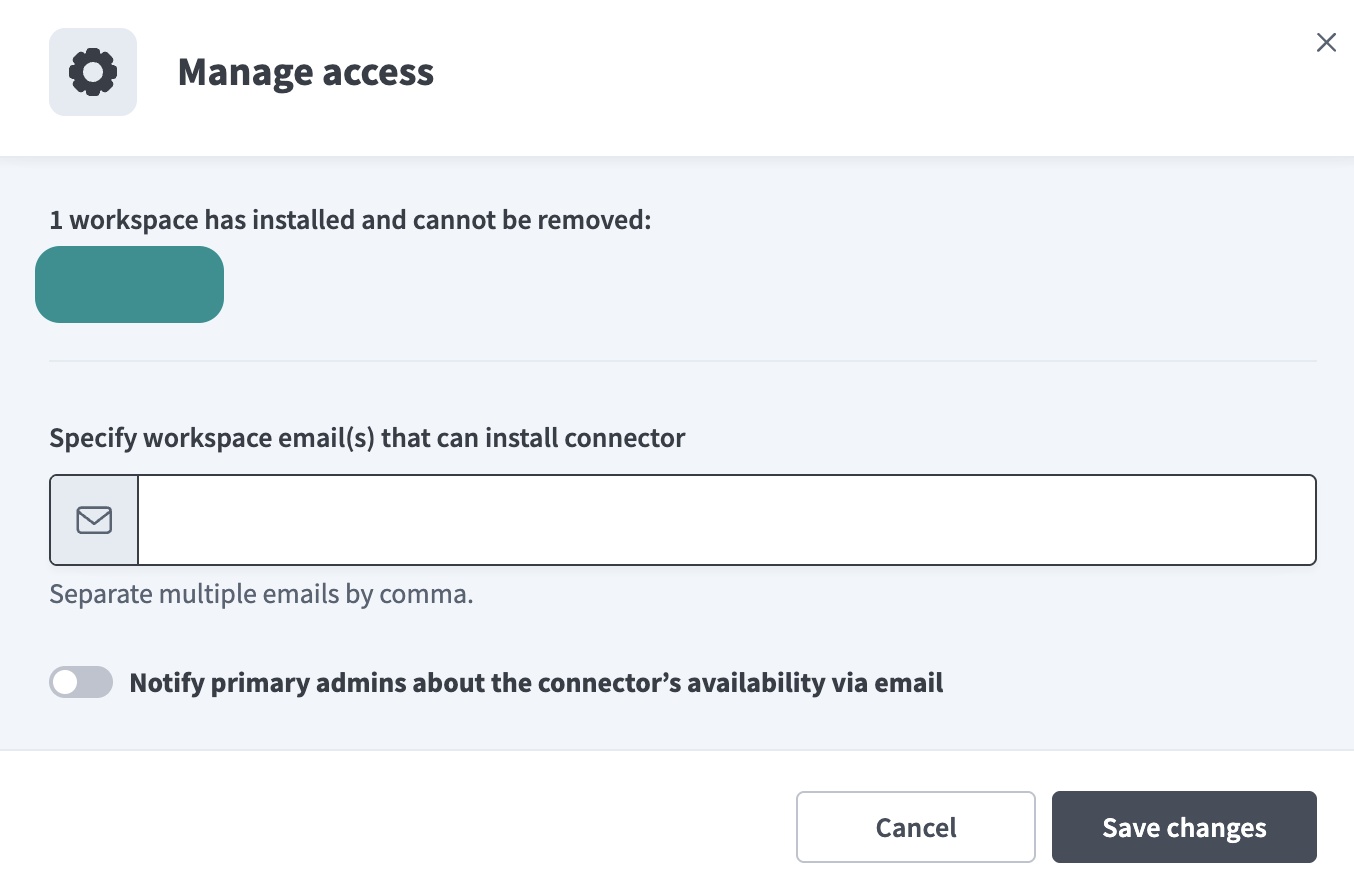
Click Manage access.
 Closed source managed access
Add workspace email addresses. Separate each email with a comma.
These workspaces can view and install the connector but can't access the source code.
 Manage access to your connector
Click the Notify primary admins about the connector’s availability via email toggle if you plan to notify primary admins about the changes.
Click Save changes.
Share a connector to the community library
Complete the following steps to share a connector to the community library:
Go to Tools > Connector SDK.
Select the connector you plan to share.
Click the connector you plan to upload
Go to the Share tab, then click Share version.
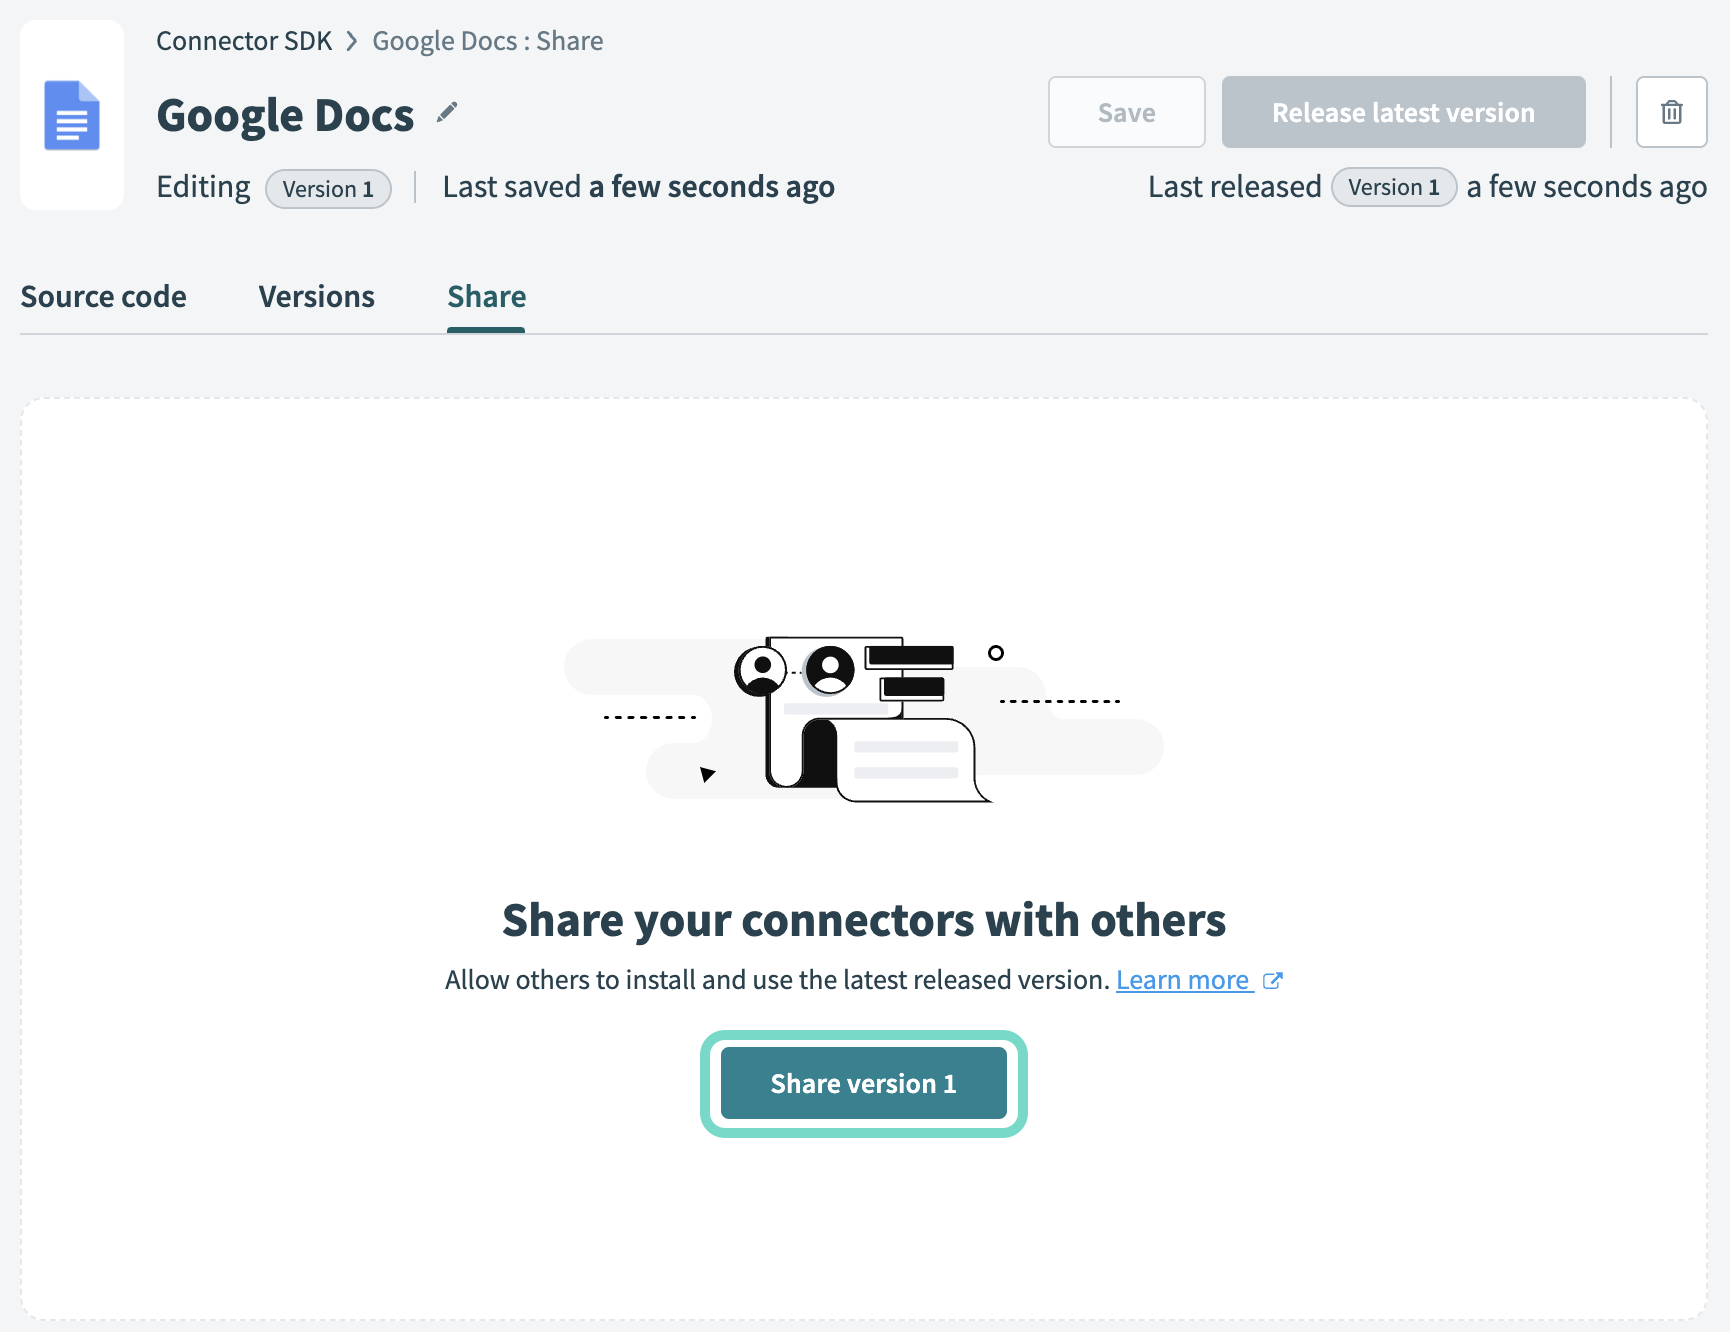 Click Share version
Optional. Click the Make source code hidden button if you plan to publish a closed-source connector. This ensures your connector code isn't visible or editable by others. You can't change this setting after publishing unless you unpublish the connector.
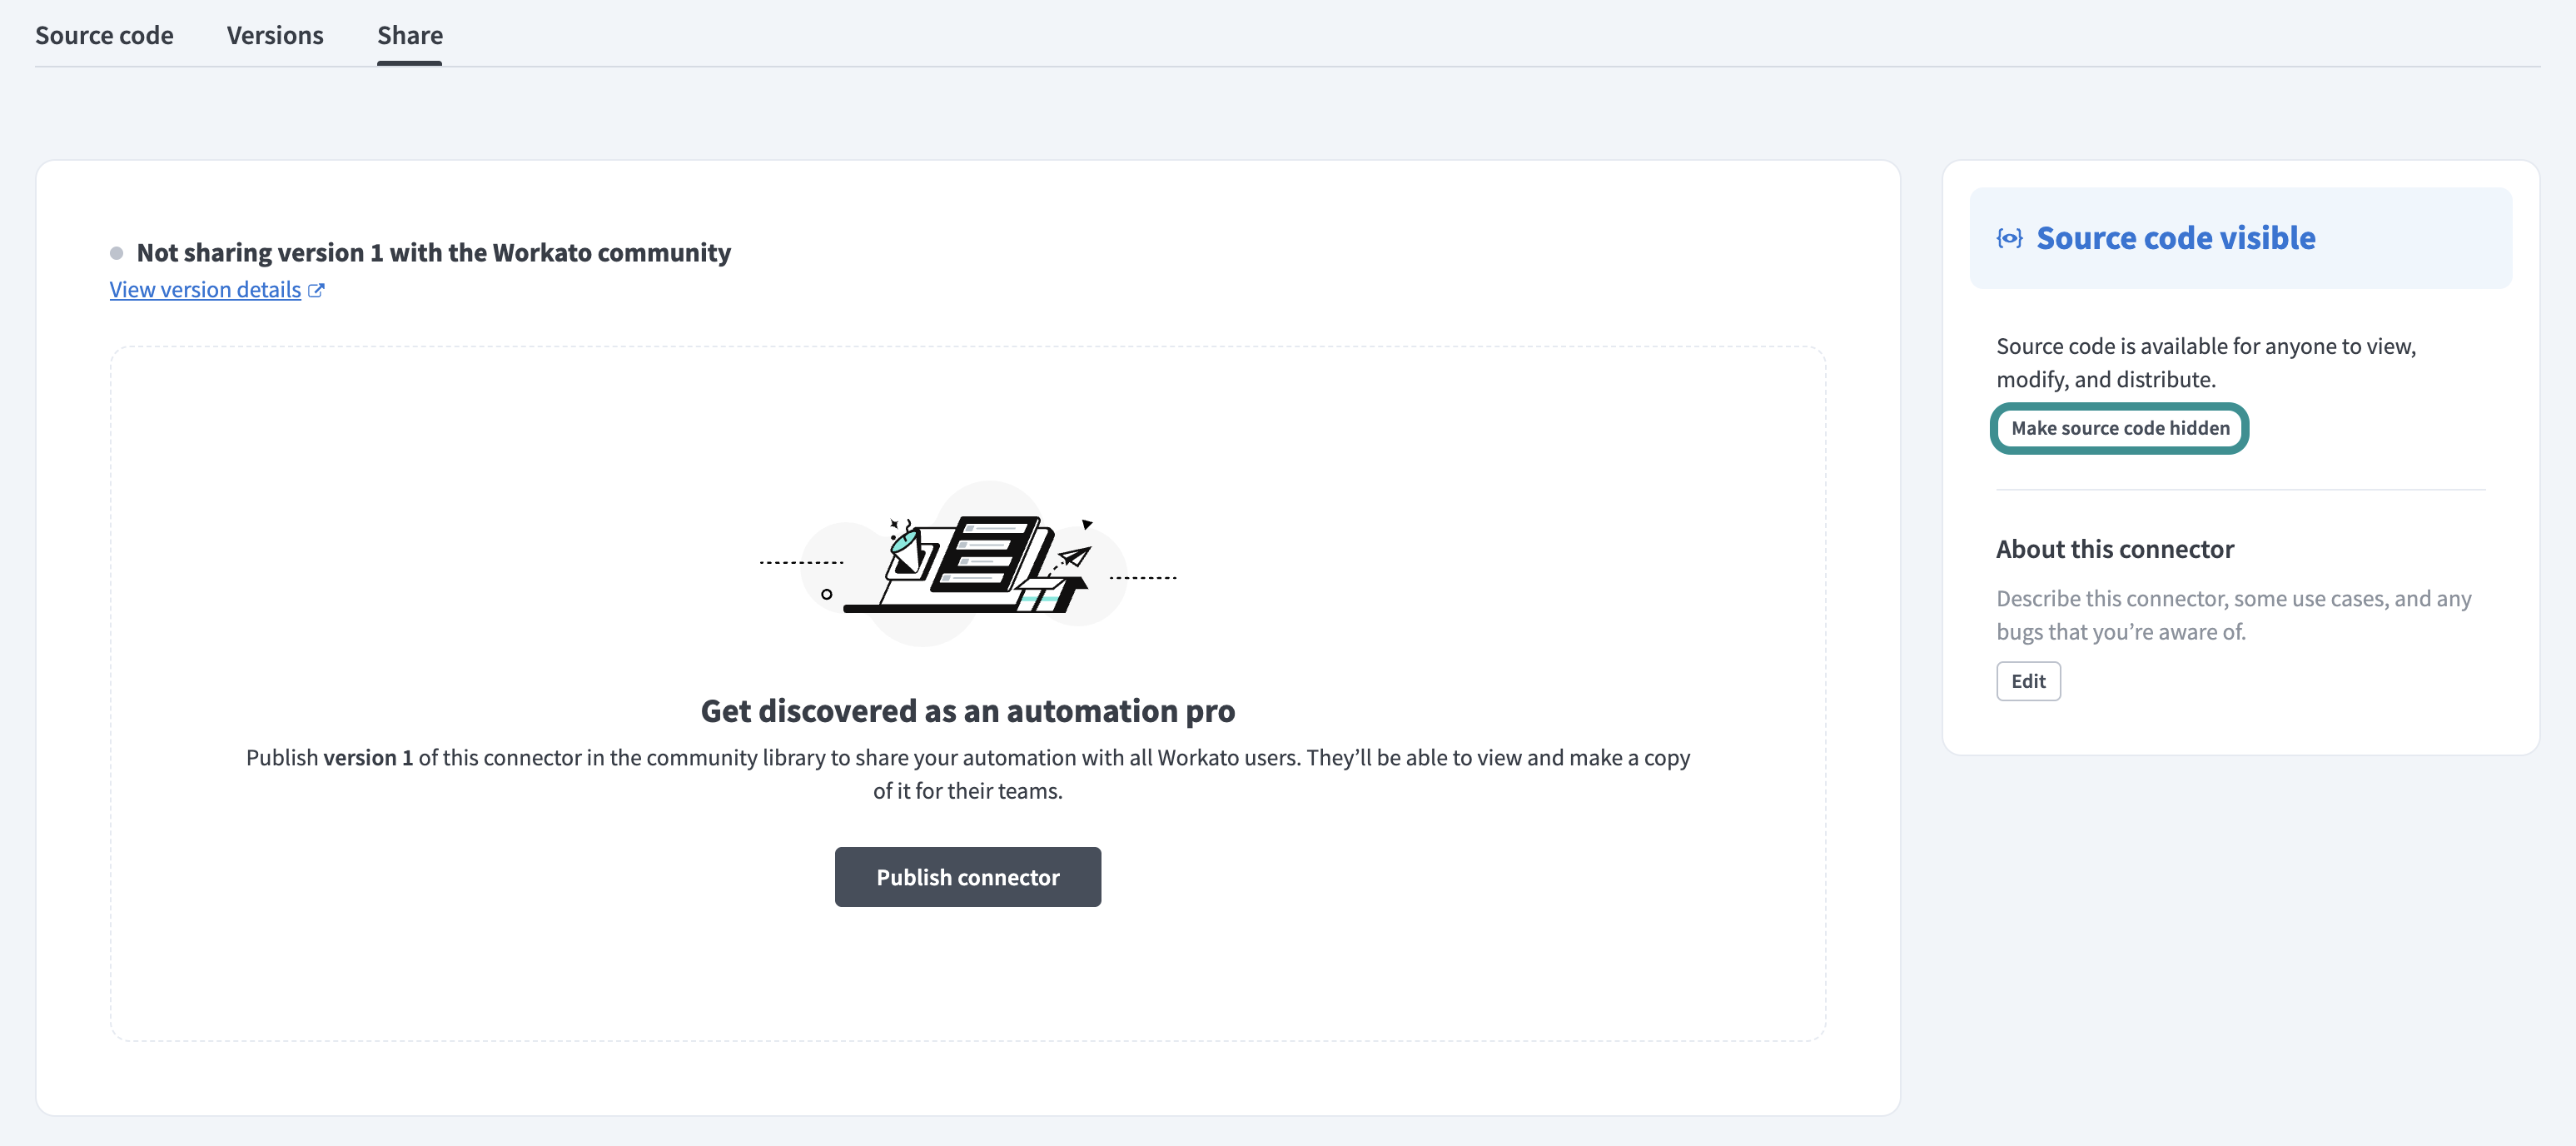 Choose to hide your source code
Click Edit in the connector description and ensure the description includes a clear way for users to contact support, such as a support email, documentation link, or help center. Submissions without support contact information may be rejected during review.
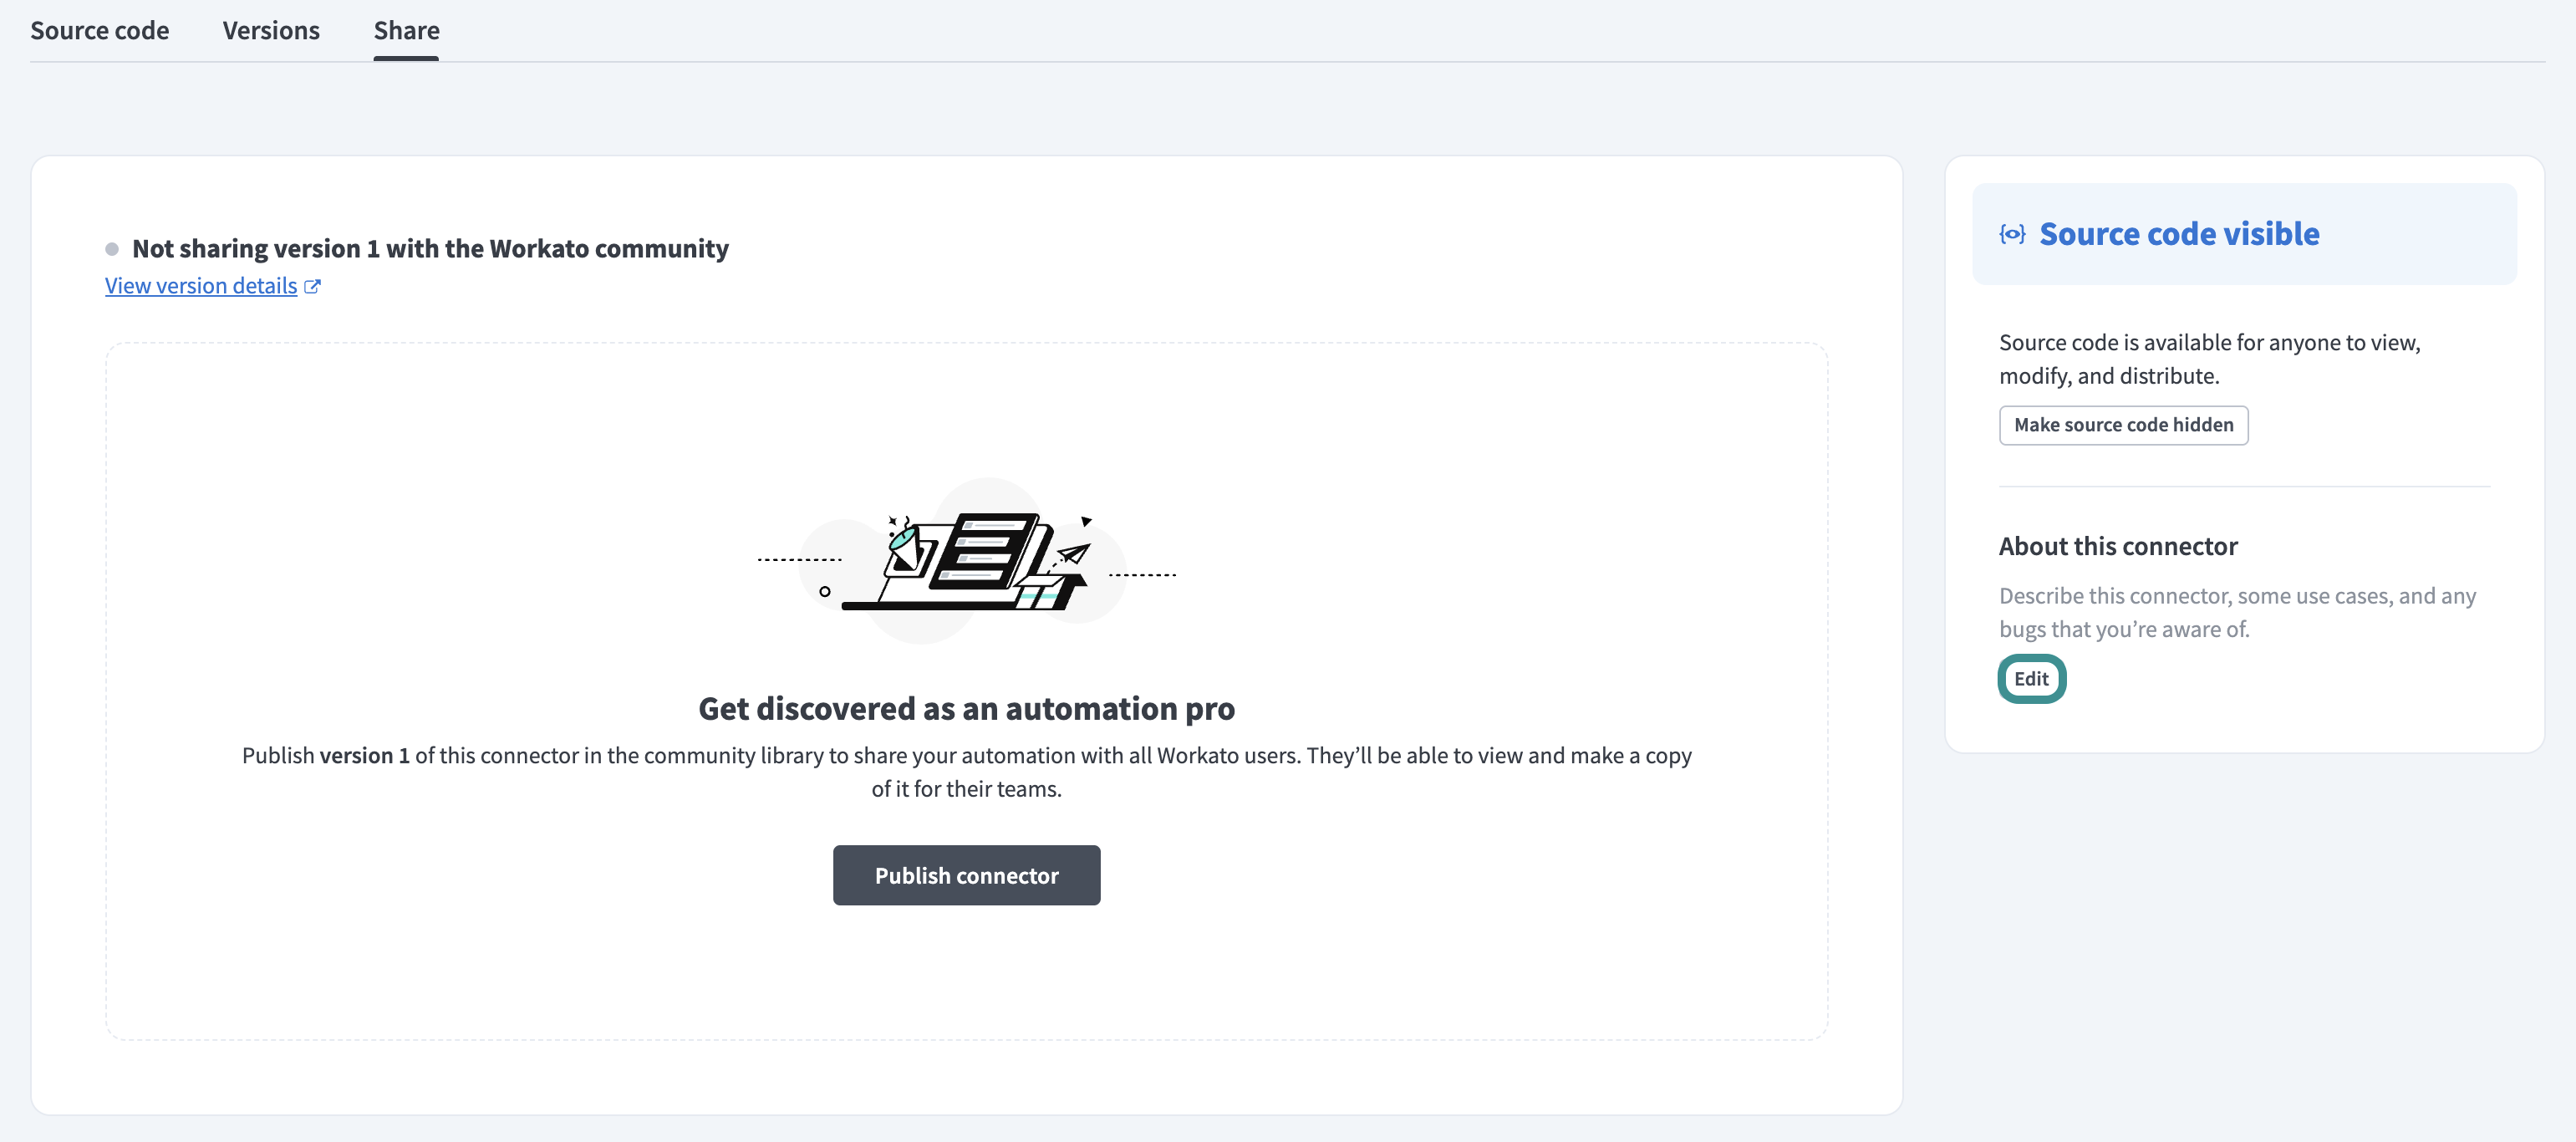 Edit connector description
Click Publish connector to open the List on community library dialog.
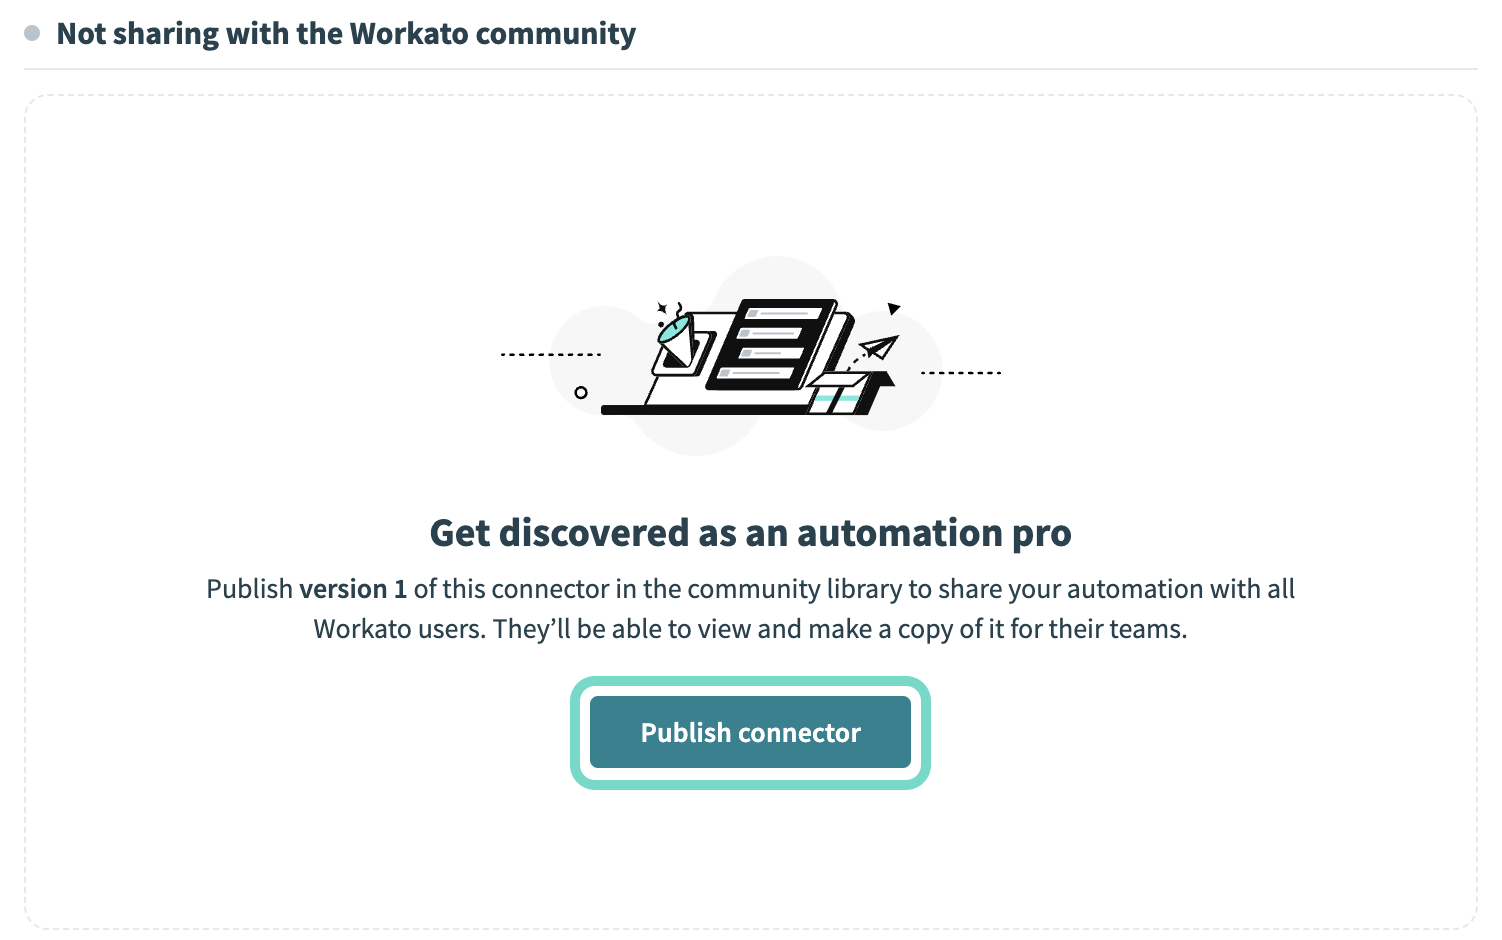 Click Publish connector
Enter the App name. This field is case-sensitive.
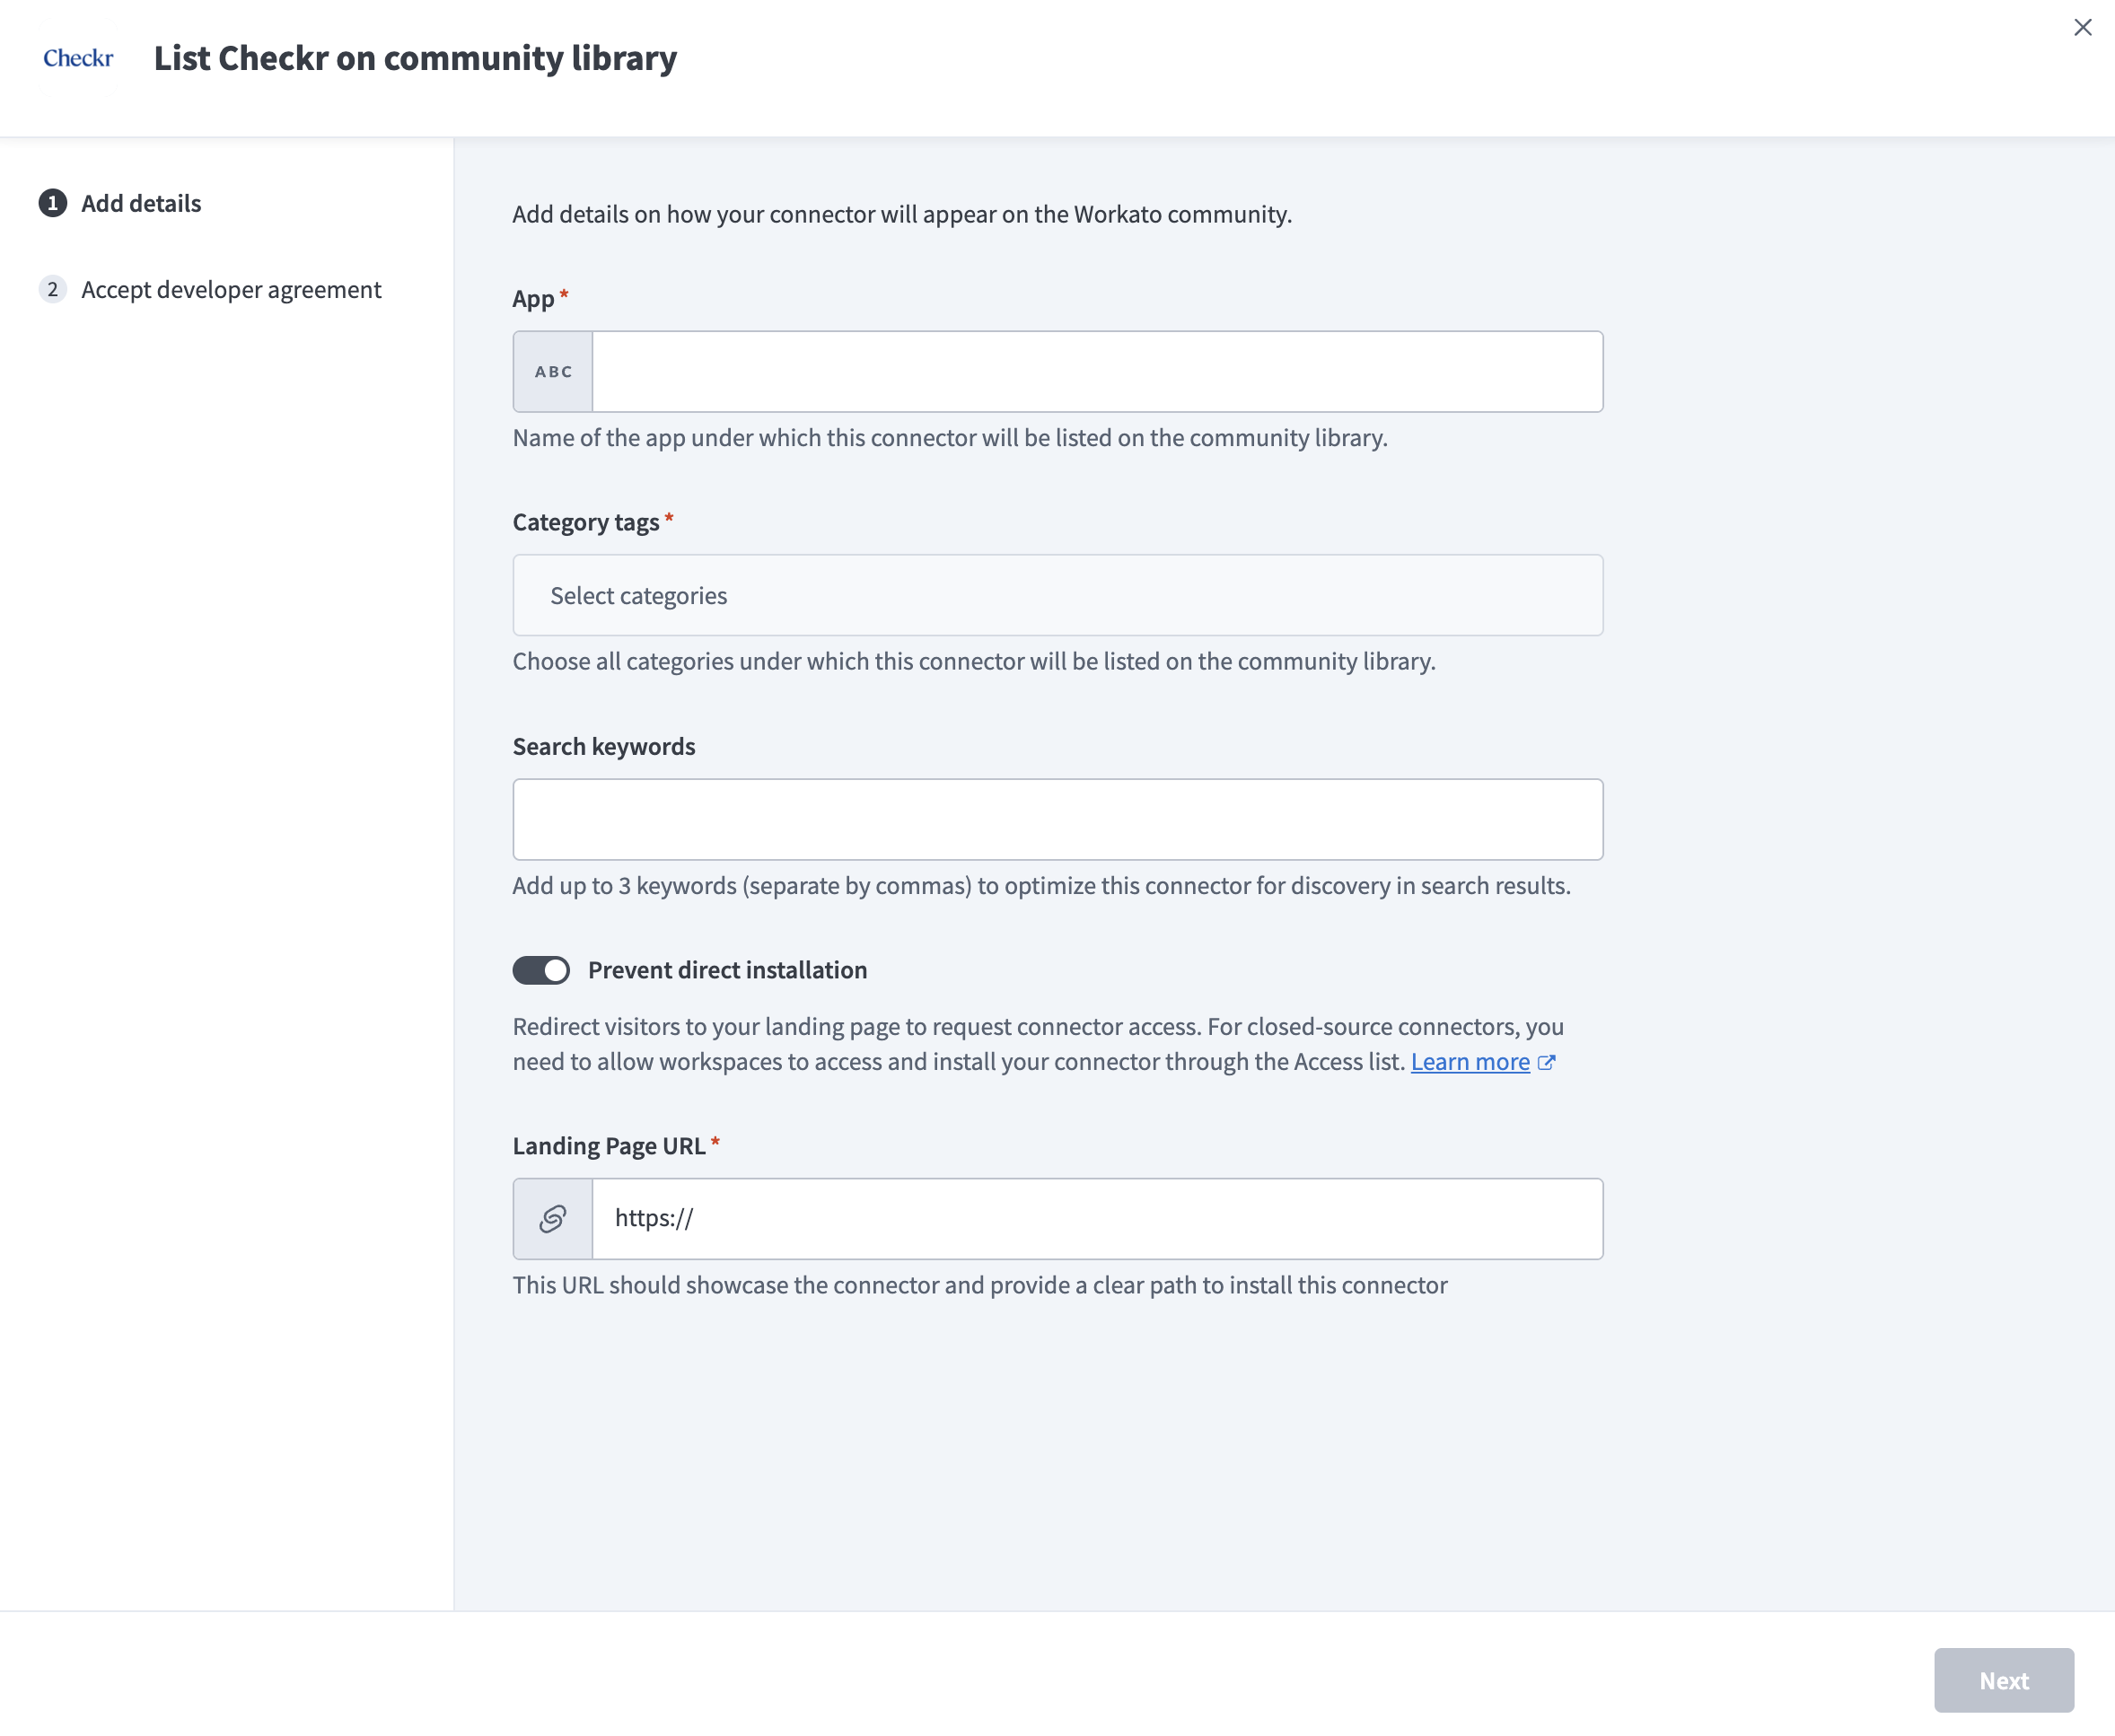 The Add details section
Select any relevant tags in the Category tags drop-down menu.
Enter up to three Search keywords, separated by commas.
Optional. Click the Prevent direct installation toggle if you plan to redirect visitors to a landing page to request access.
The following occurs when this option is enabled:
- End users can't install the connector directly from the community listing.
- Users can install the connector only through your private sharing link. Go to the Sharing privately using a link section of your connector's Share tab to obtain the link. Refer to Share a connector with a link to learn how to grant access to users.
- You must provide a Landing Page URL and a clear path.
Any workspace can install the connector directly from the community listing if you don't enable this toggle. Closed-source connectors hide the source code but don't restrict installation.
Provide a Landing Page URL if you enabled Prevent direct installation. The page you link to should showcase the connector and provide a clear path on how to obtain the private sharing link of the connector.
Read the Workato developer agreement and click the checkbox to accept the terms and conditions.
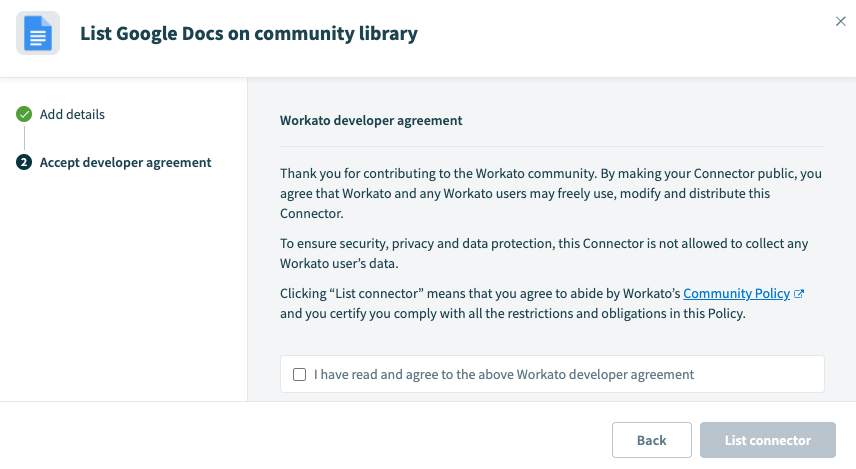 Read the Workato developer agreement
Click List connector to submit your connector for review.
Workato notifies you through your community profile's email when your connector has been reviewed.
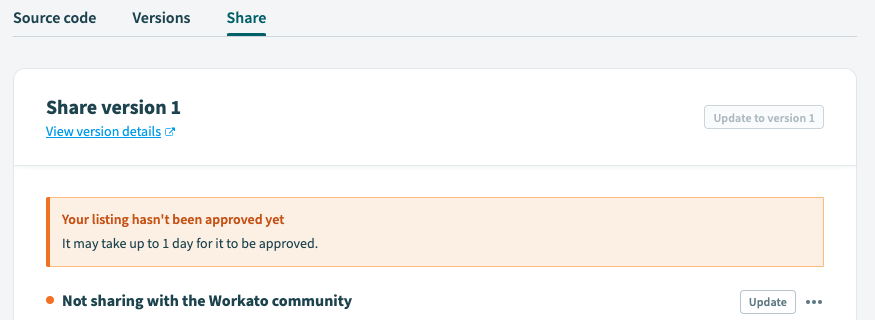 Monitor your connector's status
REQUIRED PERMISSIONS
Sharing connectors to the community library requires full access to the Connector SDK. If you don't have the required permissions, contact your workspace admin to help you share the connector.
Export packages with custom connectors
You can use the Recipe lifecycle management tool to export and import entire folders of recipes from a sandbox environment to a production environment in Workato. Recipes that you plan to export from one account and import into another often contain custom connectors that you have built or cloned. Workato helps to export custom connectors in the manifests when you export these recipes.
The latest released version and the attached version note of your custom connector used in recipes are included in the manifest export. Refer to Exporting recipes for more information.
Import a manifest with custom connectors
Workato first checks for an existing copy of the custom connector when you import a manifest. If no existing copy is found, a new custom connector is created with the latest released version as version 1. If an existing copy is found, a new latest version is created instead. In both cases, importing a manifest immediately releases the latest version of the custom connector for you because the recipes you are importing use that latest version. Refer to Importing recipes for more information.
EXPLORE RECIPE DEPENDENCIES
Be sure to explore dependencies in the existing recipes in your production account when importing a manifest that overwrites a connector.
Last updated: