Configure SAP BW OHD
The SAP BW OHD integration enables you to extract data from SAP BW Open Hub Destinations (OHD) into data pipelines using the SAP Data Agent.
This integration uses an asynchronous, package-based extraction method to securely and efficiently handle large datasets.
Overview
SAP Data Agent – BW OHD uses the SAP Data Agent to transfer Open Hub Destination data from SAP to Workato.
The following occurs when a pipeline runs:
- Workato sends an extraction request to SAP.
- SAP Data Agent collects data from the Open Hub Destination and stores it in temporary packages.
- Workato retrieves the packages sequentially.
- SAP Data Agent deletes temporary data after completion.
You can monitor logs in SAP using transaction code SLG1.
SAP Data Agent processes extraction requests asynchronously. It stages data temporarily in SAP and transfers it to Workato in controlled packages to handle large datasets efficiently.
Supported Open Hub Destination types
SAP Data Agent – BW OHD supports Open Hub Destinations with the following destination type:
- Database table
SAP Data Agent – BW OHD doesn't support Open Hub Destinations with the following destination types:
- File
- Third-party tool
Supported objects
SAP Data Agent – BW OHD supports Open Hub Destinations sourced from the following object types:
- DataSource
- DataStore object (advanced)
- DataStore object (classic)
- InfoObject
- InfoCube
- MultiProvider
- Semantically Partitioned Object
- Query
Set up SAP Data Agent
You must install and configure the SAP Data Agent on the SAP application server before creating a data pipeline.
SAP Data Agent installs as an ABAP transport in the SAP system. It exposes OData services under the /WKTO/ namespace and enables secure, package-based data extraction.
Supported SAP systems
The following SAP systems support SAP Data Agent – BW OHD:
| SAP system | Database | NetWeaver version | ABAP version |
|---|---|---|---|
| SAP ECC | Any | 7.4 EHP7 and above | 7.4 and above |
| SAP S/4HANA | SAP HANA | 1610 and above | 7.5 and above |
| SAP BW | Any | 7.4 EHP7 and above | 7.4 and above |
| SAP BW/4HANA | SAP HANA | 2.0 SPS07 and above | 7.5 and above |
BW OPEN HUB LICENSE
SAP ECC requires the BW Open Hub license as an additional license. SAP HANA-based systems include the license with the installation. Contact your SAP partner to confirm your license coverage.
Create an SAP user account
You must create a dedicated SAP user with the required authorization. SAP supports the following user types:
- Communication user (type C) for basic authentication
- System user (type B) for OAuth 2.0 (Authorization Code Grant or Client Credentials Grant)
Refer to the SAP OData OAuth 2.0 authentication guide for guidance on how to set up OAuth 2.0.
Provide the SAP username and password of the SAP Communication or System user.
Assign the required SAP role and authorization objects before testing connectivity.
Install SAP Data Agent
You must install SAP Data Agent by importing the ABAP transport request into the SAP system.
TRANSPORT REQUEST REQUIRED
Contact your Workato Account Executive or Customer Success Manager to obtain the ABAP transport request package.
The installation activates required OData services, assigns runtime components, and enables extraction under the /WKTO/ namespace.
Complete the following steps to install the SAP Data Agent:
Import the SAP transport request provided by Workato.
Assign the required SAP authorizations and roles to the user.
Activate SICF (SAP Internet Communication Framework transaction) services under the /WKTO/ namespace.
Maintain the local alias for services in transaction /IWFND/MAINT_SERVICE.
Configure OAuth settings if you use a system user.
Maintain required parameters in transaction /WKTO/CONFIG:
- Maintain
CSV_SEPto set the CSV separator. Use|(pipe). Enter only the separator character. - Maintain
BW_MSTR_CLEANUPto set the number of days before pipeline cleanup in the internal master table. Use7as the recommended value. - Maintain
FILEPATHto set theAL11path for storing export files. For example,D:\WORKATO\EXPORT\.
To uninstall SAP Data Agent, import the uninstall transport request provided by Workato into the SAP system.
Configure SAP role for BW OHD
Assign the required role and authorizations to the SAP user used for SAP Data Agent.
This role grants access to the required OData services and file-level permissions for data extraction.
Go to transaction code PFCG.
Open role /WKTO/BWOHD, or create a custom role that includes the required authorization objects.
Go to the Authorizations tab and select Change Authorization Data.
Ensure the role includes the following authorization objects and field values:
Summary of authorization included in the role
- S_SERVICE
- Authorizes access to SAP Data Agent BW OHD OData services under the
/WKTO/namespace. - S_DATASET
- Controls access to physical files on the SAP application server.
Authorization Field Values for S_SERVICE Object
- Program, transaction or Function
- SRV_NAME
- Values:
- 2EBD022B6AD68064044A4209FE6283 (/WKTO/DA_BWOH_SRV)
- 3296492449AF2A0CA265701D1572AA (/WKTO/DA_BWOH_SRV_0001)
- Type of check Flag (SRV_TYPE)
- HT
- Program Name with Search Help
- /WKTO/CL_DA_BWOH_DPC_EXT======CP
Authorization Field Values for S_DATASET Object
- Activity
- *
- Physical file name
- *
Generate the authorization profile and save the role.
Assign the role to the SAP user used for SAP Data Agent.
Expose SAP BW objects as an Open Hub Destination
You must expose your SAP BW data through an Open Hub Destination before the pipeline can extract it. Two objects are required to expose data through Open Hub:
- Open Hub Destination (OHD): Defines the target (database table) and the field mapping from the source InfoProvider.
- Data Transfer Process (DTP): Moves data from the source InfoProvider into the Open Hub Destination, and supports full or delta loads.
PREREQUISITES
Before you begin, ensure you have completed the following tasks:
- Obtain authorization for transaction
RSA1(BW Modeling) and Open Hub objects. - Activate and load the source InfoProvider (DSO, ADSO, or InfoCube) with data.
Create the Open Hub Destination
Complete the following steps to create the Open Hub Destination:
Log on to the BW system and run transaction RSA1.
Go to the InfoArea that contains the source InfoProvider you plan to expose in the Modeling tree.
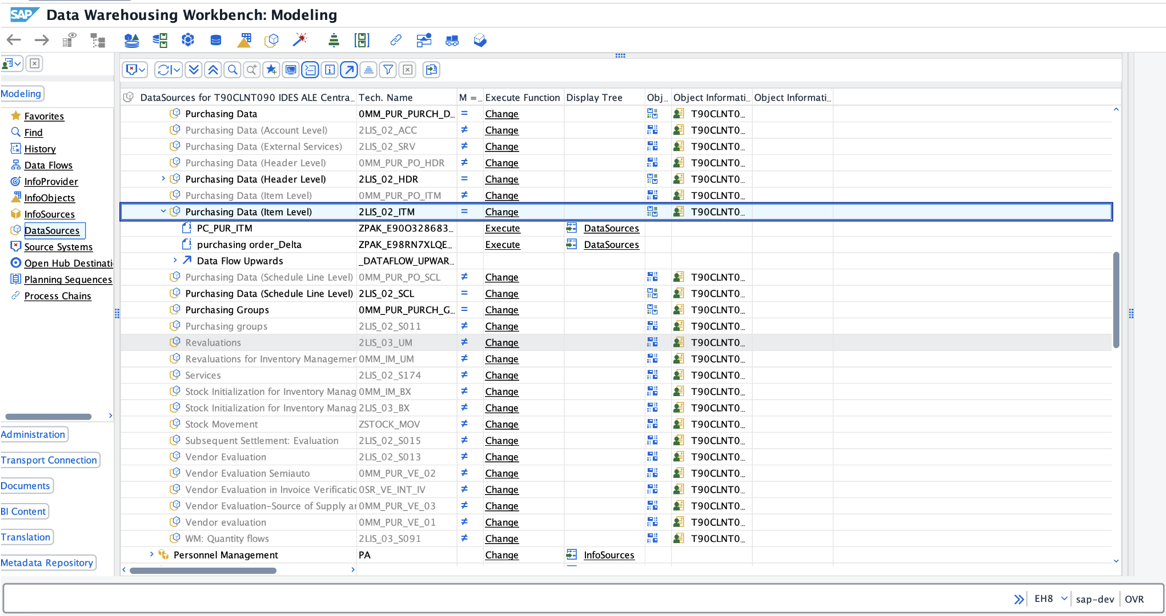 BW Modeling tree in RSA1
Create a new Open Hub Destination in the InfoArea.
Enter a technical name and description for the Open Hub Destination. For example, OHD_PUR.
Select the source InfoProvider (DSO, ADSO, or InfoCube), InfoObject, or DataSource that holds the data to expose.
Use the Destination Type field to select Database Table. SAP generates a transparent table, such as /BIC/OHOHD_PUR, for direct downstream SQL access.
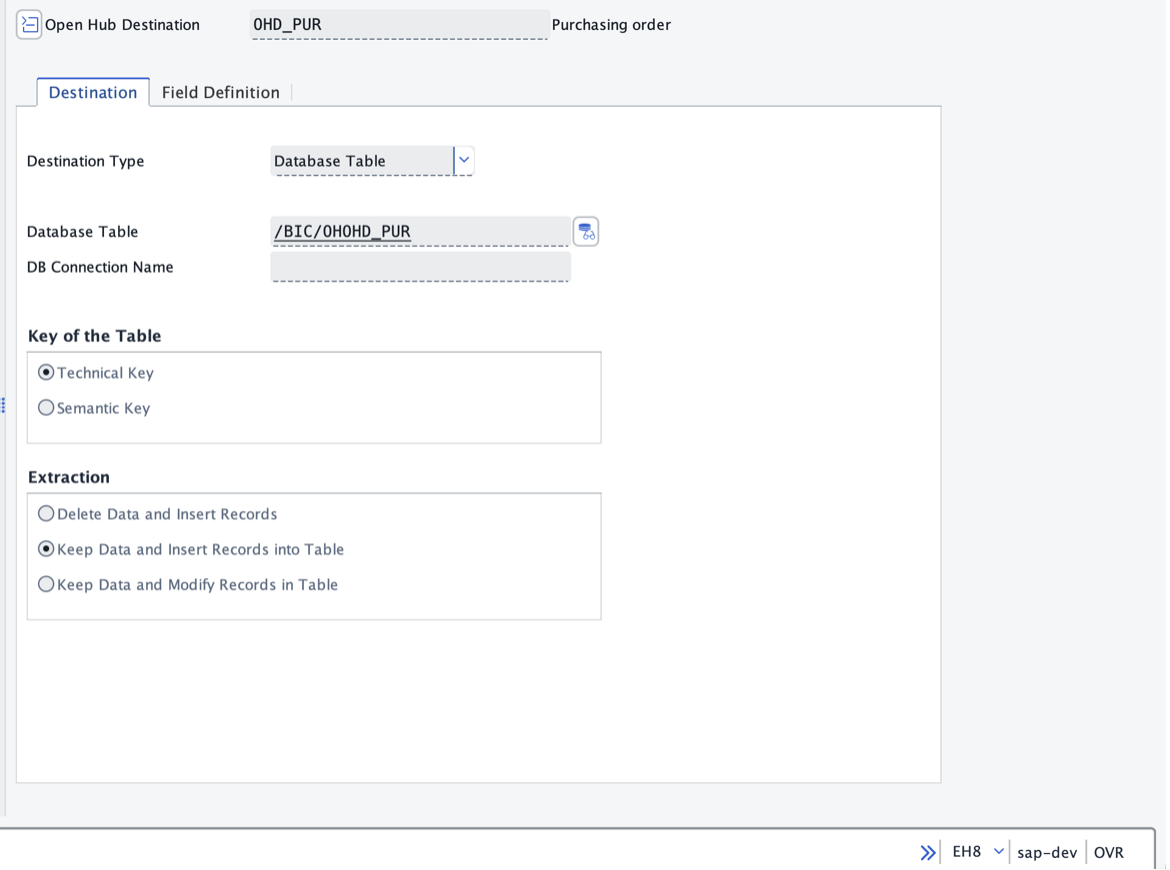 Open Hub Destination definition with database table destination type
Save the Open Hub Destination. BW proposes field names based on the source structure.
Map fields
Complete the following steps to map the source fields to the target table:
Review the auto-proposed mapping between source InfoObjects and target fields on the Field Definition tab.
Adjust data types, lengths, or field names as required by the receiving system.
Optional. Exclude fields that the target system doesn't need, such as technical BW fields.
Activate the Open Hub Destination after you confirm the mapping.
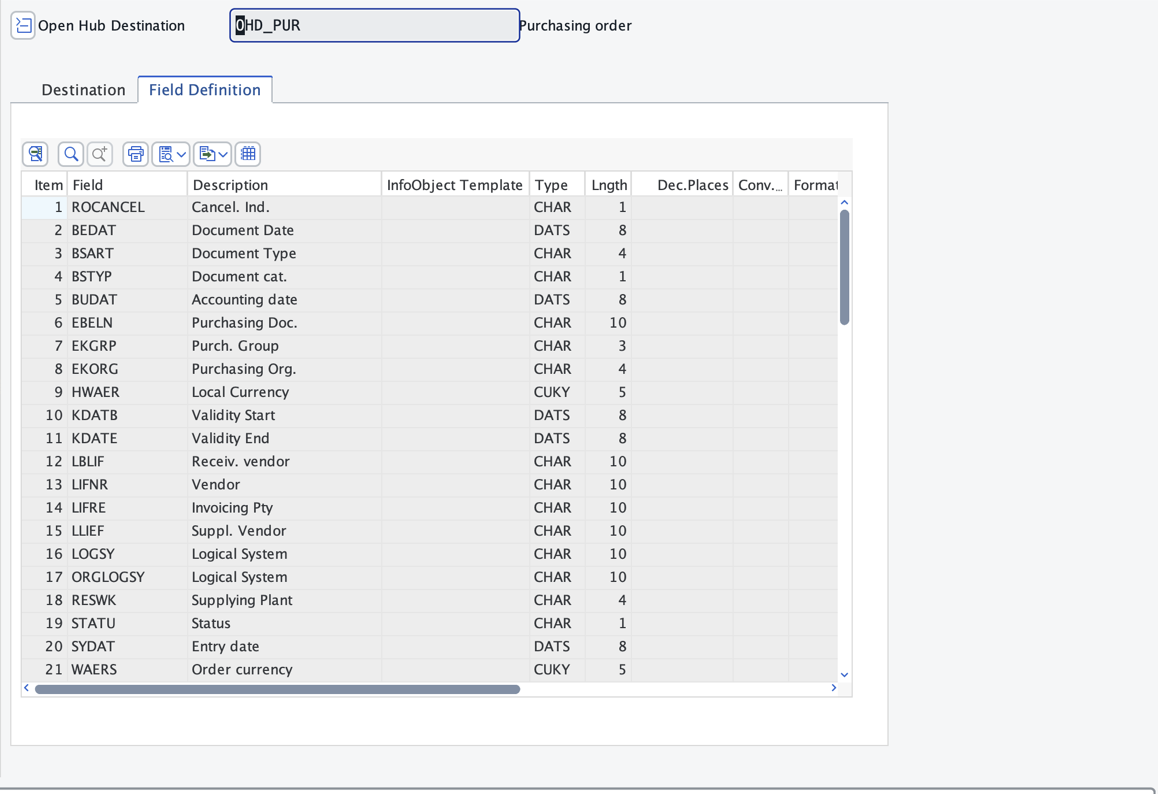 Field definition tab with confirmed mapping
Create the Data Transfer Process
Complete the following steps to create the Data Transfer Process:
Right-click the Open Hub Destination you created and select Create Data Transfer Process.
Use the Extraction Mode field on the Extraction tab to choose the DTP type:
- Full extracts the entire dataset every run. Use this type for initial loads or small static datasets.
- Delta extracts only new or changed records after the last run. Use this type for recurring, incremental loads.
Set filters on the Extraction tab if you plan to expose only a subset of data, such as a specific fiscal year, plant, or sales organization.
Activate the DTP.
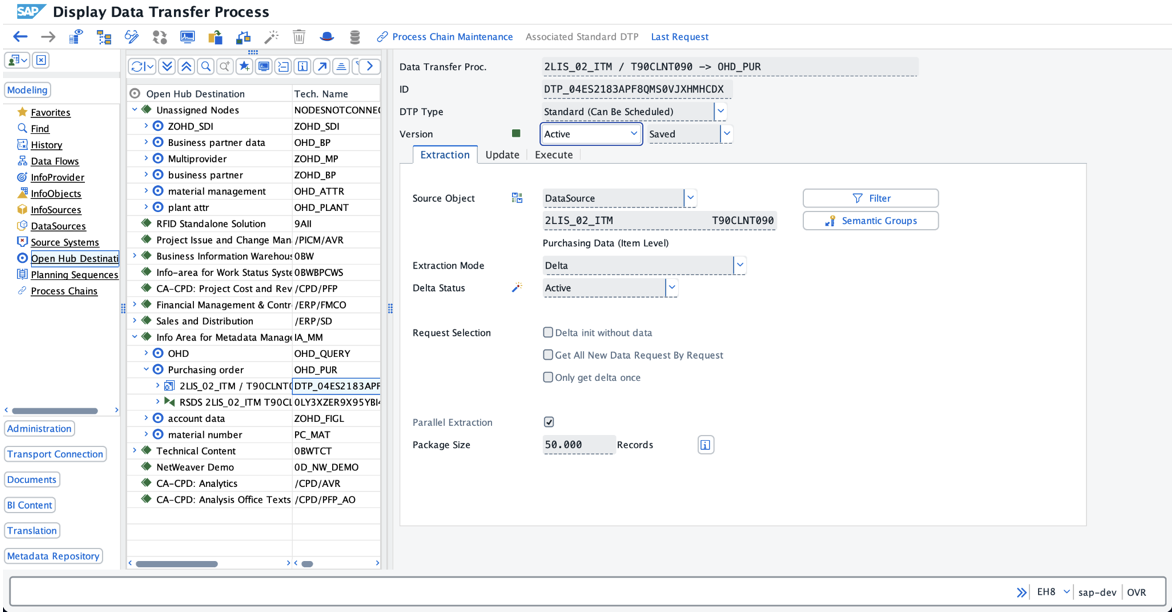 Data Transfer Process configuration
DTP TYPE AND SYNC MODE
The DTP type determines the sync mode you select when you configure the pipeline. Select Full sync for a Full DTP and Incremental sync for a Delta DTP.
Execute and validate the DTP
Complete the following steps to execute and validate the Data Transfer Process:
Execute the DTP manually for the first run, or schedule it through a process chain for recurring loads.
Monitor the execution in the DTP monitor and confirm the record count matches expectations.
Validate the output and check the contents of the generated database table.
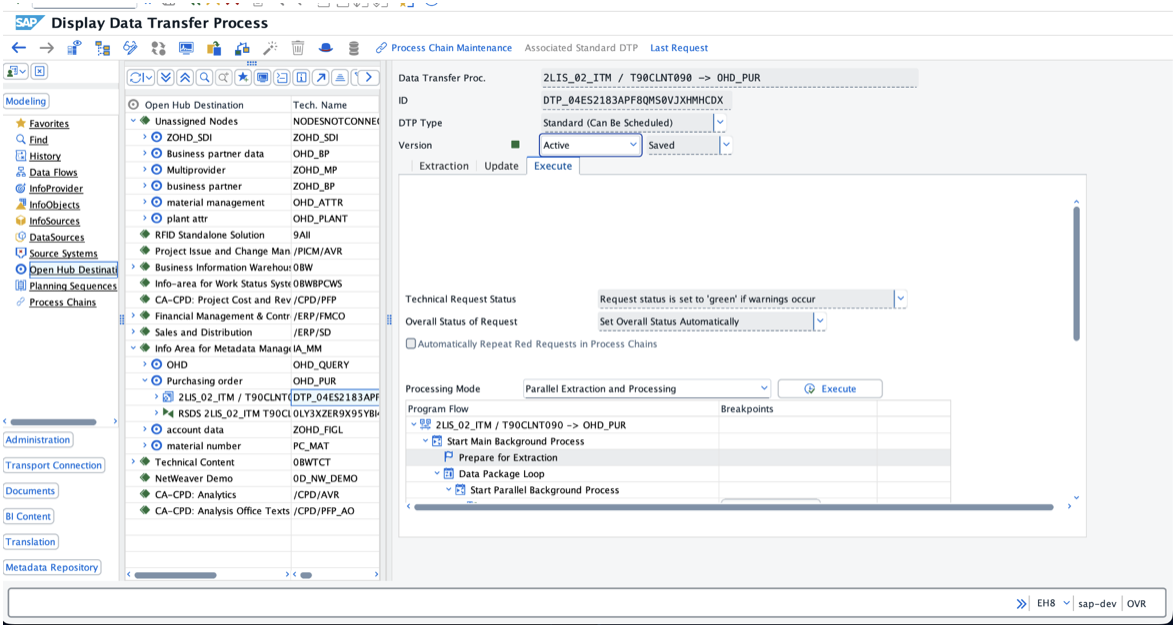 DTP monitor showing completed execution
Establish OData connectivity between Workato and SAP
You must configure connectivity between Workato and the SAP system before creating a data pipeline.
SAP Data Agent exposes OData services that Workato uses for authentication, extraction, and cleanup operations.
Connect to SAP on-premise systems
Deploy a Workato on-prem agent (OPA) if your SAP system doesn't expose OData services to the public internet.
The on-prem agent establishes a secure outbound connection from your network to Workato and enables access to internal SAP OData services.
Complete the following steps to connect to SAP on-premise systems:
Install and register a Workato on-prem agent in your workspace.
Ensure the SAP system exposes the required OData services under the /WKTO/ namespace.
Verify network connectivity between the on-prem agent host and the SAP application server.
Connect without an on-prem agent
Whitelist Workato IP addresses on the SAP HTTPS port to allow inbound traffic from Workato. You can find the HTTPS port in transaction SMICM or SAP Web Dispatcher.
Ensure the SAP OData service endpoint remains externally accessible over HTTPS.
Configure the development environment (on-prem agent)
In development environments, you may disable certificate validation in the on-prem agent configuration to troubleshoot connectivity issues.
Edit the config.yml file in the OPA conf directory:
http:
  trustAll: true
  verifyHost: false
Refer to the On-prem agent HTTP profile documentation for more information about HTTP profile configuration options.
Use this configuration only in non-production environments.
Create and configure a data pipeline
After you install SAP Data Agent and establish connectivity, create a data pipeline to extract data from an Open Hub Destination.
Create the SAP OData connection
Complete the following steps to create the SAP OData connection:
Click Create > Connection or press C twice.
Search for SAP OData and select it as your app.
Provide a name for your connection in the Connection name field.
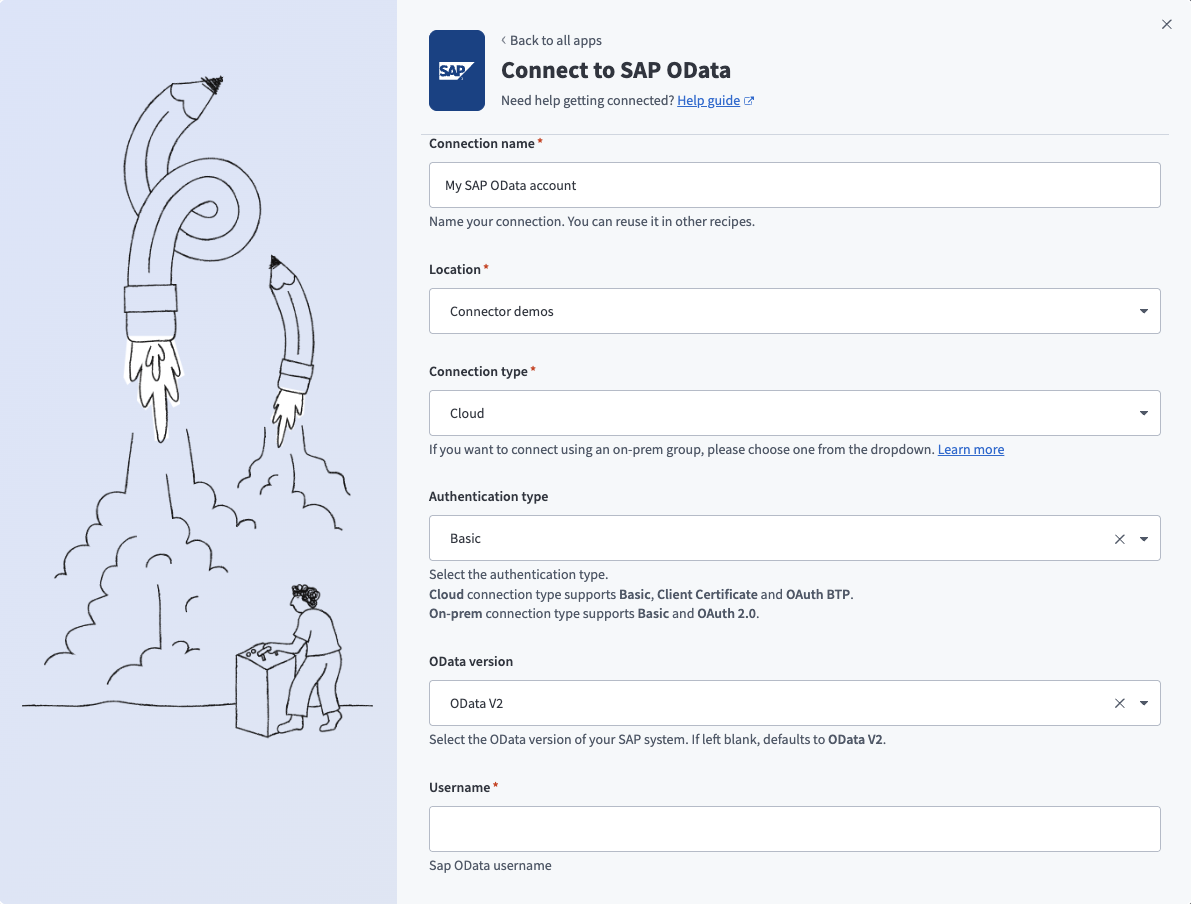 Create an SAP OData connection
Use the Location drop-down menu to select the project where you plan to store the connection.
Complete the following fields in Workato to establish the SAP OData connection:
| Field | Description |
|---|---|
| Connection type | Select the connection type based on your SAP deployment. Choose On-premise (through Secure Gateway) if your SAP instance runs on a network that doesn't allow direct external connections. Ensure you have an active on-prem agent before attempting to connect. Choose Cloud if SAP exposes OData services publicly. Requests are sent directly from Workato servers. |
| Authentication type | Select the authentication method. Supported methods include Basic, OAuth 2.0 Client Credentials, and OAuth 2.0 Authorization Code. Choose the method that matches your SAP user configuration. |
| OData version | Select OData V2. |
| Username | Enter the username of the SAP Communication user (type C) or System user (type B). |
| Password | Enter the corresponding password. |
| Host URL | Enter https://<hostname>/sap/opu/odata/ as the base path of the SAP OData services. |
| Service | Enter WKTO/DA_CM_SRV as the OData service name configured in SAP. |
| SAP Client | Enter the SAP client used for login. For example, if your service URL is https://<hostname>/sap/opu/odata/WKTO/DA_CM_SRV?sap-client=800, enter 800. This field applies only to on-prem SAP systems. |
Click Connect to validate the credentials and connection configuration.
Verify the following if the connection fails:
- SAP credentials
- Host URL format
- Service name
- Network accessibility
Common errors include 401 Unauthorized and Host unreachable.
Create a data pipeline
Complete the following steps to create a new data pipeline:
Select Create > Data pipeline or press C+I.
Enter a name for the data pipeline in the Data pipeline name field.
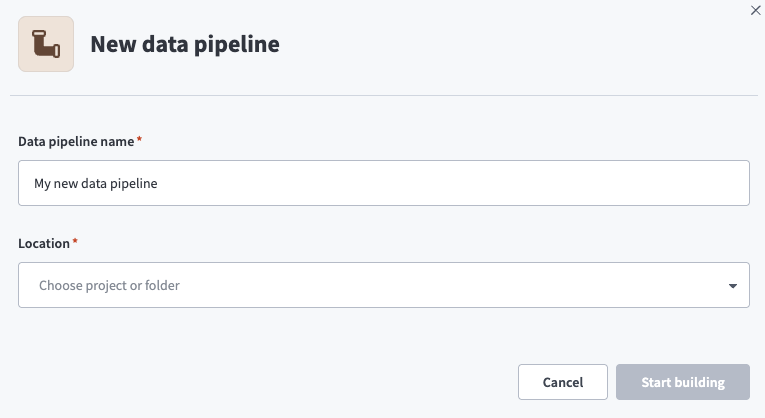 Data pipeline setup
Use the Location drop-down menu to select the project where you plan to store the data pipeline.
Click Start building.
Configure the SAP source
Complete the following steps to configure SAP as the source application:
Click the Extract new/updated records from source app trigger. This trigger defines how the pipeline retrieves data from the source application.
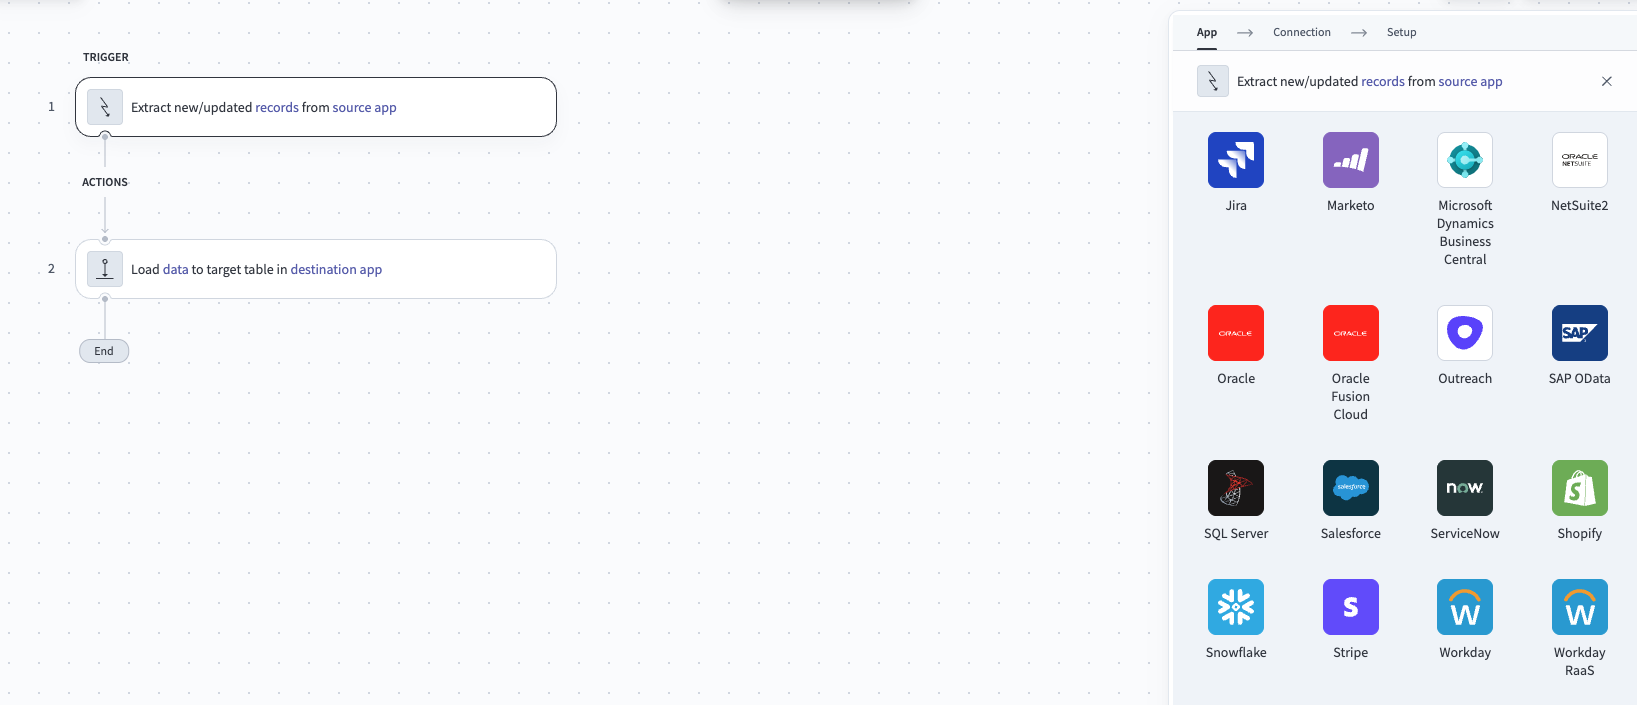 Configure the Extract new/updated records from source app trigger
Select SAP OData as the source application.
Choose the SAP OData connection to use for this pipeline. Alternatively, click + New connection to create a new connection.
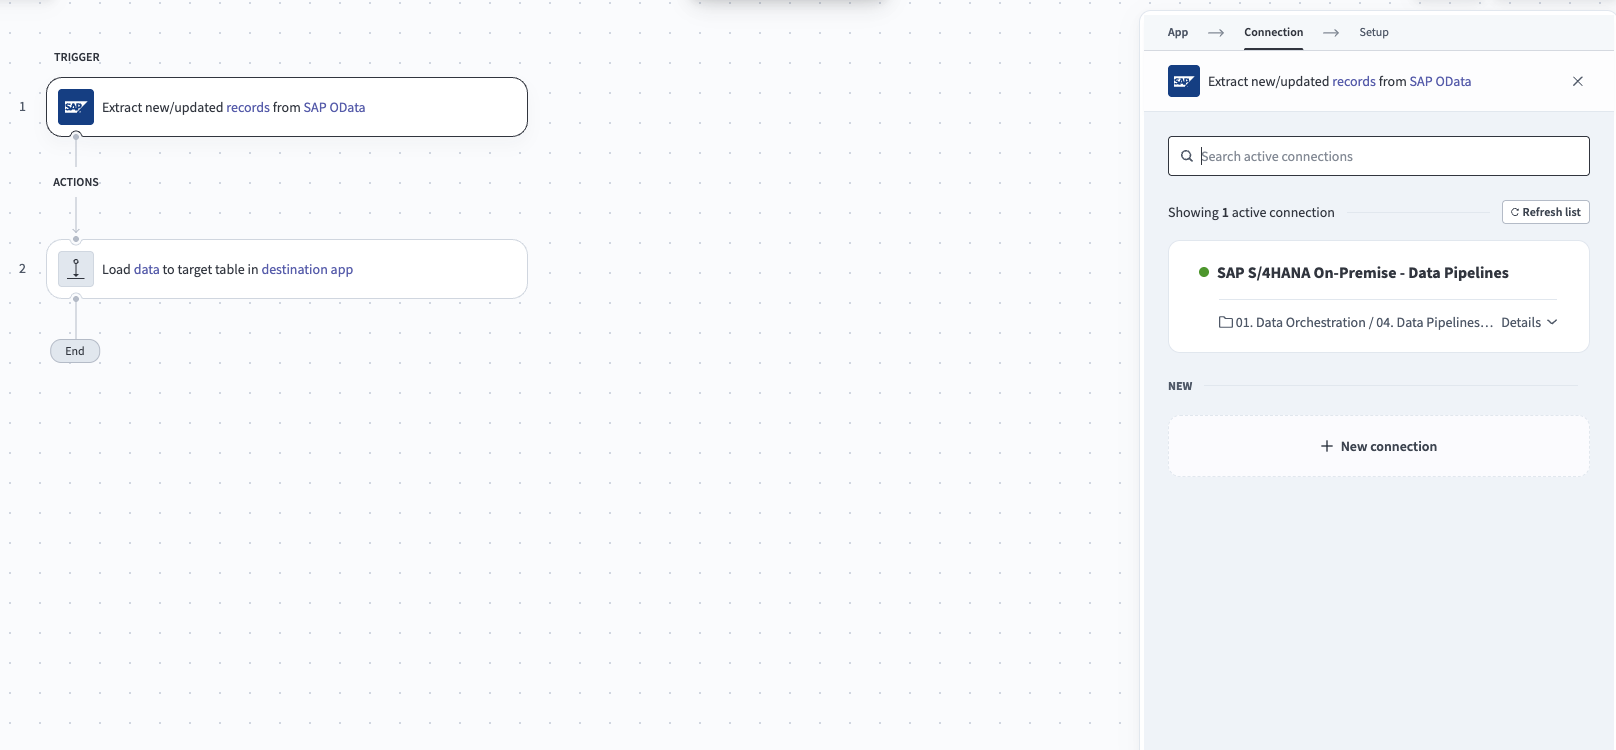 Choose the SAP OData connection
Click Add object to select the Open Hub Destination to extract.
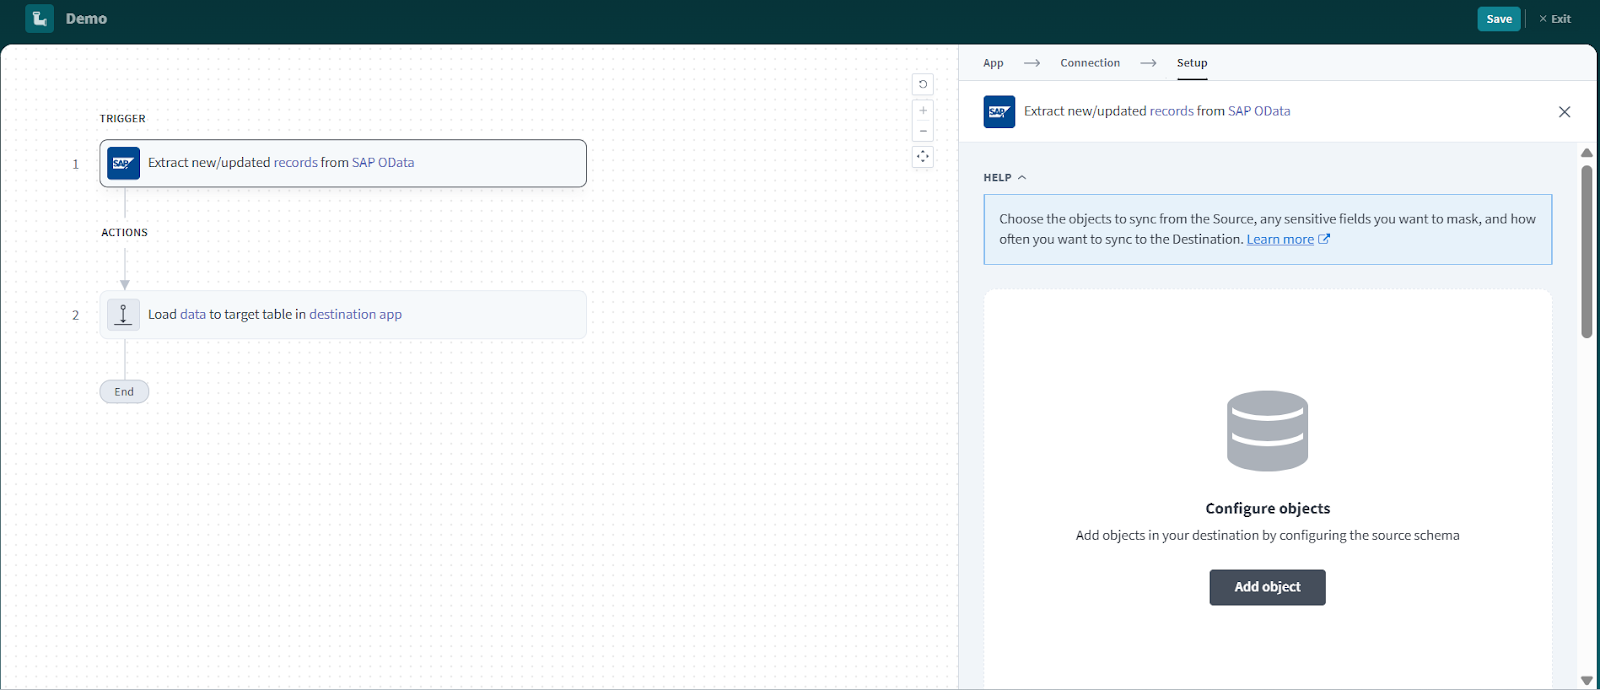 Add object
Enter at least three uppercase characters of the Open Hub Destination name in the search field.
Open Hub Destination names are case-sensitive and use uppercase letters.
Select the Open Hub Destinations from the search results.
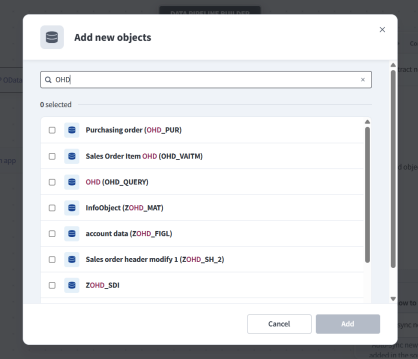 Select Open Hub Destinations
Click Add to confirm the selection.
Select the sync mode
The sync mode you select must match the extraction behavior of the data source that feeds the Open Hub Destination in the source system.
Open the settings for the object in the objects section and select the sync mode:
- Select Full sync if the data source provides a full dataset during each extraction.
- Select Incremental sync if the data source provides only delta (new or changed) records.
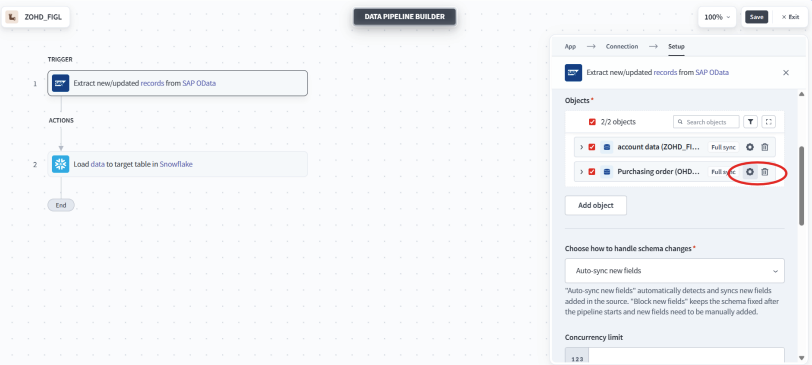 Configure the sync mode
SYNC MODE ALIGNMENT
You are responsible for ensuring that the configured sync mode aligns with the extraction logic of the data source in the source system.
Define the schema
After you add the Open Hub Destination, the pipeline automatically fetches the schema for each selected object. Review and customize the schema to ensure the destination matches the source:
Expand any object to view the list of available fields.
Keep all fields selected to extract all data, or deselect specific fields to exclude them from extraction and schema replication.
Optional. Configure field-level data protection for each non-key field:
- Replicate as is (default): Data values at the source are replicated identically to the destination.
- Hash: Hash sensitive data values in the column before syncing to your destination.
Click Add object again to add more objects using the same flow. You can repeat this step to include multiple Open Hub Destinations in your pipeline.
Use the Choose how to handle schema changes drop-down menu to select a schema drift handling option:
- Auto-sync new fields: Automatically detects and syncs new fields added in the source.
- Block new fields: Keeps the schema fixed after the pipeline starts. You must add new fields manually. This option may cause the destination to fall out of sync if the source schema updates.
Refer to Schema replication and schema drift management for more information.
Configure advanced settings
Configure pipeline-level settings to control execution behavior and SAP system impact:
Adjust the Concurrency configuration.
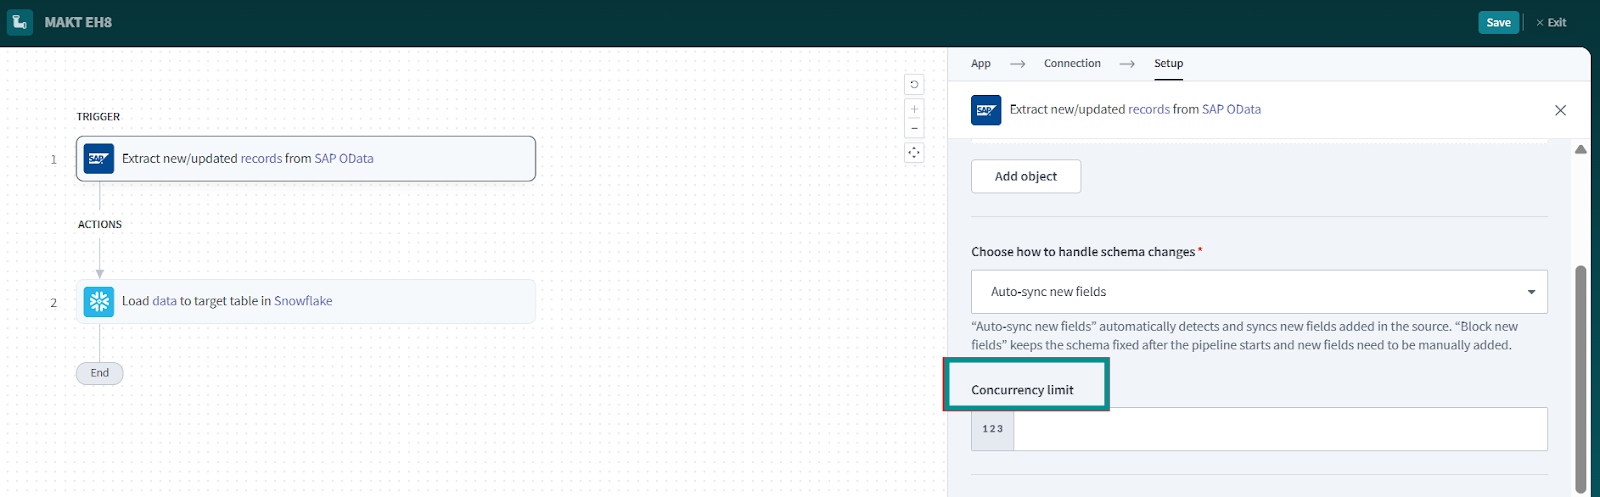 Adjust the concurrency configuration
Concurrency defines how many pipeline jobs run simultaneously:
- Higher values allow parallel executions and increase throughput.
- Lower values reduce load on the SAP system and help prevent table locks or performance issues.
Adjust concurrency carefully to avoid excessive load on the SAP system.
Set the Frequency.
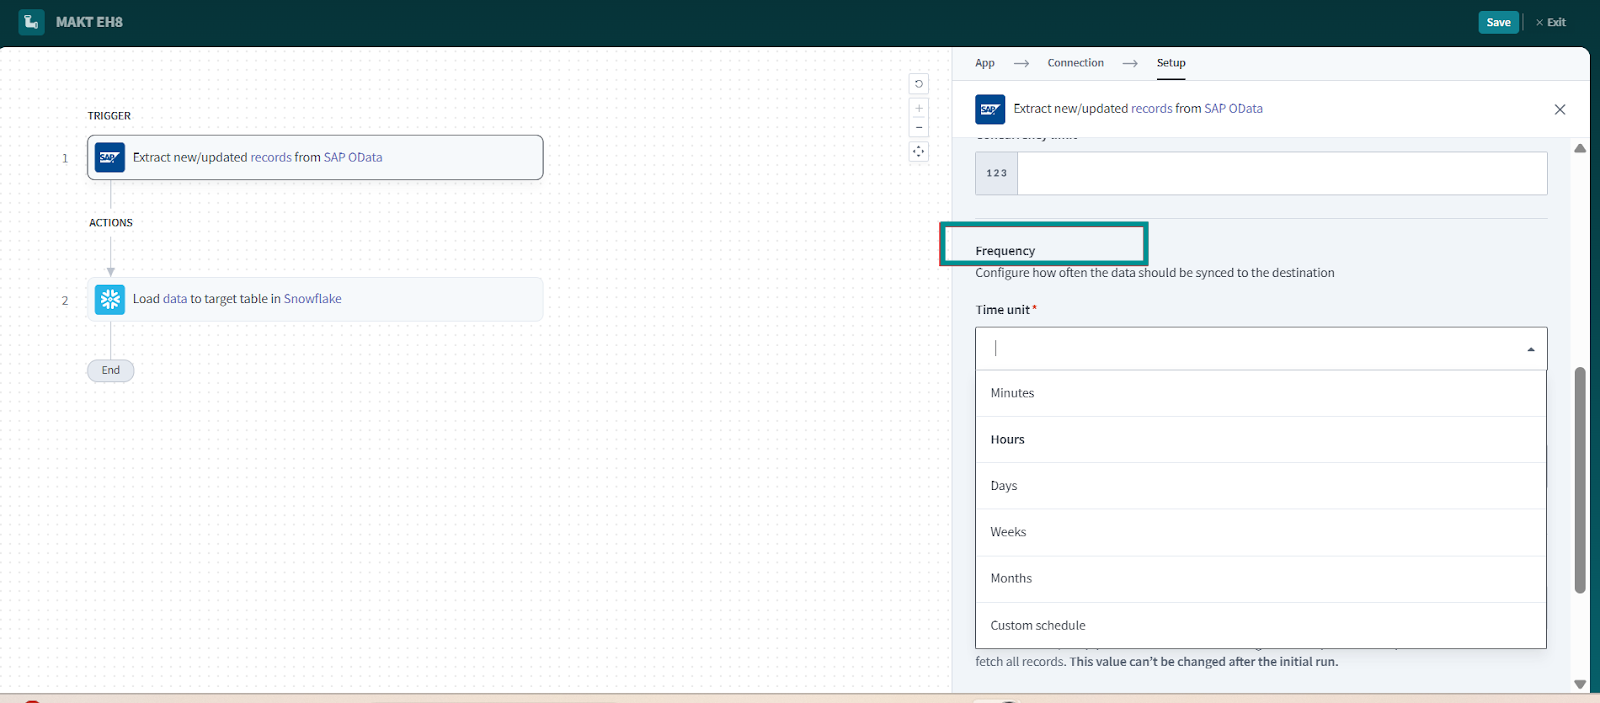 Configure frequency
Frequency defines how often the pipeline runs, such as every few minutes, hourly, or daily. Select a frequency that balances data freshness with SAP system performance and stability.
Choose either a standard time-based schedule or define a custom cron expression in the Frequency field. This determines how often the pipeline syncs data from SAP BW OHD to the destination.
Configure the destination
After you configure the SAP source and advanced settings, select the destination for your data.
Click the Load data to target table in destination app action. This action defines how the pipeline replicates data in the destination.
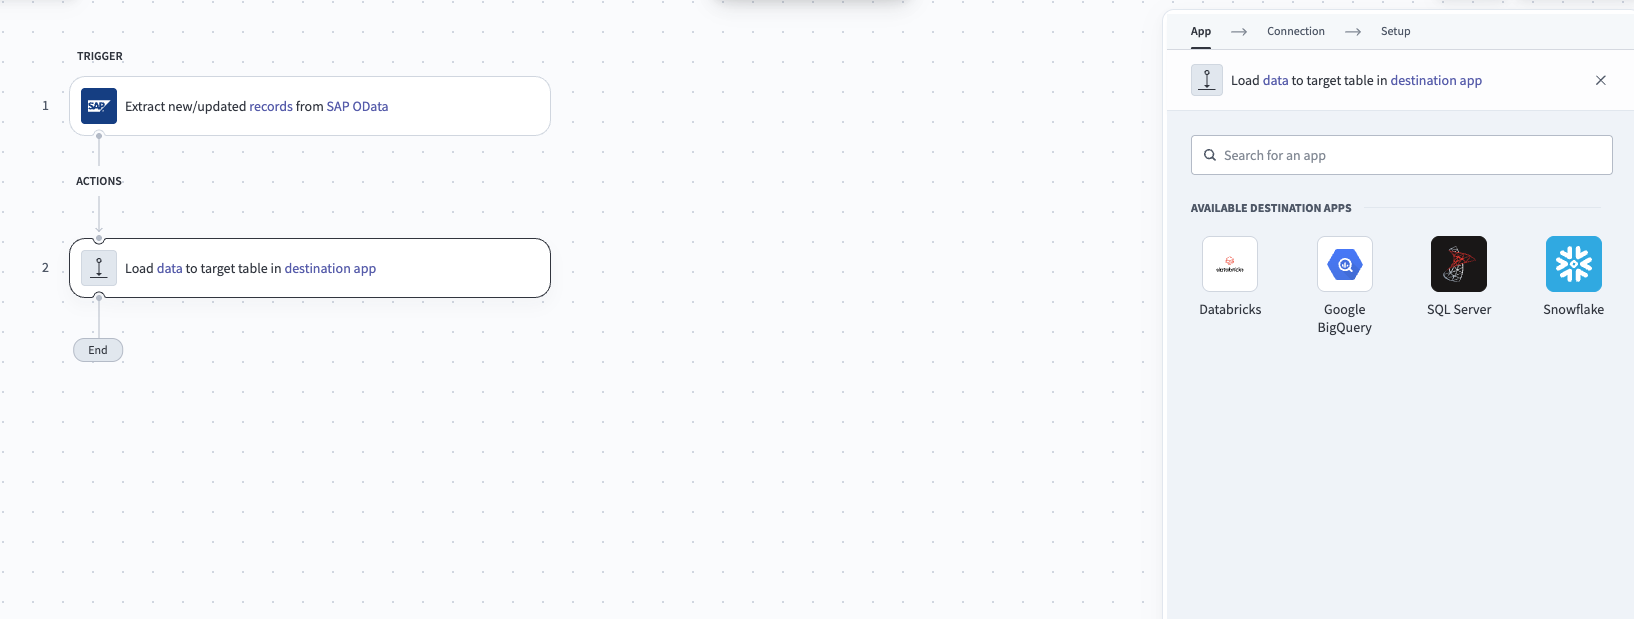 Configure destination
Select the destination application.
Select an existing destination connection, or click + New connection to create one.
Click Save.
Refer to the following guides for destination-specific configuration details:
Start the pipeline
Click Start pipeline to begin data extraction.
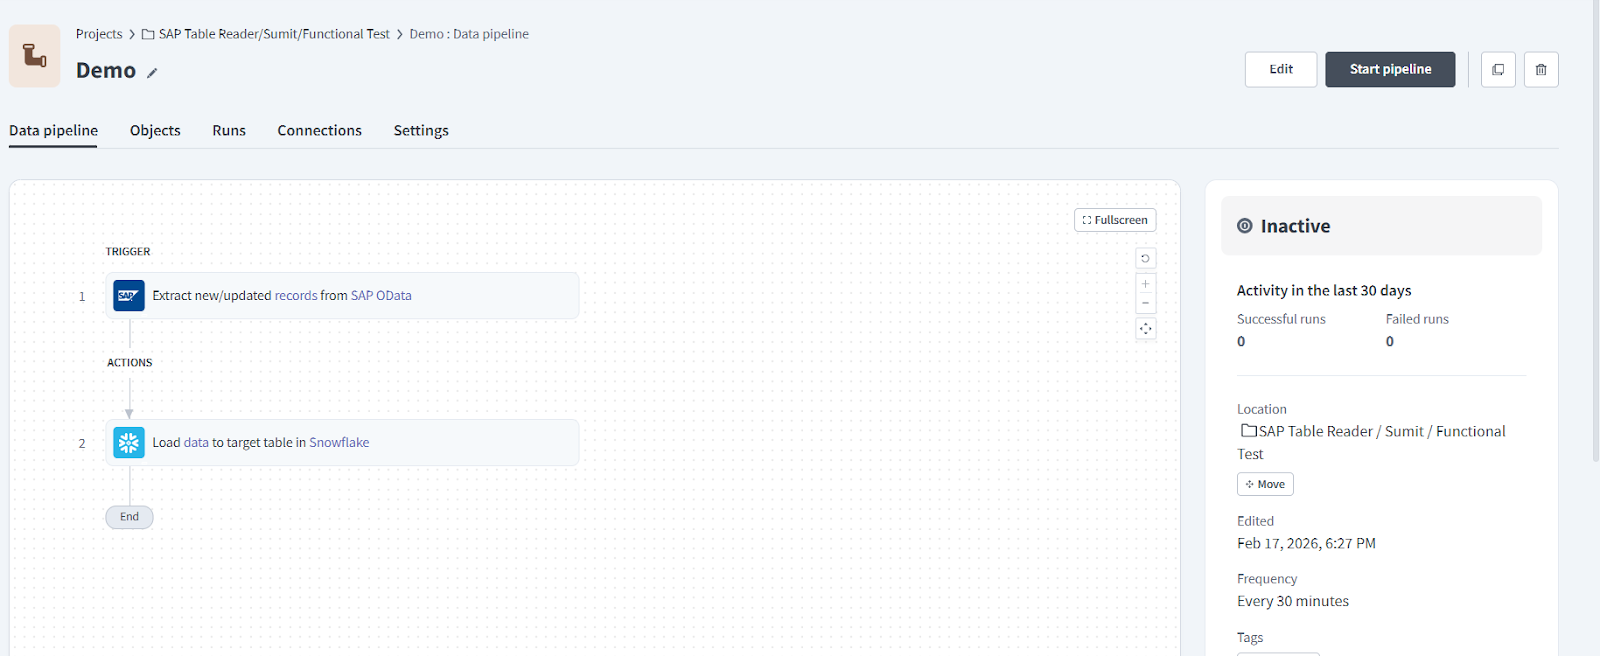 Start pipeline
Workato sends extraction requests to SAP Data Agent, retrieves data in packages, and loads the data into the destination.
Review sync completion
After the pipeline finishes extracting data, SAP Data Agent performs post-extraction cleanup to protect system performance and data security.
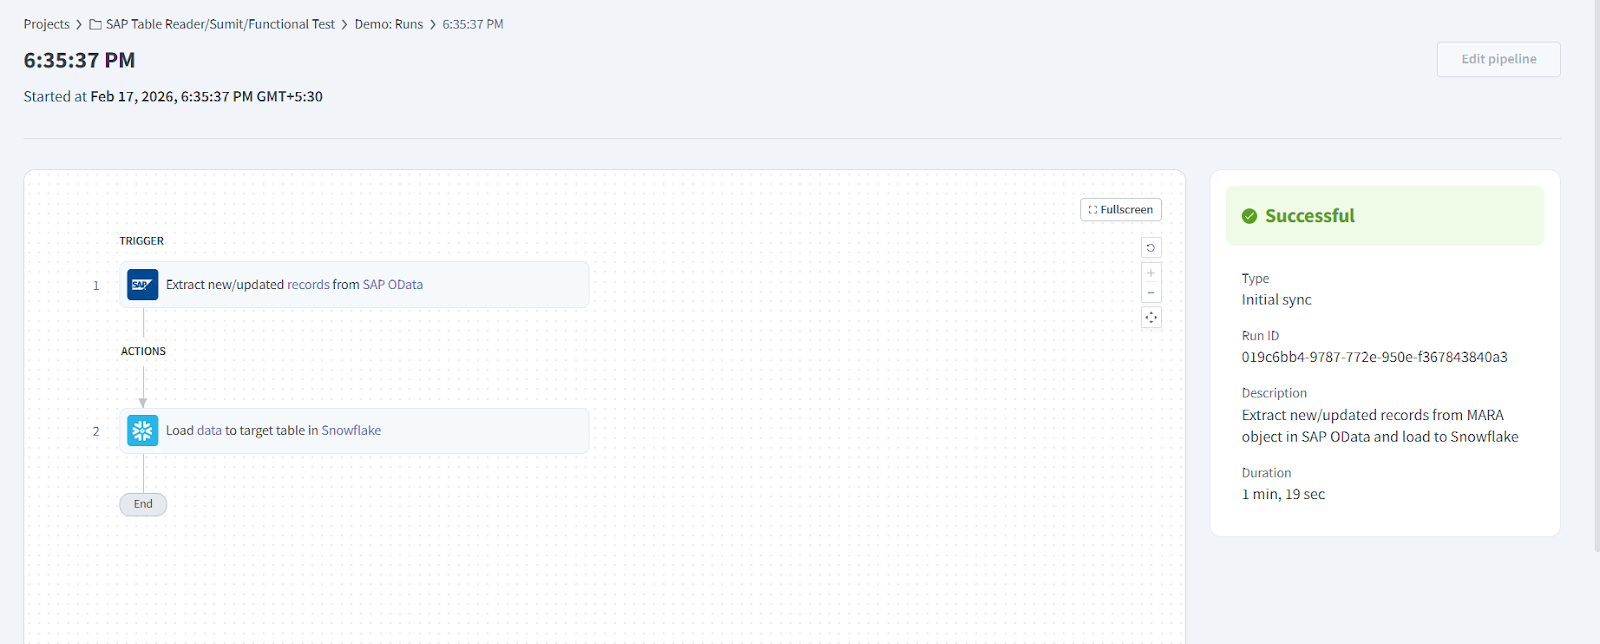 Completed sync
The following occurs:
- Workato loads the extracted data into the destination and makes it available for downstream processing.
- SAP Data Agent sets a checkpoint for the last extracted request. Future pipeline runs retrieve only new data generated after the last successful run.
- SAP Data Agent clears pipeline execution data and temporary information based on the
BW_MSTR_CLEANUPparameter value.
The sync mode determines how the pipeline loads data into the destination:
- Full sync: The pipeline replaces existing data in the destination with the latest extracted dataset.
- Incremental sync: The pipeline adds newly extracted records to the existing data in the destination.
This cleanup process ensures efficient resource usage and prevents residual staging data from accumulating in SAP.
Last updated: