# Transfer flows
File transfers automate the movement of files between systems. Each transfer manages the full lifecycle, including detection, validation, transformation, delivery, and deletion. Transfers include built-in scheduling, processing, and error handling.
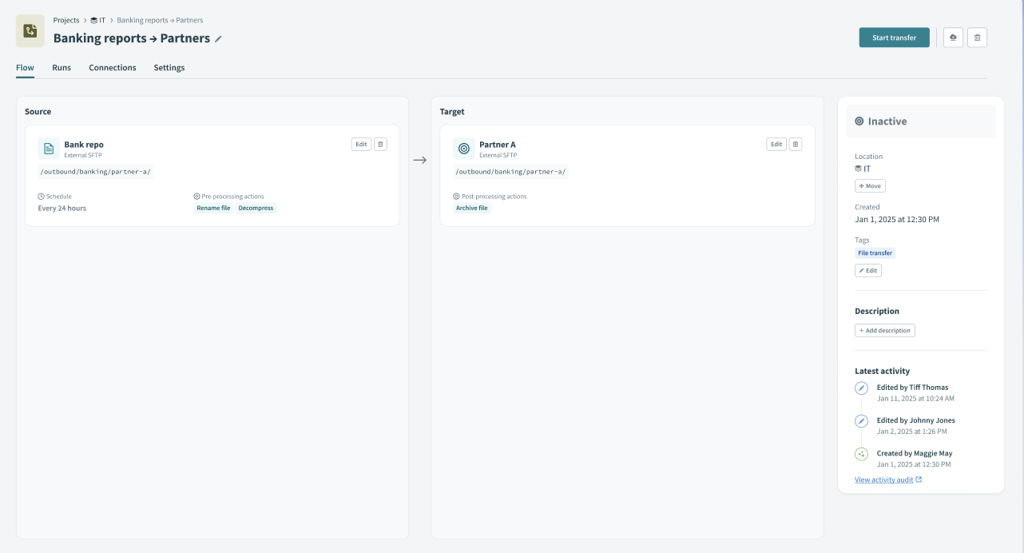 A configured file transfer
Source: Monitors a location for new files and picks them up based on a schedule.
Target: Transfer flows upload files to a target location after processing.
# Supported endpoint types
Transfer flows support the following source and target types. These endpoints enable file transfer across systems and protocols:
- Workato's SFTP server
- Workato's FTPS server
- External SFTP server
- External FTPS server
- Workato FileStorage
- Amazon S3 buckets using S3 APIs
- Azure Blob Storage using Azure Blob APIs
- HTTPS (Web URL and API endpoint)
Refer to the Add a source and Add a target sections for more information about connections.
# Configure a file transfer
Complete the following steps to create a new file transfer that automates file movement between systems:
Create a new project or select an existing one.
Click Create.
Select File transfer. The Create a file transfer modal displays.
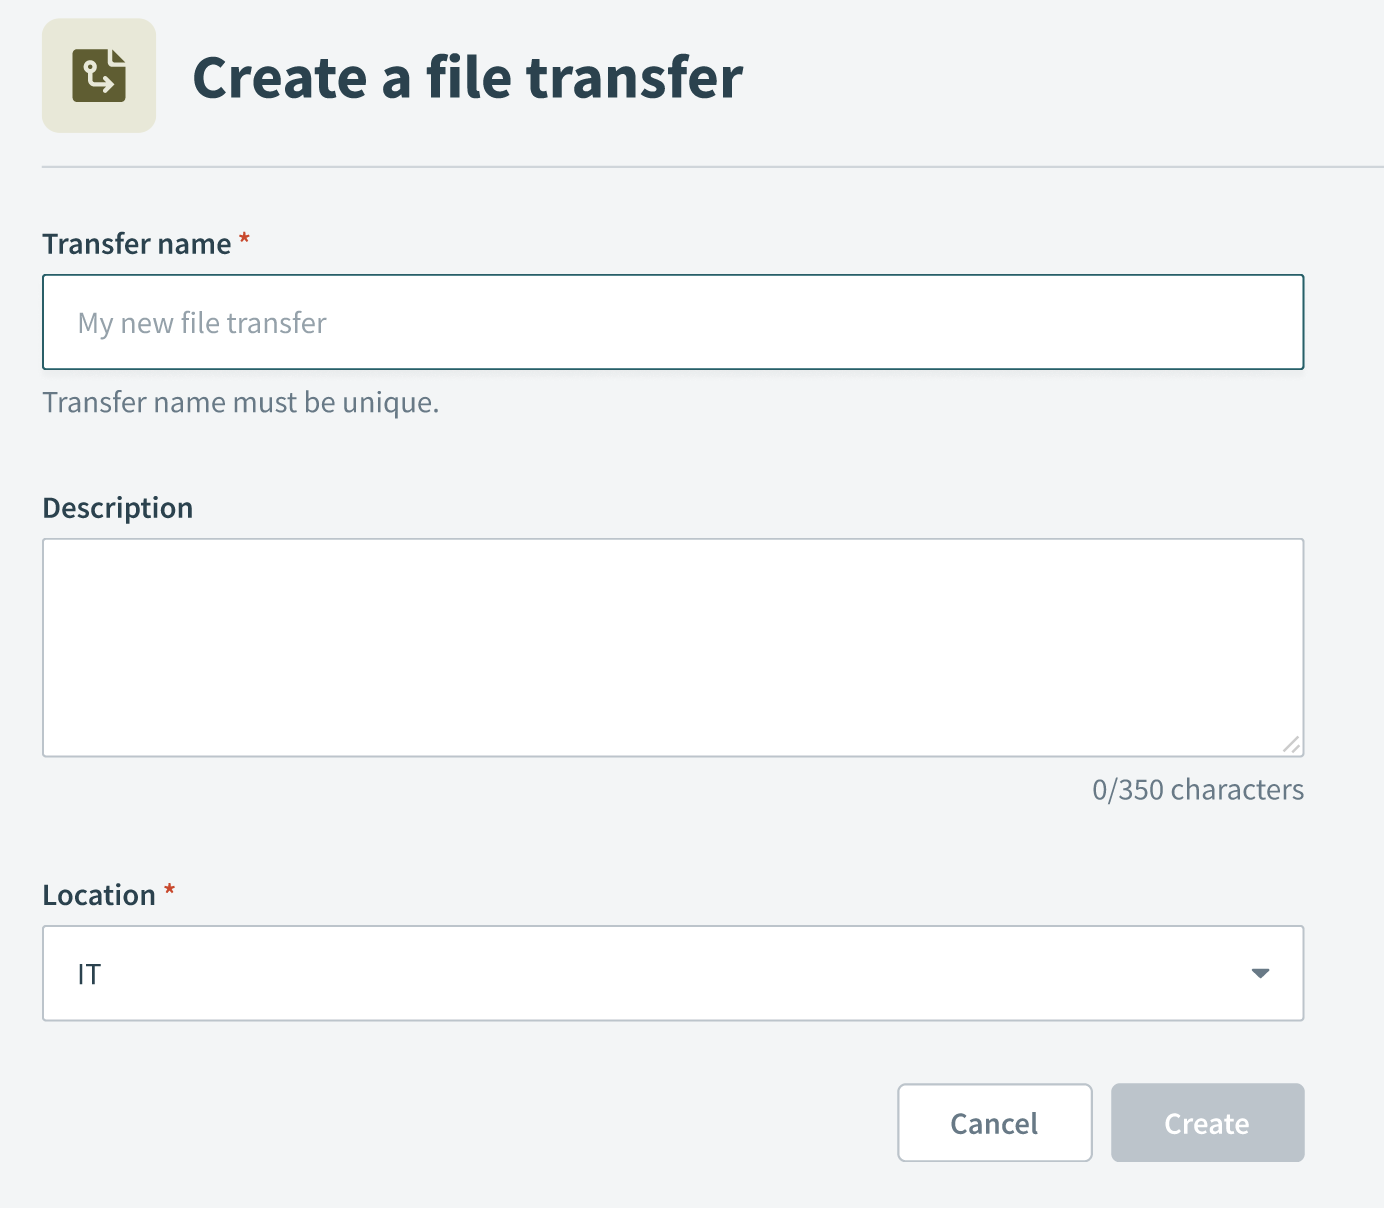 The Create a file transfer modal
Enter a descriptive Name for the file transfer. For example: Partner Orders Import or Daily Report to S3. Names must be unique within a project.
Optional. Enter a Description of what the transfer does. This field has a maximum of 350 characters.
Use the Location drop-down menu to select the project where you plan to store the file transfer.
Click Create. The transfer opens in an Inactive state on the transfer flow page.
Refer to Add a source and Add a target to complete the remaining set up steps.
# Add a source
Sources define where to pick up files, when to check for new files, and what pre-processing steps to perform.
Complete the following steps to add a source to your file transfer flow:
Select the File transfer asset you plan to configure.
Click + Add new source. The Add a source setup wizard displays.
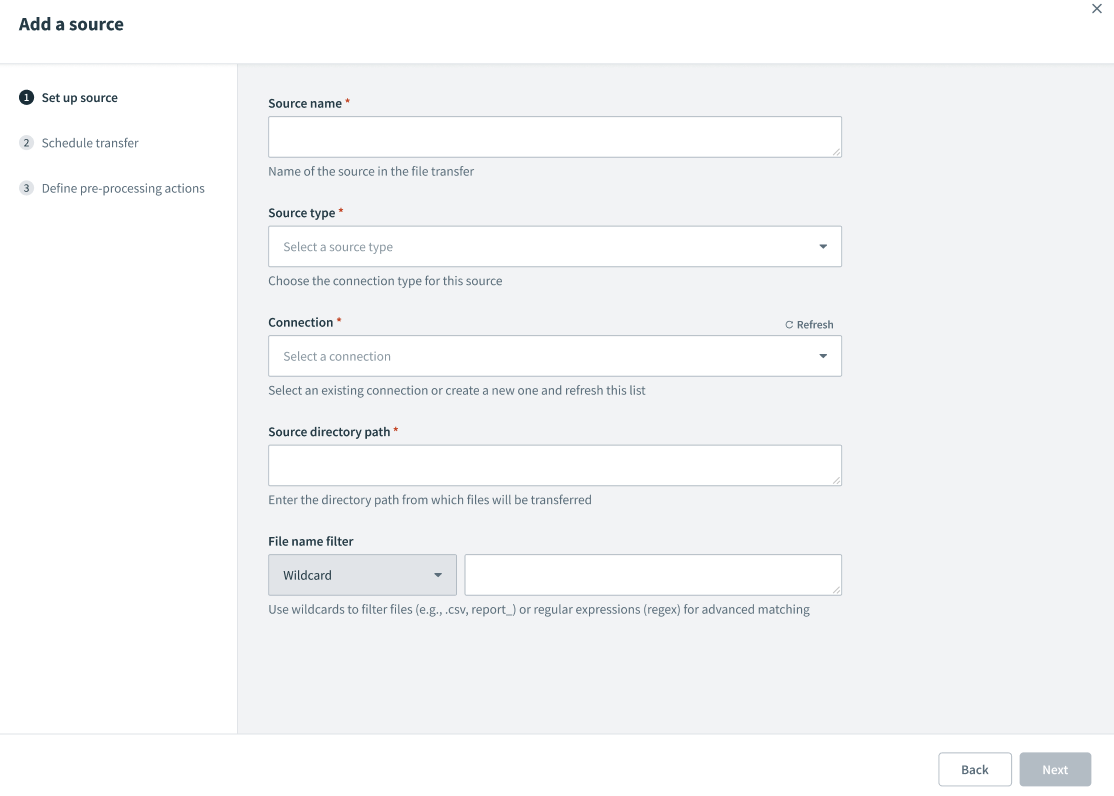 The Add a source setup wizard
Enter a descriptive name in the Source name field. For example: Partner SFTP or Bank Reports. This name appears in logs and monitoring.
Use the Source type drop-down menu to select a connection type. Workato supports the following connections:
- External SFTP
- External FTPS
- Workato FileStorage
- AWS S3
- Azure Blob Storage
- HTTP/HTTPS
Use the Connection drop-down menu to select an existing connection, or click Create new connection to create a new one. You can click Refresh after creating a new connection to update the list.
Enter the folder path to retrieve files from in the Source directory path field.
Use the File name filter drop-down menu to select how to match files. Select Wildcard for simple patterns or Regex for advanced matching.
Wildcards
Wild card patterns use the following format:
Single character wildcard
?Represents one instance of any character. For example,
Report_draft_?.pdfcan representReport_draft_1.pdf,Report_draft_2.pdforReport_draft_3.pdf.Multiple character wildcard
*Represents zero or more instances of any character. For example,
Report_draft*.pdfcan representReport_draft.pdf,Report_draft_1.pdf,Report_draft_2.pdforReport_draft_3.pdf.
Click Next, then refer to the Schedule transfers section to configure the transfer schedule.
# Schedule transfers
Complete the following steps to schedule file transfers after you add a source:
Use the Time unit drop-down menu to select the scale for your schedule, such as Minutes, Hours, or Days.
 The Schedule transfer page
Enter an interval in the Trigger every field based on the selected time unit.
For example, select Hours and enter 12 to trigger the flow every 12 hours. The minimum interval you can set is 5 minutes.
Select a Timezone for the schedule. This field defaults to your workspace's timezone when left blank.
Enter a start date and time in the Start after field or leave it blank to start after activation.
Click Next, then continue to Configure pre-processing.
# Configure pre-processing
Pre-processing actions are performed on files after pickup from the source and before delivery to the target. Workato MFT supports the following pre-processing actions:
| Action | Description |
|---|---|
| Encrypt | Encrypt files using a PGP public key. |
| Decrypt | Decrypt files using a PGP private key. |
| Compress | Compress files in ZIP, TAR, or GZIP format. |
| Decompress | Extract compressed files in ZIP, TAR, or GZIP format. |
| Rename | Rename files dynamically using the following variables:
|
Complete the following steps to define pre-processing actions after you add a source and schedule transfers:
Configure pre-processing actions on the Define pre-processing actions page.
Click Add to create the source.
# Add a target
Targets define where to deliver files and what post-processing steps to perform.
Complete the following steps to add a target to your file transfer flow:
Select the File transfer asset you plan to configure.
Click + Add new target. The Add a target setup wizard displays.
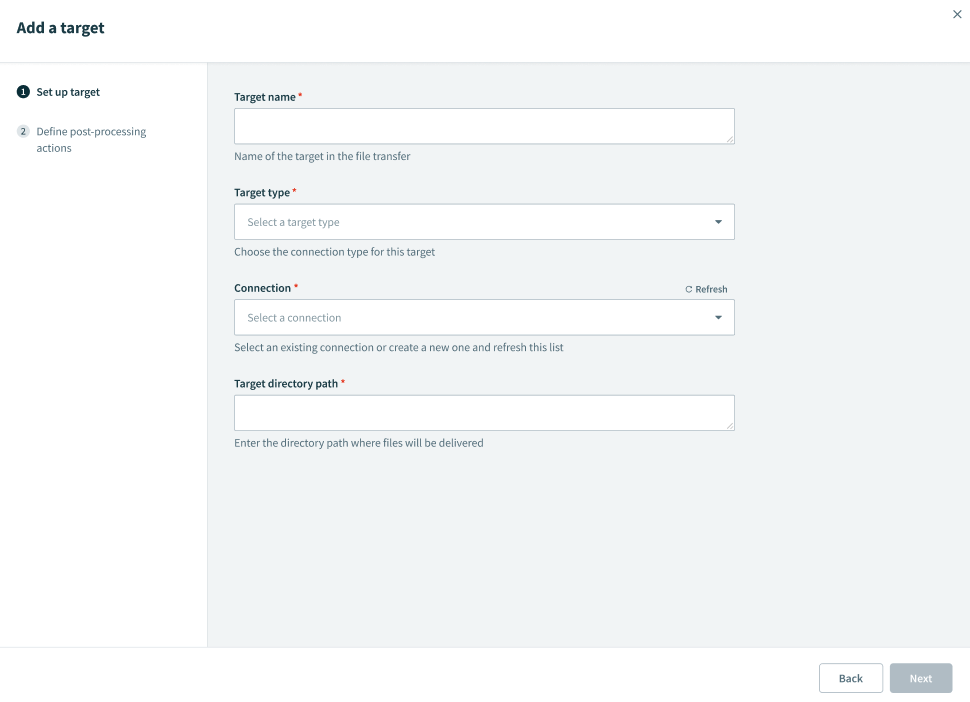 The Add a target setup wizard
Enter a descriptive name for the target in the Target name field. This name appears in logs and monitoring.
Use the Target type drop-down menu to select a connection type. Workato supports the following connections:
- External SFTP
- External FTPS
- Workato FileStorage
- AWS S3
- Azure Blob Storage
- HTTP/HTTPS
Use the Connection drop-down menu to select an existing connection, or click Create new connection to create a new one. You can click Refresh after creating a new connection to update the list.
Enter the folder path to deliver files to in the Target directory path field.
Click Next, then continue to Configure post-processing.
# Configure post-processing
Post-processing actions are performed on files after delivery to the target. Workato MFT supports the following post-processing actions:
| Action | Description |
|---|---|
| Delete | Delete files after they are successfully delivered. |
Complete the following steps to define post-processing actions after you add a target:
Configure post-processing actions on the Define post-processing actions page. All post-processing actions are optional.
Click Add to create the target.
# Start a transfer
Complete the following steps to start a transfer flow after adding a source and a target:
Select the File transfer asset you plan to start.
Click Start transfer. The status changes from Inactive to Active. Transfers begin based on the schedule and Start after time configured during source setup.
# Stop a transfer
Complete the following steps to stop an active transfer flow:
Select the File transfer asset you plan to stop.
Click Stop transfer. The status changes from Active to Inactive. Scheduled runs pause and in-progress file transfers complete.
FEATURE AVAILABILITY
Contact your Customer Success Manager for information about access to Workato MFT.
Last updated: 12/1/2025, 6:09:01 PM