Workato Developer API MCP
Workato's Developer API MCP server enables AI-powered developer environments like Claude Desktop and Cursor to programmatically access your Workato workspace. This enables you to inspect and modify assets, perform bulk operations, and interact with the platform from within your development tools.
UNSUPPORTED ENDPOINTS
The following Developer API endpoints aren't supported:
Your MCP server acts as a standard API platform user and supports Developer API token authentication. This lets you securely integrate with development environments using the same governance and access controls as the API platform.
Install Developer API MCP for remote servers
You can install a remote MCP with a URL that authenticates with a token or through Workato Identity. The configurations in this section use Cursor and Claude Desktop.
Refer to the LLM, GitHub, and Workato Developer API use case for steps to create an MCP server integration that lets you create GitHub issues with natural-language commands in ChatGPT, Claude, or Cursor.
Complete the following steps to install the MCP remote server with a URL:
2
Configure your MCP integration:
Cursor MCP remote server configuration with token authentication
Complete the following steps to configure an MCP integration in Cursor that authenticates using a token:
1
Go to AI Hub and select the MCP servers tab.
2
Click the MCP server you plan to use for your MCP remote server integration.
3
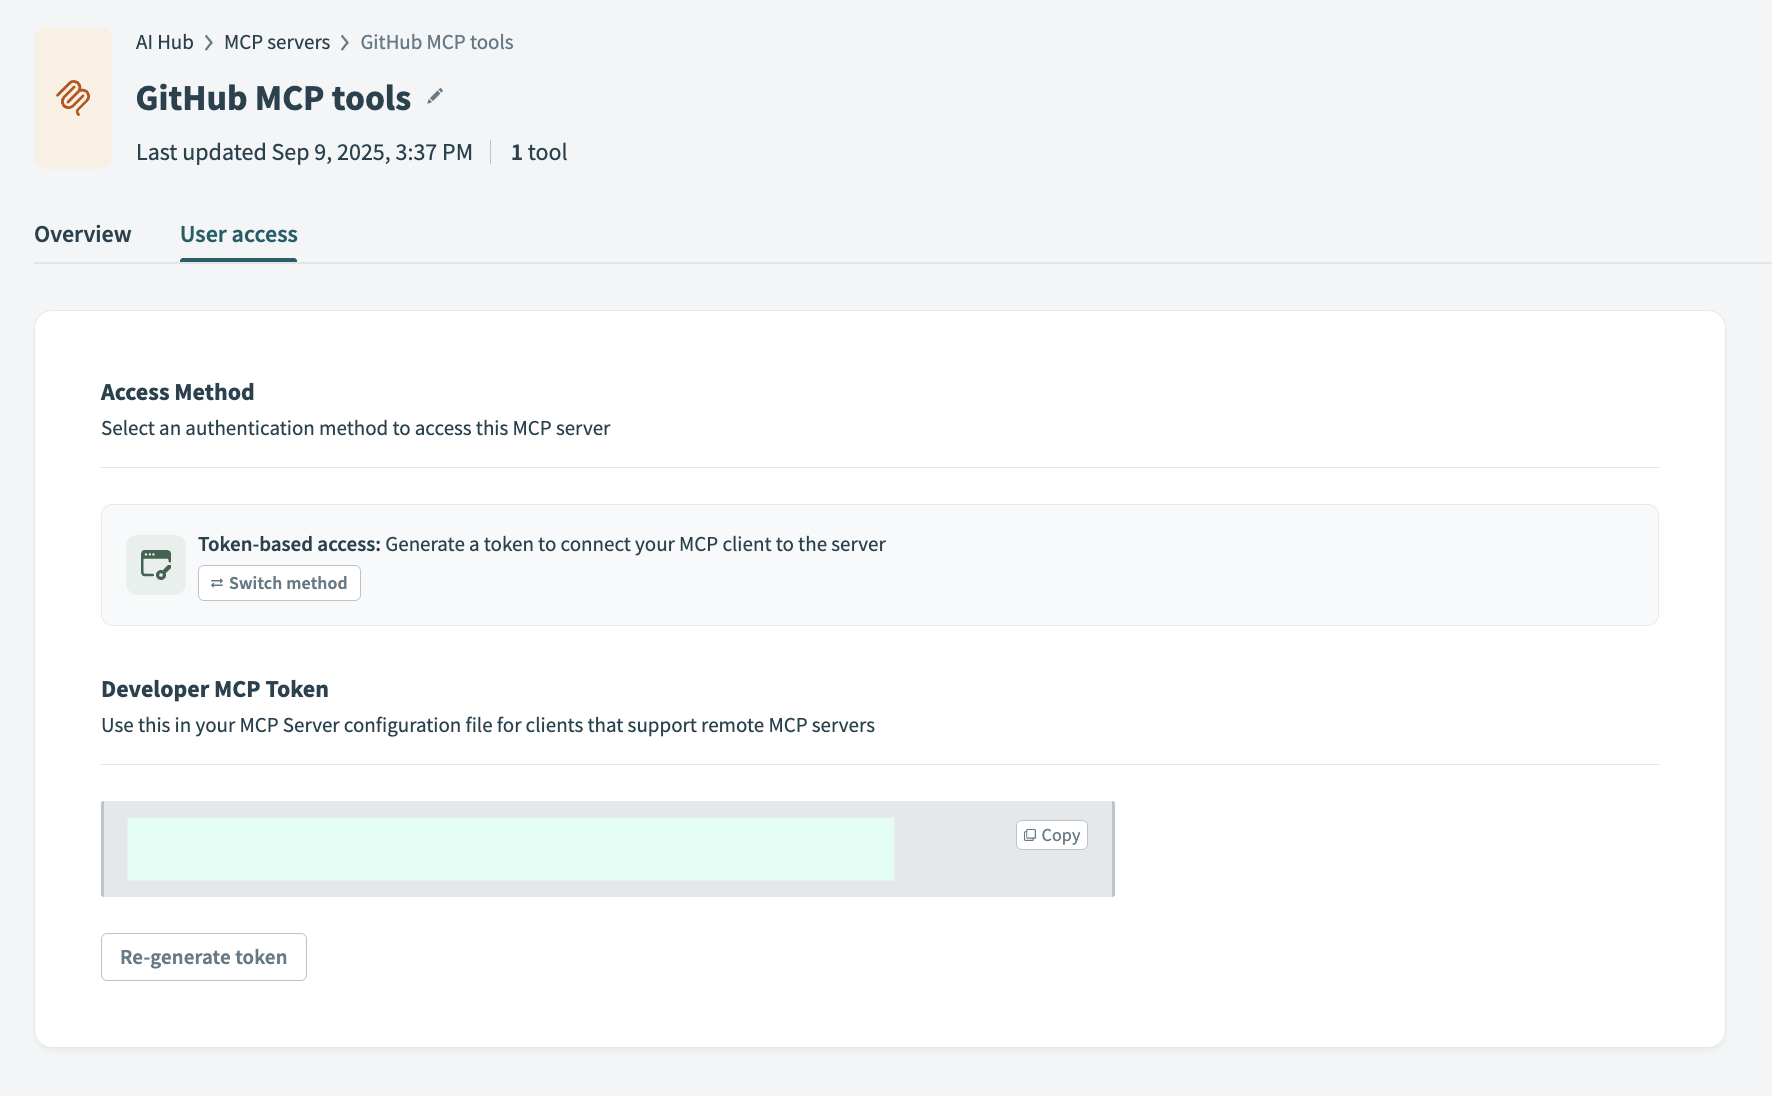
Click the User access tab.
4
Go to the Access Method section and ensure that Token-based access is selected.
5
Go to the Developer MCP Token section and click Copy.
 Copy the MCP URL and token
7
Go to Settings > Cursor settings.
8
Click MCP & Integrations in the sidebar.
9
Click + New MCP Server to open the mcp.json file.
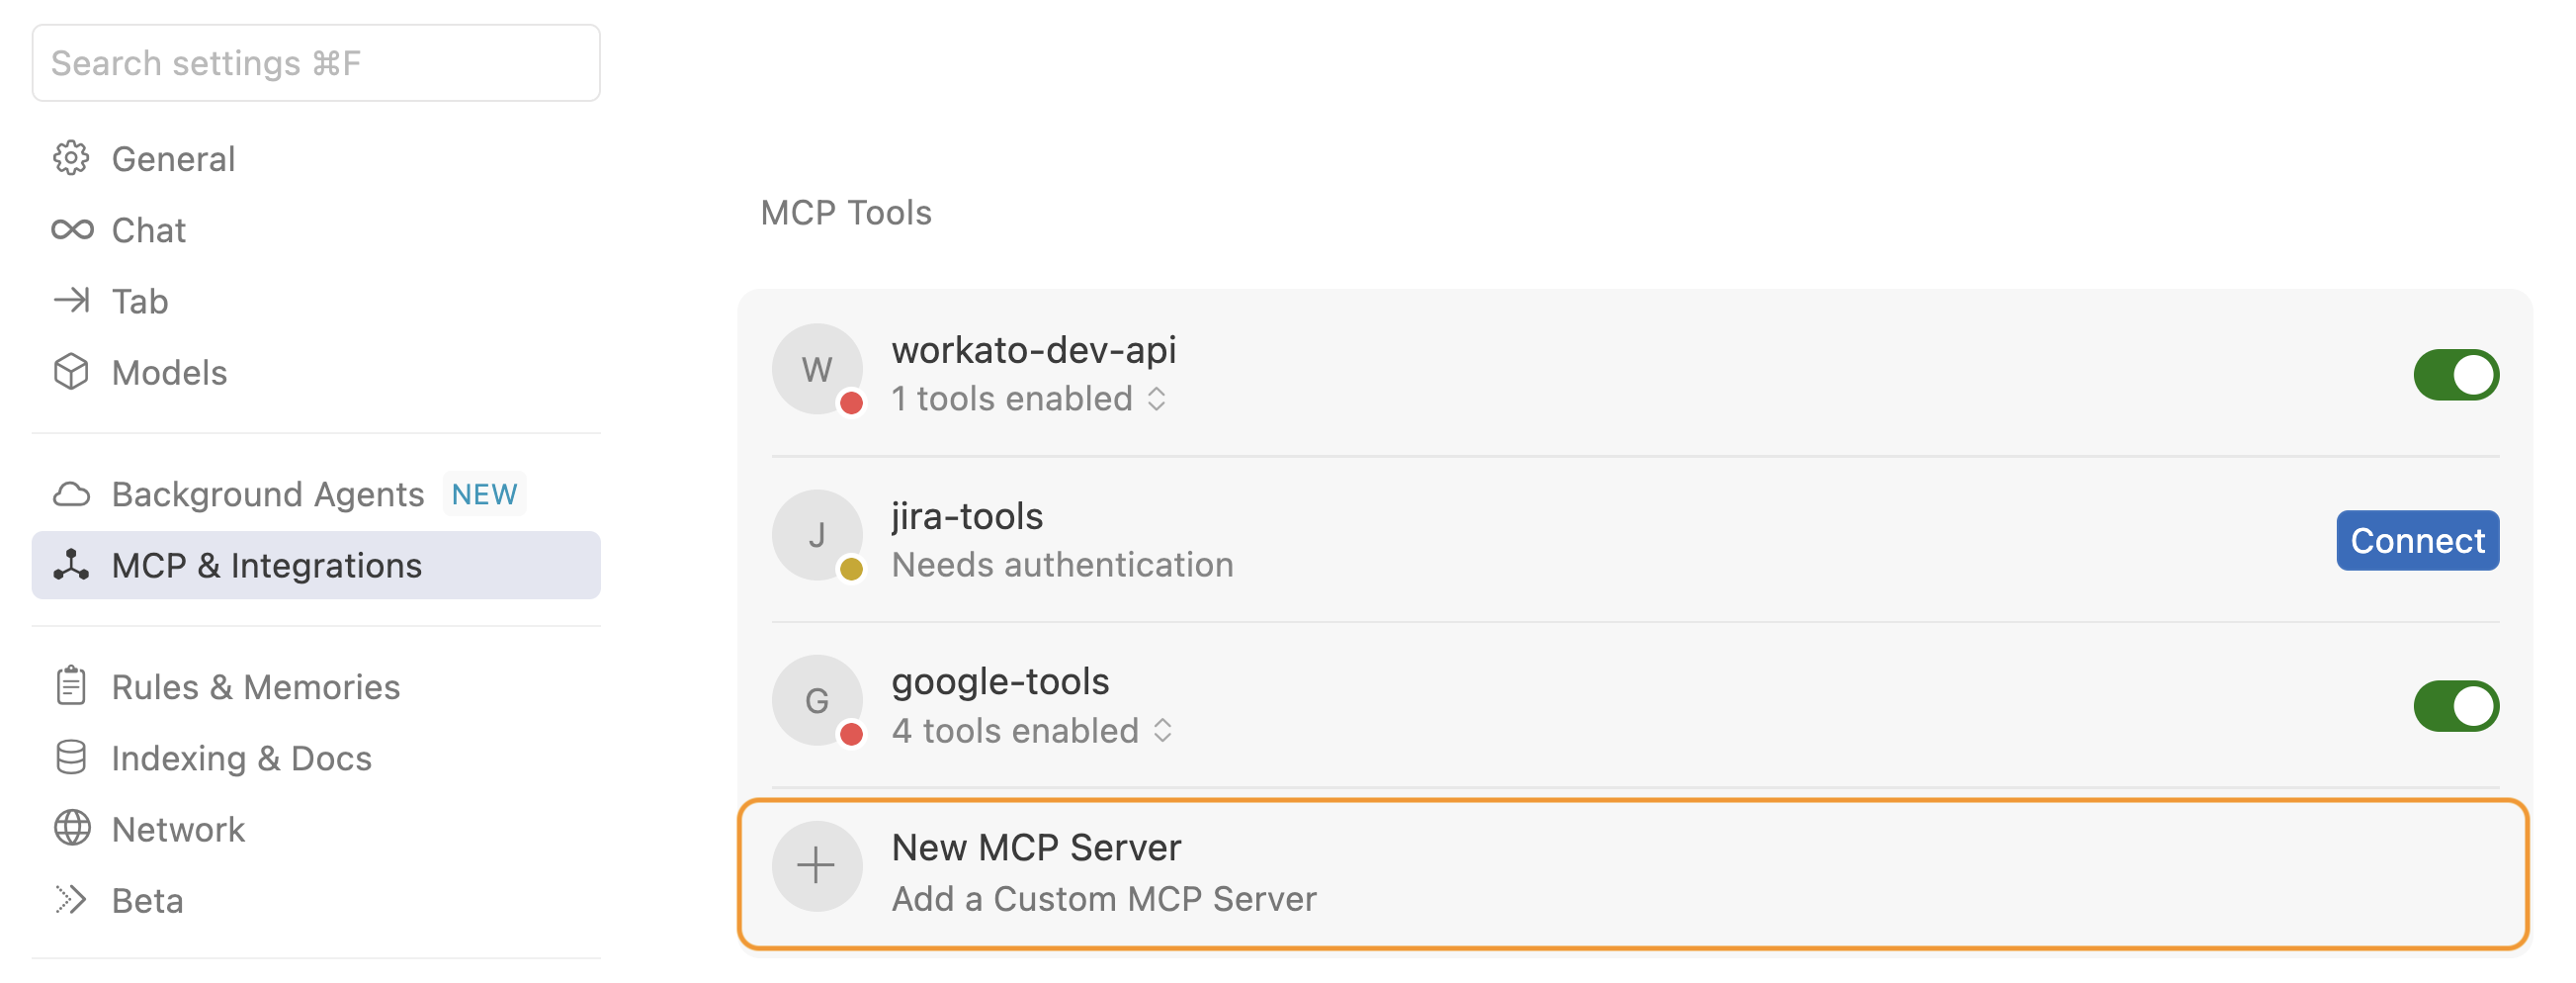 Click + New MCP Server
10
Update the configuration to use the MCP URL and token you copied in the preceding steps. Your MCP URL must begin with https. For example:
12
Create a new chat with your Cursor agent to use the tools you added.
You must start a new chat with your agent. Cursor agents only have access to the tools and capabilities available when a chat begins. Agents can't detect or use new MCP configurations, servers, or tools added after starting a chat.
Cursor MCP remote server configuration with Workato Identity authentication
Complete the following steps to configure a Cursor MCP integration that authenticates using Workato Identity:
1
Go to AI Hub and select the MCP servers tab.
2
Click the MCP server you plan to use for your remote integration.
3
Click the User access tab.
4
Go to the Access Method section and ensure that Workato Identity is selected.
5
Click Add user groups.
 Click Add user groups
6
Use the User groups drop-down menu to select the user groups you plan to provide with access to the MCP server.
8
Go to the Remote MCP URL section and click Copy URL.
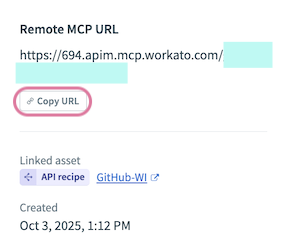 Copy your remote MCP URL
10
Go to Settings > Cursor settings.
11
Click MCP & Integrations in the sidebar.
12
Click + New MCP Server to open the mcp.json file.
Click + New MCP Server
13
Update the configuration to use the MCP URL you copied in the preceding steps. For example:
16
Go to Settings > Cursor settings > MCP & Integrations in Cursor.
17
Locate the MCP tools you added and click Connect. Tools that require authentication are labeled with Needs authentication.
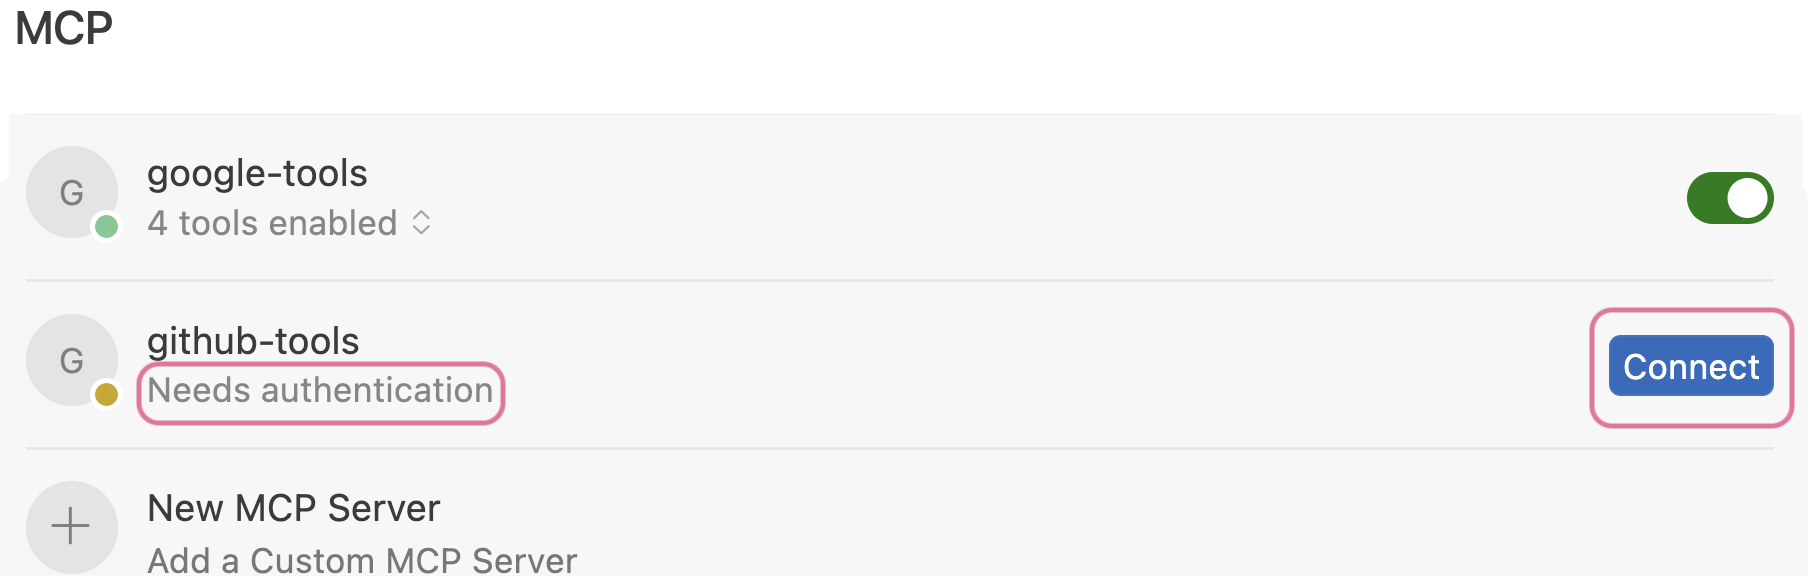 Click Connect
18
Click Open when Cursor prompts Do you want Cursor to open the external website?. This opens your organization's SSO login page.
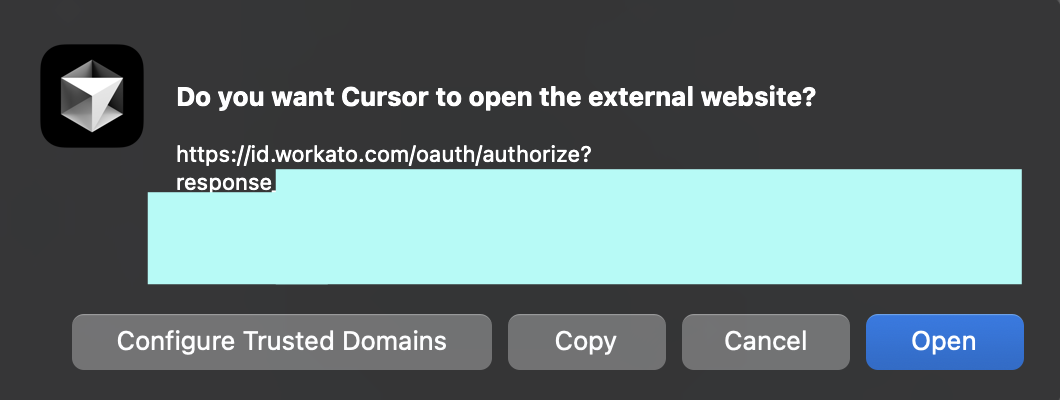 Click Open
19
Sign in to your organization's SSO provider.
20
Click Open Cursor when prompted.
21
Create a new chat with your Cursor agent to use the tools you added.
You must start a new chat with your agent. Cursor agents only have access to the tools and capabilities available when a chat begins. Agents can't detect or use new MCP configurations, servers, or tools added after starting a chat.
Claude Desktop MCP remote server configuration with token authentication
Complete the following steps create an MCP integration with Claude Desktop using an MCP URL and token:
1
Go to AI Hub and select the MCP servers tab.
2
Click the MCP server you plan to use for your remote integration.
3
Click the User access tab.
4
Go to the Access Method section and ensure that Token-based access is selected.
5
Go to the Developer MCP Token section and click Copy.
Copy the MCP URL and token
6
Sign in to Claude Desktop.
7
Go to Settings > Connectors.
8
Click + Add new connector.
9
Enter a name for your MCP connector in the Name field.
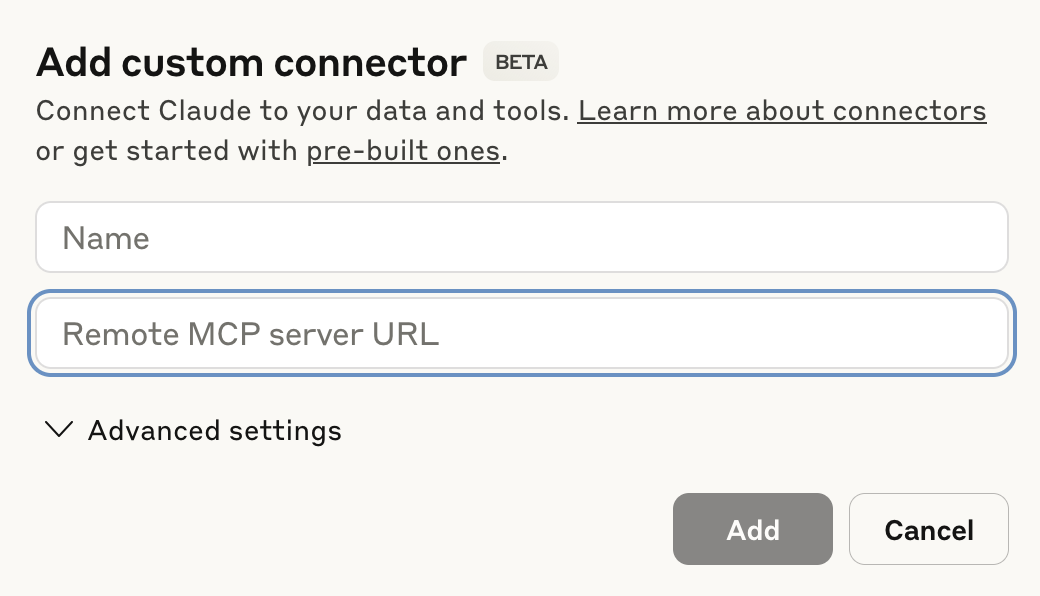 Configure your Claude MCP connector
10
Paste your MCP URL and token into the Remote MCP server URL field.
11
Click Add. The newly created MCP connector appears in the list of connectors.
13
Use the permissions drop-down menu to select Always ask permission or Allow unsupervised. Always ask permission is selected by default.
Install Developer API MCP for local servers
Complete the following steps to install and configure the MCP local server:
1
Open your preferred developer environment, such as Claude Desktop or Cursor.
2
Locate the MCP configuration settings:
Cursor requires a local proxy through npx mcp-remote.
1
Go to Settings > Tools and Integrations.
Claude requires a local proxy through npx mcp-remote.
1
Go to Settings > Developer > Edit Config.
3
Update the configuration file to use the following configuration, replacing YOUR_API_TOKEN with your MCP API token:
TOOL AVAILABILITY
The tools and endpoints available depend on the scopes defined in your API token.
4
Restart your environment in Cursor or Claude Desktop. The server populates tools based on your token’s permissions.