# Use Azure Key Vault secrets in connections
This guide demonstrates how to use secrets from your Azure Key Vault (opens new window) to configure Workato connections.
# Prerequisites
To complete the steps in this guide, you must have the following:
In Workato:
- An account with a successful workspace-level or project-level Azure Key Vault connection.
- A project role with Create and Edit Connections privileges.
In Microsoft Azure:
- Permissions allowing you to create Azure Key Vault secrets.
# Add a secret to Azure Key Vault
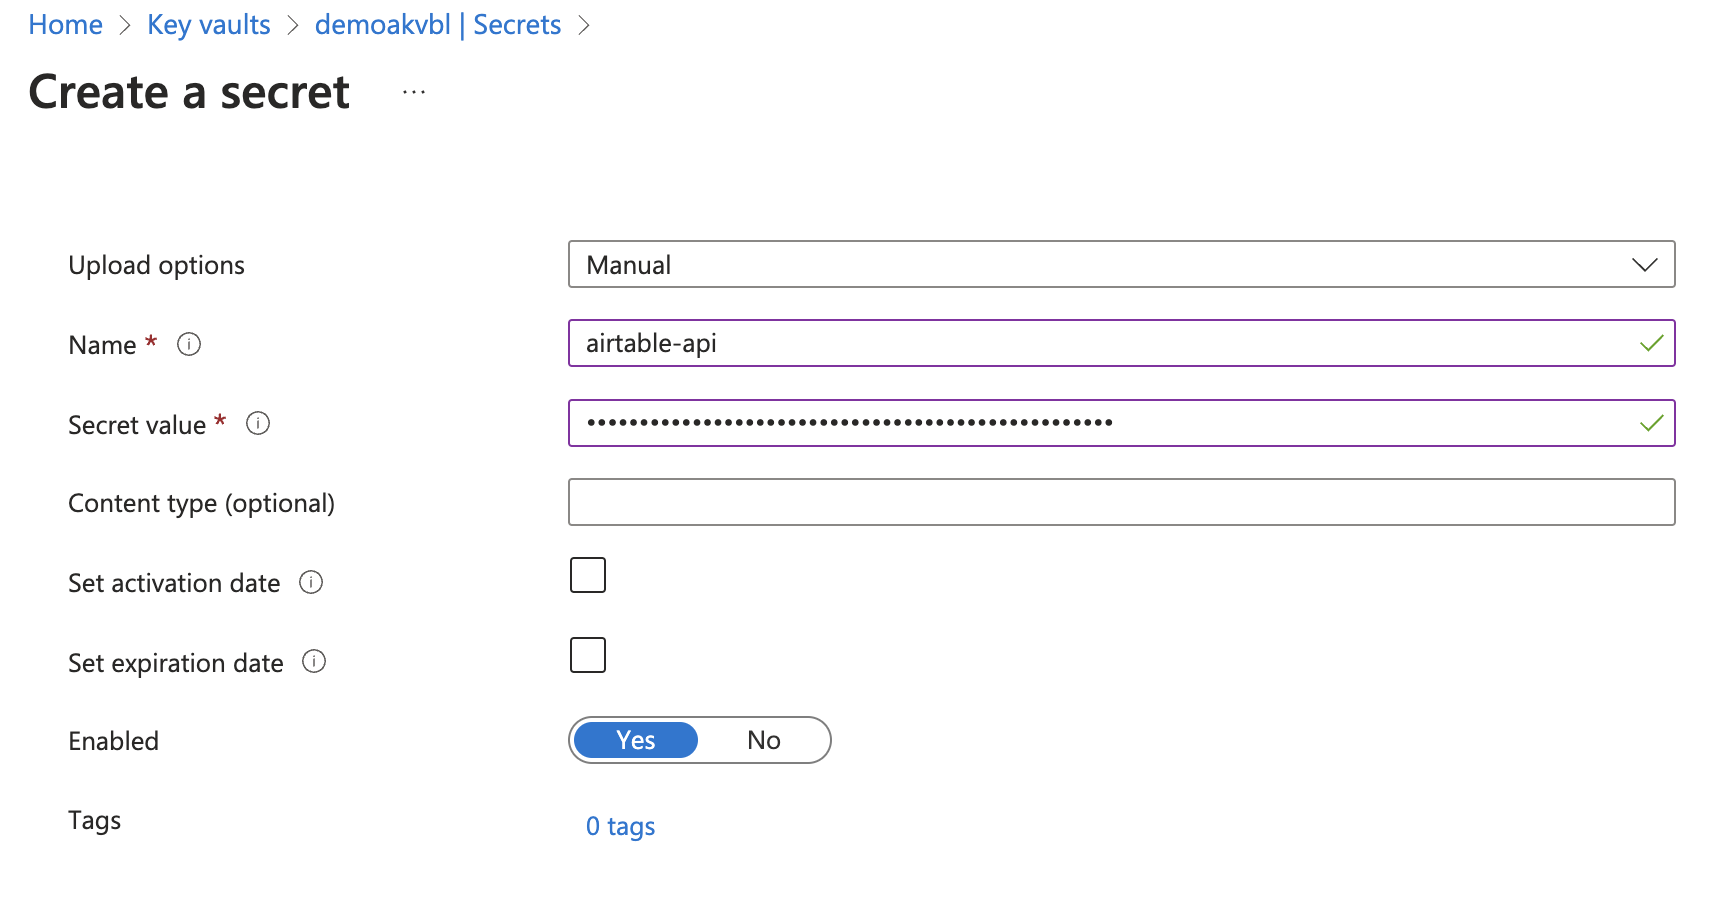
Sign in to the Azure portal and navigate to Key vaults > {key vault name} > Secrets.
Select +Generate/Import.
Set Upload options to Manual on the Create a secret page.
 Create a secret in Azure Key Vault
Enter a name for your secret that will help you remember what application it is for, such as airtable-api.
Enter the secret value. This is typically a password, API key, or other sensitive information.
Optionally, set the Content type, Activation date, and/or Expiration date.
Ensure the Enabled toggle is set to Yes.
Select Create.
# Configure a Workato connection
Create a new connection or open the configuration page for an existing connection in your Workato account.
Click the corresponding input field for connection parameters referencing an external secret. The Add external secret option appears.
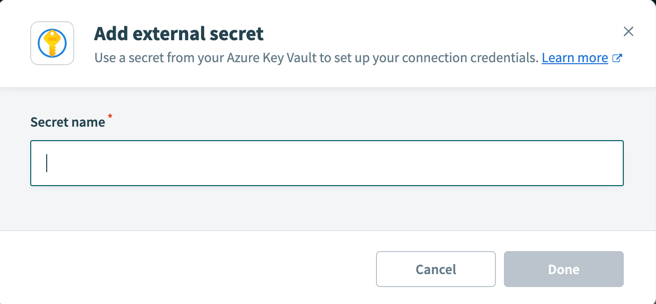
Select Add external secret to open the Add external secret popup.
Enter the Secret name in the Add external secret popup.
 Add external secret
Select Done. The secret appears as a masked datapill in the input field on the connection page.
Select the datapill to edit the secret.
Click Connect and verify that this connection works.
If you prefer to add the secret with a secret mask, use the following syntax for Workato connection credentials. Replace <secret_name> with the actual name of the secret you plan to use in Azure Key Vault:
{{workato:sm:<secret_name>}}
In the following example, the secret name is airtable-api:
{{workato:sm:airtable-api}}
Paste the entire value into the appropriate field on the connection's configuration page.
# Complete your connection setup
Click Connect and verify that this connection is working.
# Secrets cache behavior
Workato caches credentials retrieved from Azure Key Vault for 60 minutes. During this period, recipes continue to use the cached value, even if you update or rotate the secret.
After the cache expires, the next recipe execution retrieves the latest value from Azure Key Vault. You can call the Clear secrets management cache endpoint to apply changes immediately. This forces Workato to fetch the latest credentials without requiring you to disconnect and reconnect the connection.
# Troubleshooting
| Error message | How to fix it |
|---|---|
| The secret was not found in this key vault. | Ensure that your secret exists and you are connected to the right Azure Key Vault instance. |
The secret {{secret name}} has been disabled. Please ensure that it is enabled before re-trying. | Ensure that your secret is set to Enabled. |
| Caller is not authorized to perform action on resource. | Ensure that your Microsoft Entra ID app has the sufficient role or access policy and that your client secret is still valid. |
| Public network access to your Azure Key Vault is disabled. | Ensure that public access to your key vault (opens new window) is enabled. |
| Client address is not authorized and caller is not a trusted service. | Ensure that your network IP address has been added to your key vault's allowlist (opens new window). |
| Secret is expired. | Create a new secret version with a valid expiration date. |
| Secret is not activated. | Ensure that your secret's activation date is before the current date. |
| Failed to fetch secret from your vault. |
|
Last updated: 12/2/2025, 11:48:46 PM