Configure the app interface
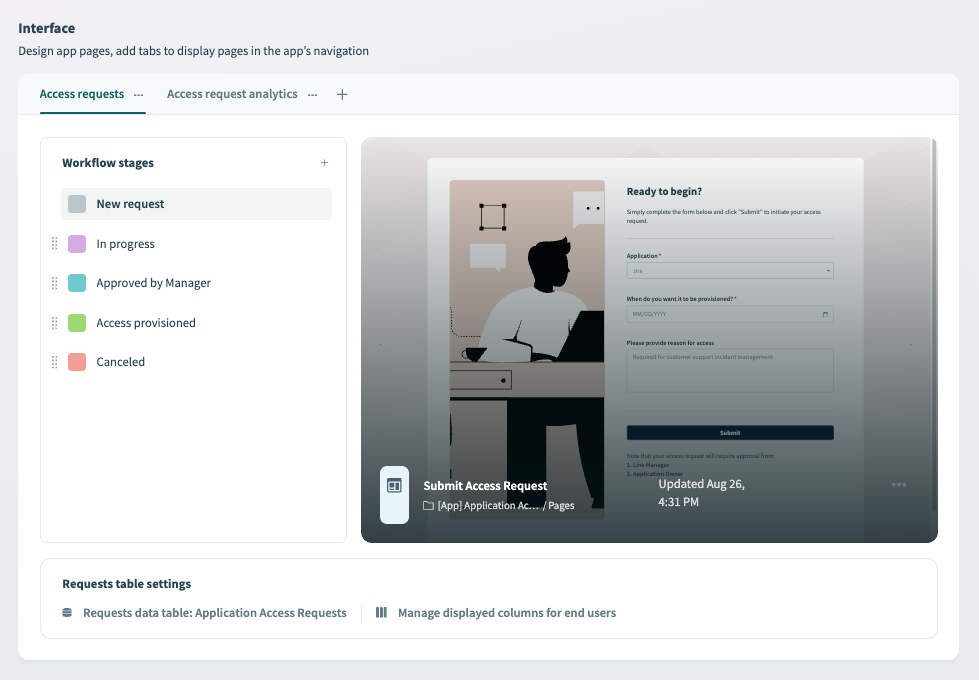
The Interface section of the Workflow app tab allows you to manage pages, add tabs for related but standalone content, and manage how columns display in your app.
If your app supports request and approval functionality, this section also enables you to assign pages to each of your workflow stages.
 Manage pages, stages, and tabs for your apps
Manage pages
Workato displays a preview of the pages assigned to tabs or workflow stages. You can edit pages in the page editor by clicking the page.
Assign pages to workflow stages
Workato automatically creates relevant workflow stages for apps with request and approval functionality. The specific stages created depend on the type of app you create. Generic apps that don't support request and approval functionality don't have workflow stages.
Workflow stages define how the request transitions through the workflow in apps with request and approval functionality. They are controlled by a recipe using the Workflow apps by Workato connector. You can apply stages to each step of your workflow in this interface and manage workflow stage logic in recipes.
Page assignments
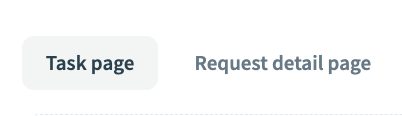
All workflow stages support page assignments that determine what users see at each stage:
- Task page: The page that users interact with to complete their assigned task for the stage.
- Request detail page: A page that displays the request details. It is only visible to the originator of the request and allows them to view the original request as it moves through different stages.
For example, in an application access workflow, you might assign a submission page named Access requests to the New request stage and an approval form named Process requests to the In progress Task page. Additionally, you can assign the submission page named Access requests to the In progress Request detail page to allow it to persist through the workflow.
PAGES AND STAGES
Users access one or more pages when they are assigned a task on a certain stage (assigned with a page).
In other words, if you don't plan to assign a particular workflow stage to users, it doesn't make sense to add a page to that stage.
For example, if you don't plan to use the canceled stage in your workflow, assigning a page to this stage serves no practical purpose.
NEW REQUEST STAGE
The New request stage is a special pre-request stage designed to handle new requests. In the portal, this stage displays as New.
You cannot make changes to this stage. This stage only supports one page assignment.
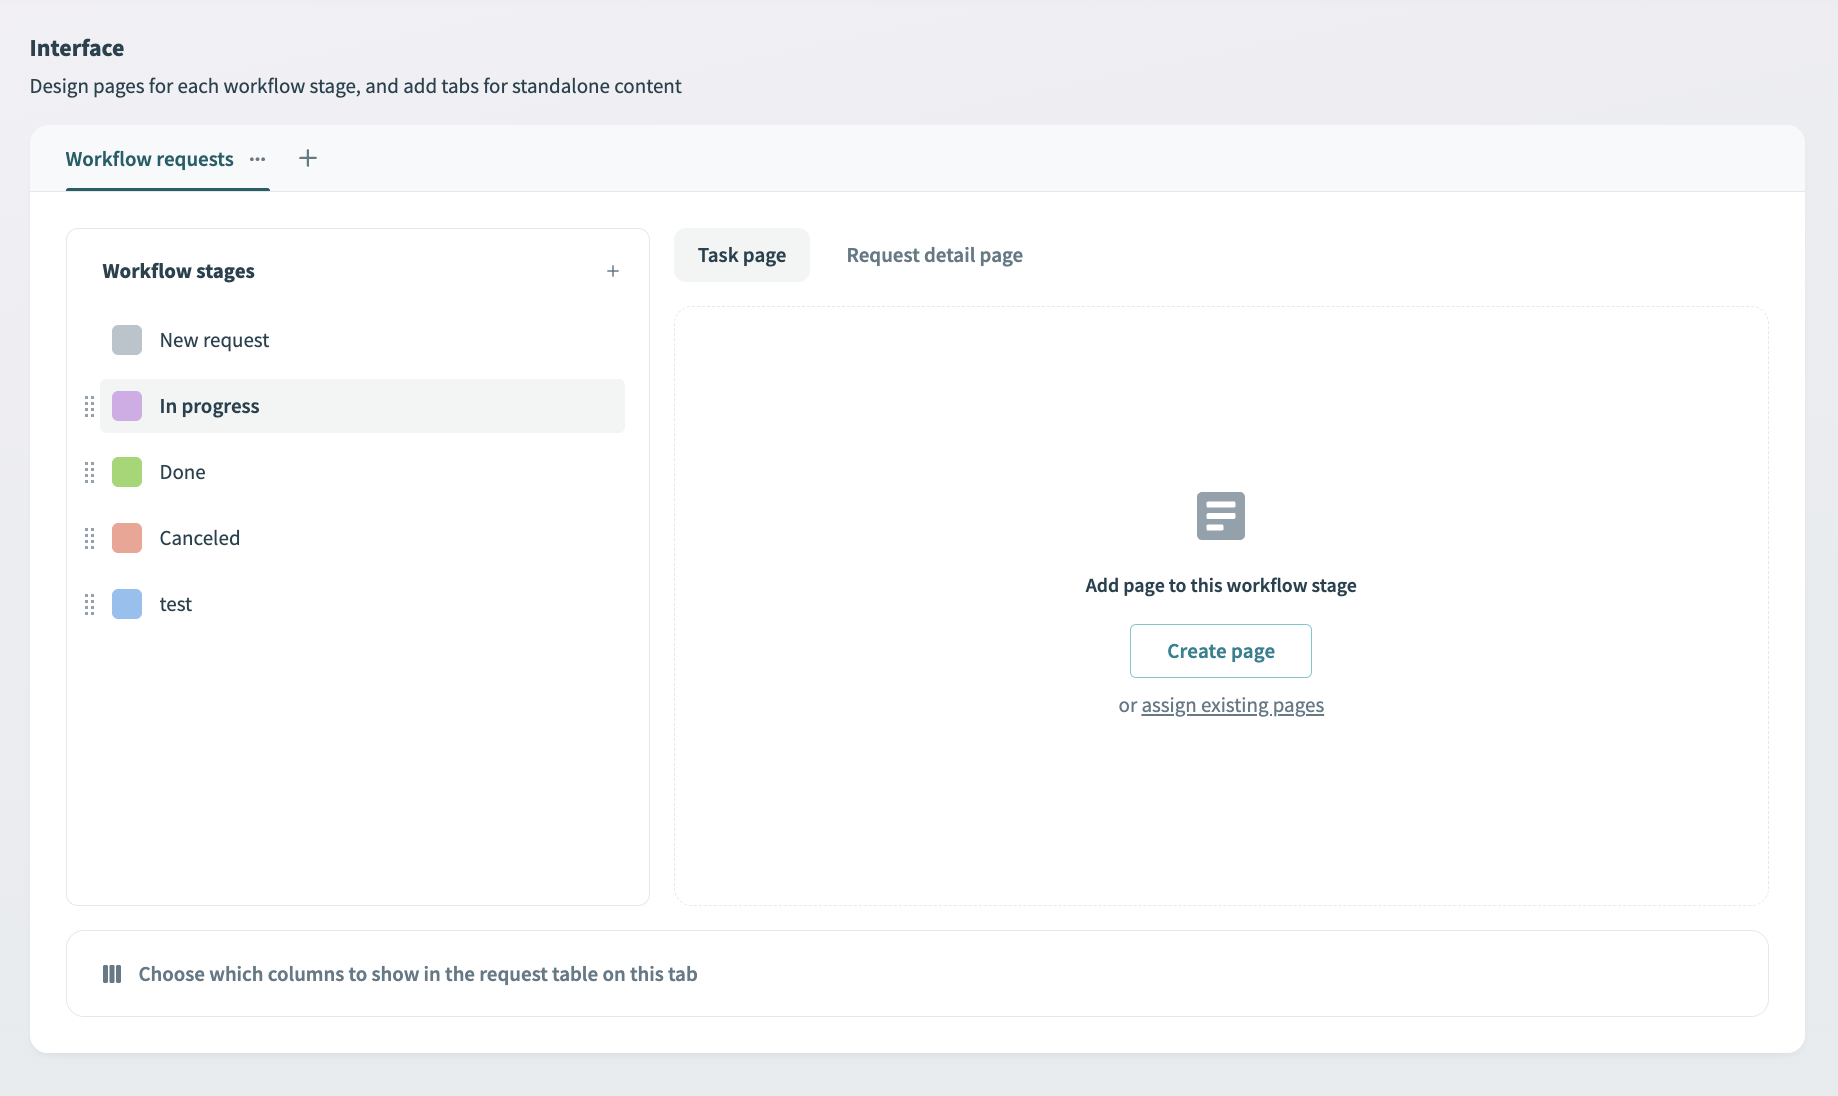
Complete the following steps to assign a page to a specific workflow stage:
Select a stage.
Select a page type. Available options for most stages are Task page and Request details page. However, the New request stage only supports one page assignment.
 Select a page type
In the right panel, choose to Create a page or Assign existing pages to this stage.
 Assign a workflow stage to your page
If you decide to create a new page, Workato redirects you to the page editor.
If using an existing page, Workato prompts you to select the page from the list:
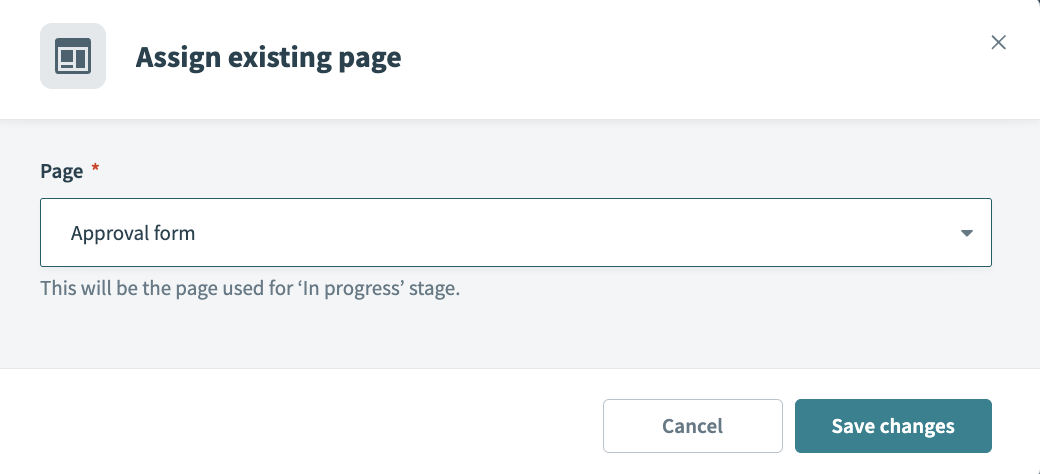 Assign an existing page
Click Save changes.
Workato previews the page you selected in the right panel.
DESIGN PAGES
Refer to our Pages guide for information on how to design pages.
Create workflow stages
Complete the following steps to add additional workflow stages to your application:
Open a Workflow app.
Go to Interface > Workflow stages.
Click + (plus).
Enter a unique Stage name.
Select a Label color for your stage.
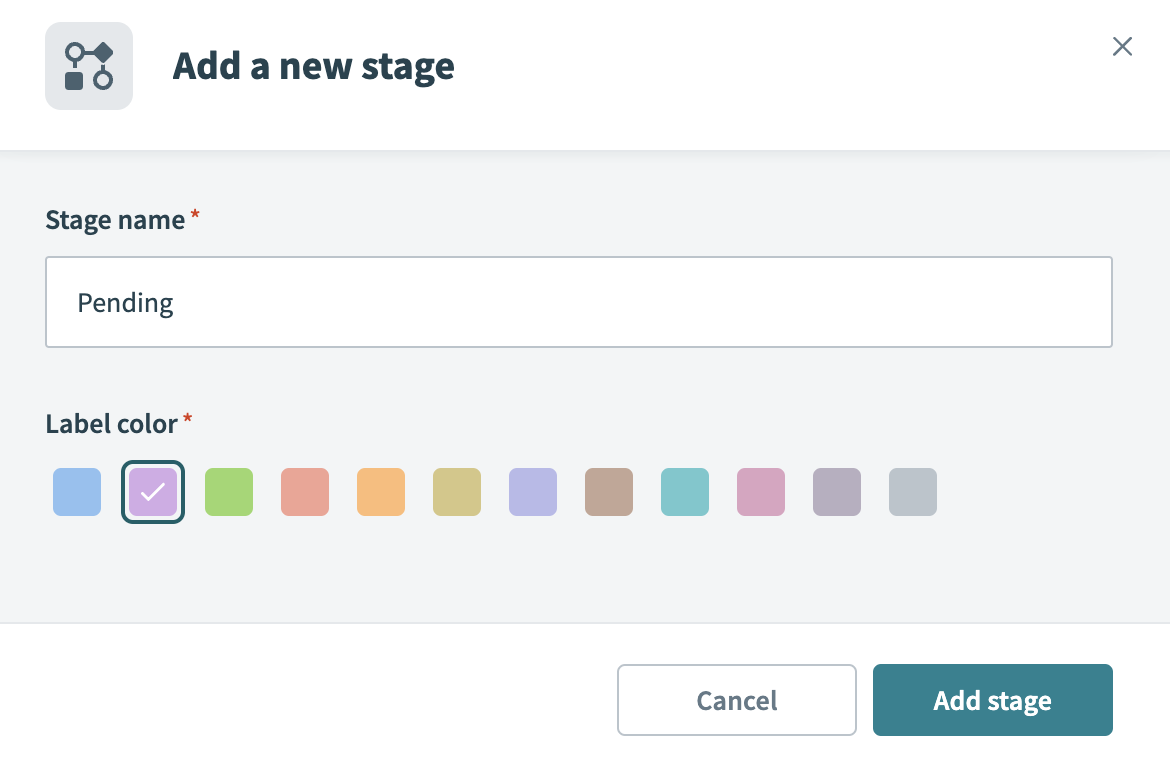 Create a new workflow stage
Click Add stage.
Optional. Select, drag, and drop workflow stages to reorganize them.
You can customize existing workflow stages by modifying their name and color.
Add tabs
You can add additional tabs to your Workflow app to include related but standalone content. These tabs can contain static information or alternate submission request forms. You can control whether tabs are visible to all users, specific user groups, or specific roles.
TAB NAMES
Tab names do not support special characters, including parentheses (()).
Complete the following steps to add tabs to your pages:
Click + (plus) to add an additional tab to an app or workflow stage.
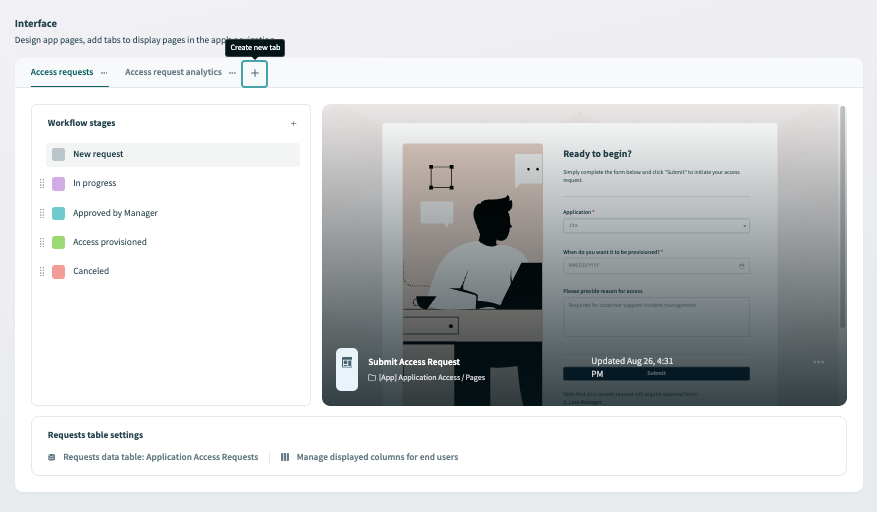 Add tabs to your workflow stages
Enter a descriptive name for your tab.
Use the Display tab to drop-down menu to determine which user groups have access to this tab. The following options are available:
- All: Display this tab to user groups with the Member or Manager role
- Managers: Display this tab to user groups with the Manager role only
- Selected user groups: Display this tab to specific user groups
- Nobody: Do not display this tab to user groups
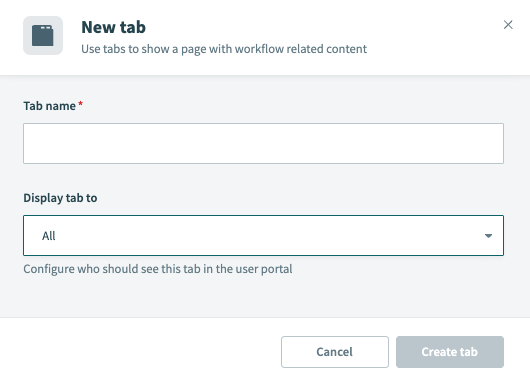 Create a new tab
Optional. Use the User groups drop-down menu to select one or more user groups who have access to this tab.
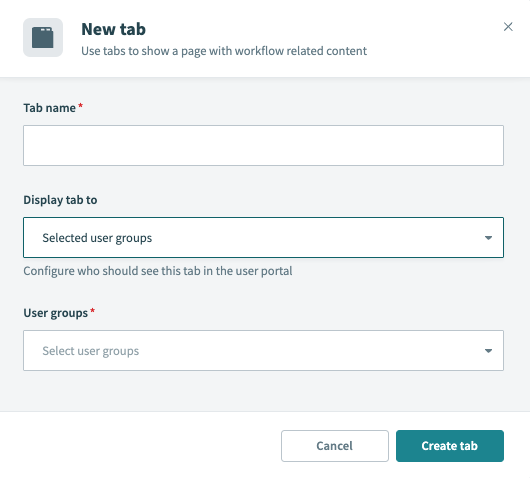 Determine tab visibility
Click Create tab.
Edit tabs
Complete the following steps to edit a tab:
Click the ... (ellipses).
Select Edit tab.
Modify tab details such as the Tab name, visibility settings, and the page where this tab displays.
Click Save changes.
Enable request and approval functionality
Adding a new tab to an app allows you to enable request and approval functionality for applications that don’t already support it.
Complete the following steps to enable request and approval functionality to an app:
Open a Workflow app.
Click + (plus).
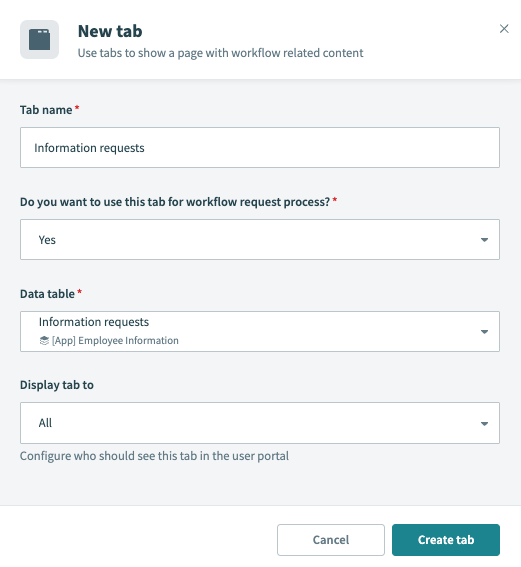
Provide a descriptive Name for your tab.
Use the Do you want to use this tab for workflow request process? to select Yes.
Use the Data table drop-down to select an existing data table to store request and approval records.
Alternatively, click + Create data table to create a new data table.
Use the Display tab to drop-down menu to determine which user groups have access to this tab. The following options are available:
- All: Display this tab to user groups with the Member or Manager role
- Managers: Display this tab to user groups with the Manager role only
- Selected user groups: Display this tab to specific user groups
- Nobody: Don't display this tab to users
Click Create tab.
 Create new tab to enable request and approval functionality
You can create a submission page and recipe to receive and process requests.
Configure request table settings
This section is available for apps with request and approval functionality and allows you to manage the app's main data table and to determine how the columns display in the app.
Manage requests data table
Complete the following steps to manage the data table assigned to your request and approval app:
Click the assigned Requests data table
Use the Data table drop-down to select a different data table.
Alternatively, click + Create data table to create a new data table.
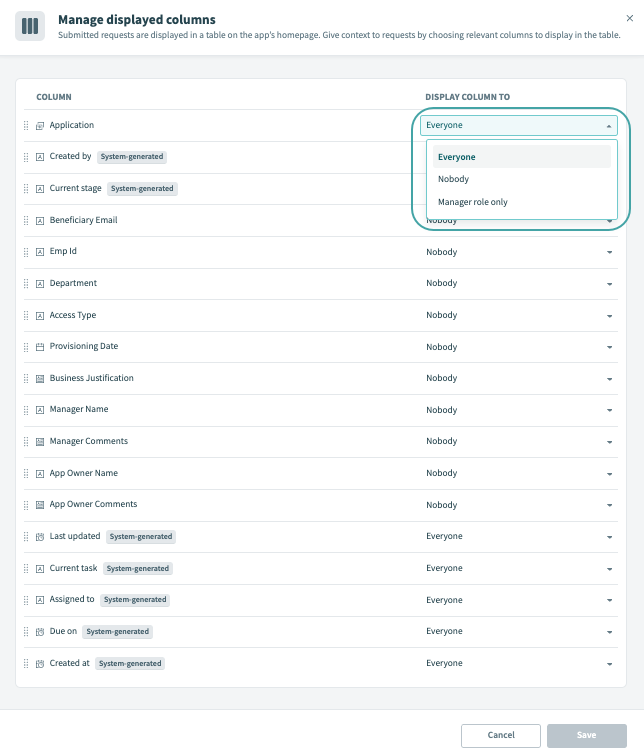
Manage displayed columns
You can configure the columns in your request data table to display to all users, only users with the manager role, or to nobody.
You can allow only users with the Manager role to view specific columns. For example, you may have a use case where end users upload sensitive information to the File column type. These permissions allow you to decide which users can access this information.
Complete the following steps to manage displayed columns:
Click Manage displayed columns for end users.
Determine which columns to display. The following options are available:
- Nobody: Select this option to prevent all users from viewing this column. This is useful to hide system-generated columns from view.
- Manager role only: Select this option to allow only Managers to view this column in your Workflow app.
- Everyone: Select this option to allow all users to view this column in your Workflow app, as Workato adds all users to the Everyone group by default.
 Control how columns display in your Workflow app
Optional. Drag and drop columns to reorganize them.
Last updated: