JMS tools by Workato
JMS tools by Workato is an on-premise connector that allows Workato to interact with Java Message Service (JMS) providers. You can use this connector to subscribe to topic/queue and publish to topic/queue.
Prerequisites
You must have the following prerequisites to use the JMS tools by Workato connector:
- An active on-prem agent
- A configured JMS connection profile
- A configured common data model
- An active JMS implementation
Additional prerequisites vary based on your JMS provider:
How to connect to the JMS tools by Workato connector
Workato supports connections to the following JMS providers:
- Amazon SQS
- ActiveMQ
- You can connect to additional providers, such as IBM MQ and RabbitMQ, using the custom provider option.
Connect to Amazon SQS JMS
Complete the following steps to connect to Amazon SQS JMS in Workato:
Click Create > Connection or press C twice.
Search for and select JMS by Workato as your connection in the New connection page.
Provide a name for your connection in the Connection name field.
 Amazon SQS connection
Use the Location drop-down menu to select the project where you plan to store the connection.
Use the On-prem group drop-down menu to select the connection profile you plan to use.
Use the Provider drop-down menu to select Amazon SQS.
Use the Region drop-down menu to select your Amazon API region. For example, us-east-2.
Enter the Amazon API Access key and Secret key. Refer to the Amazon Create new access keys guide to generate these values.
Click Connect.
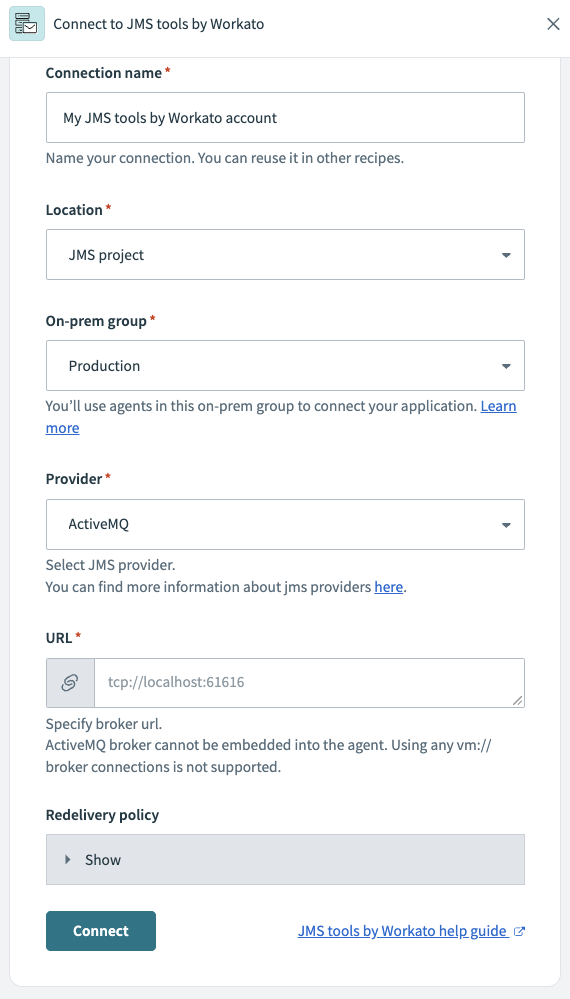
Connect to ActiveMQ JMS
Complete the following steps to connect to Apache MQ JMS (ActiveMQ) in Workato:
ACTIVEMQ CLIENT
The Workato on-prem agent (OPA) already contains an ActiveMQ client. Adding ActiveMQ client JAR files to the OPA lib_ext folder can cause conflicts with the existing client and unexpected connection behavior.
Click Create > Connection or press C twice.
Search for and select JMS by Workato as your connection in the New connection page.
Provide a name for your connection in the Connection name field.
 ActiveMQ connection
Use the Location drop-down menu to select the project where you plan to store the connection.
Use the On-prem group drop-down menu to select the connection profile you plan to use.
Use the Provider drop-down menu to select ActiveMQ.
Enter the ActiveMQ broker URL. For example: tcp://your-broker-host:port. You can't use an embedded broker URL. This field doesn't support in-memory broker connections starting with vm://.
Optional. Expand the Redelivery policy section to configure JMS behavior when a message fails to deliver:
Enter the Maximum number of attempts to allow before sending the message to a Dead Letter Queue (DLQ). Enter -1 for unlimited redeliveries.
Enter the number of seconds to wait before attempting the first redelivery in the Initial redelivery delay field.
Enter the maximum number of seconds to way before additional redelivery attempts in the Maximum delivery delay field. This value only applies when the Delay multiplier is greater than 1.0.
Enter the a multiplier to apply to the redelivery delay after each attempt in the Delay multiplier field. Values less than 1.0 result in a fixed redelivery delay.
Example redelivery policy
A redelivery policy with the following configuration attempts redelivery at 5 seconds, 10 seconds, 20 seconds, and 40 seconds:
-1
5
40
2.0
Click Connect.
Connect to custom JMS
Complete the following steps to connect to a custom JMS provider:
Click Create > Connection or press C twice.
Search for and select JMS by Workato as your connection in the New connection page.
Provide a name for your connection in the Connection name field.
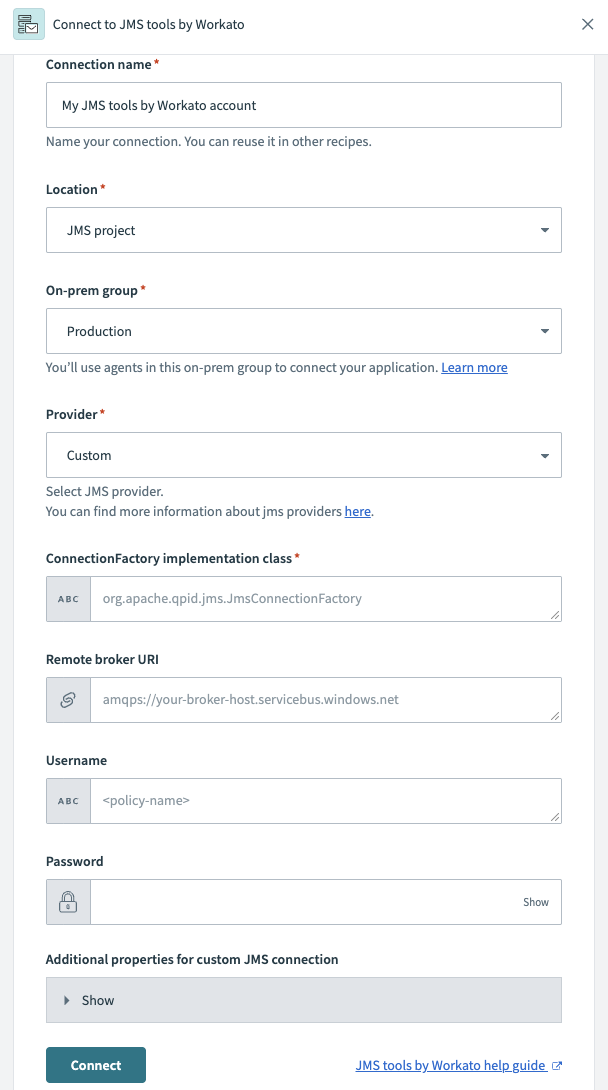 Custom connection
Use the Location drop-down menu to select the project where you plan to store the connection.
Use the On-prem group drop-down menu to select the connection profile you plan to use.
Use the Provider drop-down menu to select Custom.
Enter the ConnectionFactory implementation class. For example, org.apache.qpid.jms.JMSConnectionFactory.
Enter the Remote broker URI. For example: amqps://your-broker-host.servicebus.windows.net.
ACTIVEMQ CONNECTIONS
The connection silently fails if you enter an ActiveMQ brokerURL in the Remote broker URI field. Leave this field blank and enter your brokerURL in the Additional properties for custom JMS connection section for ActiveMQ connections. For example, enter brokerURL as the Key and tcp://your-broker-host:61616 as the Value.
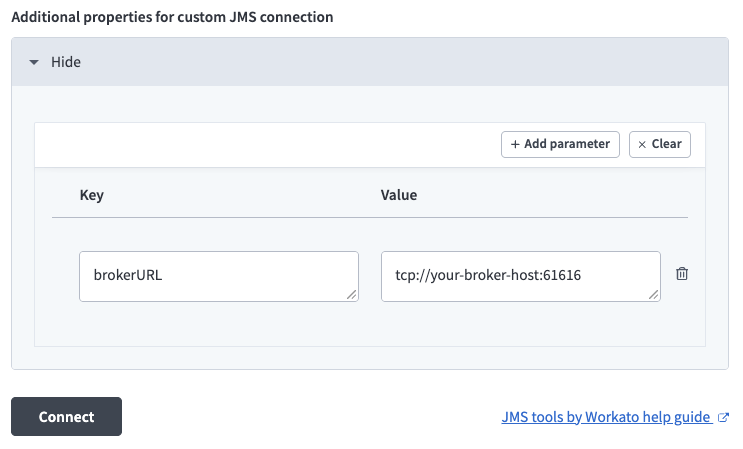 Enter your brokerURL as an additional property.
Enter the Username and Password for your provider.
Optional. Expand to the Additional properties for custom JMS connection section and click Add parameter to add additional properties for your connection.
Click Connect.
Last updated: