HTTP connector - Send request via HTTP action
The Send request via HTTP action enables you to send an HTTP request to an API endpoint. You can choose to configure your action using the HTTP wizard by clicking Start guided setup or configure it manually by clicking Setup manually.
You must create an HTTP connection before you can configure this action.
IMPLICIT RETRY
This action attempts an implicit retry when a request times out during GET, HEAD, PUT, and DELETE requests. This addresses transient network issues by automatically reattempting the request. You can disable implicit retries using the Disable retries field.
Input
SENSITIVE DATA
Don't hard-code sensitive information, such as tokens, usernames or passwords, or client IDs/secrets, into input fields for this action. Instead, store them in your connection, or use a secrets manager.
Workato supports the following secrets managers:
- AWS Secrets Manager
- Azure Key Vault
- CyberArk Conjur Secrets Manager
- Google Secret Manager
- HashiCorp Vault
Refer to the Security best practices documentation for more information.
| Input field | Description |
|---|---|
| Request name | Provide a human readable description of what this API request does. |
| Request | Contains information related to the request, including the Method, Request URL, Request payload, and headers. Refer to the Build your action with the Workato HTTP wizard section to configure this field automatically or the Work with multipart payloads section to configure this field for multi-part payloads. |
| Response | Contains information related to the response, including the Response type, encoding, and headers. Refer to the Build your action with the Workato HTTP wizard section to configure this field automatically or the Receive multipart responses section to configure this field for multi-part payloads. |
| Mark non-2xx response codes as success (Response) | Select whether to mark non-2xx responses as successful. The HTTP connector treats non-2xx response codes as errors by default. This causes the job to stop unless there is a Handle errors step. |
| Wait for response | Select whether to designate this HTTP action as a long action. This field is in public beta. Refer to the Configure HTTP action as a long action section for more information. |
| Response timeout (seconds) | Set the maximum time, in seconds, that Workato waits for a response. Jobs fail if no response arrives within this time window. Must be an integer between 11 and 3600 seconds. Defaults to 3600 seconds (1 hour). This field is in public beta and is only available when Wait for response is set to Yes. |
| Disable retries | Select whether to disable automatic retries for failed requests. Use this option to prevent duplicate requests for operations that shouldn't retry. |
| Enable streaming | Select whether to stream the HTTP response to the next action in your recipe. Workato streams responses up to 2 GB. The streamed response can be passed to any subsequent action, including actions that don't support file streaming. This field is only available when Wait for response is set to Yes. |
Schematic vs. raw JSON request body
When you choose the JSON request body option in the Request content type input field, Workato will generate an input schema based on the sample JSON provided. This allows each field to be configured individually. It also allows you to leverage formula mode to manipulate the field's value. For example, you may use ternary operator and/or skip to conditional include or omit a field.
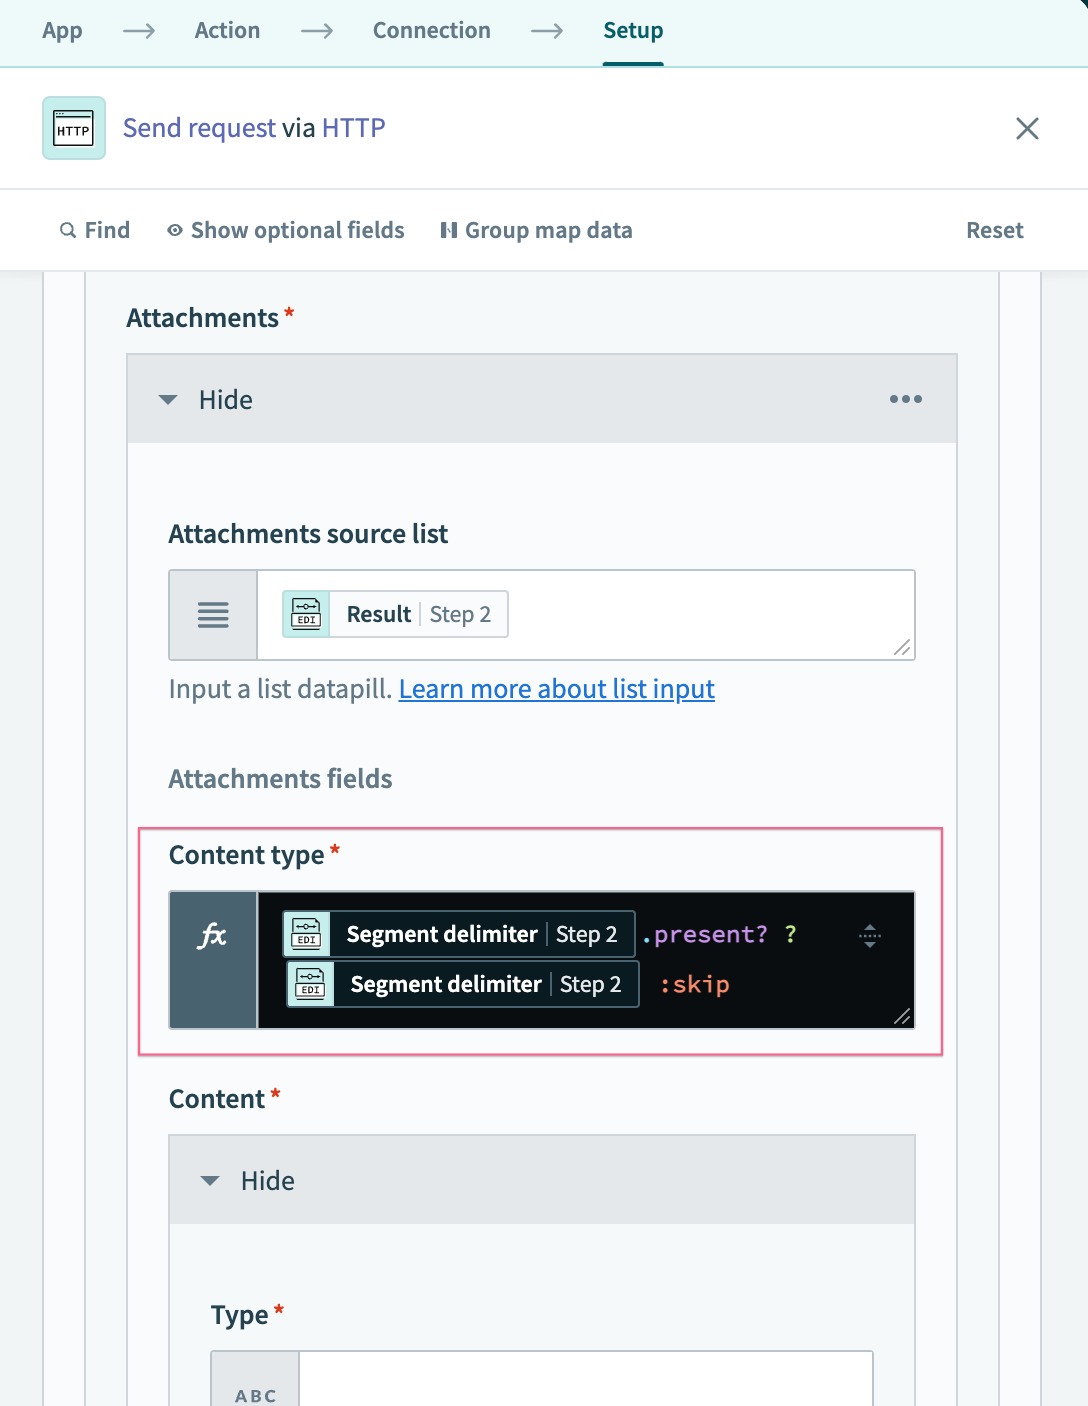 Using formula mode to manipulate input field value
However, you may want to fully customize the message formatting. In this case, you may choose Raw JSON request body instead, which allows you to input and manipulate the JSON payload structure directly.
 Raw JSON request body
Configure HTTP action as a long action
You can set the Wait for response field to Yes to designate this HTTP action as a long action if you expect frequent timeouts or expect the request to last longer than 120 seconds. Use the Response timeout (seconds) field to configure how long Workato waits for a response.
PUBLIC BETA
The Wait for response field in the Send request via HTTP action is a beta feature available to all users of Workato's HTTP connector.
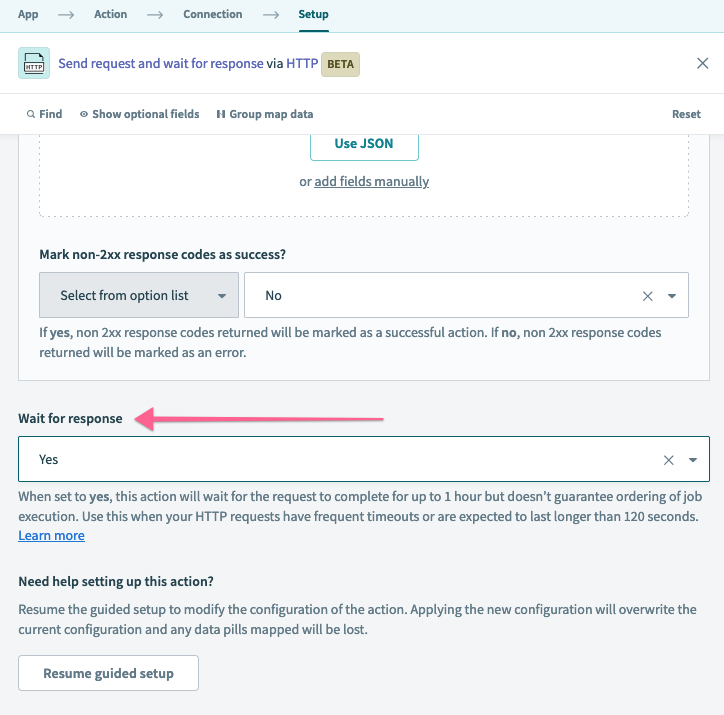 Wait for response
The following table explains the key differences when the Wait for response field is enabled:
| Without "wait for response" | With "wait for response" | |
|---|---|---|
| Request timeout | Up to 120 seconds | Configurable using the Response timeout (seconds) field. Must be an integer between 11 and 3600 seconds. Defaults to 3600 seconds (1 hour). |
| Response size | Soft response size limit of up to 200 MB | Hard response size limit of 2 GB |
| Connection types | All HTTP connection types are possible | All connection types are supported, except connections using OPA |
| Job processing | Jobs in the queue are processed in order | Jobs may not be processed in order |
Workato recommends that you start with Wait for response disabled and edit the action to enable the setting if timeouts occur.
Stream HTTP responses
Set Wait for response and Enable streaming to Yes to stream the HTTP response to the next action in your recipe.
Responses up to 2 GB are supported. The streamed response can be passed to any subsequent action in your recipe, including actions that don't support file streaming.
Output
| Output field | Description |
|---|---|
| Status code | The status code of the API response. |
| Body | The body content of the response. |
| Error | Any errors the request encountered. |
| Headers | Contains information about the headers extracted from the response, based on the configuration of the Response section. |
| Response | Contains information about the response, based on the configuration of the Response section. |
Build your action with the Workato HTTP wizard
The Workato HTTP wizard streamlines the process of setting up HTTP actions by guiding you through each configuration step.
In many situations, the wizard automatically provides a recommended HTTP configuration tailored to your endpoint, eliminating the need for manual setup. It also allows you to test the connection directly within the wizard, ensuring the endpoint responds as expected before finalizing the action.
This example uses the Workato HTTP wizard to create an action named Get incidents in ServiceNow.
Provide the HTTP method and request URL
Complete the following steps to specify the HTTP method and request URL for the API in this HTTP action:
Click Start guided setup to open the HTTP wizard.
EXITING THE SETUP WIZARD
You can exit the setup wizard by clicking Skip guided setup to configure the action manually at any time during this process. Similarly, if you decide to set up the action manually, you can choose to use the HTTP wizard by clicking Resume guided setup.
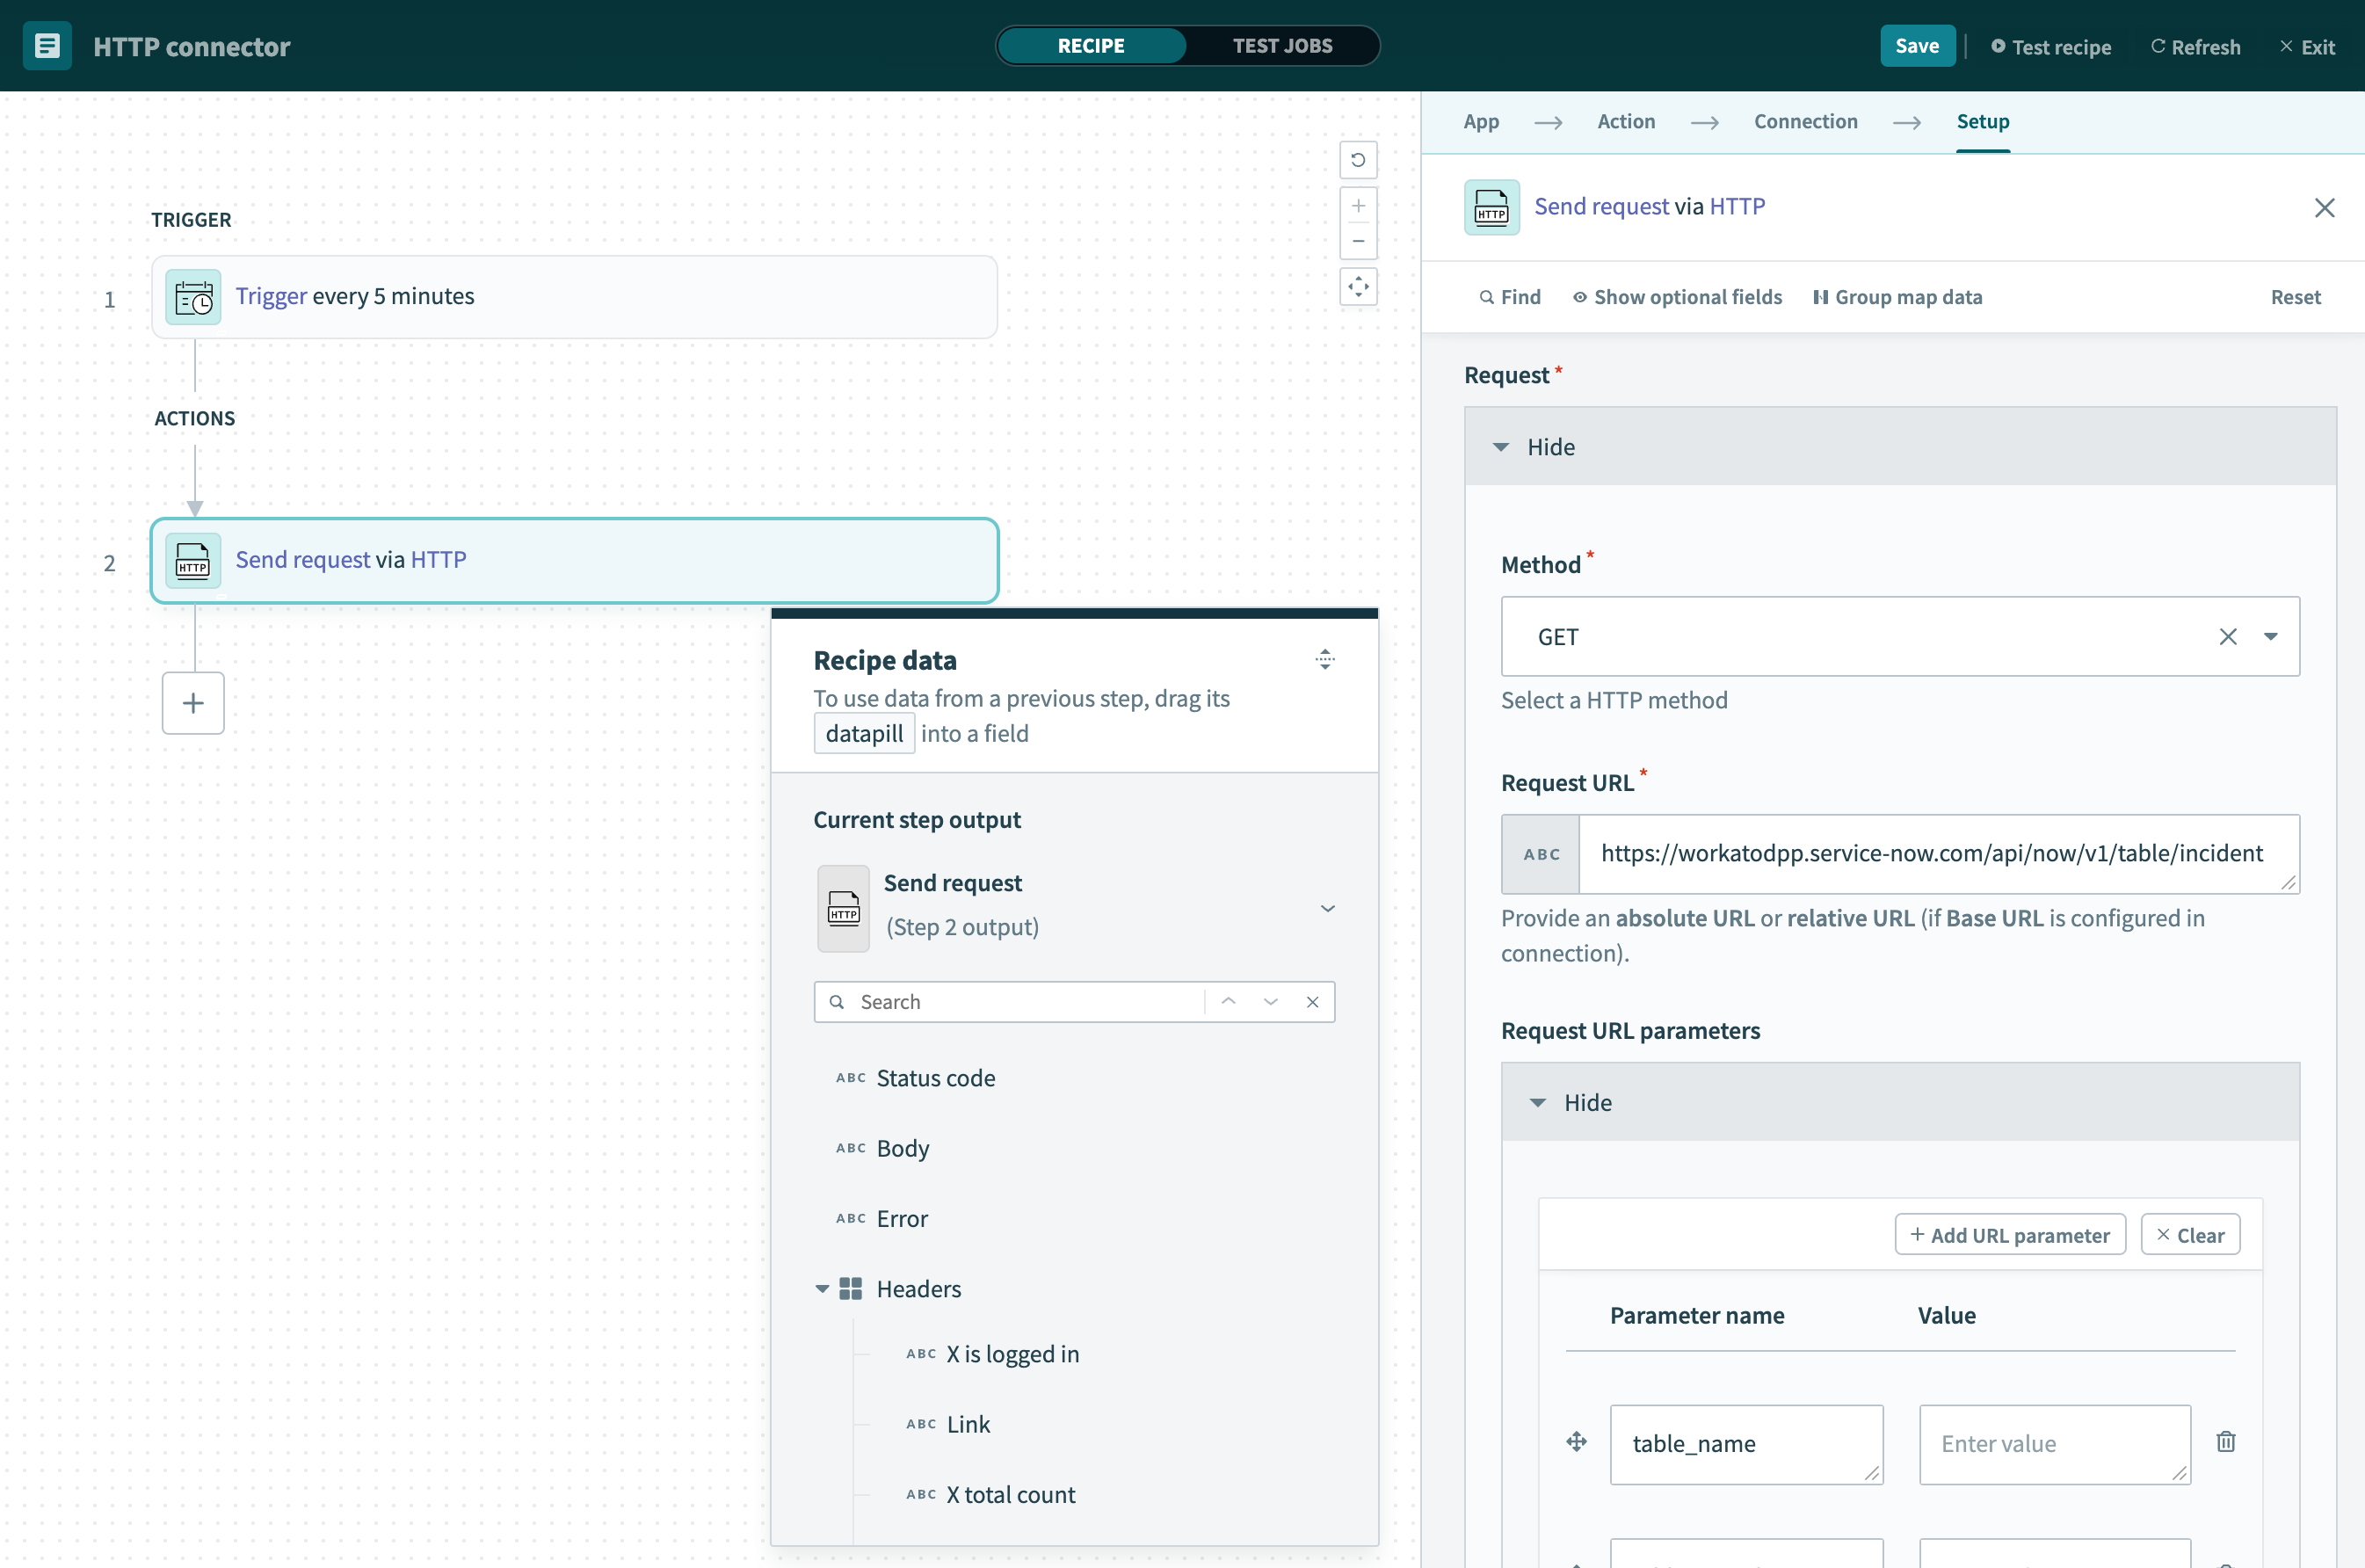
Use the Method drop-down menu to select the HTTP method of the API endpoint you plan to call. This example uses GET.
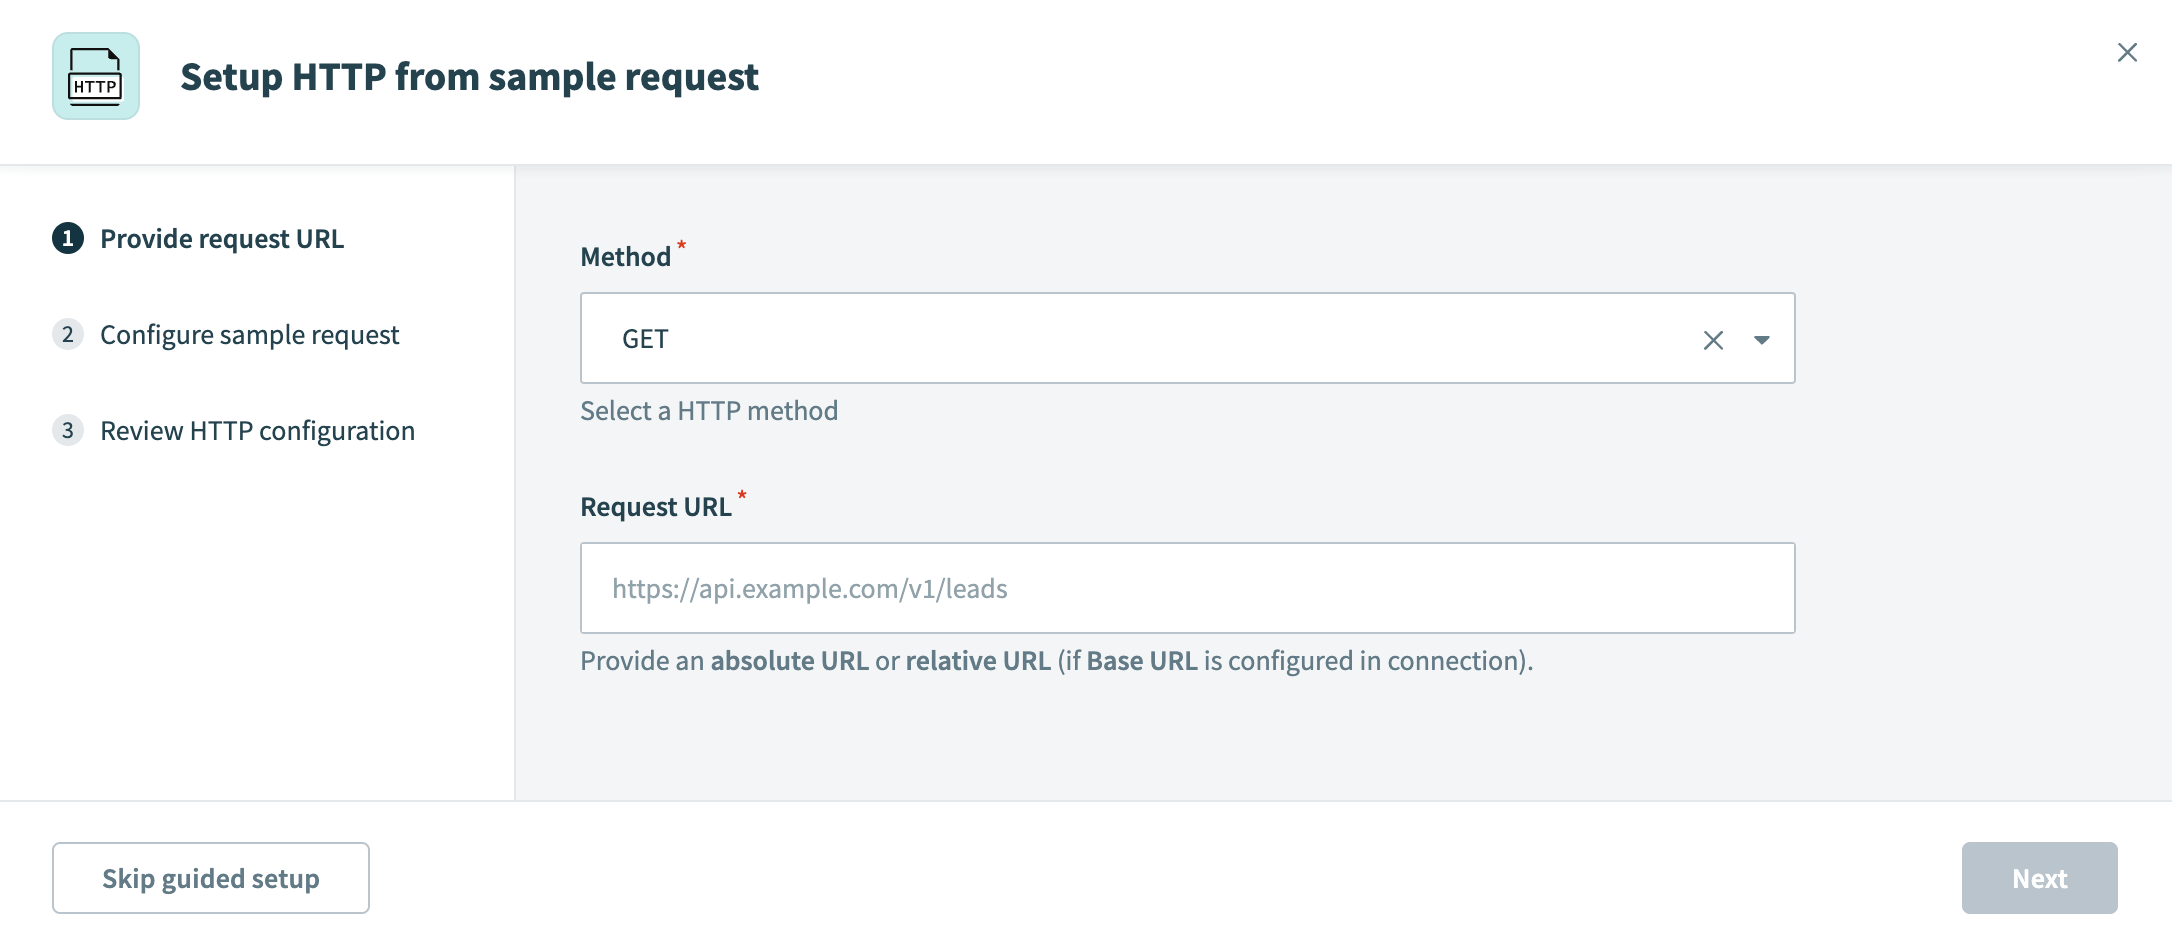 Provide an HTTP method and request URL
Enter the absolute URL of the API endpoint in the Request URL field.
Alternatively, if you configured the base URL in the connection setup, enter the relative URL in this field. For example, if the base URL is https://api.example.com/ and the absolute URL is https://api.example.com/users/123, your relative URL is users/123.
In this example, we plan to view existing incident records from ServiceNow. According to the ServiceNow documentation, this is a GET call with the following endpoint:
https://<instance>.service-now.com/api/now/v1/table/incidentReplace <instance> in the URL with the specific name of your ServiceNow instance.
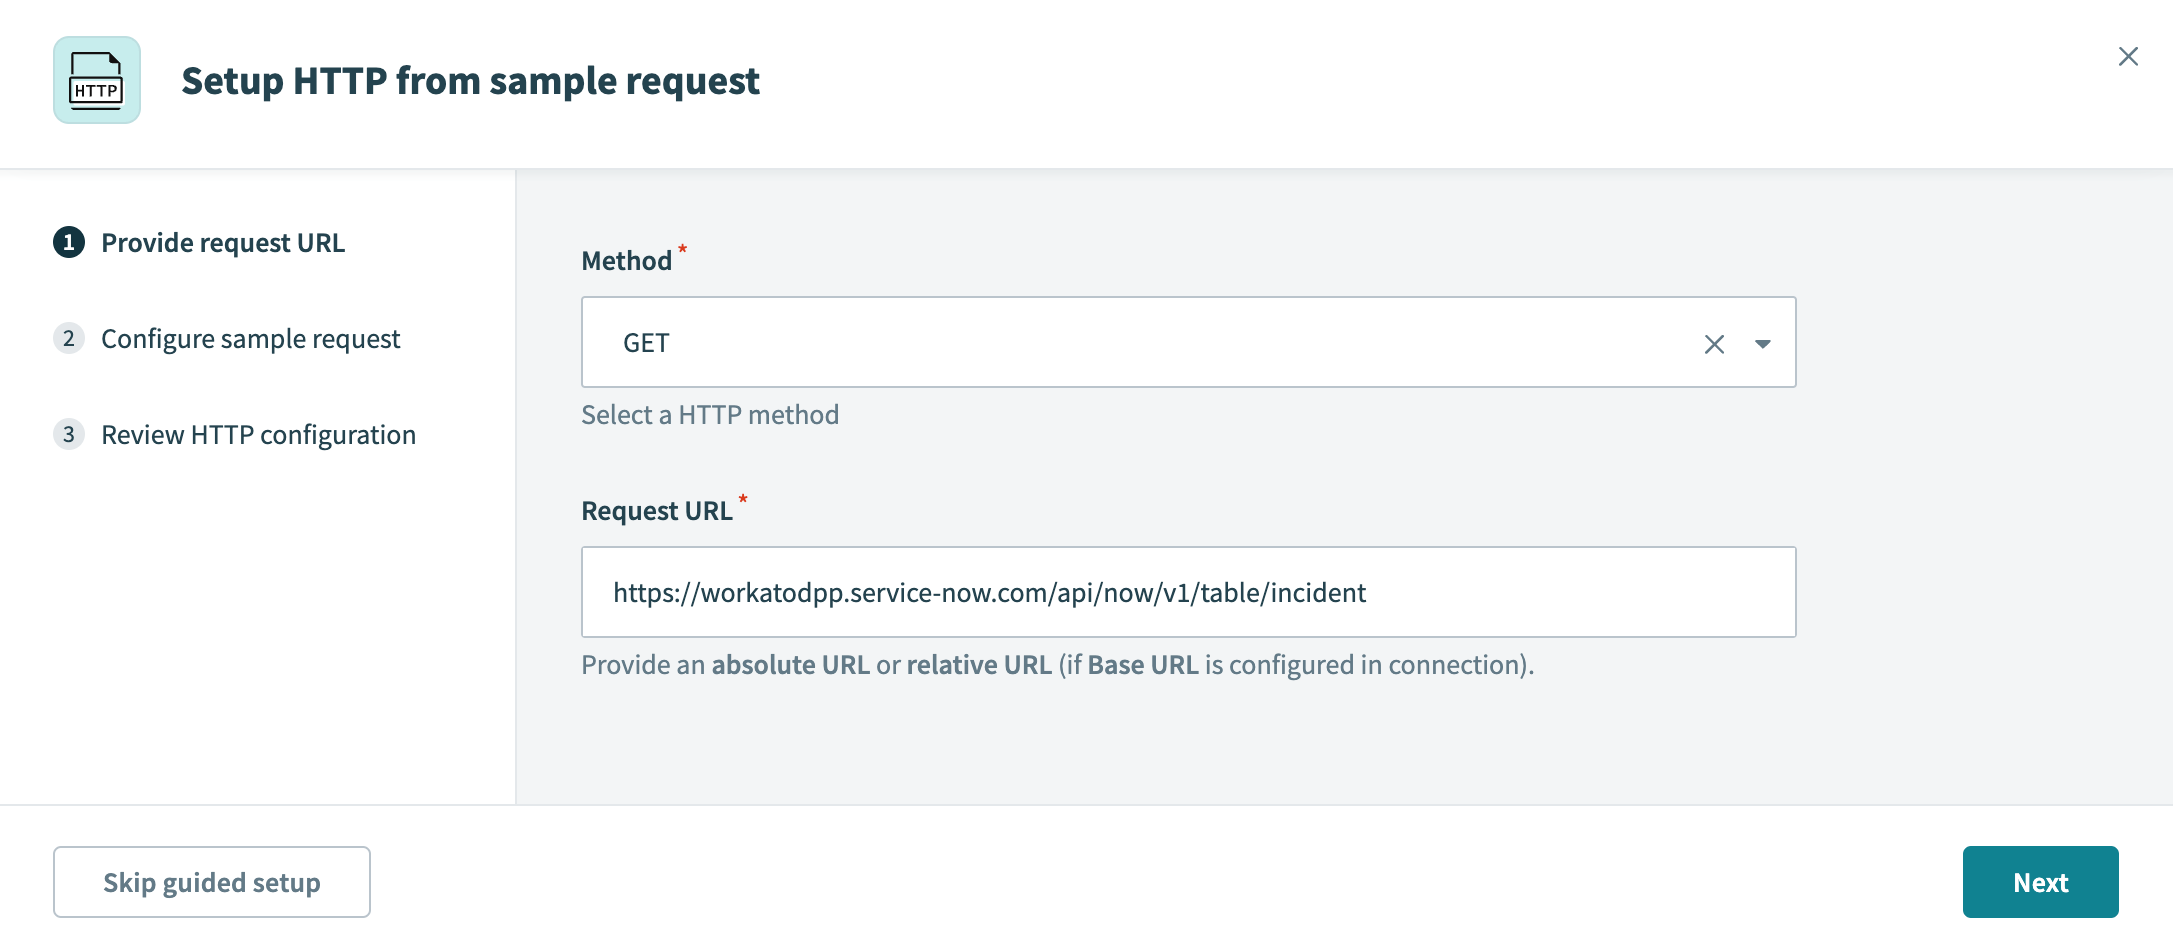 Configuring HTTP method and request URL
Click Next.
Configure and send the sample request
For certain endpoints, Workato provides a sample request that you can use as-is, customize, or remove to build your own manually.
Configure the sample request using one of the following options:
- Use Workato's recommended request settings without modification.
- Customize Workato's recommended request settings to meet your requirements.
- Remove Workato's recommended request settings and build the request manually.
AWS HTTP
When using AWS authentication methods such as Access key or IAM role auth, you don't need to append any additional authentication parameters. In AWS documentation, these are often denoted as AUTHPARAMS.
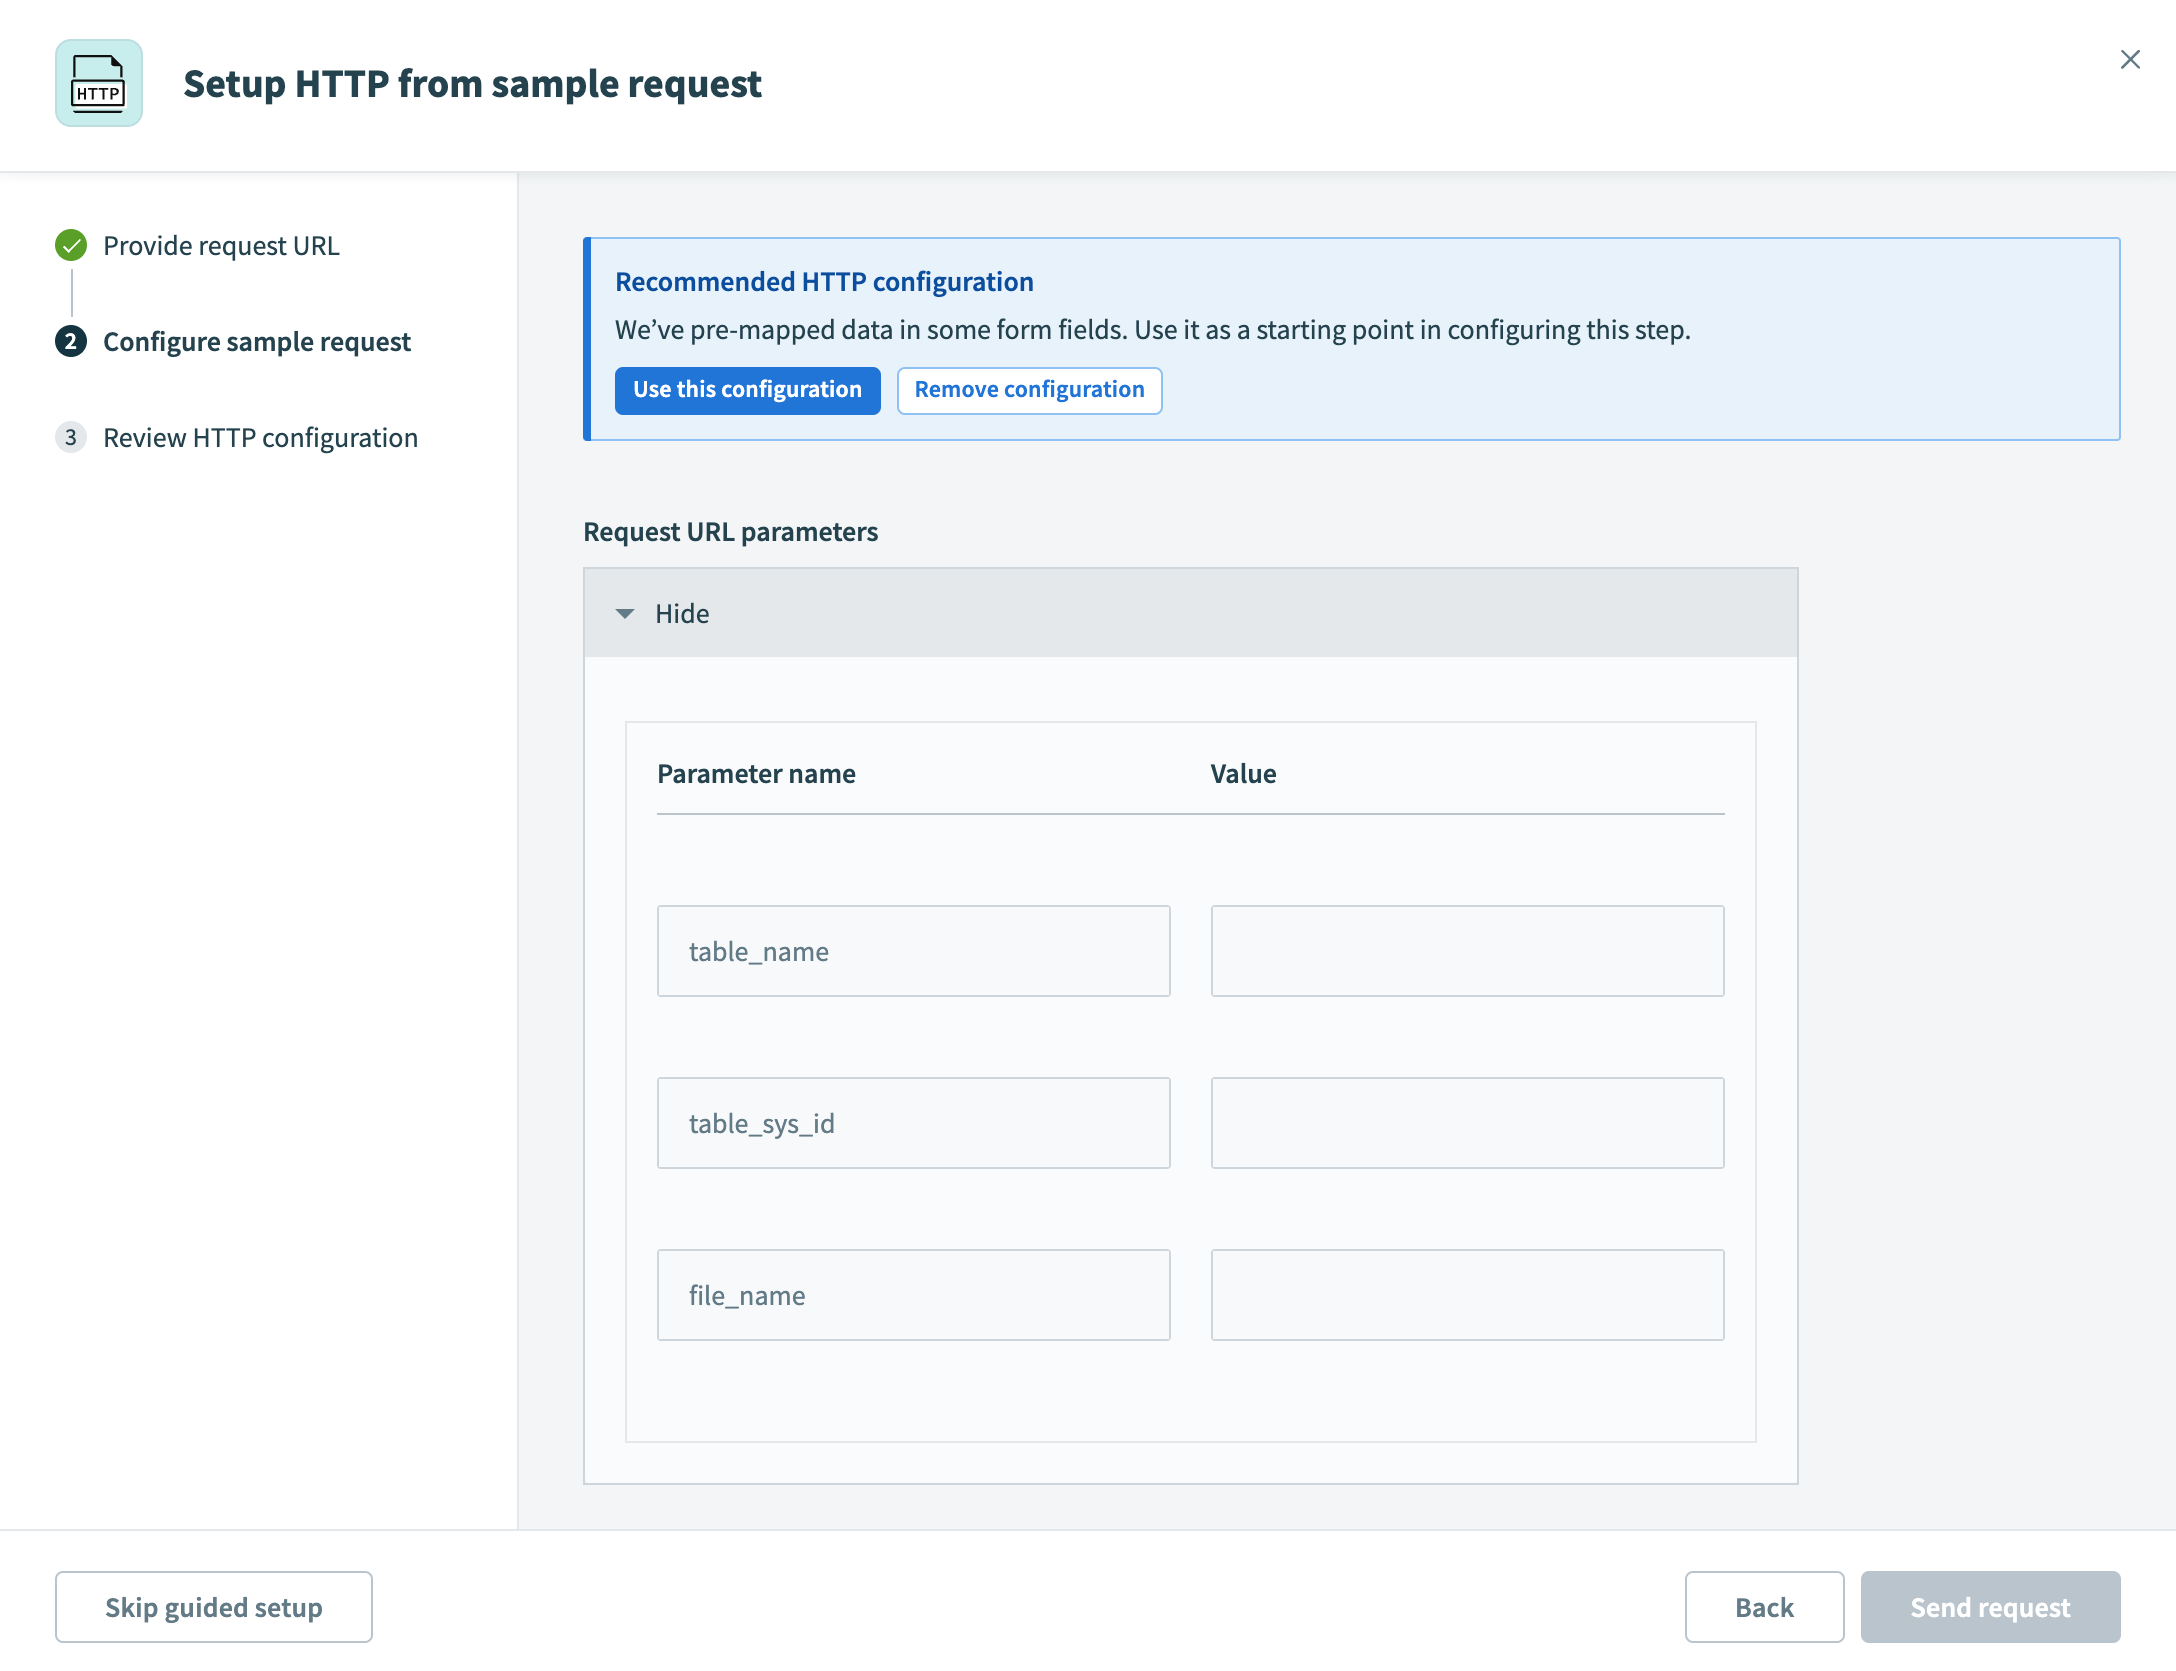 RecipeIQ recommendations for HTTP configuration
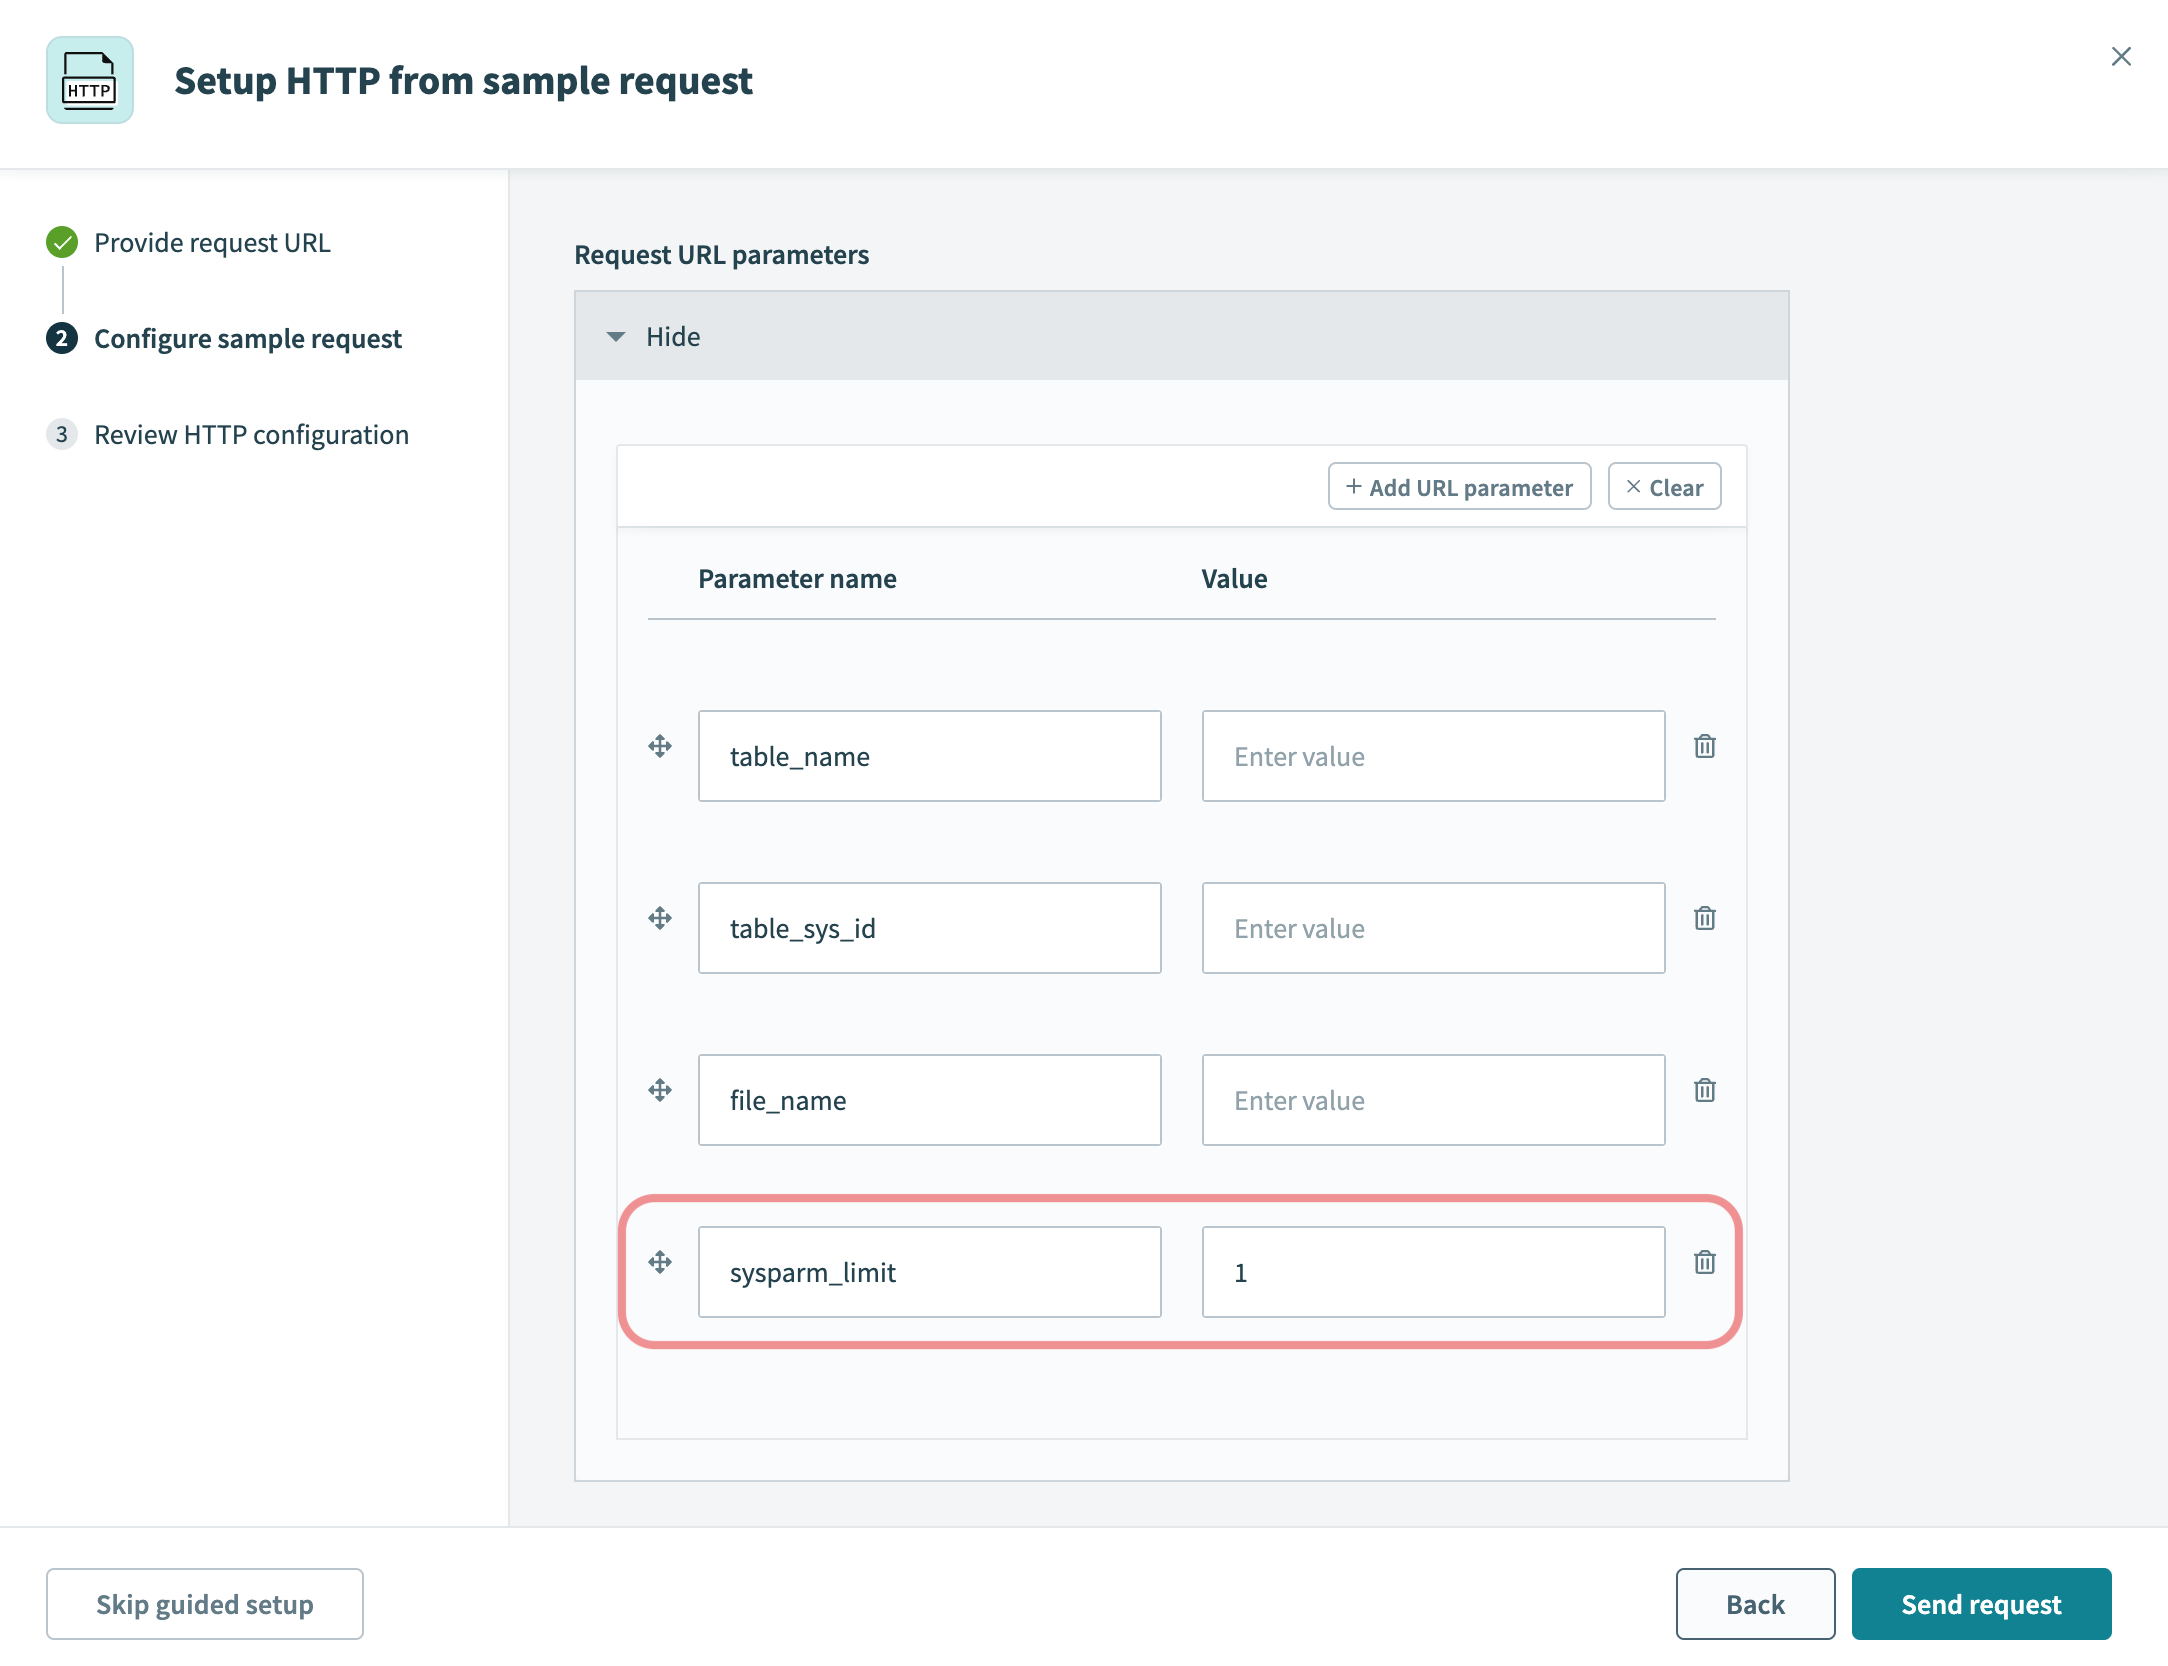 Adding request parameter
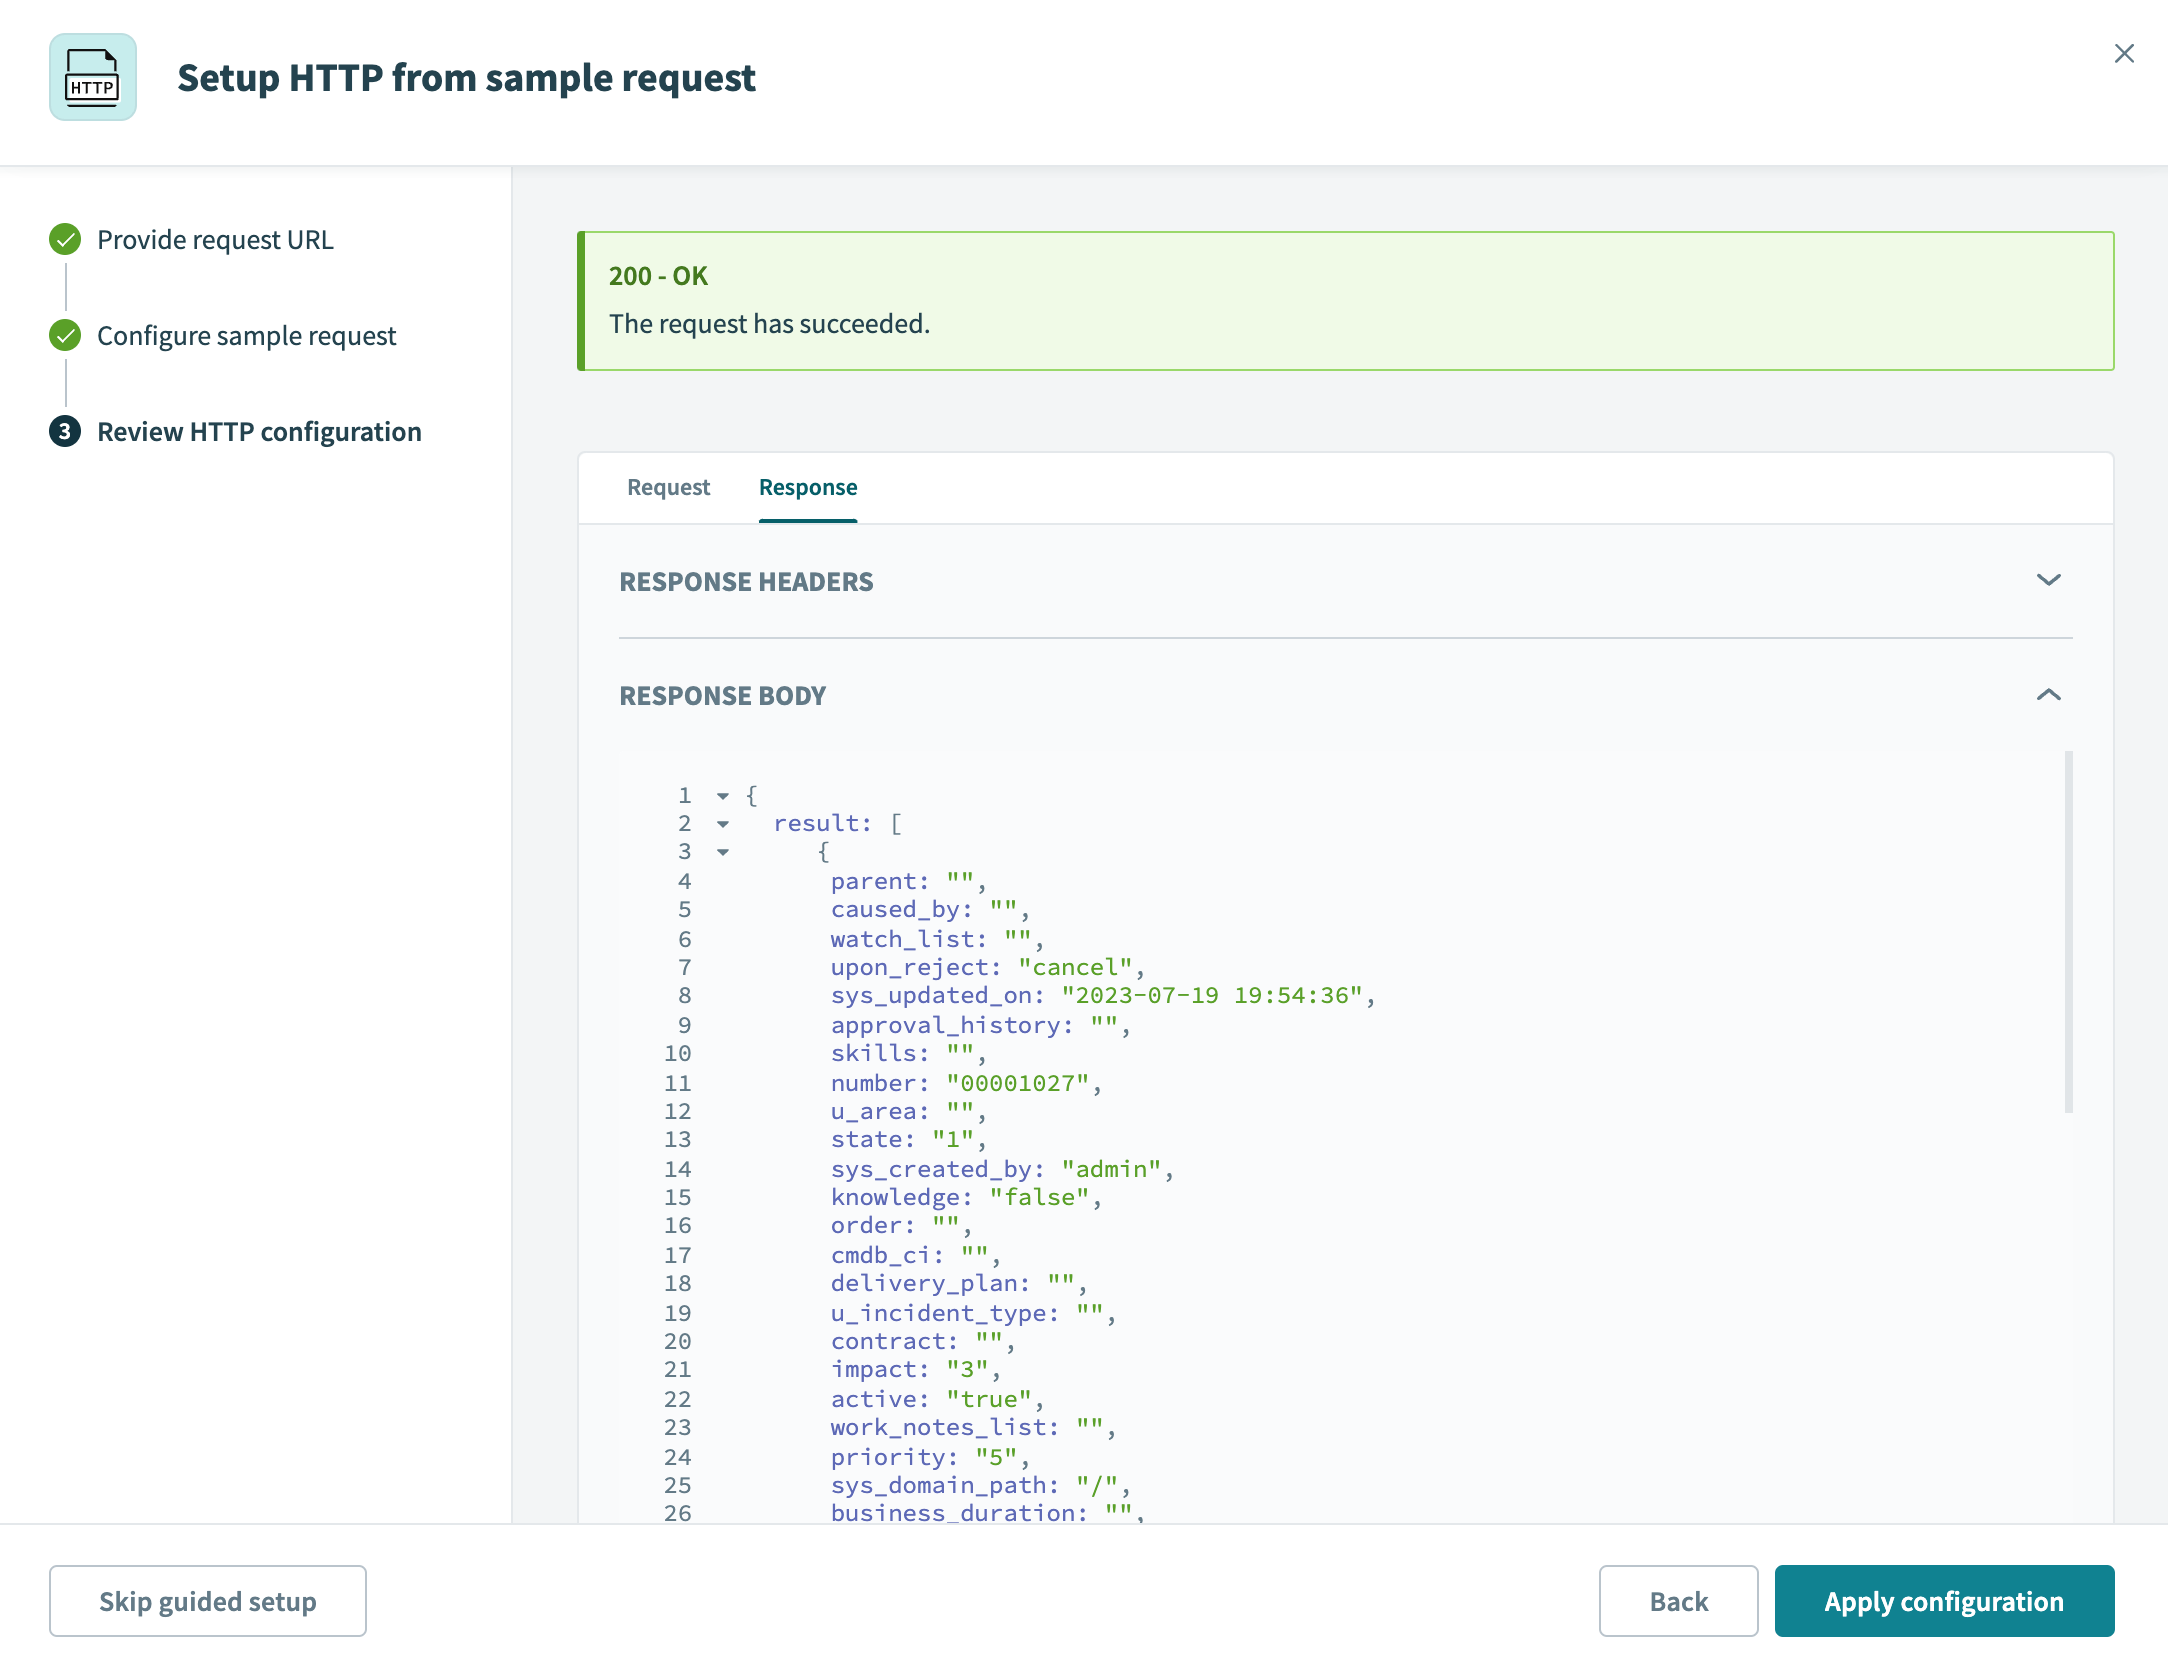 Request successful
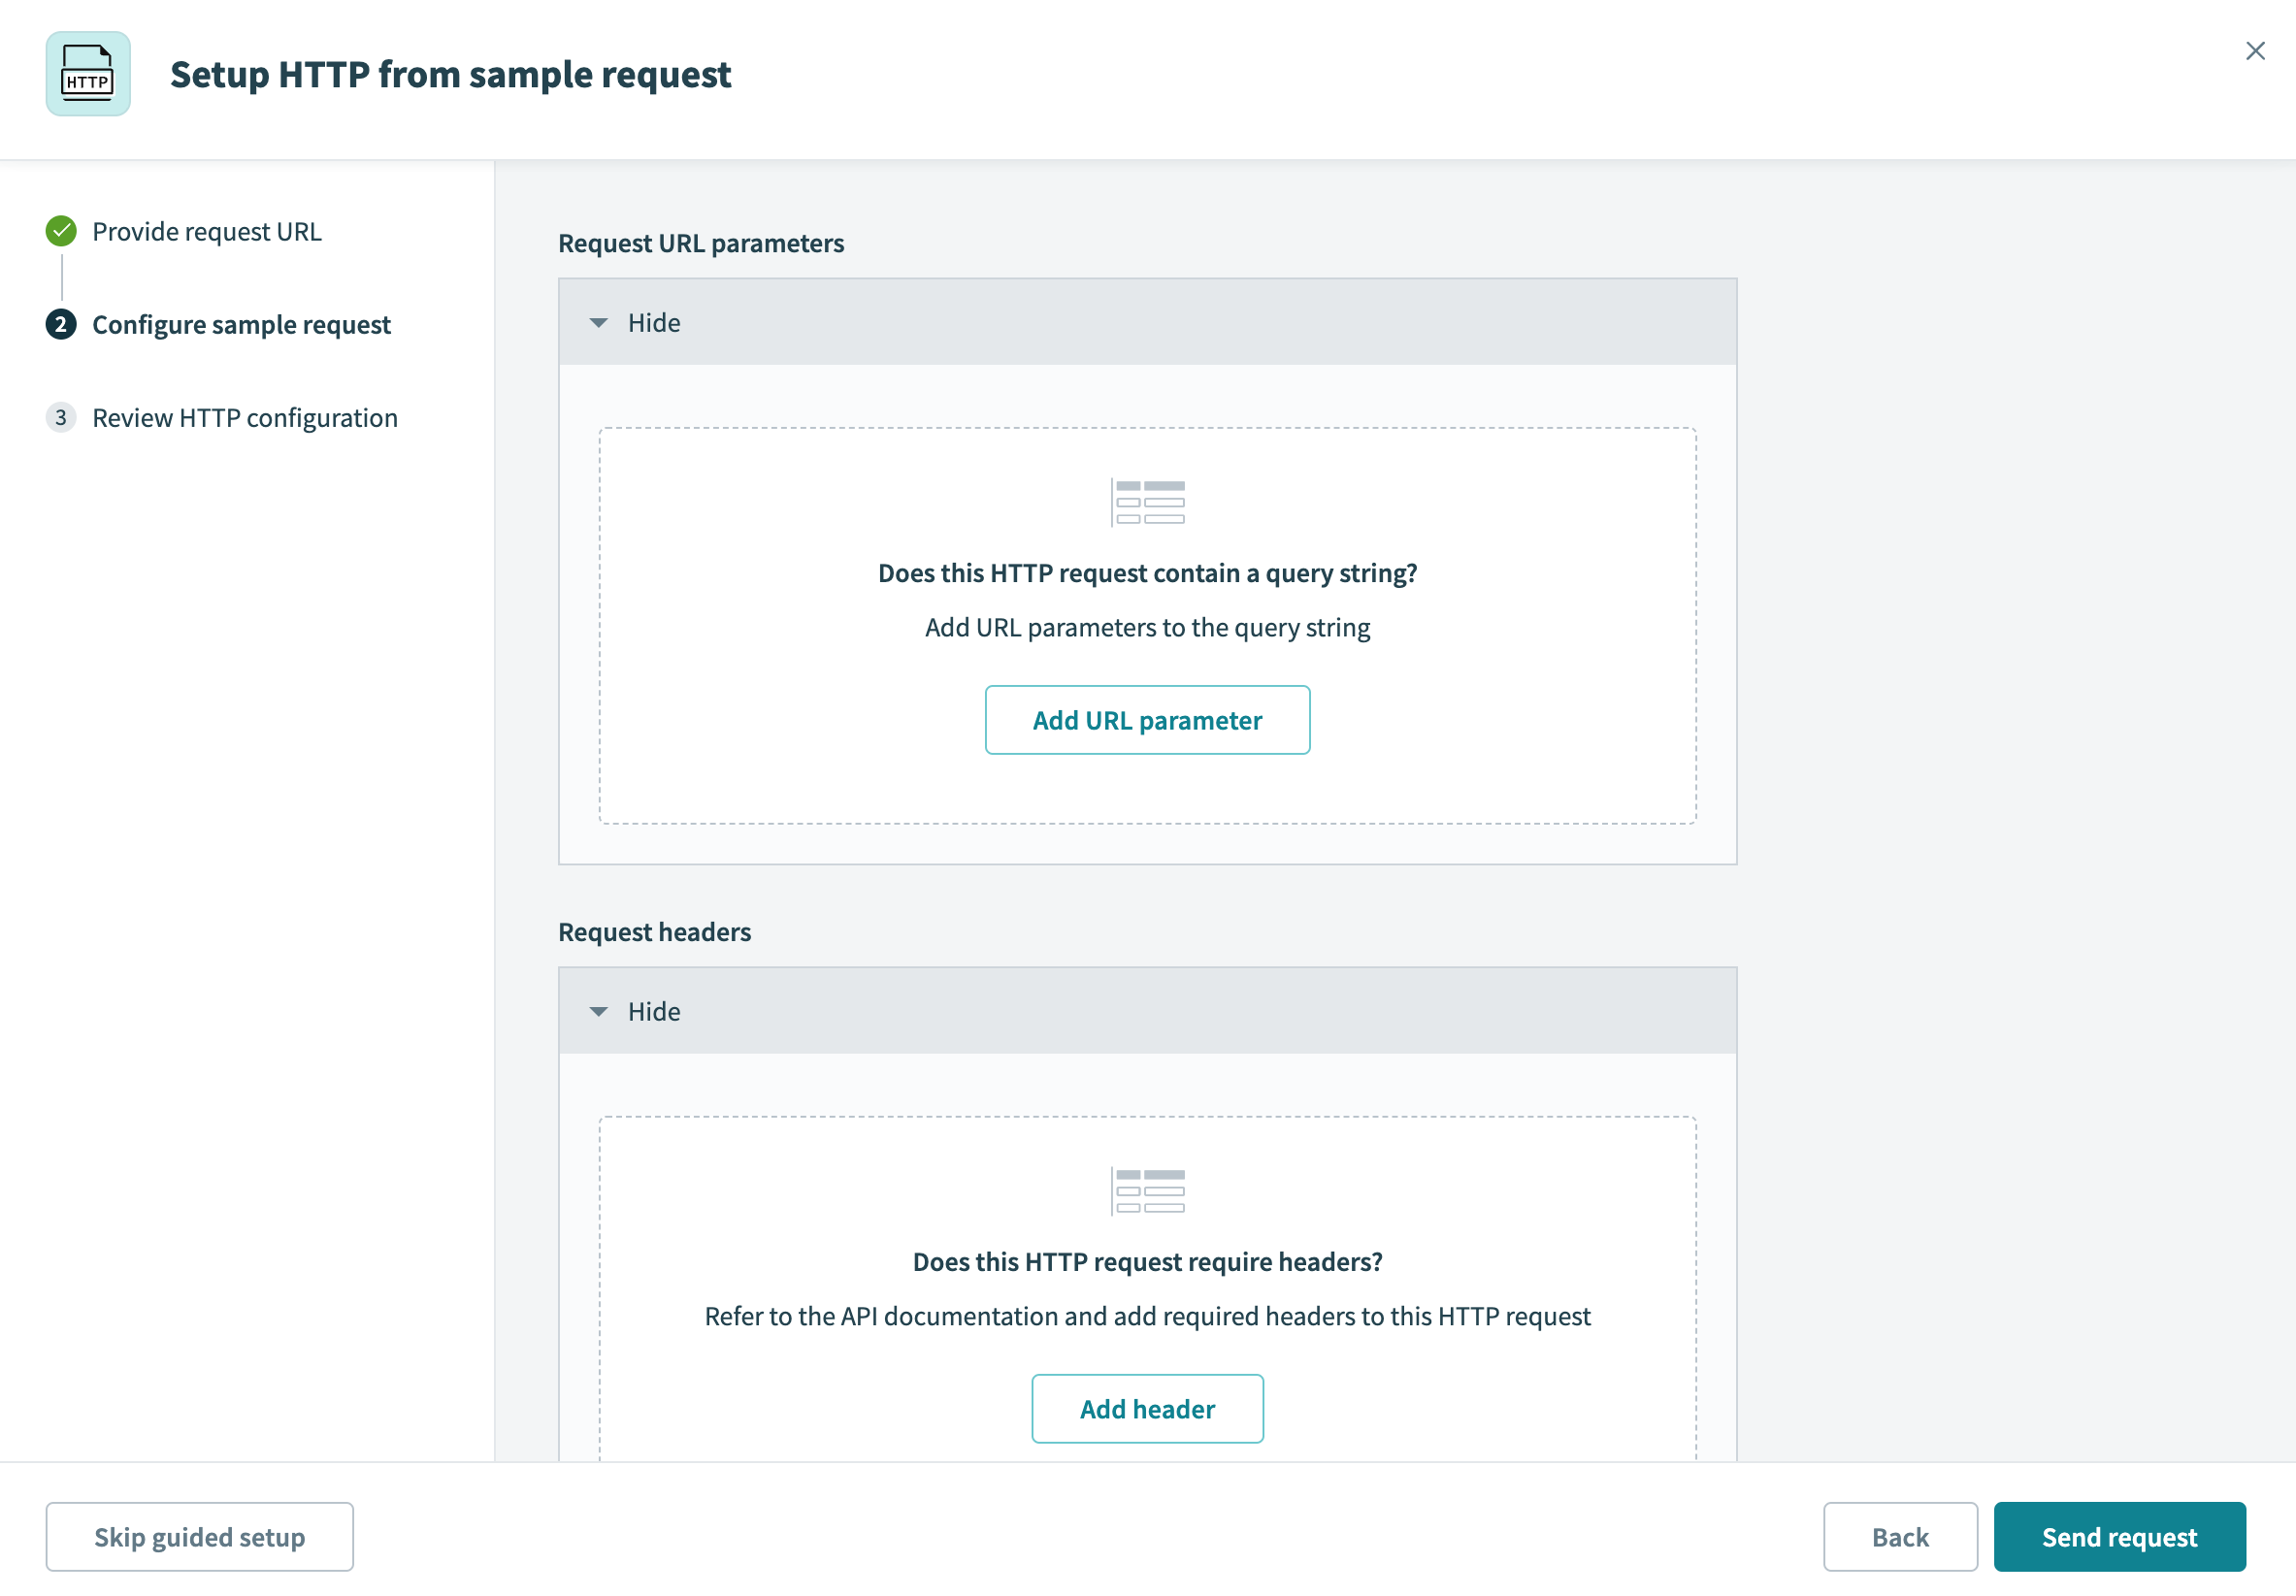 Configure the sample request
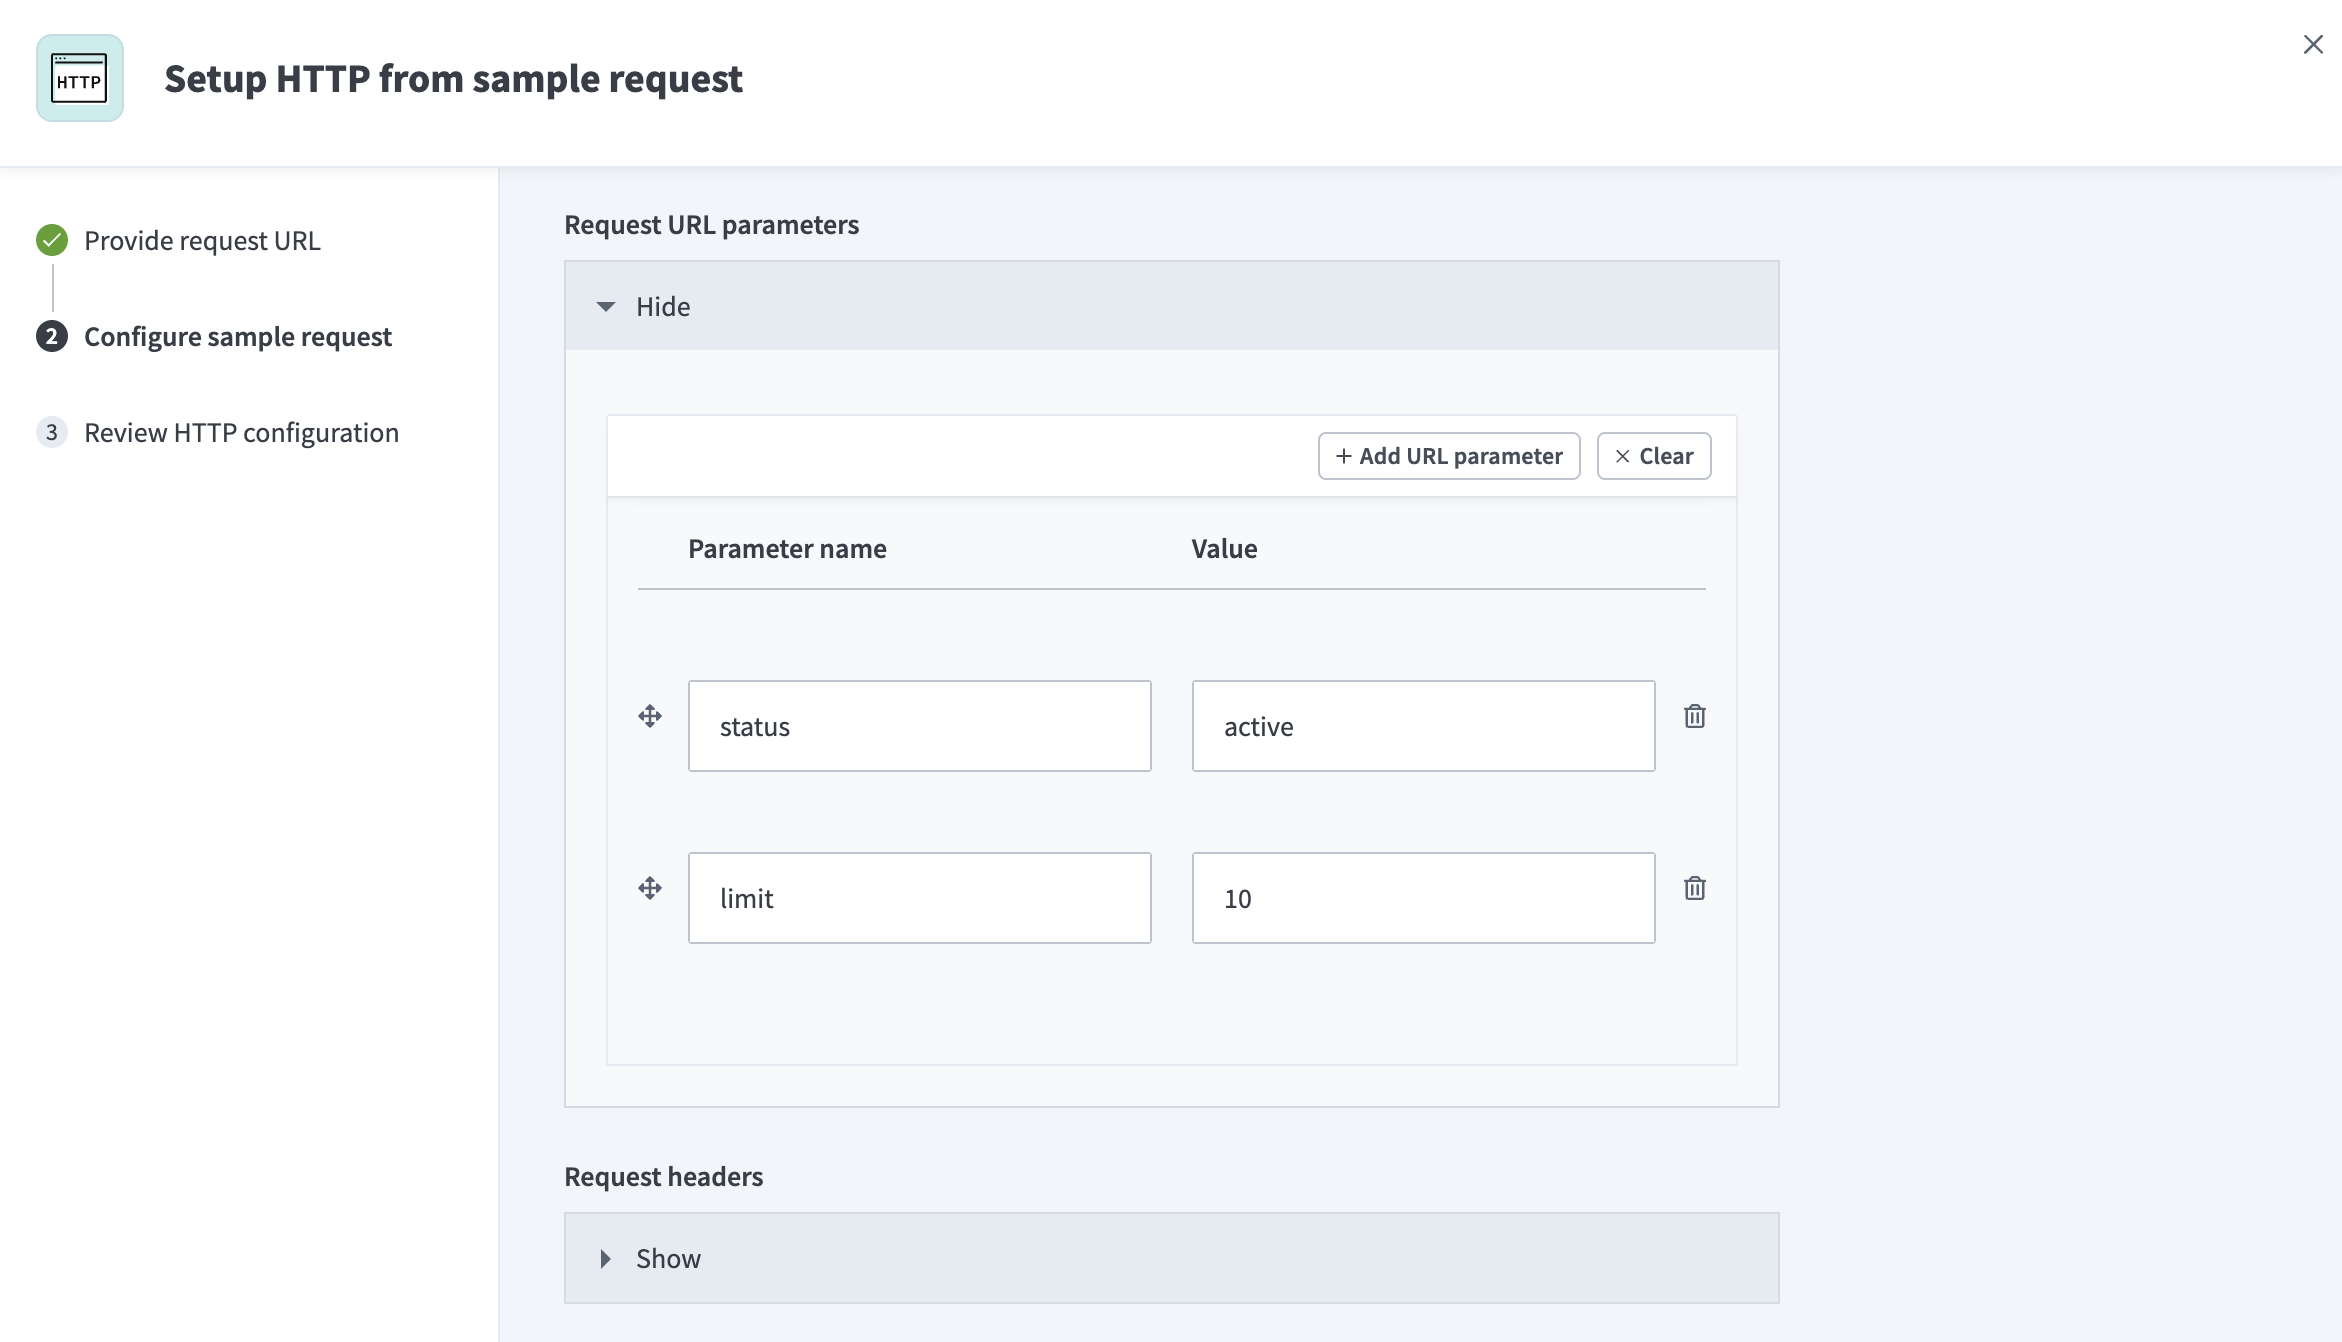 Configured sample request
Review the HTTP configuration
A successful request confirms the following:
- The connection is set up successfully.
- The API endpoint is correct.
- All required request body fields are included and contain valid values.
Click Apply configuration to apply the request and response configuration to the Workato HTTP action.
 Configuration applied for HTTP action
Finalize the HTTP configuration
After verifying that the configuration works, you can either map datapills to the Value column next to their corresponding parameters or manually enter fixed values into these fields.
Work with multipart payloads
The Send request via HTTP action supports multipart payloads that send or receive multiple pieces of data with different content types in a single HTTP request or response.
The following multipart types are available:
| Type | Payload content | Example use case |
|---|---|---|
| Multipart form | Form fields (text) and file uploads combined | Upload an invoice PDF with customer name, date, and amount fields. |
| Multipart alternative | Multiple versions of the same content in different formats | Send an email with both plain text and HTML versions. |
| Multipart digest | Multiple complete email messages (RFC822 format) | Process a mailing list digest containing multiple messages. |
| Multipart mixed | Multiple independent files or data with no relationship | Send multiple contract PDFs and a JSON summary of terms in one request. |
| Multipart related | Primary content plus supporting resources linked by Content-ID | Send a SOAP XML envelope with attached PDF files, or an HTML email with embedded images. |
| Multipart byteranges (Response only) | Multiple byte ranges (fragments) of the same file | Handle resumable downloads or video streaming. |
Refer to the following sections to configure multipart payloads:
- Send multipart form requests
- Send multipart alternative, digest, mixed, and related requests
- Receive multipart responses
LIMITATIONS
Workato doesn't support nested multipart payloads in the Send request via HTTP action.
Send multipart form requests
Complete the following steps to configure the Send request via HTTP action's Request section to send multipart form requests:
INFO
Refer to the Send multipart alternative, digest, mixed, and related requests section to send other types of multipart request.
Click Setup manually.
Go to the Request section and use the Method drop-down menu to select one of the following methods that support multipart form requests:
POSTPUTPATCHDELETE
Enter the absolute URL of the API endpoint in the Request URL field. Alternatively, enter a relative URL if you configured a base URL in the connection setup. For example, if the base URL is https://api.example.com/ and the absolute URL is https://api.example.com/users/123, your relative URL is users/123.
Use the Request content type drop-down menu to select Multipart form.
Go to the Request body schema field and click Add fields manually to open the Add new field dialog.
Enter a name for your field in the Name field. For example, File1.
Use the File attachment drop-down menu to select Yes.
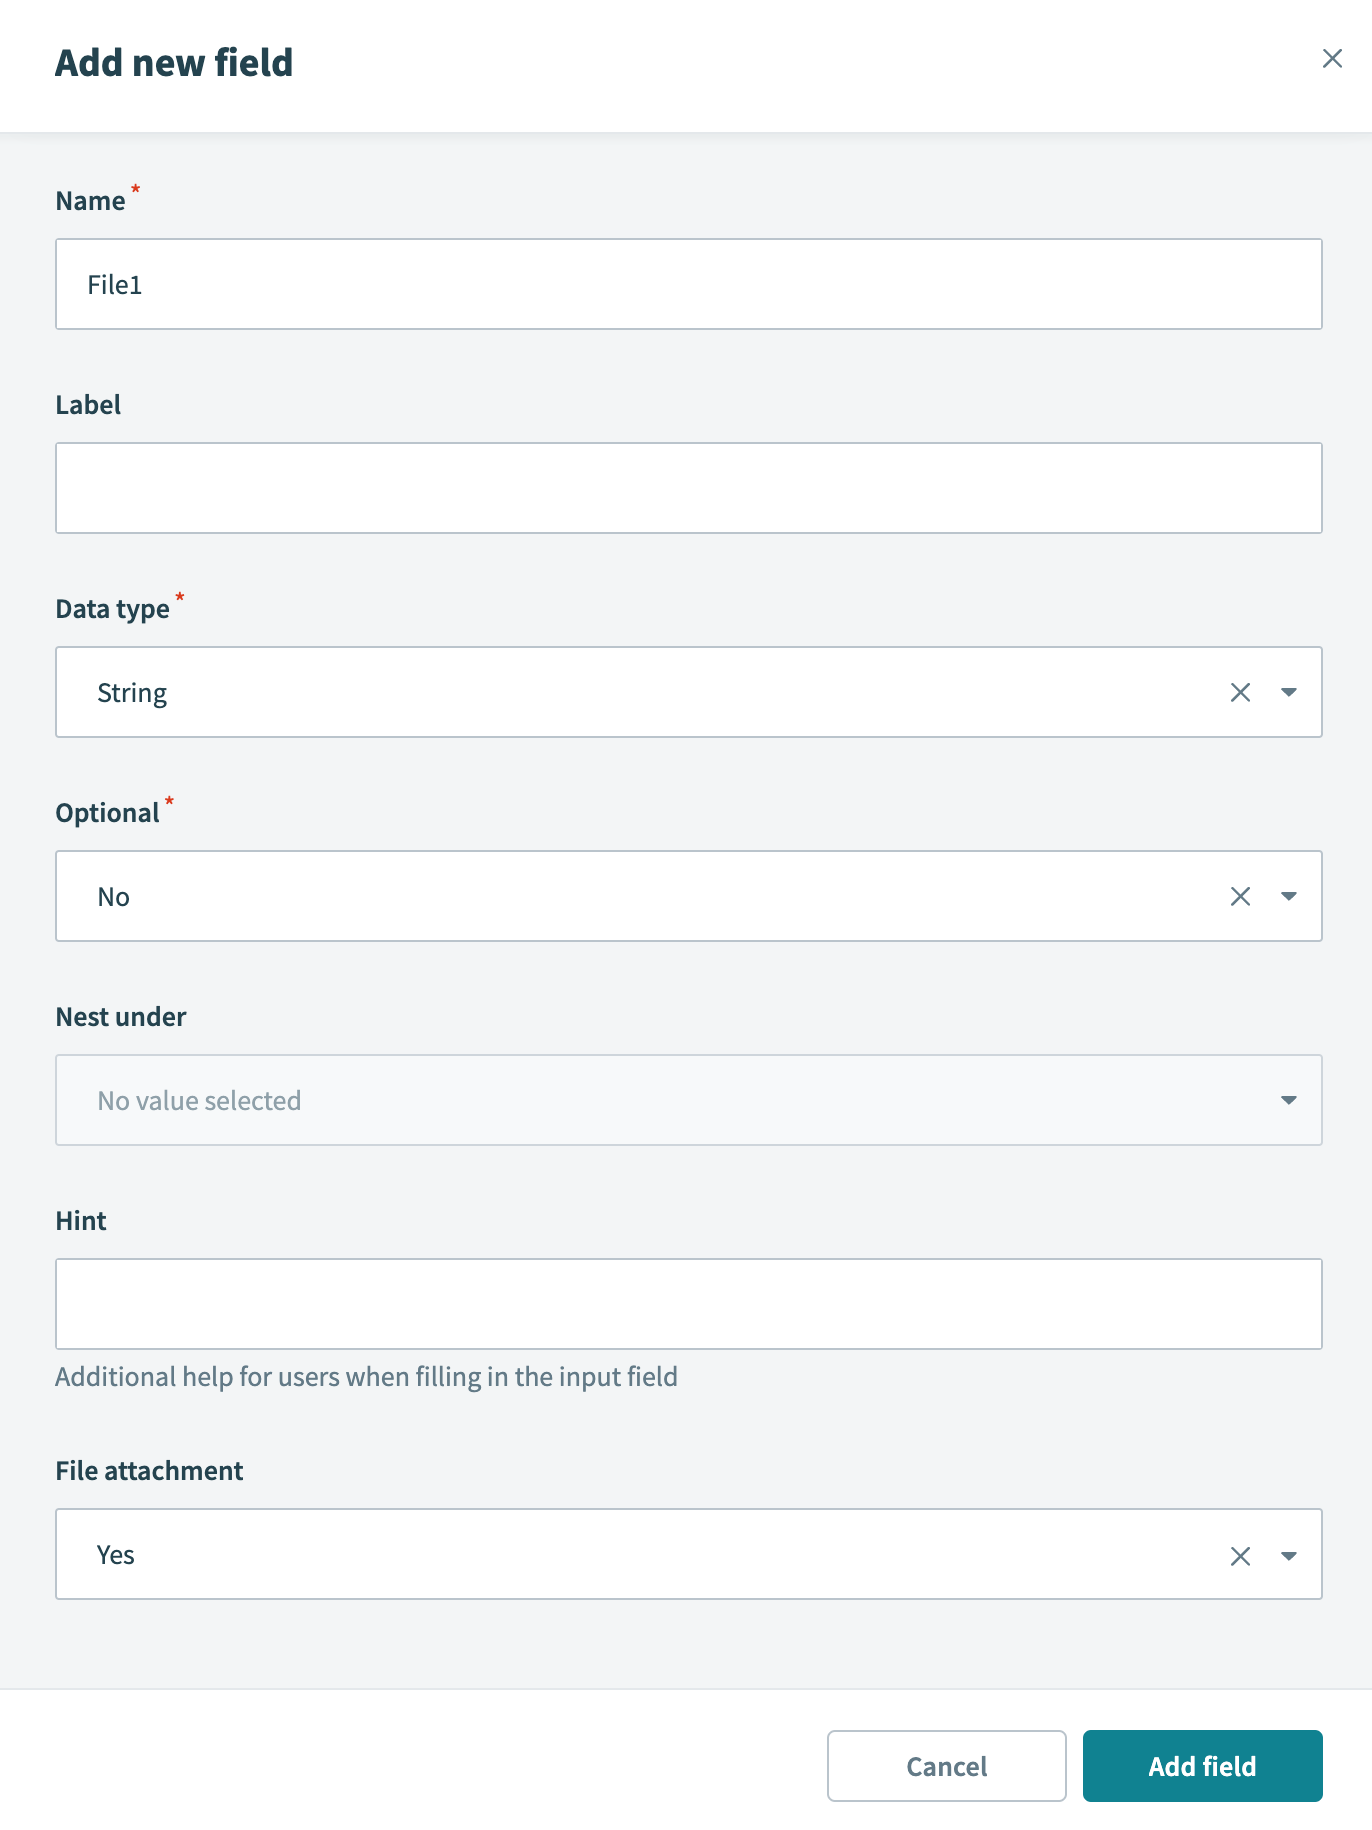 Add request body field
Click Add field. This adds a "header" exclusive to the element that you can use.
For situations where you need multiple headers in a multipart request, you can use this element without attaching a file.
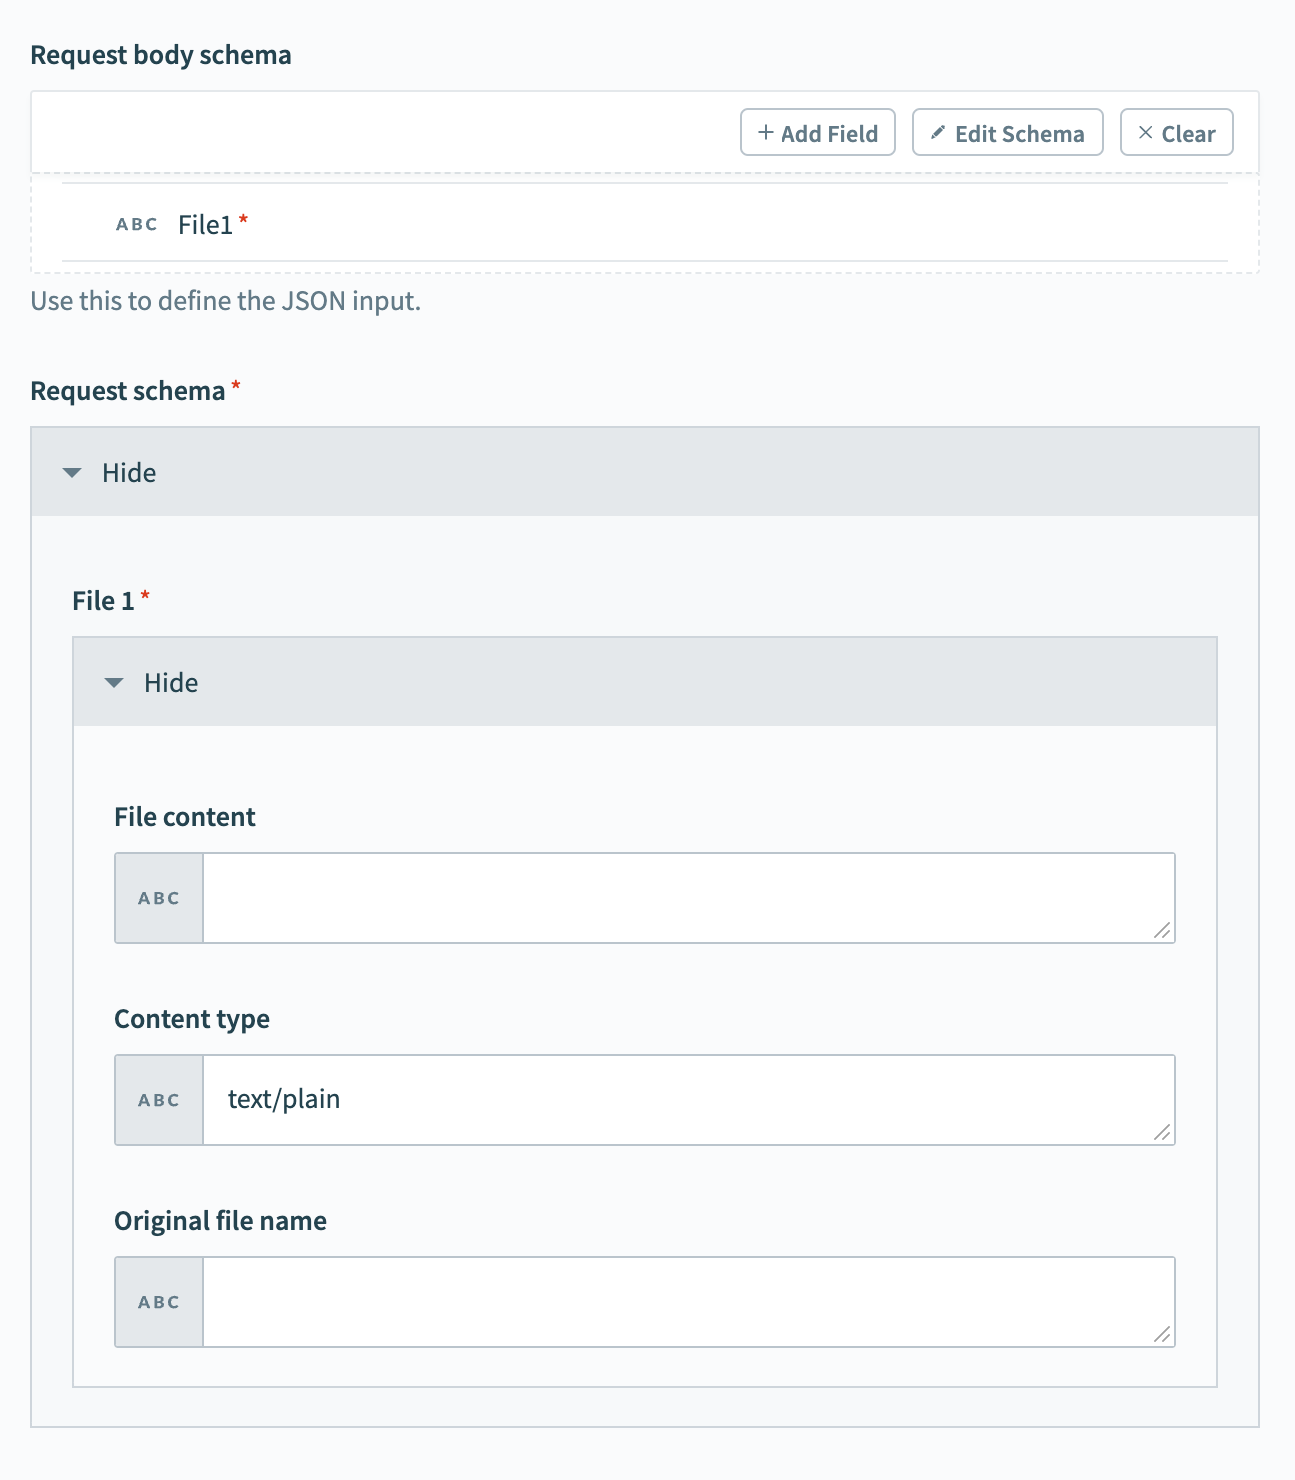 The Request body schema and Request schema fields
Click + Add Field and repeat the previous steps to create fields for additional files you plan to send in your multipart request.
Send multipart alternative, digest, mixed, and related requests
Complete the following steps to configure the Send request via HTTP action's Request section to send multipart requests other than multipart forms:
Click Setup manually.
Go to the Request section and use the Method drop-down menu to select one of the following methods that support multipart form requests:
POSTPUTPATCHDELETE
Enter the absolute URL of the API endpoint in the Request URL field. Alternatively, enter a relative URL if you configured a base URL in the connection setup. For example, if the base URL is https://api.example.com/ and the absolute URL is https://api.example.com/users/123, your relative URL is users/123.
Use the Request content type drop-down menu to select one of the following:
Multipart alternativeMultipart digestMultipart mixedMultipart related
Refer to the Working with multipart payloads section for more information about each multipart type.
Go to the Request parts section. This section defines multiple parts for the request, where each part has its own headers and body content.
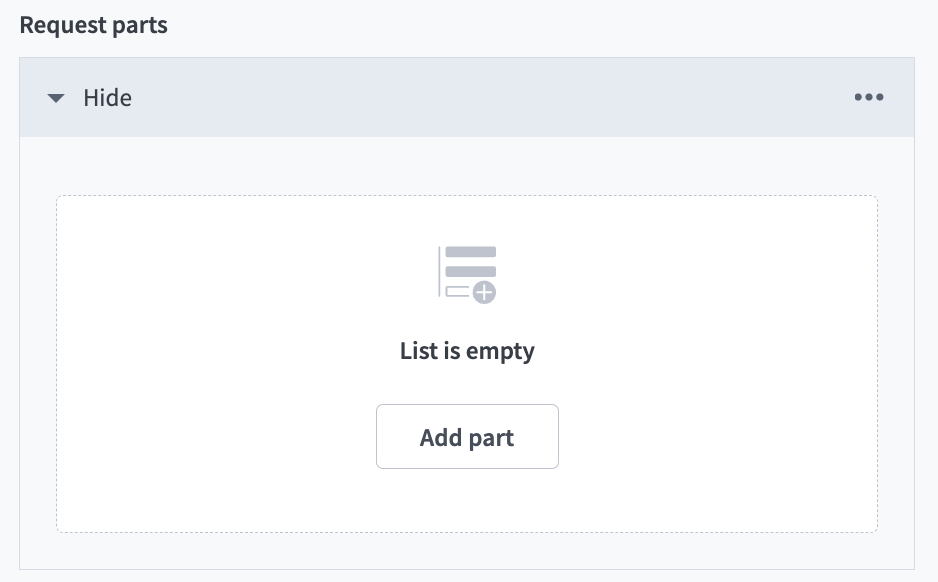 The Request parts section
Click ... (ellipses) to choose between a Fixed list or Dynamic list.
Select Fixed list when you know the total number of parts and their content. Select Dynamic list when the number of parts or their content depend on a list.
Go to the Headers section. This section defines headers for each request part.
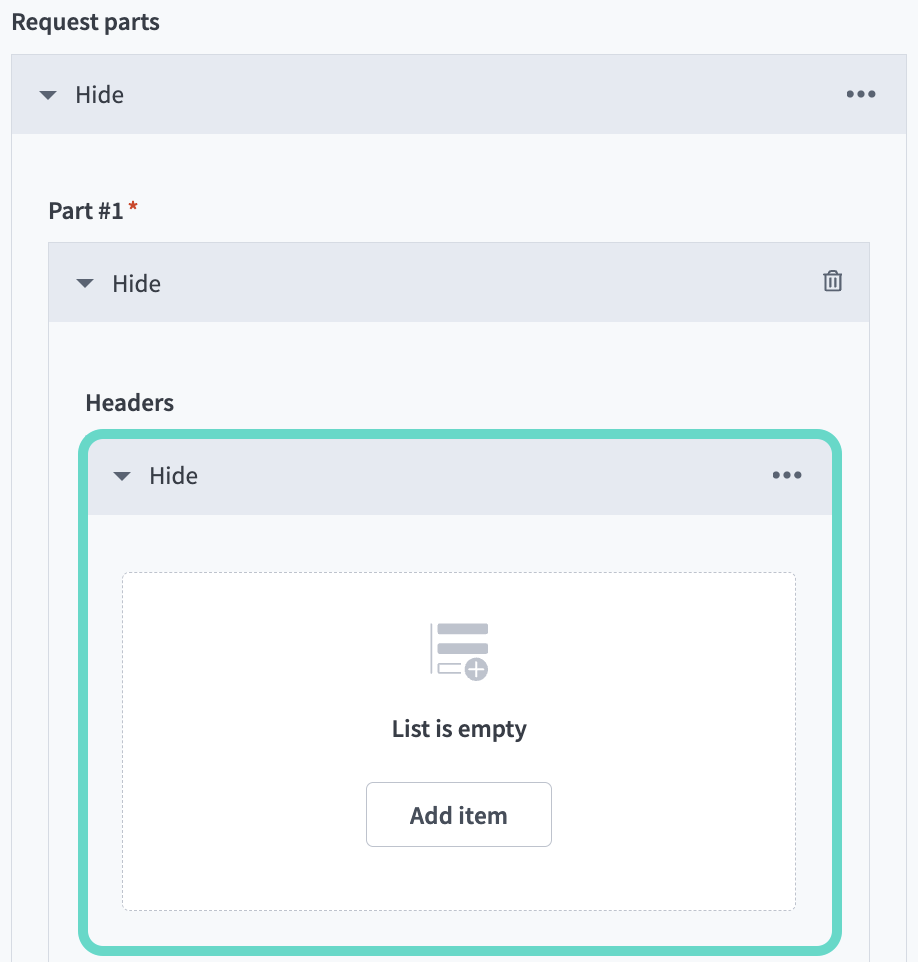 The Headers section
Click ... (ellipses) to choose between a Fixed list or Dynamic list.
Select Fixed list when you know the total number of headers and their content. Select Dynamic list when the number of headers or their content depend on a list.
Enter the content for the part in the Raw body field.
Optional. Go to the Request URL parameters section and define URL parameters if the request is for a DELETE operation.
Request URL parameters
Repeat the following steps for each URL parameter to include in the request:
Click Add URL parameter.
Enter a Parameter name and Value.
Go to the Request headers section. This section defines headers that apply to the entire request, not individual parts.
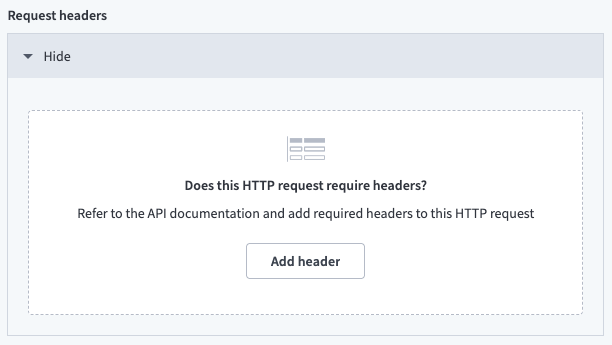 The Request headers section
Click Add header, then enter a Header name and Value for each header to include in the request.
Optional. Configure the following additional fields if the multipart type is related:
Multipart related fields
Enter the content type of the root part in the Root type field if it isn't defined in the root part's headers.
Enter the Content-ID of the root part in the Root Content-ID field if it isn't the first part.
Enter additional information for processing the compound object in the Start-Info field.
For example, if you enter the following values:
Workato generates the following Content-Type header:
Content-Type: multipart/related; boundary=f32f23tv-dydb-46c2-aa18-5e0792f9a0b0; type="Application/X-FixedRecord"; start="<[email protected]>"; start-info="-o ps"Refer to the next step for information about the header boundary.
Optional. Enter a custom boundary for the payload in the Boundary field. Workato automatically generates a boundary if you leave this field blank.
This field has a maximum length of 70 characters and supports the following:
- Alphanumeric characters (
A-Z,a-z,0-9) - Apostrophe (
') - Parentheses (
()) - Plus (
+) - Underscore (
_) - Comma (
,) - Hyphen (
-) - Period (
.) - Forward slash (
/) - Colon (
:) - Equals (
=) - Question mark (
?)
Receive multipart responses
Complete the following steps to configure the Send request via HTTP action's Response section to receive multipart responses:
Use the Response content type drop-down menu to select Multipart.
Workato automatically detects the boundary from the response's Content-Type header.
For example, Workato extracts ----Boundary123 and uses it to parse the response parts if the API returns the following:
Content-Type: multipart/mixed; boundary=----Boundary123If the boundary is missing, Workato throws an error.
Use the Encoding drop-down menu to select the encoding method.
Complete the following steps in both the HTTP response headers and Multipart part headers sections. The HTTP response headers section defines headers to extract at the response-level, while the Multipart part headers section defines headers to extract from individual parts.
Use the Mark non-2xx response codes as success? drop-down menu to select whether to mark non-2xx responses as successful. Workato's HTTP connector treats non-2xx response codes as errors by default. This causes the job to stop unless there is a Handle errors step.
The output datatree updates with the headers you defined. For example:
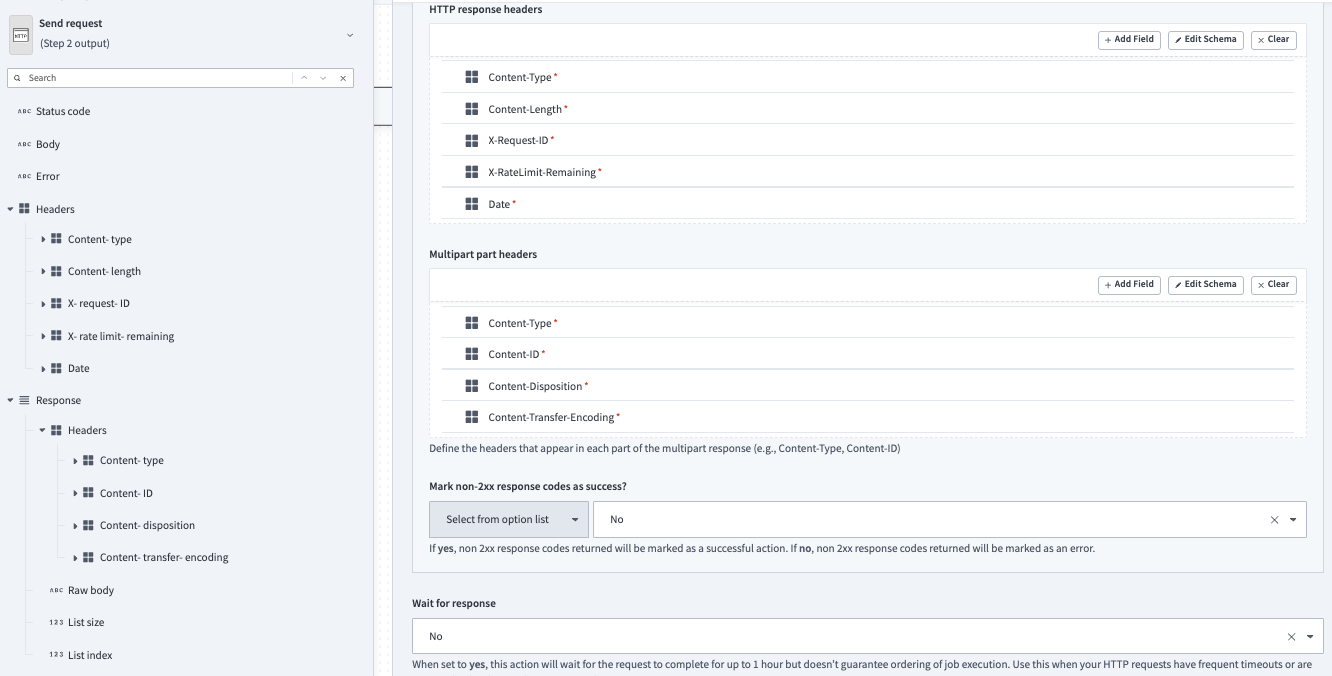 The Send request via HTTP output tree
FURTHER READING
Last updated: