AgentX Support - Settings
The Settings page allows you to configure key aspects of your AI agent, including its appearance, behavior, channels, and advanced features.
 Configure AI agent settings
Features
The Features tab allows you to configure various settings for your AI agent.
Presentation
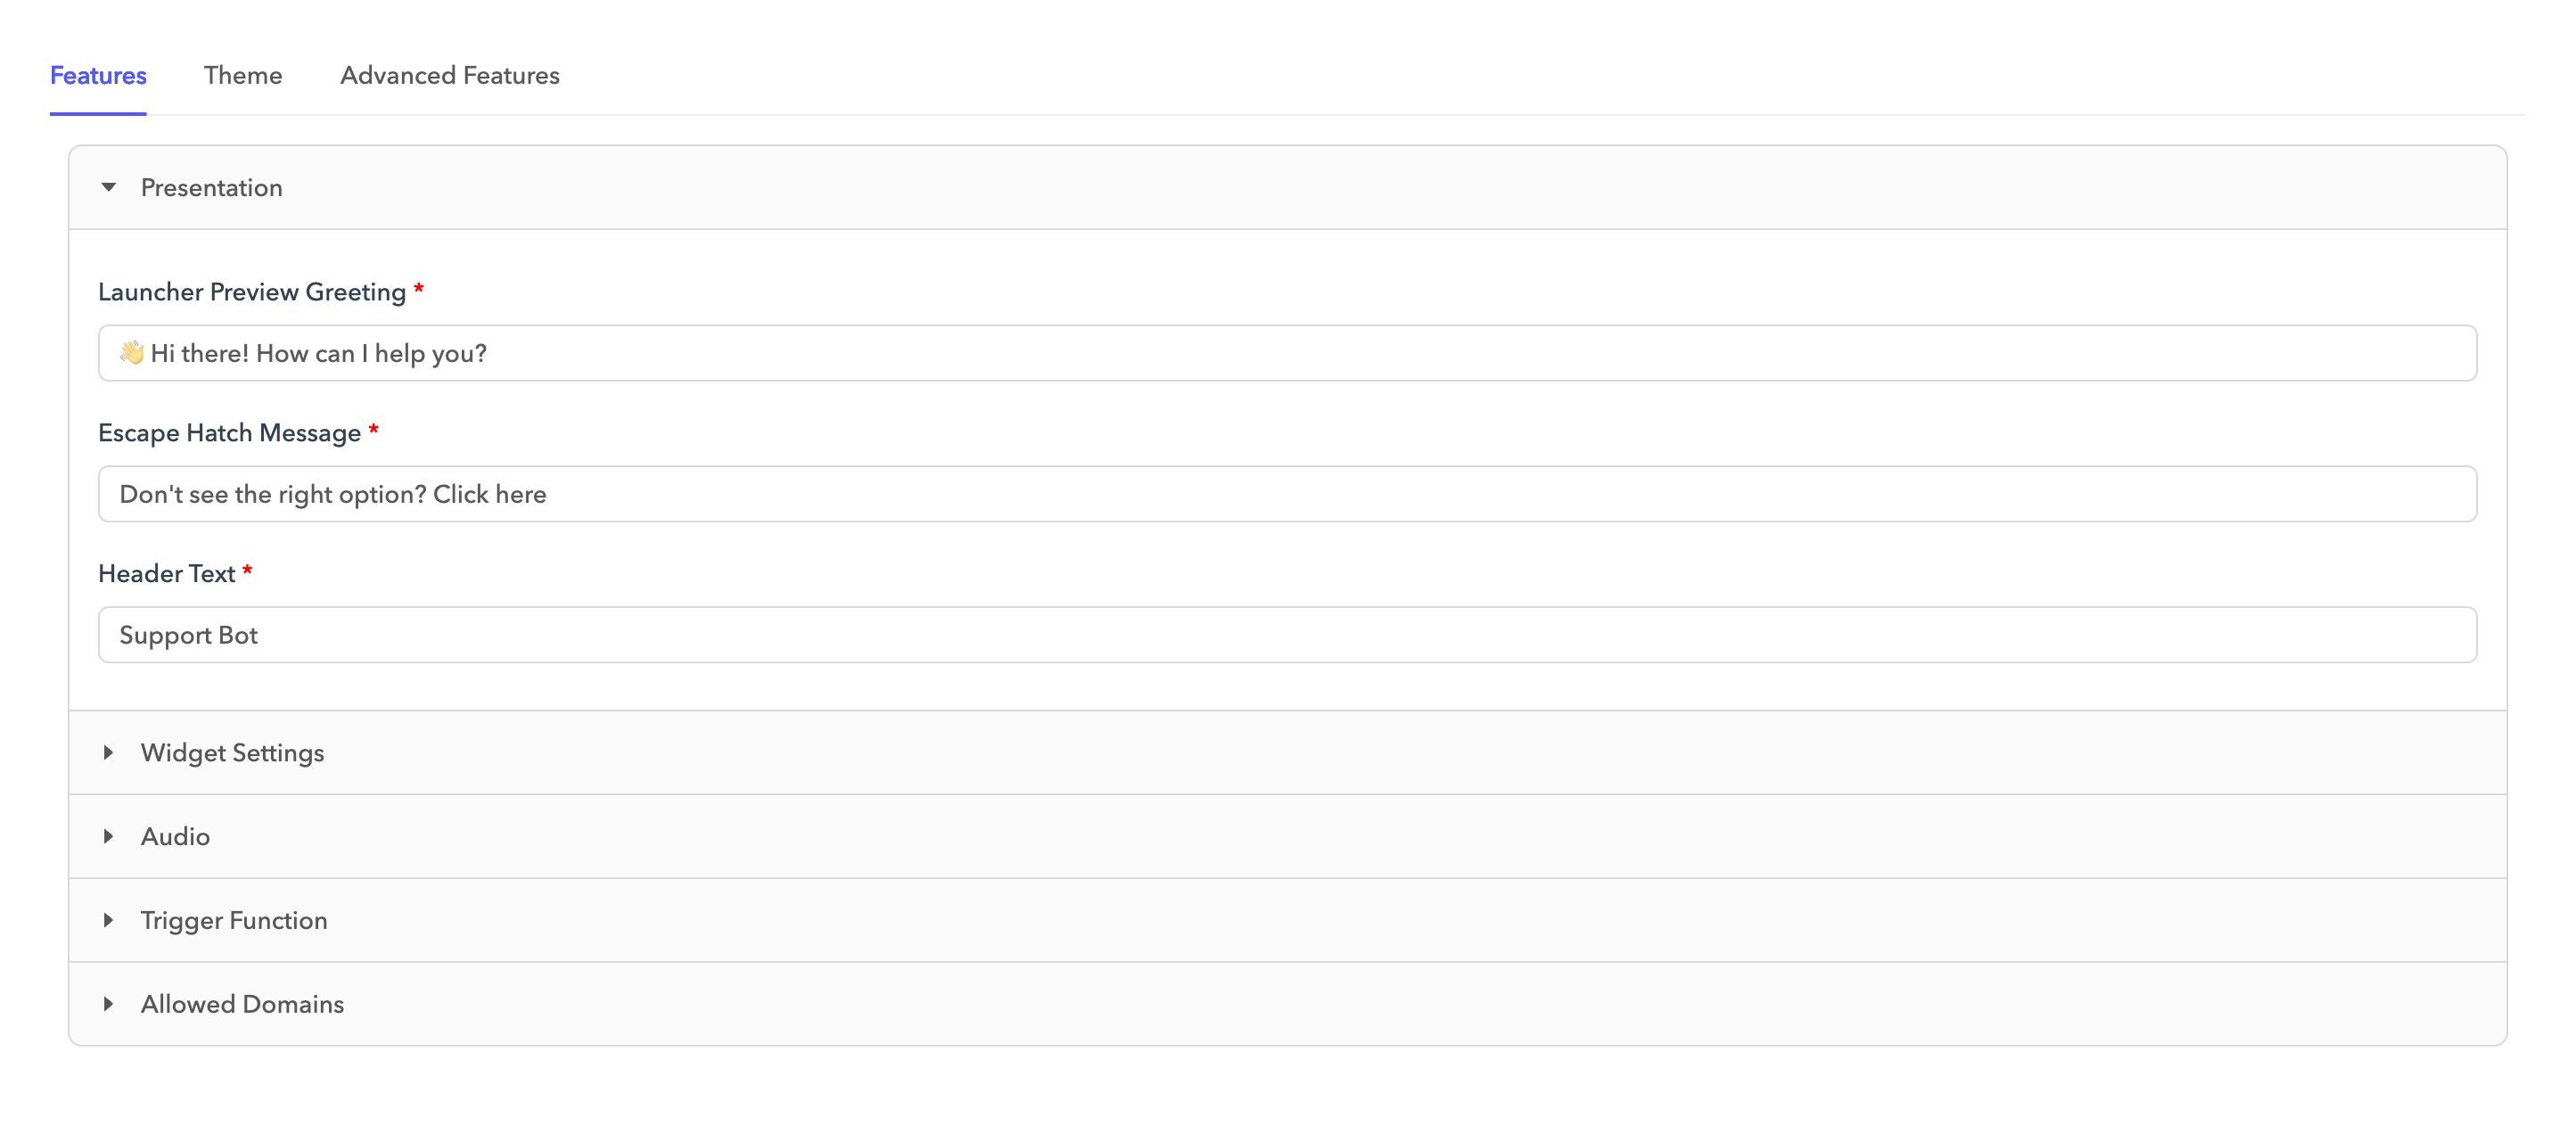
The Presentation tab is where you can customize the presentation aspects of your AI agent's interface.
| Field | Description |
|---|---|
| Launcher Preview Greeting | The greeting message displayed by the AI agent widget before it is launched or opened. |
| Escape Hatch Message | A message offering users a way to exit or redirect the conversation. |
| Header Text | The text displayed at the top of the chat interface. |
Widget settings
The Widget settings tab is where you can control the visibility and behavior of the AI agent widget.
| Field | Description |
|---|---|
| Show Settings | Controls whether users can access the AI agent settings within the chat interface. These settings allow users to enter their email to receive a chat transcript, download the transcript, and view the privacy policy. |
| Show Launcher Preview | Controls the visibility of the launcher's preview message shown before the chat is opened. |
| Show Proactive Messages | Determines whether the AI agent can initiate conversations automatically, such as with greetings or helpful prompts before the user engages. |
| Show Chatbot | Controls the visibility of the AI agent on the site. If disabled, the agent won't appear to users. |
| Enable Sneak Peek feature for Salesforce | Allows the agent to see what users are typing before they send their message. |
| Persistence Mode | Defines how the AI agent handles conversations during page reloads or tab closures. Options include:
|
| Policy | The privacy policy URL. |
| Google Analytics Tracking ID | Enables tracking of events and user interactions within Google Analytics by linking a specific tracking ID. |
Audio
The Audio tab lets you configure sound effects for various interactions with the AI agent.
| Field | Description |
|---|---|
| On New Messages | Plays a sound when a new message is received in the chat. |
| On Bot Initialization | Plays a sound when the AI agent initializes and becomes ready to use. |
| On Maximize | Plays a sound when the chat window is opened or expanded. |
| On Minimize | Plays a sound when the chat window is collapsed or minimized. |
Trigger function
The Trigger function tab specifies the JavaScript function used to trigger and initialize the AI agent widget on the page.
By default, the agent is initialized using the following code:
/** Emit event botWidgetInit to initialize**/
document.dispatchEvent(new CustomEvent("botWidgetInit", {"detail": {}}));
The botWidgetInit event is dispatched automatically when the widget is loaded. You can modify the initialization code to trigger the event based on specific actions or metadata.
Refer to the Custom initialization and passing metadata section for more information.
Allowed domains
The Allowed domains tab defines the list of domains that are permitted to embed or interact with the AI agent widget. This helps ensure the widget is only accessible from authorized websites.
Complete the following steps to add a new domain to the allowlist:
Enter your domain in the Add Domain field.
Click + Add.
Theme
The Theme tab allows you to customize your AI agent's theme to align with your brand and deliver a more personalized experience for your customers.
 Theme
Theme
Colors
The Colors section is where you can configure the core colors used in your agent's chat interface.
| Field | Description |
|---|---|
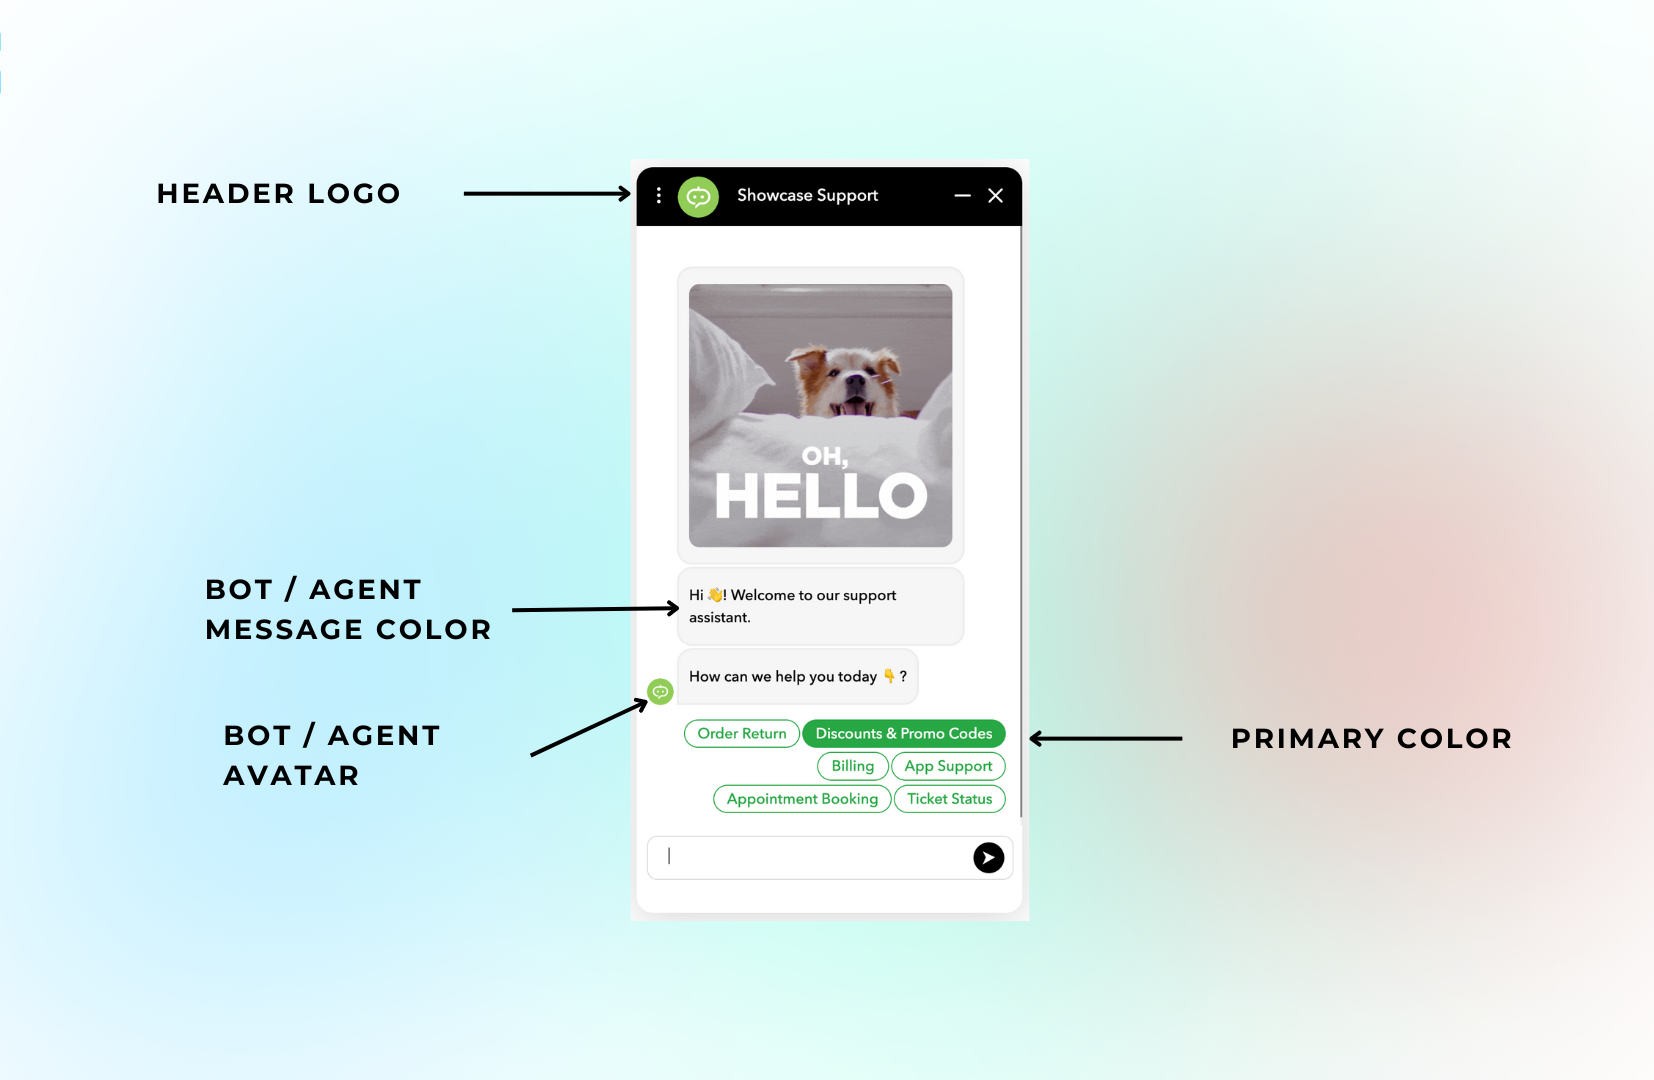
| Primary Color | The overall color scheme of the agent. |
| User Message Background Color | Background color of messages sent by the user. |
| User Message Text Color | Text color of messages sent by the user. |
| Chatbot/Agent Message Background Color | Background color of messages sent by the agent. |
| Chatbot/Agent Message Text Color | Text color of messages sent by the agent. |
Logo
The Logo section lets you link to brand assets shown in the chat UI.
| Field | Description |
|---|---|
| Chat Button Logo | URL used for the chat button logo. |
| Header Logo | Logo displayed in the chat header. |
| Agent Avatar | Avatar shown for the AI agent. |
| Chat Button Background Color | Background color for the chat launcher button. |
| Chat Button Logo Height | Custom height for the logo in pixels or rem. |
| Chat Button Logo Width | Custom width for the logo. |
| Chat Button Logo Margin | Margin space around the logo. |
External styling
The External styling section enables you to add external stylesheets or inline CSS to fully customize the agent's appearance beyond built-in options.
| Field | Description |
|---|---|
| CSS Styles | Custom CSS you want applied inline. |
| Stylesheets | URLs of external stylesheets to apply. |
Sensitive parameters
The Sensitive parameters tab is where you can declare parameters that contain sensitive information, such as personally identifiable information (PII) or API keys. These parameters aren't visible in debug mode or exposed to the frontend.
Create a parameter
Complete the following steps to add a sensitive parameter:
Select your AI agent.
Go to Settings > Advanced Features > Sensitive parameters.
Click + Add parameter.
Enter a name for the parameter.
Specify the parameter type. Options include:
- Password
- Address
- SSN
- Phone number
- API key
- User token
- Other
Optional. Select the Encrypted checkbox to encrypt the parameter.
Click Submit.
Channels
The Channels tab displays the communication channels through which the AI agent is available. You can configure the following settings for each channel:
| Field | Description |
|---|---|
| Block Text Input | Restricts users from entering free text. Users can only select from quick reply options. |
| Loop Entry Flow | Repeats the entry flow after it completes if no other conversation paths are defined. |
Advanced features
The Advanced features tab is where you can activate additional features for your AI agent, such as automatic translations, redaction of sensitive data, and message delays.
| Field | Description |
|---|---|
| Automatic Translations | Use Google Translate to automatically translate content to all supported locales. |
| Use User Language | Automatically adjust the language of the interaction to match the customer's browser or system language. |
| PII Redaction | Enable automatic redaction of personally identifiable information (PII) from conversations. |
| Message Delay | Number of seconds to wait between messages sent by the AI agent. |
| Disconnect Delay | Number of seconds the system waits before ending a session after inactivity. |
| PII Retention Days | Specifies how many days PII is retained before being automatically deleted. |
Properties
The Properties tab lets you add properties for your AI agent. Properties are used to store configuration values or other settings for the agent.
Add a property
Complete the following steps to add a property:
Select your AI agent.
Go to Settings > Advanced Features > Properties.
Click + Add property.
Enter a name and value for the property.
Optional. Select the Sensitive checkbox to mask the property value.
Click Submit.
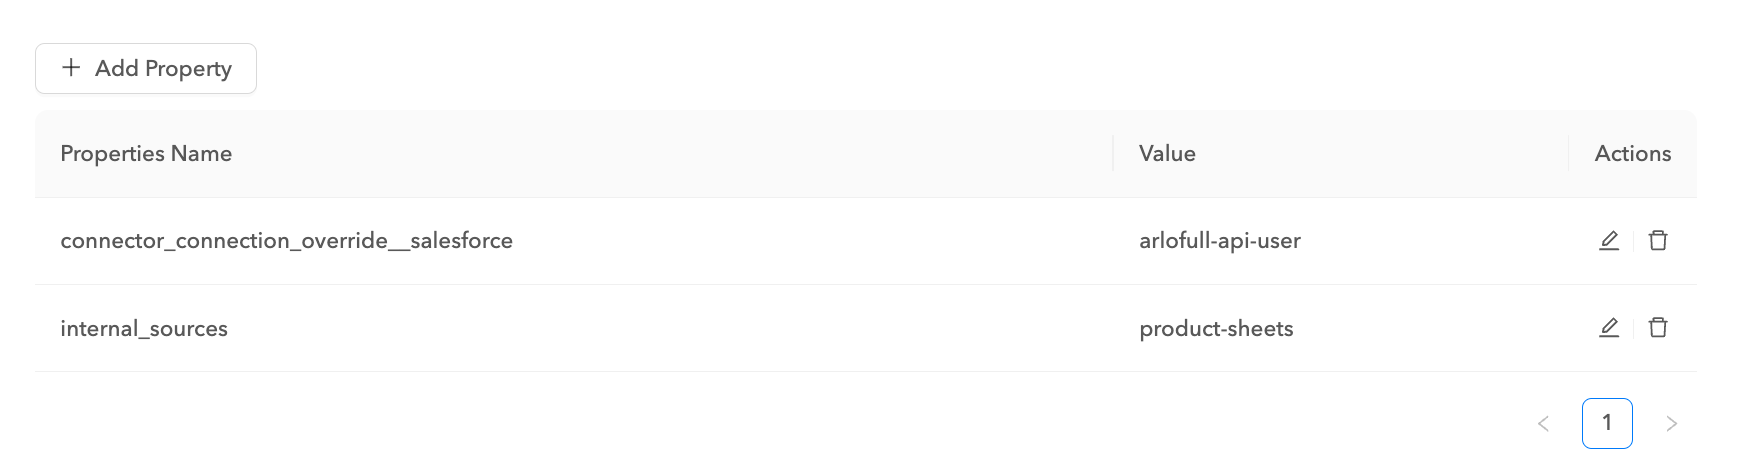
Override a connection
You can override the connection used in the Connector node by adding a property to the AI agent with the connection you plan to override it with.
connector_connection_override__salesforceUse this property in the AI agent and provide the value of the connection you plan to use in the Salesforce connector calls.
 Connection override
Deployment
The Deployment tab contains scripts that you can use to deploy the AI agent.
Refer to the Deploy AI agents documentation for more information.
Announcements
The Announcements tab lets you create announcements to display messages or promote seasonal sales or offers in the AI agent user interface.
Create an announcement
Complete the following steps to create an announcement:
Select your AI agent.
Go to Settings > Advanced Features > Announcements.
Click Add Announcement.
Enter a title and description for the announcement.
Configure the start and end dates for the announcement.
Click Submit to create the announcement.
Click Test to preview the announcement.
ACTIVATE ANNOUNCEMENTS AFTER EDITING
The Active toggle is switched off automatically when you edit an announcement. If you plan for the announcement to remain active, switch the toggle on after making your changes.
Last updated: