Developer and Embedded API MCP server
The Developer API and Embedded API MCP server enables AI-powered developer environments like Claude Desktop and Cursor to programmatically access your Workato workspace. You can manage assets and projects programmatically with Workato Developer and Embedded APIs exposed as a remote MCP server with following authentication:
- Developer API: Use standard Developer API token authentication.
- Embedded API: Use an API token created in an Embedded admin workspace.
You can inspect and modify assets, perform bulk operations, and call Developer or Embedded API endpoints directly from your development tools. MCP tools built with API endpoints also allow you to pass authorization headers in API calls.
FEATURE AVAILABILITY
MCP is available to all users in the US, EU, AU, JP, and SG data centers. MCP servers are hosted in the US, EU, and APAC regions and respect data residency requirements where possible. MCP isn't available to workspaces in the CN data center. This reflects local regulatory requirements and Workato's commitment to data sovereignty and applies to our multi-tenant and Virtual Private Workato (VPW) offerings.
Contact your Customer Success representative if you're interested in using MCP or require additional information.
Your MCP server respects all Developer API and Embedded API permissions and project scopes configured in your API client role. This means you can restrict access to specific projects or endpoints by configuring your API client settings in Workspace admin > API clients.
MCP URL AND API TOKEN INTEGRATION
You can manage Developer APIs and Embedded APIs with both remote and local MCP servers with the following configuration:
"YOUR-API-REMOTE-NAME": {
      "url": "https://app.workato.com/mcp",
      "headers": {
        "Authorization": "Bearer <YOUR_API_TOKEN>"
      }
    }
Configure Developer APIs and Embedded APIs as an MCP server
Complete the following steps to use your Developer API or Embedded API endpoints as an MCP server with your LLM:
Sign in to Workato.
Go to Workspace admin > API clients to view your API client role that defines which tools you have access to or Create a client role with the tools you plan to use. For example, enable List folders, Create project or folder, and Update folder if these are tools you plan to use in your LLM.
EMBEDDED API CLIENT AND TOKEN REQUIREMENT
You must use a token created in an Embedded admin workspace to manage Embedded APIs through the MCP server.
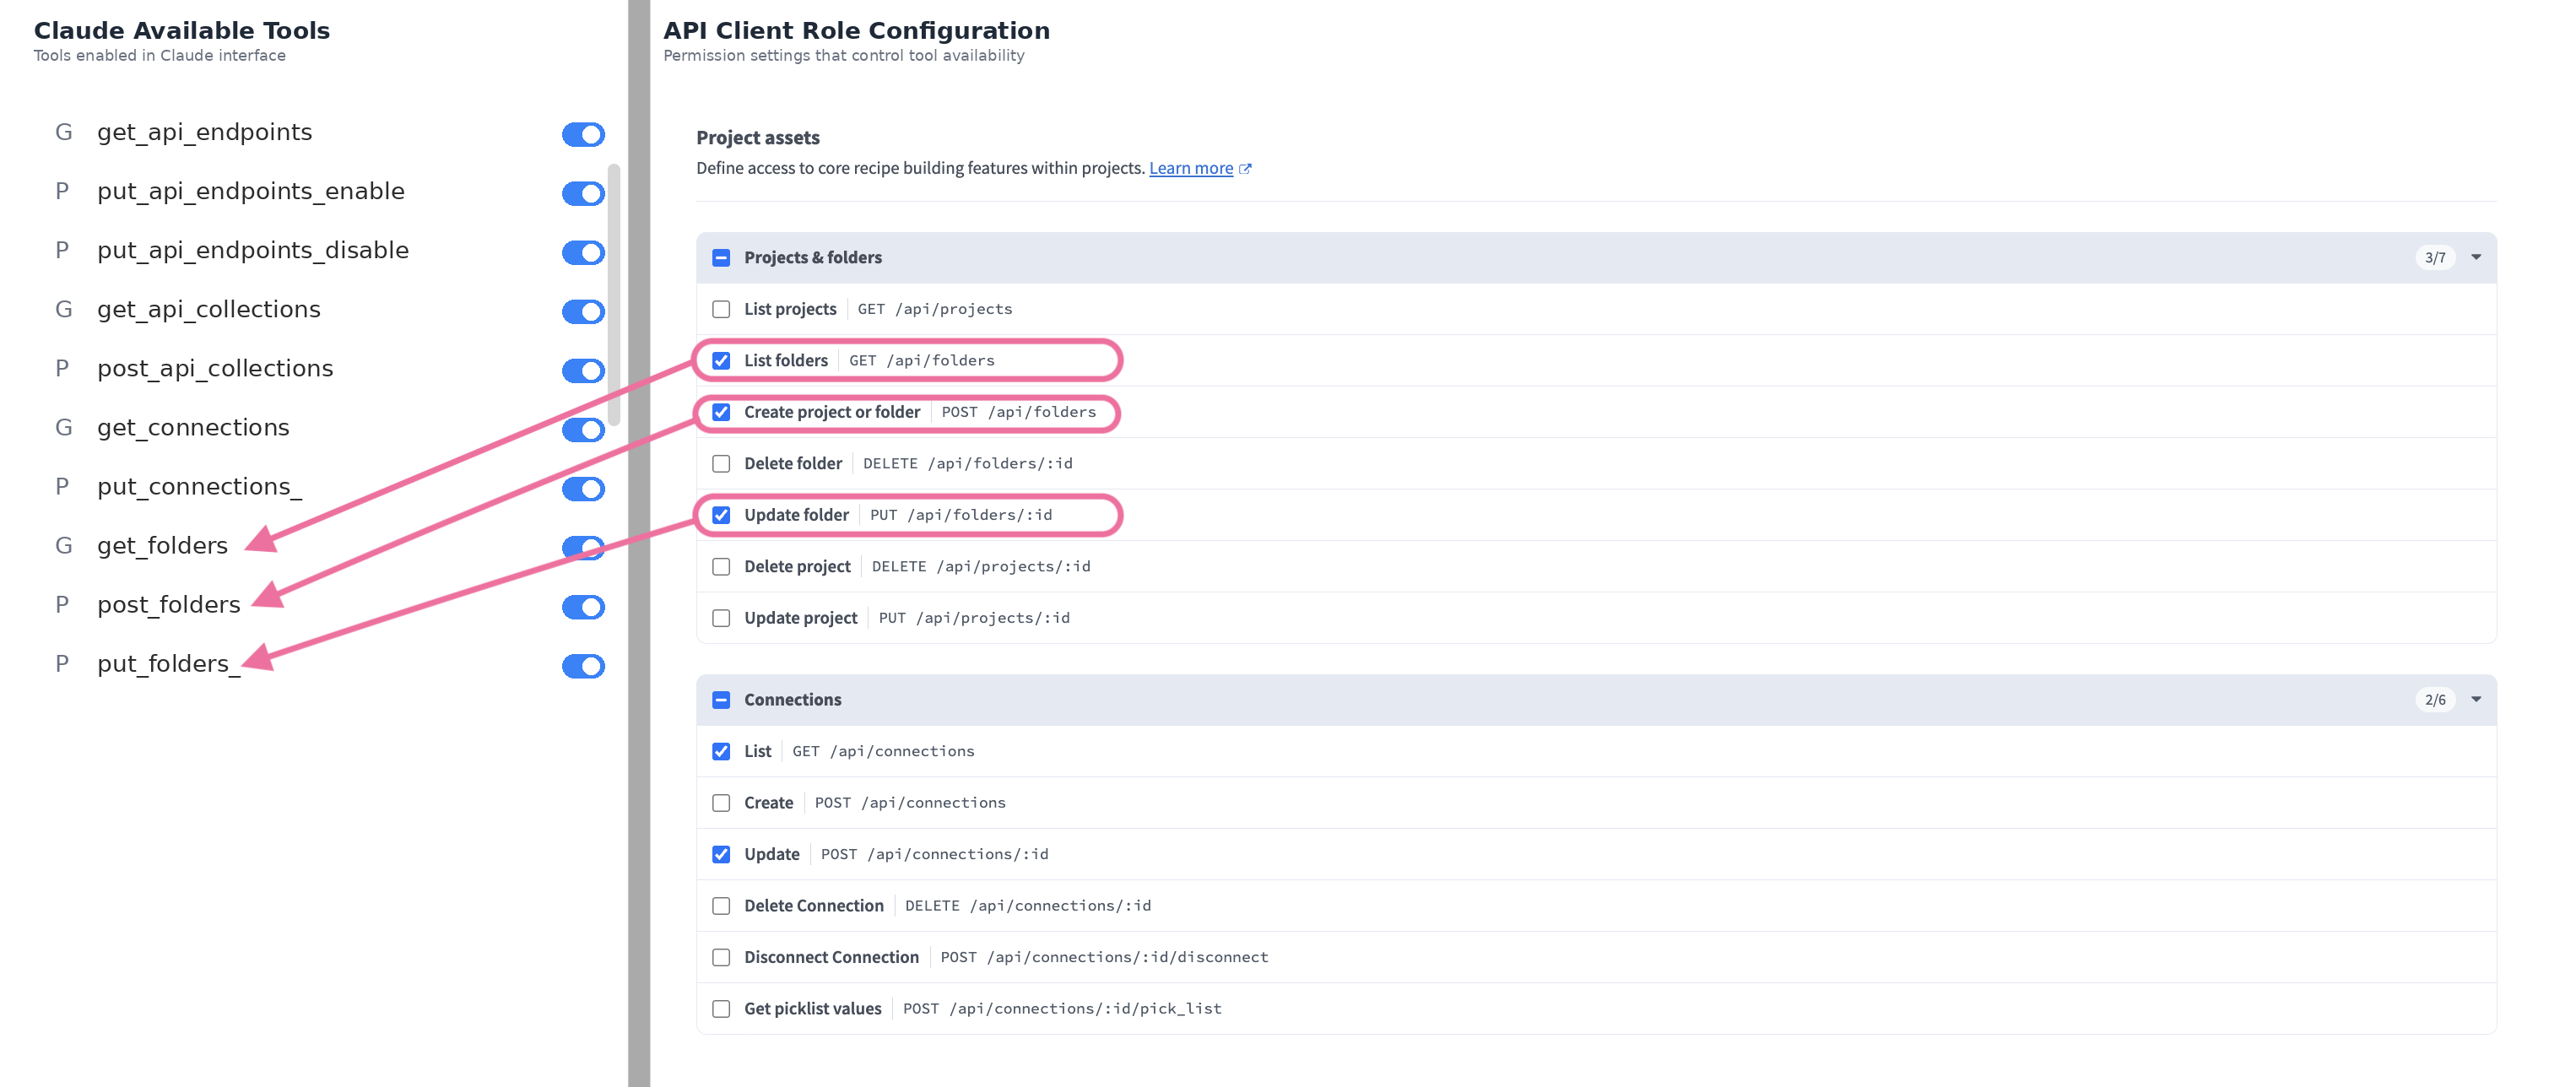 LLM tool availability is defined in the client role
Obtain your API client token or Create an API client and copy and store the generated API token.
Configure your LLM to use the endpoints defined in your API client role:
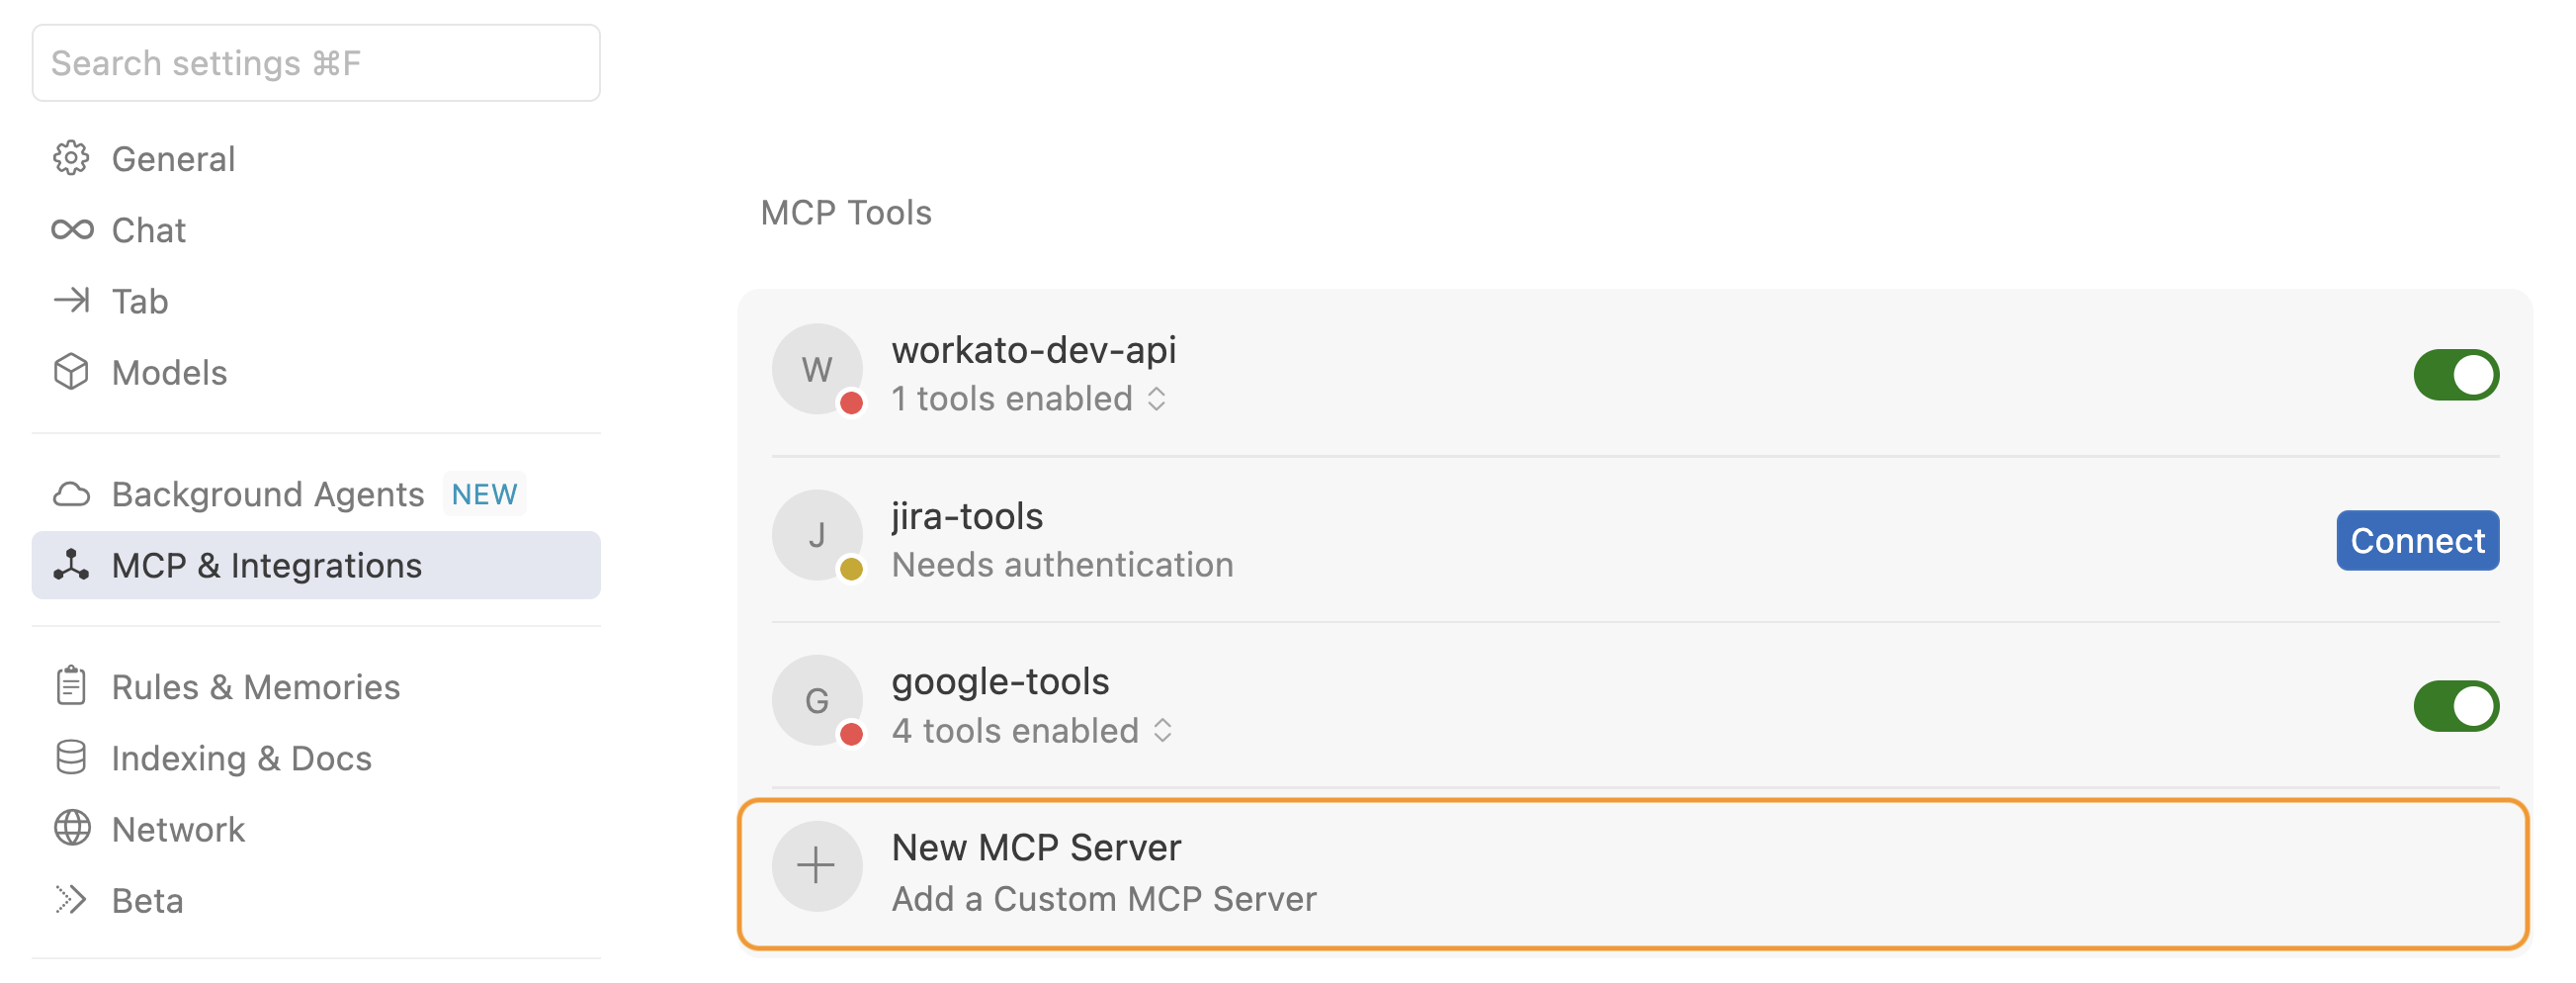 Click + New MCP Server
Manage Developer APIs and Embedded APIs through your MCP
You can manage the Developer API and Embedded API endpoints enabled in your API client role after you configure your MCP JSON file.
Complete the following steps to manage your Developer API or Embedded API project and assets through your LLM:
Start a new chat with your LLM and enter a prompt.
Example prompt for project and asset management
Enter the following prompt:
Propose a maximum of 3 tags based on my workspace activity. Create tags from your LLM
Review the suggestions and ask your LLM to create the proposed tags.
Go to Workspace admin > Settings > Tags and click Manage tags to view the tags created by your LLM.
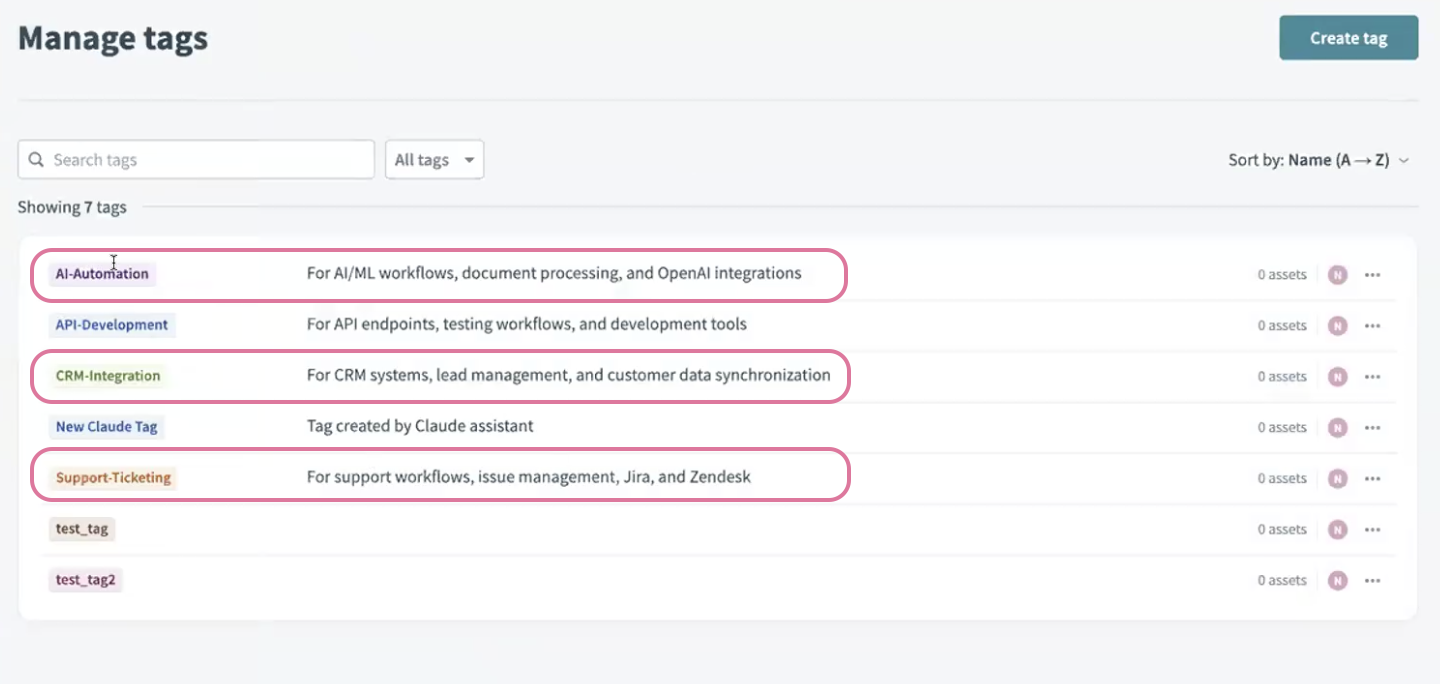 Tags created by your LLM
Use more natural language prompts to manage your projects and assets, for example:
Move folder 12345 to parent folder 67890.List all folders in my Acme test project.Start analyzing recipe health for recipe 68000123.List all connections and group by active and inactive status.List jobs from recipe 68000123.
Pass authorization headers in API calls
You can call APIs with authorization headers within Workato recipe actions. You must use the header X-Wkt-Ext-Authorization datapill in your Workato recipe for APIM-collection-based MCP servers.
Complete the following steps to pass authorization headers in your API calls:
Go to a project and click Create > Recipe or press C+R.
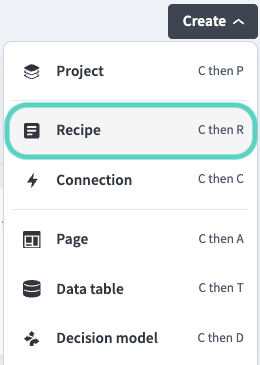 Create a new recipe
Enter a name for your recipe in the Name field.
Use the Location drop-down menu to select the project where you plan to store the recipe.
Click Start building.
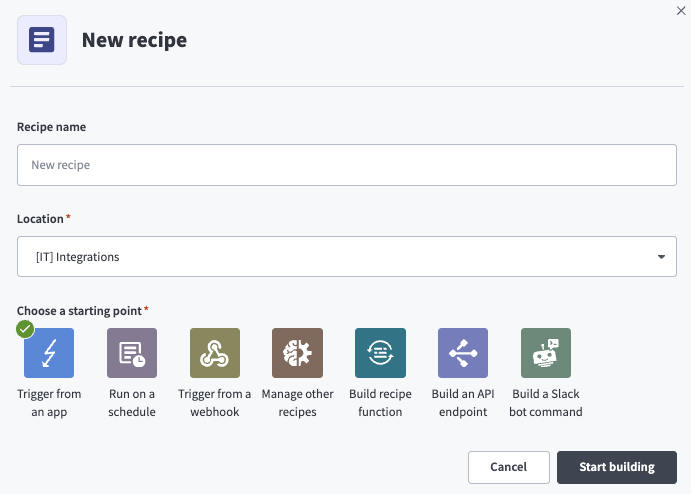 Start building your recipe
Click Pick a starting point and select Trigger from an app.
Click Select an app and trigger event.
Search for and select API platform by Workato.
Select the New API request trigger. The New API request trigger in this use case doesn't require you to establish a connection.
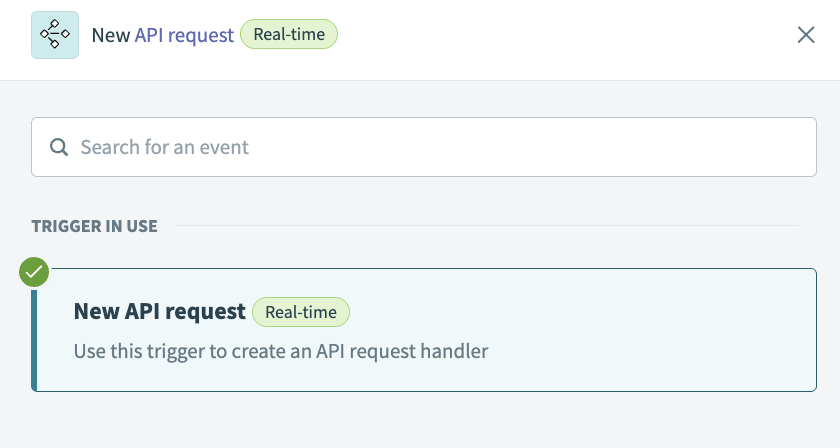 New API request trigger
Complete the following steps to configure your request schema:
Go to the Request headers section and click Add header.
Enter the following name in the Name field:
X-Wkt-Ext-AuthorizationOptional. Provide a descriptive label for your header in the Label field.
Click Add field. Your header value is now accessible as a datapill under the New API request step output.
Map the X-Wkt-Ext-AuthorizationStep 1 datapill to the field where you plan to pass the header authorization.
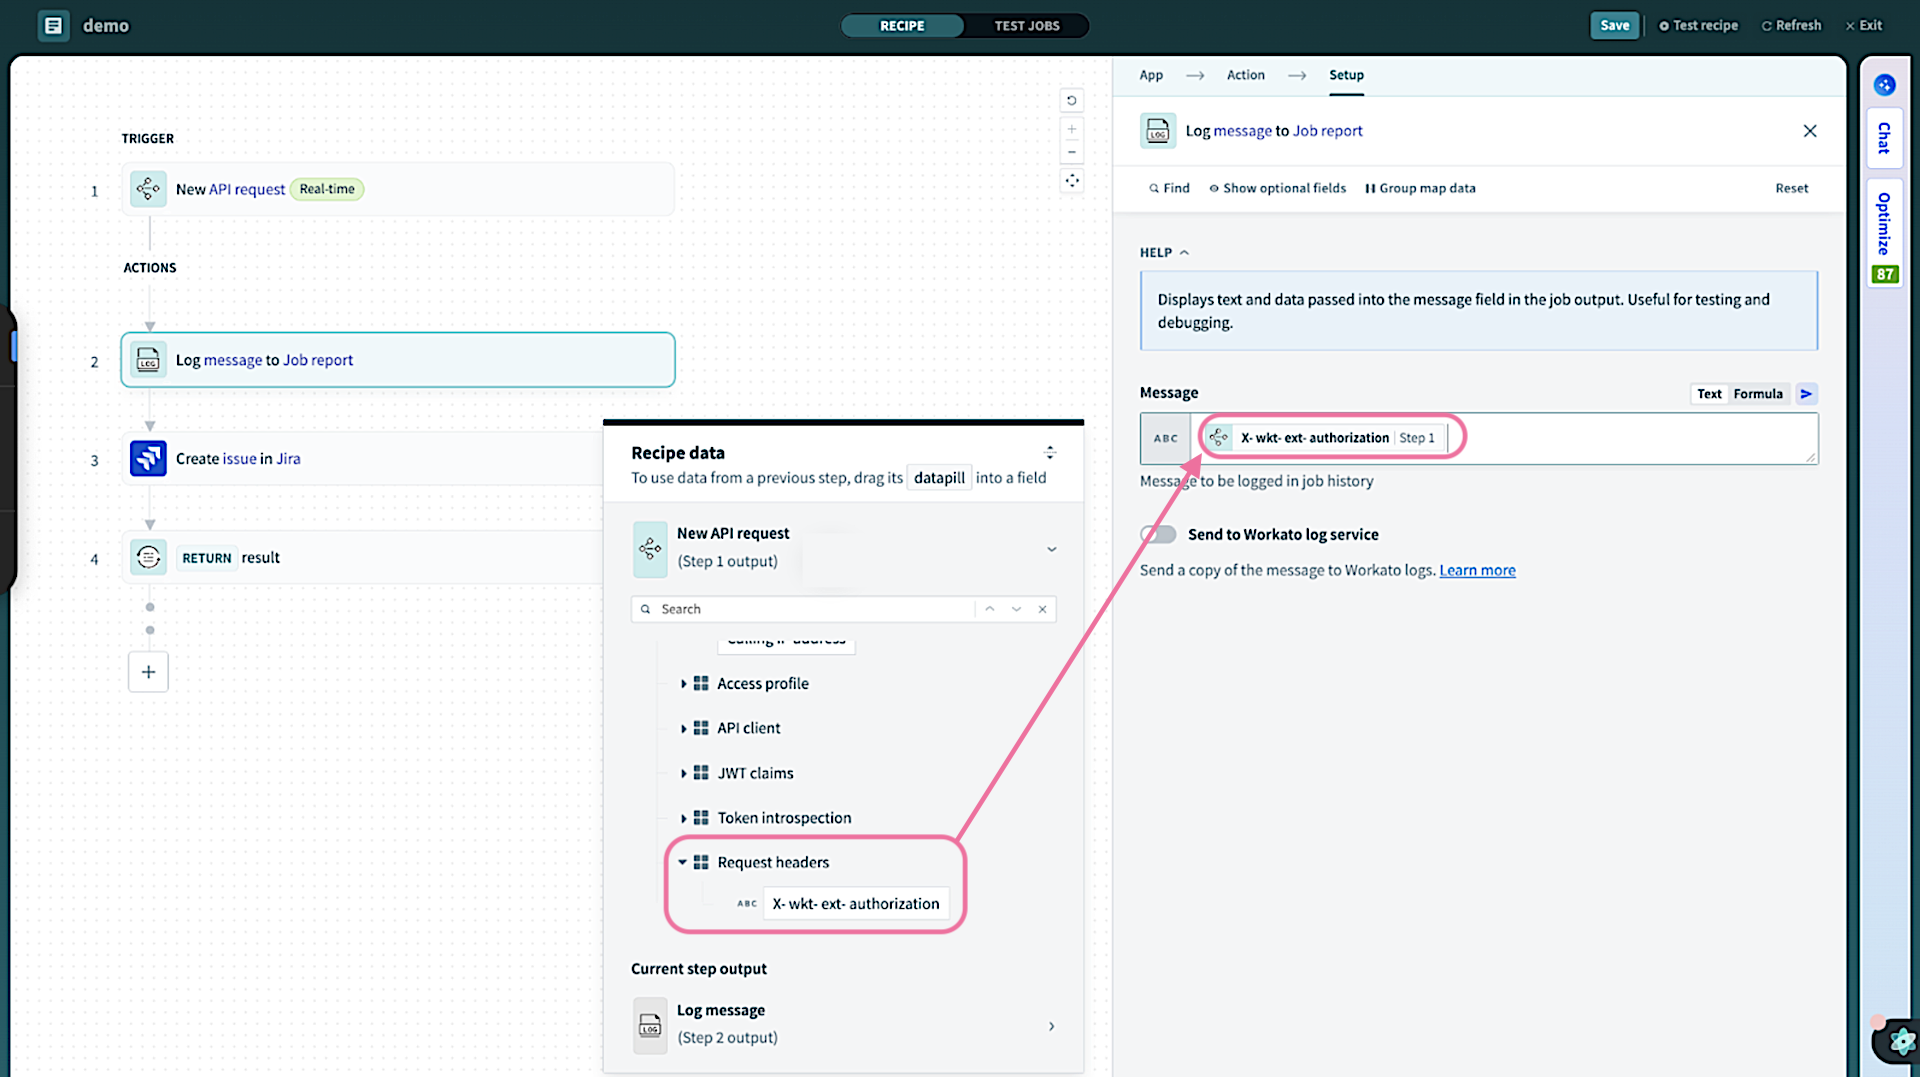 Map the X-Wkt-Ext-AuthorizationStep 1 datapill
Save your changes.
Go to AI Hub > MCP servers and select the MCP server that uses the recipe you created in the preceding steps.
Go to Settings > End user access and verify that Access Method is set to Token-based access.
Copy the Developer MCP Token URL that includes the wkt_token.
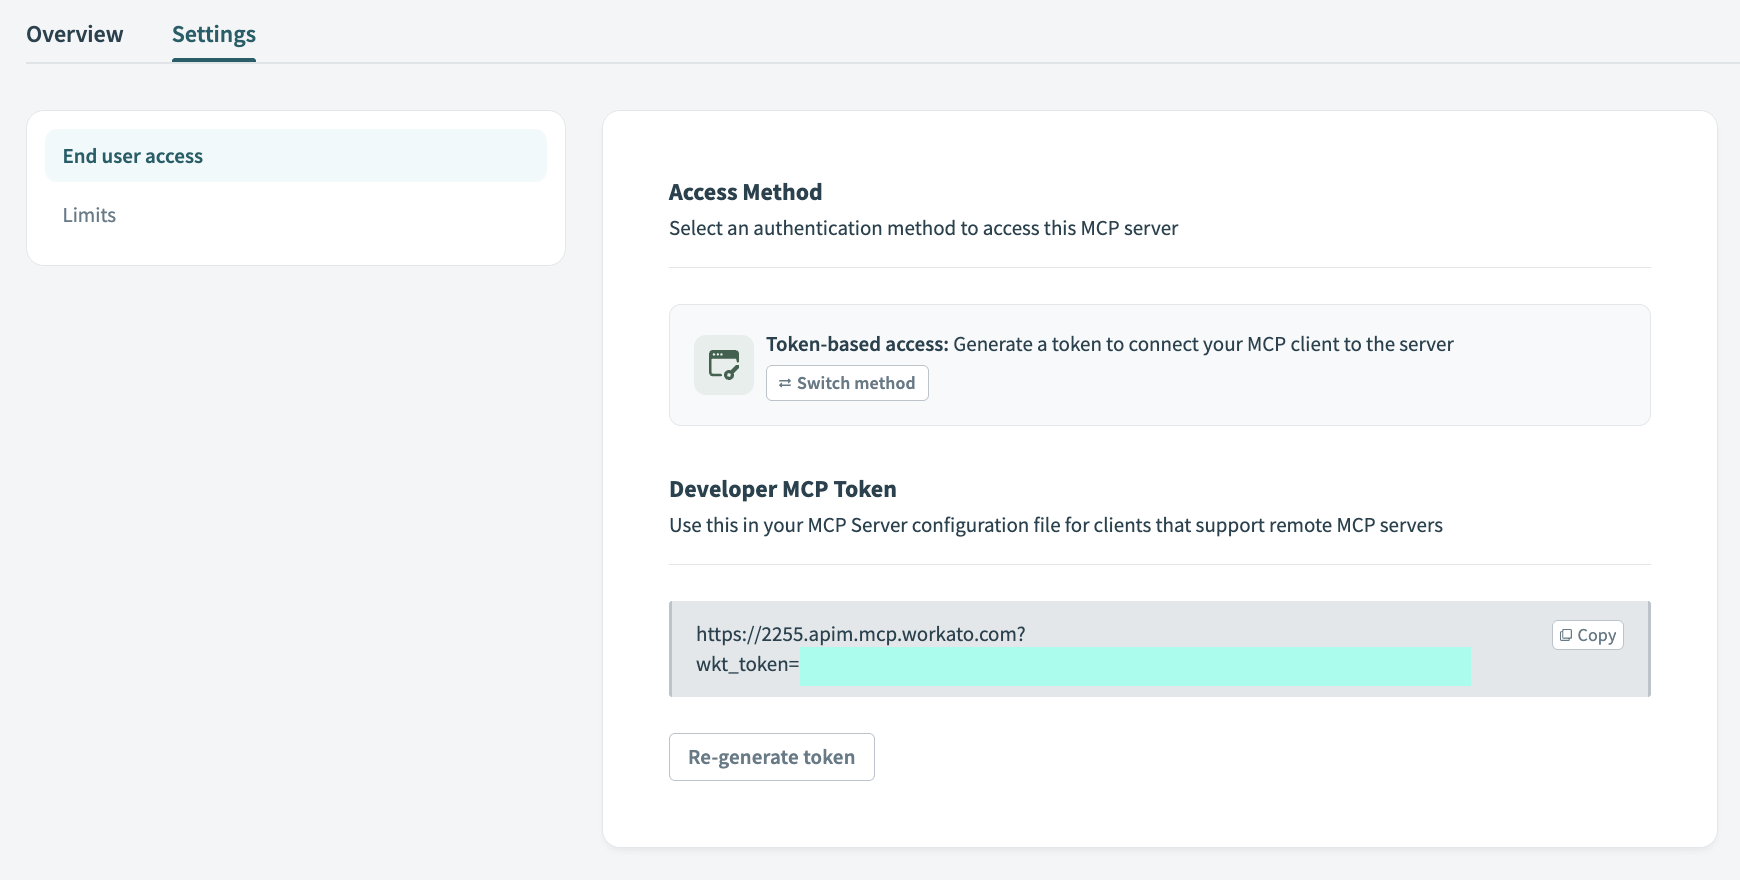 Copy the Developer MCP Token URL
Return to the Request schema section and click + Add Field.
Enter description in the Name and Label fields.
Use the Data type drop-down menu to select String.
Use the Optional drop-down menu to select No.
Use the Nest under drop-down menu to select payload.
Click Save.
Return to the Request schema section and click + Add Field.
Enter title in the Name and Label fields.
Use the Data type drop-down menu to select String.
Use the Optional drop-down menu to select No.
Use the Nest under drop-down menu to select payload.
Click Save.
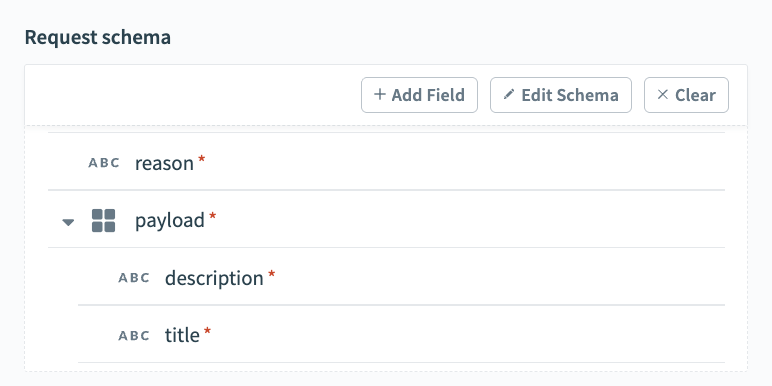 Request schema
Limitations
Workato Developer API and Embedded API MCP servers have the following limitations:
Unsupported endpoints
The following Developer API and Embedded API endpoints aren't supported:
Developer API
Embedded API
Last updated: