Sync Zendesk tickets to Salesforce and notify your team in Slack
This use case guides you through connecting Zendesk, Salesforce, and Slack to create a powerful automation.
What does this recipe do?
This recipe checks Zendesk for new tickets at an interval you specify. When a new ticket is found, the recipe checks if there is an existing Salesforce case. The recipe either updates the existing case or creates a new one, then posts the case details in Slack to a channel or direct message of your choice.
Create your recipe
Sign in to Workato.
Select the project where you plan to create the recipe.
Create connections for Zendesk, Salesforce, and Slack using the following steps:
Create a Zendesk connection.
Create a Zendesk connection
This step creates a connection between Workato and your Zendesk account. The Zendesk connector supports OAuth 2.0 authentication.
DEPRECATED AUTHENTICATION METHODS
Effective March 31, 2026, you can no longer create new Zendesk connections using Basic authentication or Custom OAuth profiles. This change is required by Zendesk's updated Developer Terms.
Existing connections using these authentication methods will continue to work until December 31, 2026. On this date, Zendesk connections still using Basic authentication or a Custom OAuth profile will be terminated, and recipes relying on these connections will stop functioning.
Click Create > Connection or press C twice.
Search for and select Zendesk on the New connection page.
Provide a name for your connection in the Connection name field.
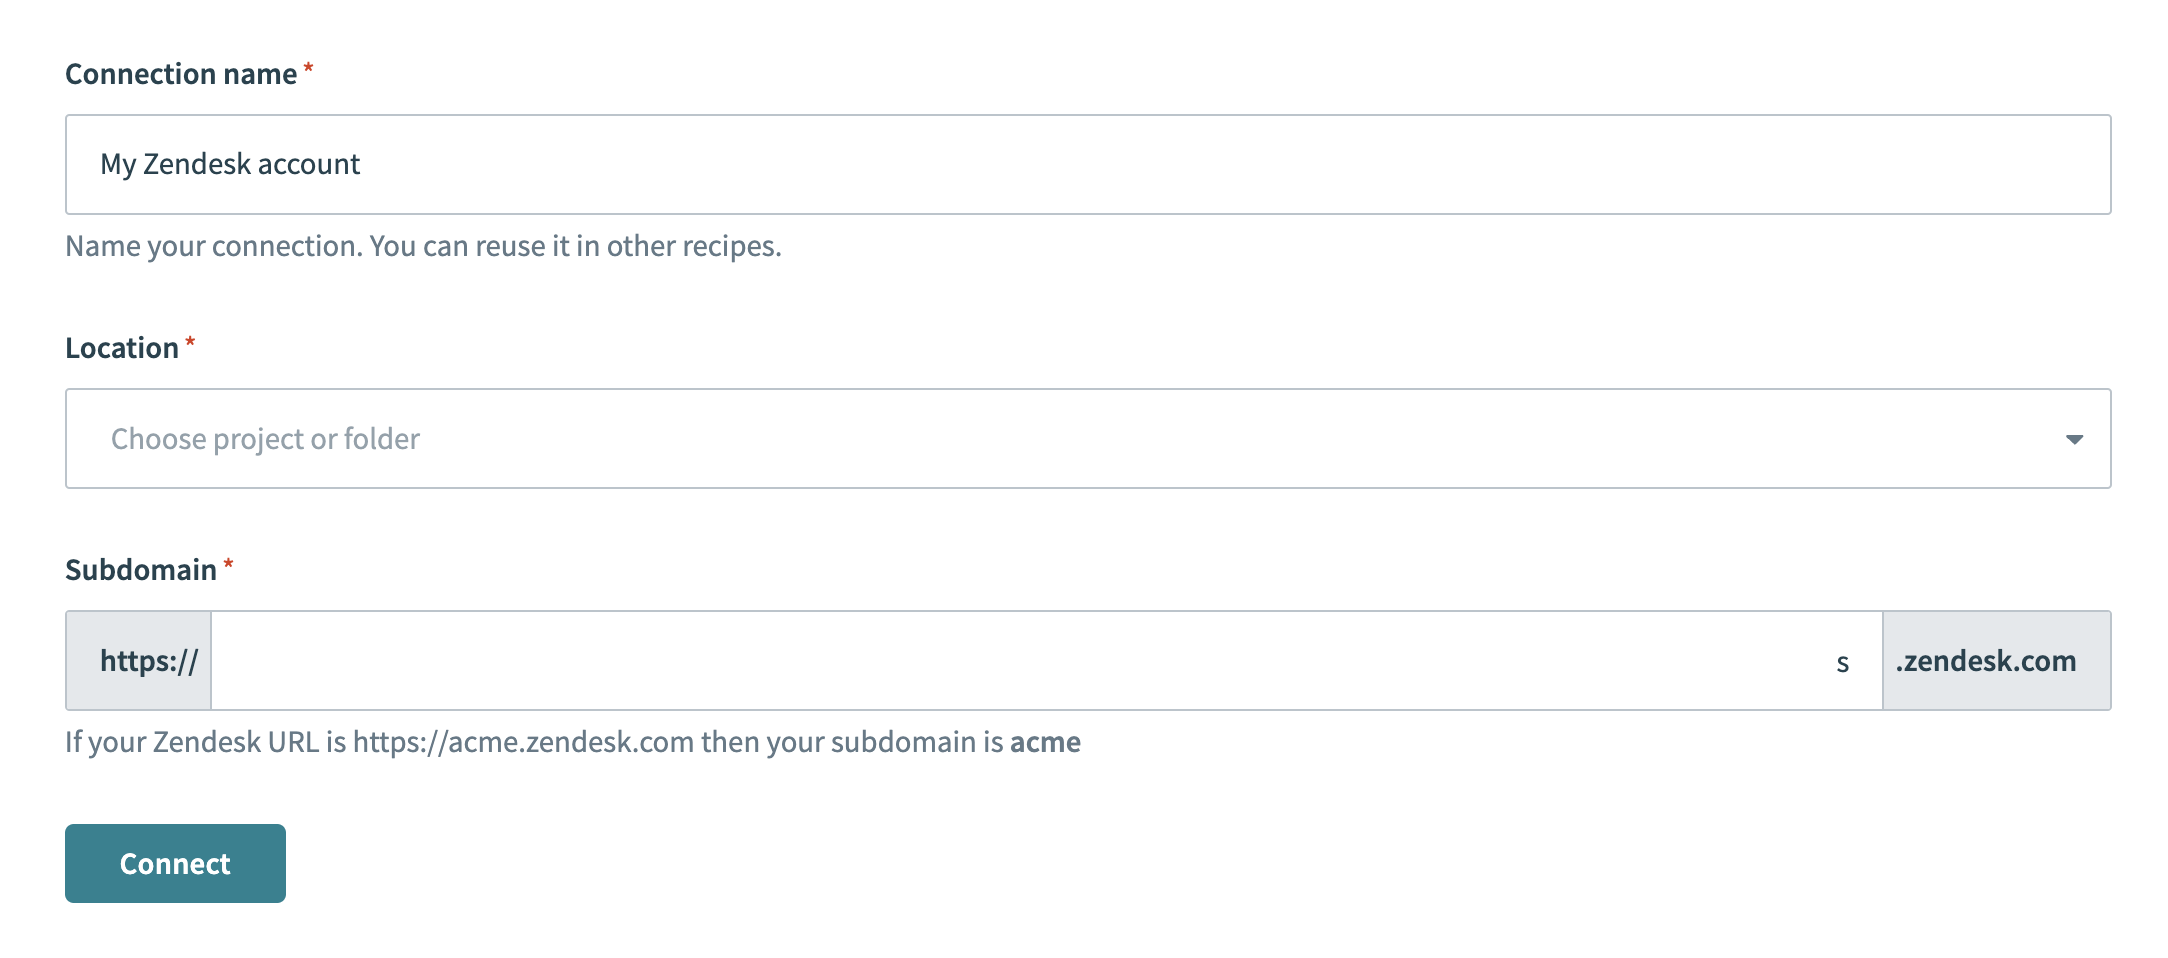 Zendesk connection setup
Use the Location drop-down menu to select the project where you plan to store the connection.
Enter the Subdomain for your Zendesk URL. For example, if your Zendesk URL is https://acme.zendesk.com, your subdomain is acme.
Click Connect.
Create a Salesforce connection.
Create a Salesforce connection
This step creates a connection between Workato and your Salesforce account.
Click Create > Connection or press C twice.
Search for and select Salesforce on the New connection page.
Provide a name for your connection in the Connection name field.
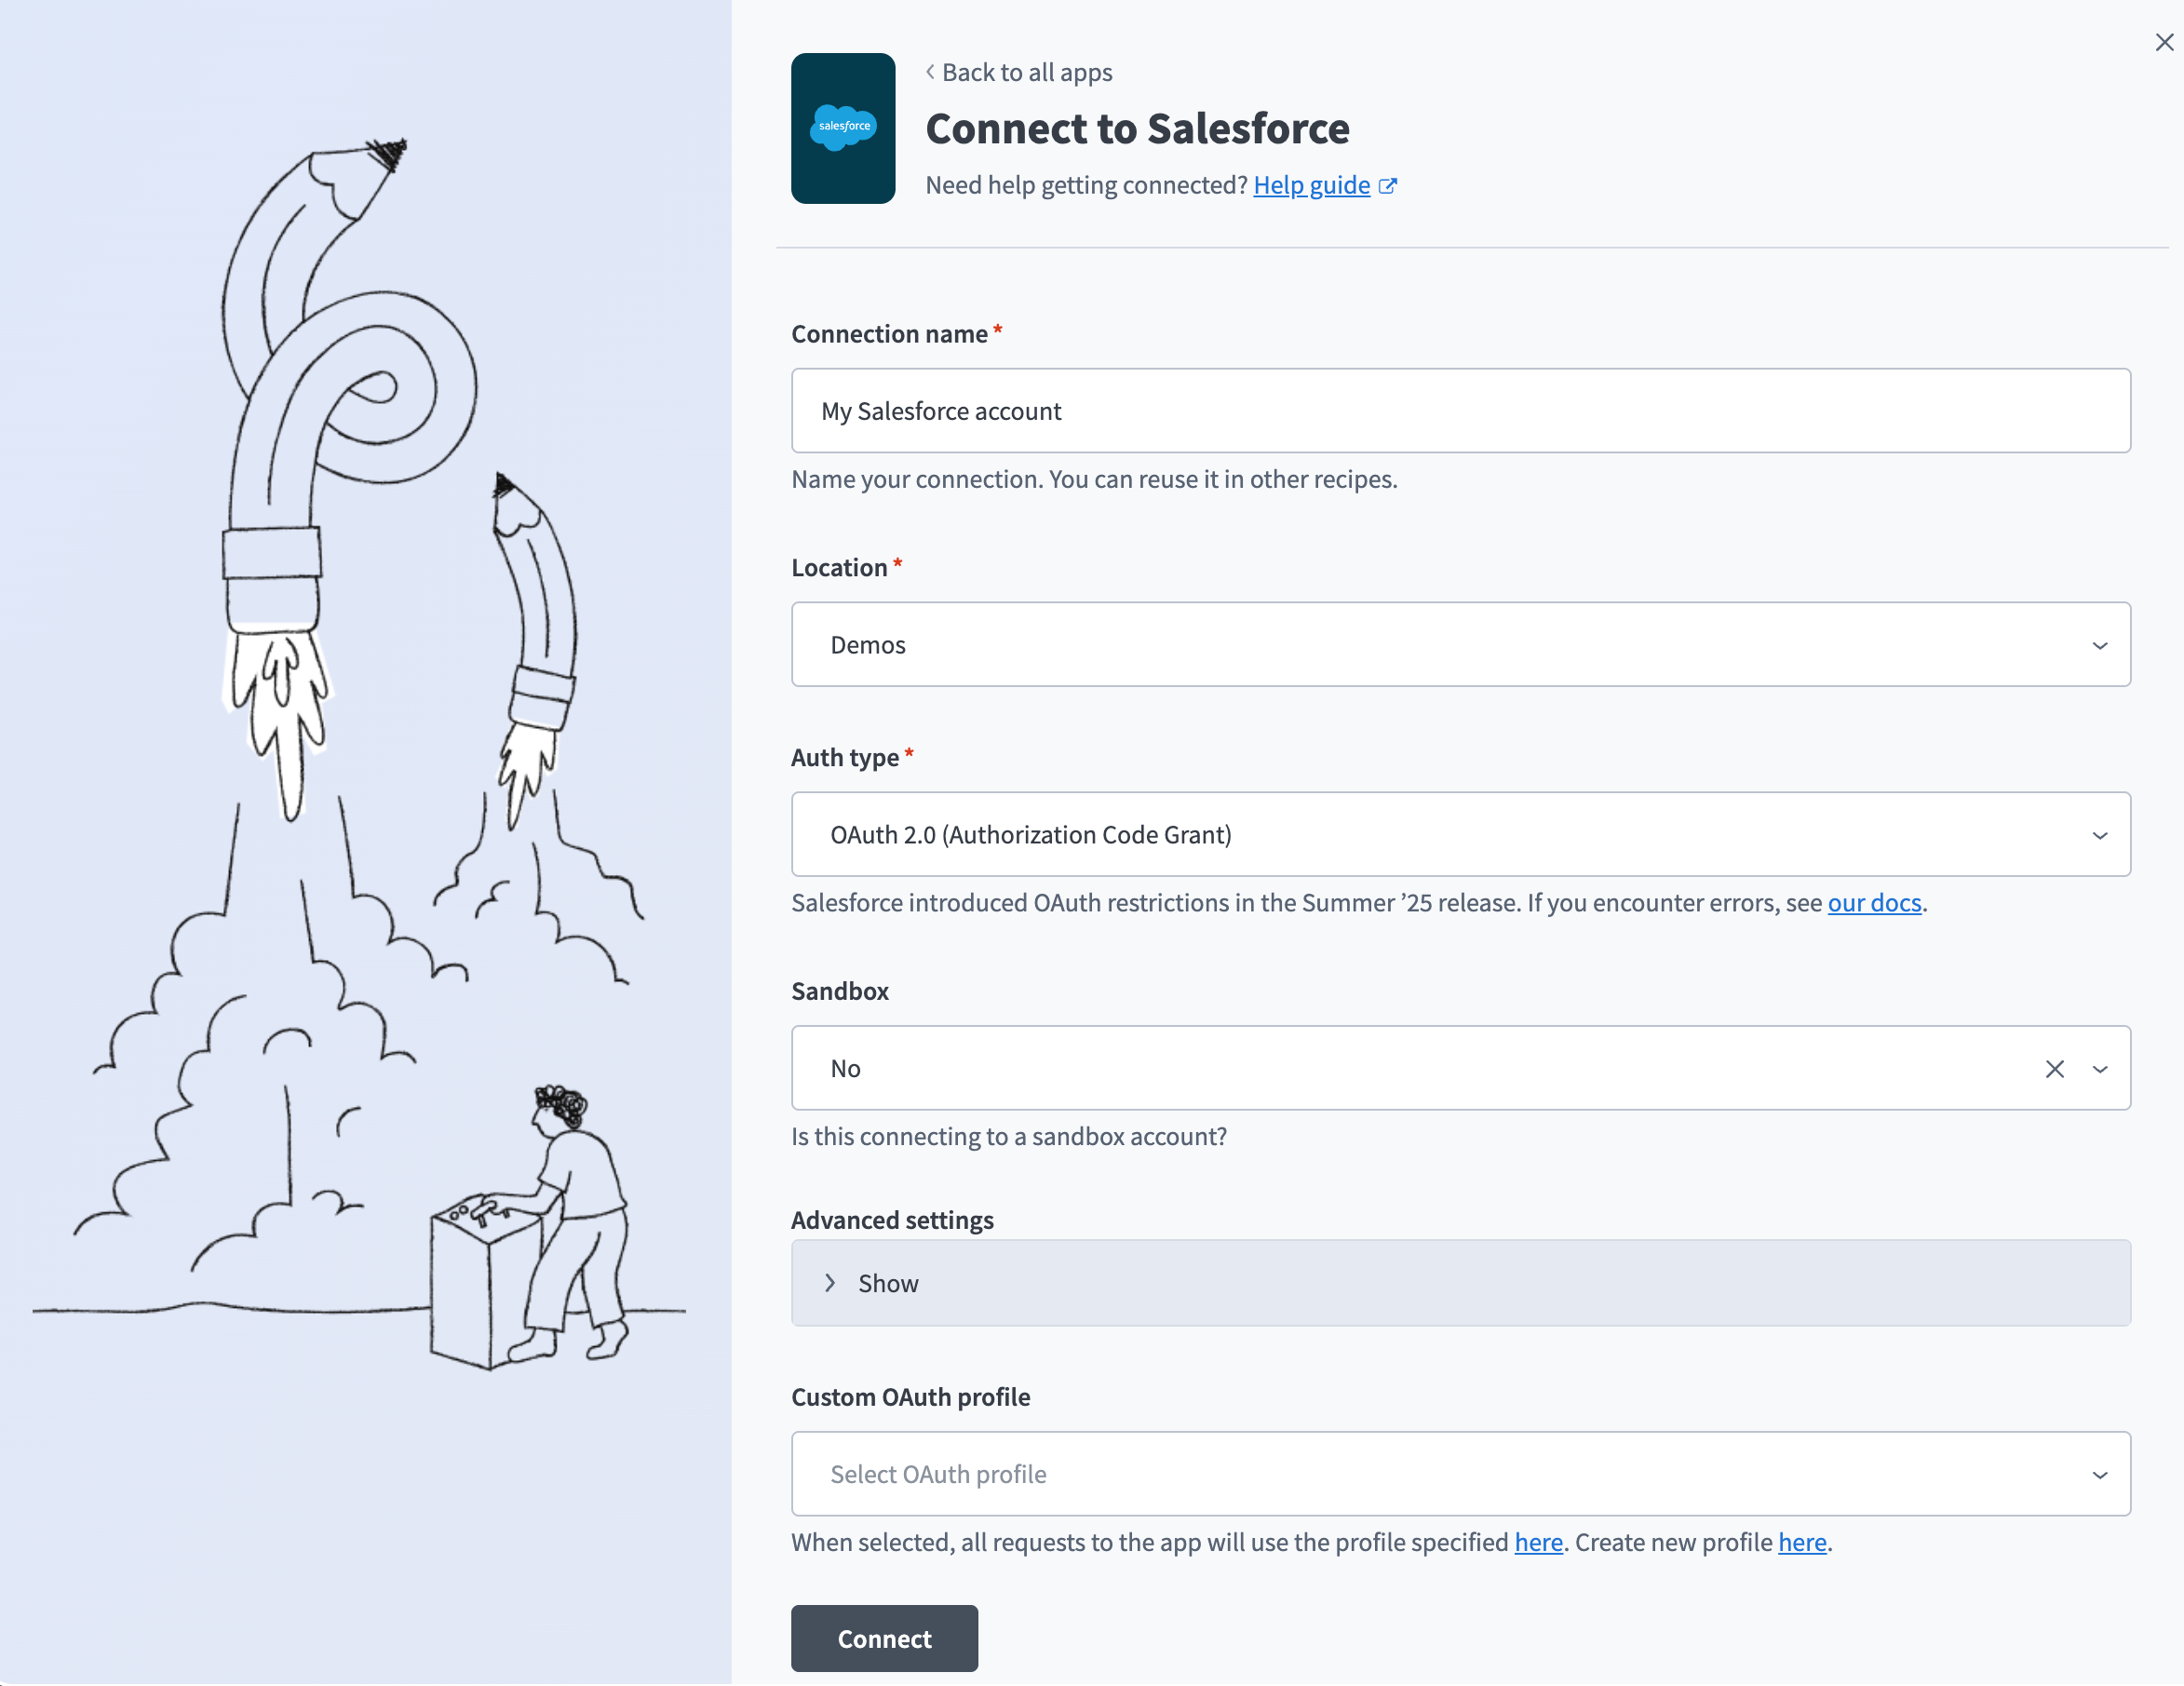 Salesforce connection setup
Use the Location drop-down menu to select the project where you plan to store the connection.
Use the Auth type drop-down menu to select the authentication method. The default is OAuth 2.0.
Use the Sandbox drop-down menu to specify whether the Salesforce account is a sandbox account.
Optional. Expand Advanced settings to configure advanced connection options.
Optional. Use the Custom OAuth profile drop-down menu to select a custom OAuth profile for your connection.
- This custom OAuth profile ensures that the connection is restricted to the same set of scopes you selected for all users with the profile, and the authentication flow uses the client app linked to the custom profile.
Click Connect.
Enter your Salesforce account credentials and click Log In.
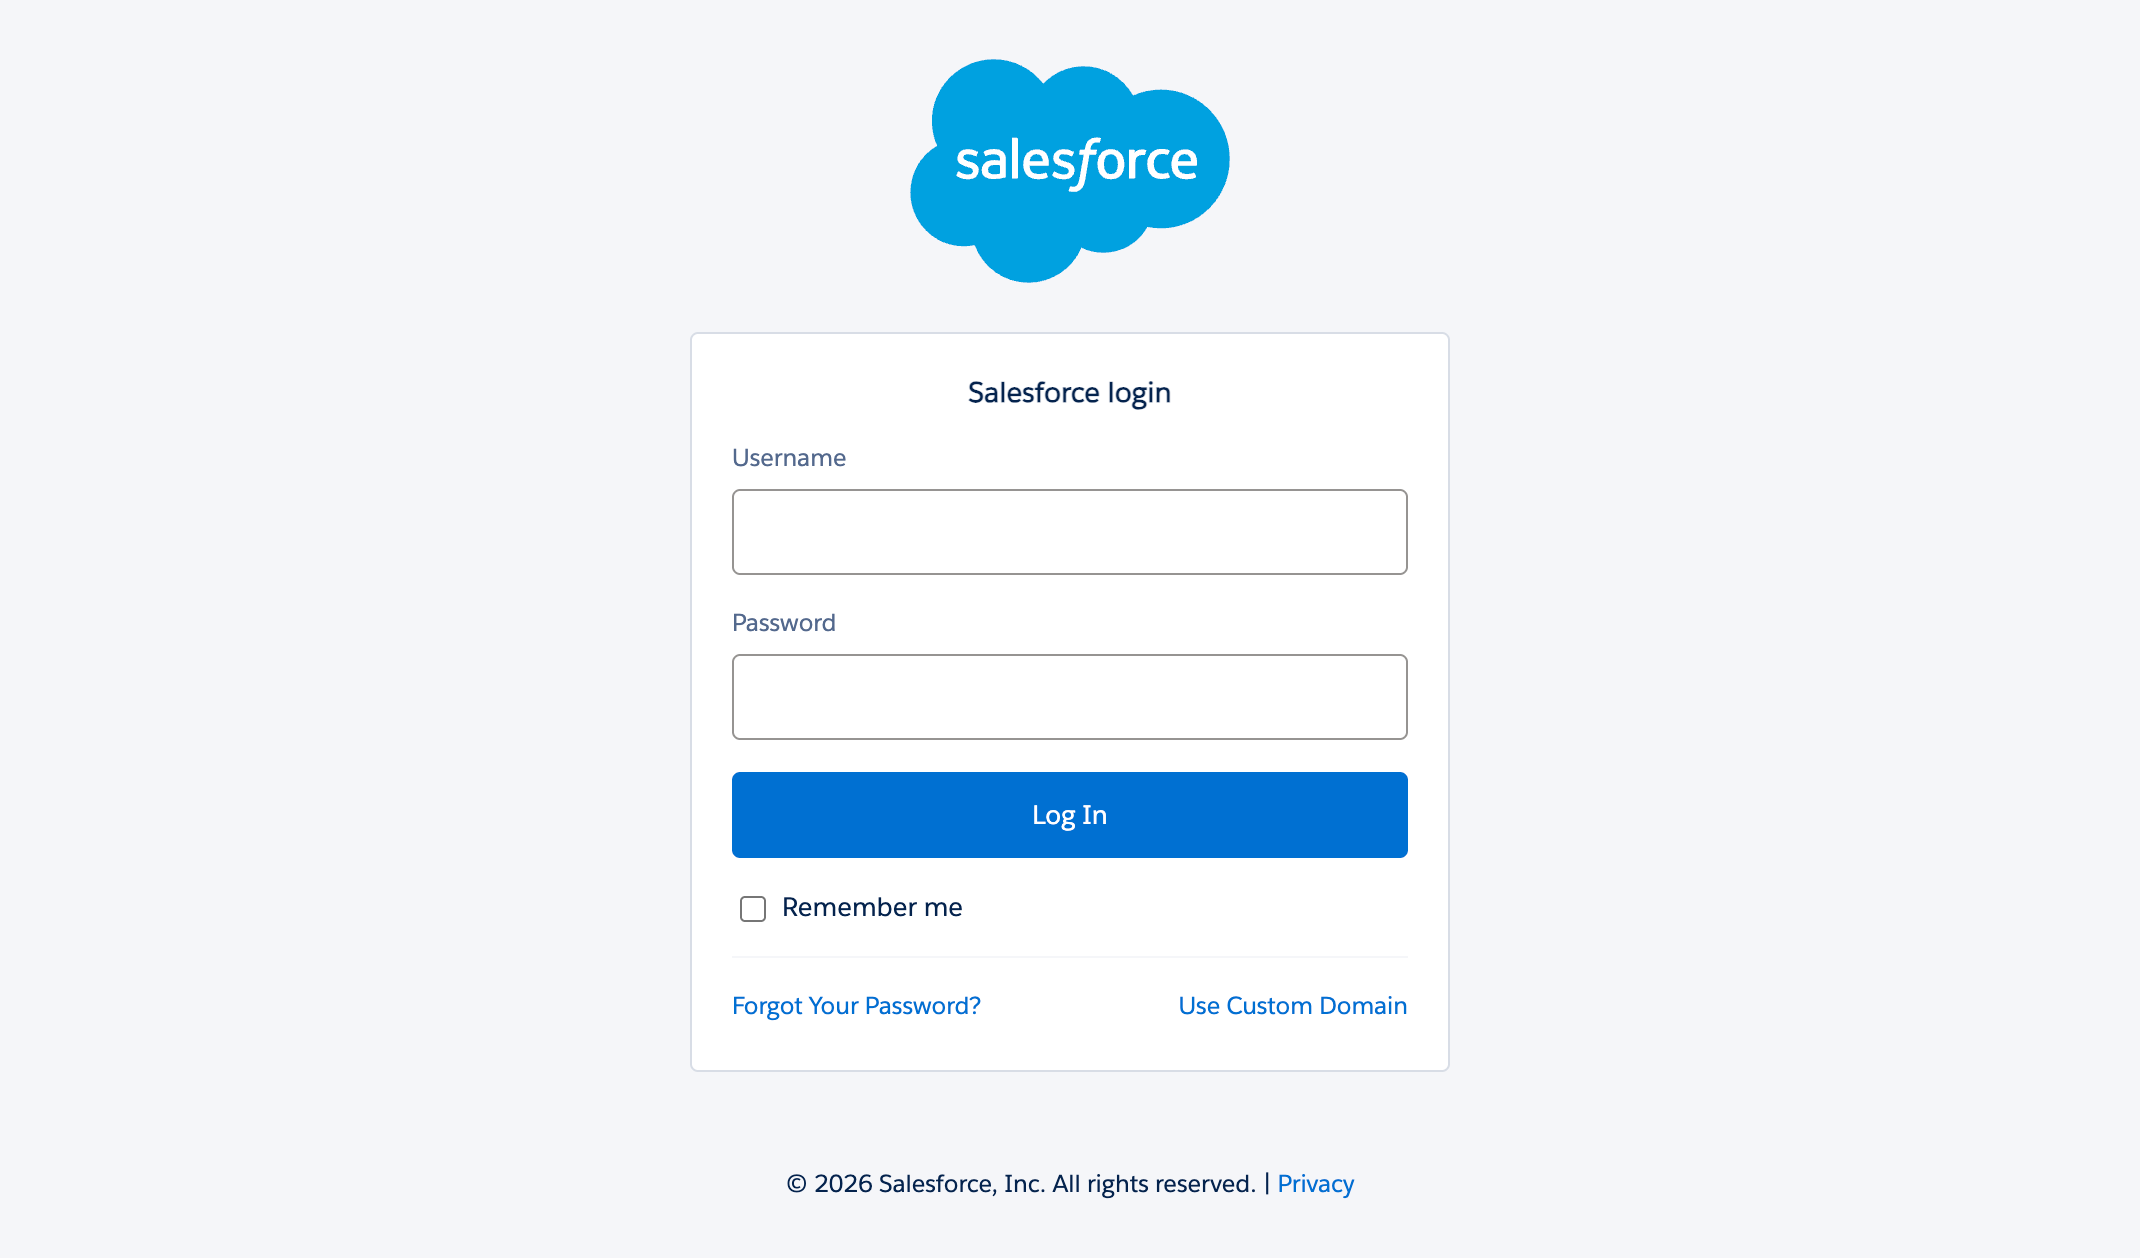 Log in to your Salesforce account
Create a Slack connection.
Create a Slack connection
This step creates a connection between Workato and your Slack account.
Click Create > Connection or press C twice.
Search for and select Slack on the New connection page.
Enter a name for your connection in the Connection name field.
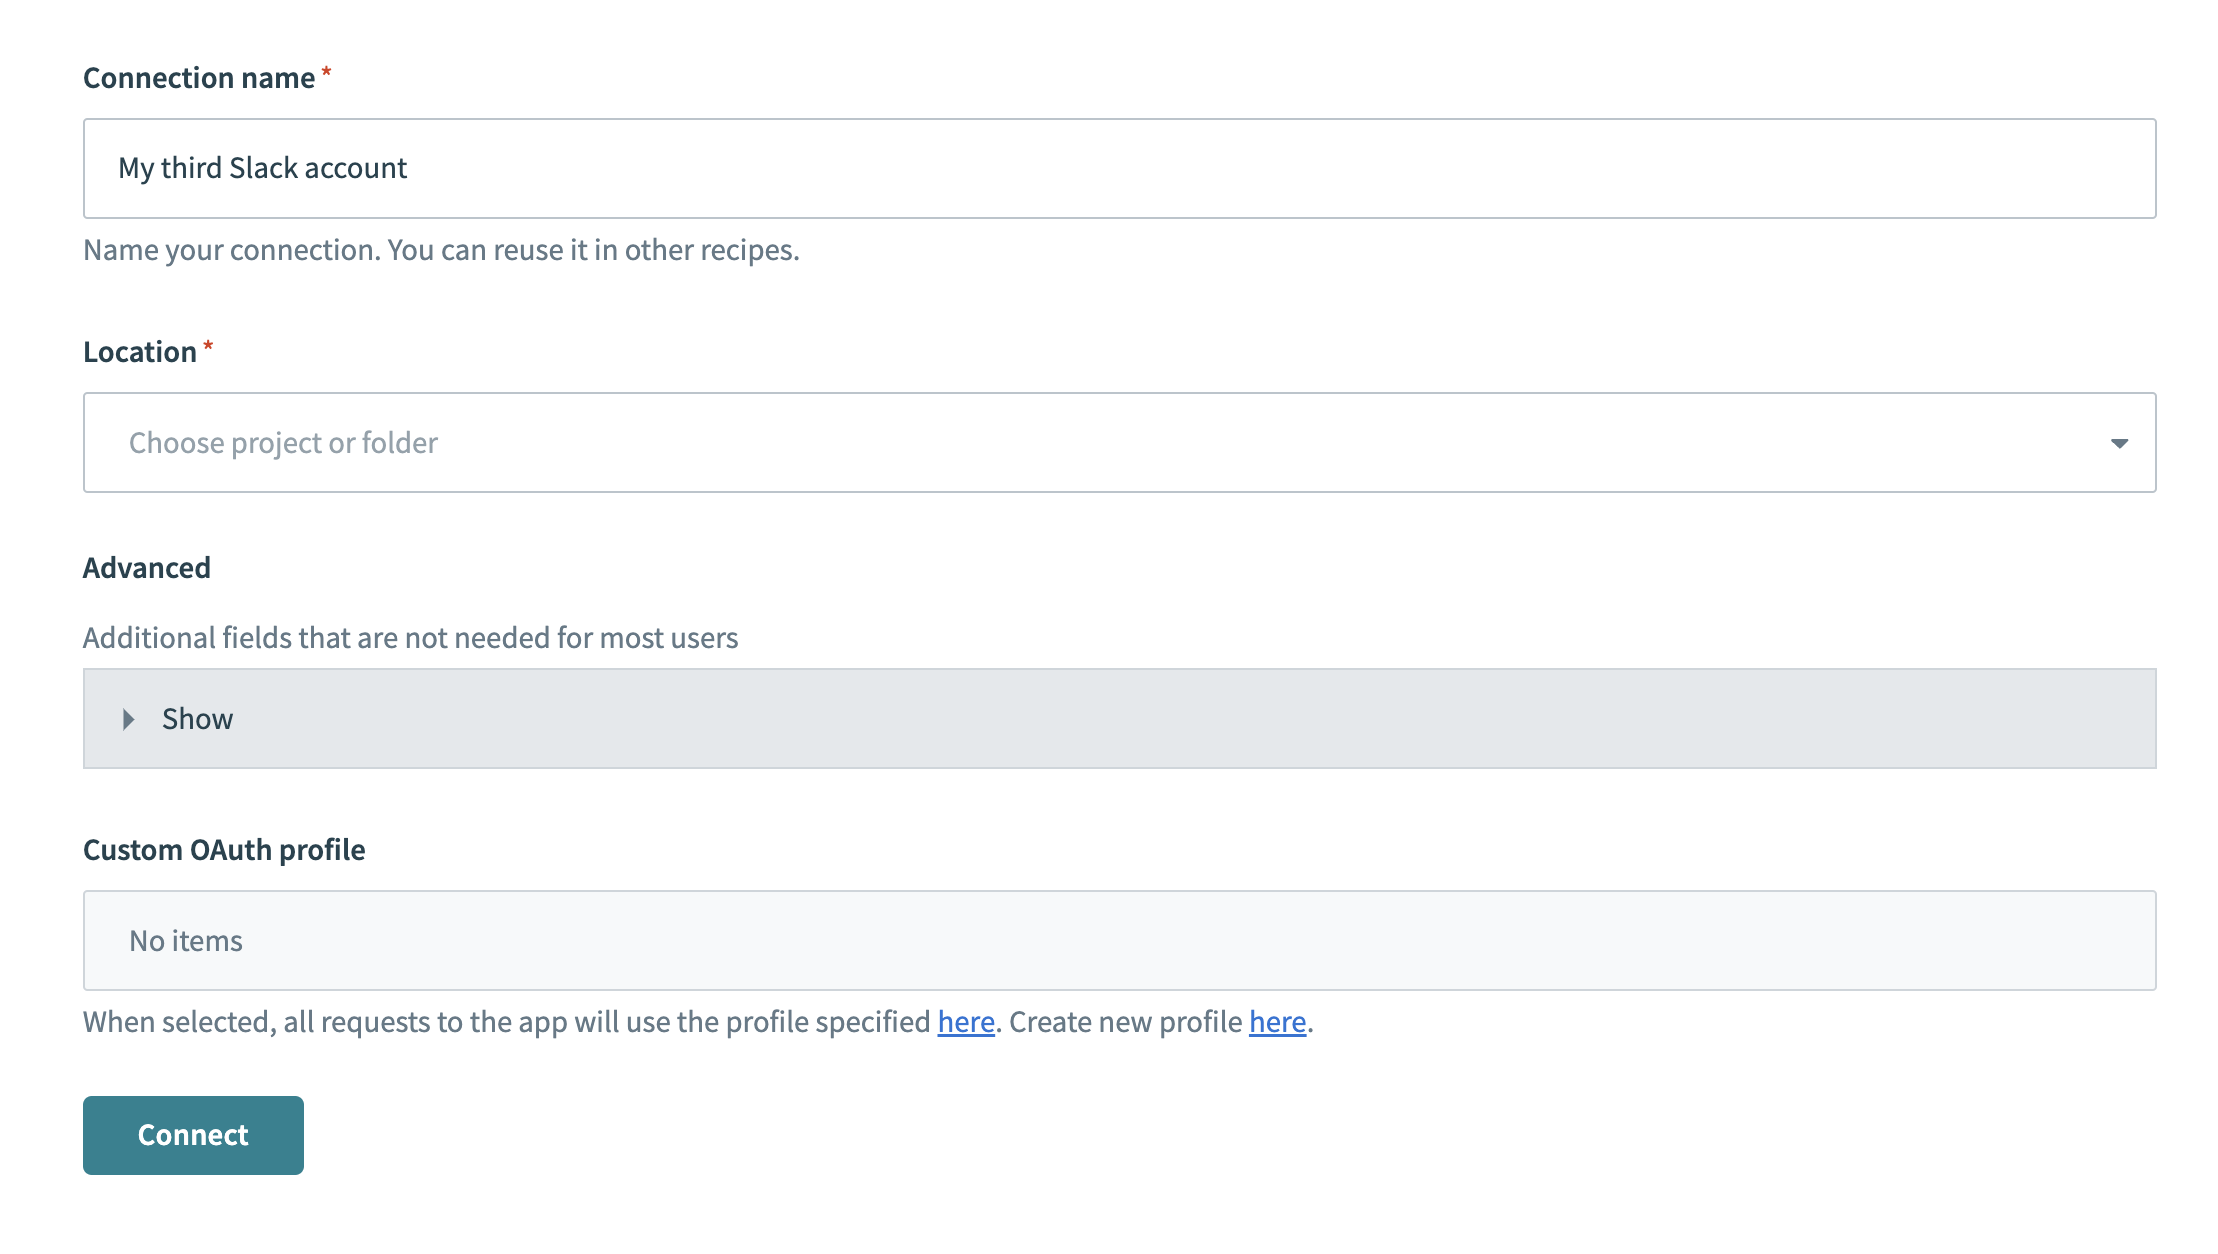 Slack connection setup
Use the Location drop-down menu to select the project where you plan to store the connection.
Optional. Configure Advanced and Custom OAuth profile settings if required for your account type.
Click Connect.
Go back to your project and click Create > Recipe or press C+R.
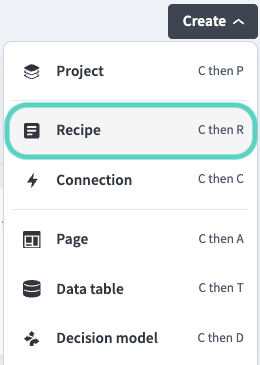 Create a new recipe
Enter a name for your recipe in the Name field.
Use the Location drop-down menu to select the project where you plan to store the recipe.
Click Start building.
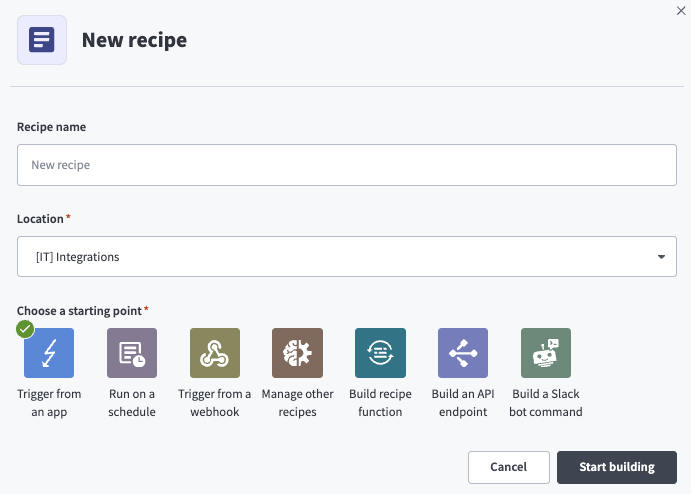 Start building your recipe
Click Pick a starting point > Trigger from an app.
Click Select an app and trigger event.
Set up your Zendesk New ticket trigger.
Set up Zendesk New ticket trigger
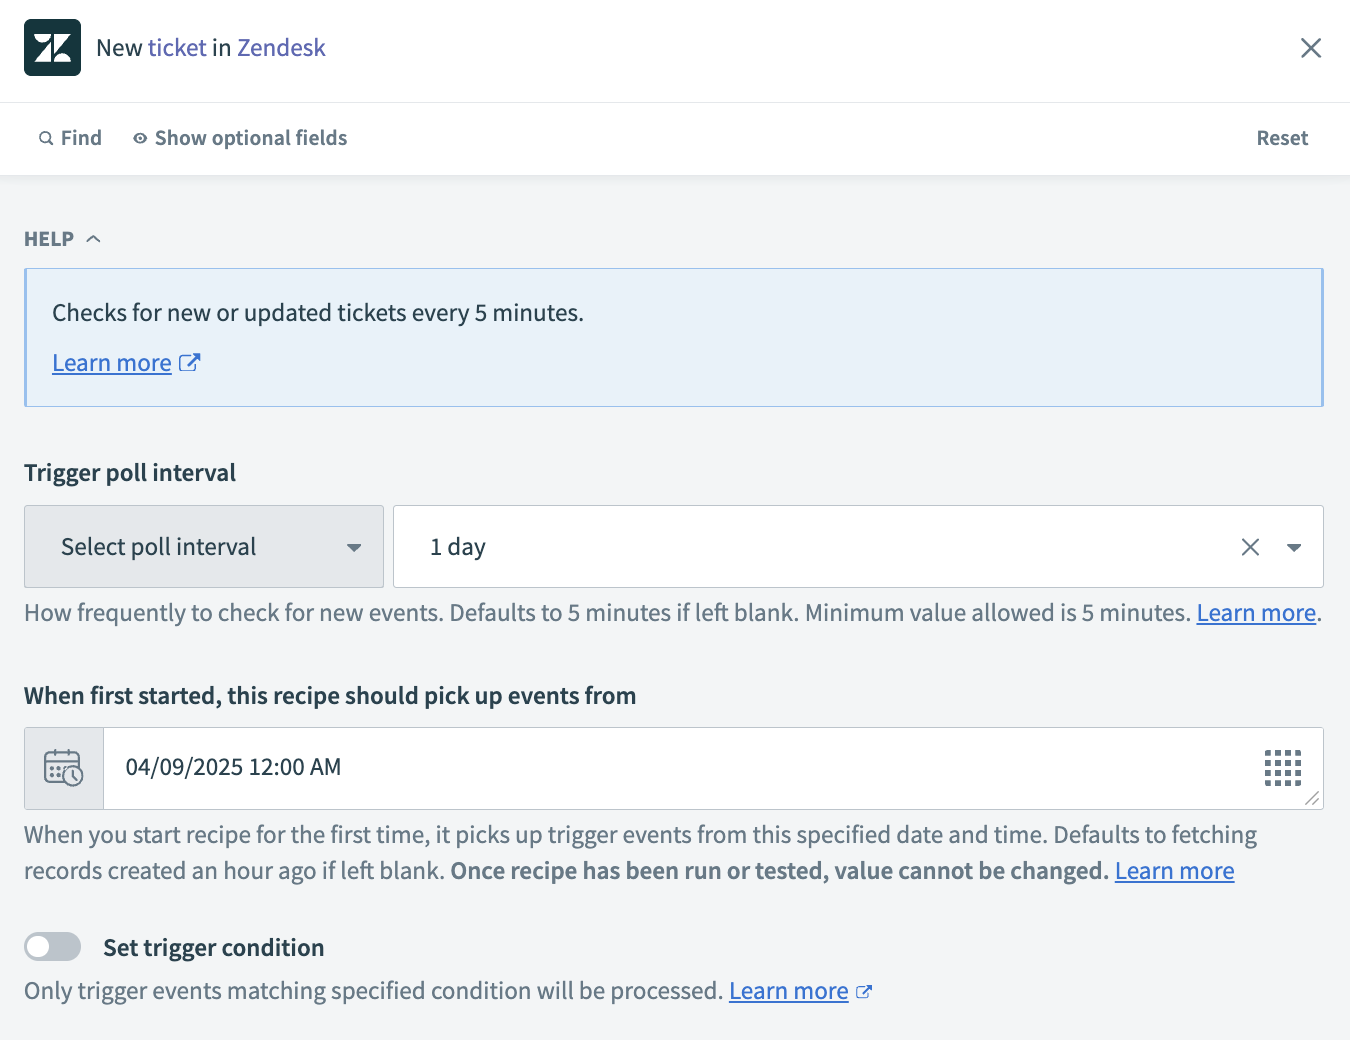
This step checks Zendesk for new tickets at an interval you specify.
Search for Zendesk and select it as your app.
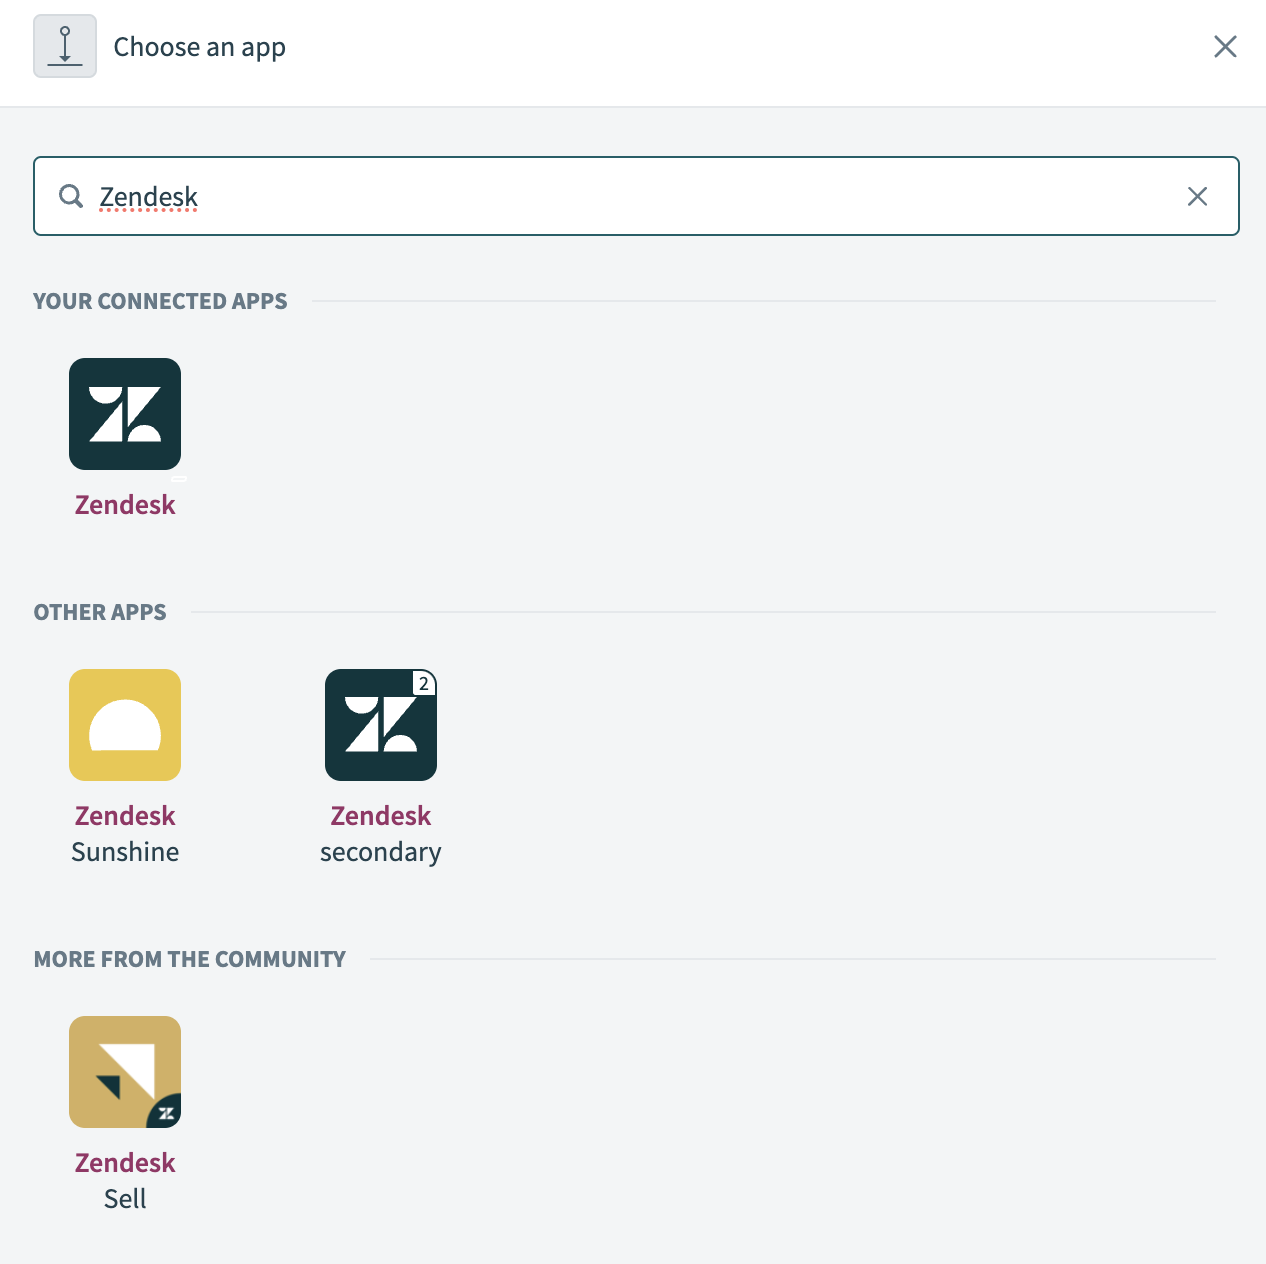 Search for and select
 Zendesk
Select the New ticket trigger.
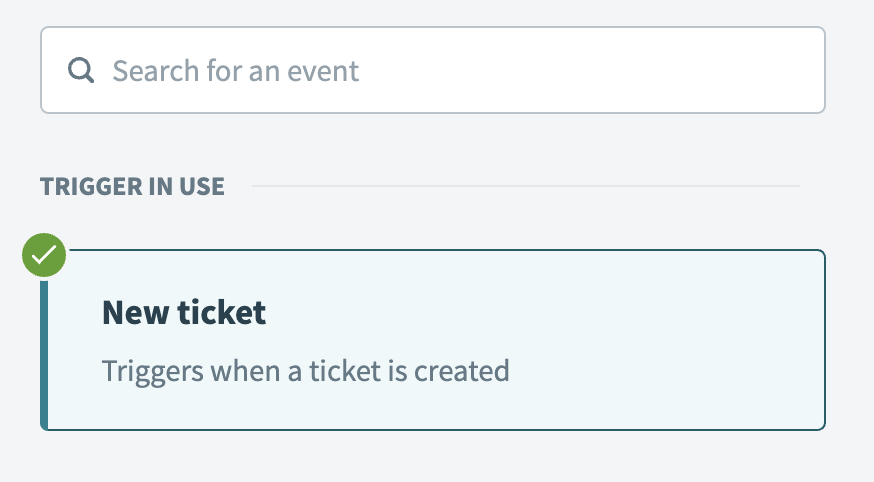 Select the New ticket trigger
Select the Zendesk connection you created in the preceding steps.
Optional. Specify how frequently the trigger checks for new events in the Trigger poll interval field. This field defaults to five minutes if left blank.
 Configure the Trigger poll interval
Optional. Set the date and time to start picking up trigger events from in the When first started, this recipe should pick up events from field. This enables your recipe to capture past events. Leave this field empty to fetch events from the last hour. You can't change this value after you run or test the recipe. Refer to Triggers to learn more about this input field.
Click Save.
 New ticket trigger
Click + Add step > Action in app.
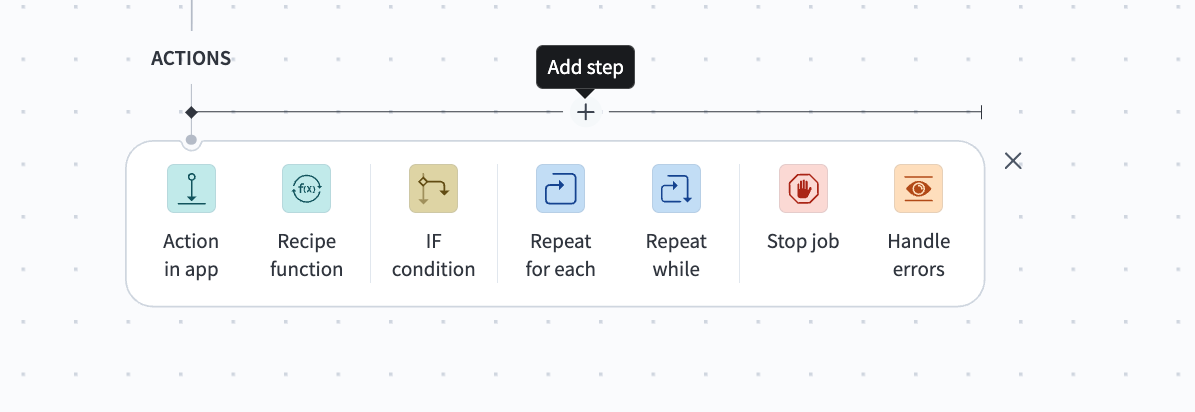 Click + Add step > Add action in app
Set up your Salesforce Search records batch action.
Set up Salesforce Search records batch action
This step searches Salesforce for cases matching the Salesforce Case ID attached to the new Zendesk ticket. The action retrieves details from matching cases for each Fields to retrieve selection.
Search for Salesforce and select it as your app.
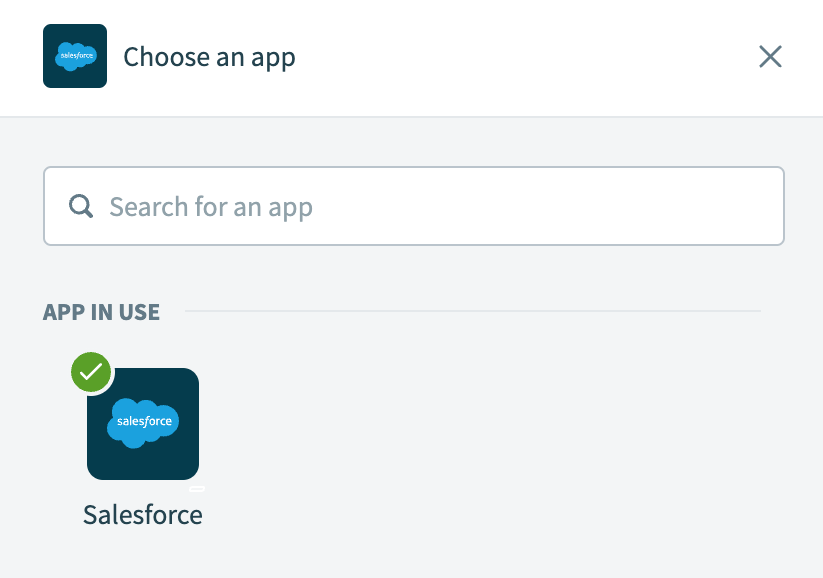 Search for and select
 Salesforce
Select the Search records batch action.
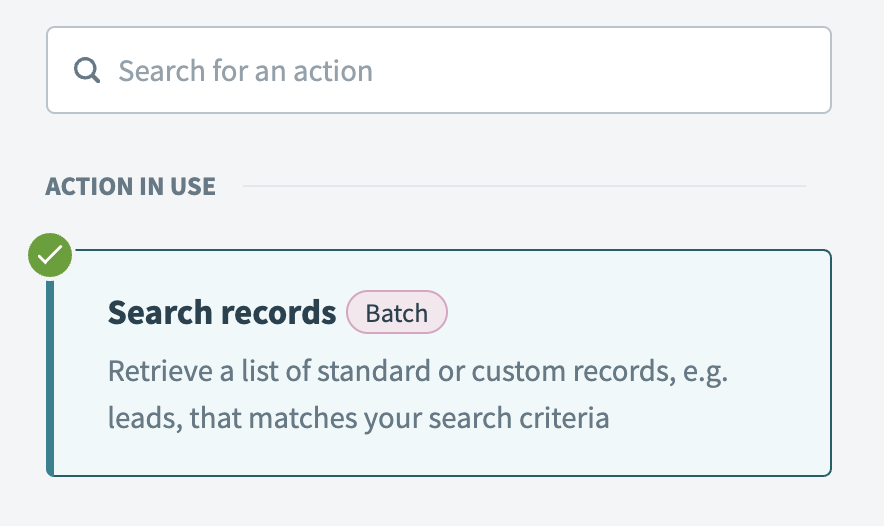 Select the Search records batch action
Select the Salesforce connection you created in the preceding steps.
Go to the Search for field and search for Case.
Optional. Go to the Related objects field and search for Contact and Account.
Go to the Fields to retrieve field and search for Case ID and Content URL.
Optional. Use the Limit field to specify the maximum number of records to retrieve with each search. This field defaults to 150 and has a maximum of 2,000.
Map the Salesforce Case IDStep 1 datapill to the Case ID field.
Click Save.
 Search records action
Click + Add step > IF condition.
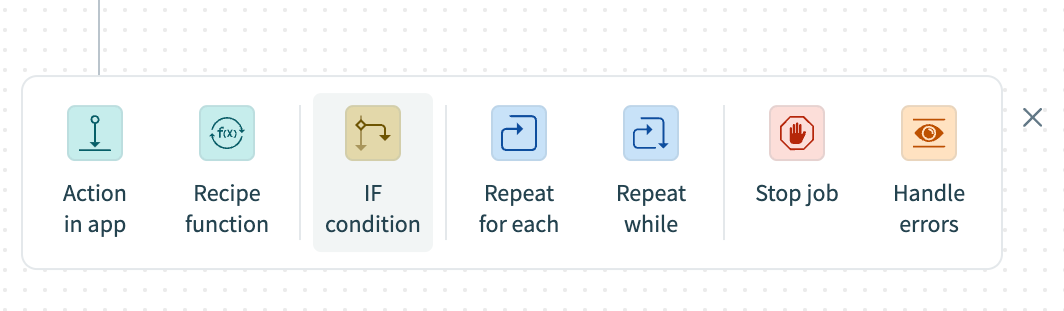 Click + Add step > IF condition
How do IF conditions work?
Salesforce and Zendesk IF condition example
An IF condition enables you to make decisions based on specific conditions. You can control your recipe workflow by executing different actions depending on whether a condition you specify is present or not present (true or false).
Set up your Salesforce and Zendesk IF condition.
Set up a Salesforce and Zendesk IF condition
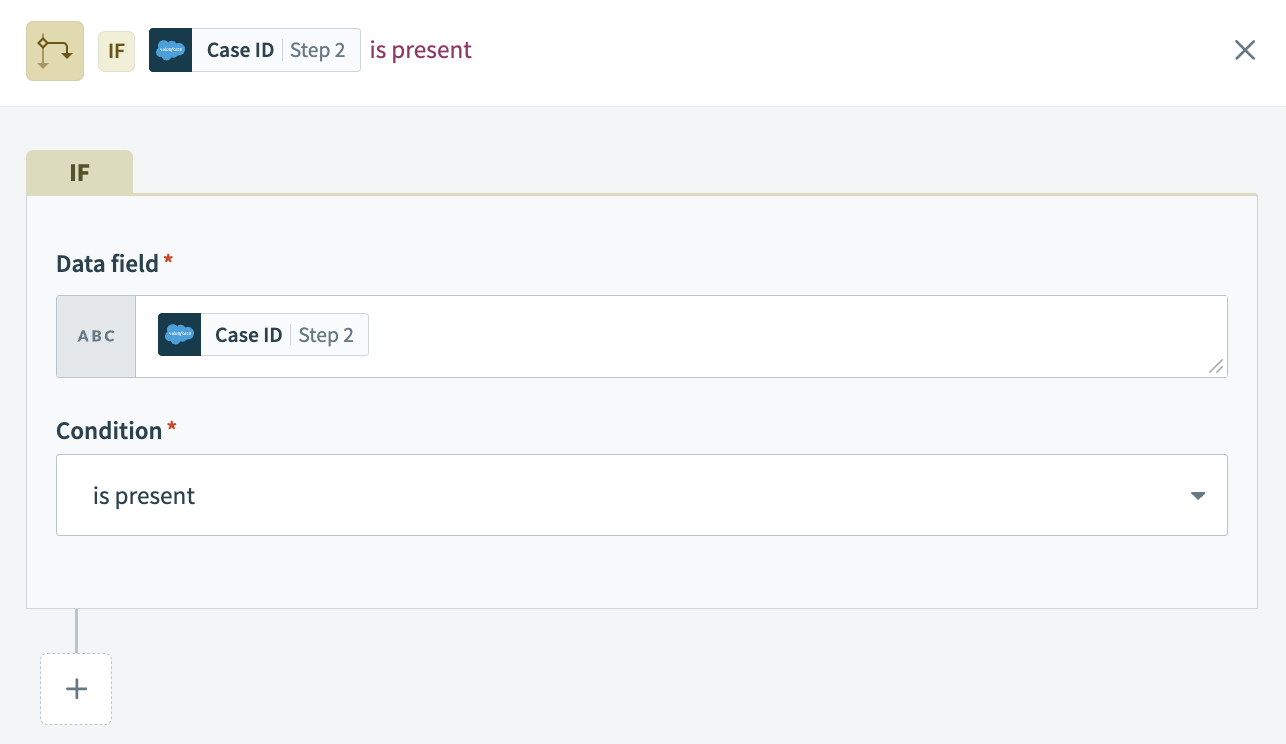
This step checks if the Salesforce Search records action found a Case IDStep 2 that matches the Salesforce Case IDStep 1 attached to the new Zendesk ticket.
Map the Case IDStep 2 datapill to the Data field field.
Select is present in the Condition field to specify that the IF condition runs only when Case IDStep 2 is not null or an empty string.
Click Save.
 IF condition
Go to the Yes branch of the IF condition and click + Add step > Action in app.
Set up your Salesforce Update record action.
Set up Salesforce Update record action
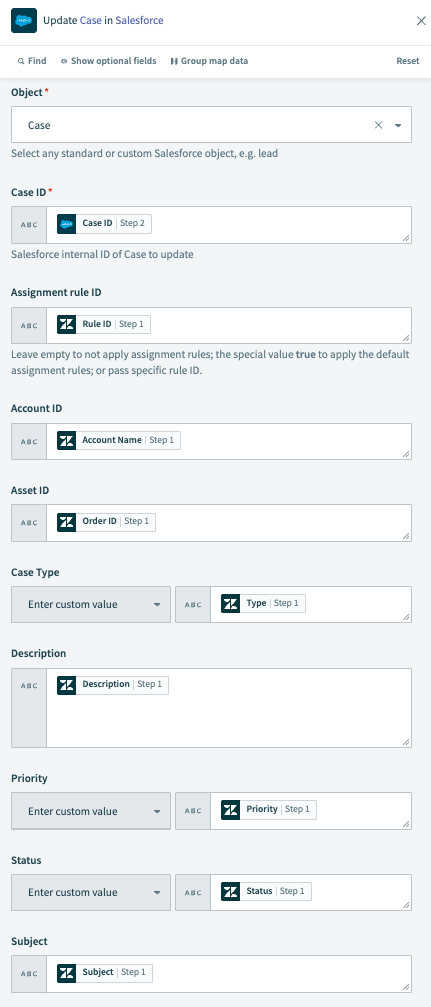
This step updates the contents of the existing Salesforce ticket to match the new Zendesk ticket.
Search for Salesforce and select it as your app.
Search for and select Salesforce
Select the Update record action.
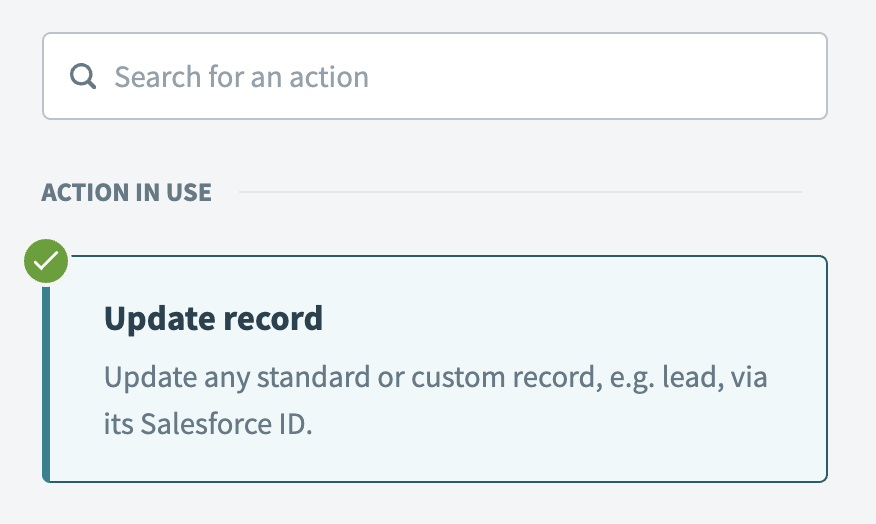 Select the Update record action
Go to the Object field and search for Case.
Map the Case IDStep 2 datapill to the Case ID field.
Map the Rule IDStep 1 datapill to the Assignment rule ID field.
Map the Account NameStep 1 datapill to the Account ID field.
Map the Order IDStep 1 datapill to the Asset ID field.
Map the TypeStep 1 datapill to the Case Type field.
Map the DescriptionStep 1 datapill to the Description field.
Map the PriorityStep 1 datapill to the Priority field.
Map the StatusStep 1 datapill to the Status field.
Map the SubjectStep 1 datapill to the Subject field.
Click Save.
 Update record action
Click + Add step > Action in app.
Set up your Slack Post message action.
Set up Slack Post message action
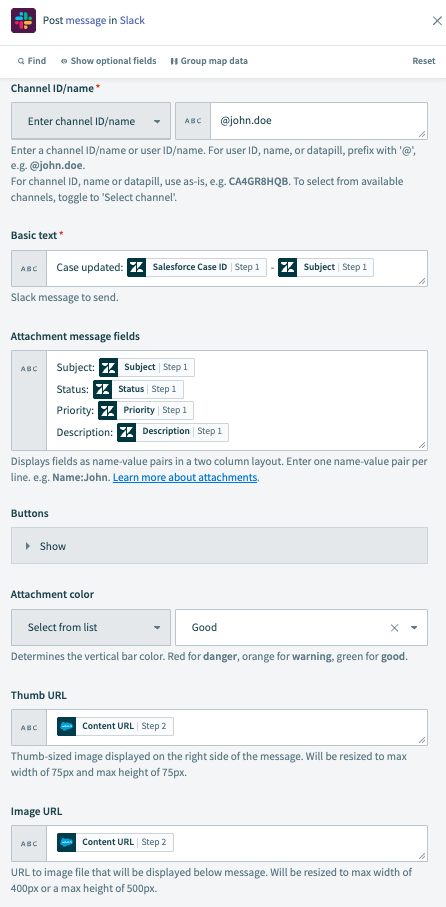
This step posts a message in Slack with information about the updated Salesforce ticket.
Search for Slack and select it as your app.
 Search for and select
 Slack
Select the Post message action.
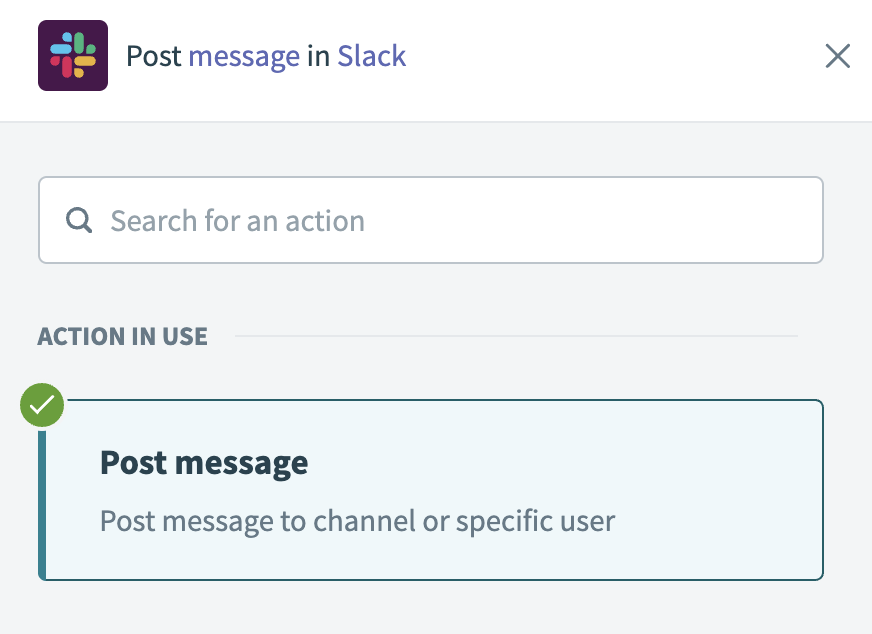 Select the Post message action
Go to the Channel field and select the channel where you plan to post the message. Alternatively, you can switch the field to Enter channel ID/name and specify a channel to post in with the # prefix or a user to direct message with the @ prefix, for example: #support-ticket-101 or @johndoe.
Go to the Basic text field and enter the body text of the message, for example: Case updated: Salesforce Case IDStep 1-SubjectStep 1.
Go to the Attachment message fields field and enter additional details you plan to share as name-value pairs, for example:
Subject: SubjectStep 1
Status: StatusStep 1
Priority: PriorityStep 1
Description: DescriptionStep 1
Go to the Attachment color field and select Good.
Map the Content URLStep 2 datapill to the Thumb URL field.
Map the Content URLStep 2 datapill to the Image URL field.
Click Save.
 Post message action
Go to the No branch of the IF condition and click + Add step > ELSE. The Choose an app search box opens automatically.
 Click + Add step > ELSE in the No branch
How do ELSE conditions work?
Salesforce and Zendesk ELSE condition example
The actions in an ELSE branch run if the IF conditions are not met. The ELSE branch in this recipe runs if the Salesforce Search records action didn't find a Case IDStep 2 matching the Salesforce Case IDStep 1 from the new Zendesk ticket.
Refer to the IF control statement documentation for more information.
Set up your Salesforce Create record action.
Set up Salesforce Create record action
This step creates a new ticket in Salesforce with the contents of the new Zendesk ticket.
Search for Salesforce and select it as your app.
Search for and select Salesforce
Select the Create record action.
 Select the Create record action
Go to the Object field and search for Case.
Map the Rule IDStep 1 datapill to the Assignment rule ID field.
Map the Account NameStep 1 datapill to the Account ID field.
Map the Order IDStep 1 datapill to the Asset ID field.
Map the TypeStep 1 datapill to the Case Type field.
Map the DescriptionStep 1 datapill to the Description field.
Map the PriorityStep 1 datapill to the Priority field.
Map the StatusStep 1 datapill to the Status field.
Map the SubjectStep 1 datapill to the Subject field.
Click Save.
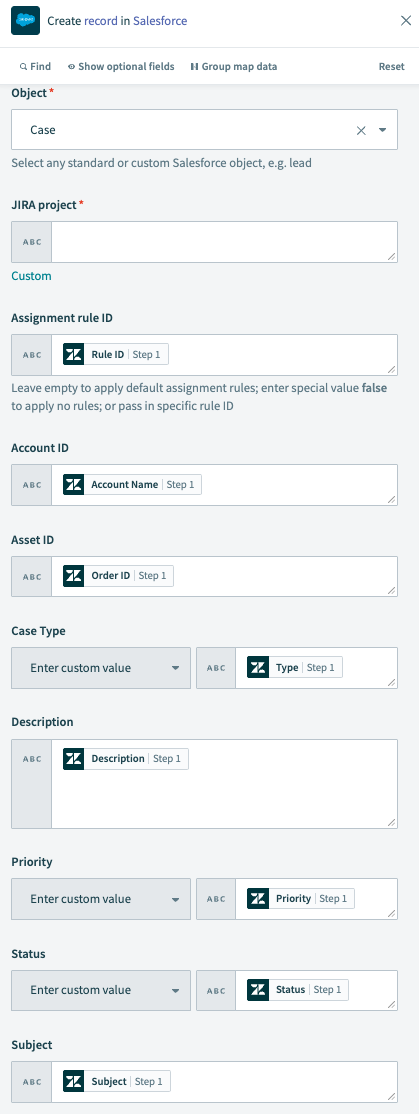 Create record action
Click + Add step > Action in app.
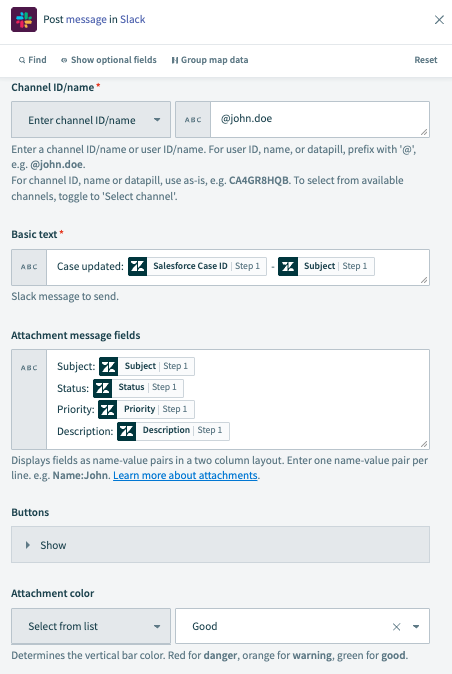
Set up your Slack Post message action.
Set up Slack Post message action
This step posts a message in Slack with information about the new Salesforce ticket.
Search for Slack and select it as your app.
Search for and select Slack
Select the Post message action.
Select the Post message action
Go to the Channel field and select the channel where you plan to post the message. Alternatively, you can switch the field to Enter channel ID/name and specify a channel to post in with the # prefix or a user to direct message with the @ prefix, for example: #support-ticket-101 or @johndoe.
Go to the Basic text field and enter the body text of the message, for example: Case updated: Salesforce Case IDStep 1-SubjectStep 1.
Go to the Attachment message fields field and enter additional details you plan to share as name-value pairs, for example:
Subject: SubjectStep 1
Status: StatusStep 1
Priority: PriorityStep 1
Description: DescriptionStep 1
Go to the Attachment color field and select Good.
Click Save.
 Post message action
Your Sync Zendesk tickets to Salesforce and notify your team in Slack recipe is ready to test and implement.
Example recipe configuration.
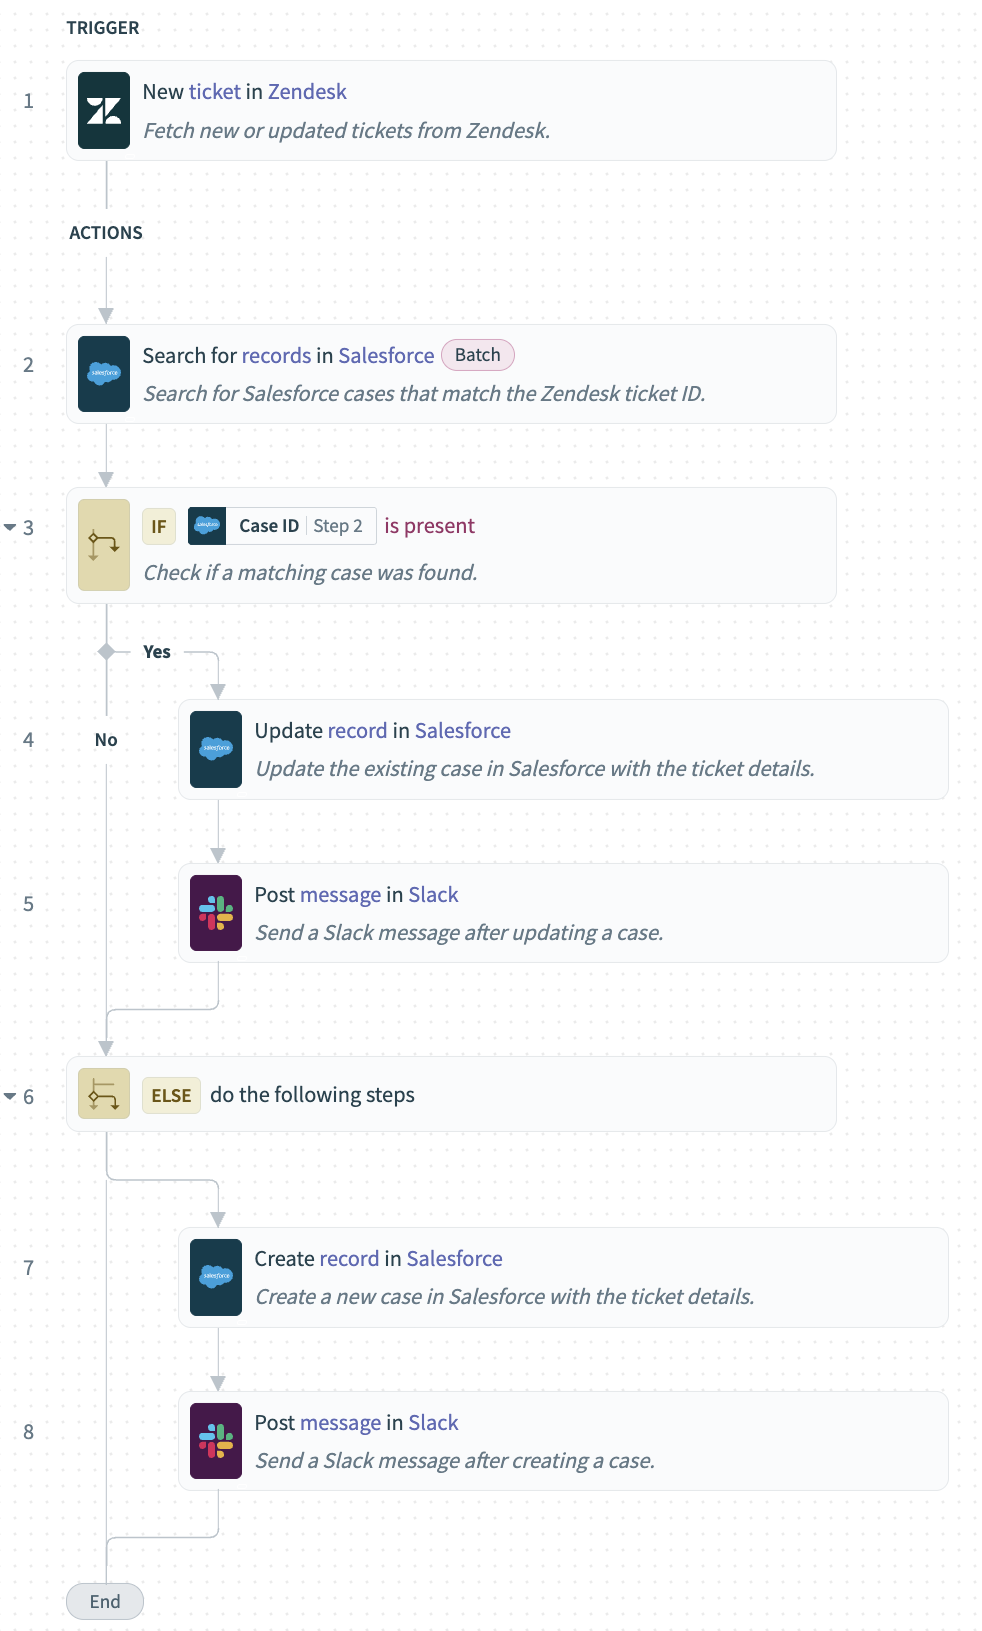 Sync Zendesk tickets to Salesforce and notify your team in Slack recipe
Last updated: