Configuring AWS Secrets Manager for on-prem agent
Amazon Web Services (AWS) Secrets Manager is a service that enables you to securely store and access secrets in the cloud. Workato supports AWS Secrets Manager for managing secrets for on-prem systems.
AWS Secrets Manager support for OPA connection types
AWS Secrets Manager supports both cloud profiles and connection profiles, though the process of connecting to and using AWS Secrets Manager is different for each, as summarized in the following table:
| On-prem system connection type | AWS Secrets Manager setup | AWS Secrets Manager secret syntax |
|---|---|---|
| Cloud profile (recommended) | AWS Secrets Manager setting in Workato | {{workato:sm:<key_name>:<secret_ARN>}} |
| Connection profile | secrets section in config.yml | { secret: '<secret_name>' } |
Configure and use AWS Secrets Manager according to the connection type of the on-prem system whose secrets are stored in Secrets Manager:
- Using AWS Secrets Manager with on-prem systems configured as cloud profiles
- Using AWS Secrets Manager with on-prem systems configured as connection profiles
CONNECTION TYPES
- Cloud profiles are set up directly in Workato, so you don't need to access the machine where the on-prem agent is installed.
- Connection profiles are set up manually in a
config.ymlfile on the machine where the on-prem agent is installed.
Using AWS Secrets Manager with cloud profiles
To set up and use AWS Secrets Manager to store credentials for an on-prem system configured as a cloud profile, complete the following steps:
- Set up AWS Secrets Manager for either workspace-level secrets management or project-specific secrets management.
- Use AWS Secrets Manager secrets in connections. In the Connection type field of the connection setup, select the name of the on-prem group that you set up as a cloud profile (meaning directly in Workato).
Using AWS Secrets Manager with connection profiles
LEGACY CONNECTION CONFIGURATION
Setting up AWS Secrets Manager with a config.yml file is a legacy connection configuration that will eventually be deprecated. We encourage you to migrate your connection profiles to cloud profiles, so you can set up AWS Secrets Manager directly in Workato.
In this guide, we'll show you how to use Amazon Web Services Secrets Manager with Workato's on-prem agent (OPA) to store credentials for a database that is configured as a connection profile.
When configured, OPA uses the Default Credential Provider Chain to authenticate its requests to AWS, eliminating the need to store credentials in your OPA config file. See Amazon Web Services (AWS) Secrets Manager.
Alternatively, you can choose to manage access at the project level, changing secrets manager settings so that connections in the project can use the specified role in the project settings. So, customers can create project-specific IAM roles to limit the use of secrets to connections within the project. See Amazon Web Services (AWS) Secrets Manager for projects.
Prerequisites
To configure AWS Secrets Manager to work with OPA, you'll need:
- The On-prem groups privilege in Workato.
- The following in AWS:
- Permissions that allow you to:
- Create and manage secrets
- Create and manage IAM access keys
- An existing IAM access key stored as an environment variable. Workato uses the Default Credential Provider Chain to authenticate requests to AWS. Creating an IAM access key and storing it is outside the scope of this tutorial, but you can use these AWS guides to complete this prerequisite:
- Permissions that allow you to:
Step 1: Create the Secret in AWS
Log in to your AWS console.
Use the search bar at the top of the page to open the AWS Secrets Manager.
Click the Store a new secret button.
On the Step 1 - Choose secret type page:
In the Secret type section, click Other type of secret.
In the Key/value pairs section, click the Plaintext option.
In the Plaintext field, enter the password. OPA will retrieve this value and pass it as-is.
Your configuration should look like the following:
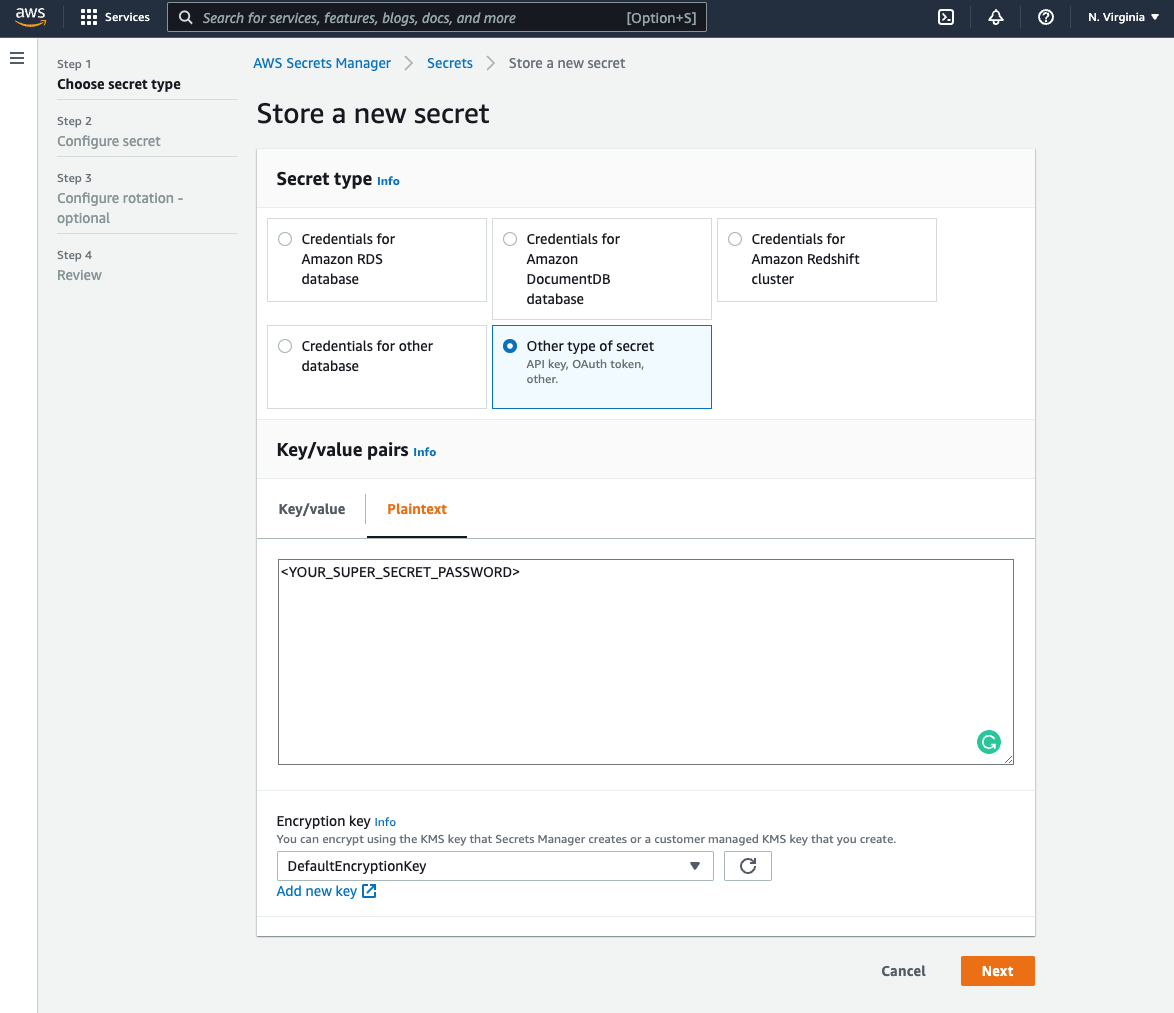 Configured Secret Type page in AWS Secrets Manager
Click Next.
On the Step 2 - Configure secret page:
Fill in the following fields:
- Secret name: Enter a name for the secret. You'll add this value to your OPA config file in the next section, which will allow OPA to retrieve the correct password.
- Description (optional): Enter a brief description of the secret.
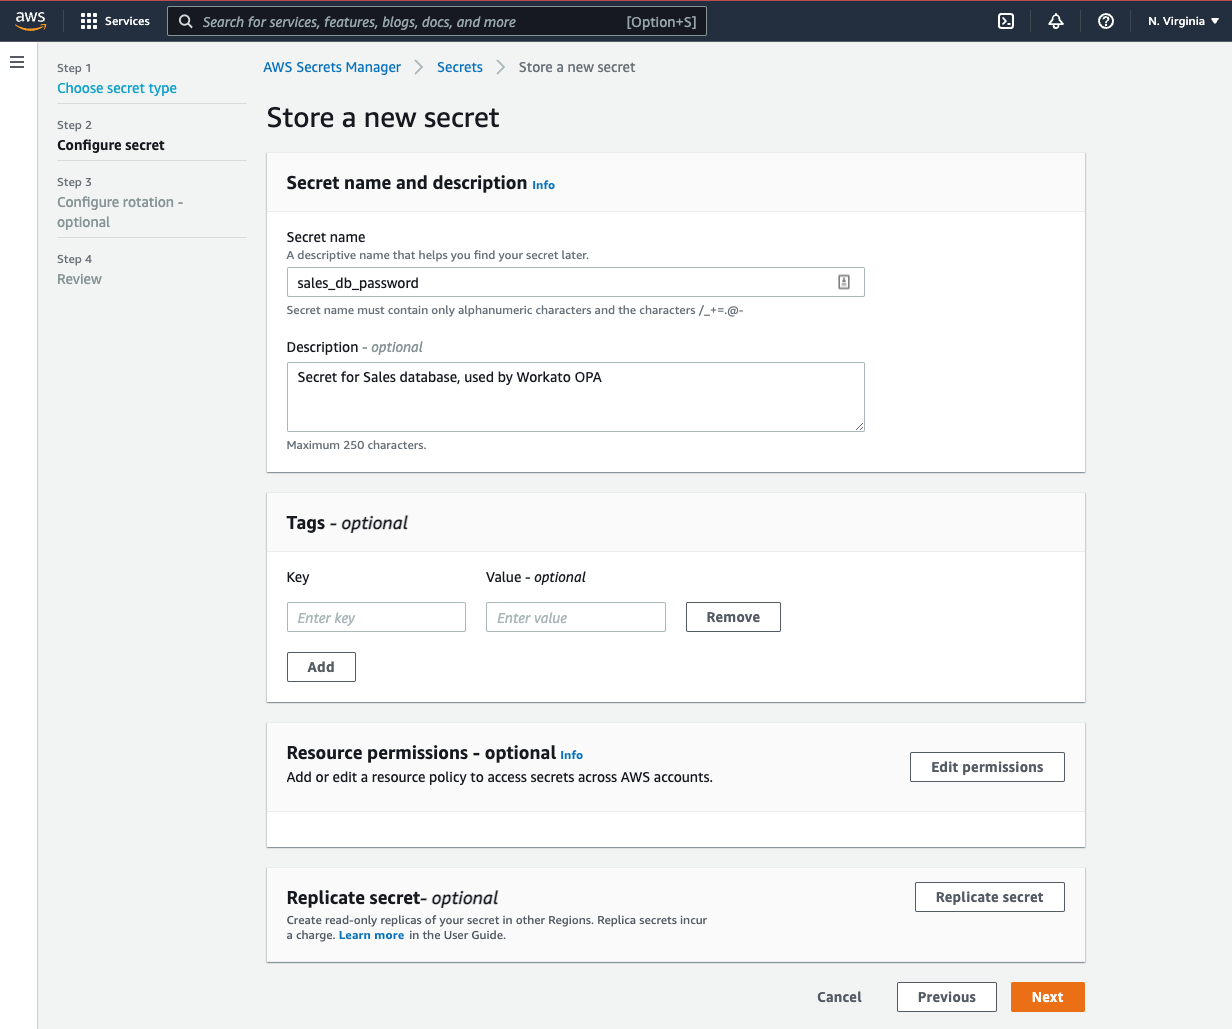 Configure Secret page in AWS Secrets Manager
When finished, click Next.
Optional: On the Step 3 - Configure rotation page, configure rotation for the secret if desired. When finished, click Next.
On the Step 4 - Review page:
Review the secret's details.
If everything looks fine, click Store to create and store the secret.
Step 2: Configure the OPA Config File
In this step, you'll add info about your secrets manager to your OPA configuration file.
NO CREDENTIALS NEEDED
When configured, OPA will use the Default Credential Provider Chain to authenticate its requests to AWS. This eliminates the need to store your credentials - either those for AWS Secrets Manager or a database - in your OPA config file.
In your OPA config file, add a secrets section with provider and region keys:
secrets:
  provider: aws
region: <YOUR_REGION>For provider, enter aws.
For region, enter the region your AWS instance is in:
secrets:
  provider: aws
  region: us-east-1
You can find this info in your AWS console by clicking the region menu at the top of the page, located next to the user menu:
 Configure Secret page in AWS Secrets Manager
In this example, the region is us-east-1.
Save the file.
Step 3: Configure the Database Profile
To wrap things up, you'll specify which secret to use in the database's profile.
In the config file, navigate to the database's profile.
In the password key, use { secret: '<SECRET_NAME>'} to specify the secret. The <SECRET_NAME> must match the name of the secret you created in Step 1:
database:
  sales_database:
    adapter: sqlserver
    host: localhost
    port: 1433
    database: test
    username: sales_user
password: { secret: 'sales-db-password-password' }Save the file.
Last updated: