Configure SCIM in OneLogin
Workato supports the SCIM 2.0 protocol with the OneLogin identity provider.
Prerequisites
- Your organization must have the Data Monitoring/Advanced Security & Compliance capability.
- You must have SAML SSO successfully set up with your identity provider.
- You already configured SCIM in Workato.
Configure for generic SAML applications
If you are using a generic SAML application without provisioning on OneLogin, you must first add a new application that supports provisioning from the OneLogin app catalog.
RECOMMENDATION
We recommend that you also configure SAML SSO for the application, and then proceed to configure SCIM.
Follow these steps:
Log into OneLogin.
Navigate to Apps > Add App.
Search for “SCIM”, and select the **SAML with SCIM Provisioner (core user 2.0)**option.
Add the application.
Configure SCIM
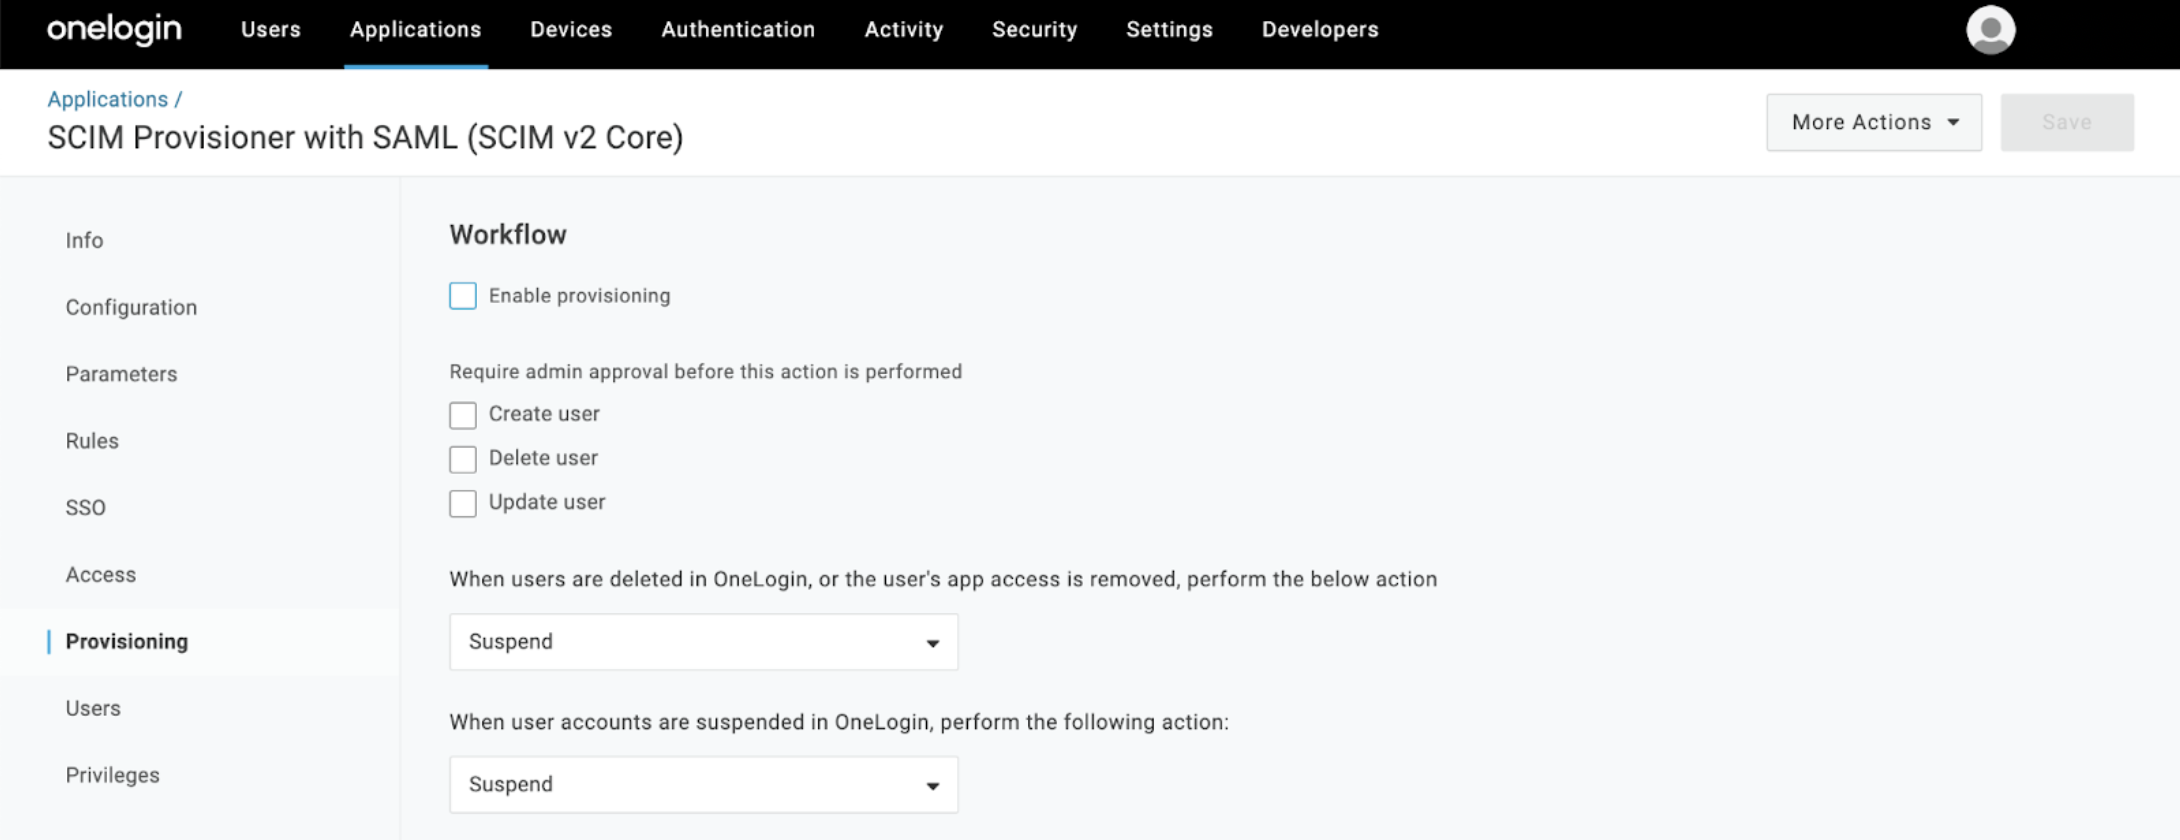
Navigate to the Provisioning interface, and select the following options:
- Enable provisioning
- Select this option.
- When users are deleted...
- Choose .
- When user accounts are suspended...
- Choose .
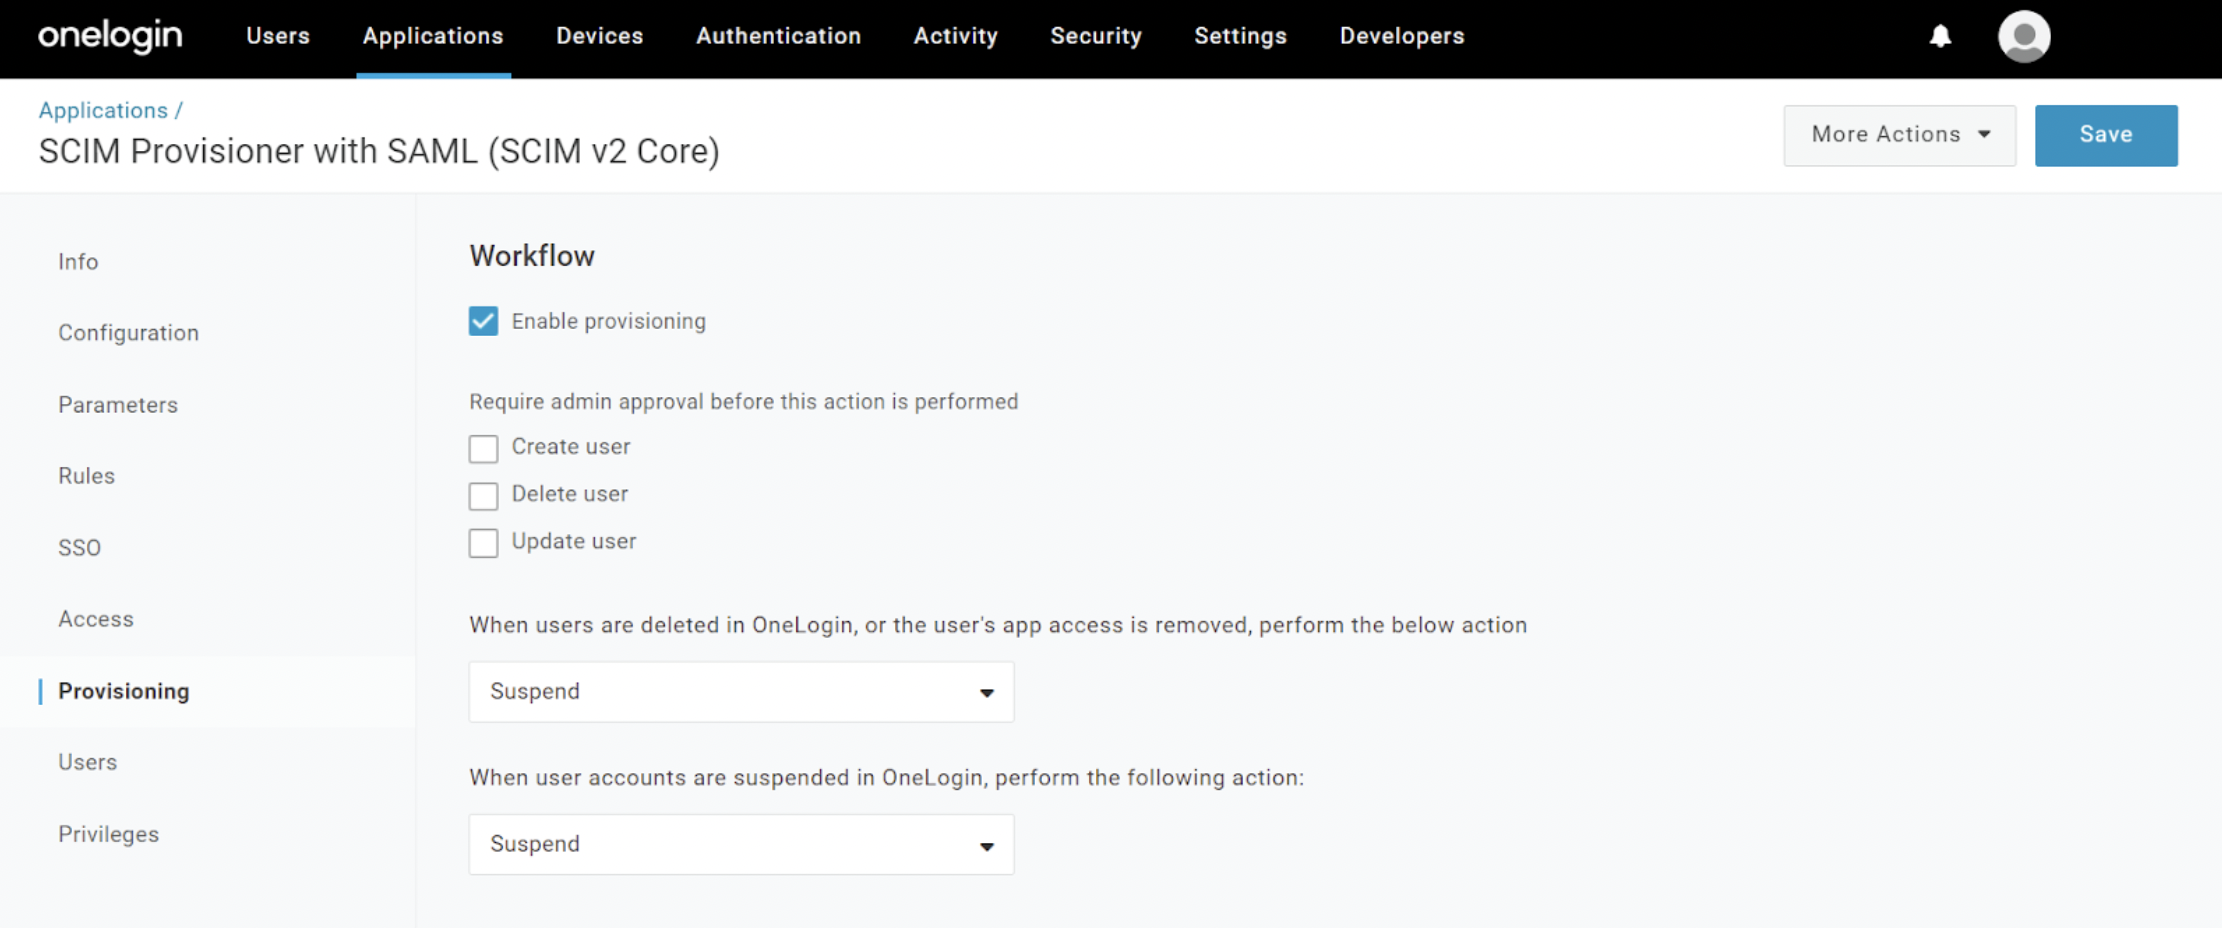 Enable provisioning
Navigate to the Configuration interface, and add values to the following fields:
- SCIM Base URL
- This is the Base URL of the Workato SCIM API endpoint, that you copied when configuring SCIM in Workato.
- SCIM Bearer Token
- This is the SCIM token you copied when configuring SCIM in Workato.
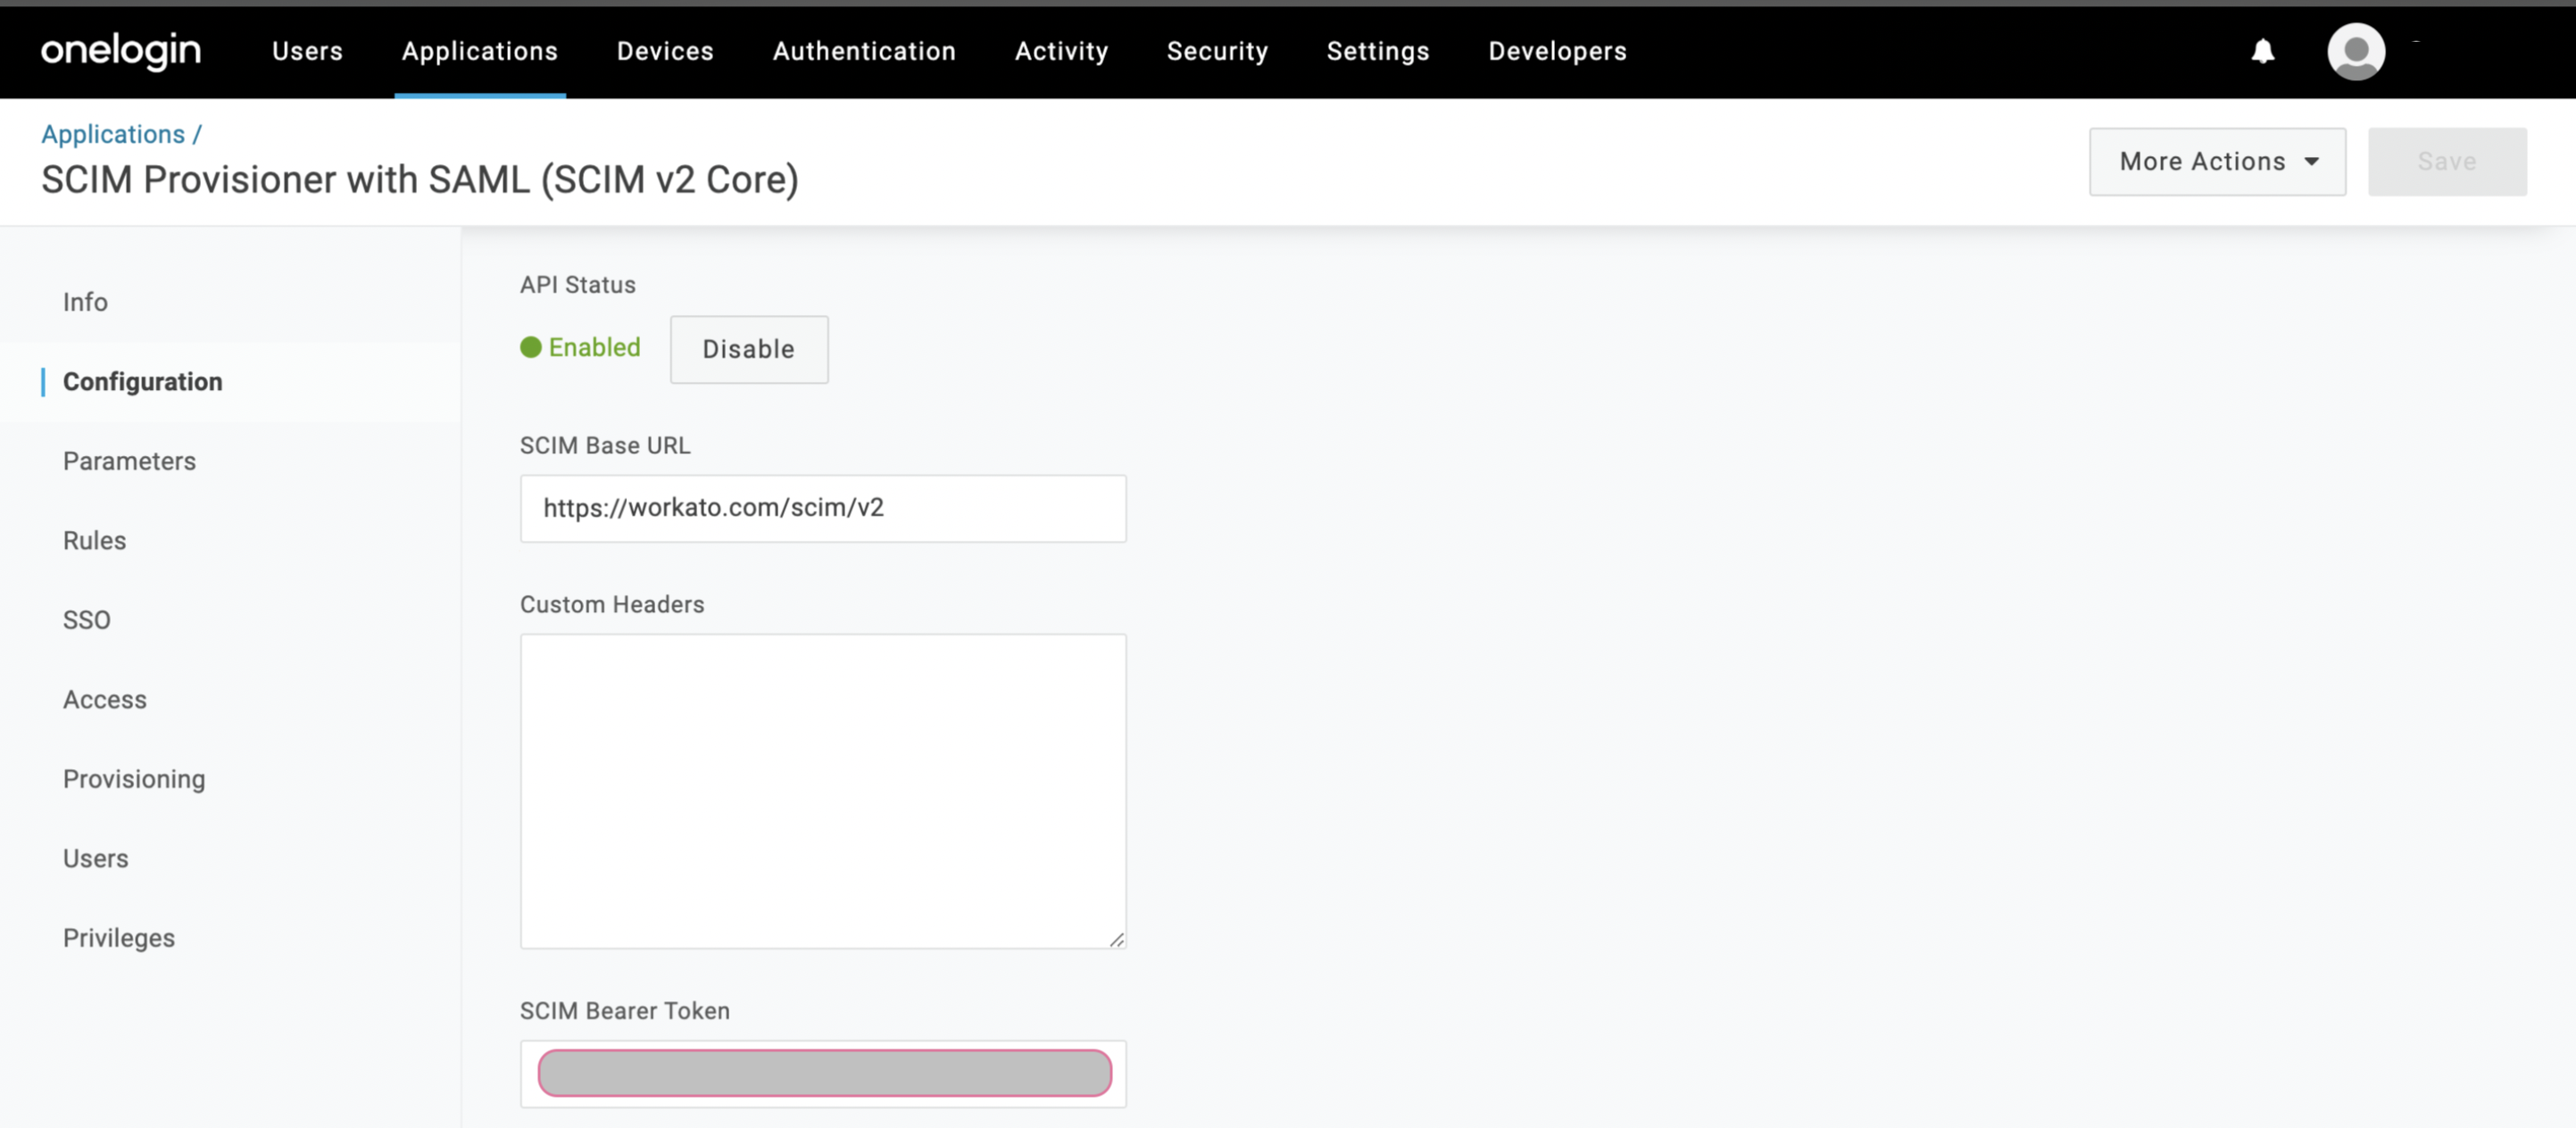 Supply Base URL and SCIM token from Workato
To update Workato user roles from OneLogin through SCIM provisioning, you must configure the standard JSON schema in OneLogin.
Expand the SCIM JSON template and add in the following:
- As part of "schemas", add
urn:ietf:params:scim:schemas:workato:1.0:WorkatoRole - After emails, within the rest of the schema, add the following code:
"urn:ietf:params:scim:schemas:workato:1.0:WorkatoRole": {
"workato_role": "{$user.custom_fields.workato_role}",
"workato_role_test": "{$user.custom_fields.workato_role_test}",
"workato_role_prod": "{$user.custom_fields.workato_role_prod}"
}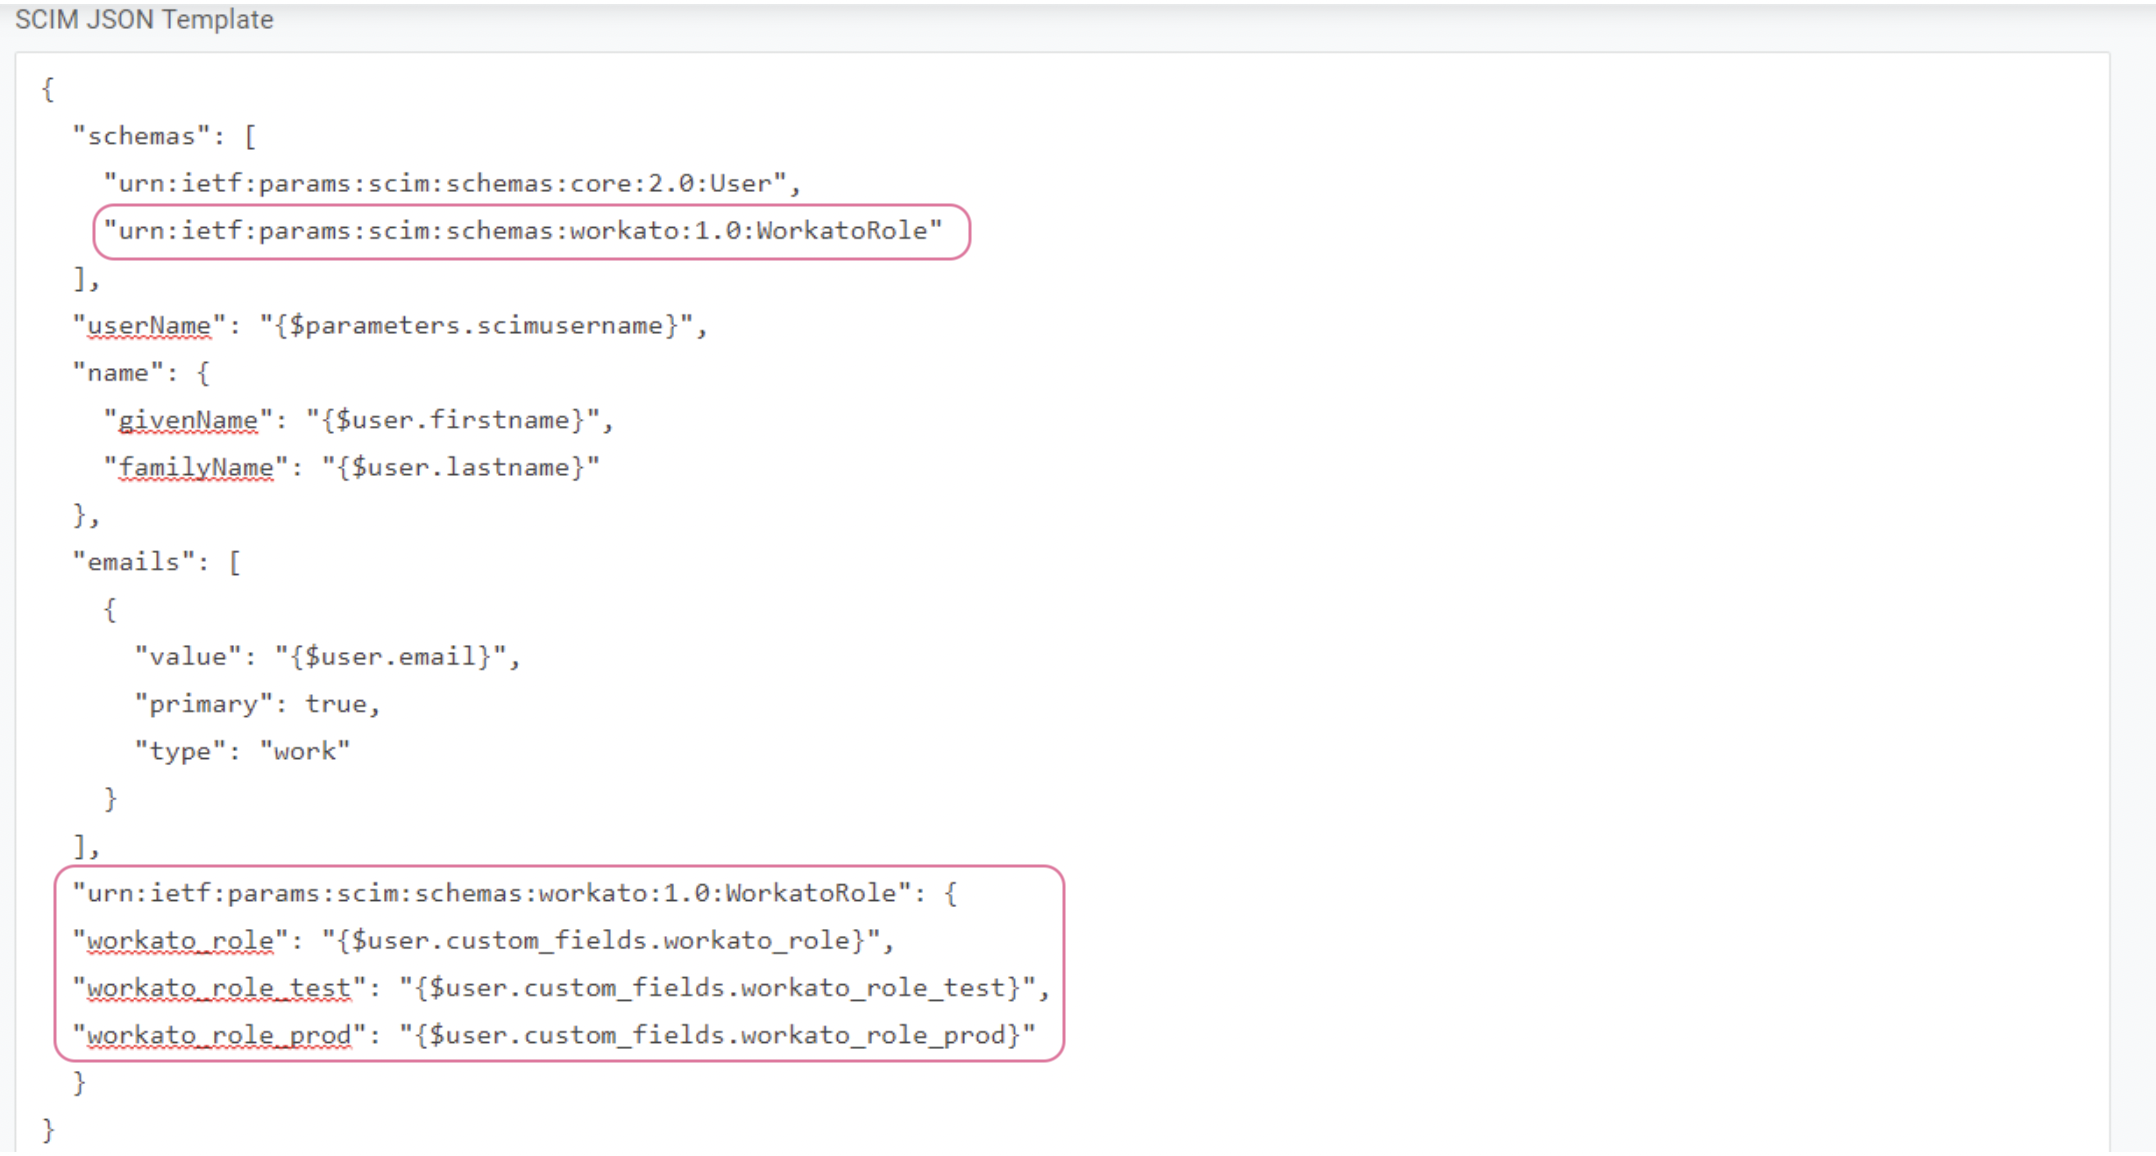 Update Workato user roles
If you did not configure the custom user fields for updating Workato roles through SAML Roles Sync, complete the configuration of custom user attributes like “workato_role”, “workato_role_test”, and “workato_role_prod” before moving on to the next step. See SAML role sync.
Configure the parameters to reference these role attributes.
Navigate to the Parameters interface, and edit the workato_role by adding the following fields to reference the workato_role attribute values:
- Select the + (plus) icon, under Field name, ensuring that the value corresponds to the short name that you configured for the custom user attributes.
- Select the Include in SAML Assertion option.
- Select the Include in User Provisioning option.
Click Save.
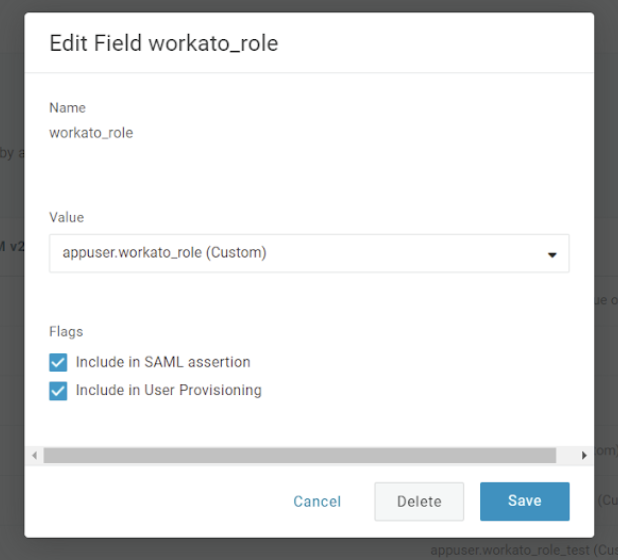 Configure role attribute parameters
If your organization has the Environment feature in Workato, repeat this step for all environment-specific roles, such as workato_role_prod, workato_role_test, and for any additional custom roles.
After you finish configuring the parameters, your interface should appear similar to this example:
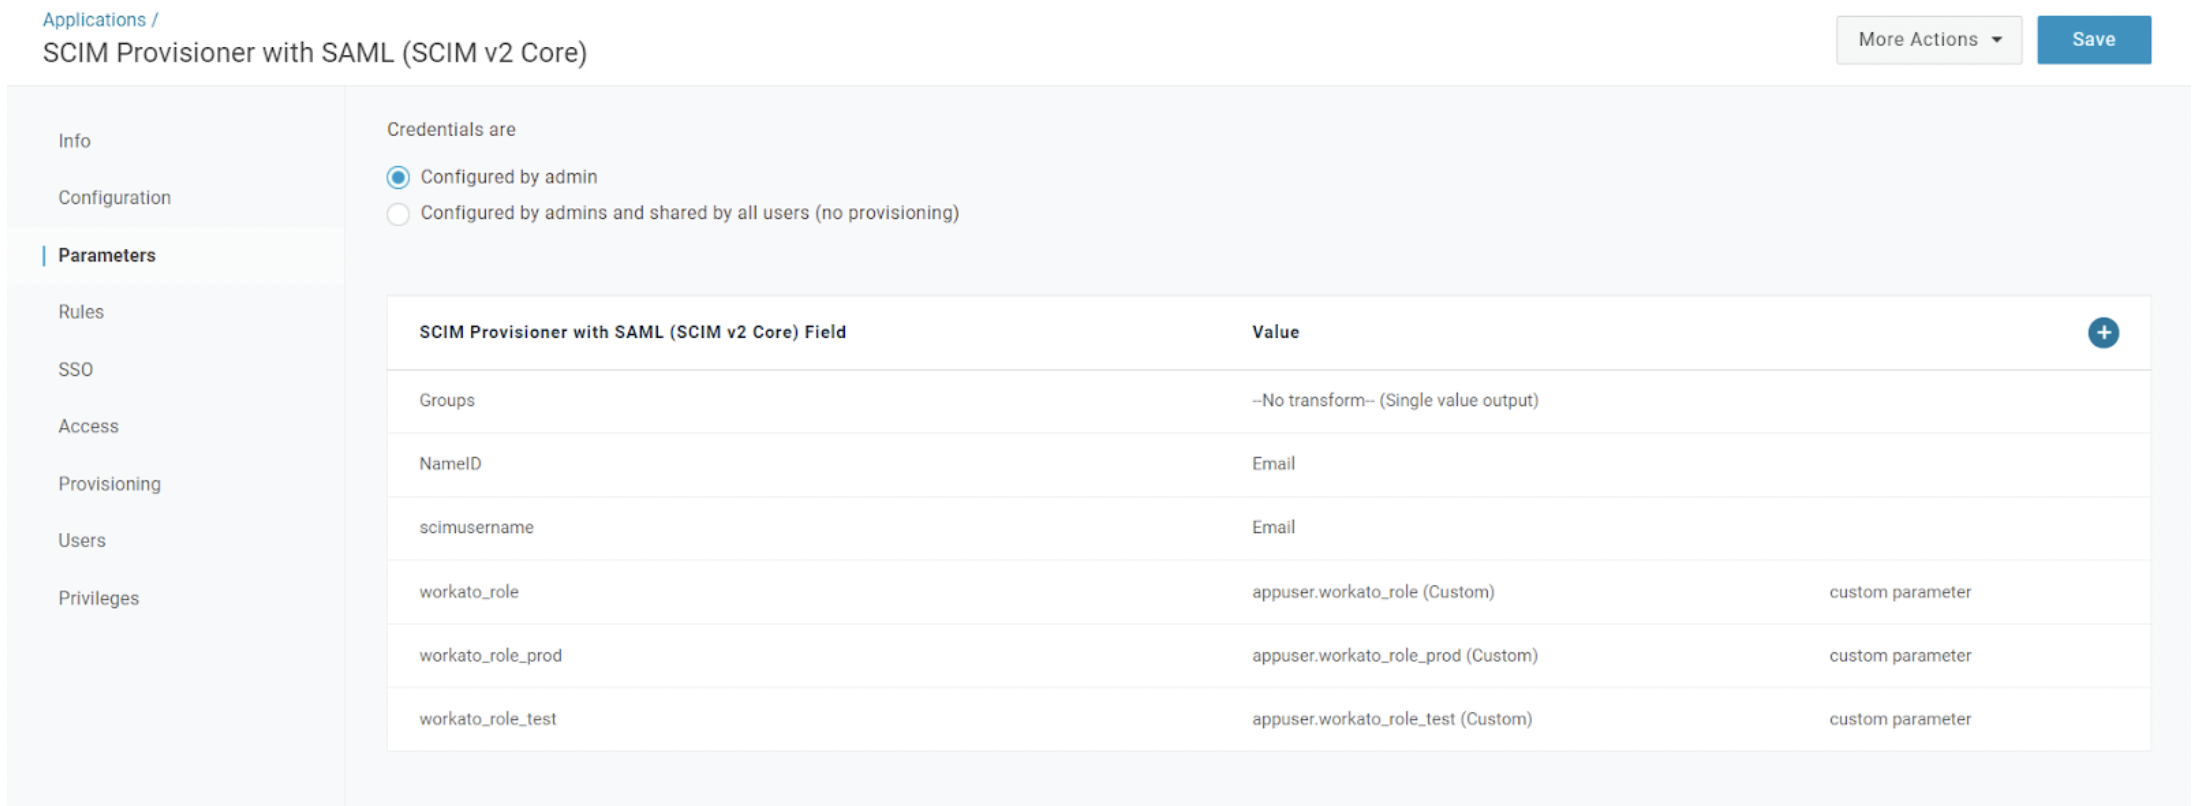 Parameters
Again, navigate back to the Configuration interface.
Under API connection, select Enable.
 Enable API connection
Provision users
If you already have users assigned to your Workato application for SAML SSO, you can trigger a provisioning job to sync your existing users between OneLogin and Workato. This ensures that you don't unintentionally create duplicate accounts on your Workato workspace.
In OneLogin, find the Workato application.
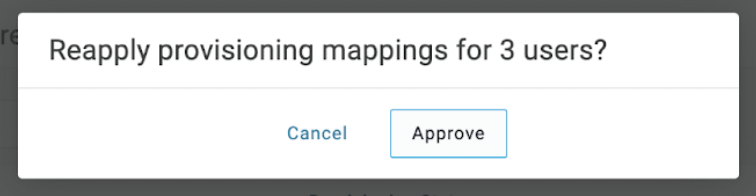
Navigate to Users, select Apply to all, then choose Reapply Mappings, and confirm by clicking Approve.
 Provision users
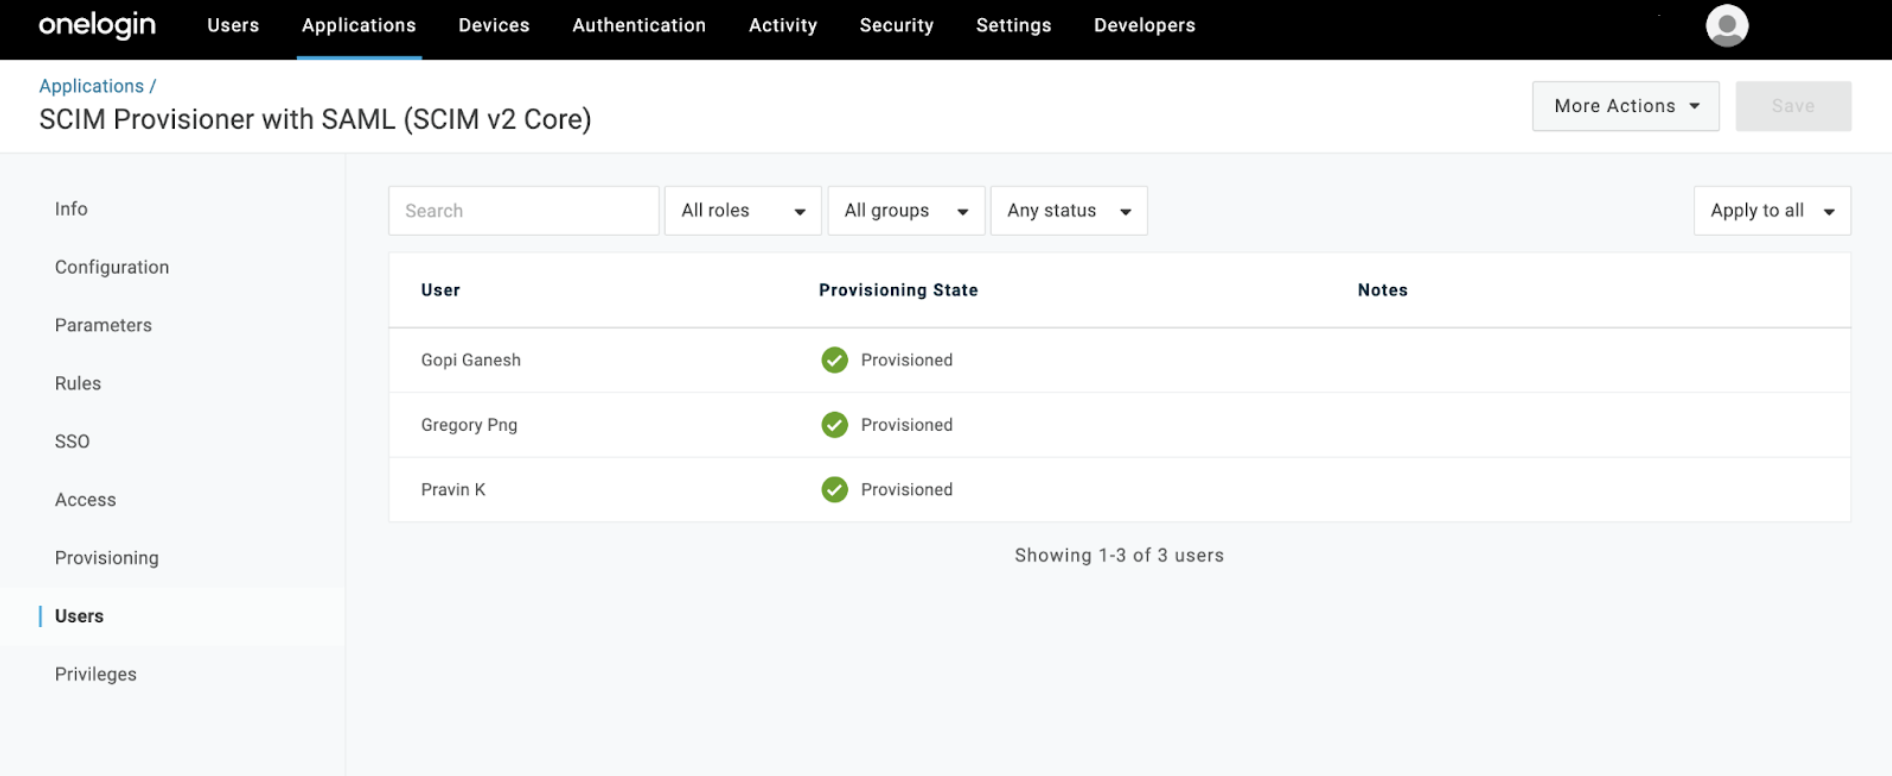
This action triggers a bulk sync between Workato and OneLogin, and ensures that all existing collaborators are now managed through SCIM.
Navigate to the Users interface to see the Provisioning State for all users.
 Updated provisioning state for users
When assigning new users to Workato, you can either assign the application to them, or assign a OneLogin Role with the necessary access policy.
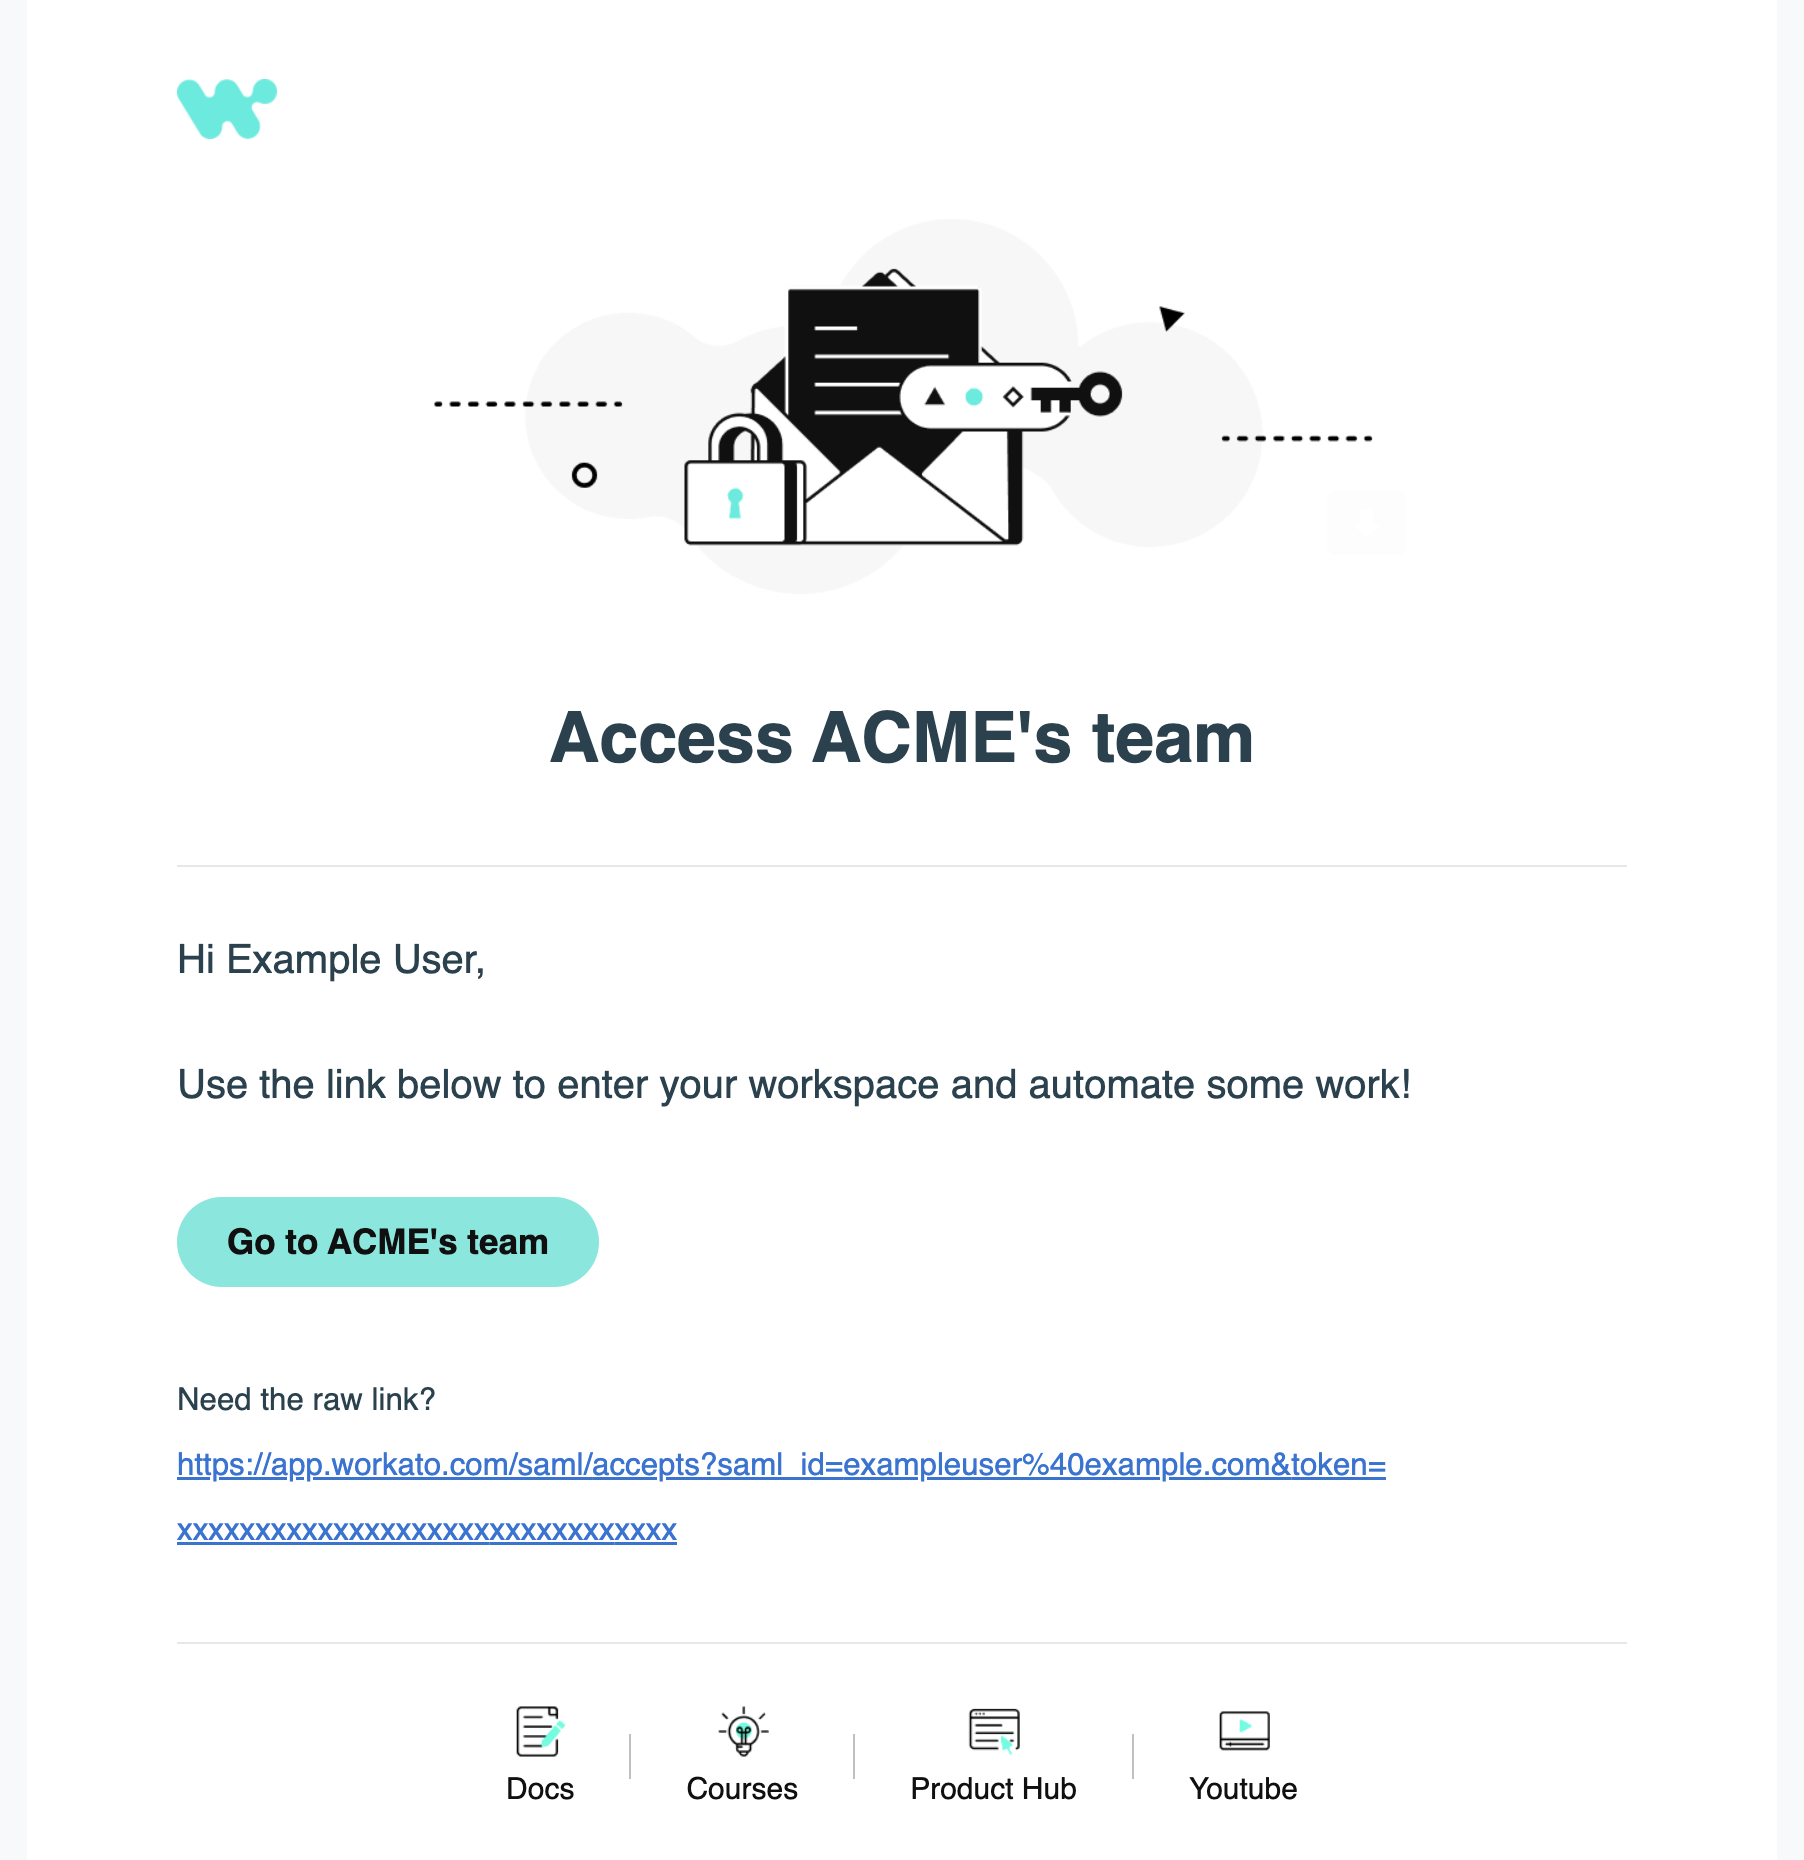
Workato sends an email invitation to the selected users. Instruct users to click the link in the email to verify their email address:
 Email invitation to join a workspace
The collaborator can then sign in to the assigned workspace with the role(s) you configured.
TROUBLESHOOTING
If clicking on the invitation email redirects you to the Workato login page instead of your organization’s workspace, it is likely that you already have a Workato account associated with the same email. If you have forgotten your login credentials, reset your password.
You can check the Workato activity audit log to confirm the addition of the user:
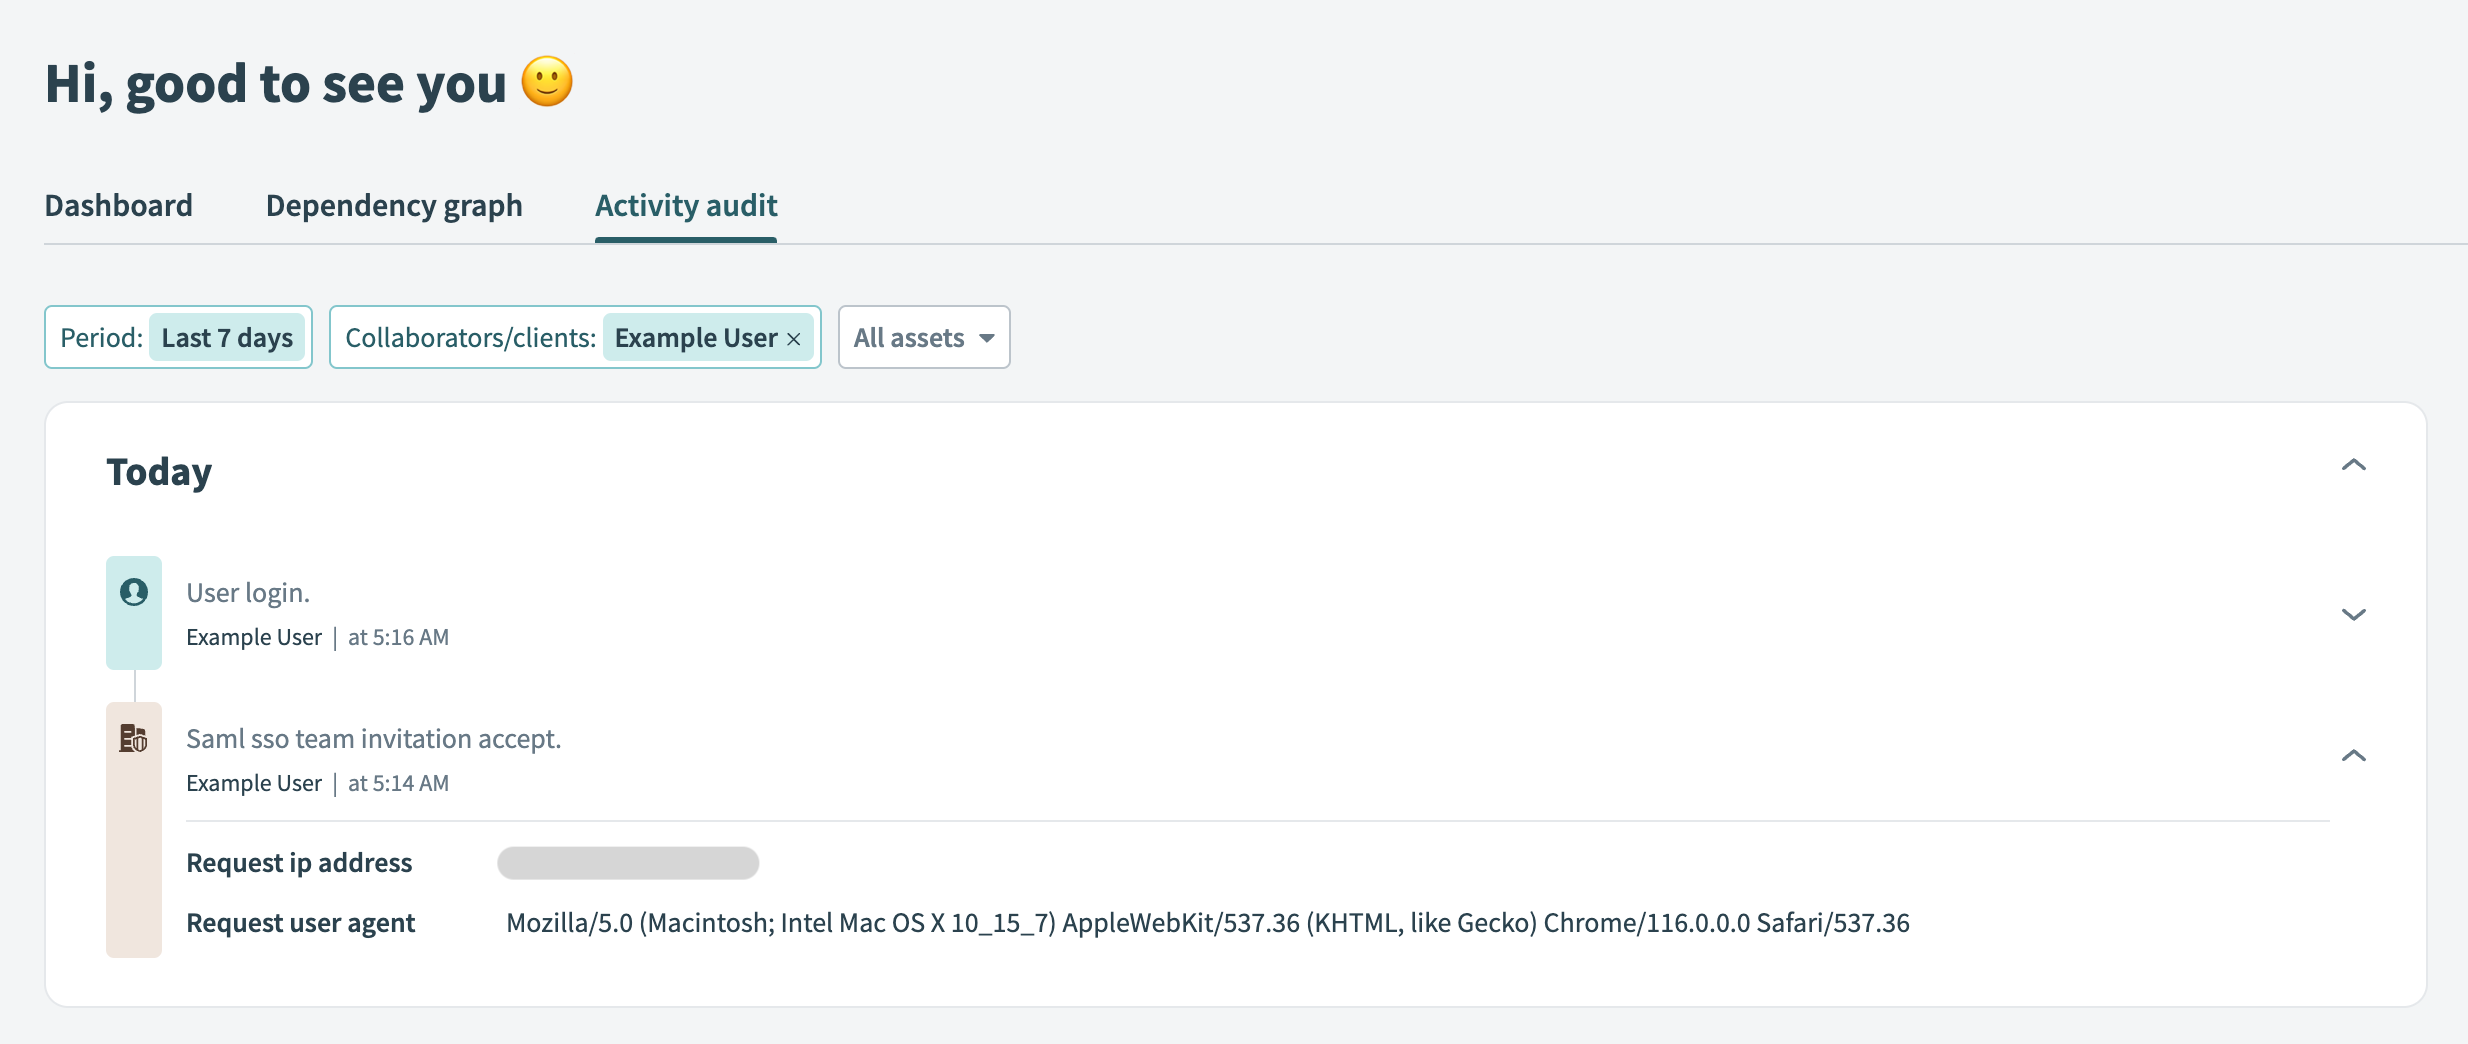 Activity audit log showing that a user has accepted an invitation
Update users
To update Workato roles from OneLogin, you must update the user’s custom attributes.
In OneLogin, navigate to the Users interface.
Select the user that you plan to update.
Enter the name of the role you plan to provision.
TIP
Role names are case-sensitive.
Click Save.
To verify role changes on Workato, you can examine the activity-audit logs dashboard.
We denote changes made through SCIM as scim_auto_sync.
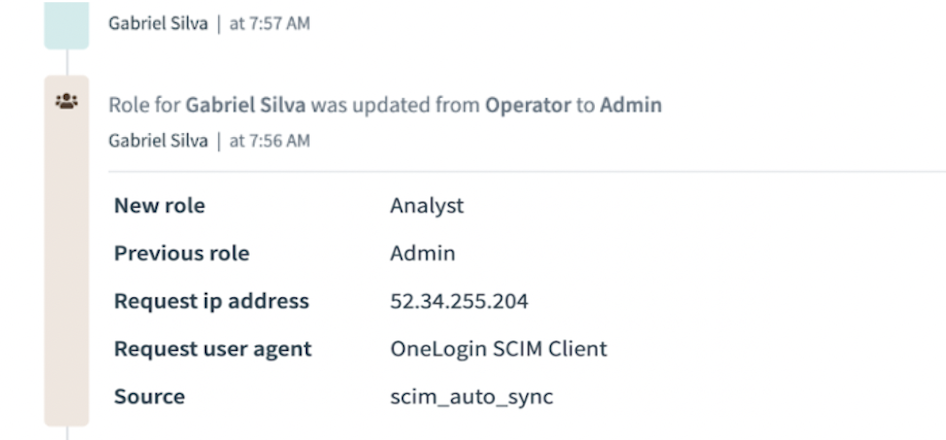 Confirming role change through SCIM
Deprovision users
To deprovision users, you can use one of the three (3) available methods, depending on the circumstances and use case. In all these situations, the user cannot access the Workato workspace. The user’s recipes and connections remain available to the rest of the team.
Each of these scenarios on OneLogin trigger a deprovisioning event on Workato:
- Remove App access
- In OneLogin, navigate to the Workato application.
- Select Users.
- Find the user that you plan to deprovision.
- Click Delete.
- Confirm.
- Deactivate the user
- In OneLogin, navigate to the Users interface.
- Select the user that you plan to deactivate.
- Toggle the Active switch to Inactive.
- Click Save.
- Delete the user
- In OneLogin, navigate to the Users interface.
- Select the user you plan to delete.
- Click More Actions and select Delete.
- Click Save.
INFO
If users are deprovisioned during an active session, their next action locks them out from the workspace. Their data, such as recipes and connections, remain accessible to other users in the workspace.
Disable SCIM
To disable SCIM, follow these steps in OneLogin. Alternatively, you can disable SCIM in Workato.:
In OneLogin, find the Workato application.
In the Provisioning interface, deselect the Enable provisioning option.
Disable SCIM by unselecting the Enable SCIM provisioning option, and then Save your action.
This action breaks your SCIM connection. User data cannot be synced between OneLogin and Workato.
 Disabling SCIM
Last updated: