Configure SCIM in Workato
The SCIM Provisioning page becomes available under Workspace admin > Settings after you enable SCIM for your workspace.
VIRTUAL PRIVATE WORKATO (VPW) CUSTOMERS
This feature requires configuration steps that are specific to your Virtual Private Workato (VPW) instance. If you are a VPW customer, refer to your VPW private documentation for the configuration details for your instances.
Prerequisites
Your organization must have the Data Monitoring/Advanced Security & Compliance capability to configure and use SCIM in Workato. Contact your Customer Success Representative to learn more about using SCIM 2.0 in your organization. Additionally, to complete the steps in this guide, you must have one of the following
- You are signed in with the root email address of the workspace
- You have the admin role
- You have a custom role with the SCIM provisioning privilege
Complete the following steps to configure SCIM 2.0 in Workato:
Go to Workspace admin > Settings > Authentication > SCIM Provisioning. 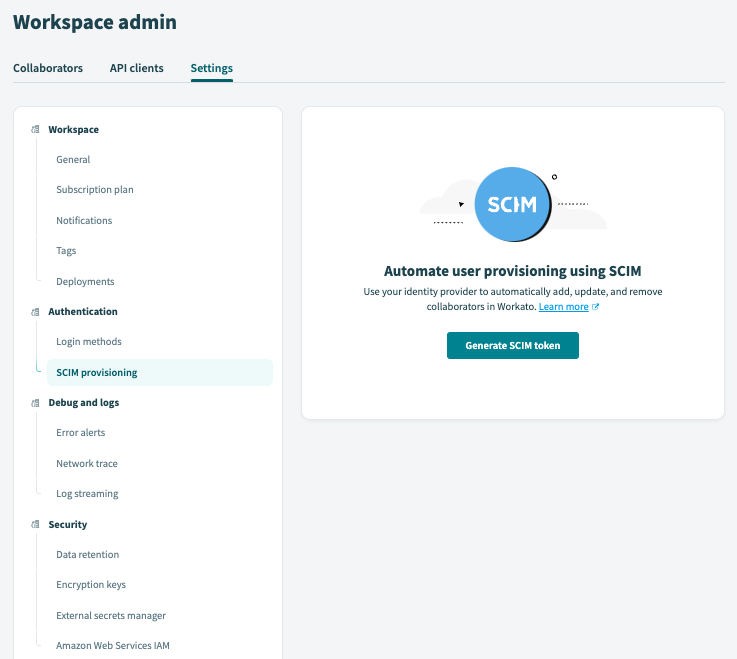 SCIM provisioning
Click Generate SCIM token to generate the SCIM token and Base URL. 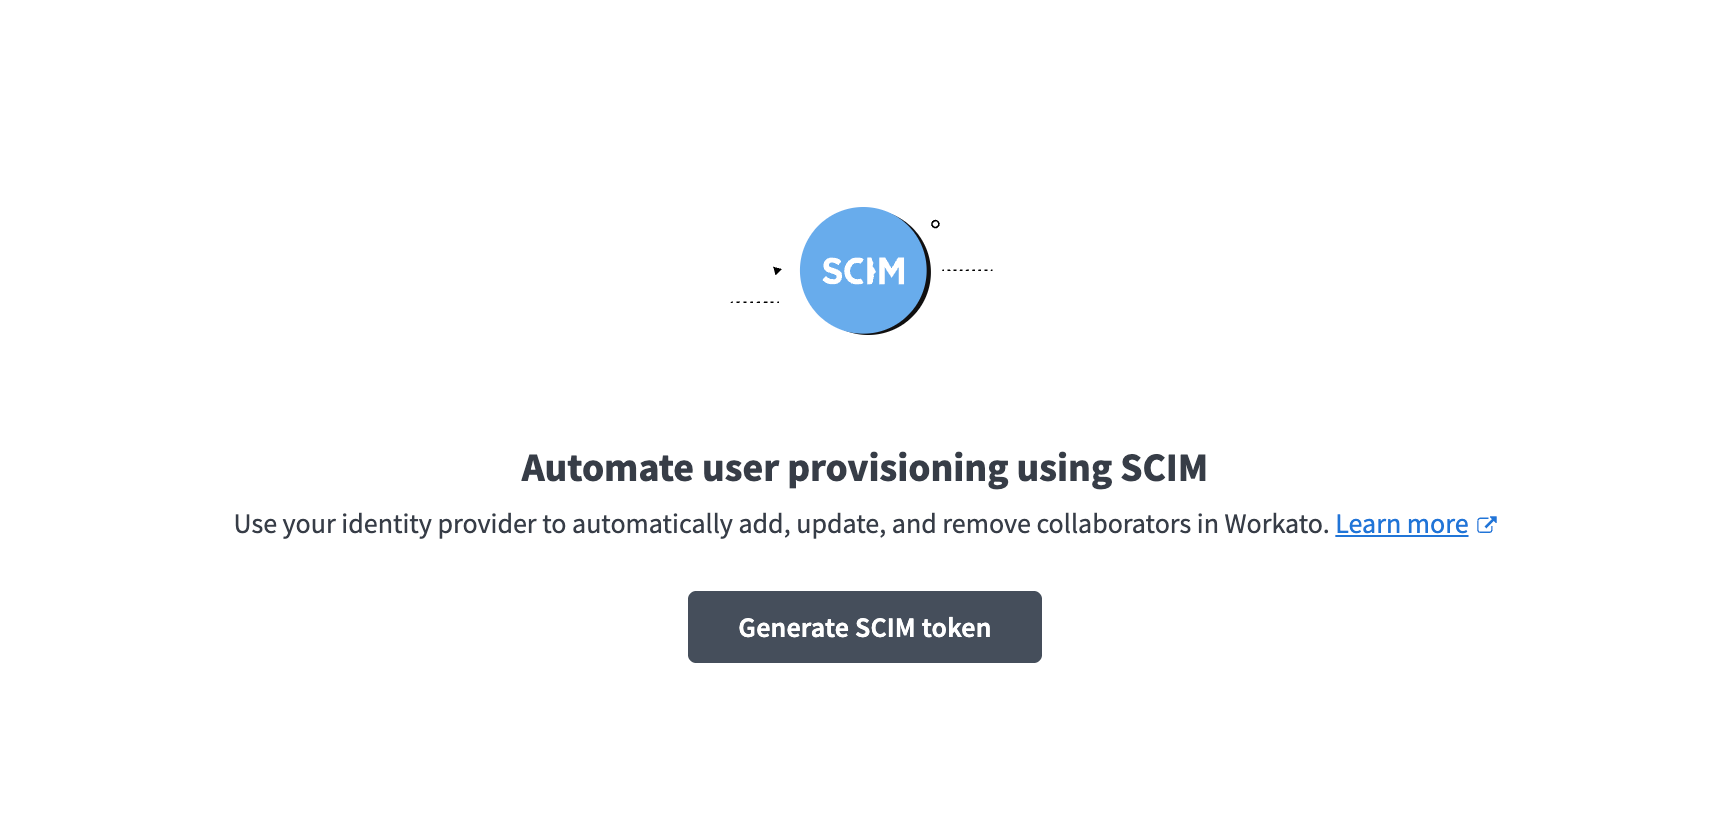 Generate SCIM token
Copy the SCIM token and Base URL and save them for configuring SCIM in your identity provider.
- SCIM token: The security token for configuring an automatic sync between your identity provider and Workato. The SCIM token in this example is obscured.
- Base URL: The base URL of Workato's SCIM API endpoint. The base URL in this example is
https://workato.com/scim/v2, but can vary based on the data center in which your workspace is located. For example,https://app.eu.workato.com/scim/v2.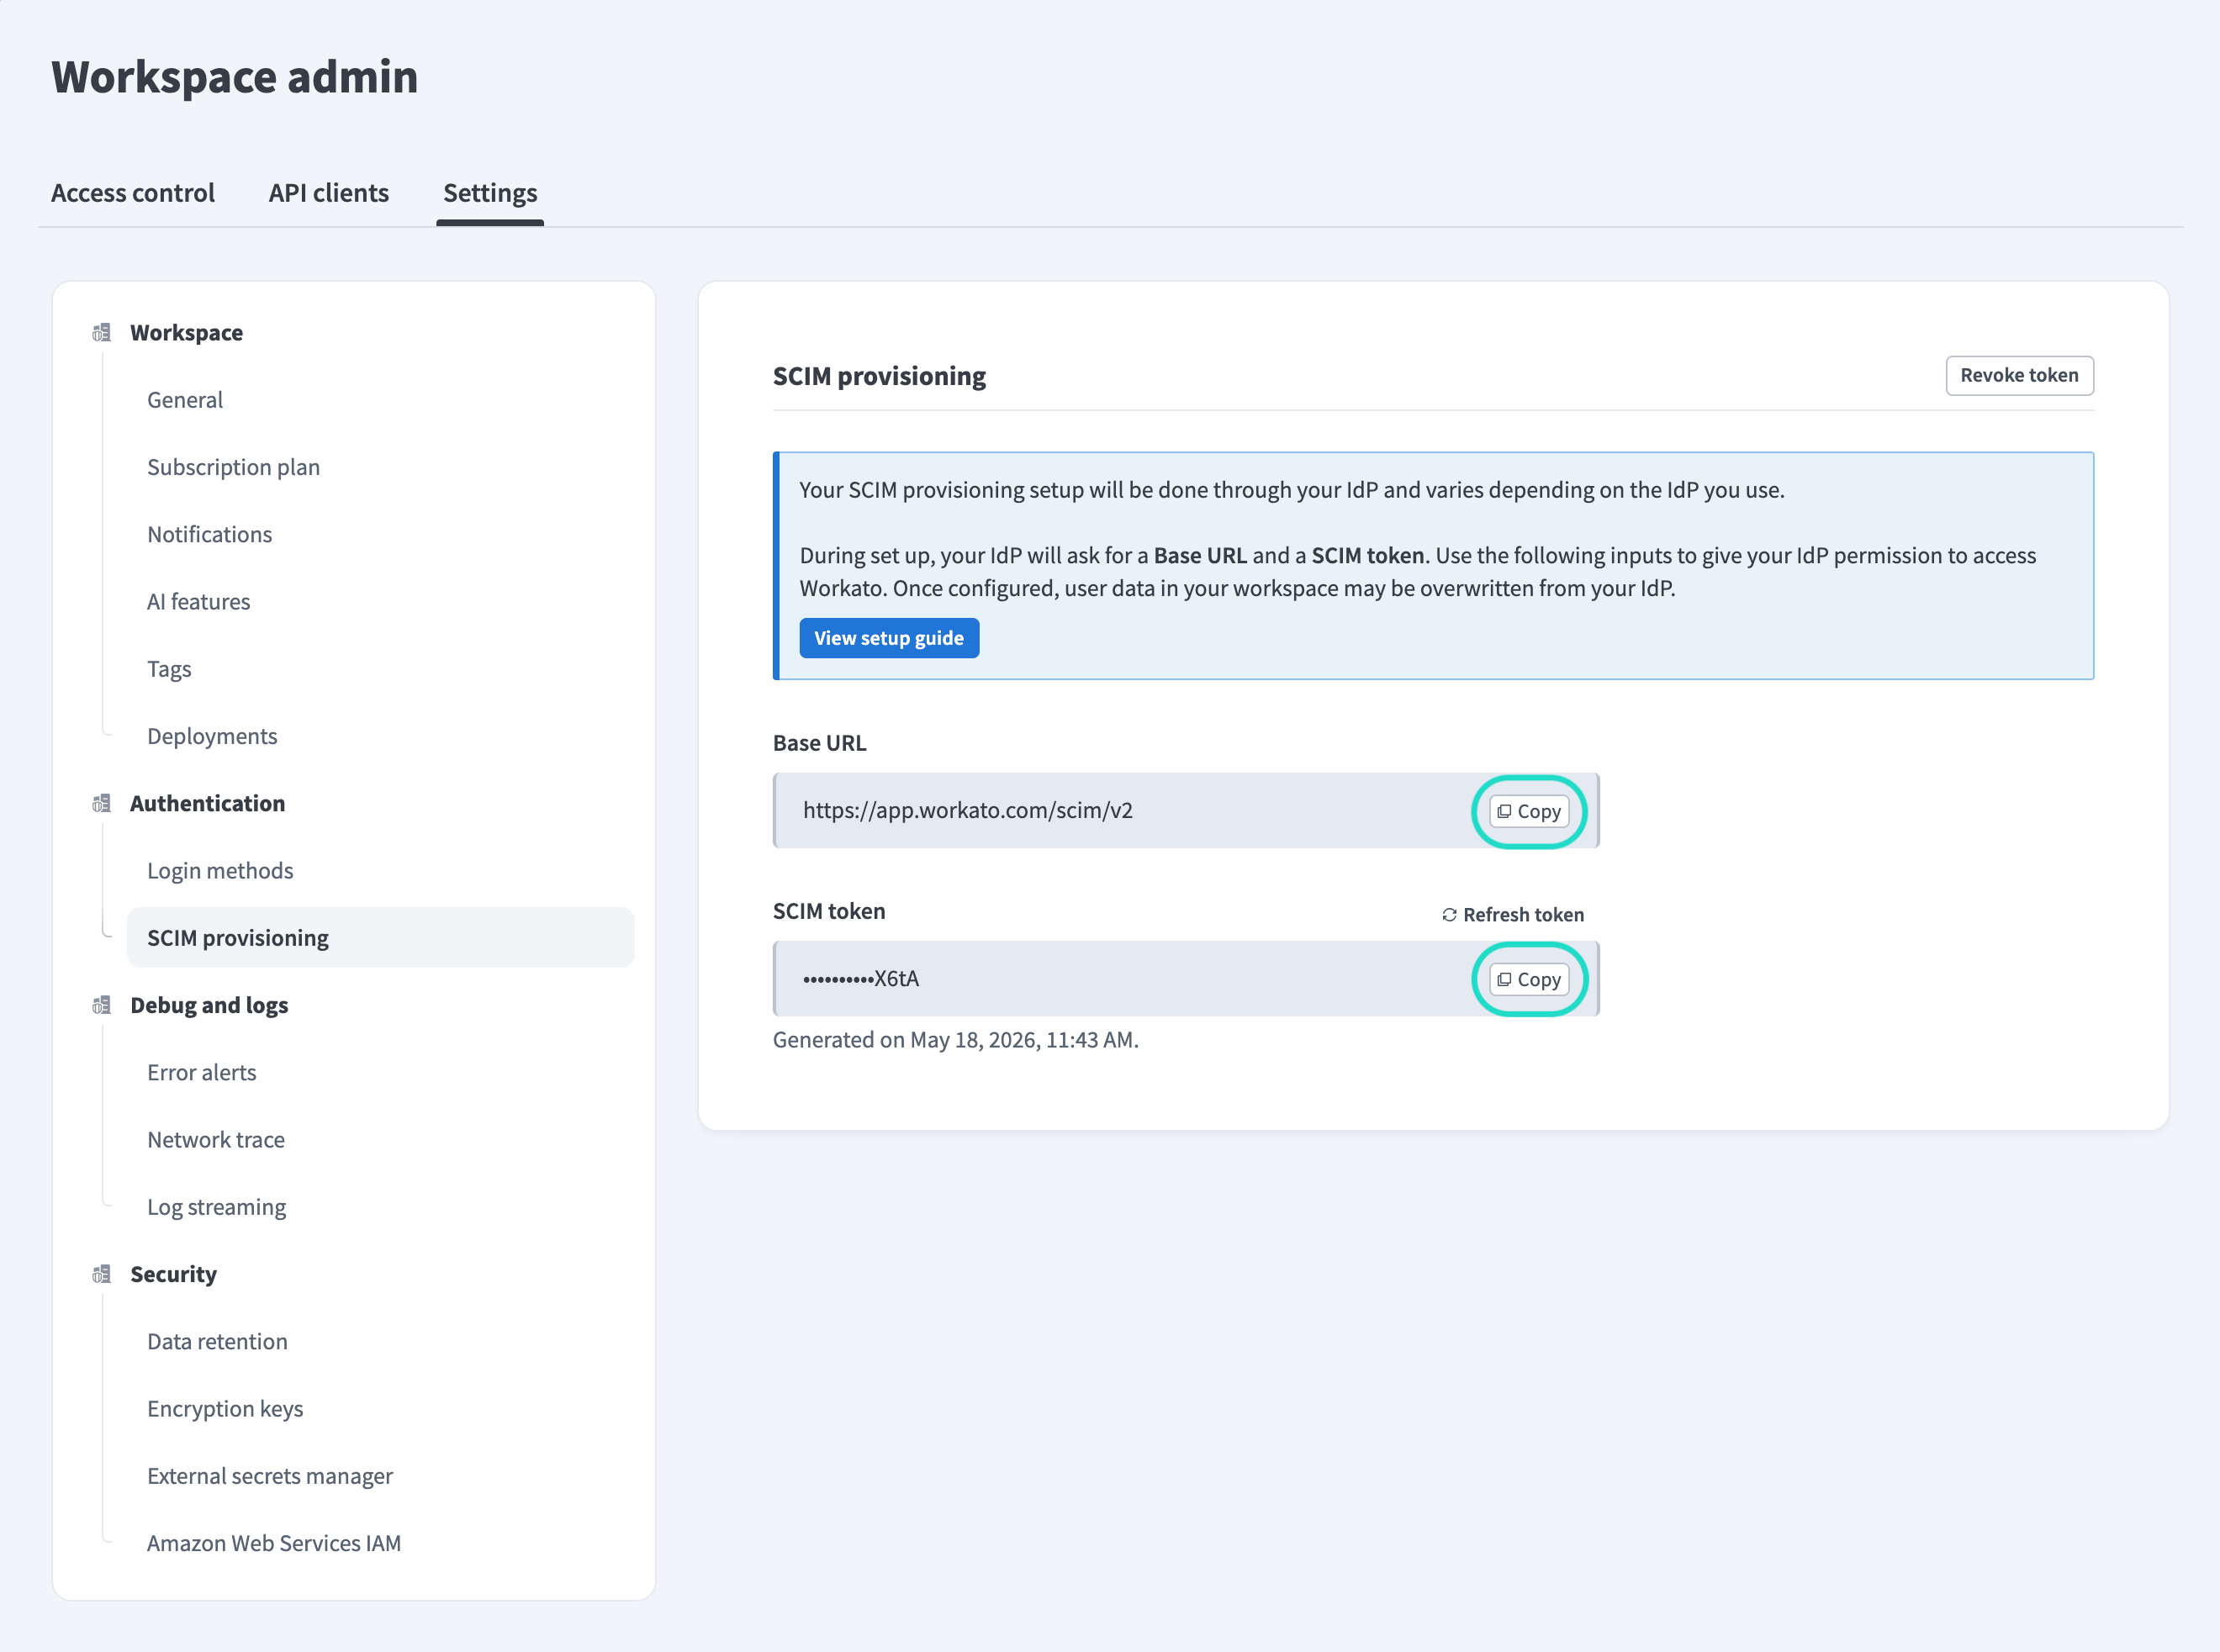 Supply Base URL and SCIM token from Workato
Configure SCIM 2.0 in your identity provider:
Disabling SCIM
Complete the following steps to invalidate the SCIM configuration by refreshing or revoking the SCIM token. To complete this task, you must be signed in with the root email address, have the Environment admin role, the legacy Admin collaborator role, or a custom role with the SCIM provisioning privilege.
In Workato, go to Workspace admin > Settings > Authentication > SCIM Provisioning.
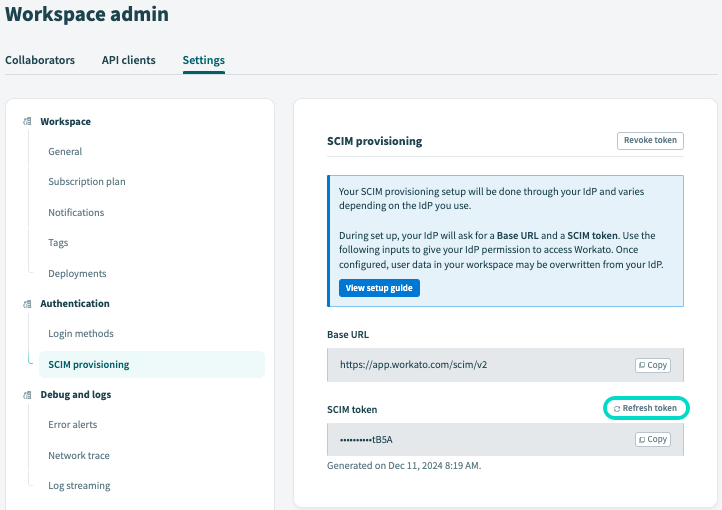 Click Refresh Token
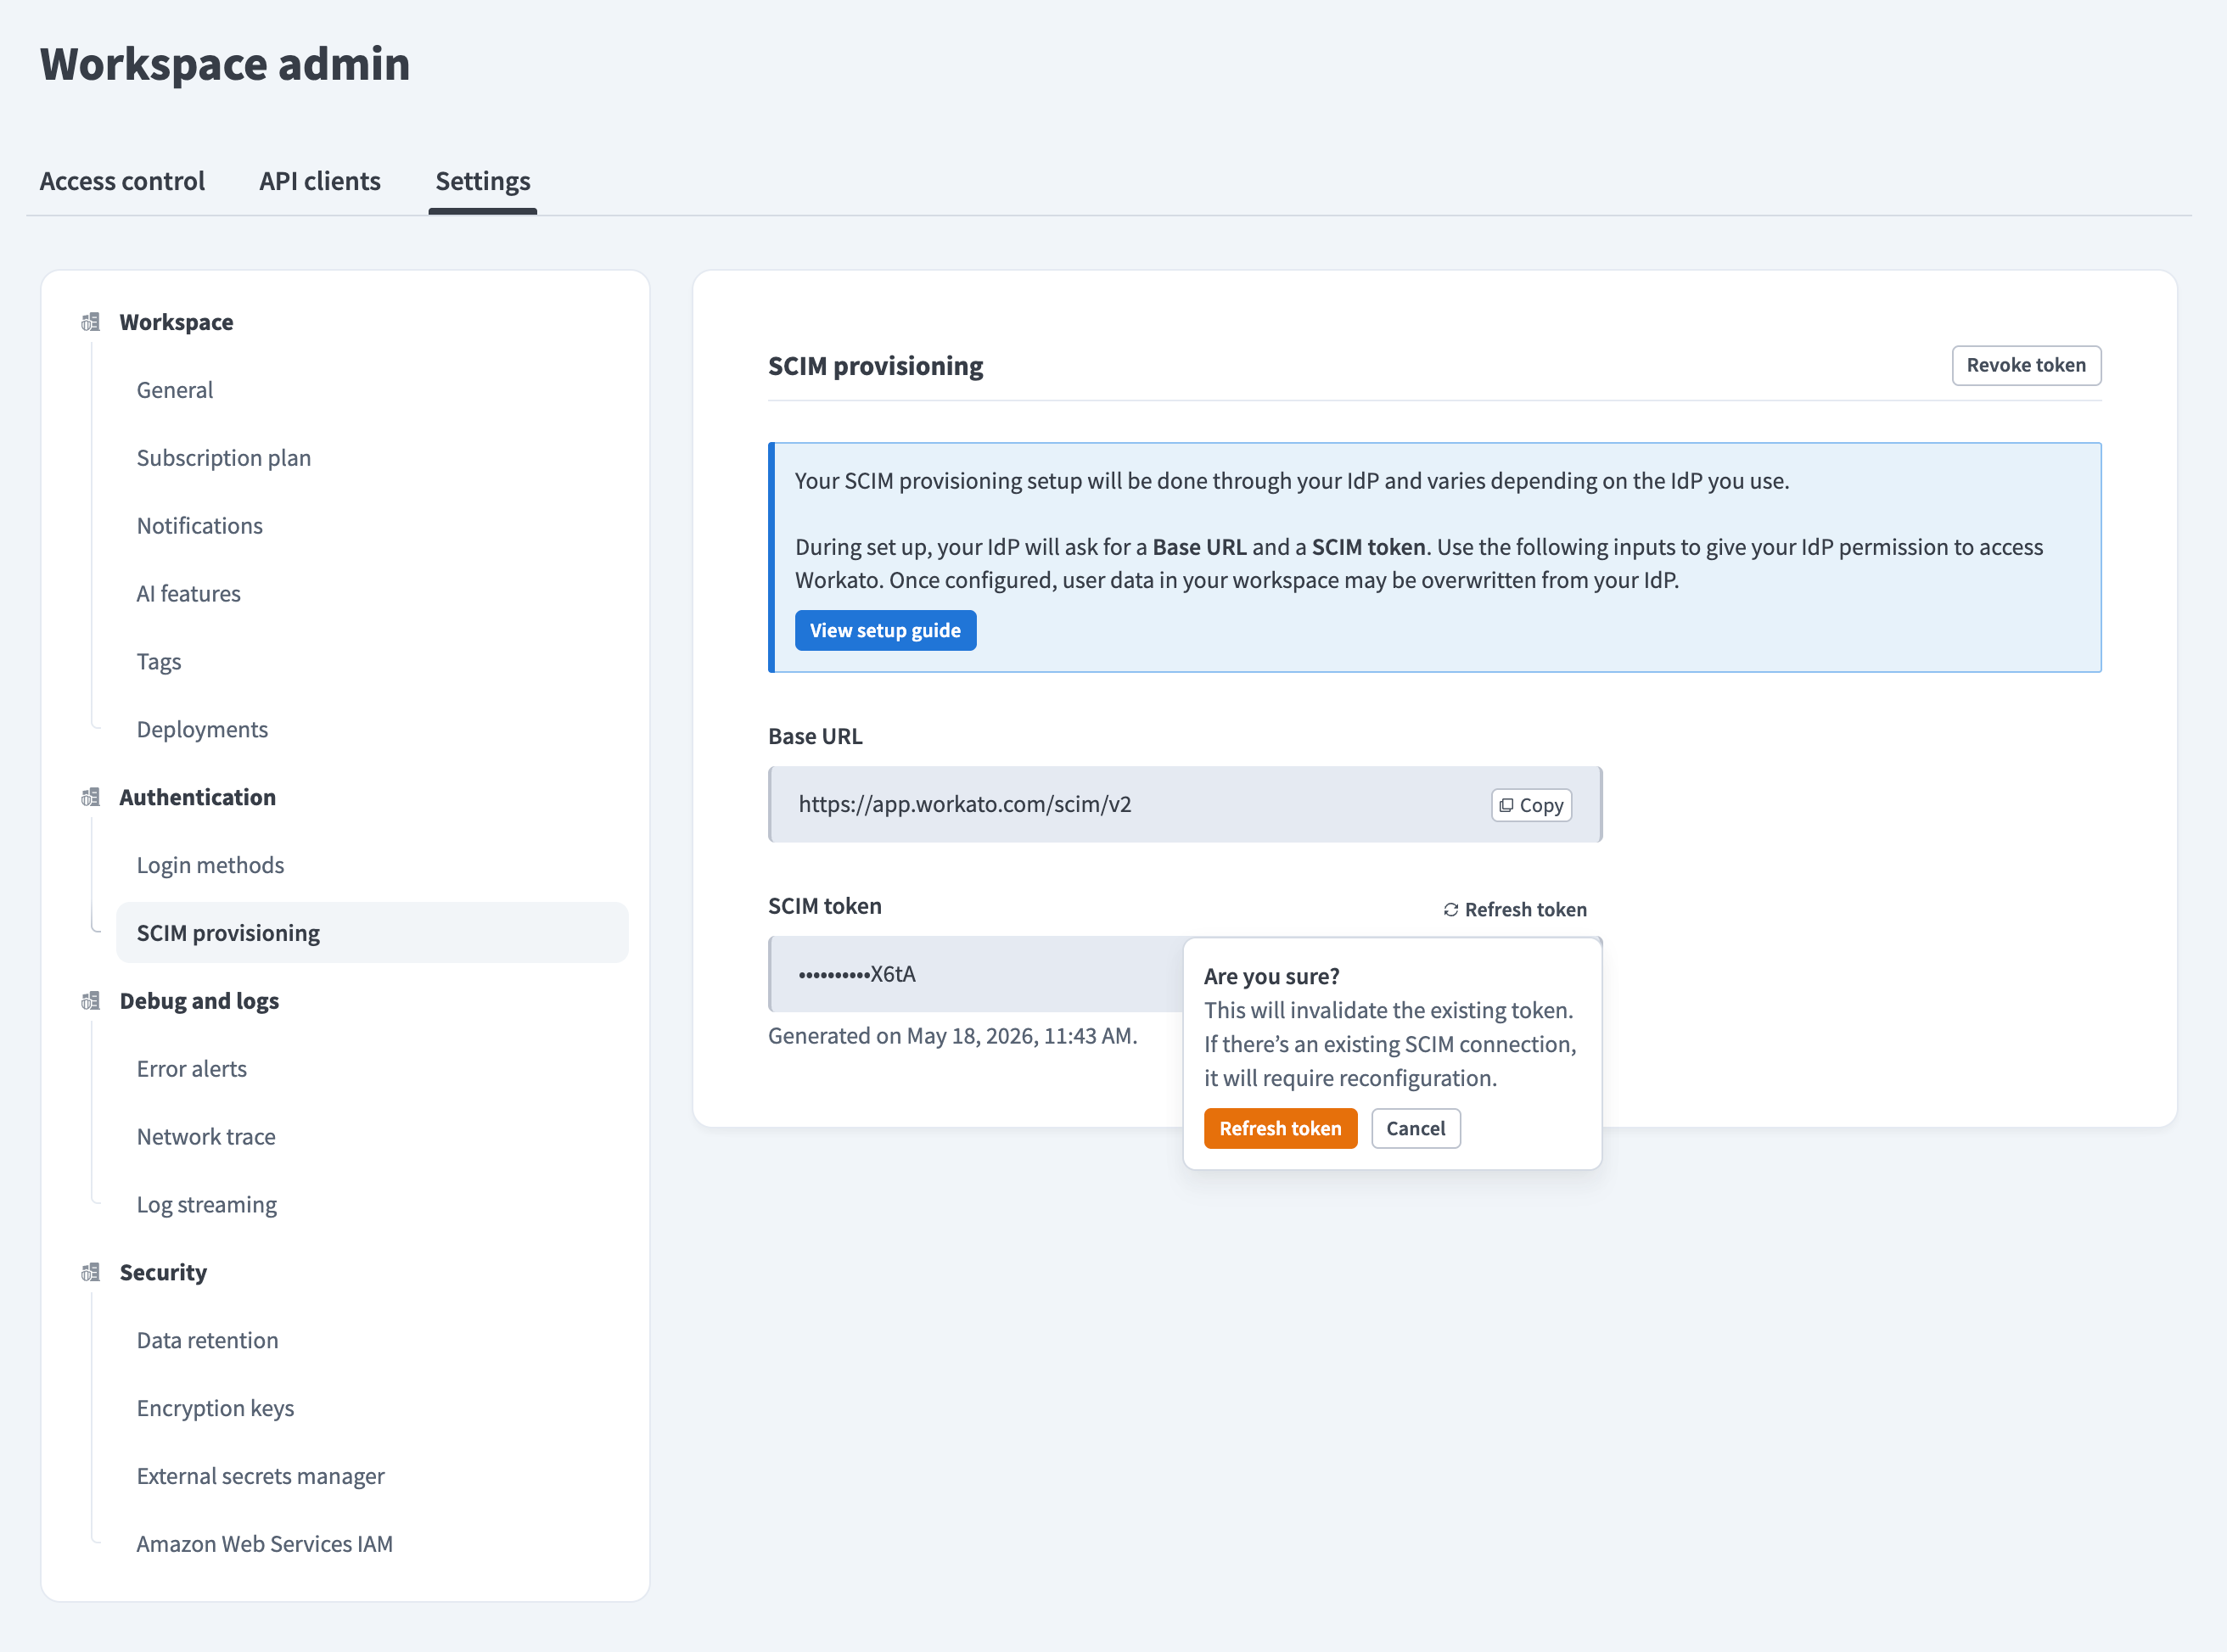 Click Refresh Token
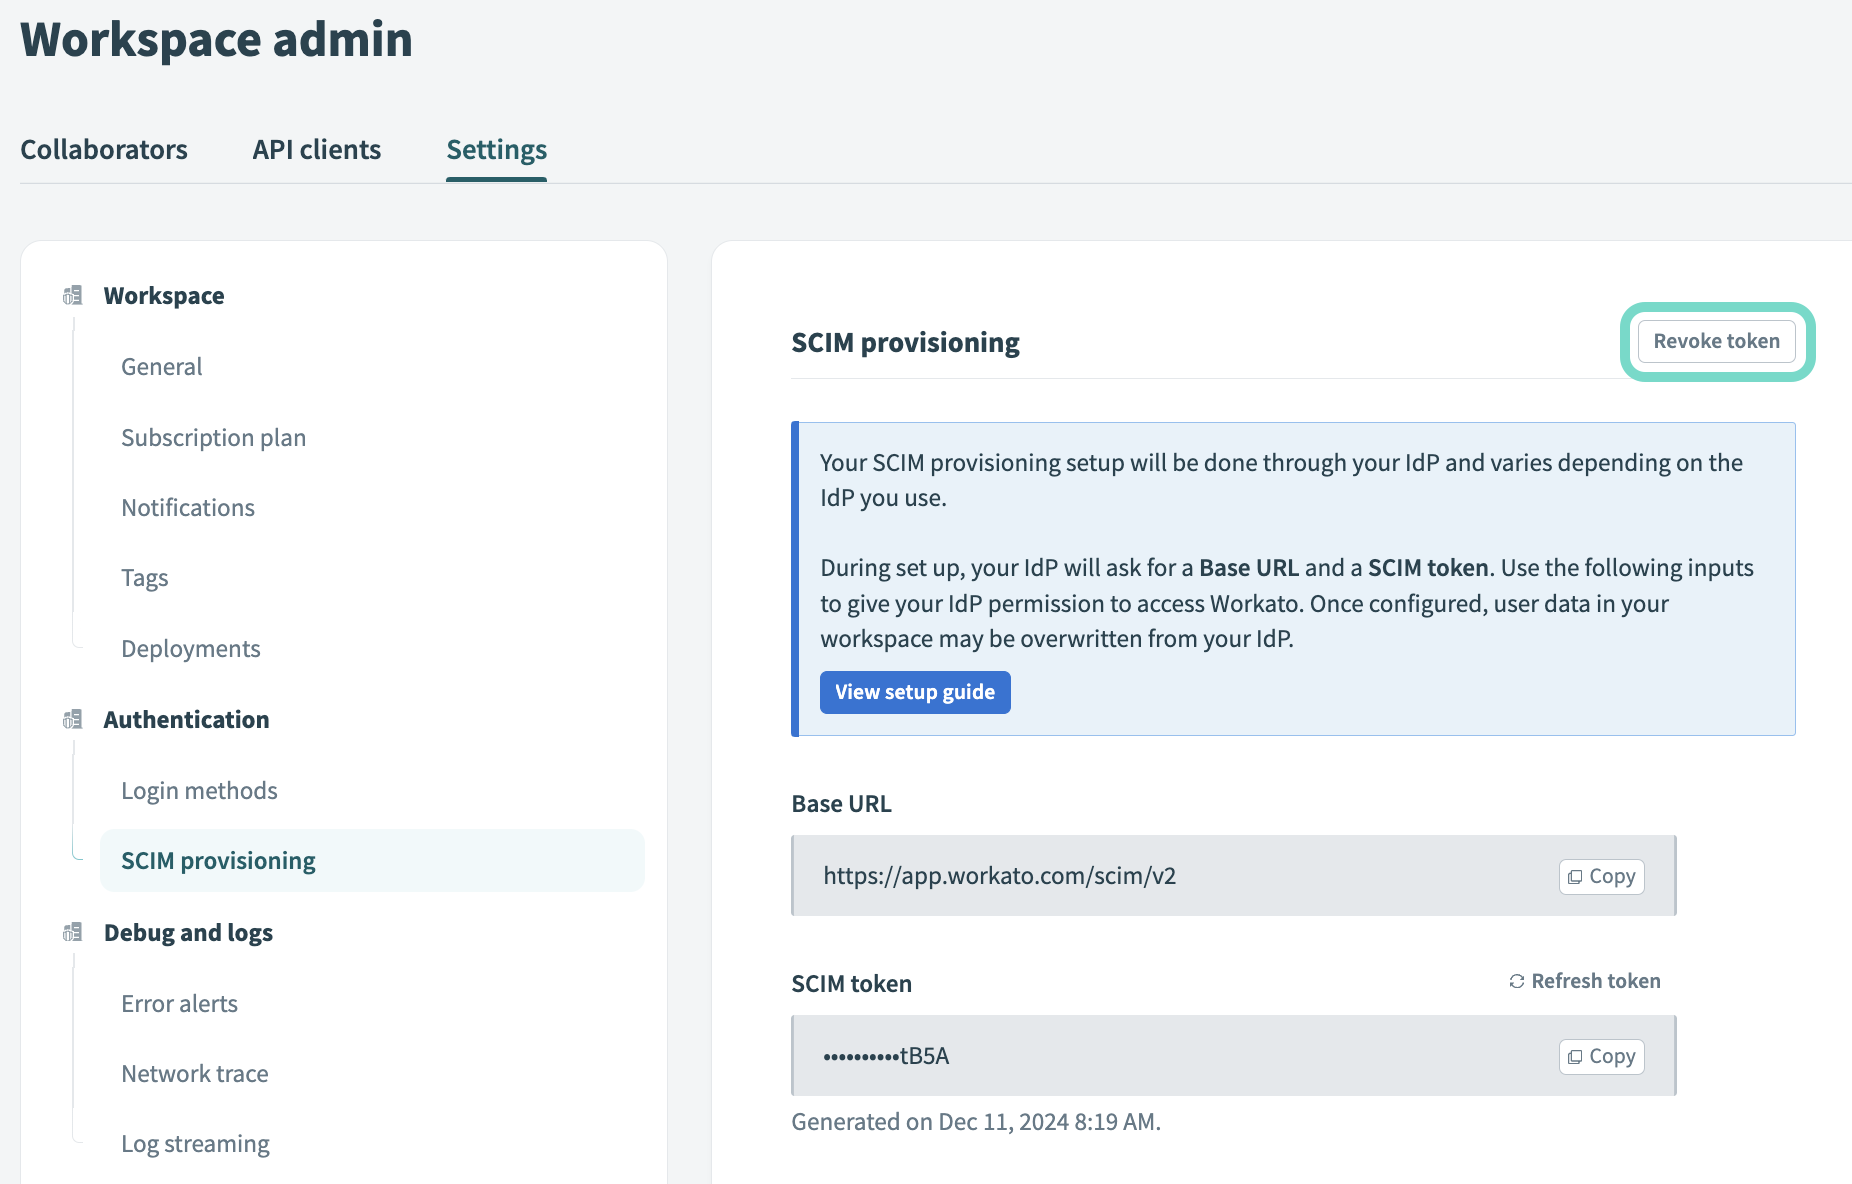 Click Revoke token
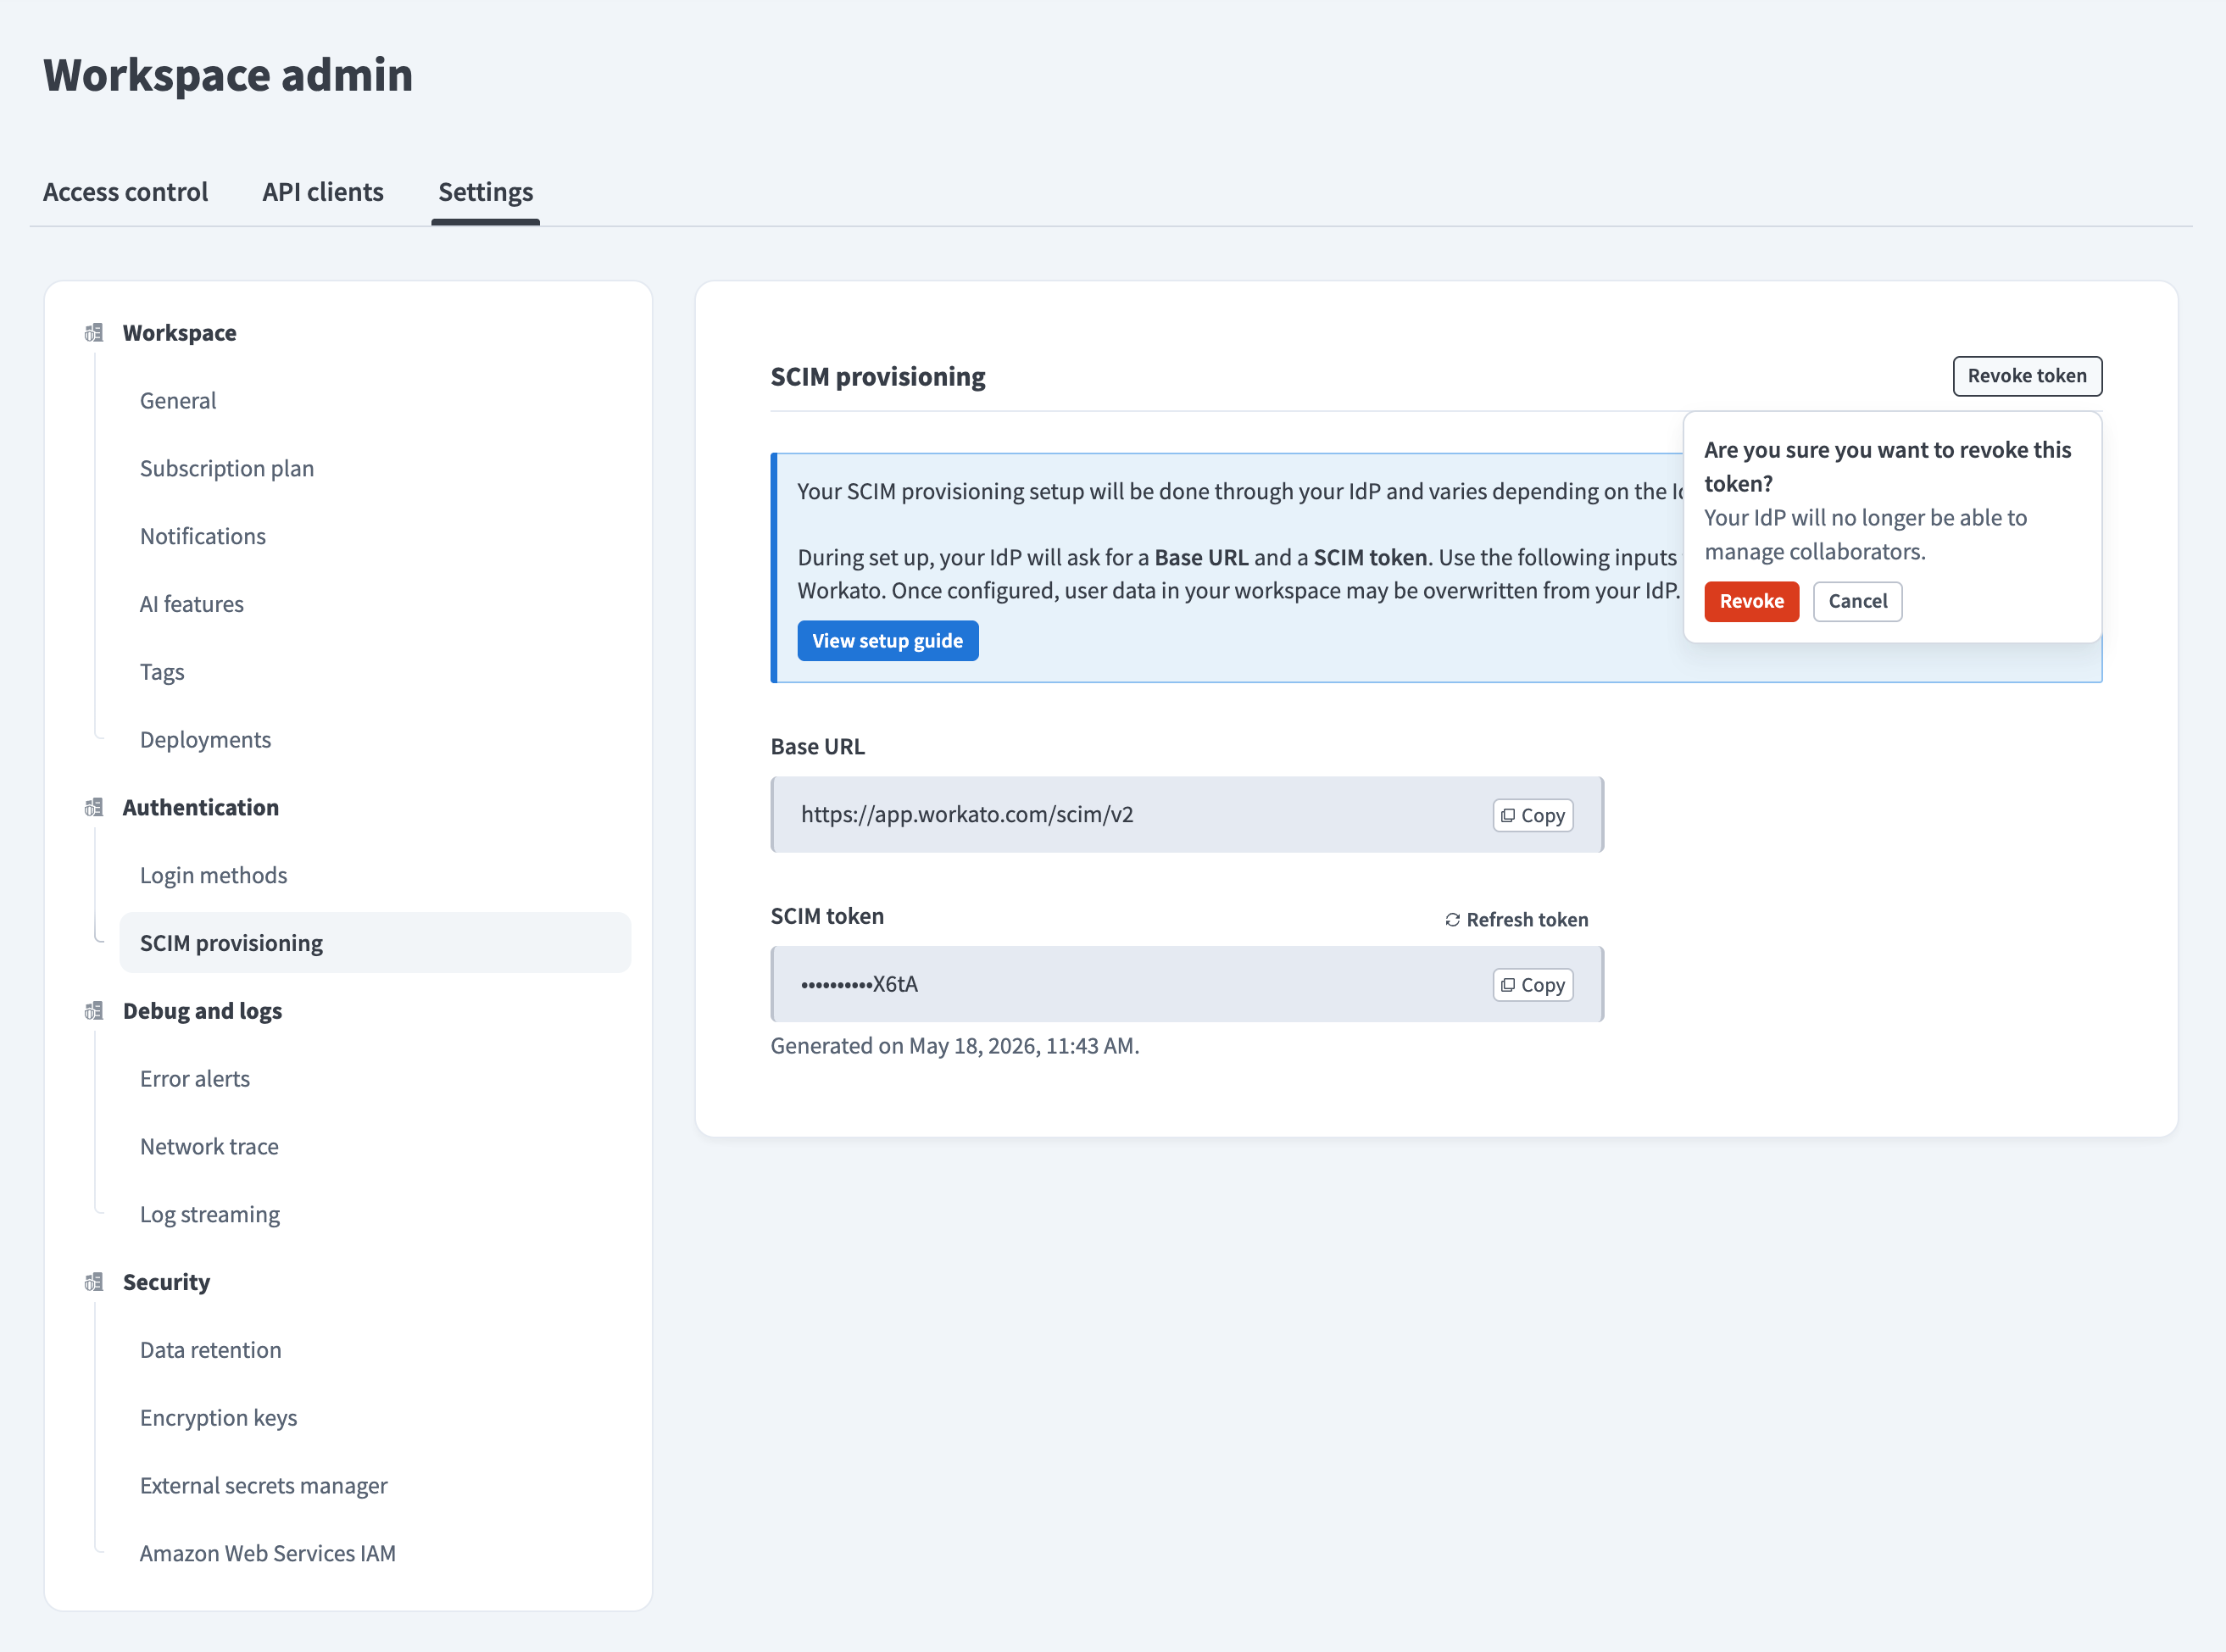 Click Revoke
DISABLE SCIM EXTERNALLY
You can also disable SCIM 2.0 externally through your identity provider:
Last updated: