# Workbot buttons, Task modules and Pick lists
Workbot commands can be invoked via button or task module submissions.
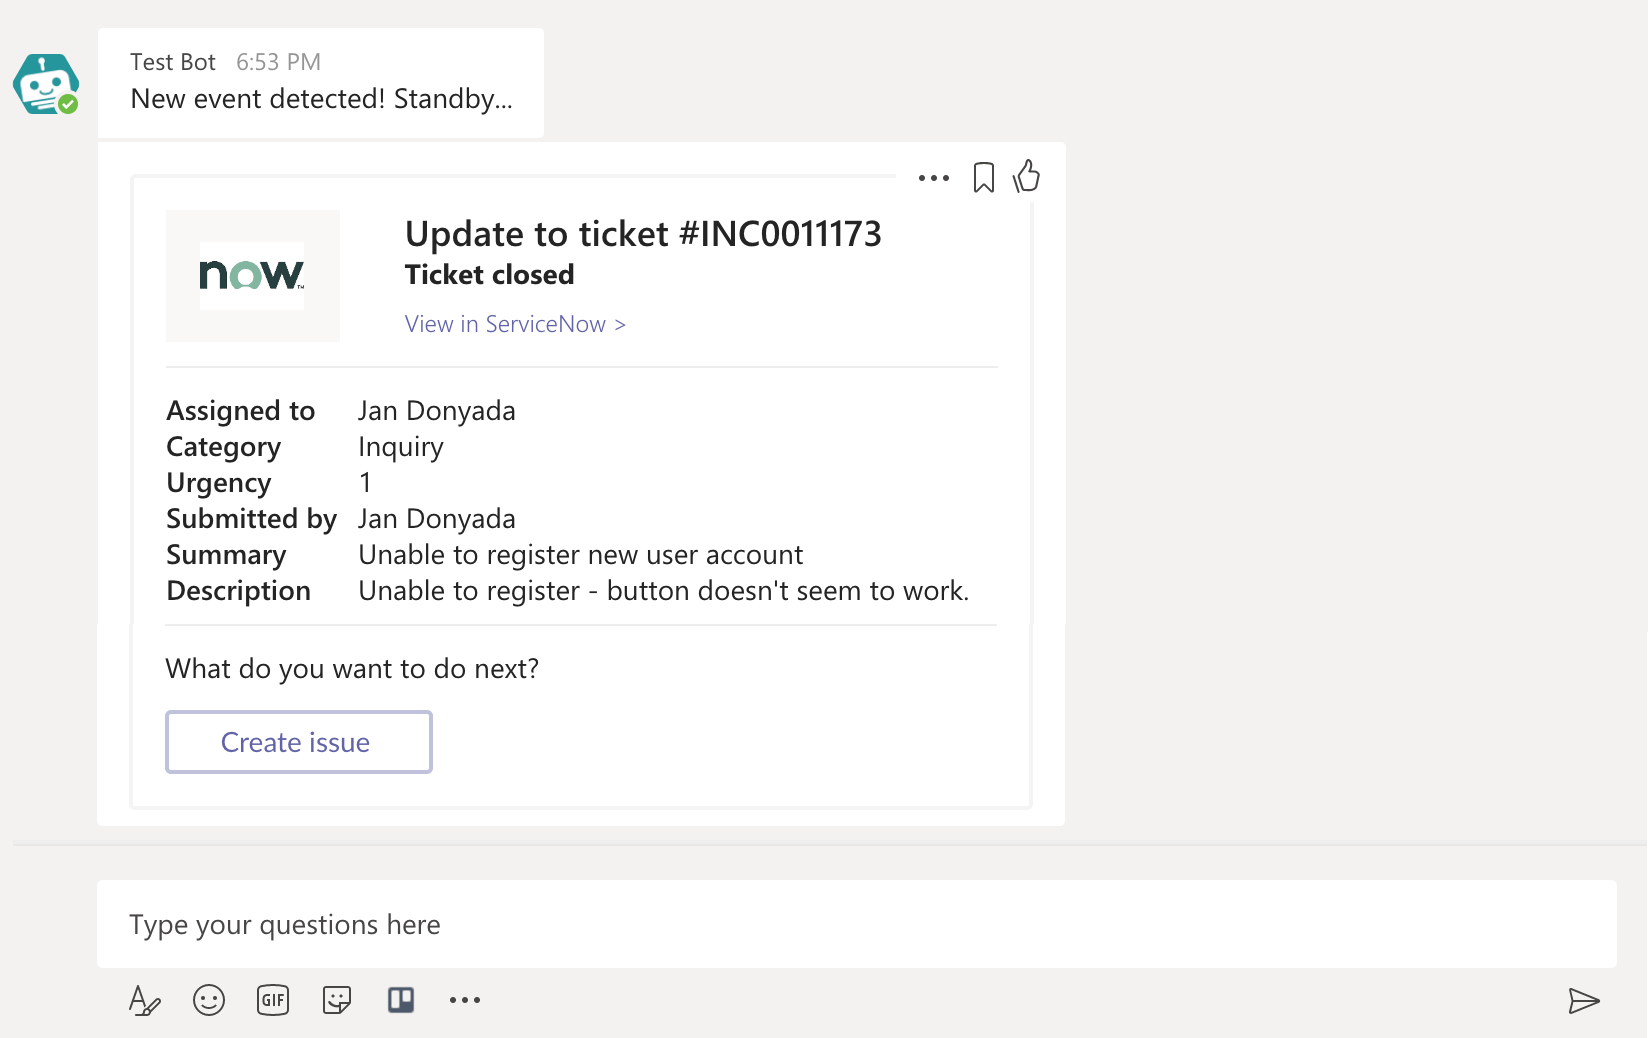 The 'Create issue' button invokes the 'newissue' command and executes the recipe when submitted
Additional parameters can also be passed by buttons and task modules as they invoke a Workbot command. Typically, you use parameters to pass context to the invoked Workbot recipe.
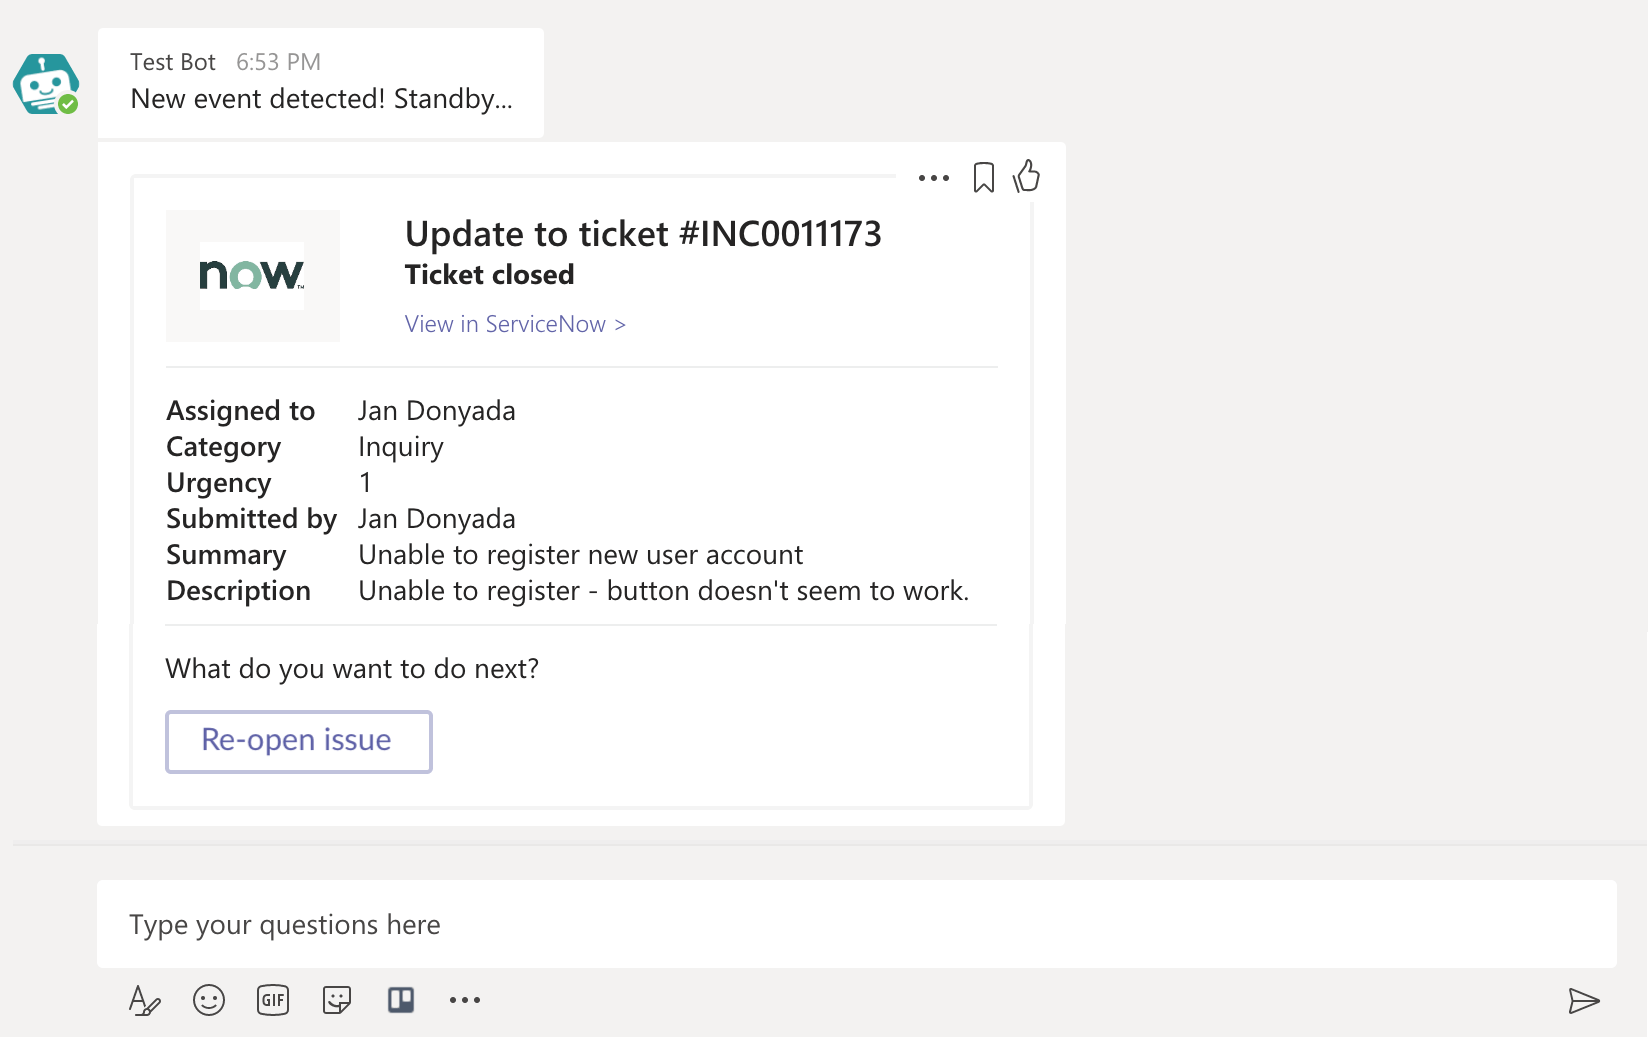 The 'Re-open issue' button not only invokes the 'reopen_issue' command - it's also passing parameters!
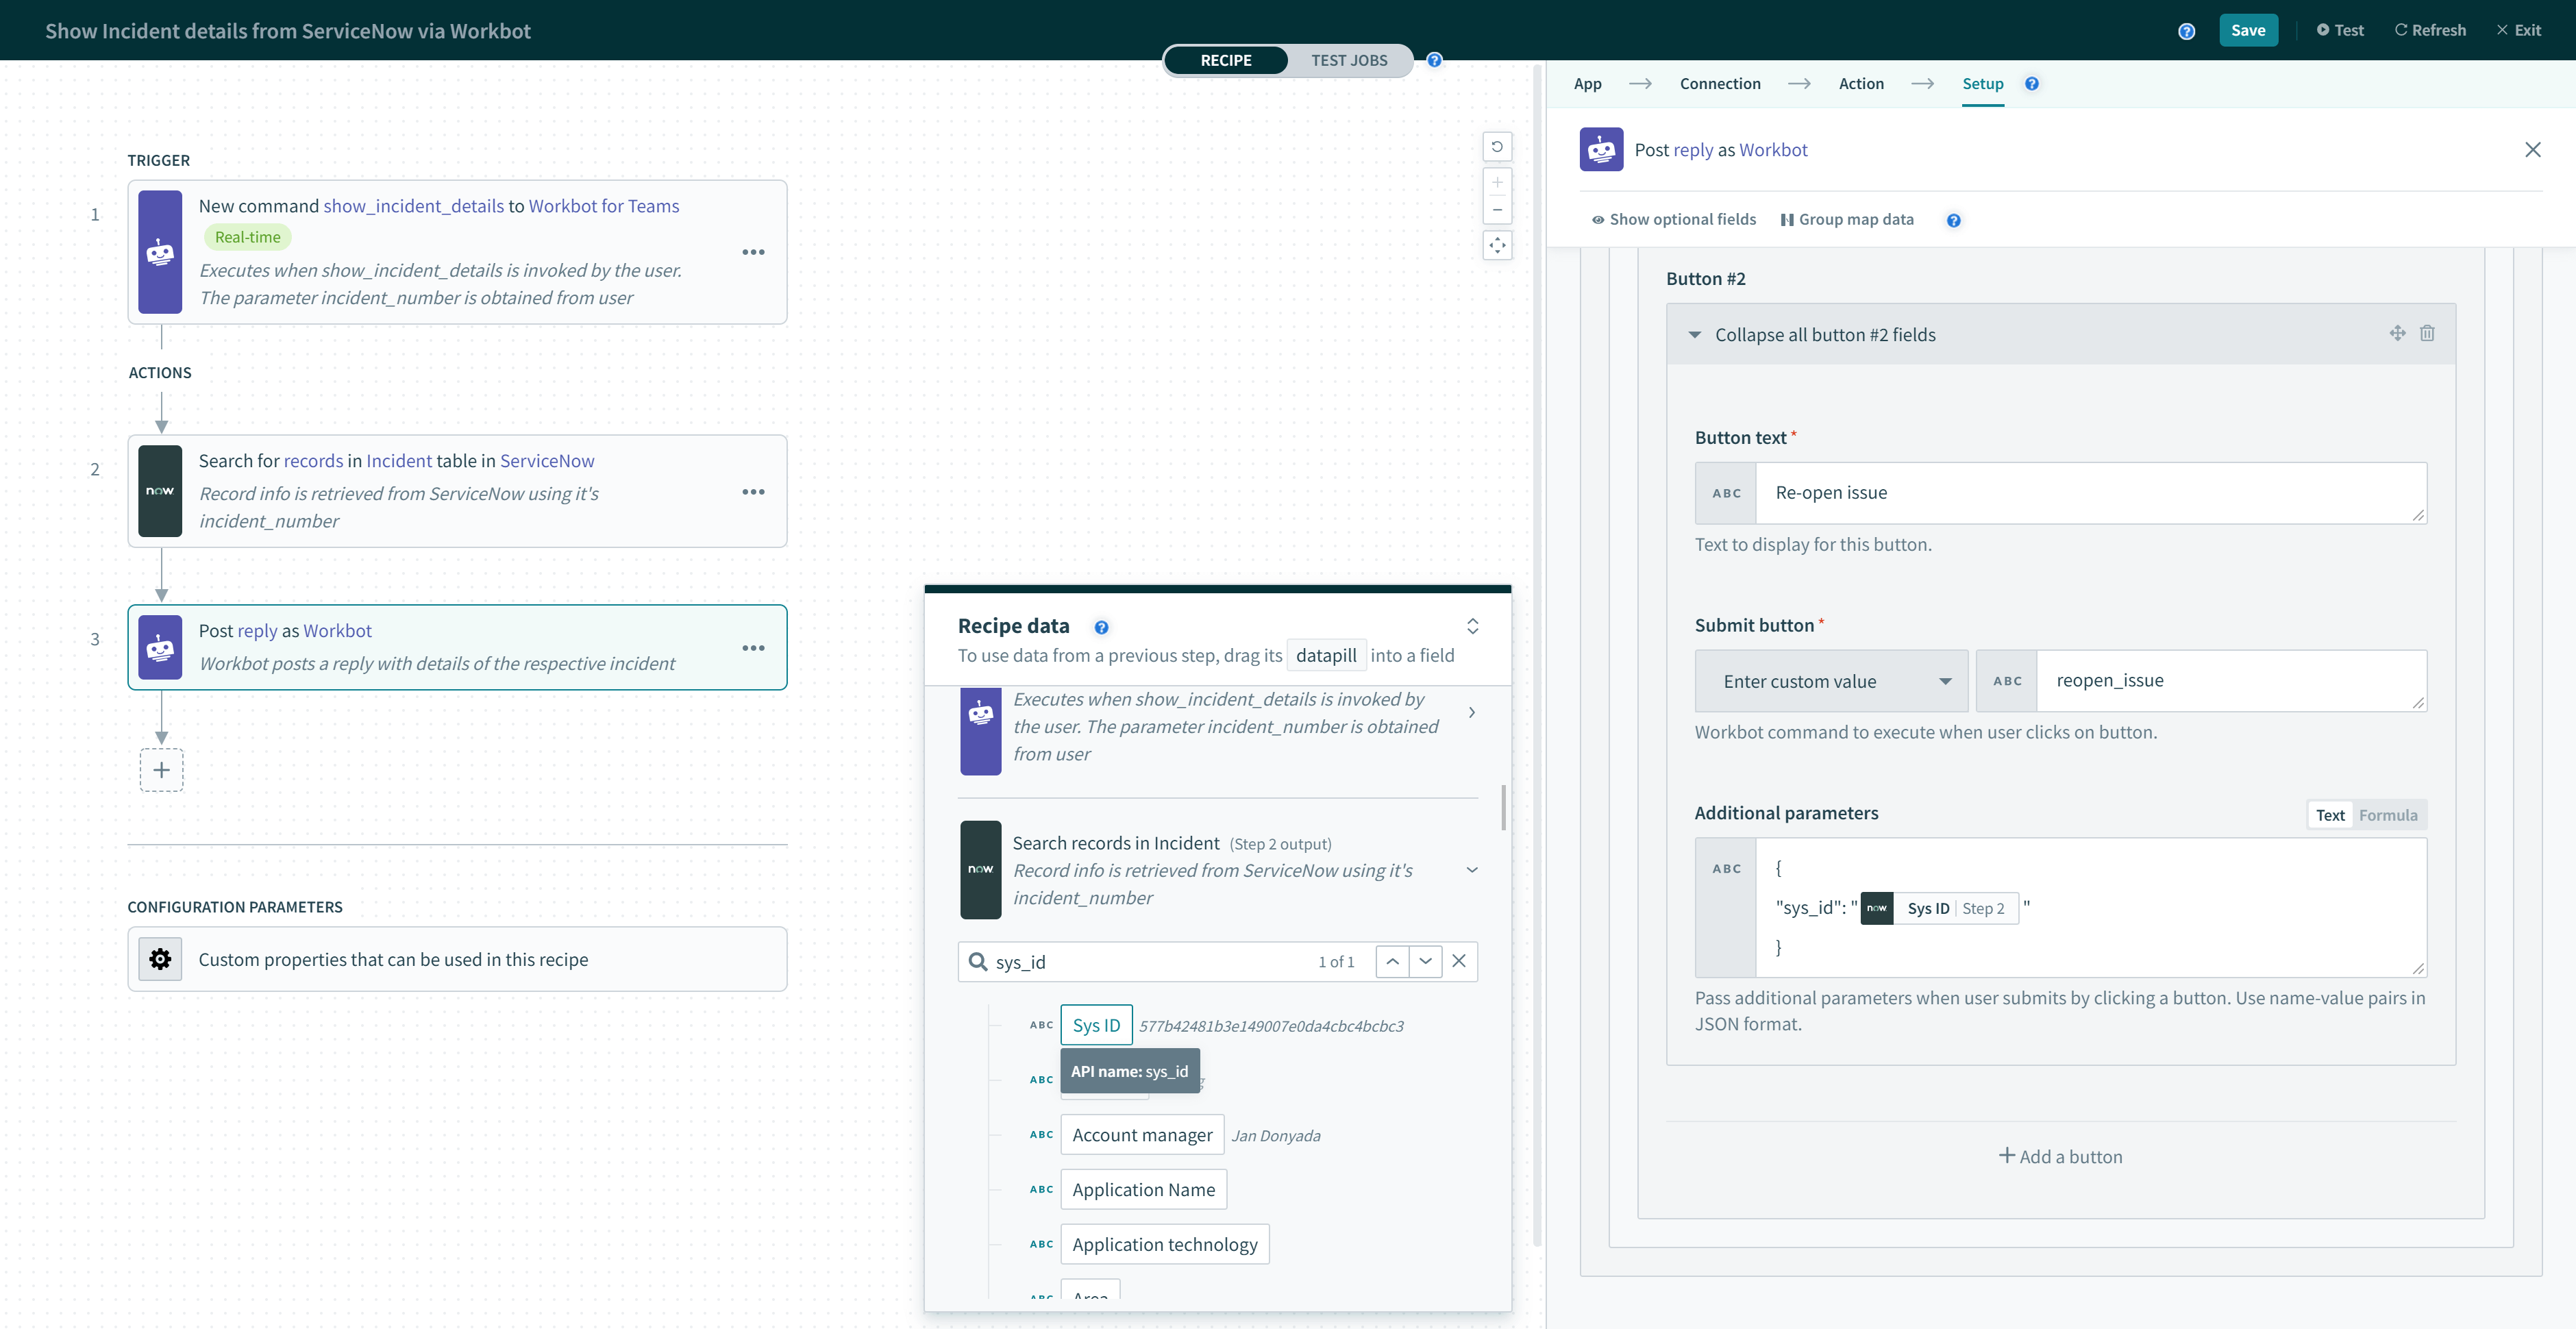 The 'Re-open issue' button is configured to pass the 'sys_id' so that the 'reopen_issue' recipe knows which issue to re-open
While choices in a pick list cannot invoke Workbot commands, they can pass their choice parameter together with button or task module submissions in the same message.
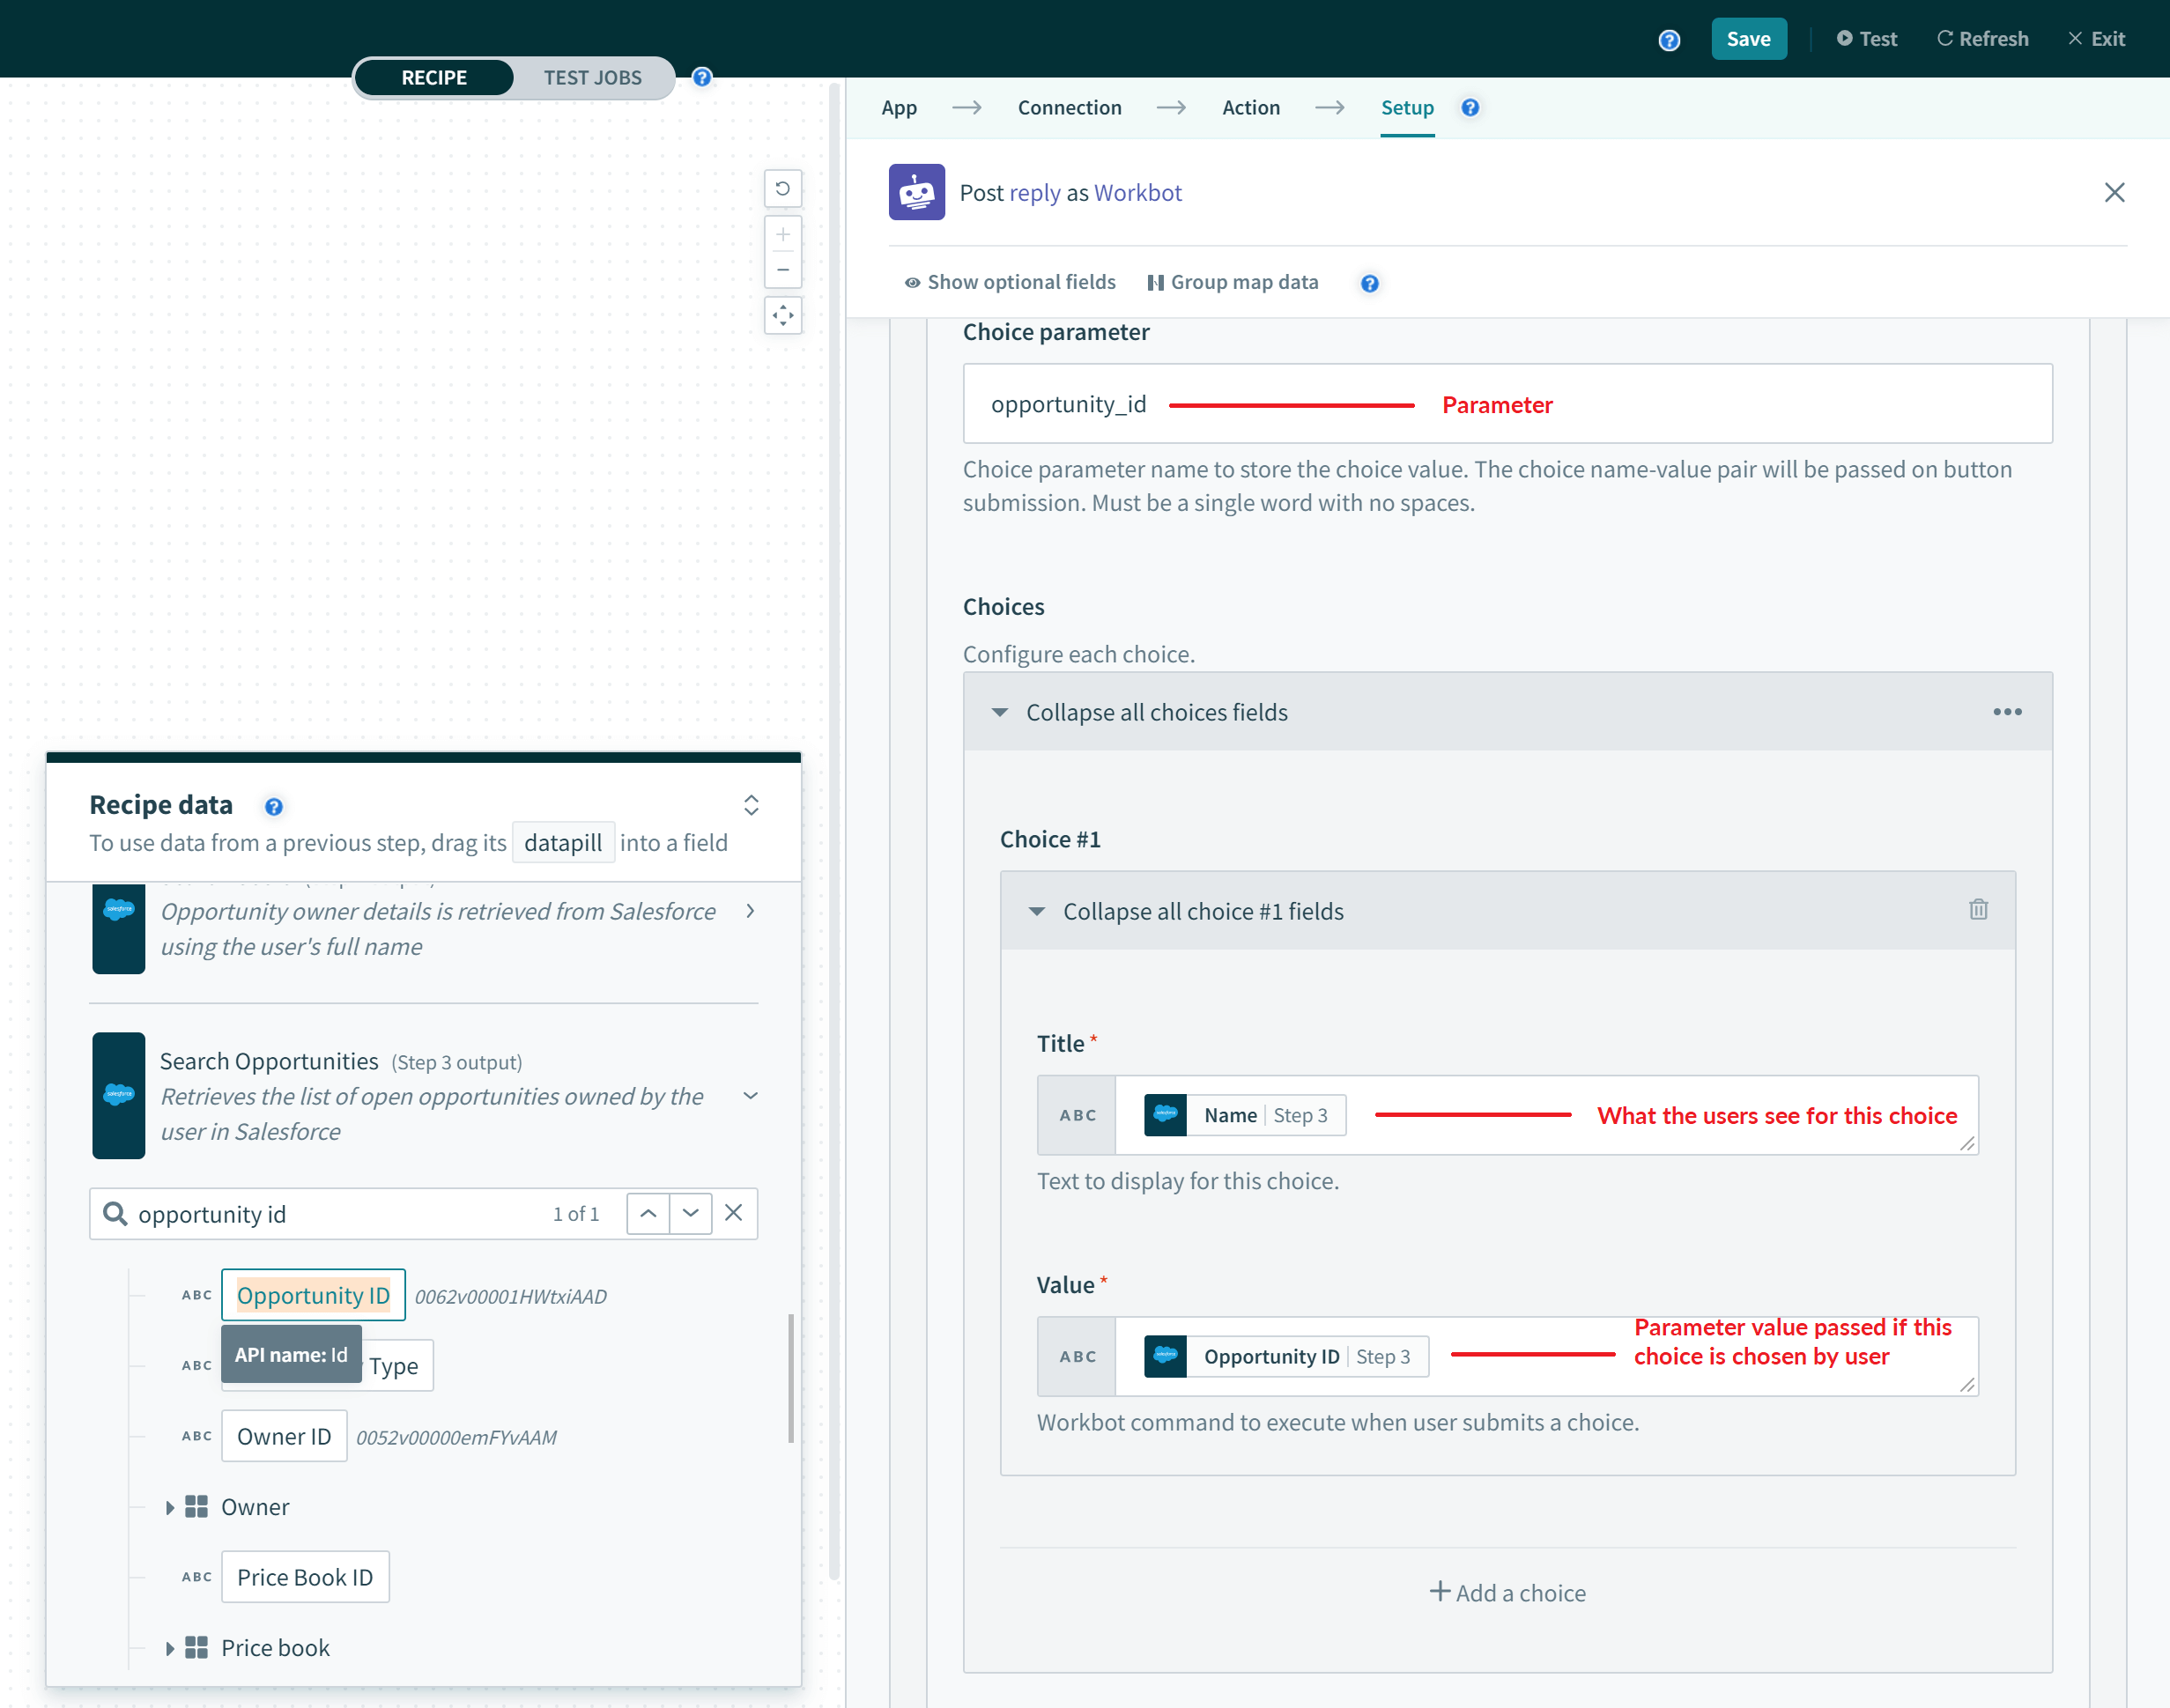 The choice parameter will take its value from a choice (if it's chosen)
The choice parameter is passed when a button from the same message is submitted (along with any other parameters the button may have).
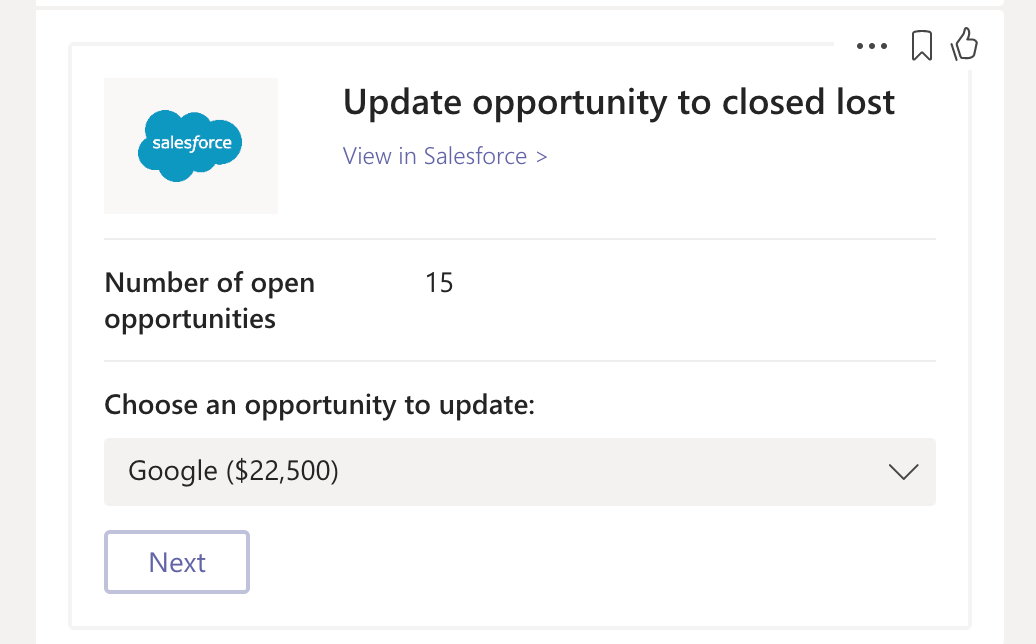 The 'Next' button also passes the 'opportunity_id' of 'Google' onto the command recipe that it invokes
# Configuring buttons
Buttons can be used in either a post reply or a post message action.
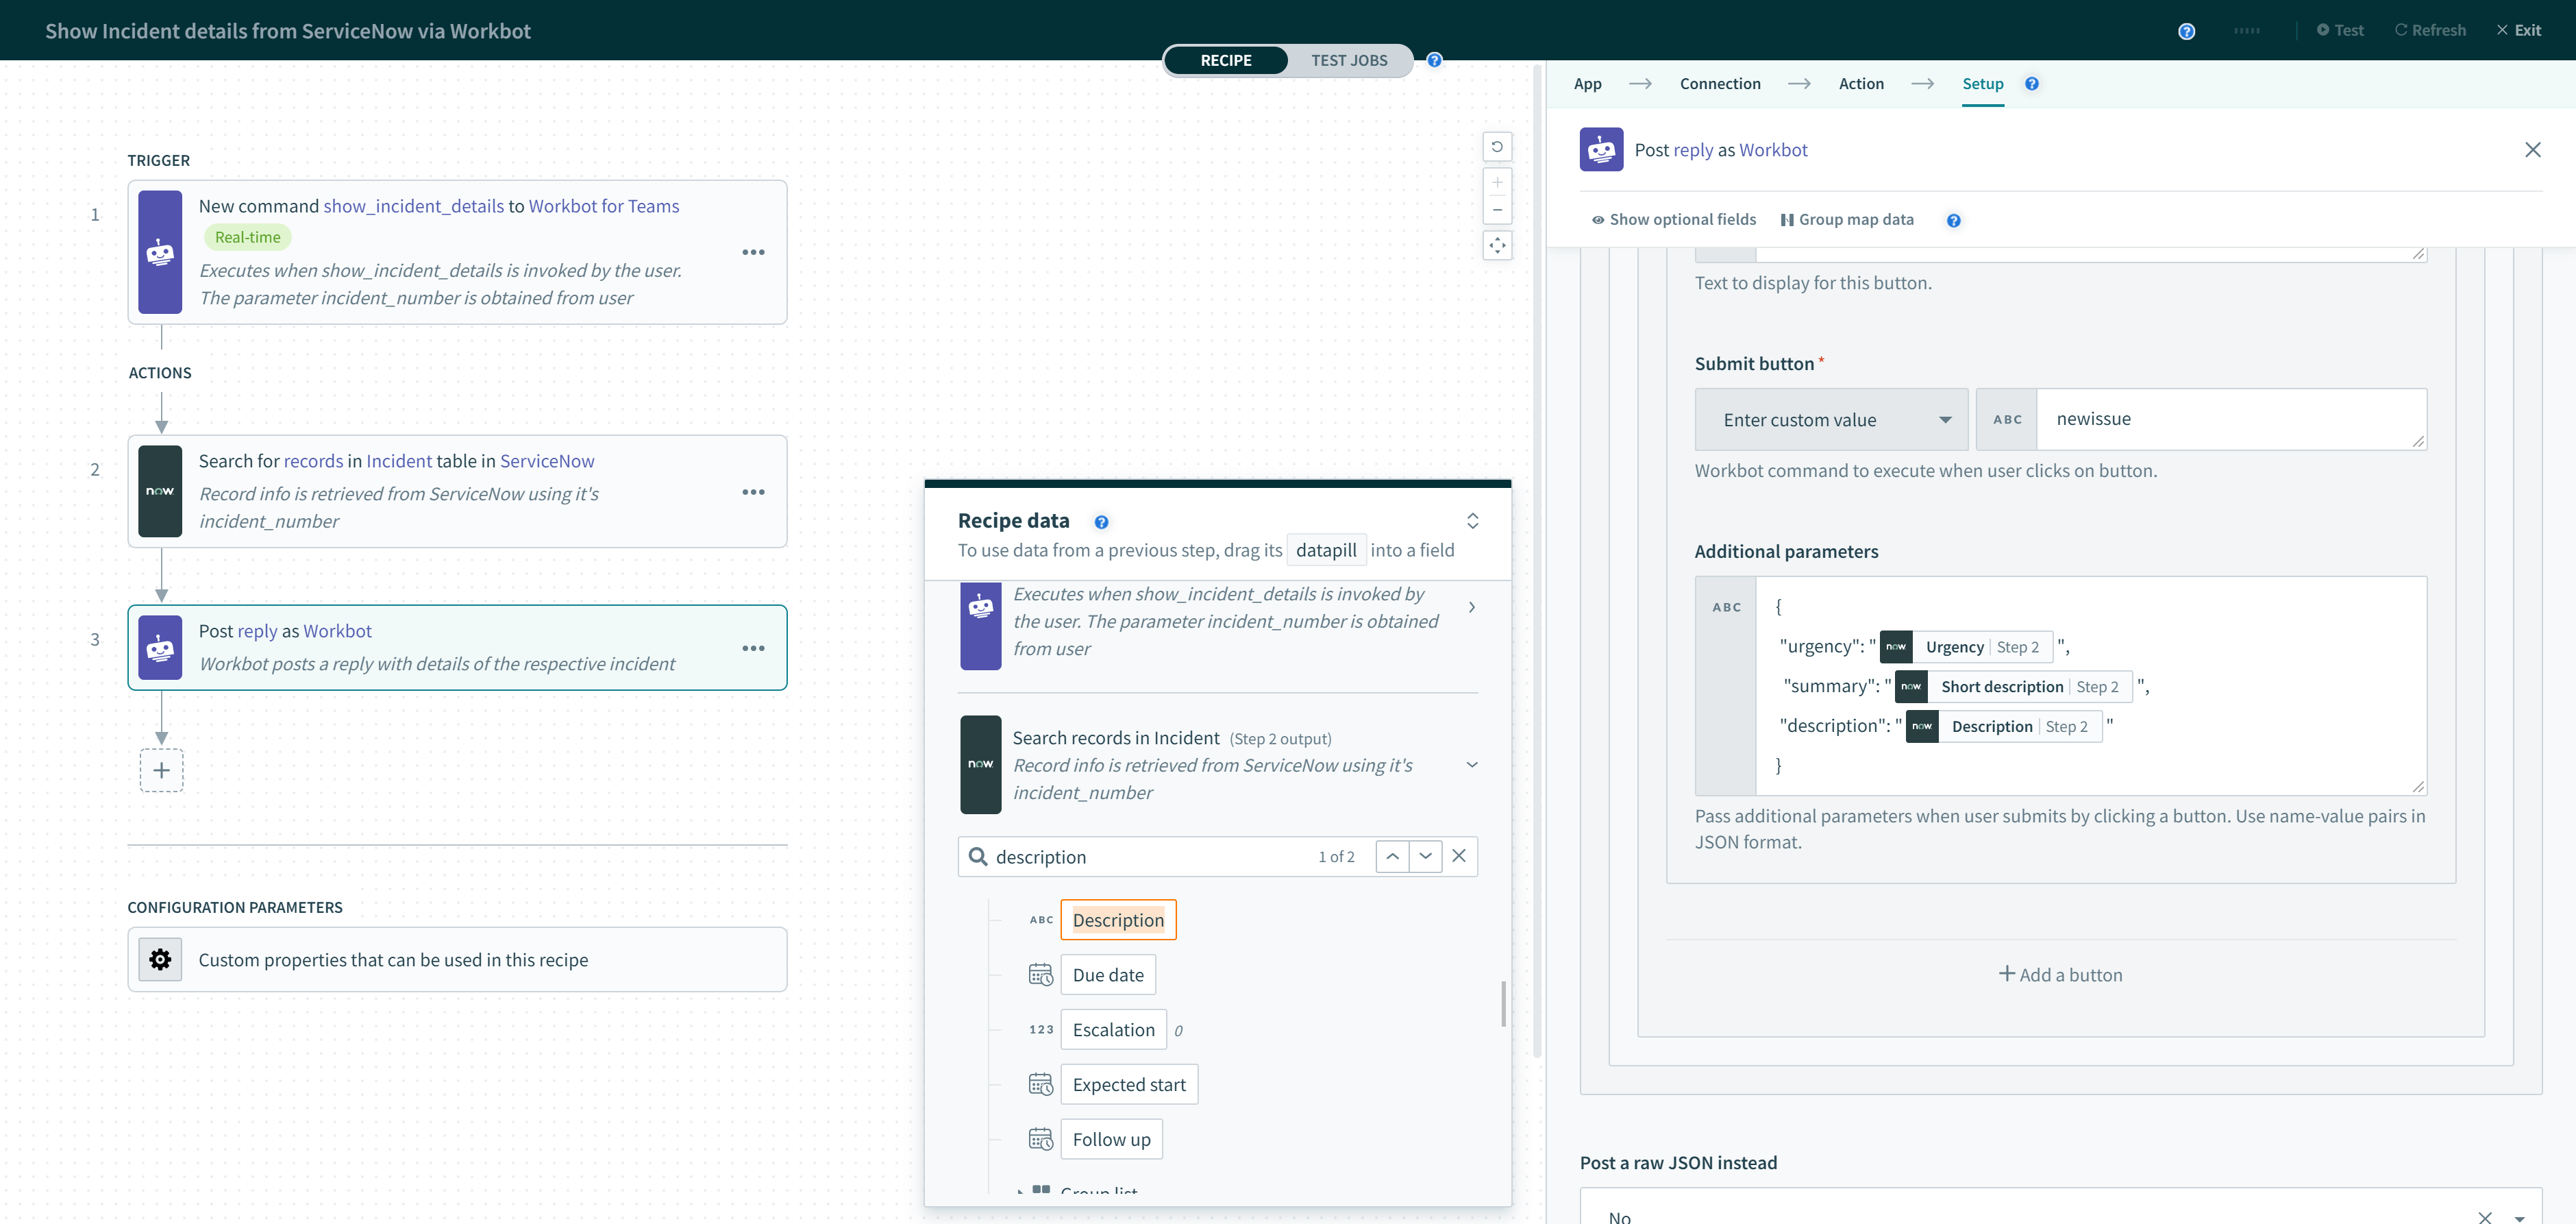 A button can be configured to invoke a Workbot command of another recipe
The following table shows what goes into the button fields:
| Input field | Value | Description |
|---|---|---|
| Title | Button title for example, Create ticket |
Title of the button to be displayed. |
| Submit button command |
Workbot command to execute when button is clicked, for example,
create_ticket | Choose from a list of existing recipes that can be invoked by a Workbot command. |
| Parameters |
Parameter values to pass onto the next recipe when button is clicked, for example,{ | Key in name-value pairs to pass onto the next recipe as parameter values. Remember to wrap datapills with double quotes. |
# Configuring a pick list and choices
While choices cannot invoke Workbot commands, they can pass their choice parameter together with button or task module submissions in the same message.
 The choice parameter will take its value from a choice (if it's chosen)
The choice parameter is passed when a button from the same message is submitted (along with any other parameters the button may have).
 The 'Next' button also passes the 'opportunity_id' of 'Google' onto the command recipe that it invokes
The following table shows what goes into the pick list and choice fields:
| Input field | Description |
|---|---|
| Pick list name | Name of pick list. Displays before choices, and supports markdown. |
| Pick list style | Compact displays choices in a drop-down menu, while Expanded displays all choices with radio buttons. |
| Choice parameter | Parameter name to store the choice value. This name-value pair will be passed on as additional parameters. |
| Title (choice) | Title of the choice to be displayed. |
| Value (choice) | Value of the choice. If chosen, passes its value to the Choice parameter. |
# Task modules
When parameters are defined in the Workbot command, Workbot will launch a task module within Teams to collect parameter values from the user.
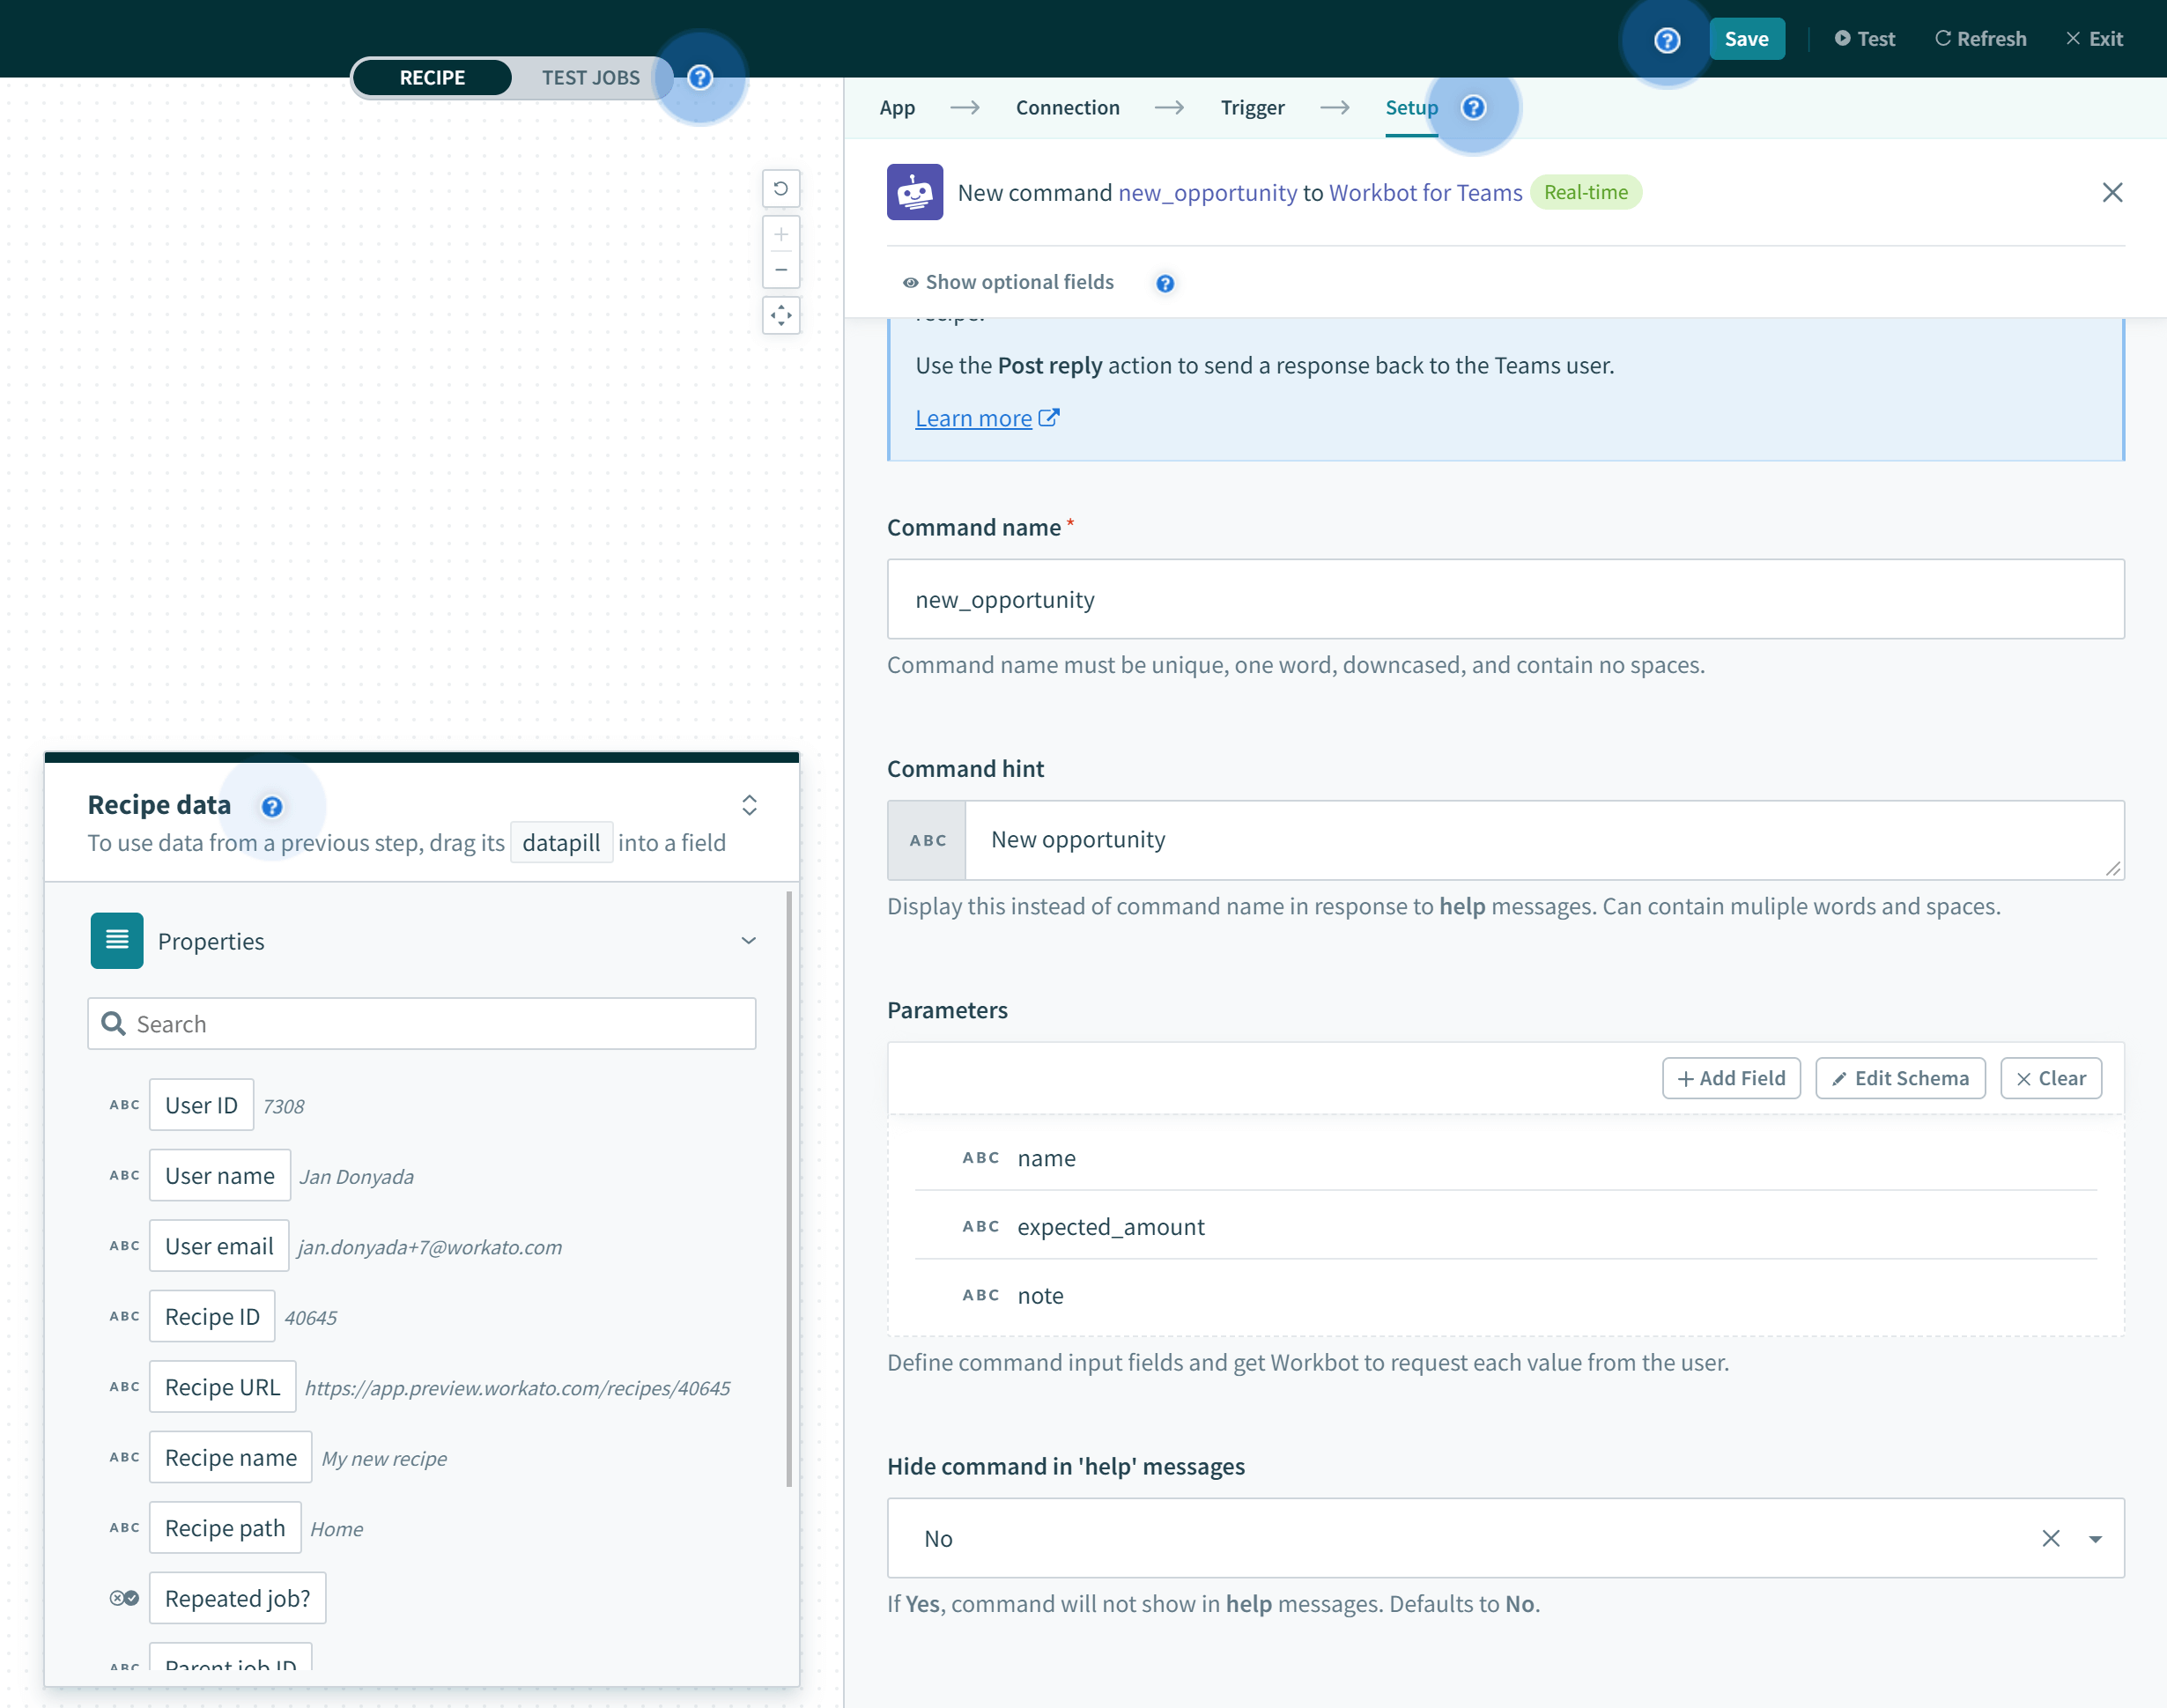 Parameters in recipe
Here's how the task module looks like when prompting users for parameter values.
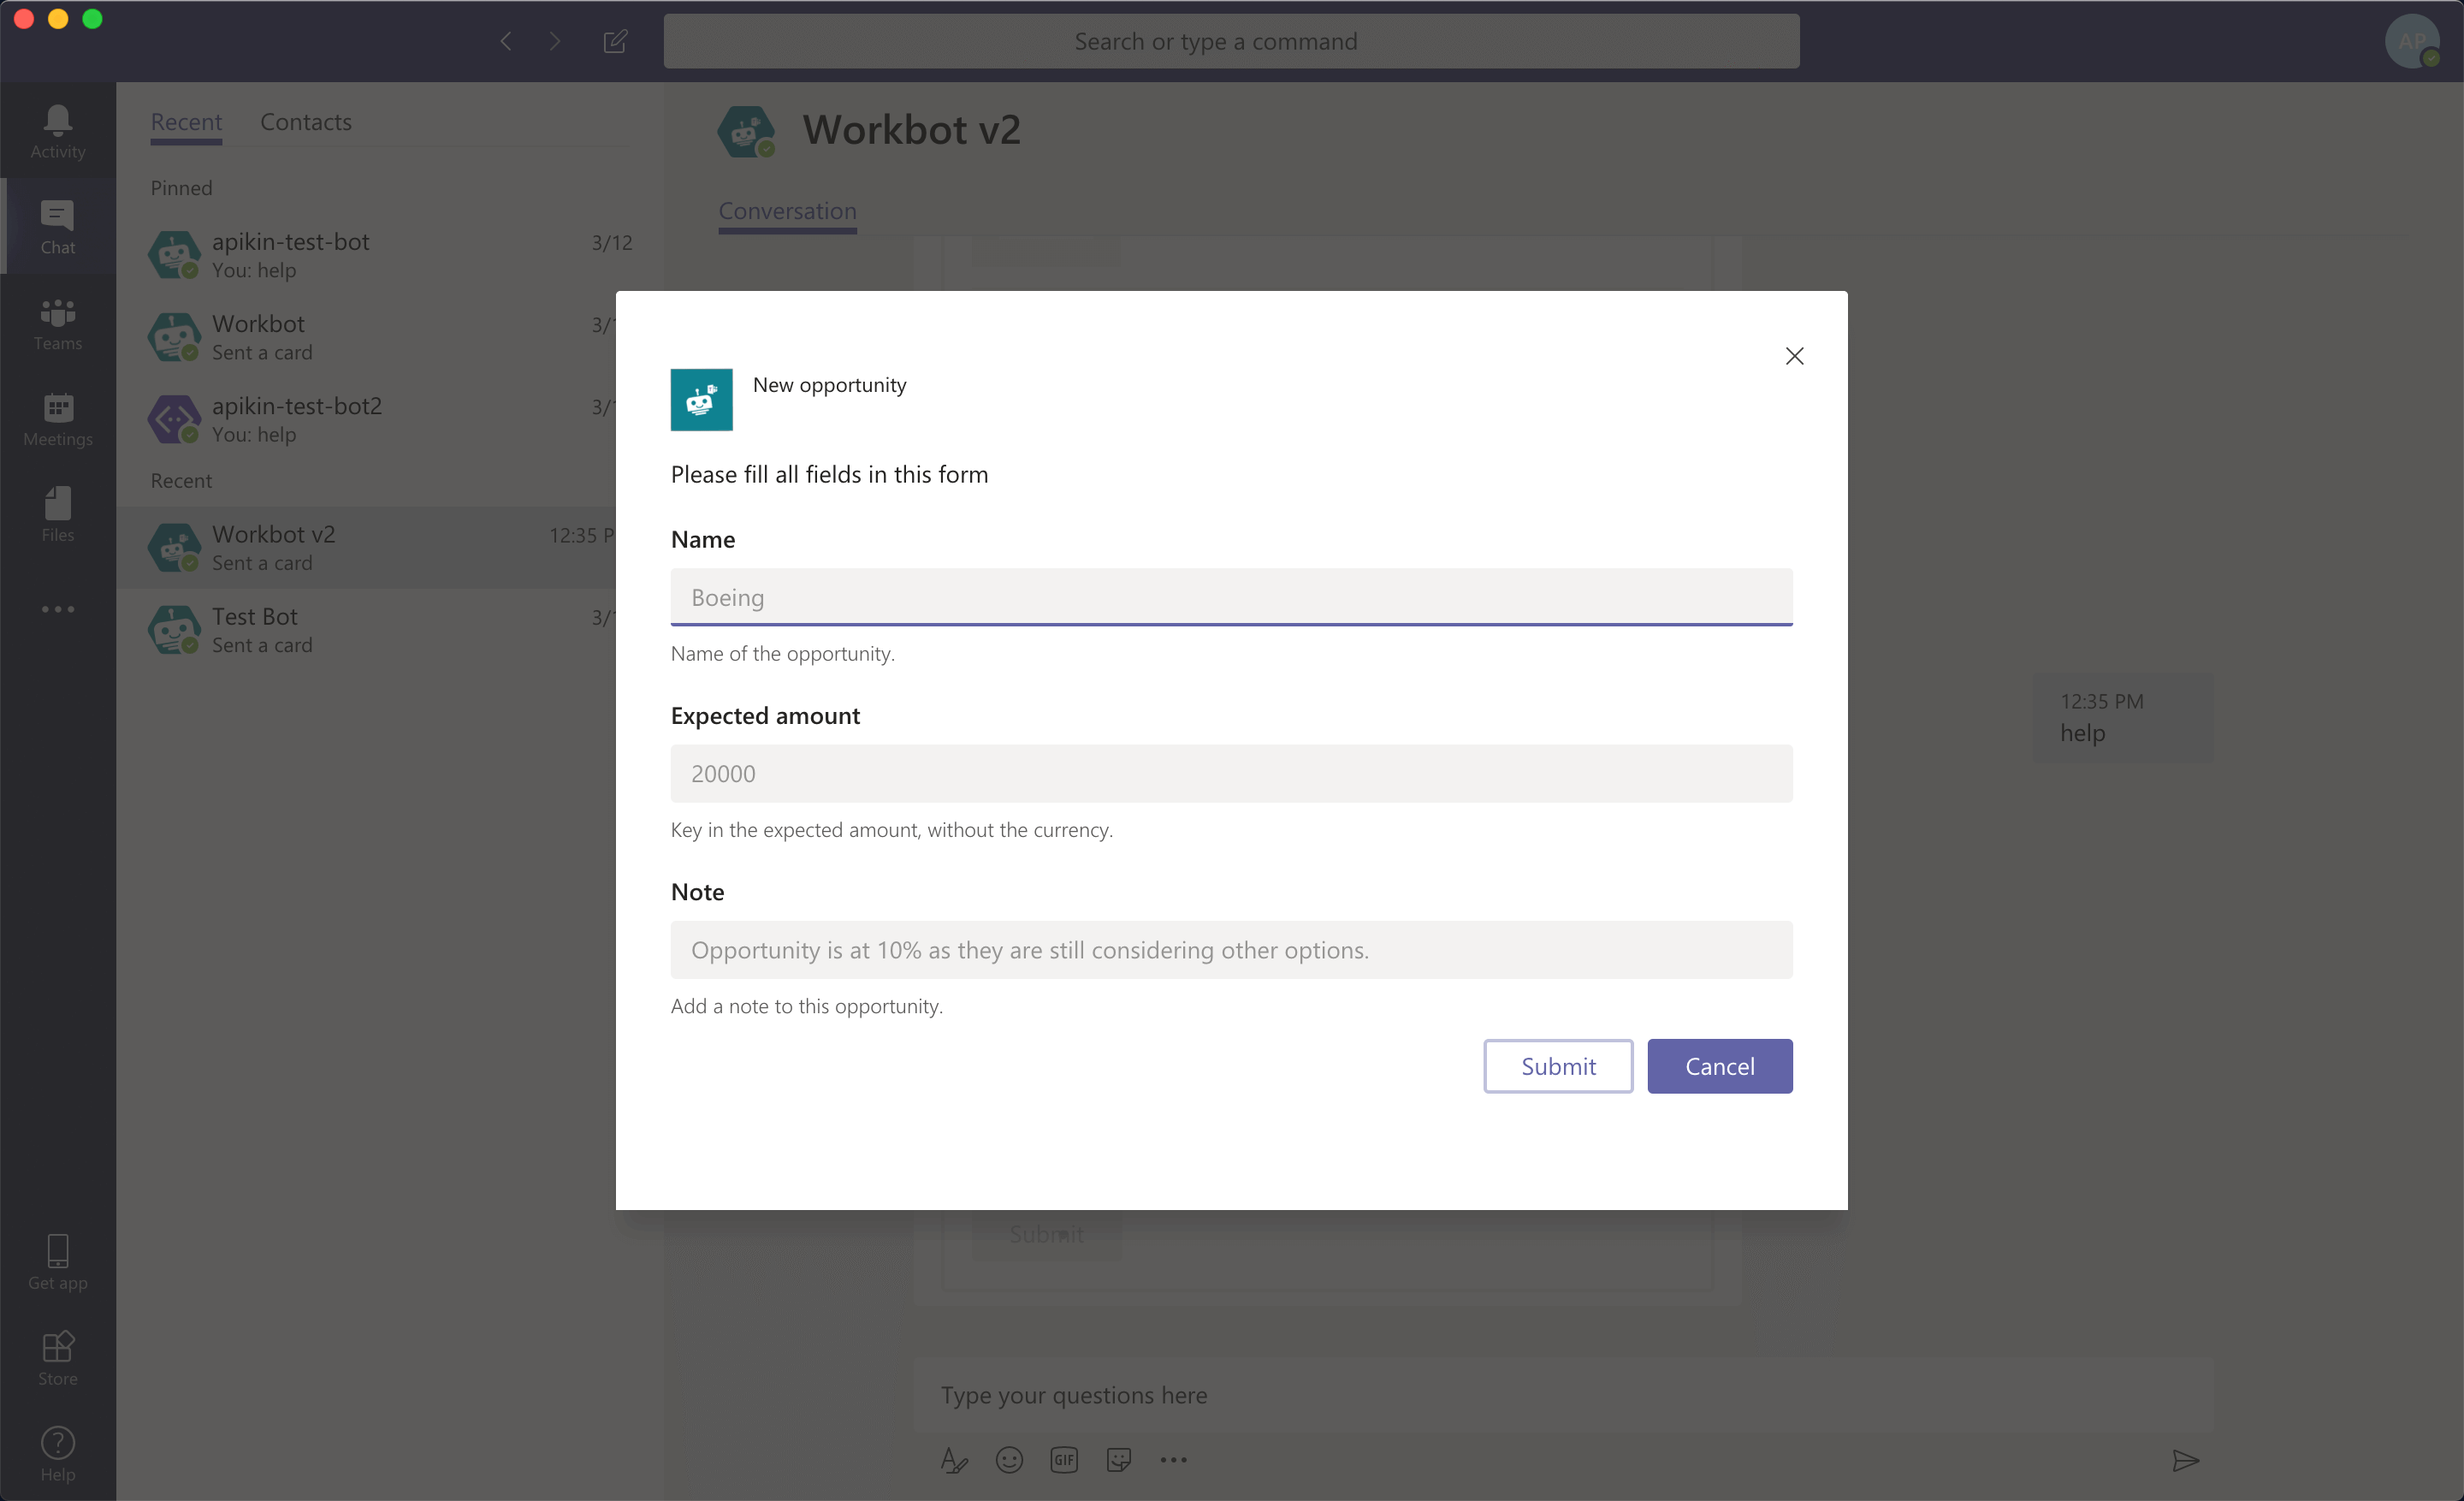 Parameters in recipe
# Adding hints and example values in task modules
Hints and example values can be configured for each parameter. Hints appear below the input field; example values will appear inside the input field.
 Parameters in recipe
Here's how the task module looks like when prompting users for parameter values.
 Hints below input fields; example values inside input fields
# Hiding parameters
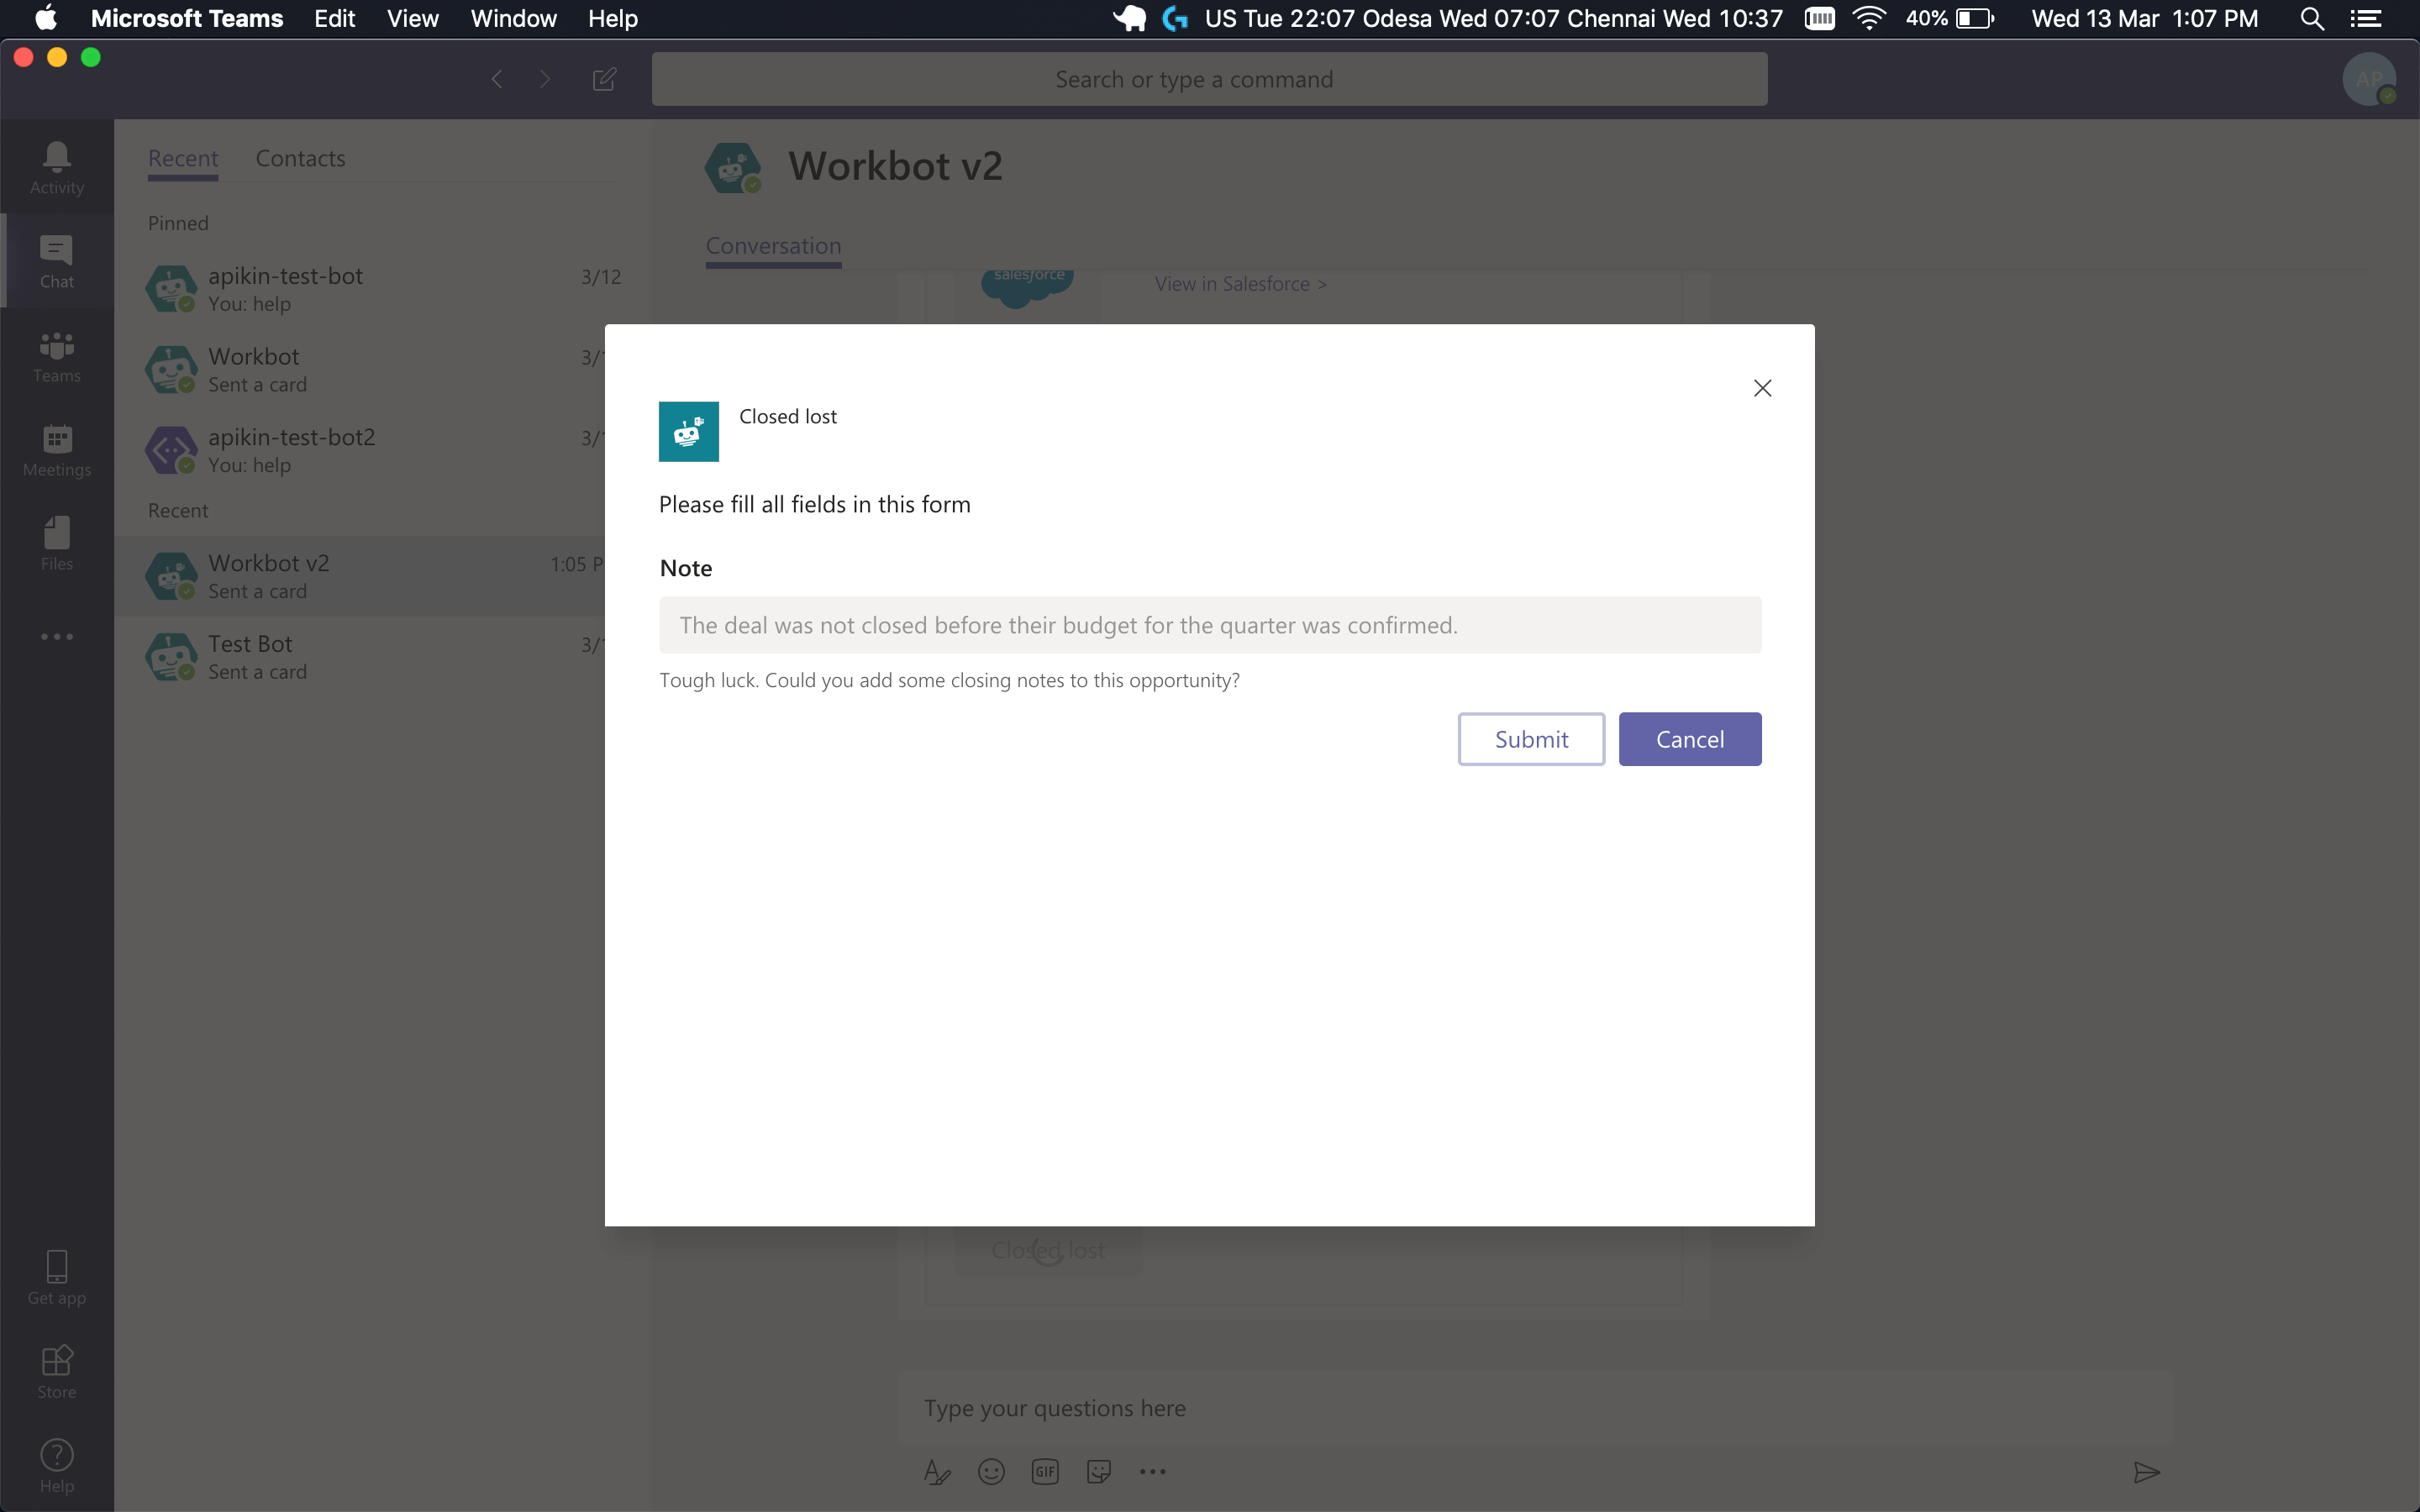
Parameters can be hidden in task modules by setting Optional to Yes, and Visible? to No. This is useful when passing record IDs that are not human-readable.
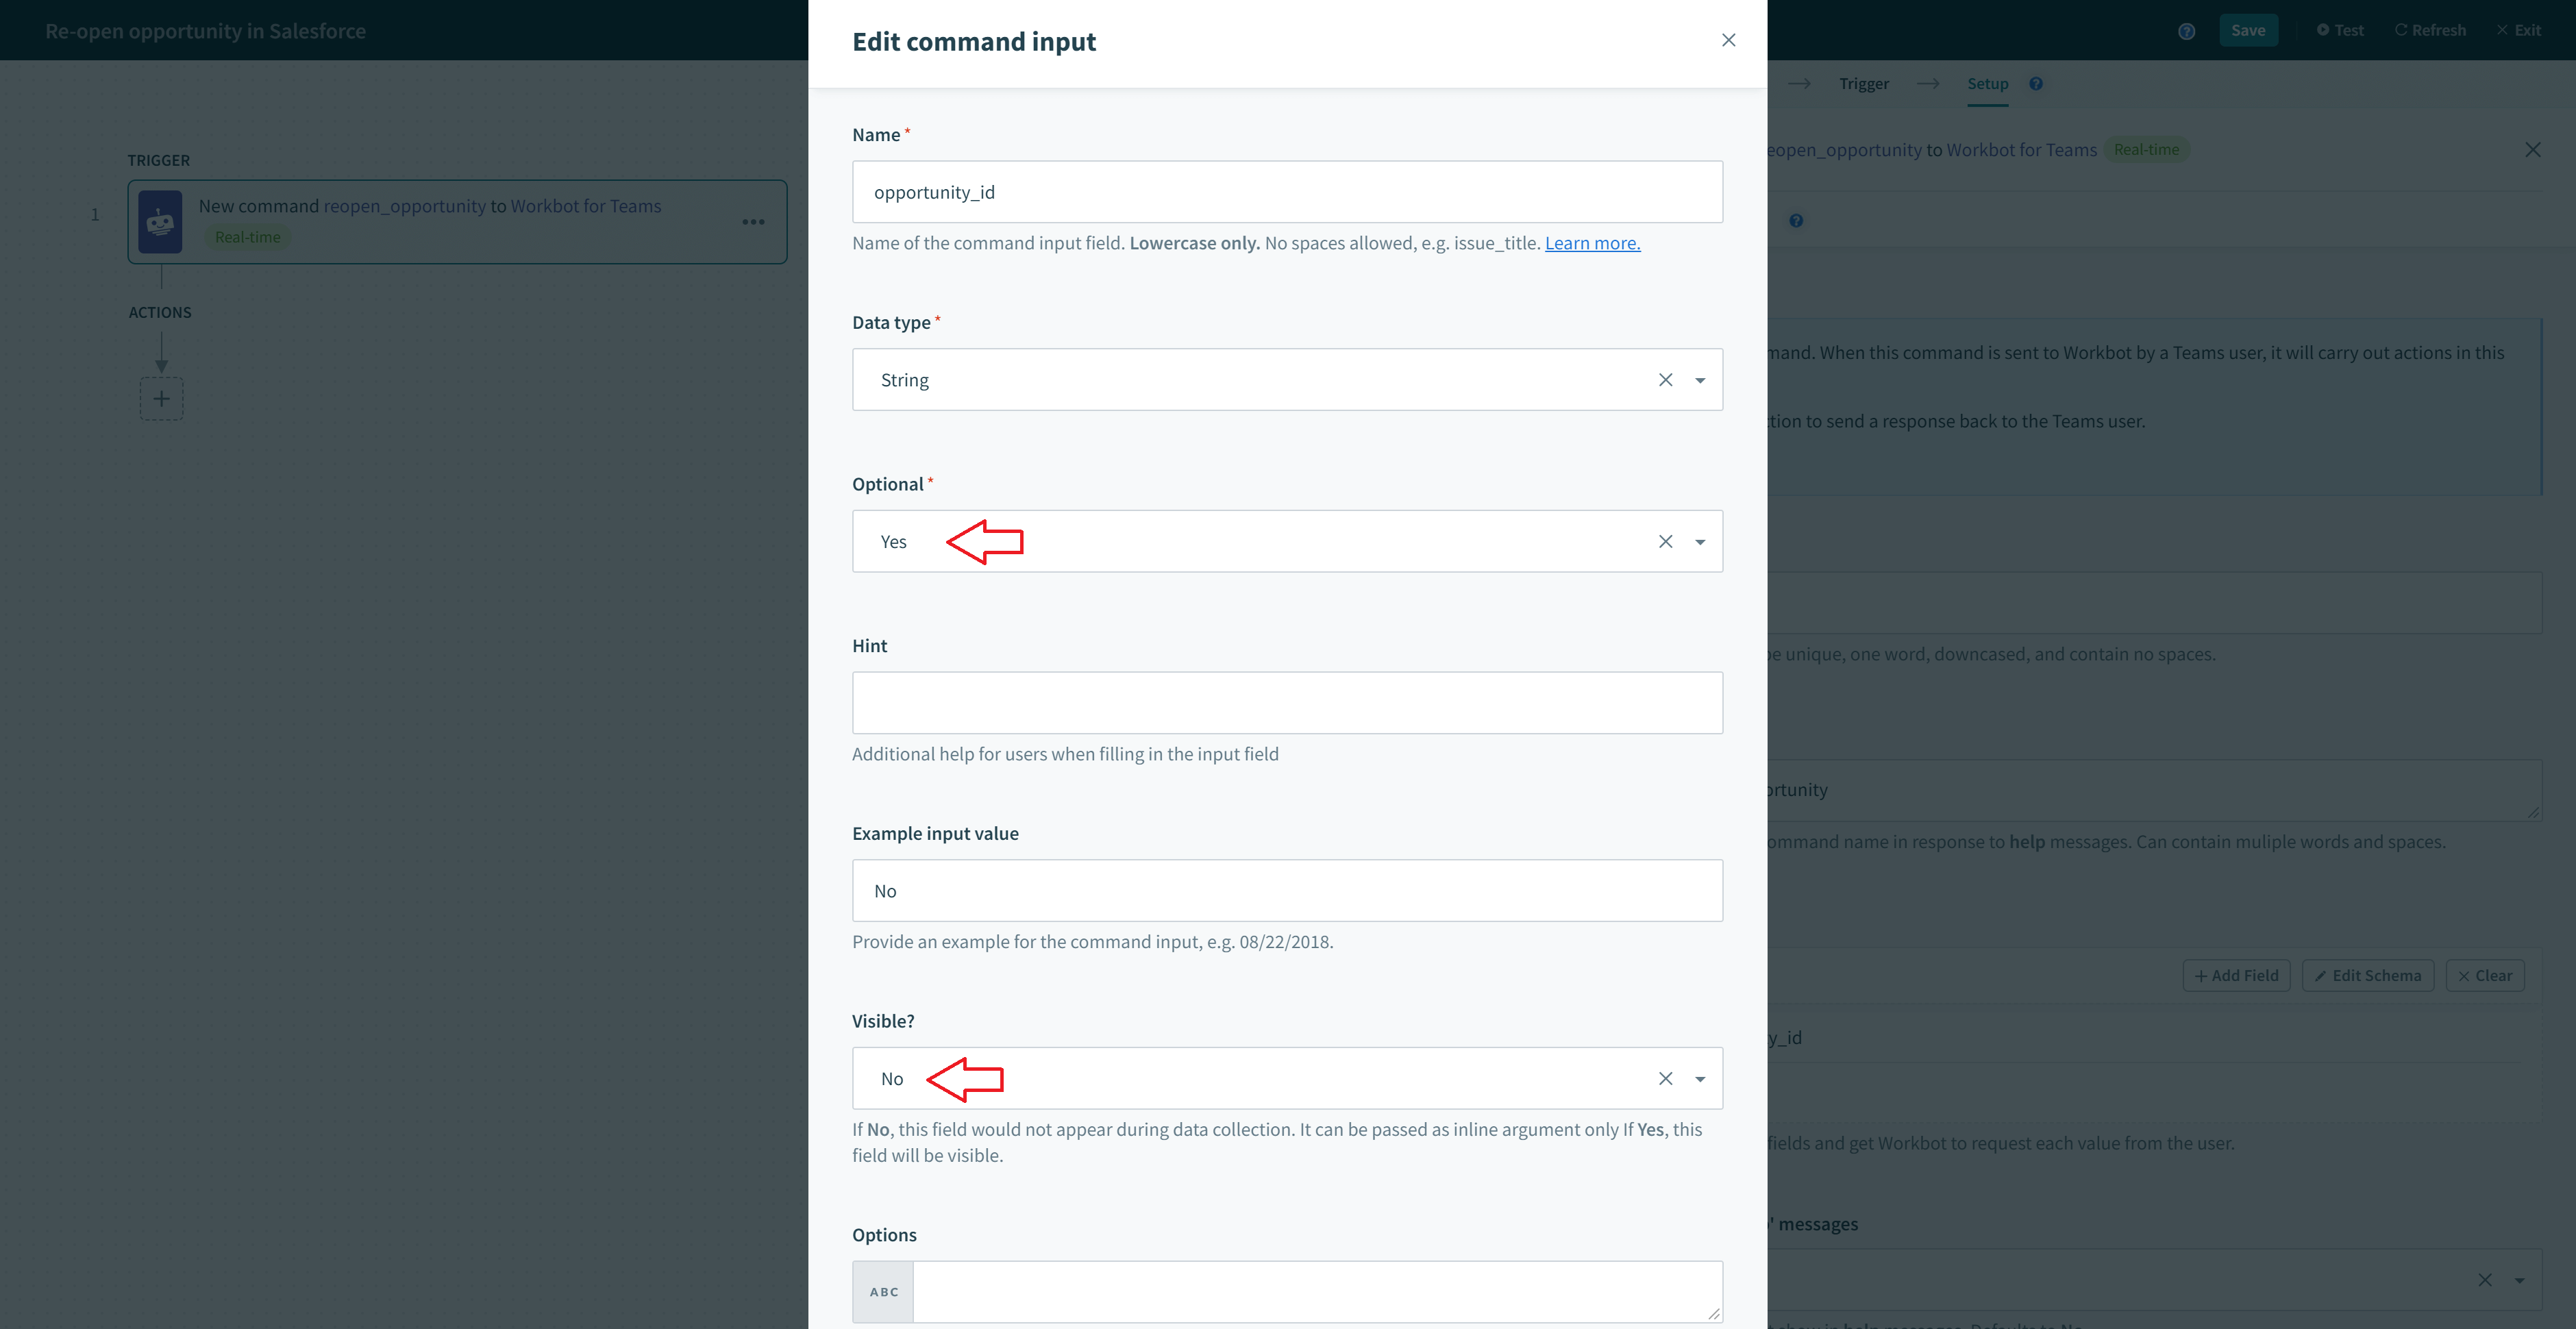
The parameter will be hidden from the task module.
# Adding picklist options in task modules
Picklist options can be configured so that users can pick from a finite list of choices. This is useful when the available options are known, for example, Urgency (High:1, Medium: 2, Low: 3), Priority (1,2,3,4,5), and so on.
To add a picklist, simply add comma-separated options in the Options field. If the display name and the value are different, separate the two by a colon, for example, High:1, Medium:2, Low: 3.
It's important to note that pick list display name and value cannot contain : or ,.
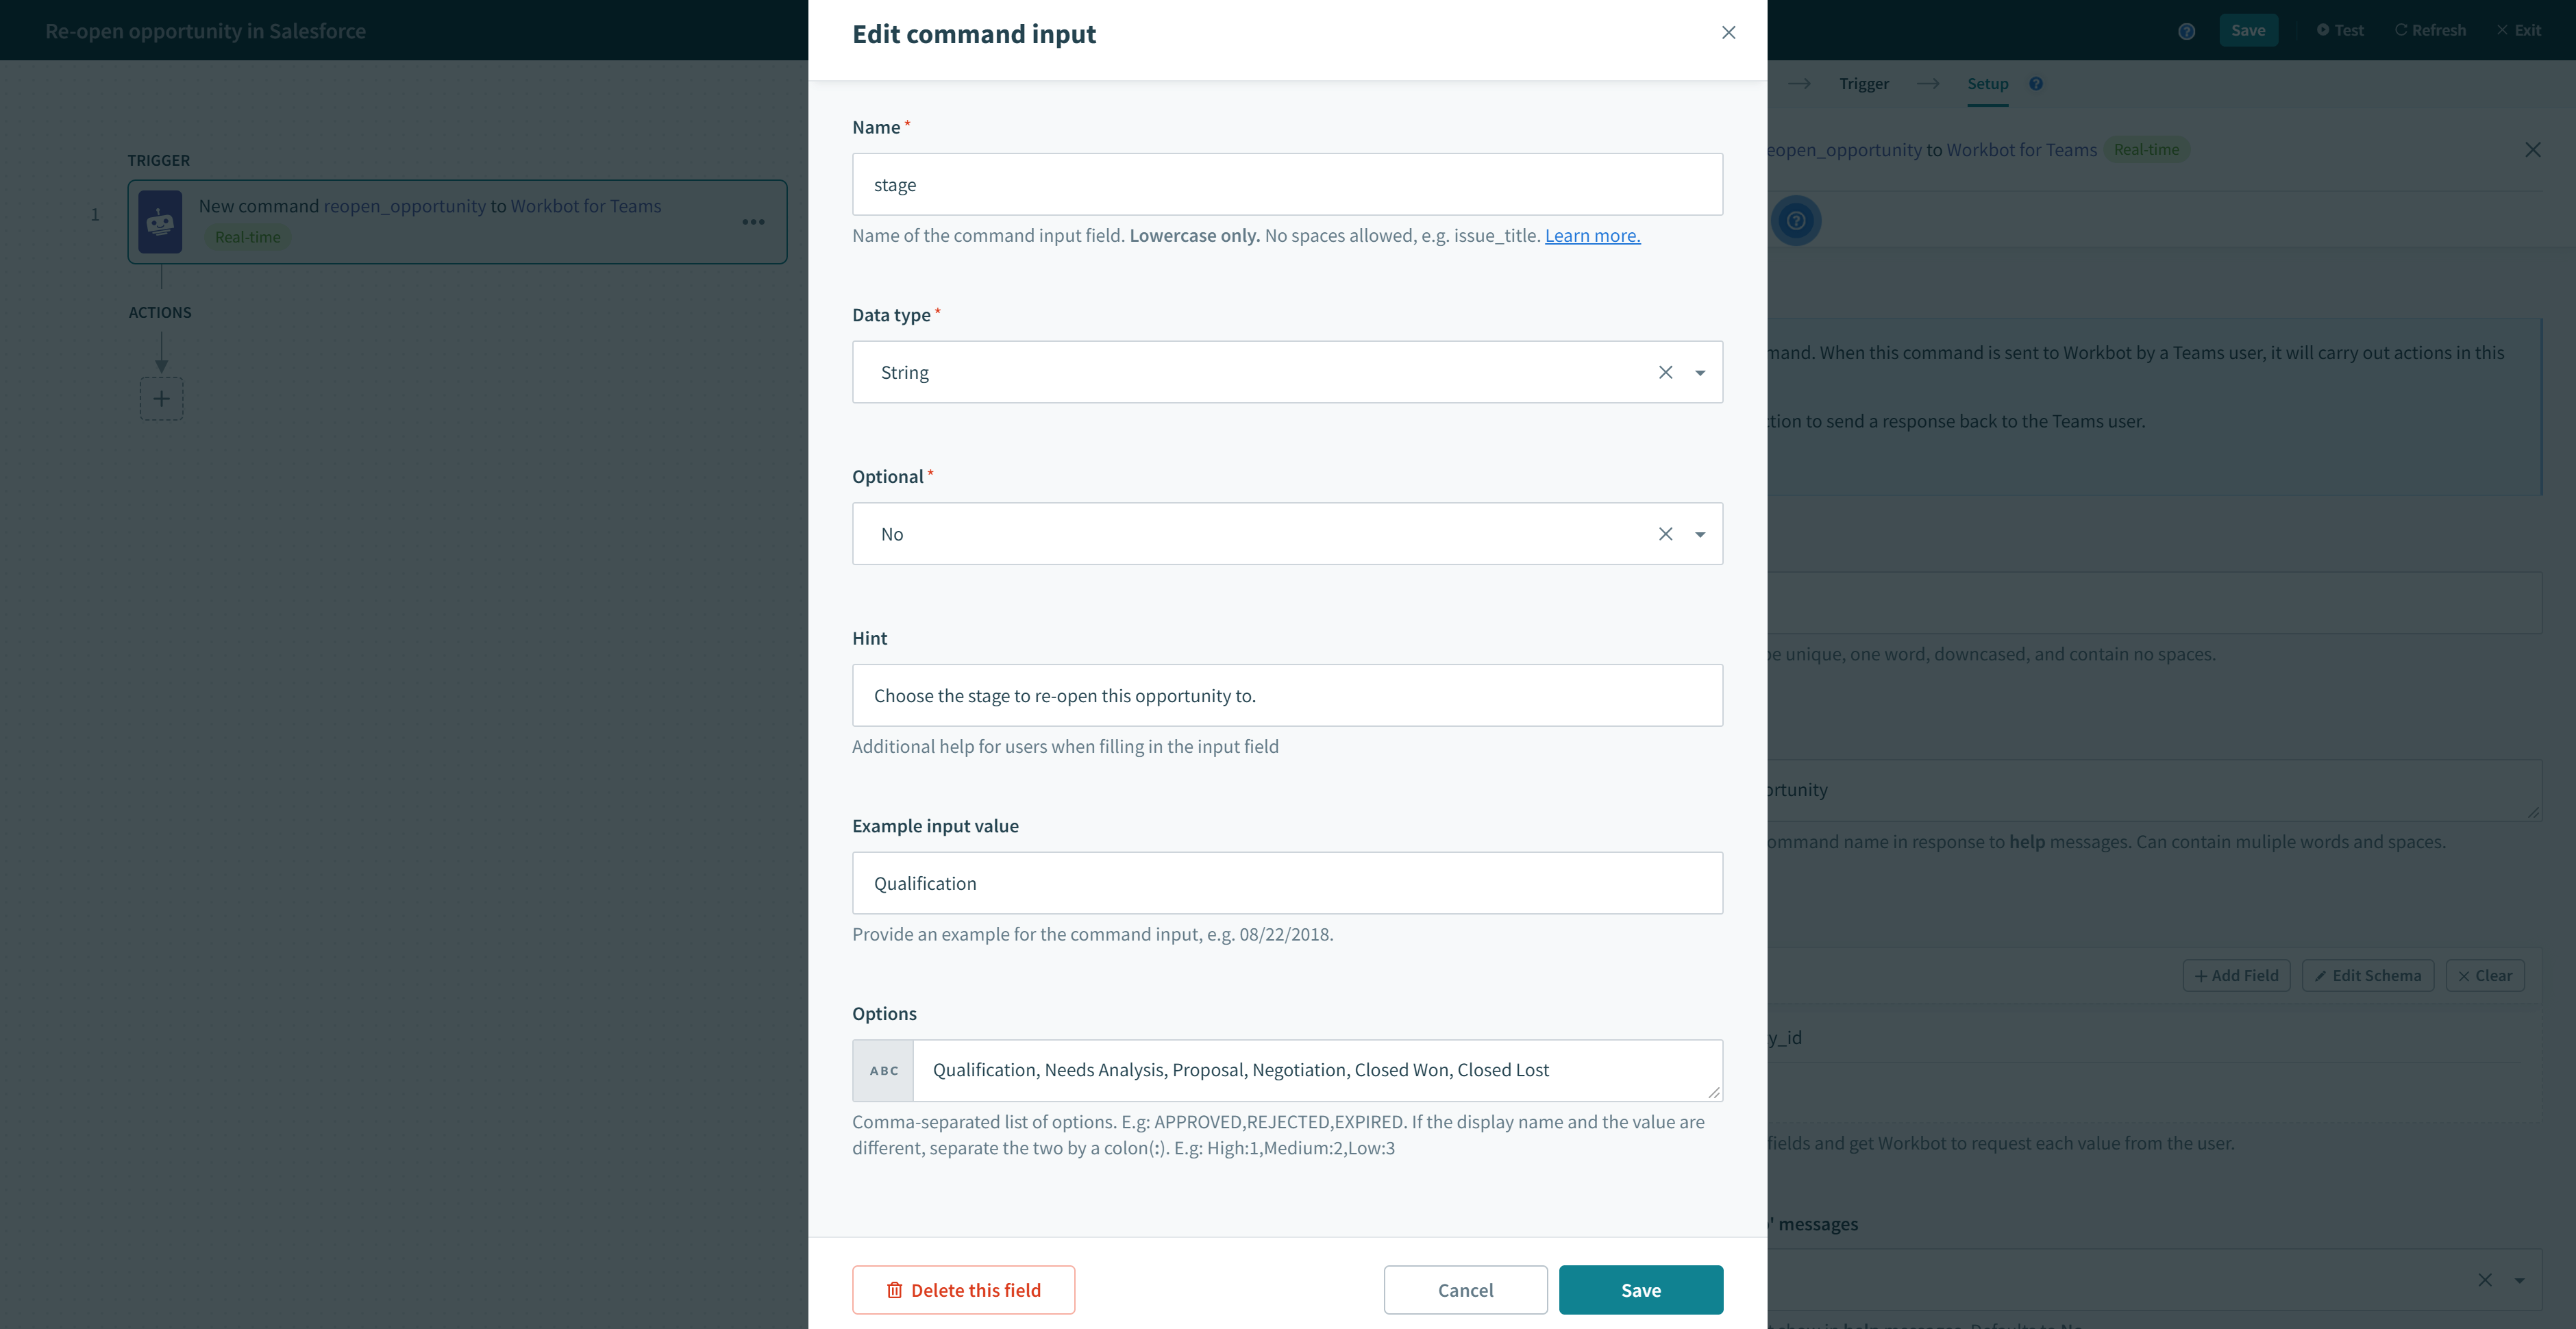 Options where display name and value are the same
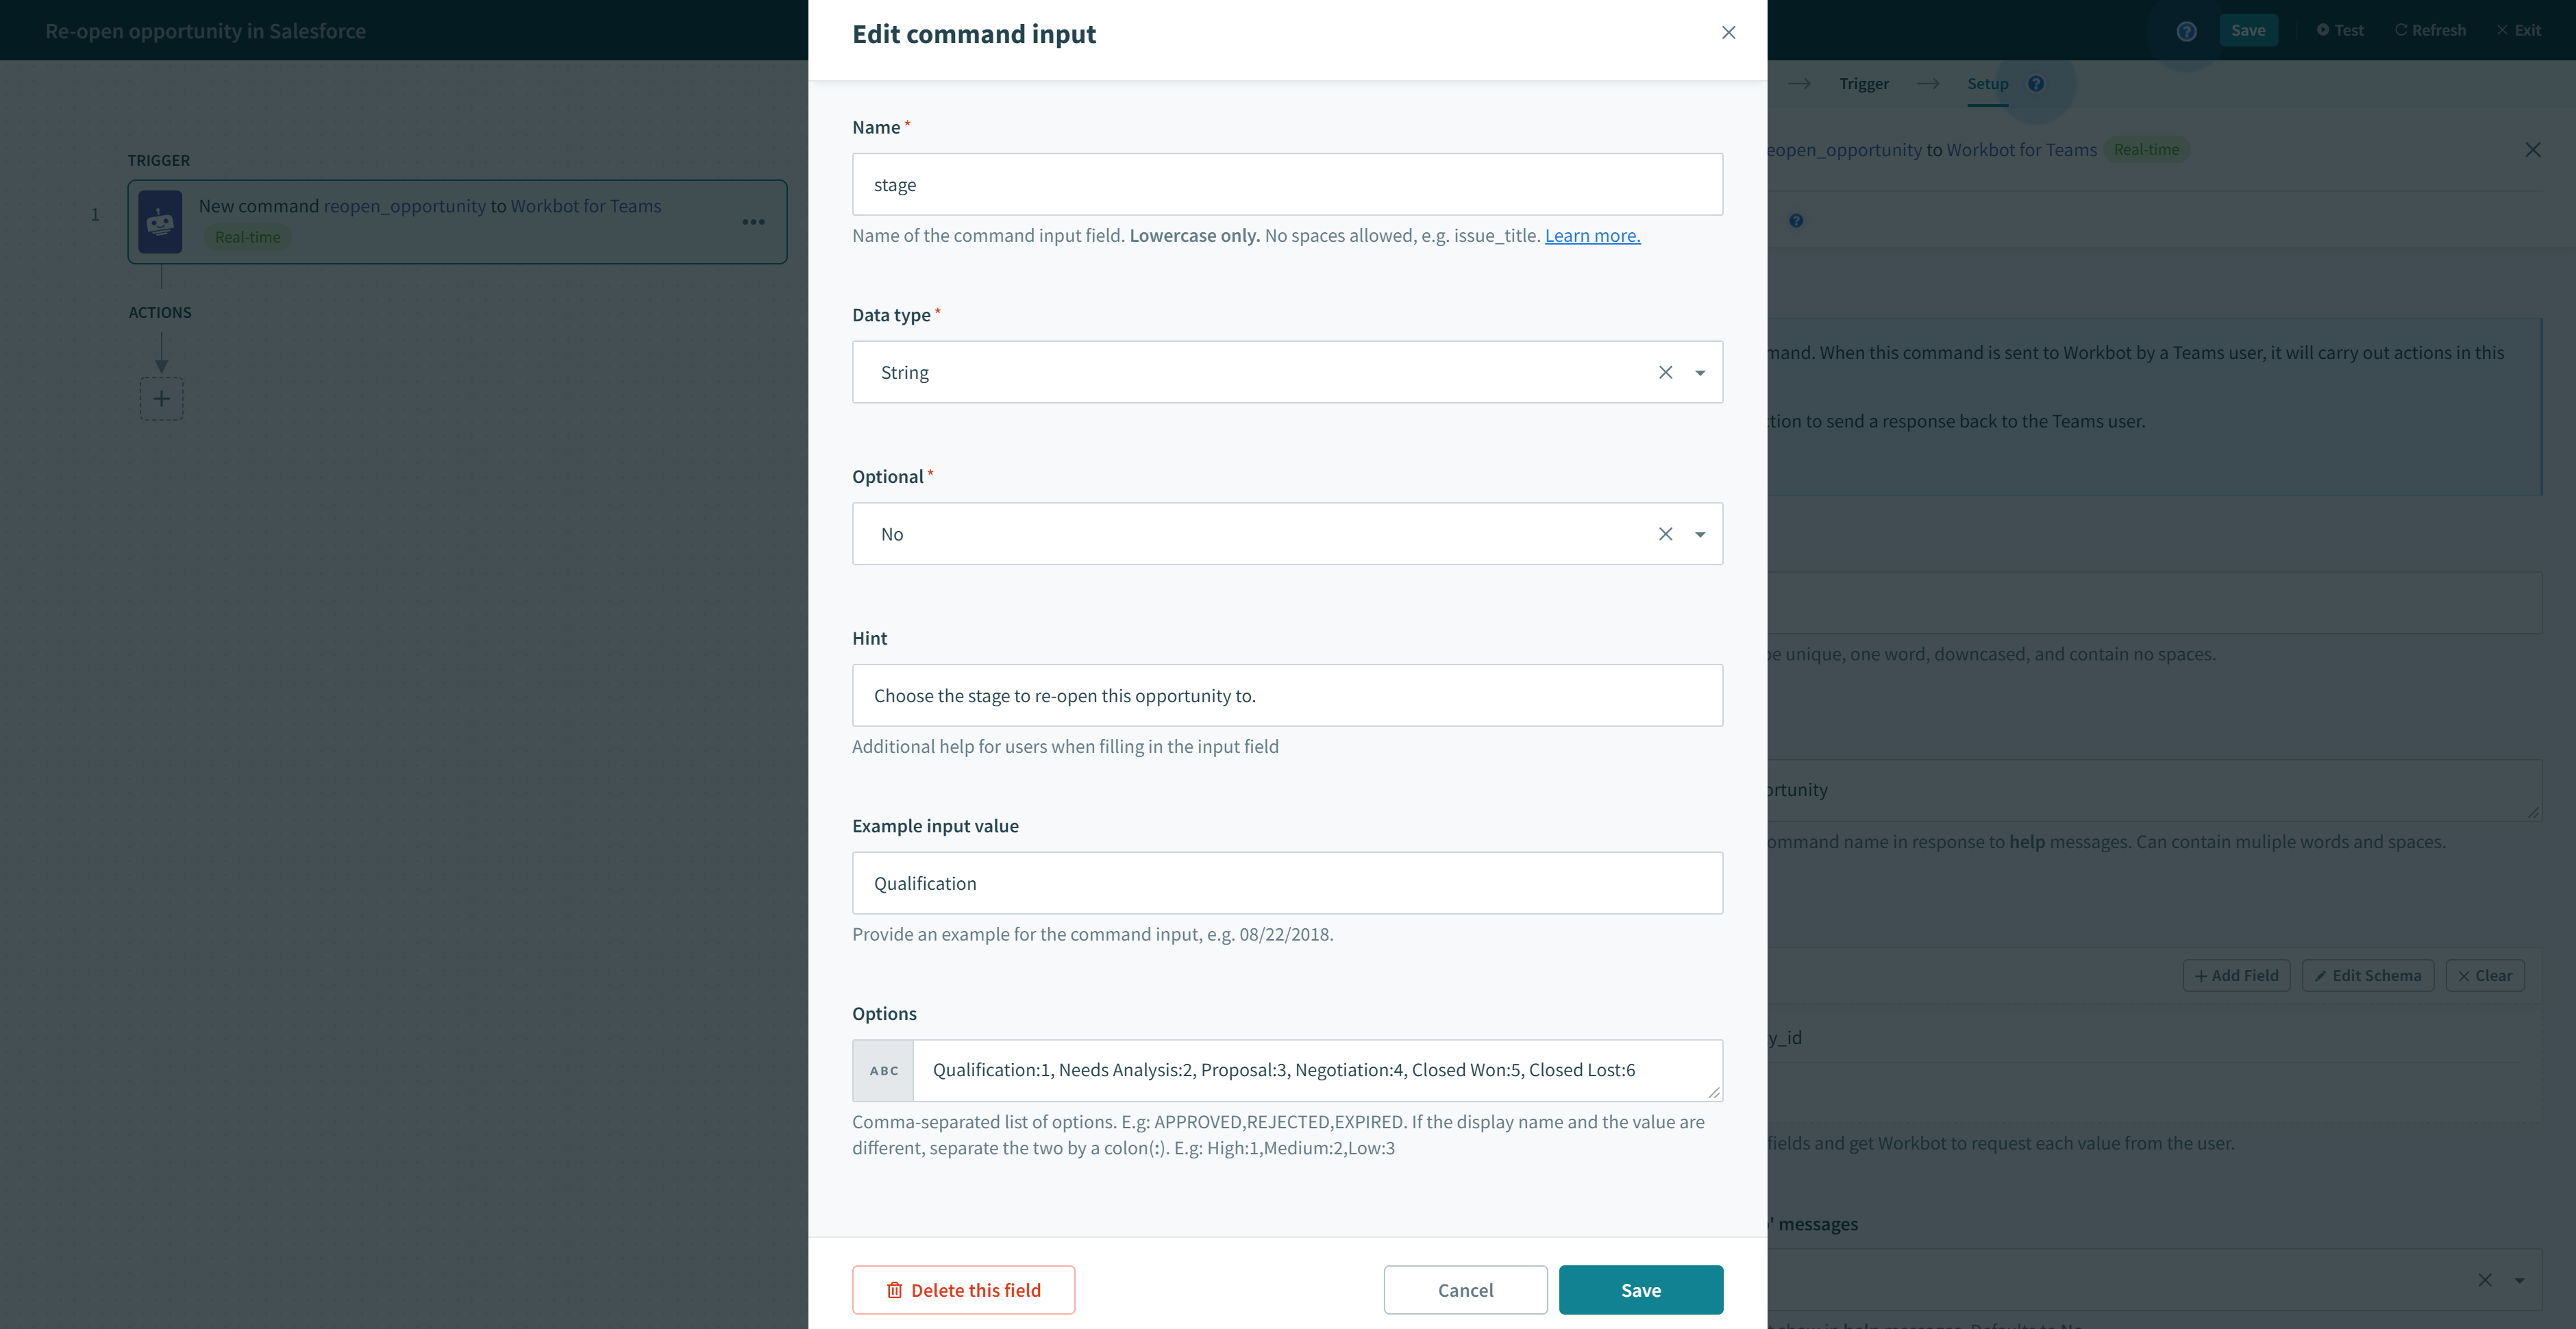 Options where display name and value are different
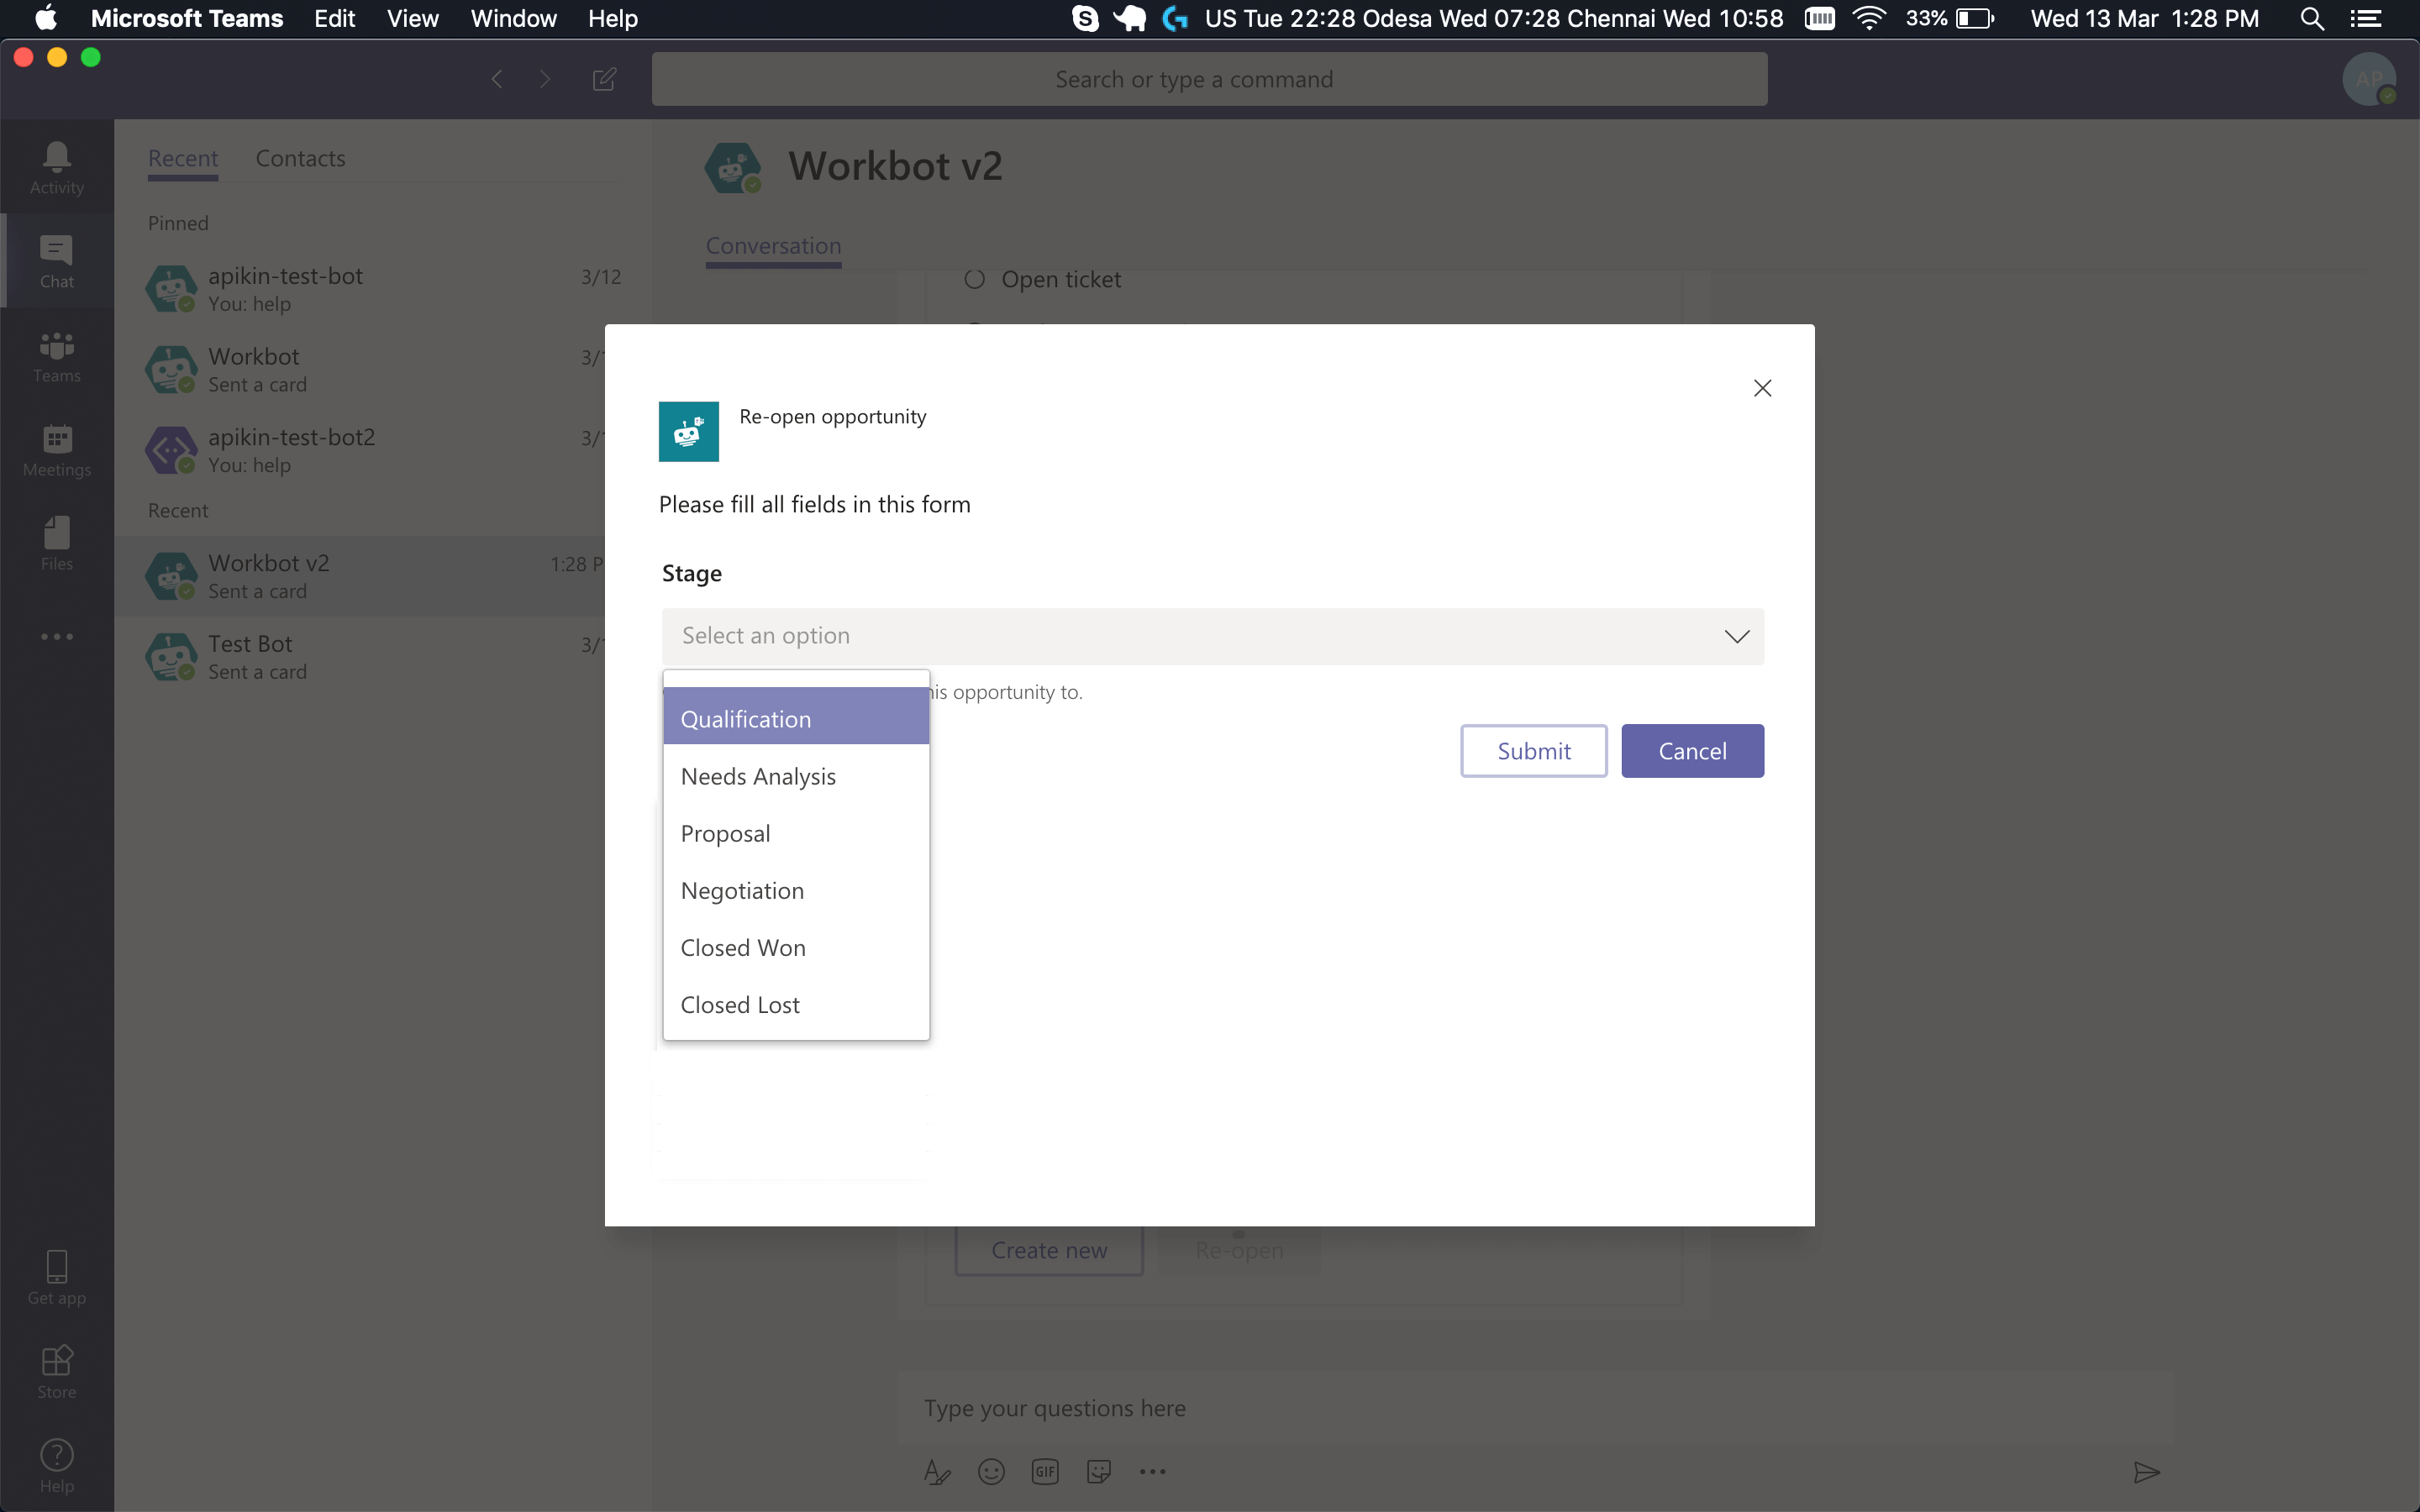 Options displayed in a picklist in task module
# Dynamic buttons & fact sets
Buttons and fact sets can also be generated dynamically using a list datapill (for more information on lists, see the list management guide)
From the button (or fact set) fields, select the horizontal ellipsis on the top-right and choose 'Dynamic List'. This should bring up the dynamic list option.
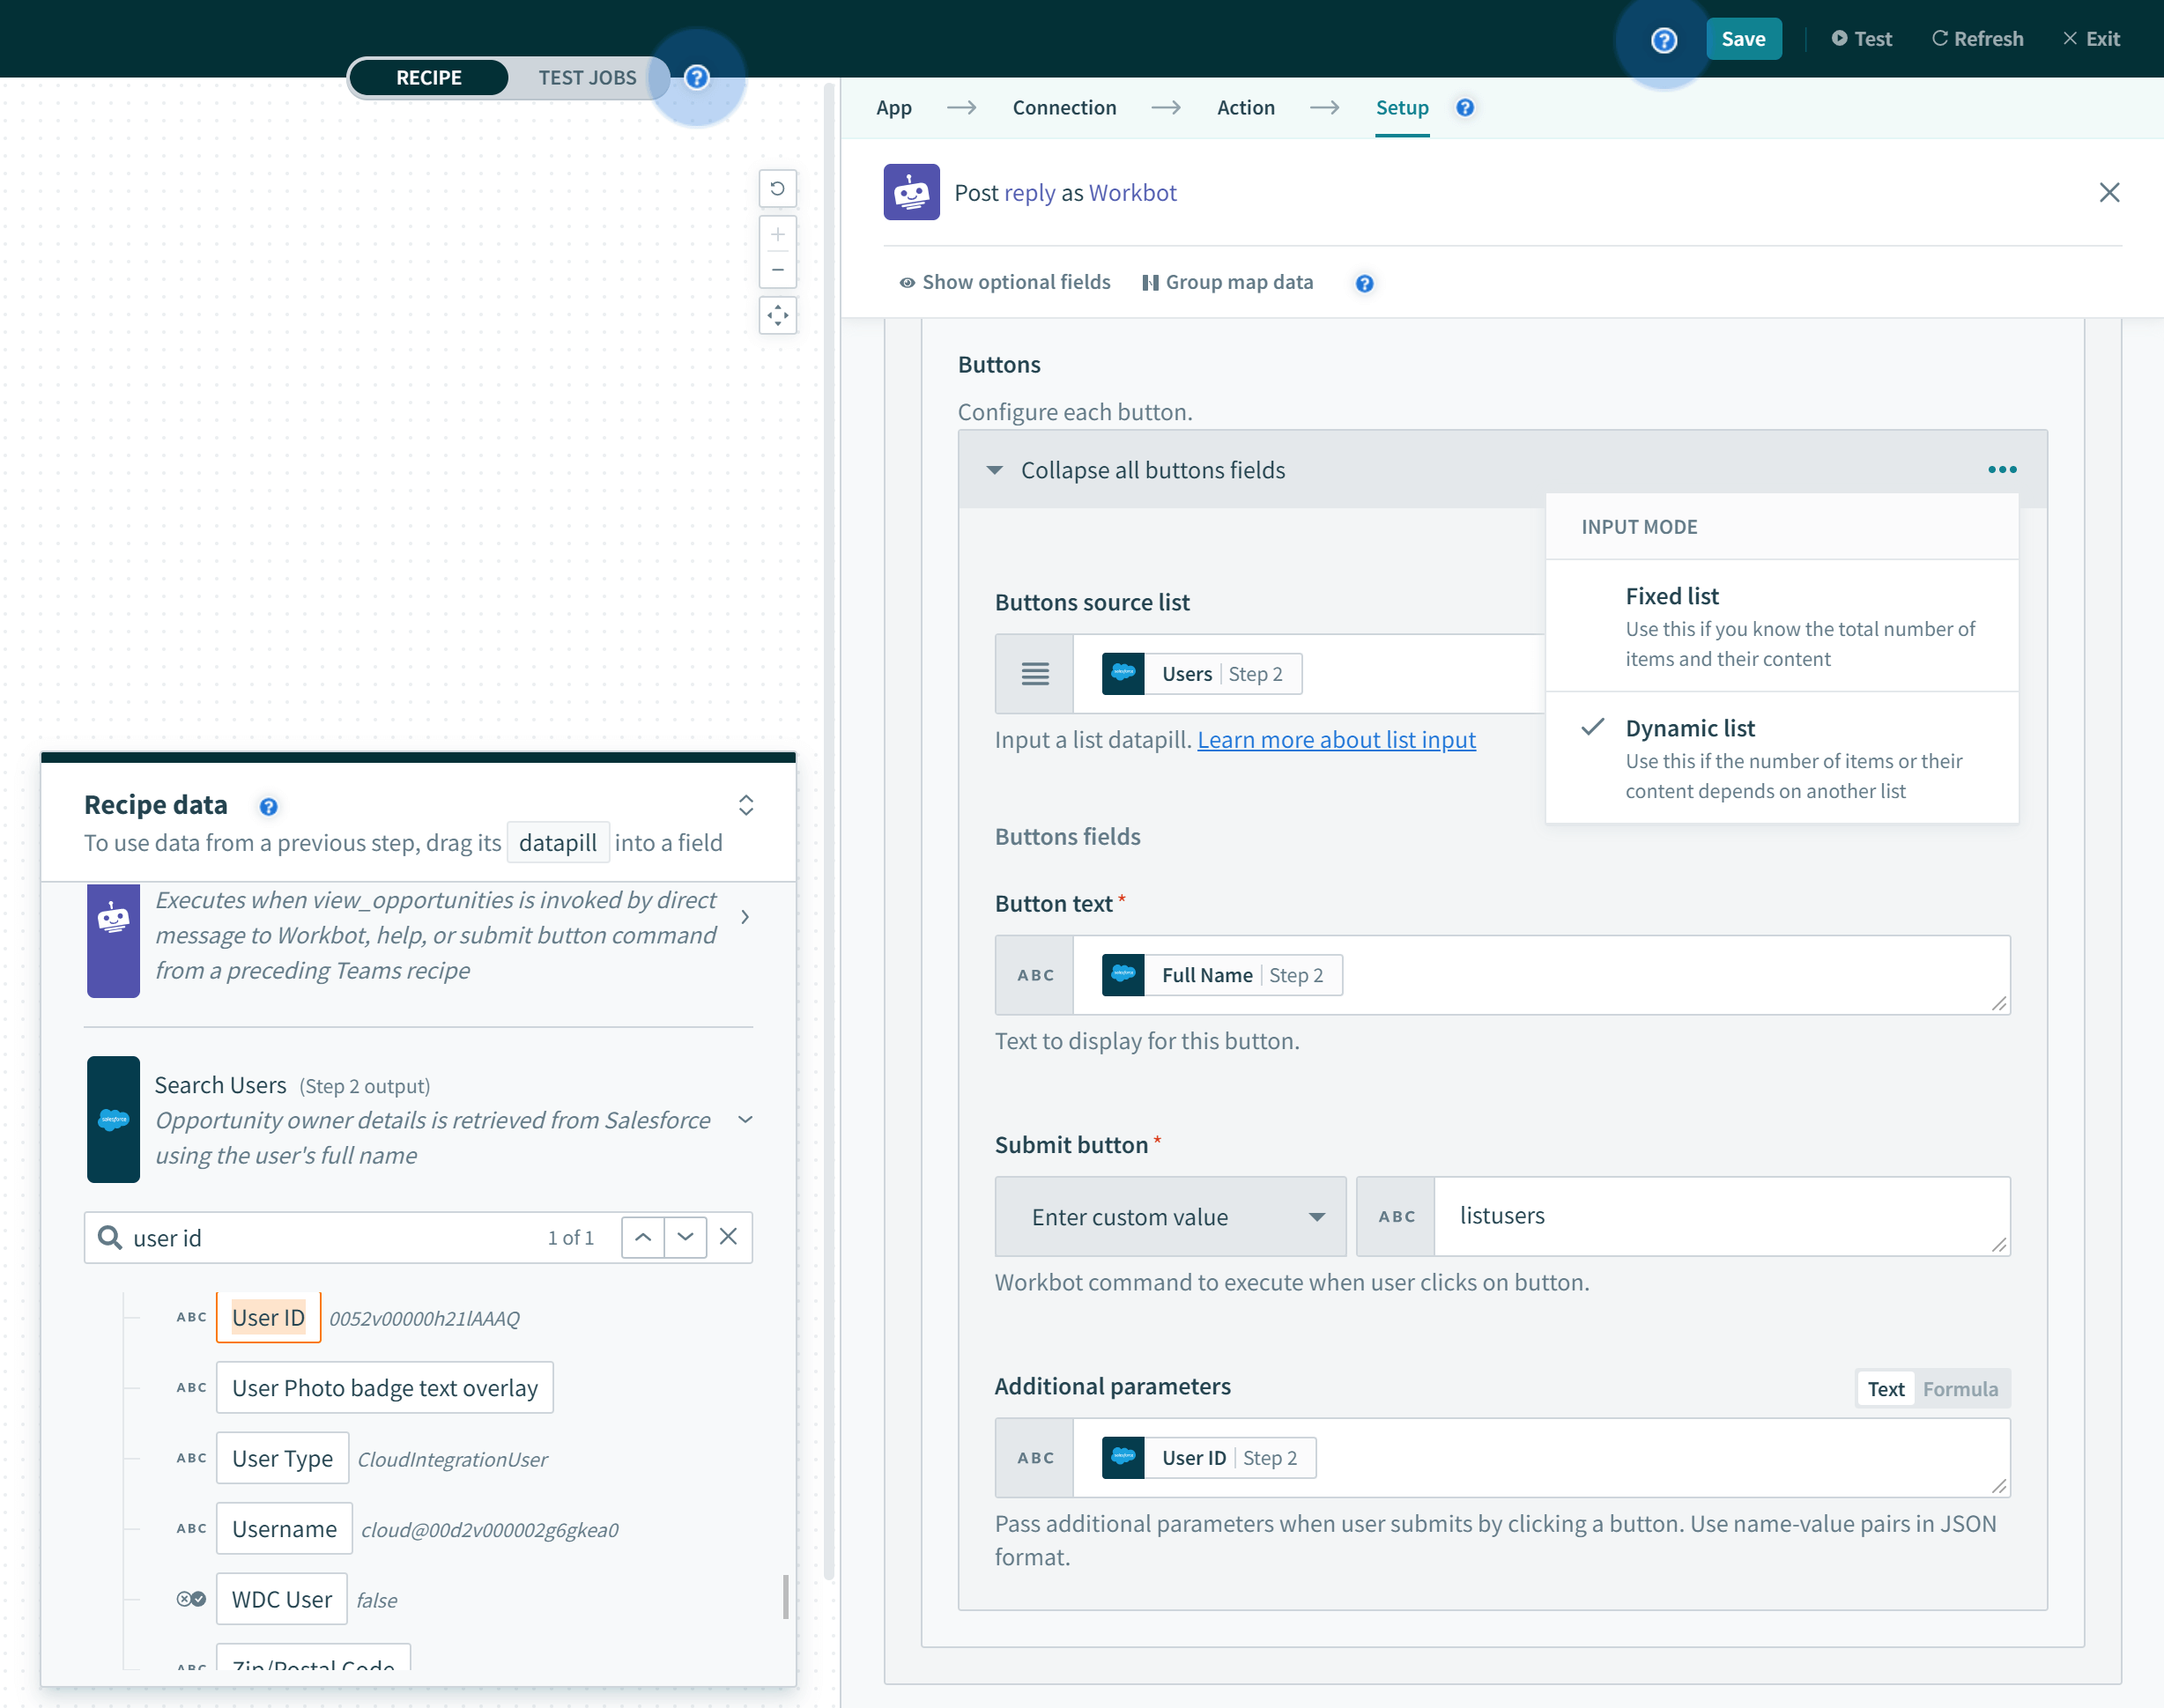
The following table shows what goes into the dynamic buttons fields:
| Input field | Value | Description |
|---|---|---|
| Button source list | Input a list datapill, for example, Users . |
List datapills have a list icon next to them in the datatree, for example, Salesforce users: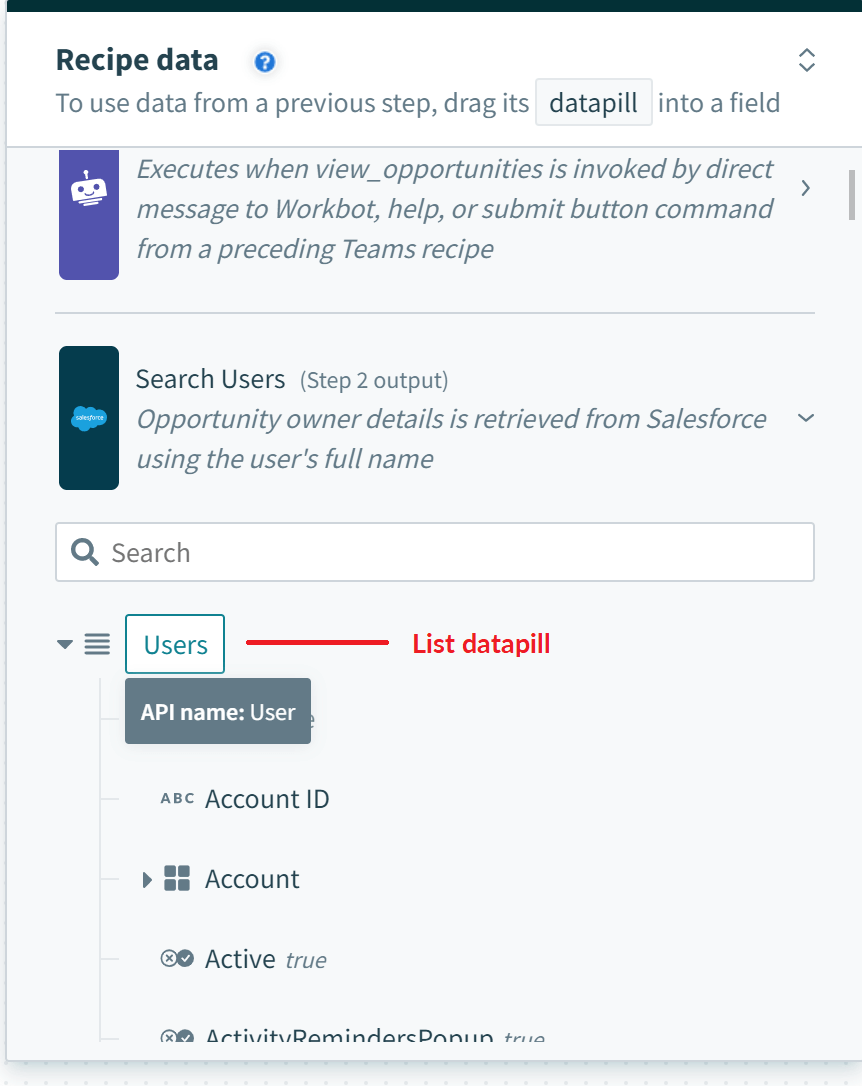 |
| Title | Button title for example, Assign users |
The title of the button to be displayed. Typically, you want to use datapills from the list datapill, for example, Salesforce user name , a datapill from the Salesforce users list:
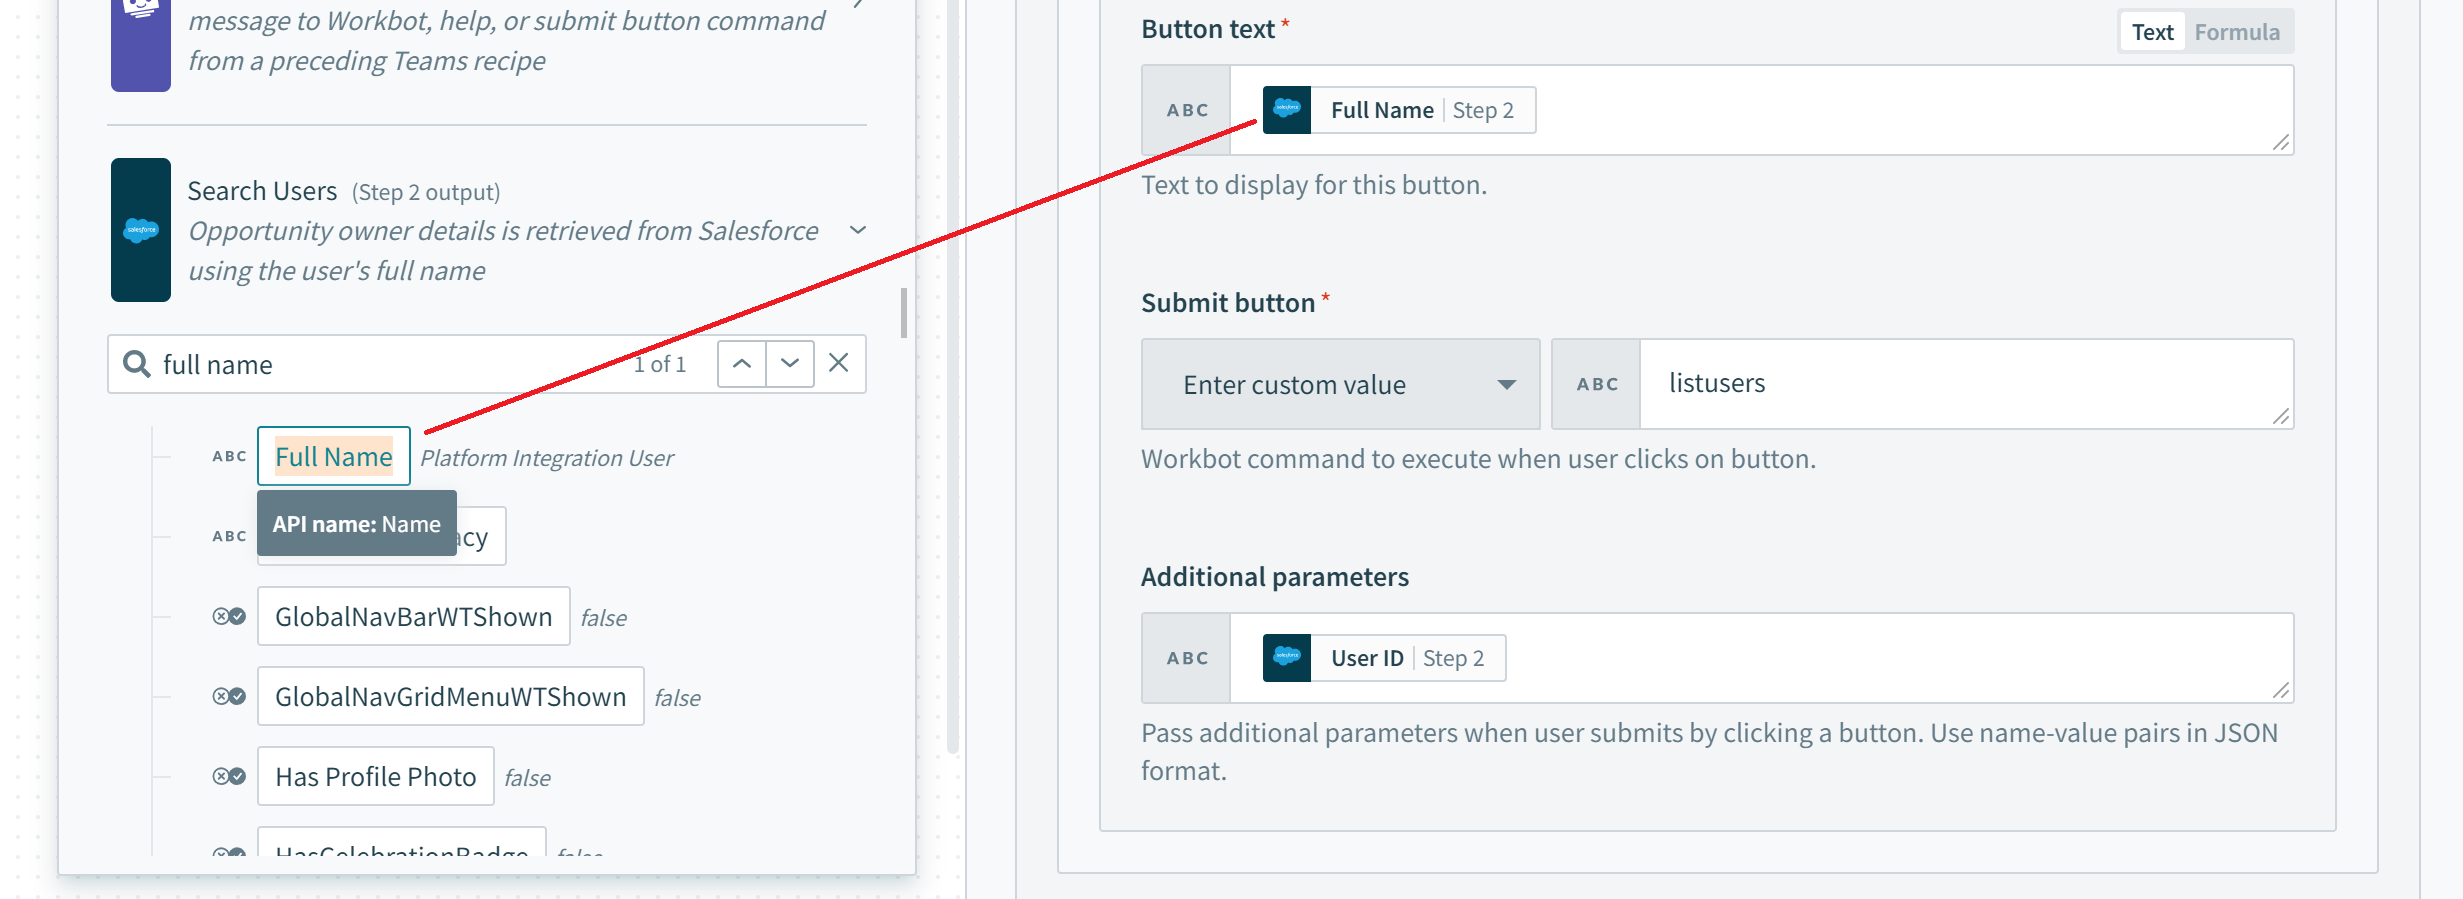 |
| Submit button command |
Workbot command to execute when button is clicked, for example,
assign_user | Choose from a list of existing Workbot command recipes or key in a new command. Clicking on this button will trigger the recipe with the corresponding command trigger. |
| Additional parameters |
Pass additional parameters when user submits by clicking a button. Format should be JSON with name-value pairs, for example,{ | Key in name-value pairs to pass onto the next recipe as additional parameters. |
# Learn more
Last updated: 1/9/2026, 11:39:57 PM