Create an API recipe
This guide explains how to create an API recipe. External business partners and internal stakeholders can use this endpoint to access and consume data without requiring access to a Workato account.
PREREQUISITES
You must have the following prerequisites to create an API recipe:
- Access to the API platform feature. The API Platform feature is available to customers on specific pricing plans. Refer to your pricing plan and contract to learn more.
- Create privileges for API collections and endpoints and recipes.
Refer to the Add users to Google Workspace use case for steps to create an integration for Workato API platform and Google Workspace that enables you to add users to your Google Workspace with your preferred CLI or when a new employee is detected in BambooHR.
Supported data types
You use the Content type drop-down menu to configure the data format the connector accepts. API recipes support the following options:
- JSON: Accepts data in JavaScript Object Notation format. Use this for most REST APIs and structured payloads.
- Text/XML: Accepts raw content such as XML, SOAP, CSV, and YAML. Use this to handle non-JSON formats or plain text payloads.
- Multipart: Accepts requests in multiple parts. Use this for requests that include mixed data.
Refer to the Parse the request body section for additional data processing information.
Create the recipe
Complete the following steps to create an API recipe:
TROUBLESHOOTING
We recommend building recipes in small steps and frequently saving and testing your recipe to make it easier to troubleshoot any issues you encounter.
Sign in to Workato.
Select the project where you plan to create the recipe.
Click Create > Recipe or press C+R.
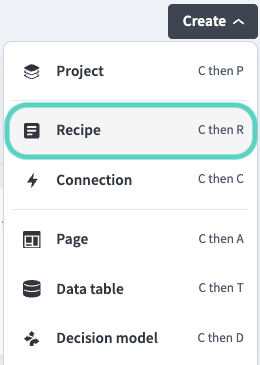 Create a new recipe
Enter a name for your recipe in the Name field.
Use the Location drop-down menu to select the project where you plan to store the recipe.
Click Start building.
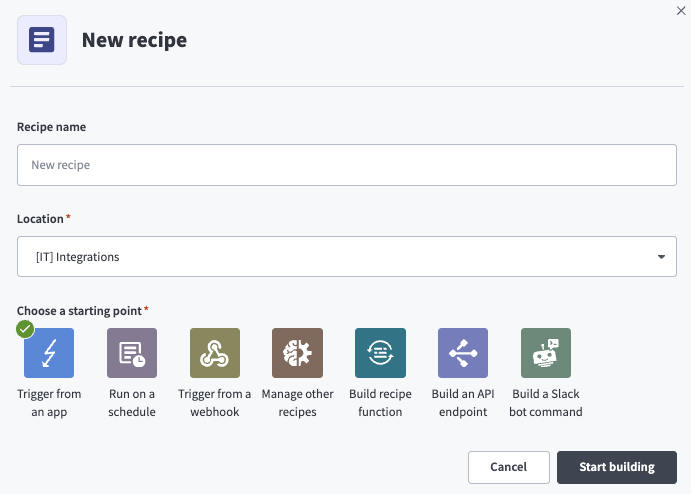 Start building your recipe
Click Pick a starting point > Build an API endpoint. Workato automatically creates a New API request trigger.
Select the New API request trigger.
Set up the endpoint request structure.
Go to the trigger's Request section.
Use the Content type drop-down menu to select the type of data for the endpoint to accept. For example, selecting application/json means the endpoint accepts valid JSON data.
Optional. Use the Request header section to define parameters to accept in request headers.
Optional. Use the Path parameters section to define parameters to accept in the endpoint path for JSON and Text/XML requests. You can either upload a sample JSON file or enter the fields manually.
Use the Request schema section to define the schema of request bodies for JSON and Multipart requests. You can either upload a sample JSON file or enter the fields manually.
Step summary
This step defines the request structure for the endpoint using fields in the New API request trigger.
Set up the endpoint response structure.
Go to the trigger's Response section.
Use the Content type drop-down menu to select the type of data to send in the response.
Optional. Use the Response headers section to define parameters to send in response headers.
Go to the Responses section and select Add response.
Specify a name for the response in the Response #1 section.
Use the HTTP status code drop-down menu to select a code for the response. Alternatively, you can toggle the input field from Standard response to Custom response and enter a custom HTTP status code from 2xx to 5xx.
Use the Responses section to define the schema of response bodies. You can either upload a sample JSON file or enter the fields manually.
You can create a nested schema response by dragging and dropping properties between parents, including the root. Alternatively, click the Edit schema button and provide the nested schema you plan to use.
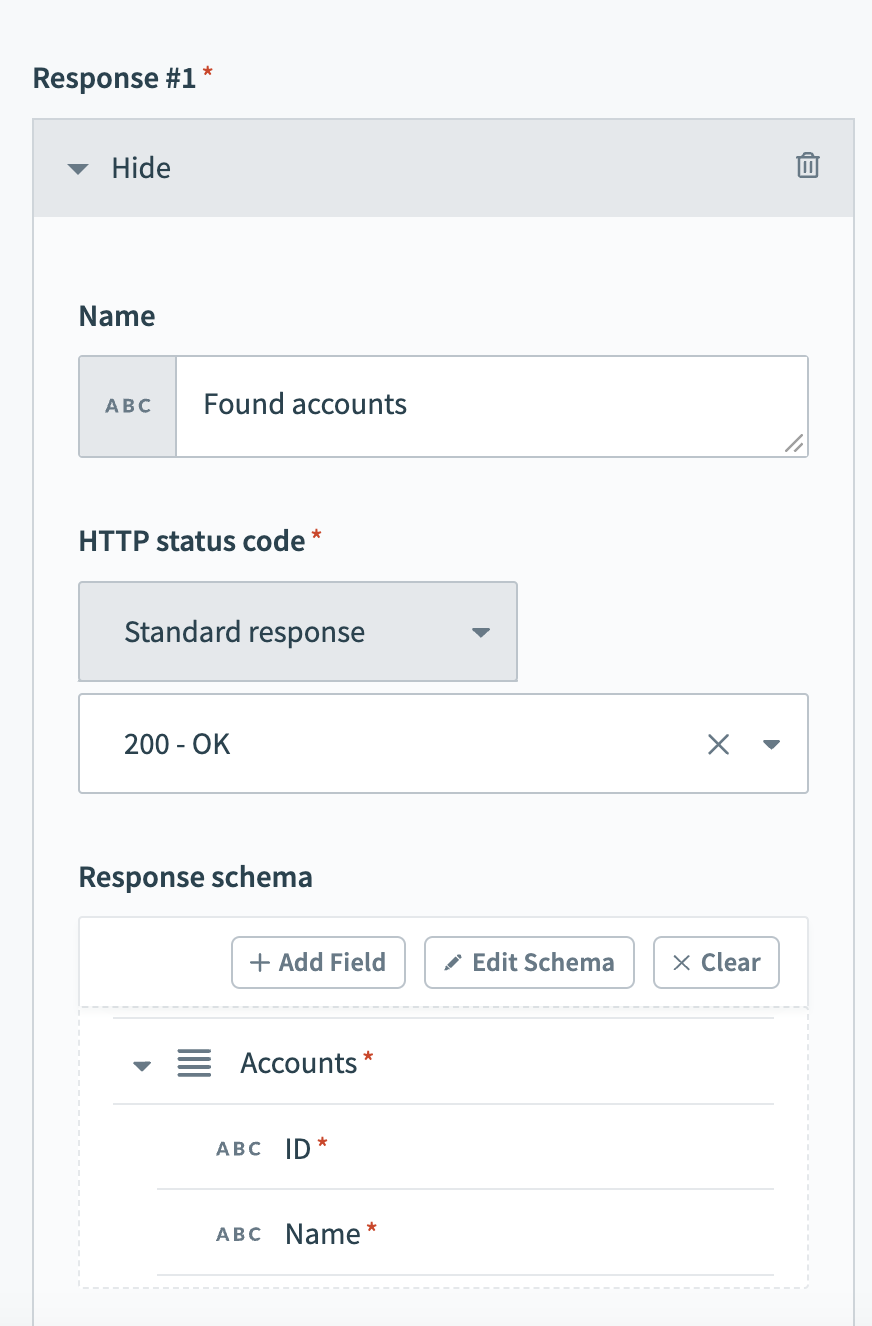 Response schema
[
  {
    "name": "Accounts",
    "type": "array",
    "of": "object",
    "label": "Accounts",
    "optional": false,
    "hint": "Found Salesforce accounts",
    "properties": [
      {
        "control_type": "text",
        "label": "ID",
        "name": "ID",
        "type": "string",
        "optional": false,
        "hint": "Account ID"
      },
      {
        "control_type": "text",
        "label": "Name",
        "name": "Name",
        "type": "string",
        "optional": false,
        "hint": "Account name"
      }
    ]
  }
]
Step summary
This step defines the response structure for the endpoint using fields in the New API request trigger.
Click + Add step, then select Handle errors.
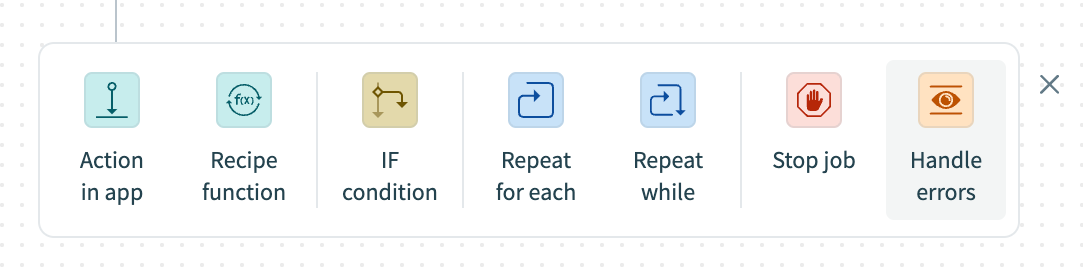 Add an error handling step
MCP SERVERS
The Handle errors control statement isn't required if you plan to use your API endpoints with an MCP server. Refer to the MCP local servers documentation for information about how MCP servers connect to the API platform or the MCP use cases section for a step-by-step guide on how to create and use API endpoints with an MCP server.
How does the Handle errors control statement work?
The Handle errors control statement allows you to monitor your recipe for errors in actions, similar to the try/catch concept in programming languages. You have the opportunity to perform the following actions if an error occurs:
Retry the sequence of actions again, in case it was a temporary error such as network issues.
Take remedial actions, such as notifying users of the error through email or error messages in the app, or to carry out a rollback. For example, you can reverse the job by deleting any created or half-created records.
This control statement consists of two blocks: the Monitor block and the Error block. Place the actions that you plan to monitor for errors within the Monitor block. If all actions are successful, Workato ignores the Error block. However, if any action in the Monitor block results in an error, the actions within the Error block are executed.
Set up the Monitor block.
Add the actions you plan to expose through the API endpoint inside the Monitor actions for error block. Refer to the connector documentation for an app for specific connection and configuration steps.
 Add actions to monitor for errors
Click + Add step > Action in app.
Search for and select API platform by Workato.
Use the Response drop-down menu to select the type of the response to send if the operation doesn't encounter errors. The options in this menu are determined by the responses defined in the recipe's New API request trigger.
You can use IF conditions to send differing responses based recipe data.
Use Response body section to configure the data to return in the response body if the recipe doesn't encounter errors. The structure of this section varies based on the schema defined in the New API request trigger.
Use Response headers section to configure the data to return in the response headers if the recipe doesn't encounter errors. The structure of this section varies based on the schema you defined in the New API request trigger.
Step summary
This step defines the recipe logic to expose through the API endpoint and the response data to send when the recipe doesn't encounter errors.
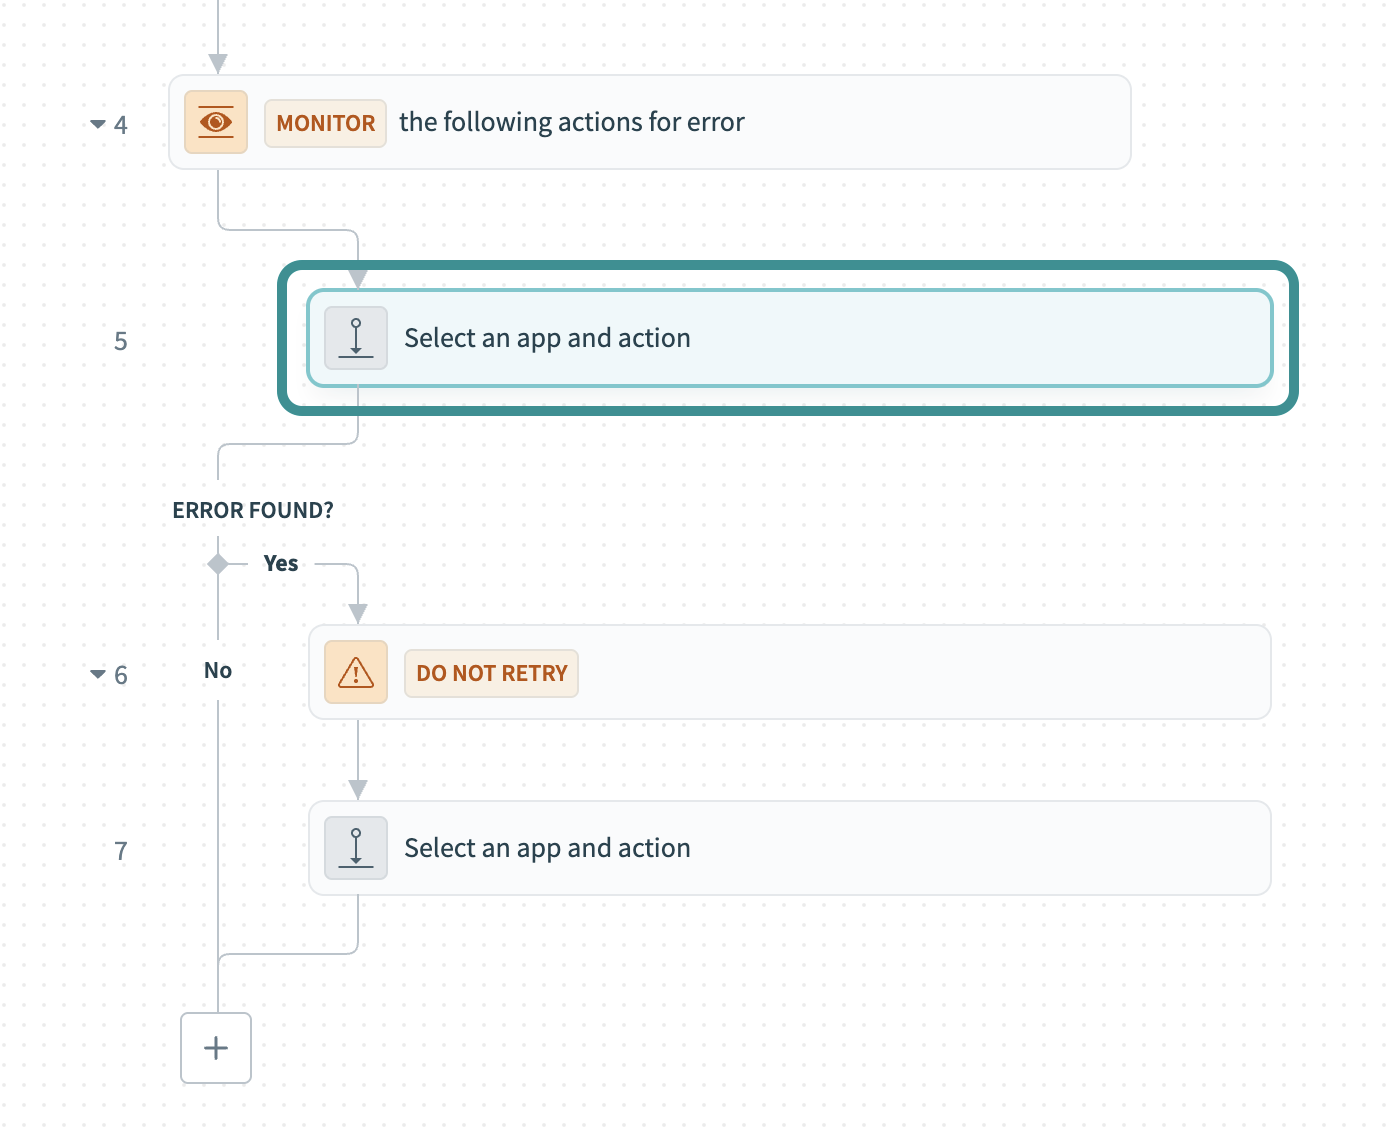
Set up the Error found? block.
Select Do not retry in the Error found? block.
Use the Retry actions in Monitor block? drop-down menu to select how many times to retry failed actions. Workato allows up to three retries.
Click Select an app and action.
Search for and select API platform by Workato.
Use the Response drop-down menu to select the type of the response to send if the operation encounters errors. The options in this menu are determined by the responses you defined in the recipe's New API request trigger.
You can use IF conditions to send differing responses based recipe data.
Use Response body section to configure the data to return in the response body if the recipe encounters errors. The structure of this section varies based on the schema you defined in the New API request trigger.
Use Response headers section to configure the data to return in the response headers if the recipe encounters errors. The structure of this section varies based on the schema you defined in the New API request trigger.
Step summary
This step defines retry attempt settings and the response data to send when the recipe encounters errors.
Your API recipe is ready to test and implement.
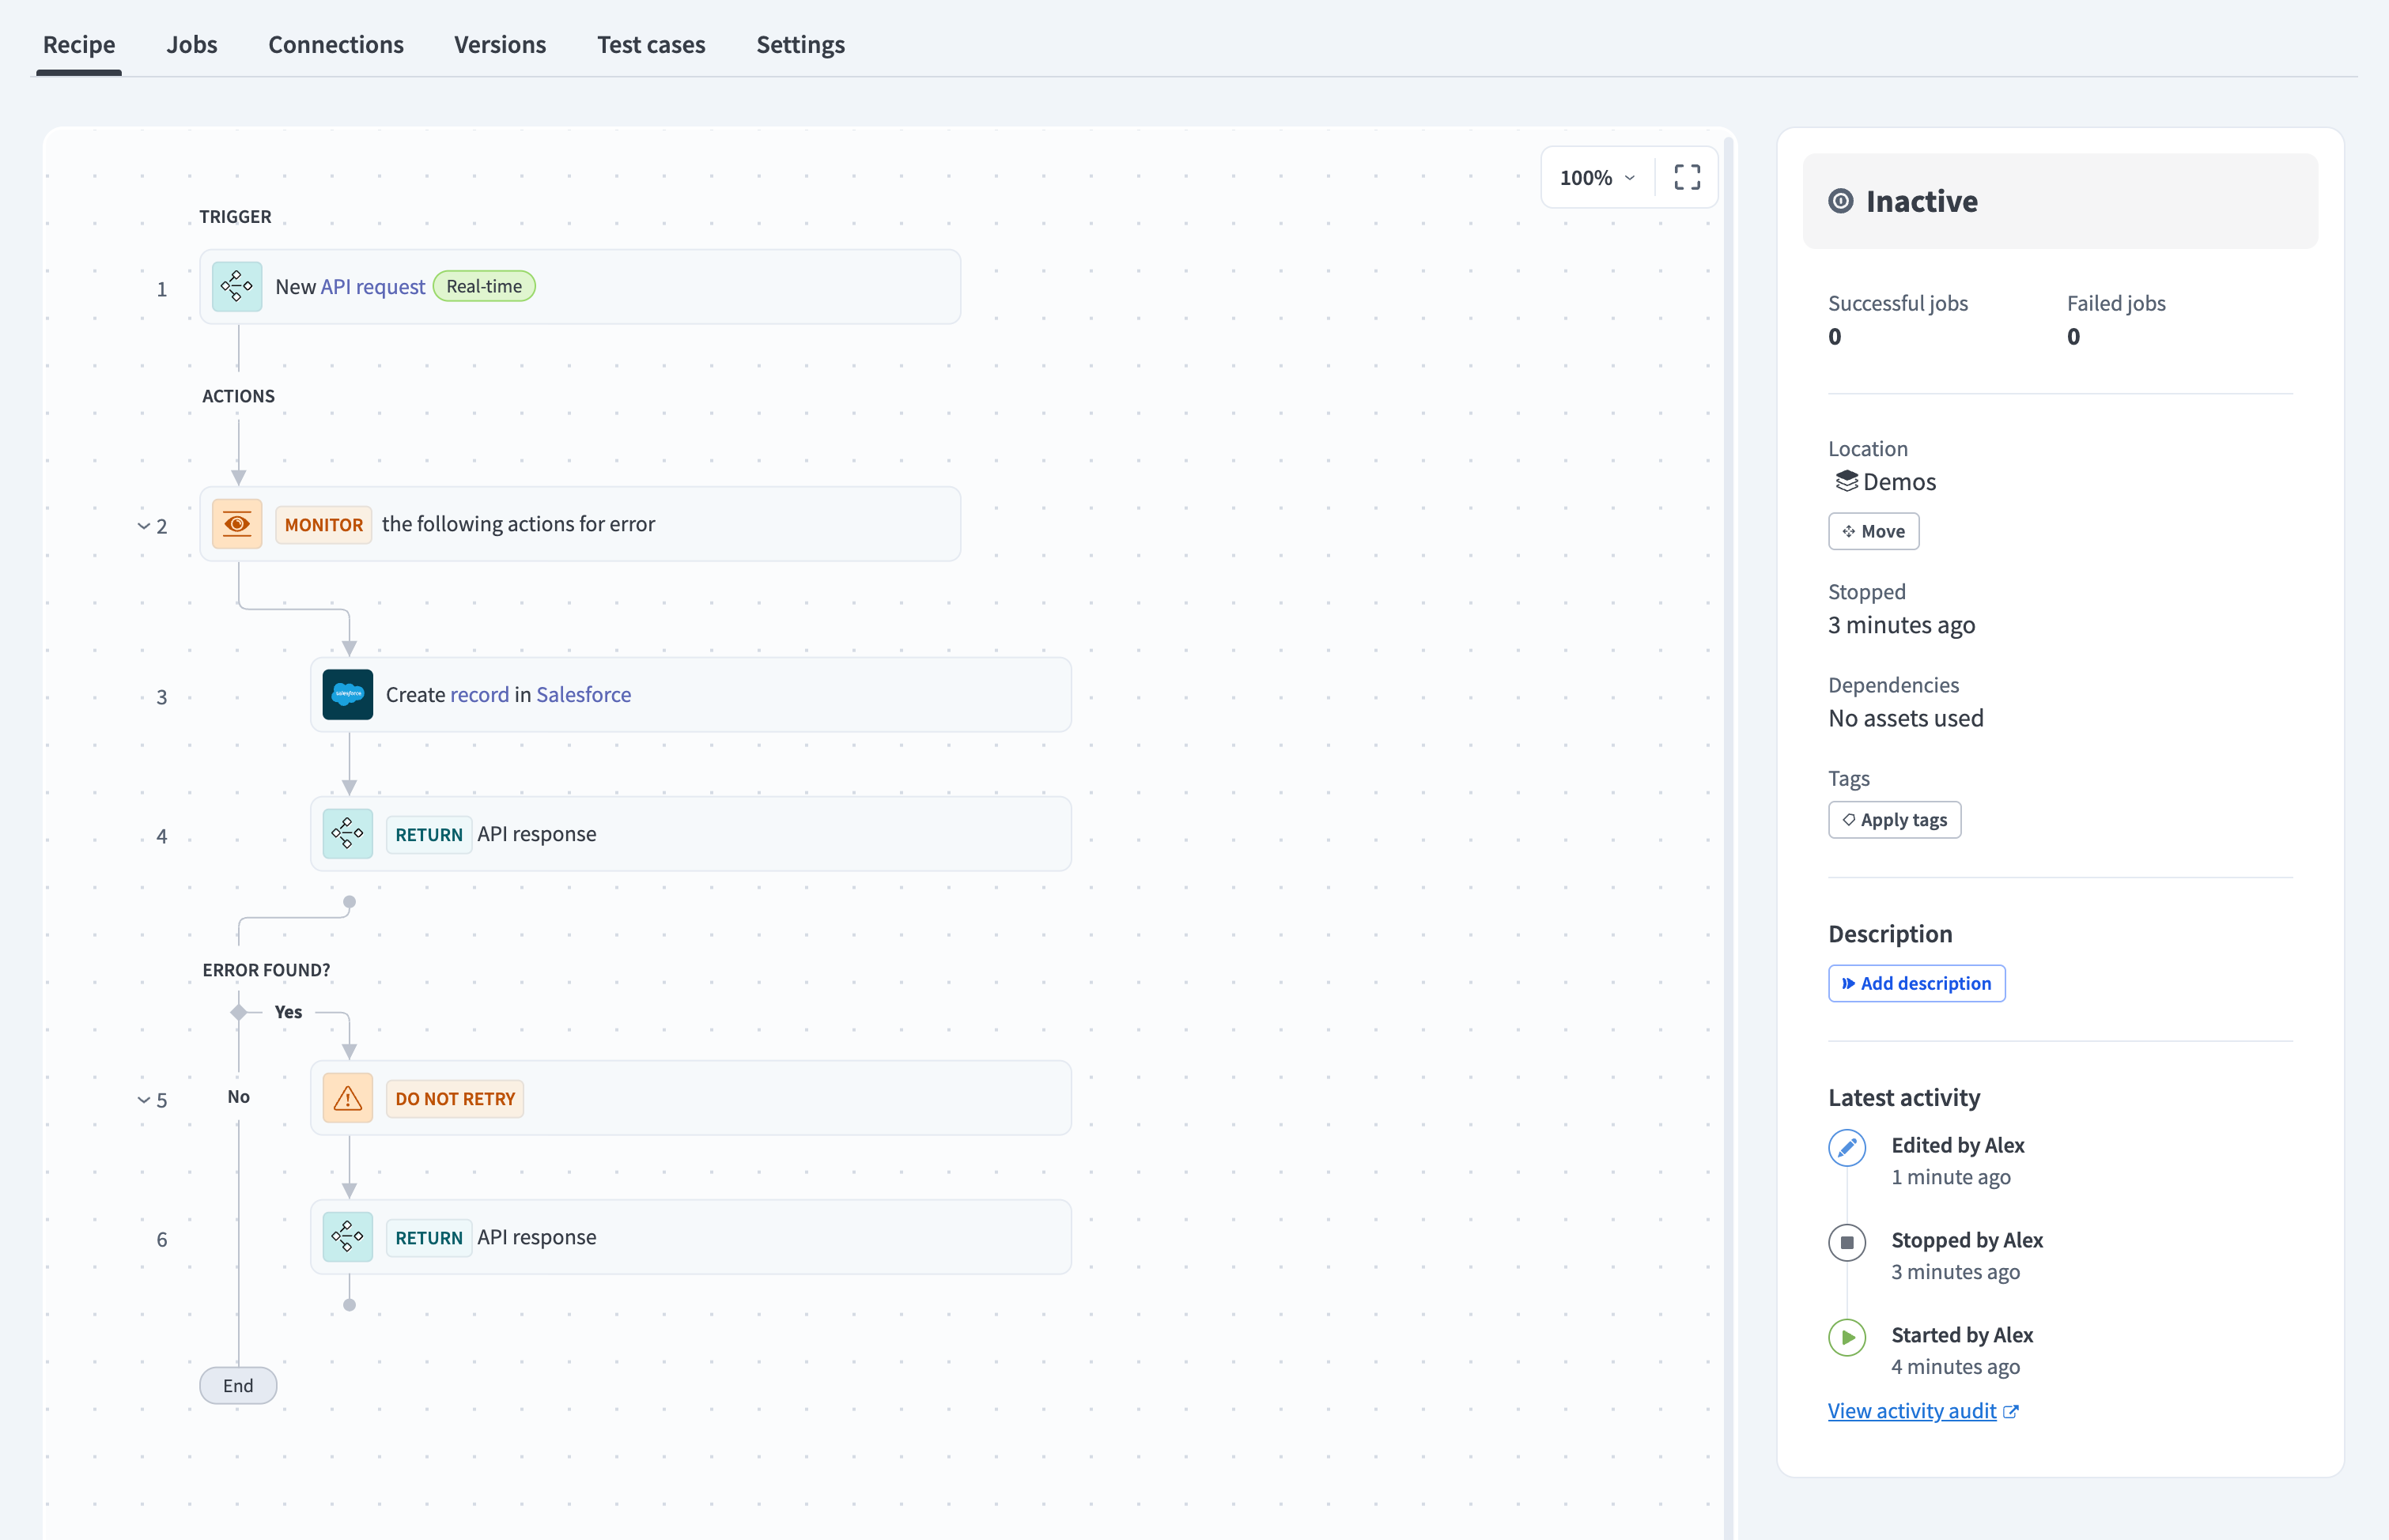 A configured API recipe
API PERFORMANCE
You can go to a recipe's Settings > Data retention tab and configure the Jobs data retention setting to disable log creation if your API recipes require reduced latency.
Refer to the Defining data retention for recipes guide for more information.
Parse the request body
Optionally, you can use Workato's data handling connectors to create datapills from data an endpoint receives.
Complete the following steps to parse a request body:
Click + Add step > Action in app.
Search for and select a data handling connector, for example: XML tools by Workato.
Select the connector's Parse document action, for example: Parse XML document.
Refer to the connector's documentation to configure connector-specific fields.
Enter a Sample document that defines the expected structure of the input. Workato uses this to generate the output schema.
Map the Request bodyStep 1 datapill from the New API request trigger's output to the Document field.
The data parsing step is complete. Workato generates datapills based on the structure defined in the Sample document field.
Expose an API endpoint
After you create the recipe, the next step is to expose the API recipe as an endpoint in the API platform. This allows you to test the endpoint before releasing it to production and ensure it behaves as expected.
Complete the following steps to expose the recipe as an endpoint:
Go to Platform > API platform > API collections.
Create a new API collection if you don't have an existing collection in your workspace.
Endpoint management
You can manage an API endpoint using the following tools:
API recipe collections organize endpoints into groups for distribution and version control.
API clients organize users into groups for API access management.
API keys provide secure authentication for API clients.
API access policies enforce rate limits and request limits for clients.
The RecipeOps connector enables you to build recipes to monitor and manage workspaces. For example, you can use the API concurrency threshold exceeded trigger to monitor the concurrency limit in a workspace.
Last updated: