# BambooHR
BambooHR (opens new window) is a HR software solution for collecting, maintaining, and analyzing your people data.
Review a BambooHR, QuickBooks Online, and Okta example recipe
Complete the following steps to create a recipe that monitors BambooHR for new employees. When activity is detected, it creates a new employee in QuickBooks Online and a new user in Okta.
This use case is intended to serve as an example. Recipe modifications such as trigger and action configuration and conditional logic may require adjustments if you plan to include this recipe in your own workflow.
Sign in to Workato.
Select the project where you plan to create the recipe.
Create connections for BambooHR, QuickBooks Online, and Okta.
Click Create > Recipe.
Enter a name for your recipe in the Name field.
Use the Location drop-down menu to select the project where you plan to store the recipe.
Click Start building.
Click Pick a starting point, then select Trigger from an app.
Click Select an app and trigger event.
Search for BambooHR and select it as your app.
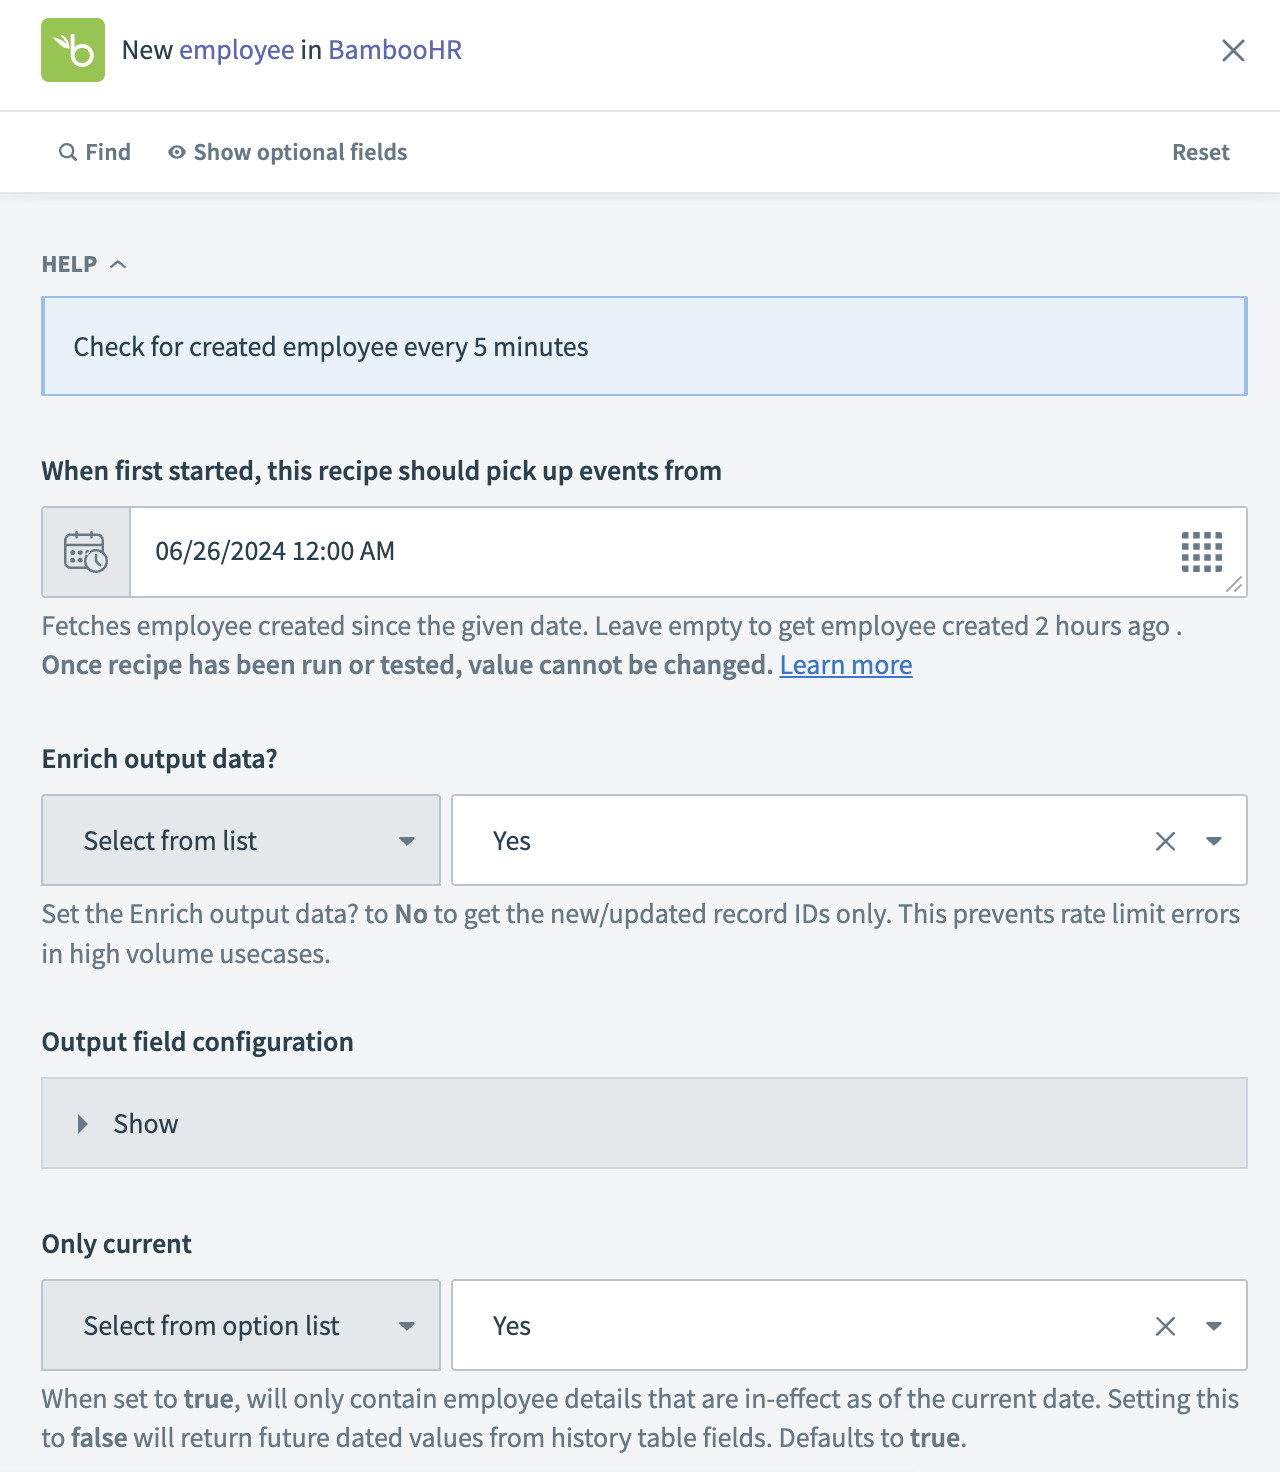
Select the New employee trigger.
 Select New employee as your trigger
Use the calendar modal to select the date from which your recipe should begin to monitor events in the When first started, this recipe should pick up events from field. The trigger checks for new events every five minutes by default. Leave this field empty to fetch events from the last hour. You can't change this value after you run or test the recipe.
Refer to Triggers to learn more about this input field.
 Set up your trigger
Click Save.
Click + Add step and select Action in app.
Search for QuickBooks Online and select it as your app.
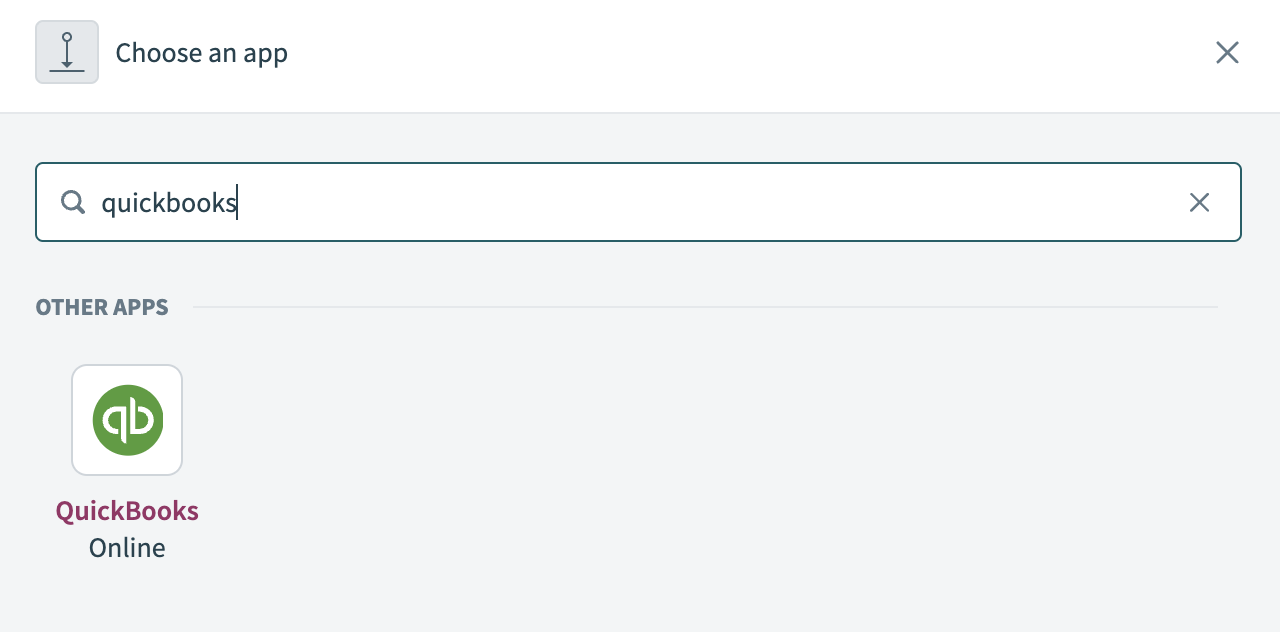 Choose QuickBooks Online as your app
Select Create employee as your action.
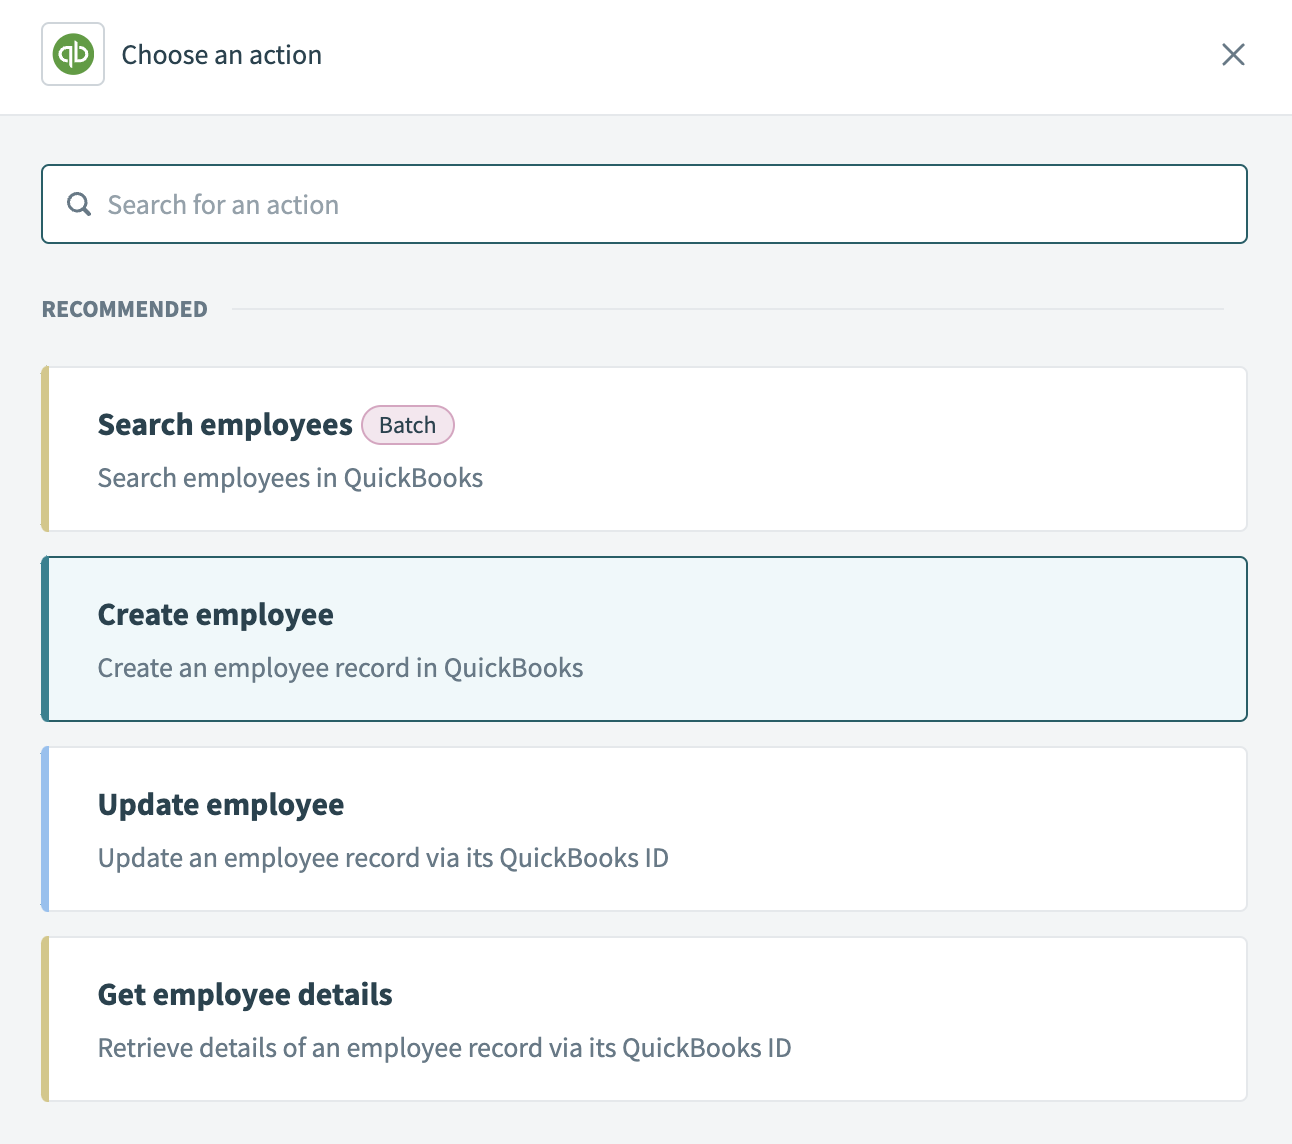 Select Create employee as your action
Map the BambooHR Mobile phone Step 1 datapill into the Phone field and the BambooHR Work email Step 1 datapill into the Email field.
 Map the datapills for your action
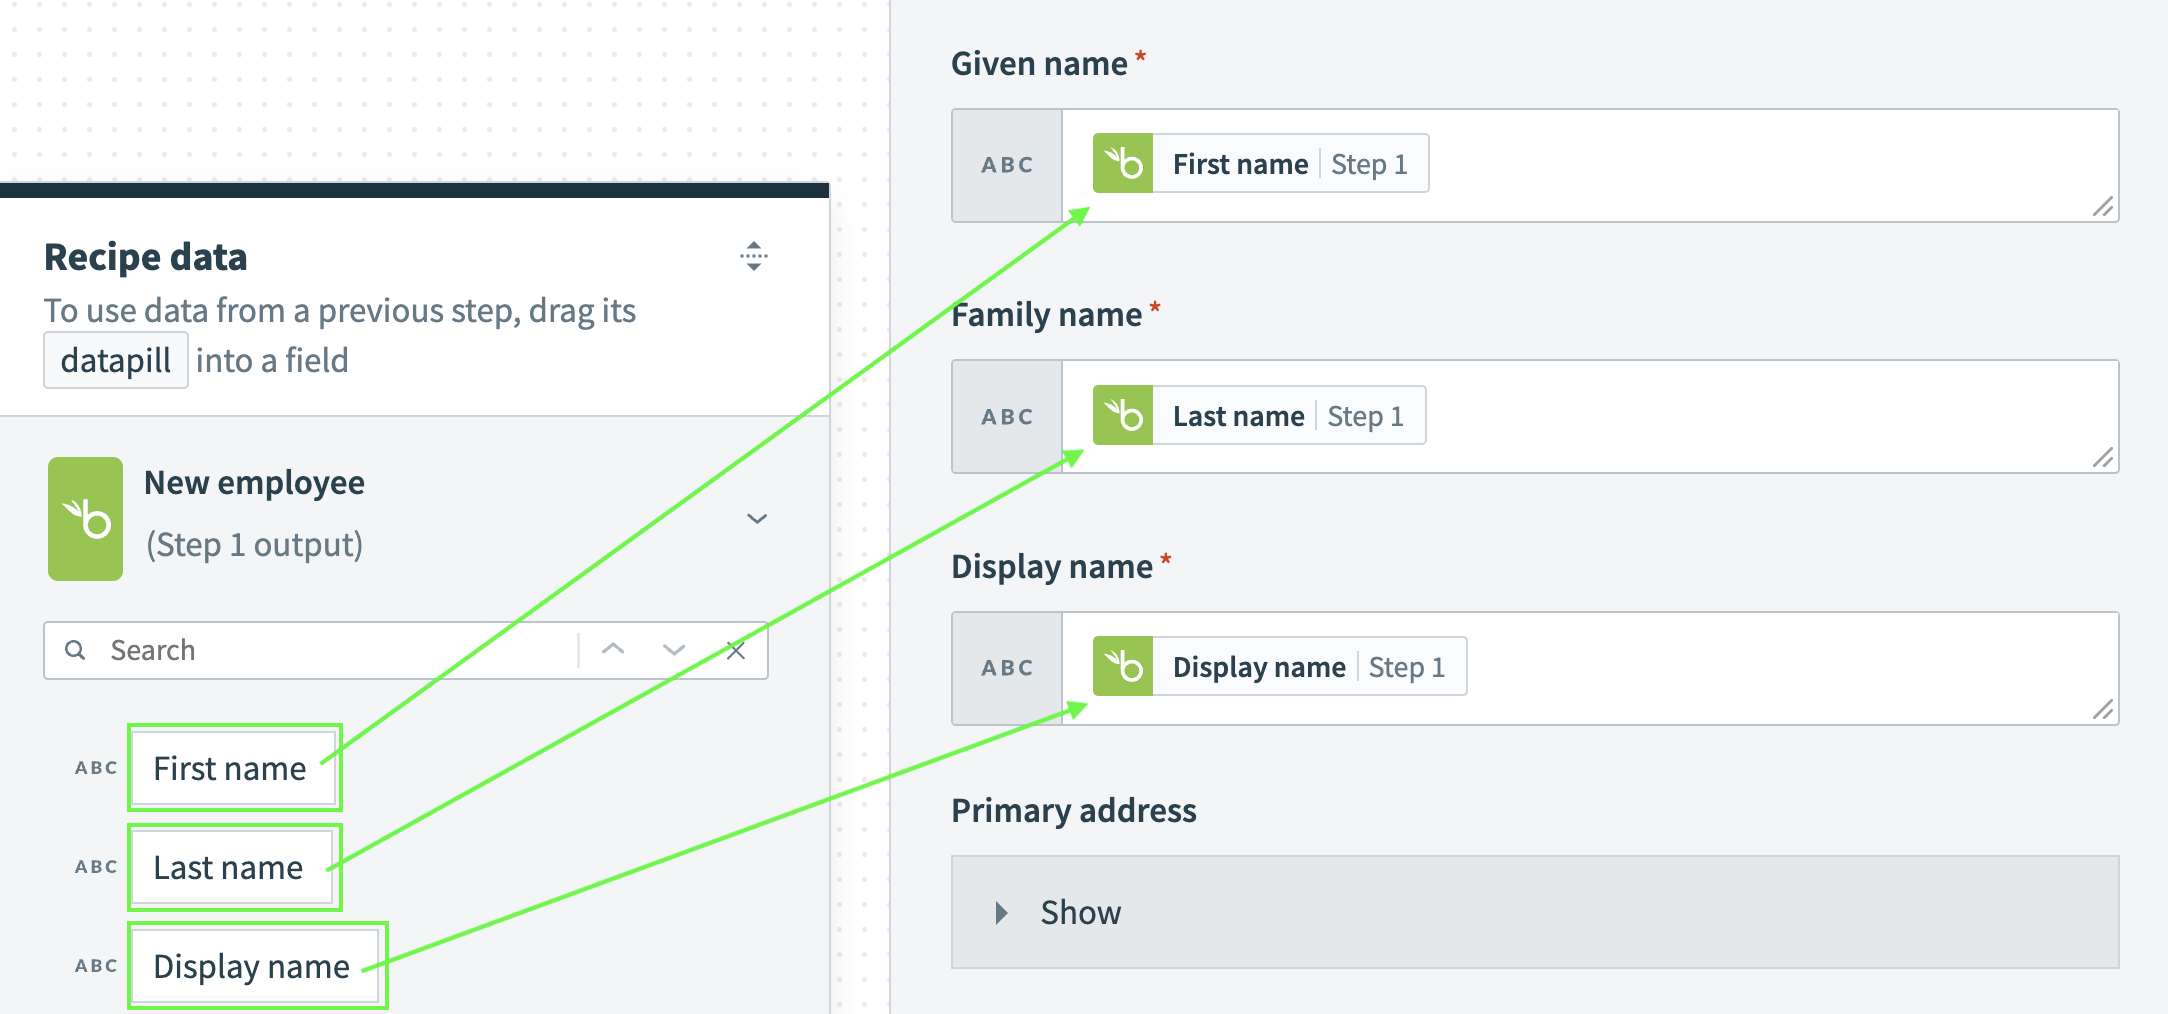
Map the BambooHR First name Step 1 datapill into the Given name field, map the BambooHR Last name Step 1 datapill into the Family name field, and then map the BambooHR Display name Step 1 datapill into the Display name field.
 Map the datapills for your action
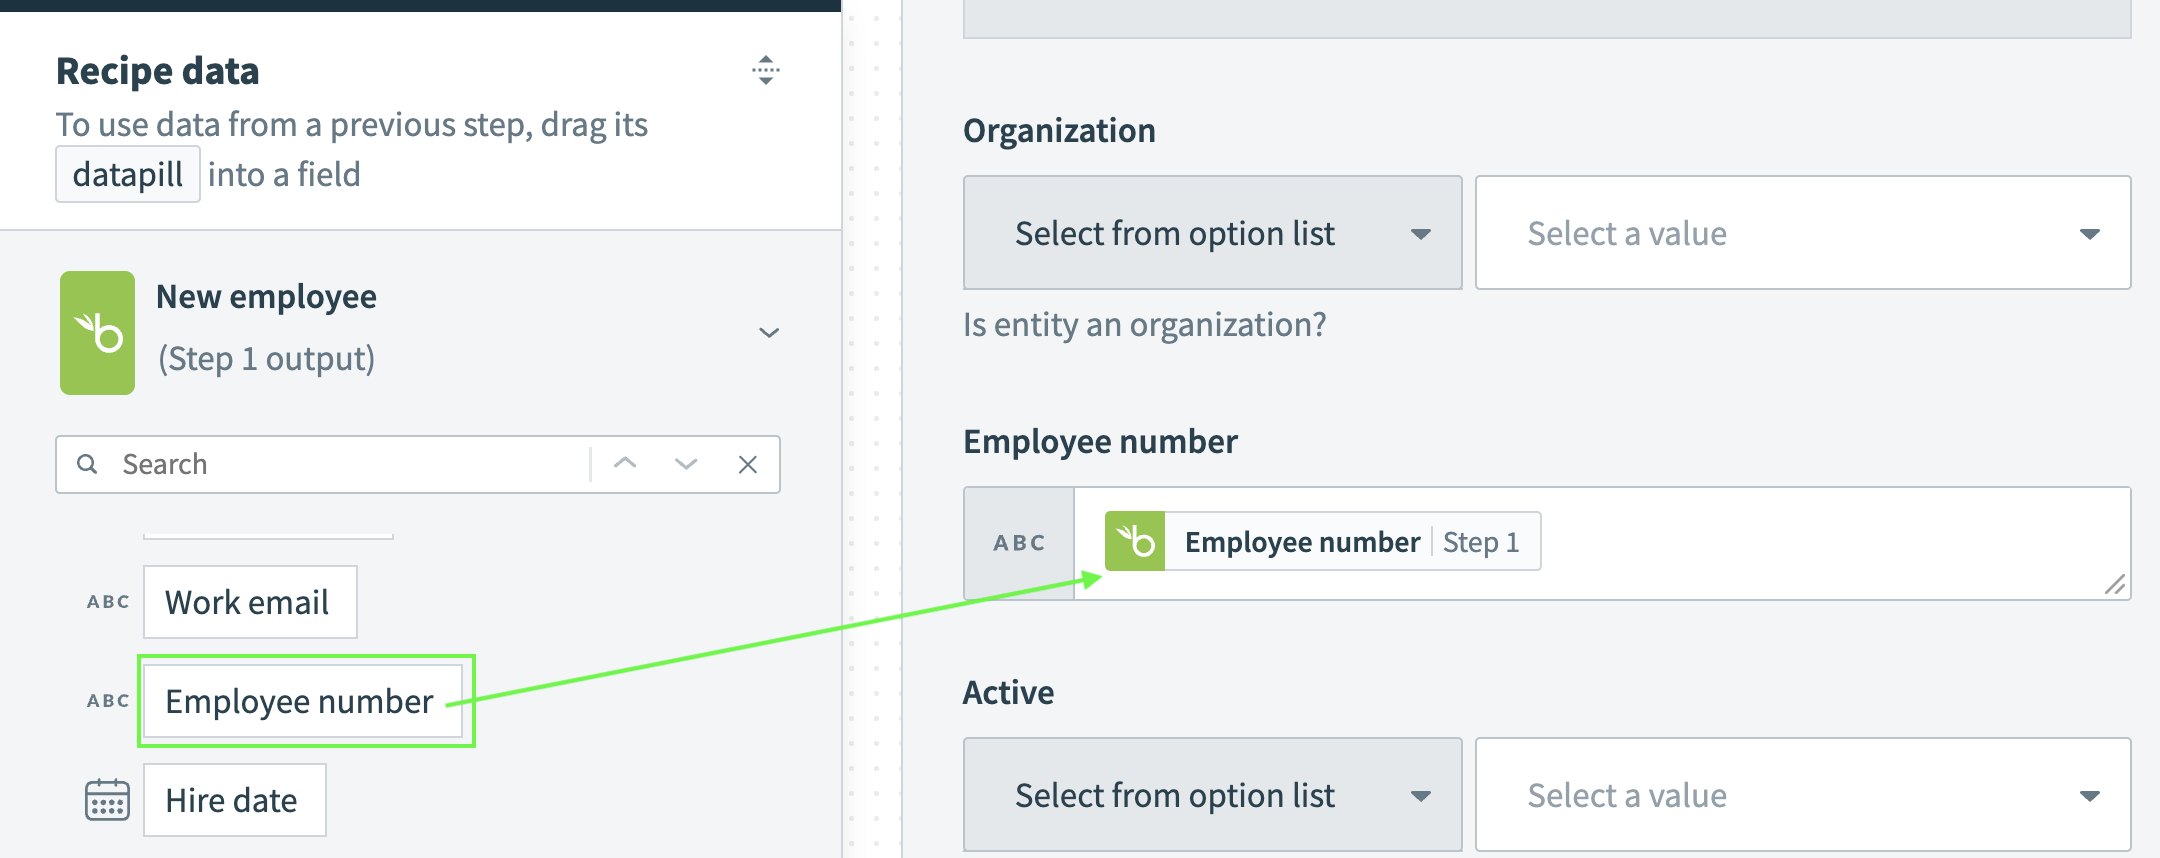
Map the BambooHR Employee number Step 1 datapill into the Employee number field.
 Map the Employee number datapill
Click Save.
Click + Add step and select Action in app.
Search for Okta and select it as your app.
Select the Create user action.
 Select Create user as your action
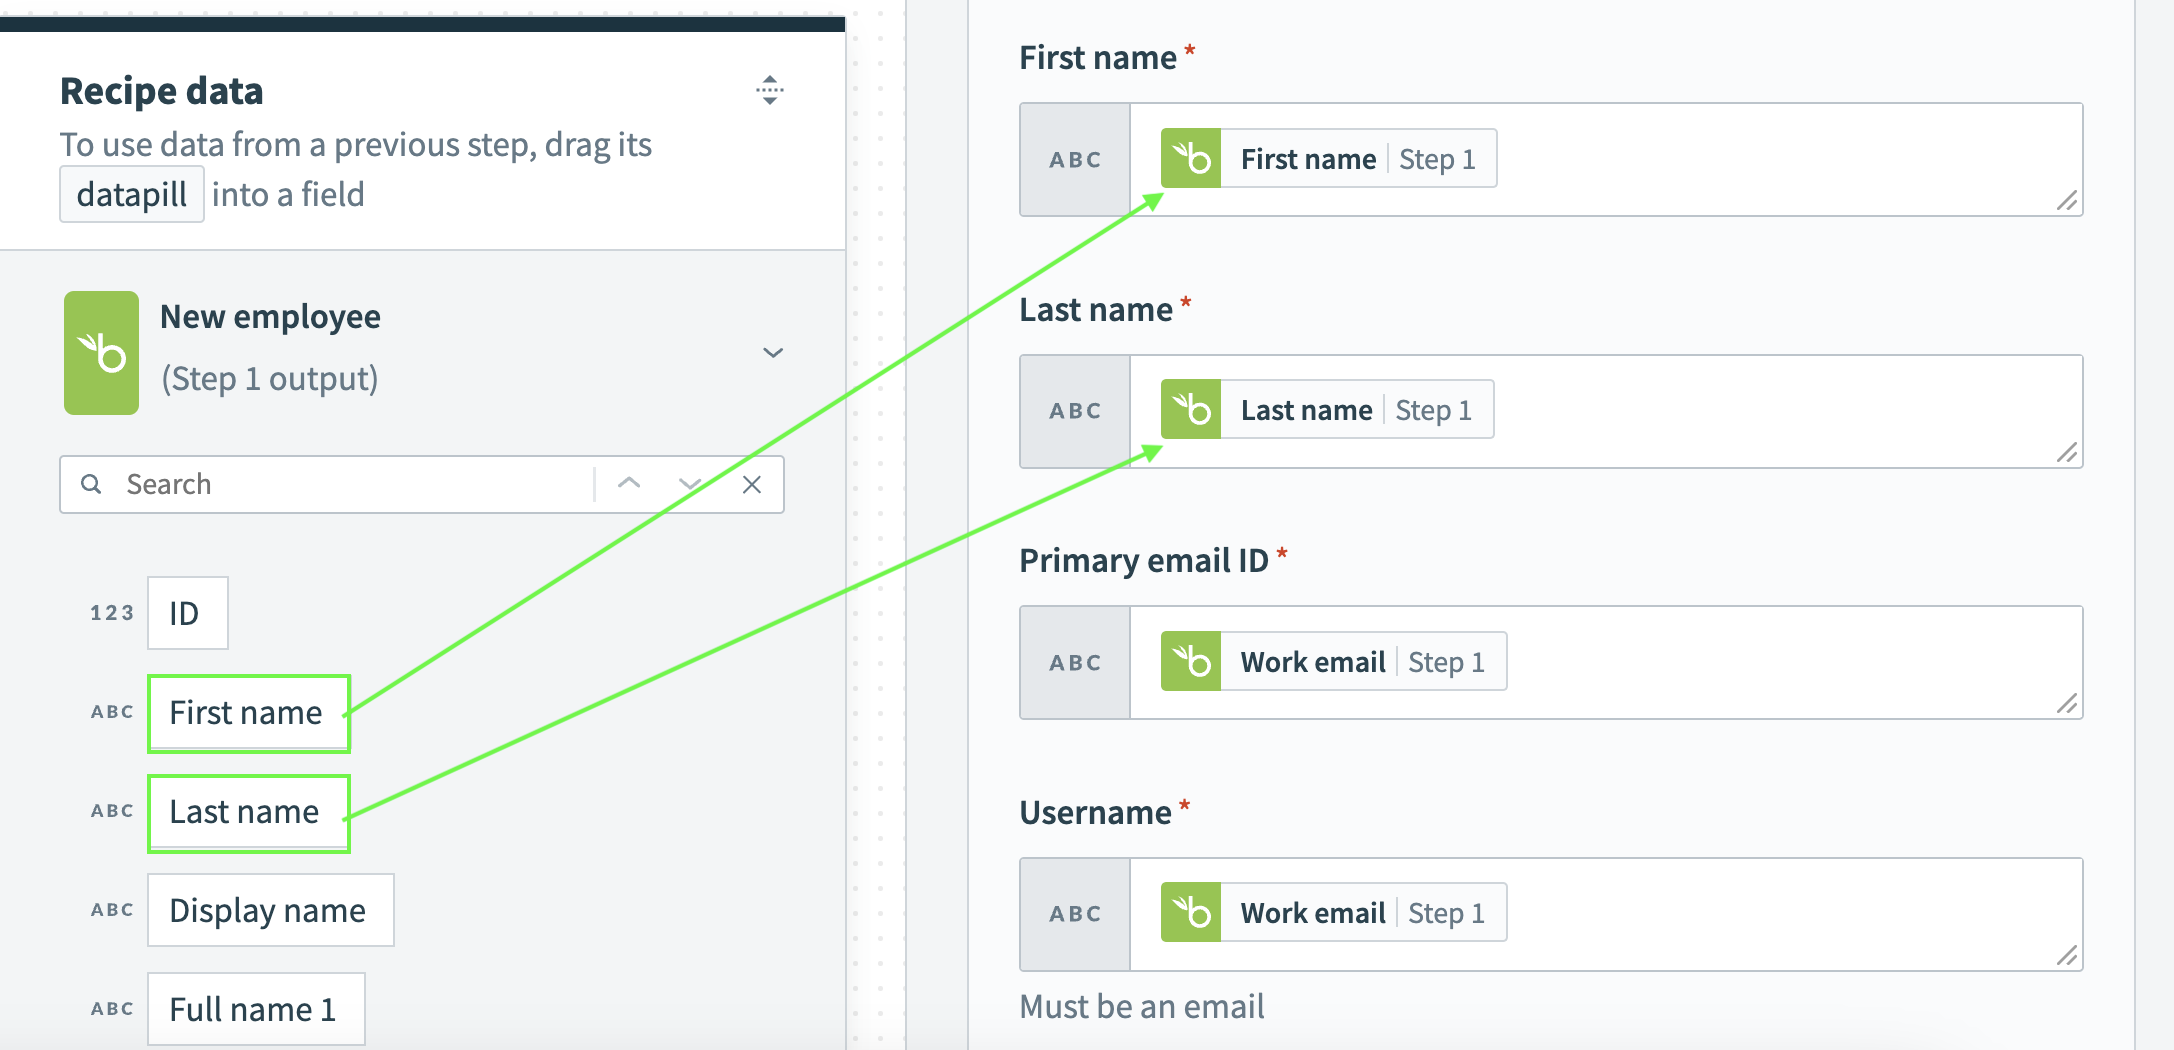
Map the BambooHR First name Step 1 into the First name field and the BambooHR Last name Step 1 datapill into the Last name field.
 Map the datapills for your action
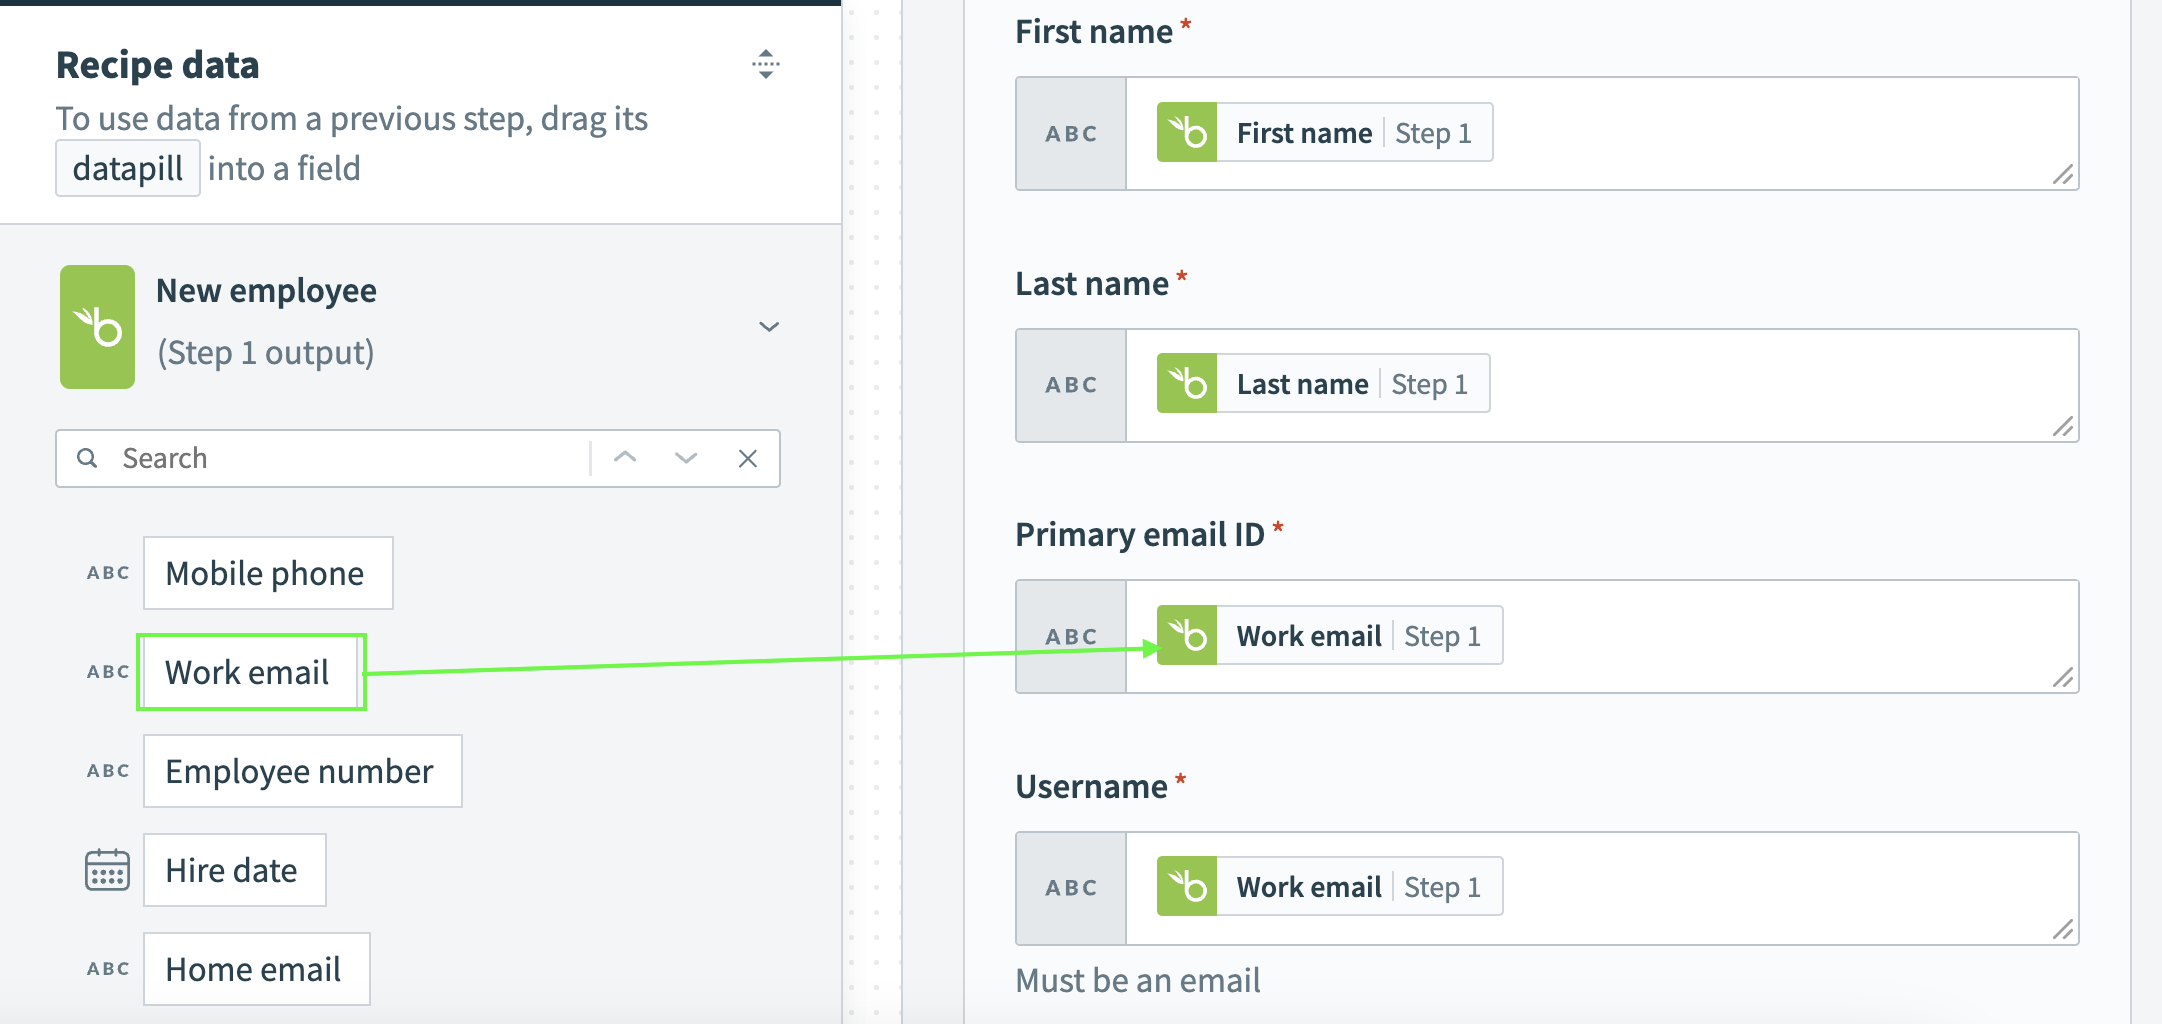
Map the BambooHR Work email Step 1 datapill into the Primary email ID field and the BambooHR Work email Step 1 datapill into the Username field. The Username field must contain an email address.
 Map the datapills for your action
Map the BambooHR Employee number Step 1 datapill into the Employee number field.
Click Save.
Your BambooHR, QuickBooks Online, and Okta recipe is ready to test and implement.
# API version
The BambooHR connector uses the Bamboo REST API v1 (opens new window).
# Prerequisites
Ensure you have completed the following steps before using the BambooHR connector in Workato:
Sign in to the BambooHR (opens new window) portal.
Go to My Account > API Keys.
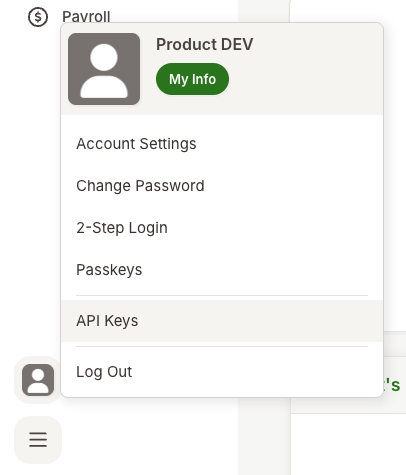 Navigate to BambooHR API Keys
Create a new API key by selecting Add New Key.
Provide a descriptive name for this new API Key, for example, workato_user.
Save the generated API key in a secure location.
API KEY ONLY VISIBLE IN THIS STEP
You can't retrieve this key after this step.
Refer to the BambooHR documentation (opens new window) for more information.
# How to connect to BambooHR on Workato
Complete the following steps to establish a BambooHR connection:
Click Create > Connection.
Search for and select BambooHR as your connection on the New Connection page.
Provide a unique name for the connection in the Connection name field.
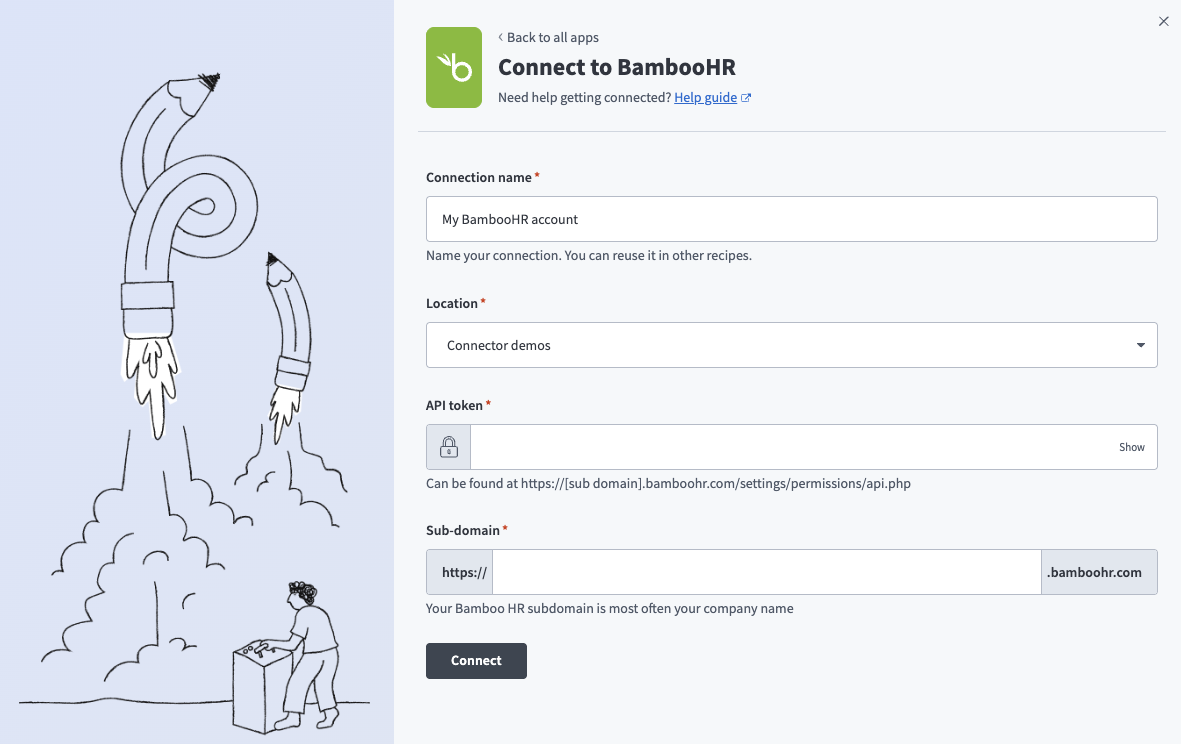 BambooHR Connection
Use the Location drop-down menu to select the project where you plan to store the connection.
Enter the API token and Sub-domain.
Click Connect.
Last updated: 2/24/2026, 7:06:23 PM