Add users to Google Workspace
This use case provides step-by-step instructions to create an API recipe and a custom endpoint that adds users to Google Workspace programmatically or when a new employee is detected in BambooHR. This allows you to automate user provisioning from your CLI (command line interface) or HR system rather than manually logging into Google Admin console to add each new hire or batches of new hires.
USE CASES ARE INTENDED AS EXAMPLES ONLY
Use cases are intended to serve as examples. API recipe modifications such as API trigger configuration, action configuration, and conditional logic may require adjustments for your specific setup.
What does this API recipe do?
This API recipe enables you to add users to your Google Workspace programmatically or when a new employee is detected in BambooHR.
Create your API recipe
Complete the following steps to create an API recipe that adds new employees to Google Workspace:
Sign in to Workato.
Select the project where you plan to create the recipe.
Create a connection for Google Workspace.
Create a connection for Google Workspace
This step creates a connection between Workato and your Google Workspace account. The Google Workspace connector supports the following authentication methods:
OAuth 2.0 authentication
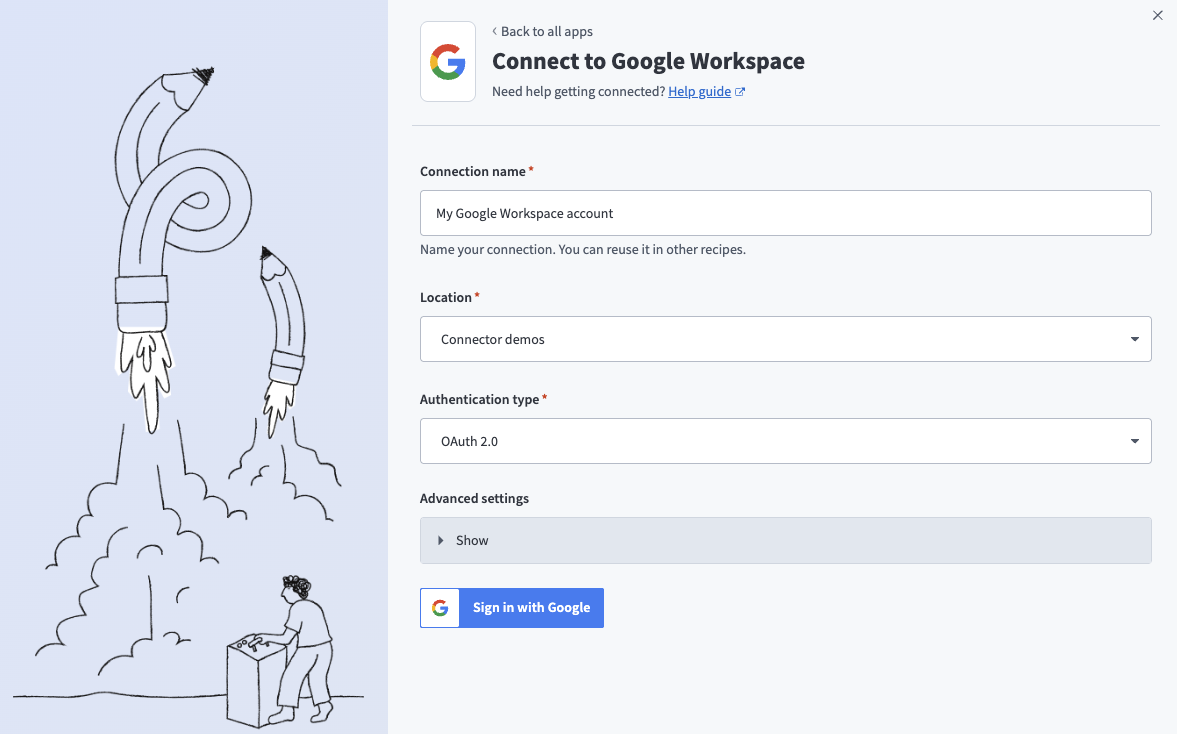
Complete the following steps to connect to Google Workspace using OAuth 2.0 authentication:
Click Create > Connection or press C twice.
Search for and select Google Workspace as your connection.
Provide a name for your connection in the Connection name field.
Use the Location drop-down menu to select the project where you plan to store the connection.
Use the Authentication type drop-down menu to select OAuth 2.0.
Optional. Expand the Advanced settings section and select OAuth 2.0 scopes to request for your connection.
Workato requests the following scopes by default in addition to the scopes you select:
| Description | Scope requested |
|---|---|
| View and manage the provisioning of users on your domain | admin.directory.user |
| View and manage organization units on your domain | admin.directory.orgunit |
| View and manage the provisioning of domains for your customers | admin.directory.domain |
| View and manage the provisioning of user schemas on your domain | admin.directory.userschema |
| View and manage the provisioning of groups on your domain | admin.directory.group |
| View and manage group subscriptions on your domain | admin.directory.group.member |
| View and manage data transfers between users in your organization | admin.datatransfer |
| Manage your mobile devices by performing administrative tasks | admin.directory.device.mobile.action |
| View audit reports for your Google Workspace domain | admin.reports.audit.readonly |
| View usage reports for your Google Workspace domain | admin.reports.usage.readonly |
| Manage delegated admin roles for your domain | admin.directory.rolemanagement |
| Manage data access permissions for users on your domain | admin.directory.user.security |
Refer to the Google Directory API scopes or OAuth 2.0 Scopes for Google APIs guide for more information about scopes.
Click Sign in with Google.
 Connect to Google Workspace
Sign in with your Google account. Your Google account must have admin privileges to make organization-wide changes in Google Workspace.
Click Allow to enable Workato to access your Google account.
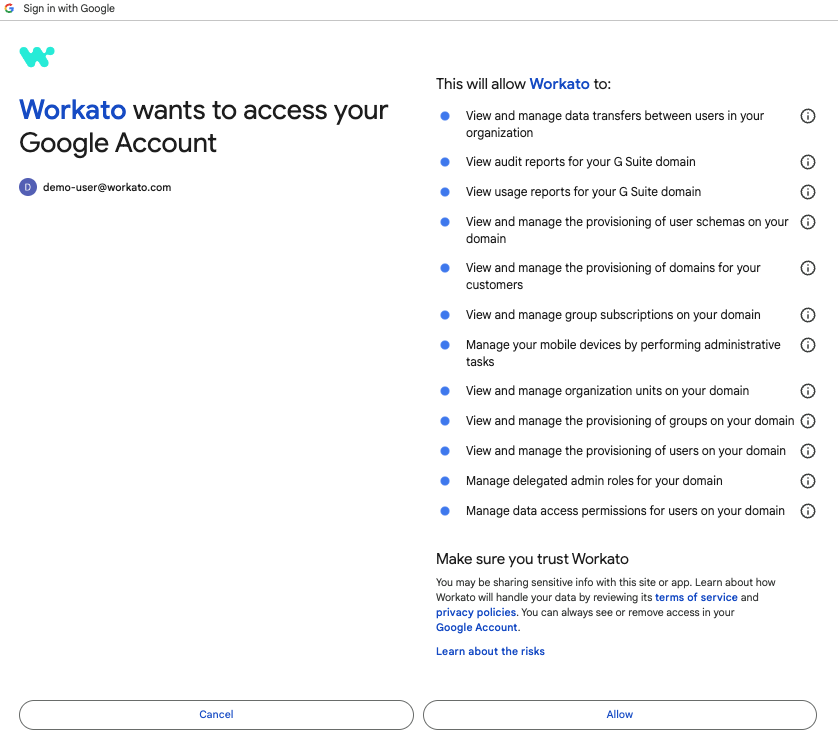 Enable Workato to access your Google account
Service account authentication
Complete the following steps to set up a Google service account:
Create a service account in your GCP project.
Go to IAM & Admin > Service accounts. Ensure your dashboard is scoped to the project that contains your service account. 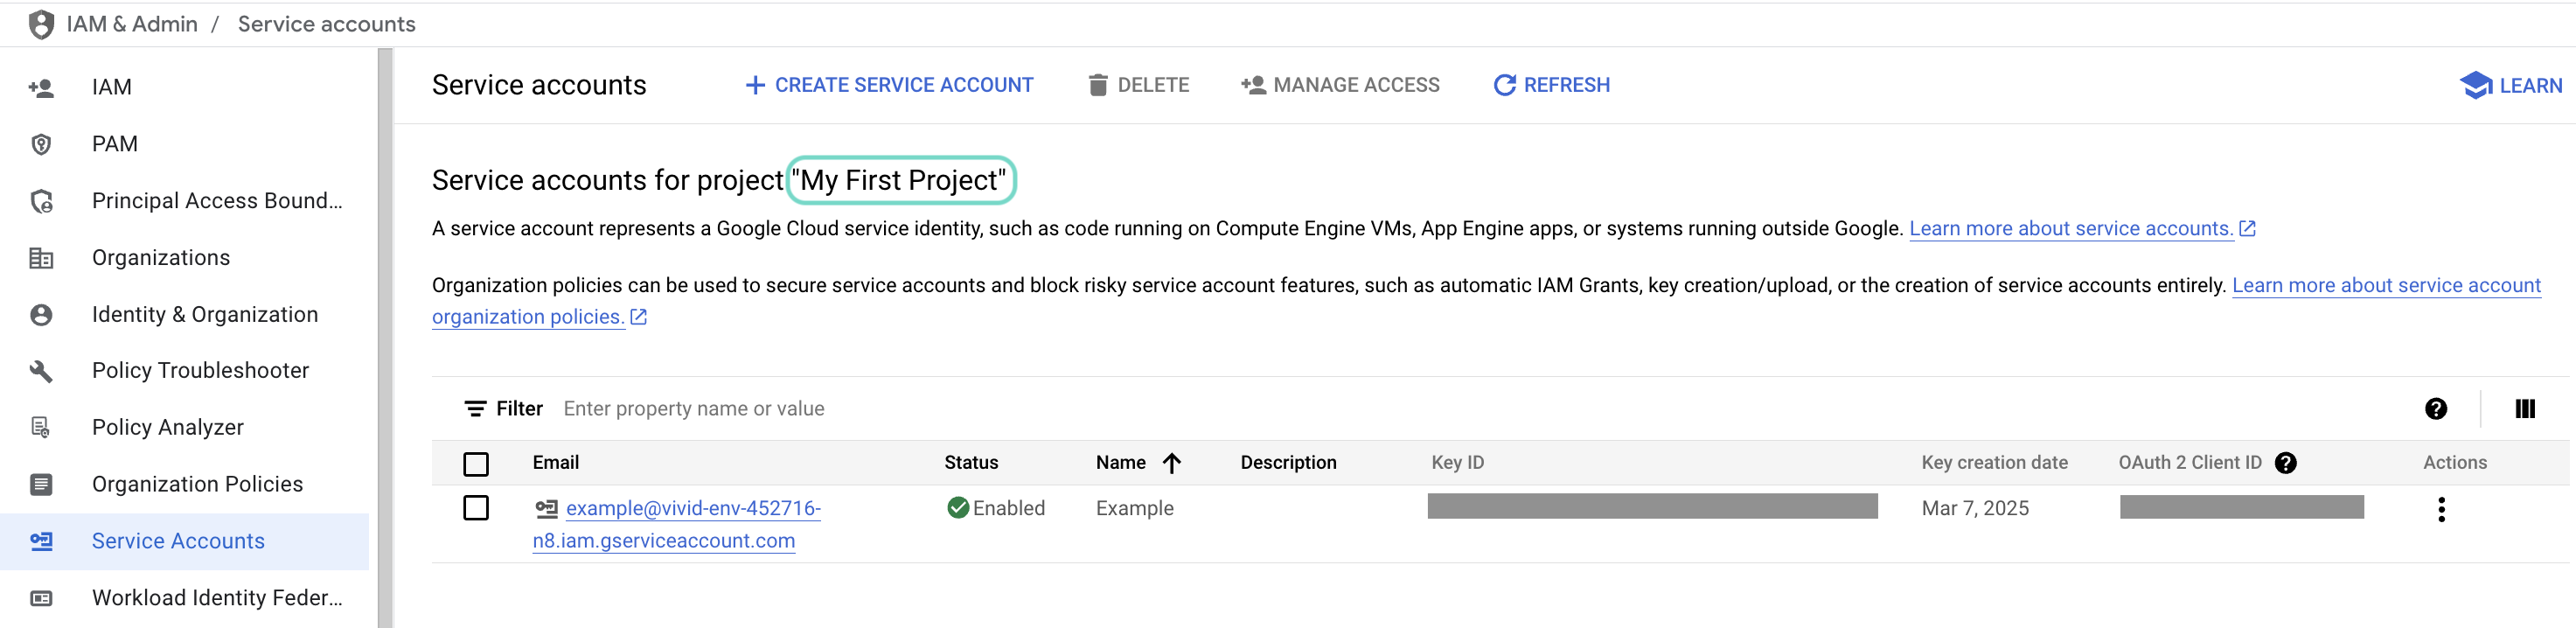 Check the scope of your dashboard.
Click the Email of the service account you intend to use. 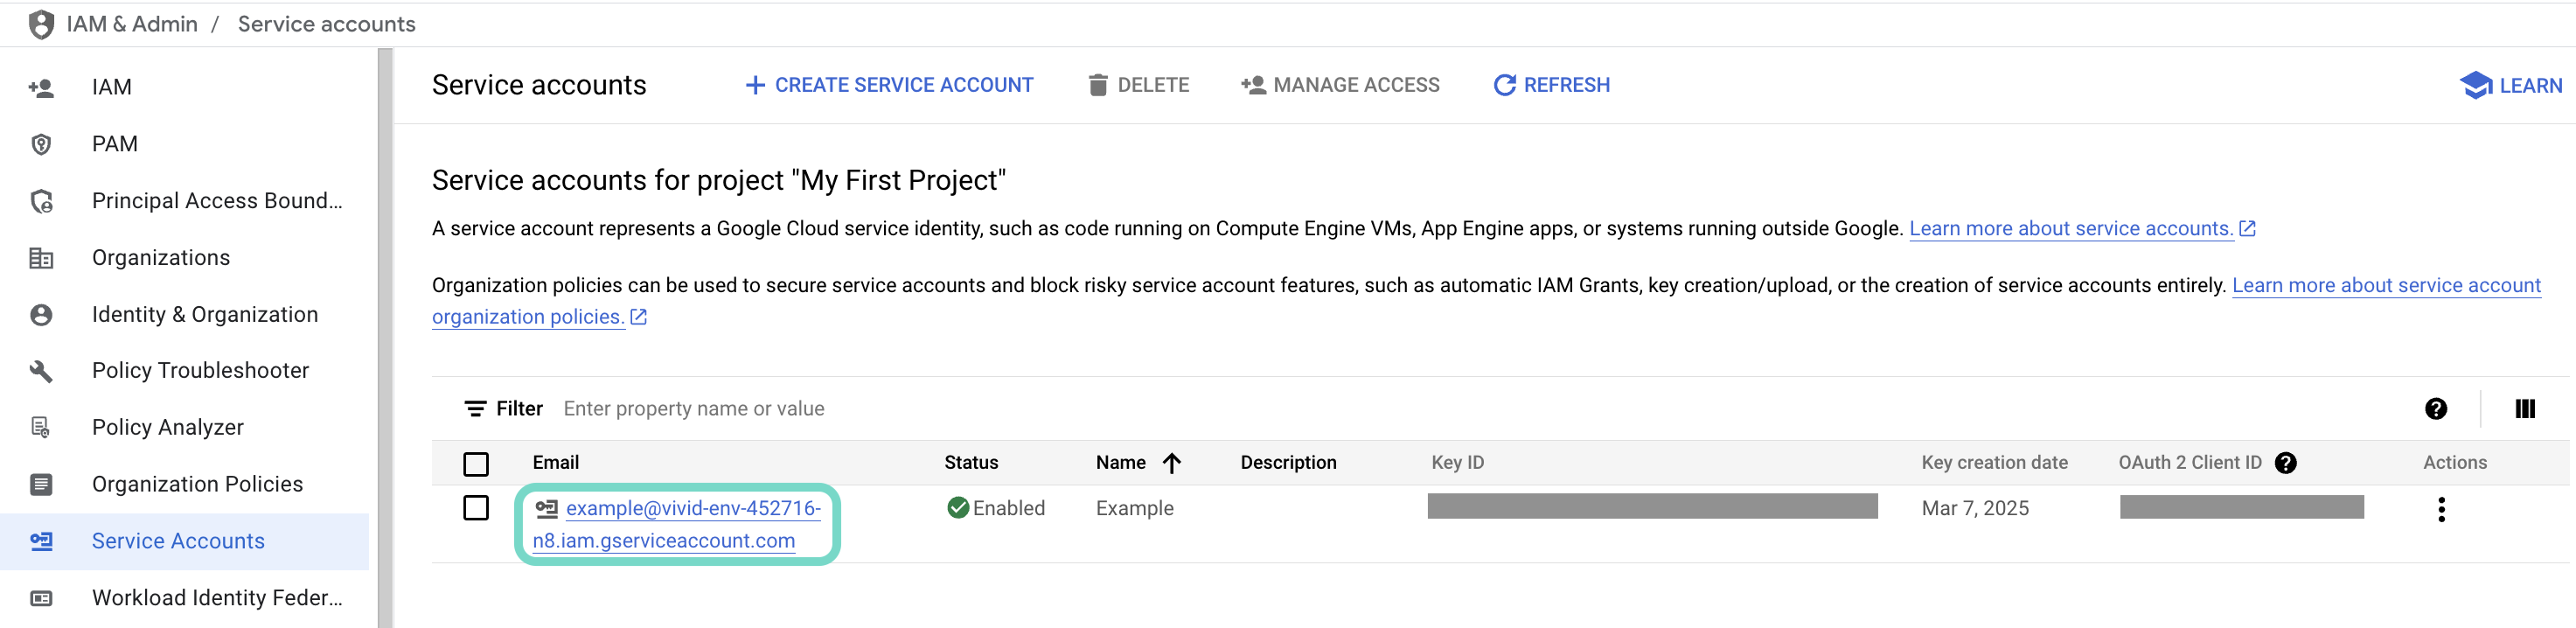 Click the Email of the service account you intend to use.
Copy the service account's Email and save it to configure your connection later.  Copy the account's Email.
Go to the KEYS tab.
Generate a private key and download it in JSON format. You can only download the key once.
Open the JSON file, then copy the entire private key from -----BEGIN PRIVATE KEY----- to -----END PRIVATE KEY-----\n (inclusive) and save it to configure your connection later.
Select the project where you plan to create the API request recipe.
Click Create > Recipe or press C+R.
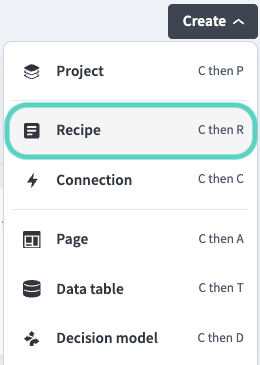 Create a new recipe
Enter a name for your recipe in the Name field.
Use the Location drop-down menu to select the project where you plan to store the recipe.
Click Start building.
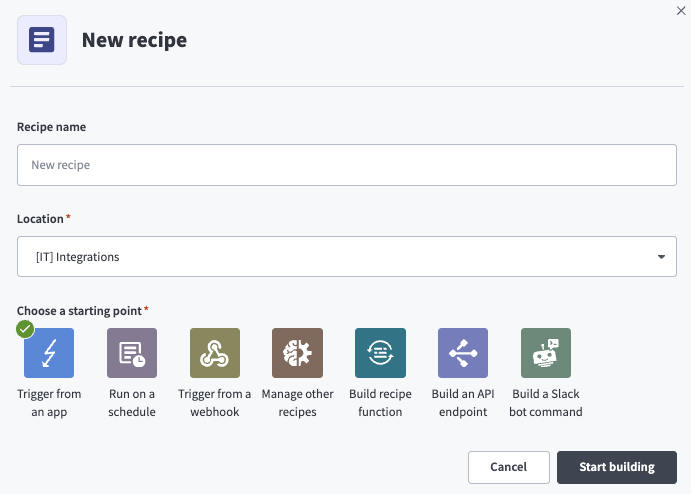 Start building your recipe
Click Pick a starting point and select Trigger from an app. The API request trigger doesn't require you to establish a connection.
Click Select an app and trigger event.
Set up your New API request trigger.
New API request trigger setup
This step creates an API request and response that enables your recipe to process and respond to your API request.
Search for API platform by Workato and select it as your app.
Select the New API request trigger.
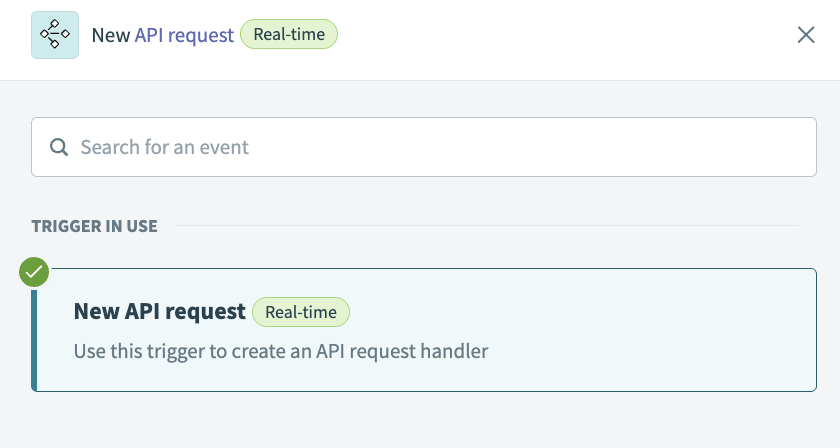 New API request trigger
Complete the following steps to configure your request schema:
Go to the Request schema section and click + Add Field.
Enter Users in the Name and Label fields.
Use the Data type drop-down menu to select Object.
Use the Optional drop-down menu to select No.
Click Save.
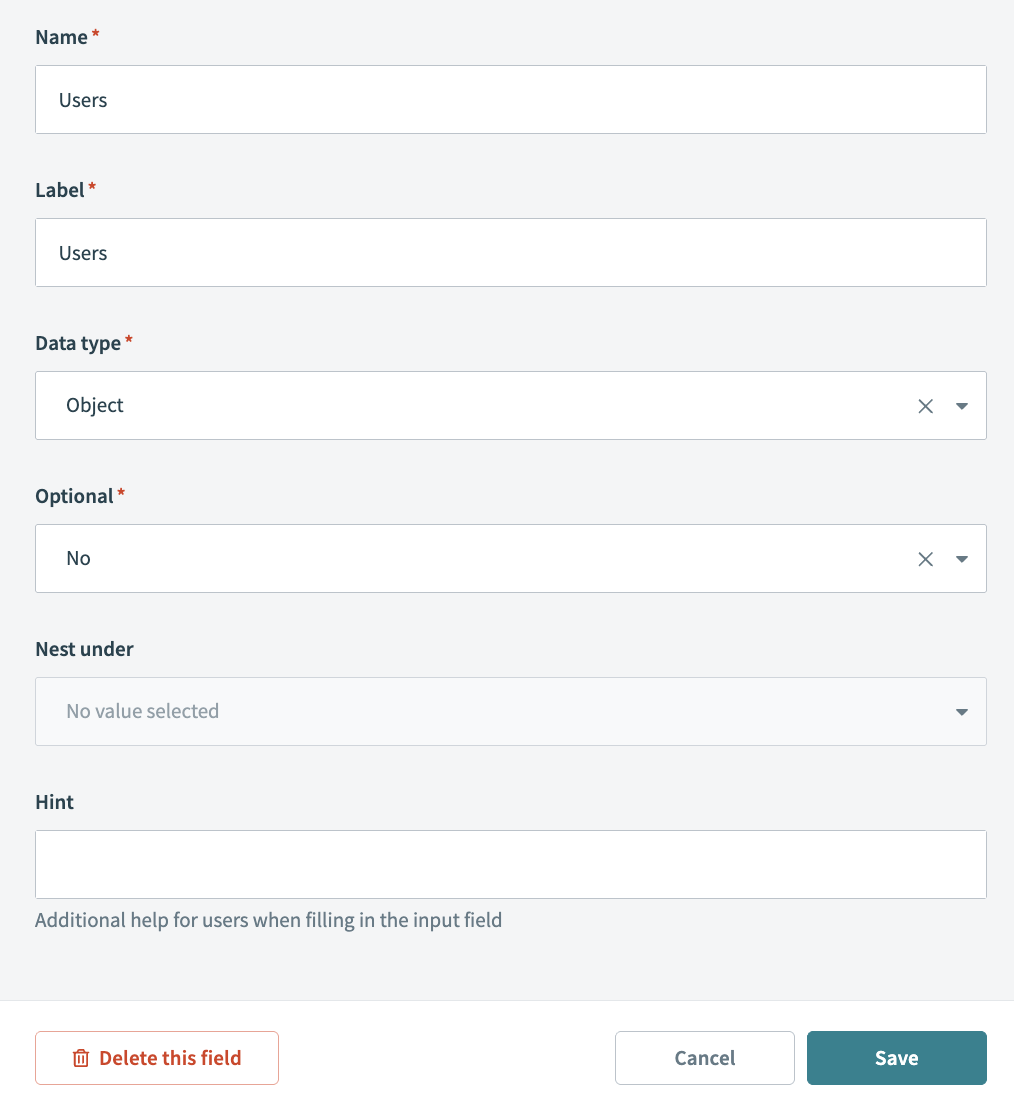 Users object
Enter username in the Name and Label fields.
Use the Data type drop-down menu to select String.
Use the Optional drop-down menu to select No.
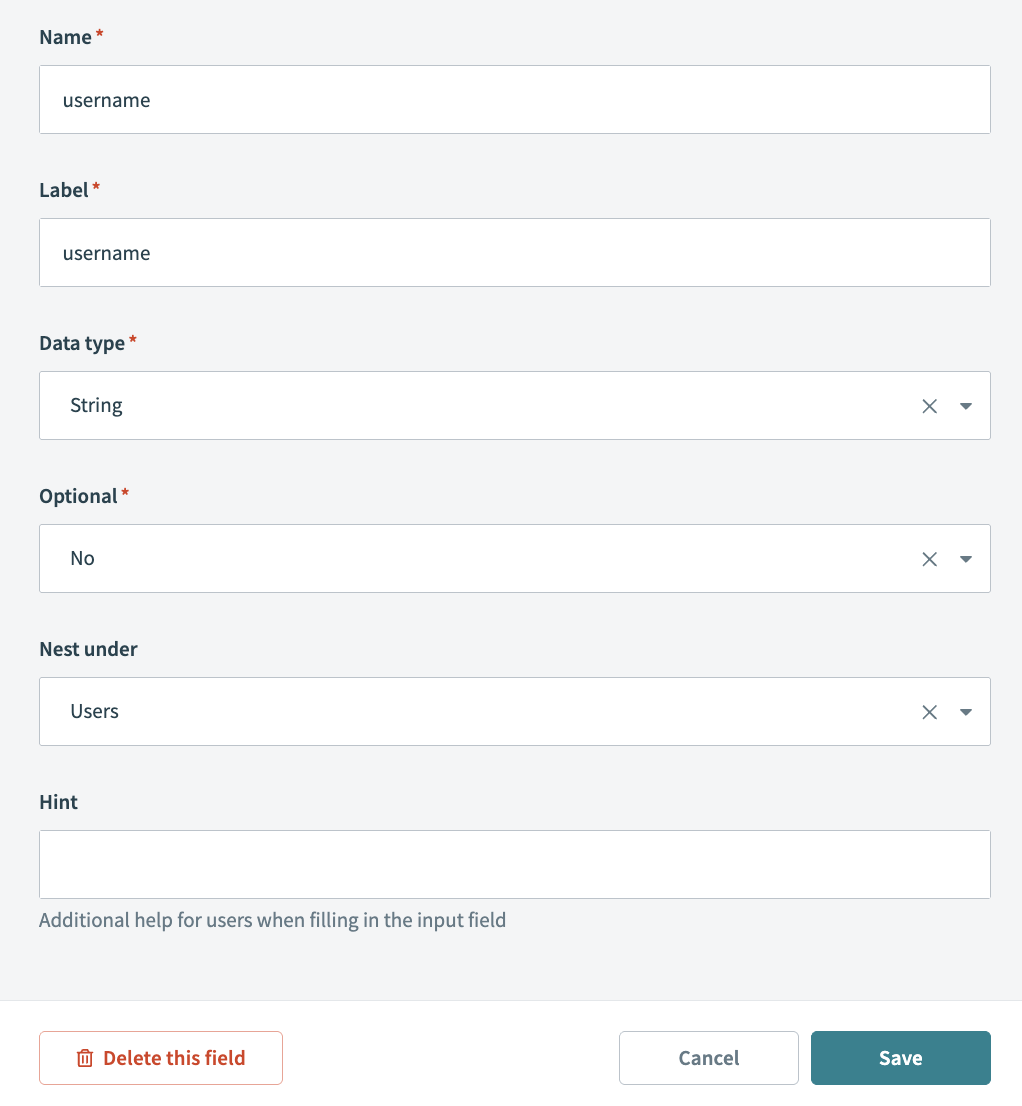 Username Request schema
Use the Nest under drop-down menu to select Users.
Click Save.
Return to the Request schema section and click + Add Field.
Enter firstname in the Name and Label fields.
Use the Data type drop-down menu to select String.
Use the Optional drop-down menu to select No.
Use the Nest under drop-down menu to select Users.
Click Save.
Return to the Request schema section and click + Add Field.
Enter lastname in the Name and Label fields.
Use the Data type drop-down menu to select String.
Use the Optional drop-down menu to select No.
Use the Nest under drop-down menu to select Users.
Click Save.
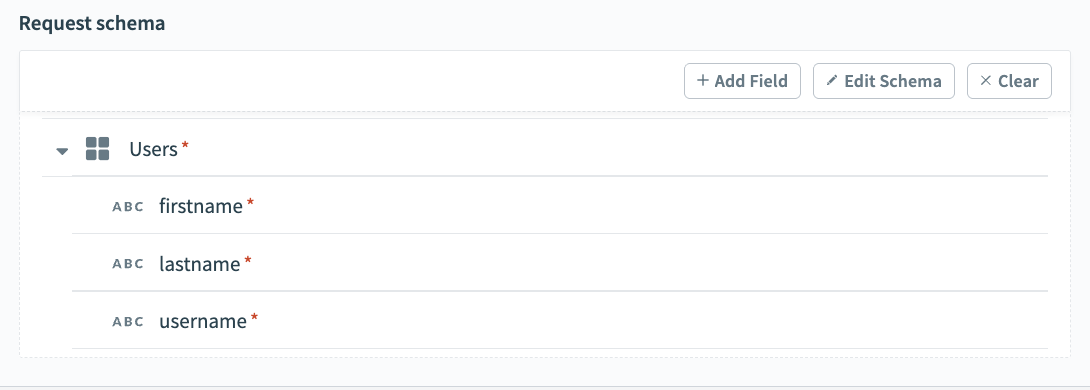 Configured Request schema
Complete the following steps to configure your request responses:
Go to the Responses section and click Add response.
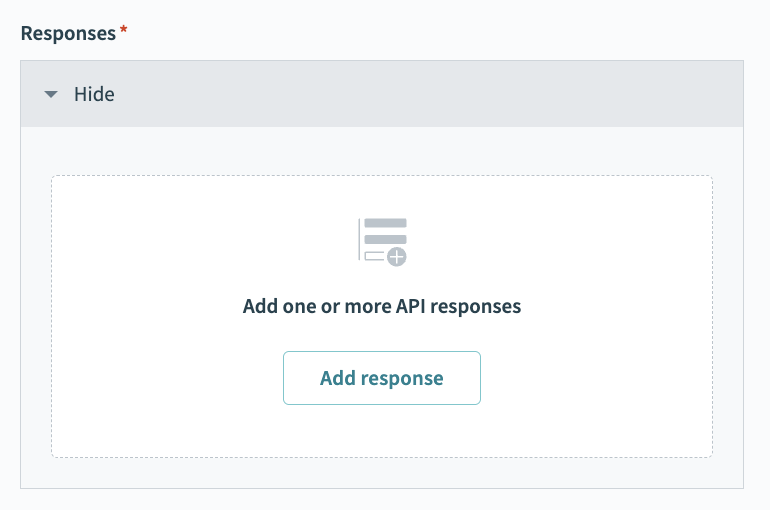 Click Add response
Enter Return result in the Name field.
Use the HTTPS status code standard response drop-down menu to select 200 - OK.
Go to the Response schema section and click add fields manually.
Enter result in the Name and Label fields.
Use the Data type drop-down menu to select String.
Use the Optional drop-down menu to select No.
Click Save.
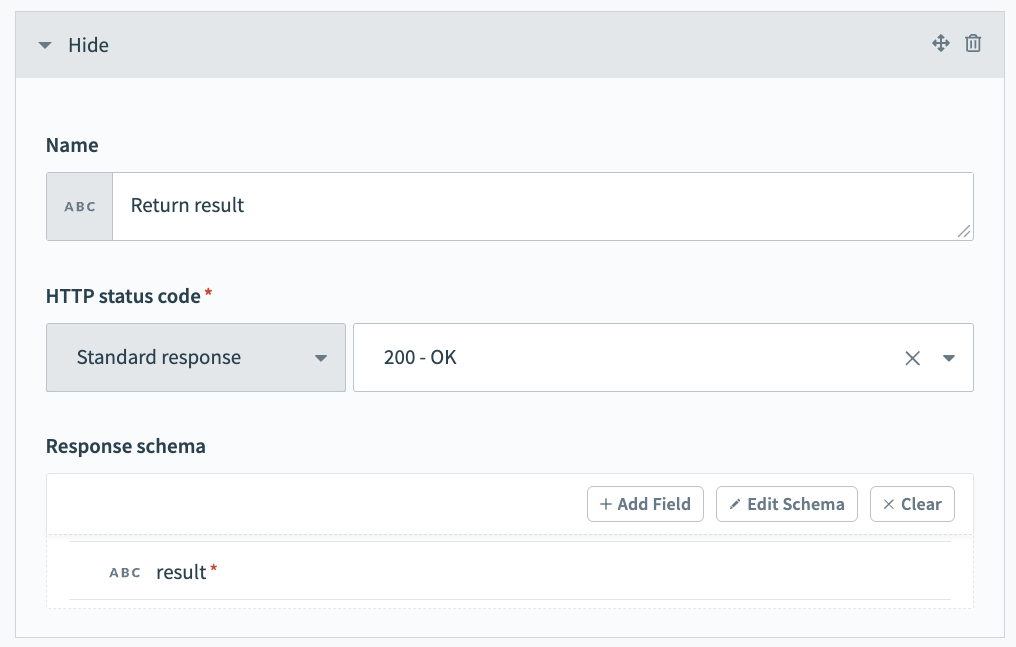 Configured
 200 - OK response
Click Add response again.
Enter Error output in the Name field.
Use the HTTPS status code standard response drop-down menu to select 400 - Bad Request.
Go to the Response schema section and click add fields manually.
Enter result in the Name and Label fields.
Use the Data type drop-down menu to select String.
Use the Optional drop-down menu to select No.
Click Save.
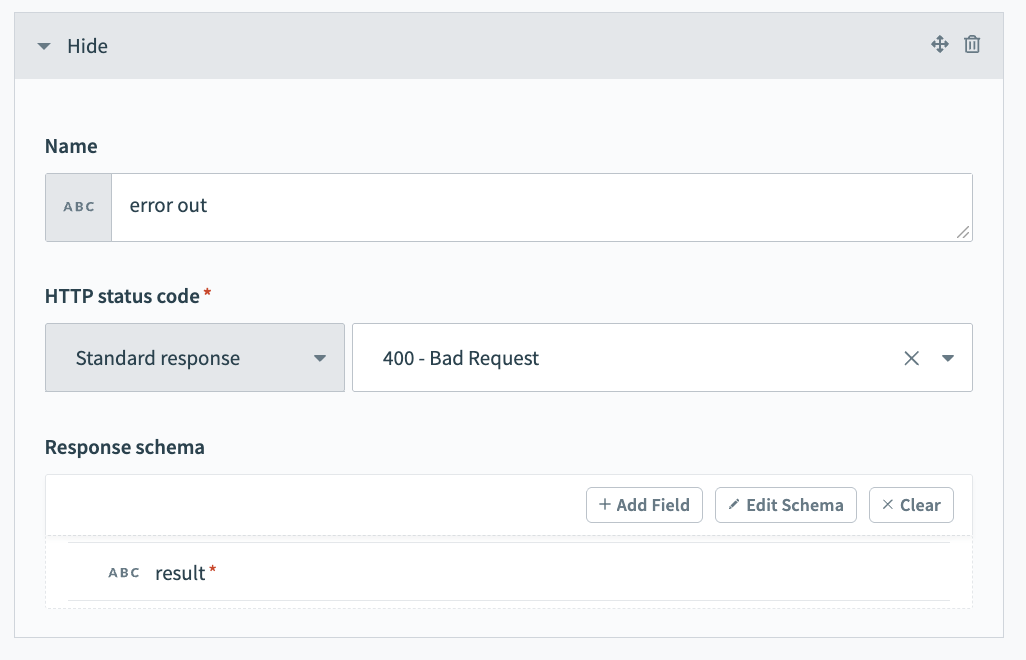 Configured
 400 - Bad Request response
Click + Add step and select Handle errors.
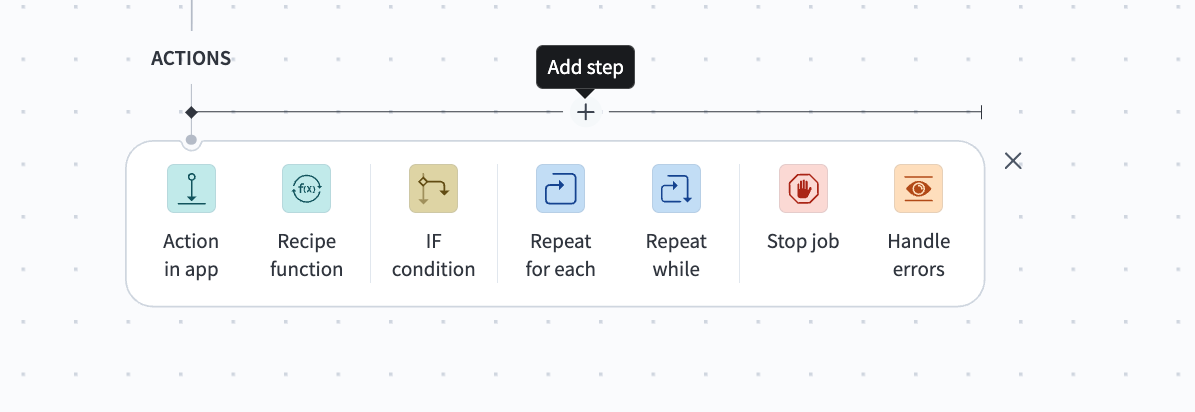 Click Add step > Handle errors
How does the Handle errors control statement work?
The Handle errors control statement allows you to monitor your recipe for errors in actions, similar to the try/catch concept in programming languages. You have the opportunity to perform the following actions if an error occurs:
Retry the sequence of actions again, in case it was a temporary error such as network issues.
Take remedial actions, such as notifying users of the error through email or error messages in the app, or to carry out a rollback. For example, you can reverse the job by deleting any created or half-created records.
This control statement consists of two blocks: the Monitor block and the Error block. Place the actions that you plan to monitor for errors within the Monitor block. If all actions are successful, Workato ignores the Error block. However, if any action in the Monitor block results in an error, the actions within the Error block are executed.
Set up your Google Workspace add user action.
Set up your Google Workspace add user action
This step adds a user to Google Workspace. Note that this step is nested within the Monitor block.
Search for and select Google Workspace as the app to monitor.
Select Add record as your action.
Use the Object drop-down menu to select Users.
Expand the Name field and map the lastnameStep 1 datapill to the Surname field.
Map the firstnameStep 1 datapill to the First name field.
Enter the user's email address in the Primary email field.
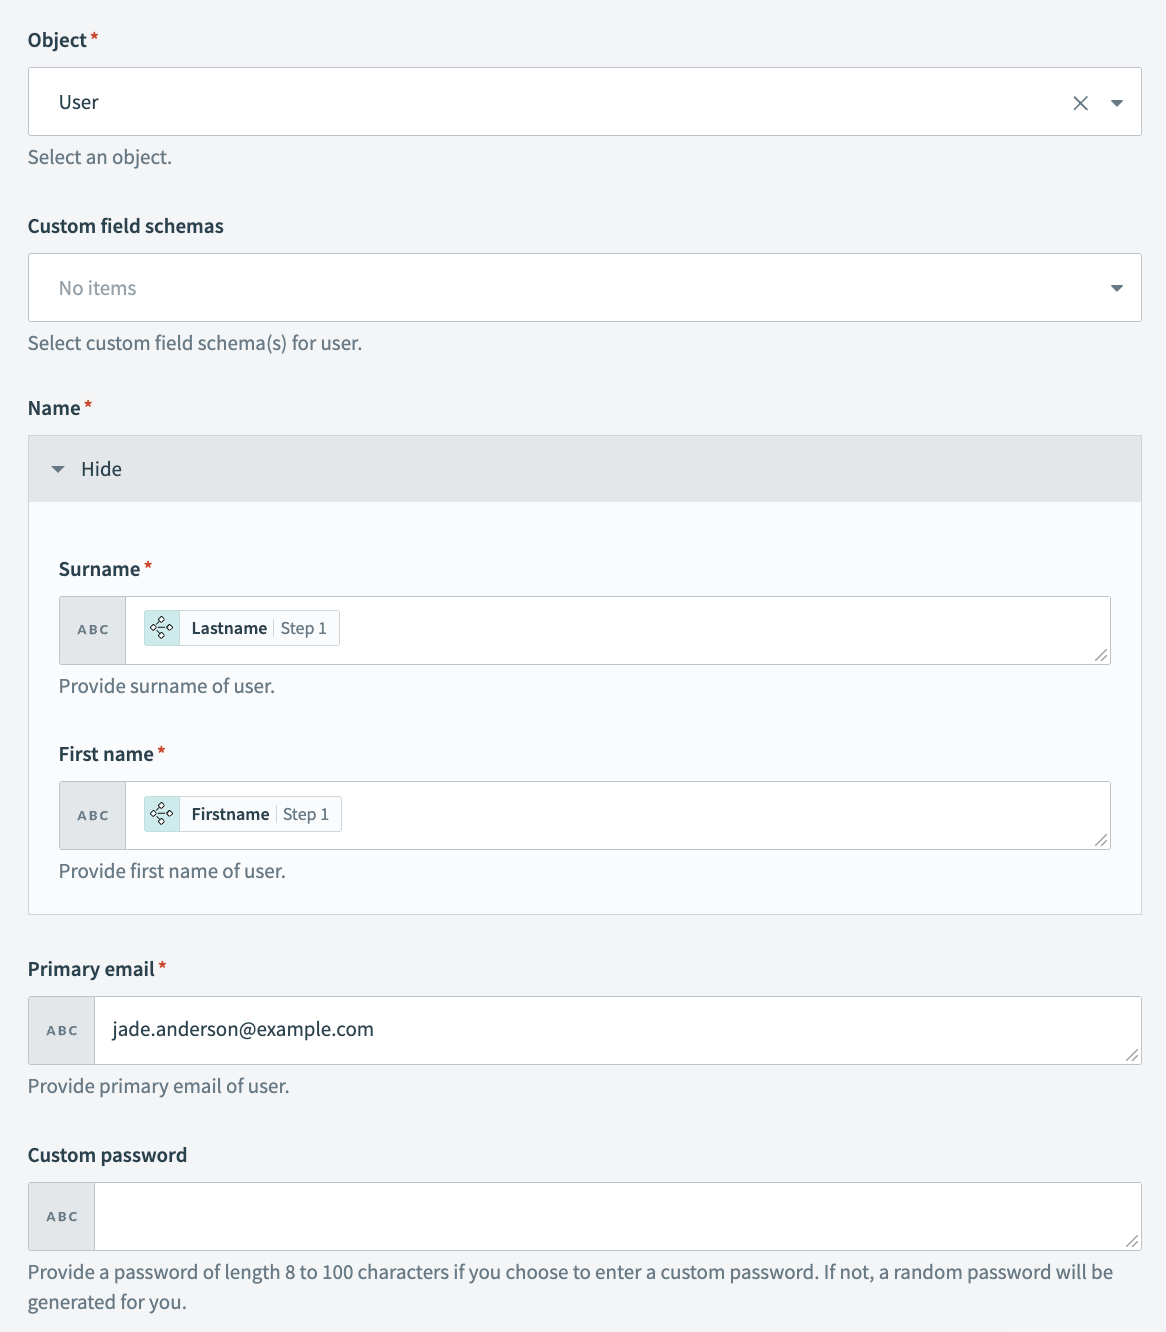 Add user action
Click Save.
Configure your ERROR FOUND? block.
This step tells your recipe how to respond if it receives an error when it executes the Add user action.
Complete the following steps to configure your ERROR FOUND? block:
Go to the ERROR FOUND? block and confirm that the Yes branch shows DO NOT RETRY. This option is usually set by default.
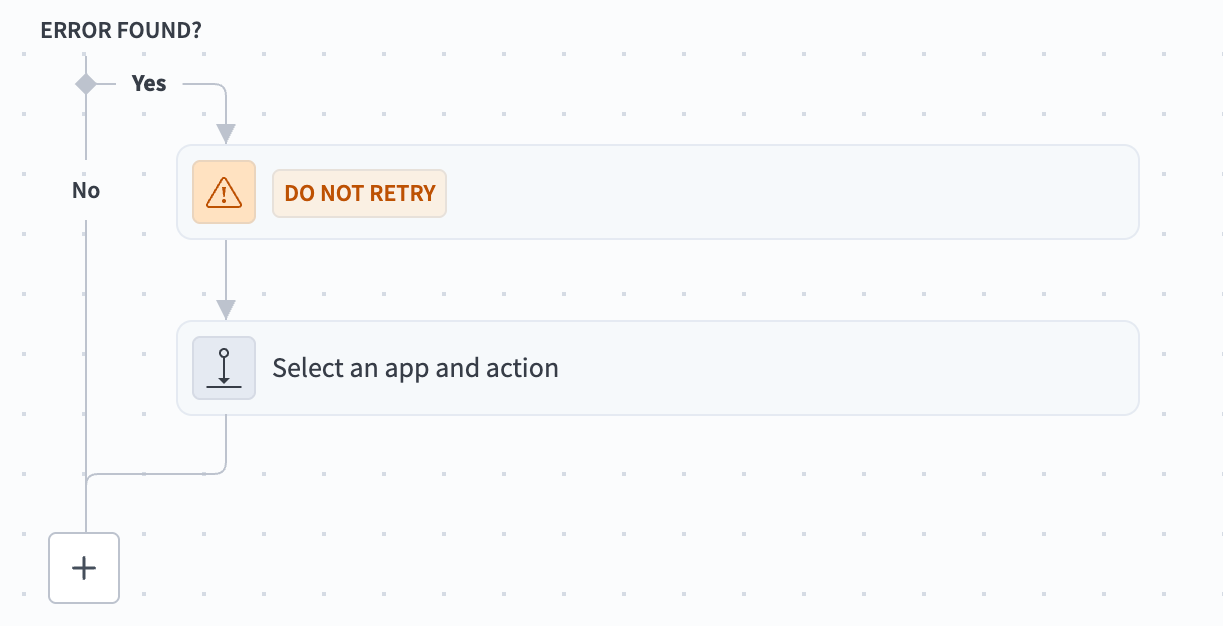 ERROR FOUND? block
Go to the Yes branch and click Select and app and action.
Search for and select API platform by Workato as your app.
Select Respond to API request as your action.
Use the Response drop-down menu to select error out.
Expand the Response body section.
Map the Error messageStep 4 datapill to the Result field.
 Map the Error messageStep 4 datapill to the Result field
Go to the No branch and click the + Add step button.
Search for and select API platform by Workato as your app.
Select Respond to API request as your action.
Use the Response drop-down menu to select Return result.
Create an API collection and API endpoint
This section provides steps on how to create a new API collection and API endpoint.
Complete the following steps to create an API collection:
Create an API collection.
Create an API collection
This section provides steps on how to create a new API collection where you can store your Google Workspace API endpoint.
Go to Platform > API platform.
Click the API collections tab.
Click + Create new collection.
Ensure that API recipe collection is selected and then click Next.
Ensure that Use existing recipes is selected.
Use the Recipe folder drop-down menu to select the folder where you plan to store the API collection.
Deselect all endpoints.
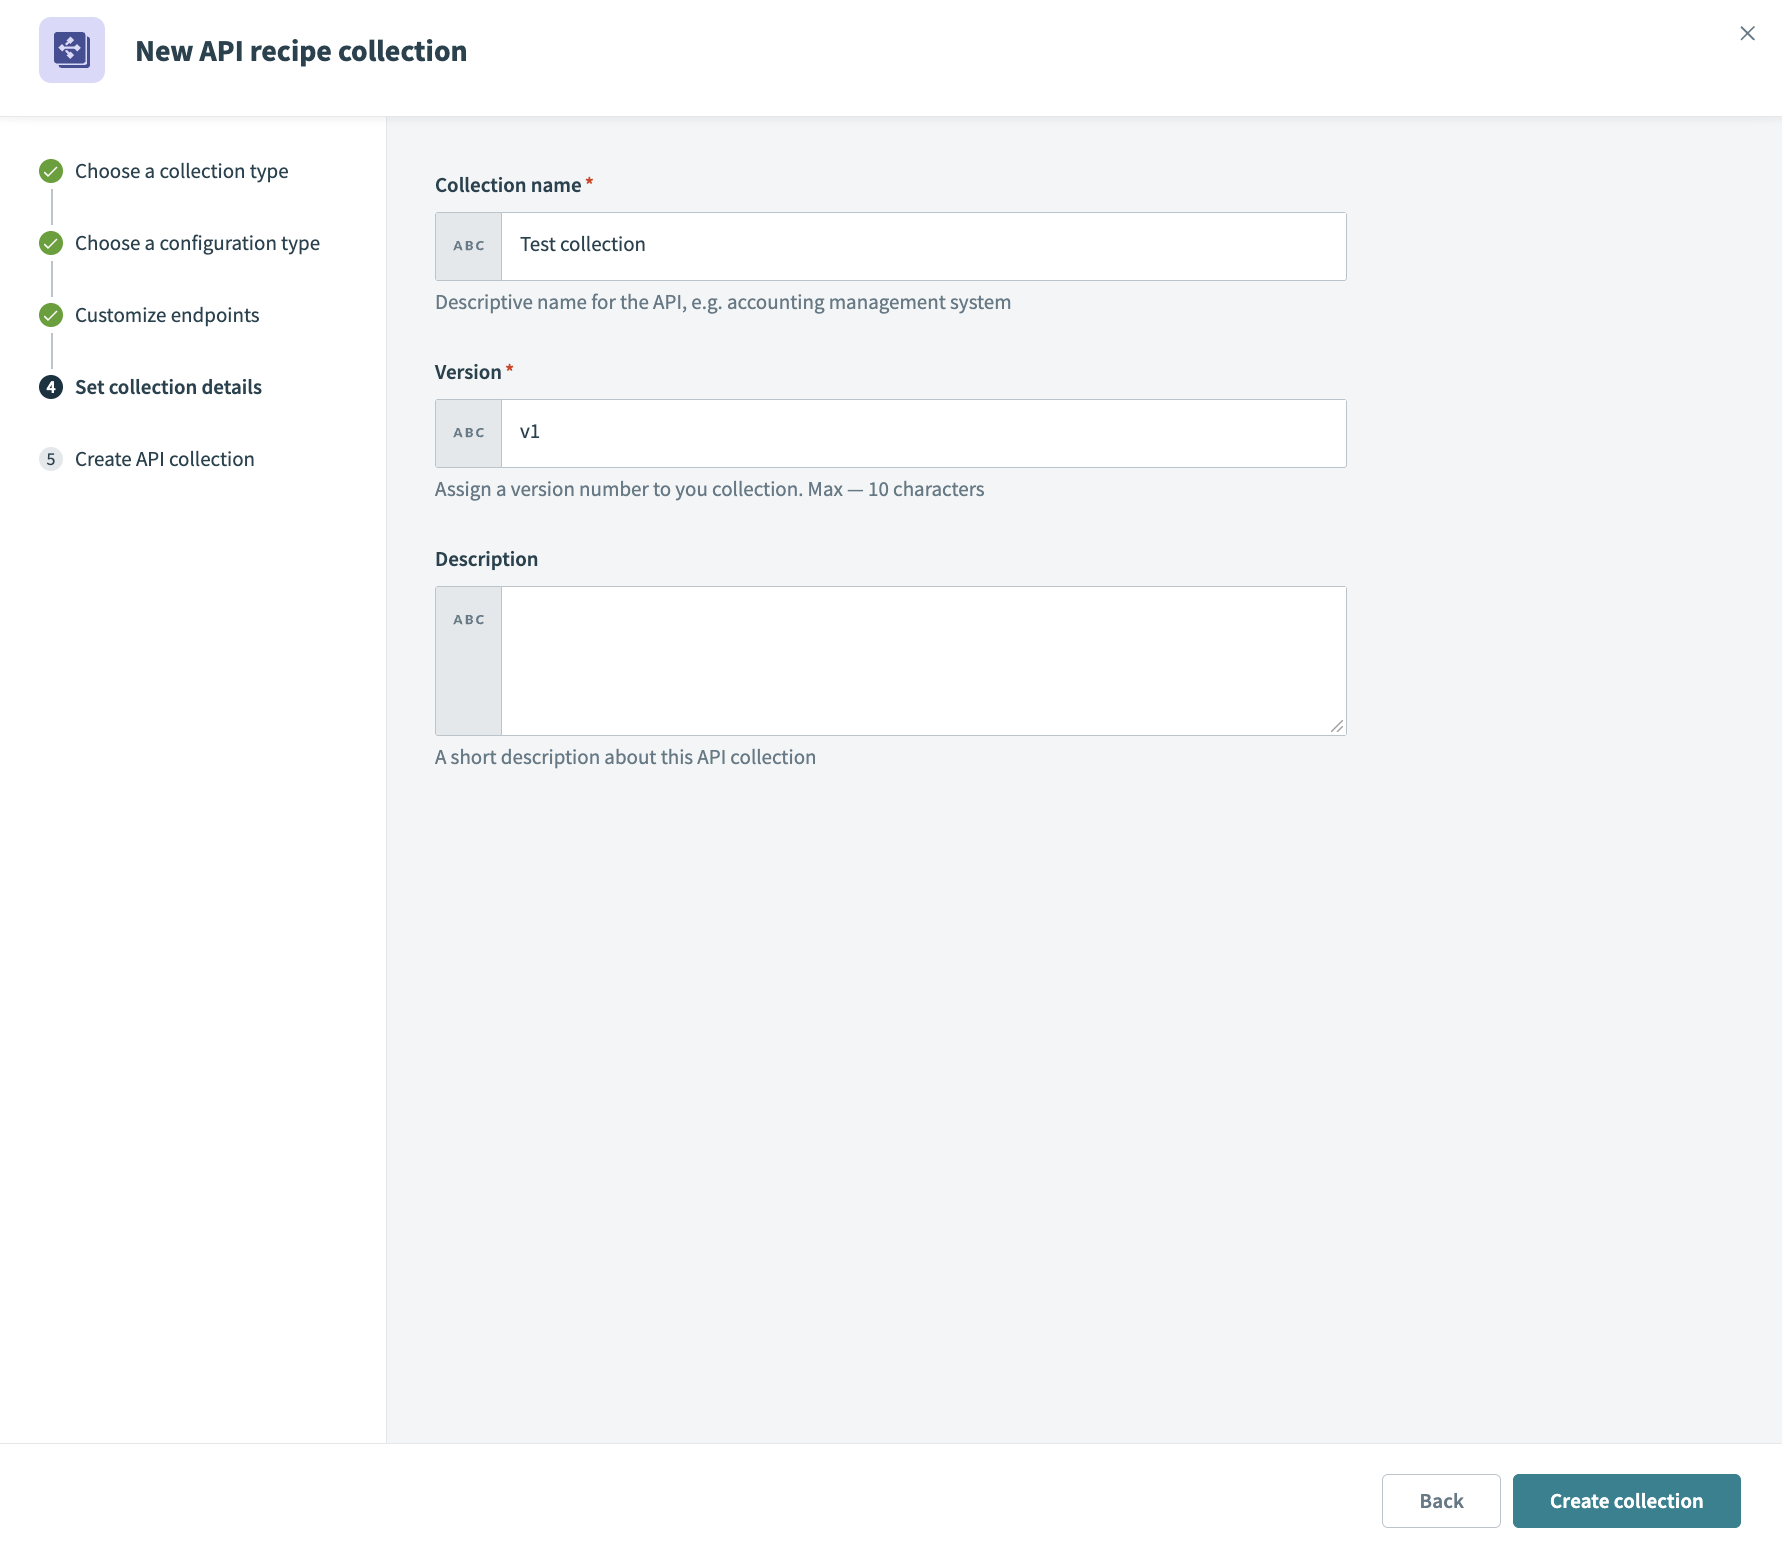
Enter a name in the Collection name field.
Enter a version number for your collection. For example: v1.
Optional. Provide a description for the collection in the Description field.
Click Create collection.
 Click Create collection
Create a new endpoint.
Create an endpoint
This step creates a new endpoint based on your API request recipe and stores it in your API collection.
Go to Platform > API platform.
Click the API collections tab.
Select the API collection you created in the preceding steps.
Click Create new endpoint.
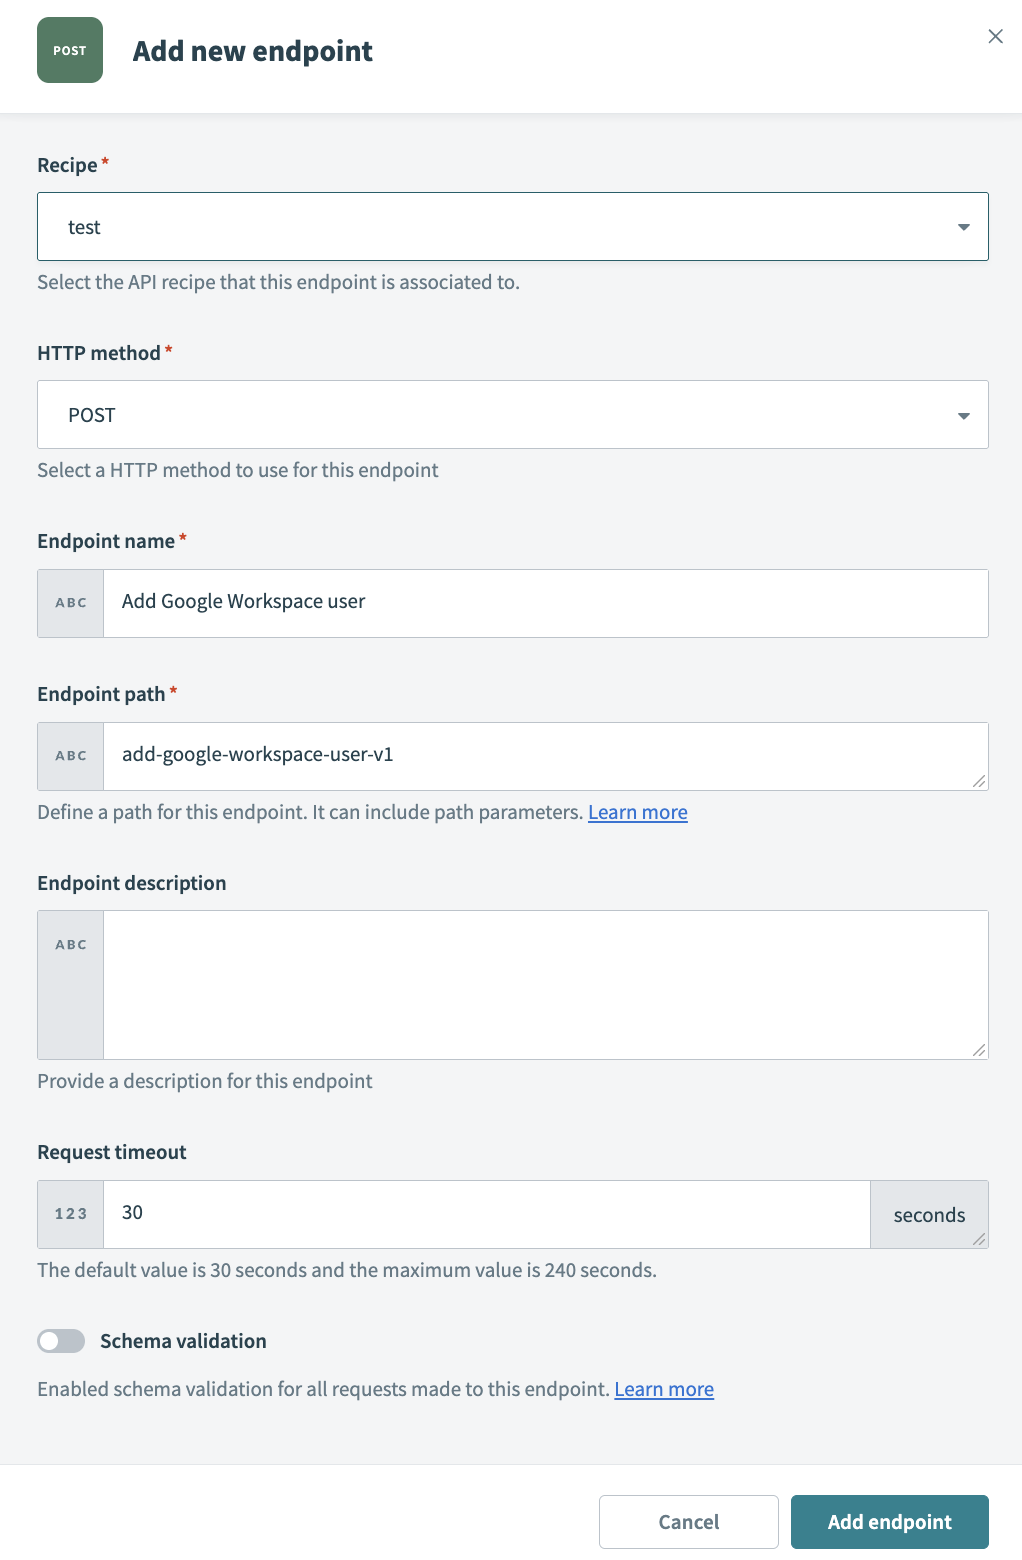
Use the Recipe drop-down menu to select the API request recipe you created in the preceding steps.
Use the HTTP method drop-down menu to select POST.
Enter a name for your endpoint in the Endpoint name field.
Define a path for your endpoint in the Endpoint path field. For example: add-google-workspace-user-v1. Don't include a slash \ in your endpoint path. This is automatically appended after you create the endpoint.
Optional. Provide a description in the Endpoint description field.
Optional. Set a timeout value in the Request timeout field. The default value is 30 seconds and the maximum value is 240 seconds.
Click Add endpoint.
 Create an endpoint
Add users from a CLI
You can use your endpoint to add users directly from your CLI.
How does a curl command work?
Your curl command can be broken down to the following items:
-X POST: Uses the POST HTTP methodhttps://apim.workato.com/<your-workspace-name>/<your-endpoint-name>: Your API endpoint URL. You must replace<your-workspace-name>and<your-endpoint-name>your actual workspace and endpoint names.-H "Content-Type: application/json": Specifies JSON format.-H "API-Token: <your-api-token>": Authentication header. You must replace<your-api-token>with your actual API token. --d '{"username": "janderson", "firstname": "Jade", "lastname": "Anderson"}': The request body with the three required fields from your request schema:username,firstname, andlastname.
The actual base URL and authentication method depend on how your Workato API collection is configured. You can find the exact URL and authentication details in your API collection settings under Platform > API platform > API collections.
curl -X POST https://apim.workato.com/<your-workspace-name>/<your-endpoint-name>\
  -H "Content-Type: application/json" \
  -H "API-Token: <your-api-token>" \
  -d '{
    "users": [
      {"username": "janderson", "firstname": "Jade", "lastname": "Anderson"},
      {"username": "jhernandez", "firstname": "Josh", "lastname": "Hernandez"},
      {"username": "ssingh", "firstname": "Sanjeev", "lastname": "Singh"},
      {"username": "etan", "firstname": "Emily", "lastname": "Tan"},
      {"username": "amiller", "firstname": "Alex", "lastname": "Miller"}
    ]
  }'
Complete the following steps to use your API endpoint to add users to Google Workspace programmatically from your CLI:
Open your preferred CLI, such as Cursor or VSCode.
Run the following command, updating <your-workspace-name>, <your-endpoint-name>, and <your-api-token> to match your configuration:
 Run the command in your CLI
Add users through a BambooHR trigger
Complete the following steps to add users to Google Workspace when a new employee is detected in BambooHR:
Sign in to Workato.
Select the project where you plan to create the recipe.
Create a connection for BambooHR. The HTTP connector doesn't require connection setup.
Create a BambooHR connection.
Create a BambooHR connection
This step creates a connection between BambooHR and your Workato account. Refer to BambooHR for more information.
Complete the following steps to set up your BambooHR connection:
Click Create > Connection or press C twice.
Search for and select BambooHR on the New connection page.
Provide a name for your connection in the Connection name field.
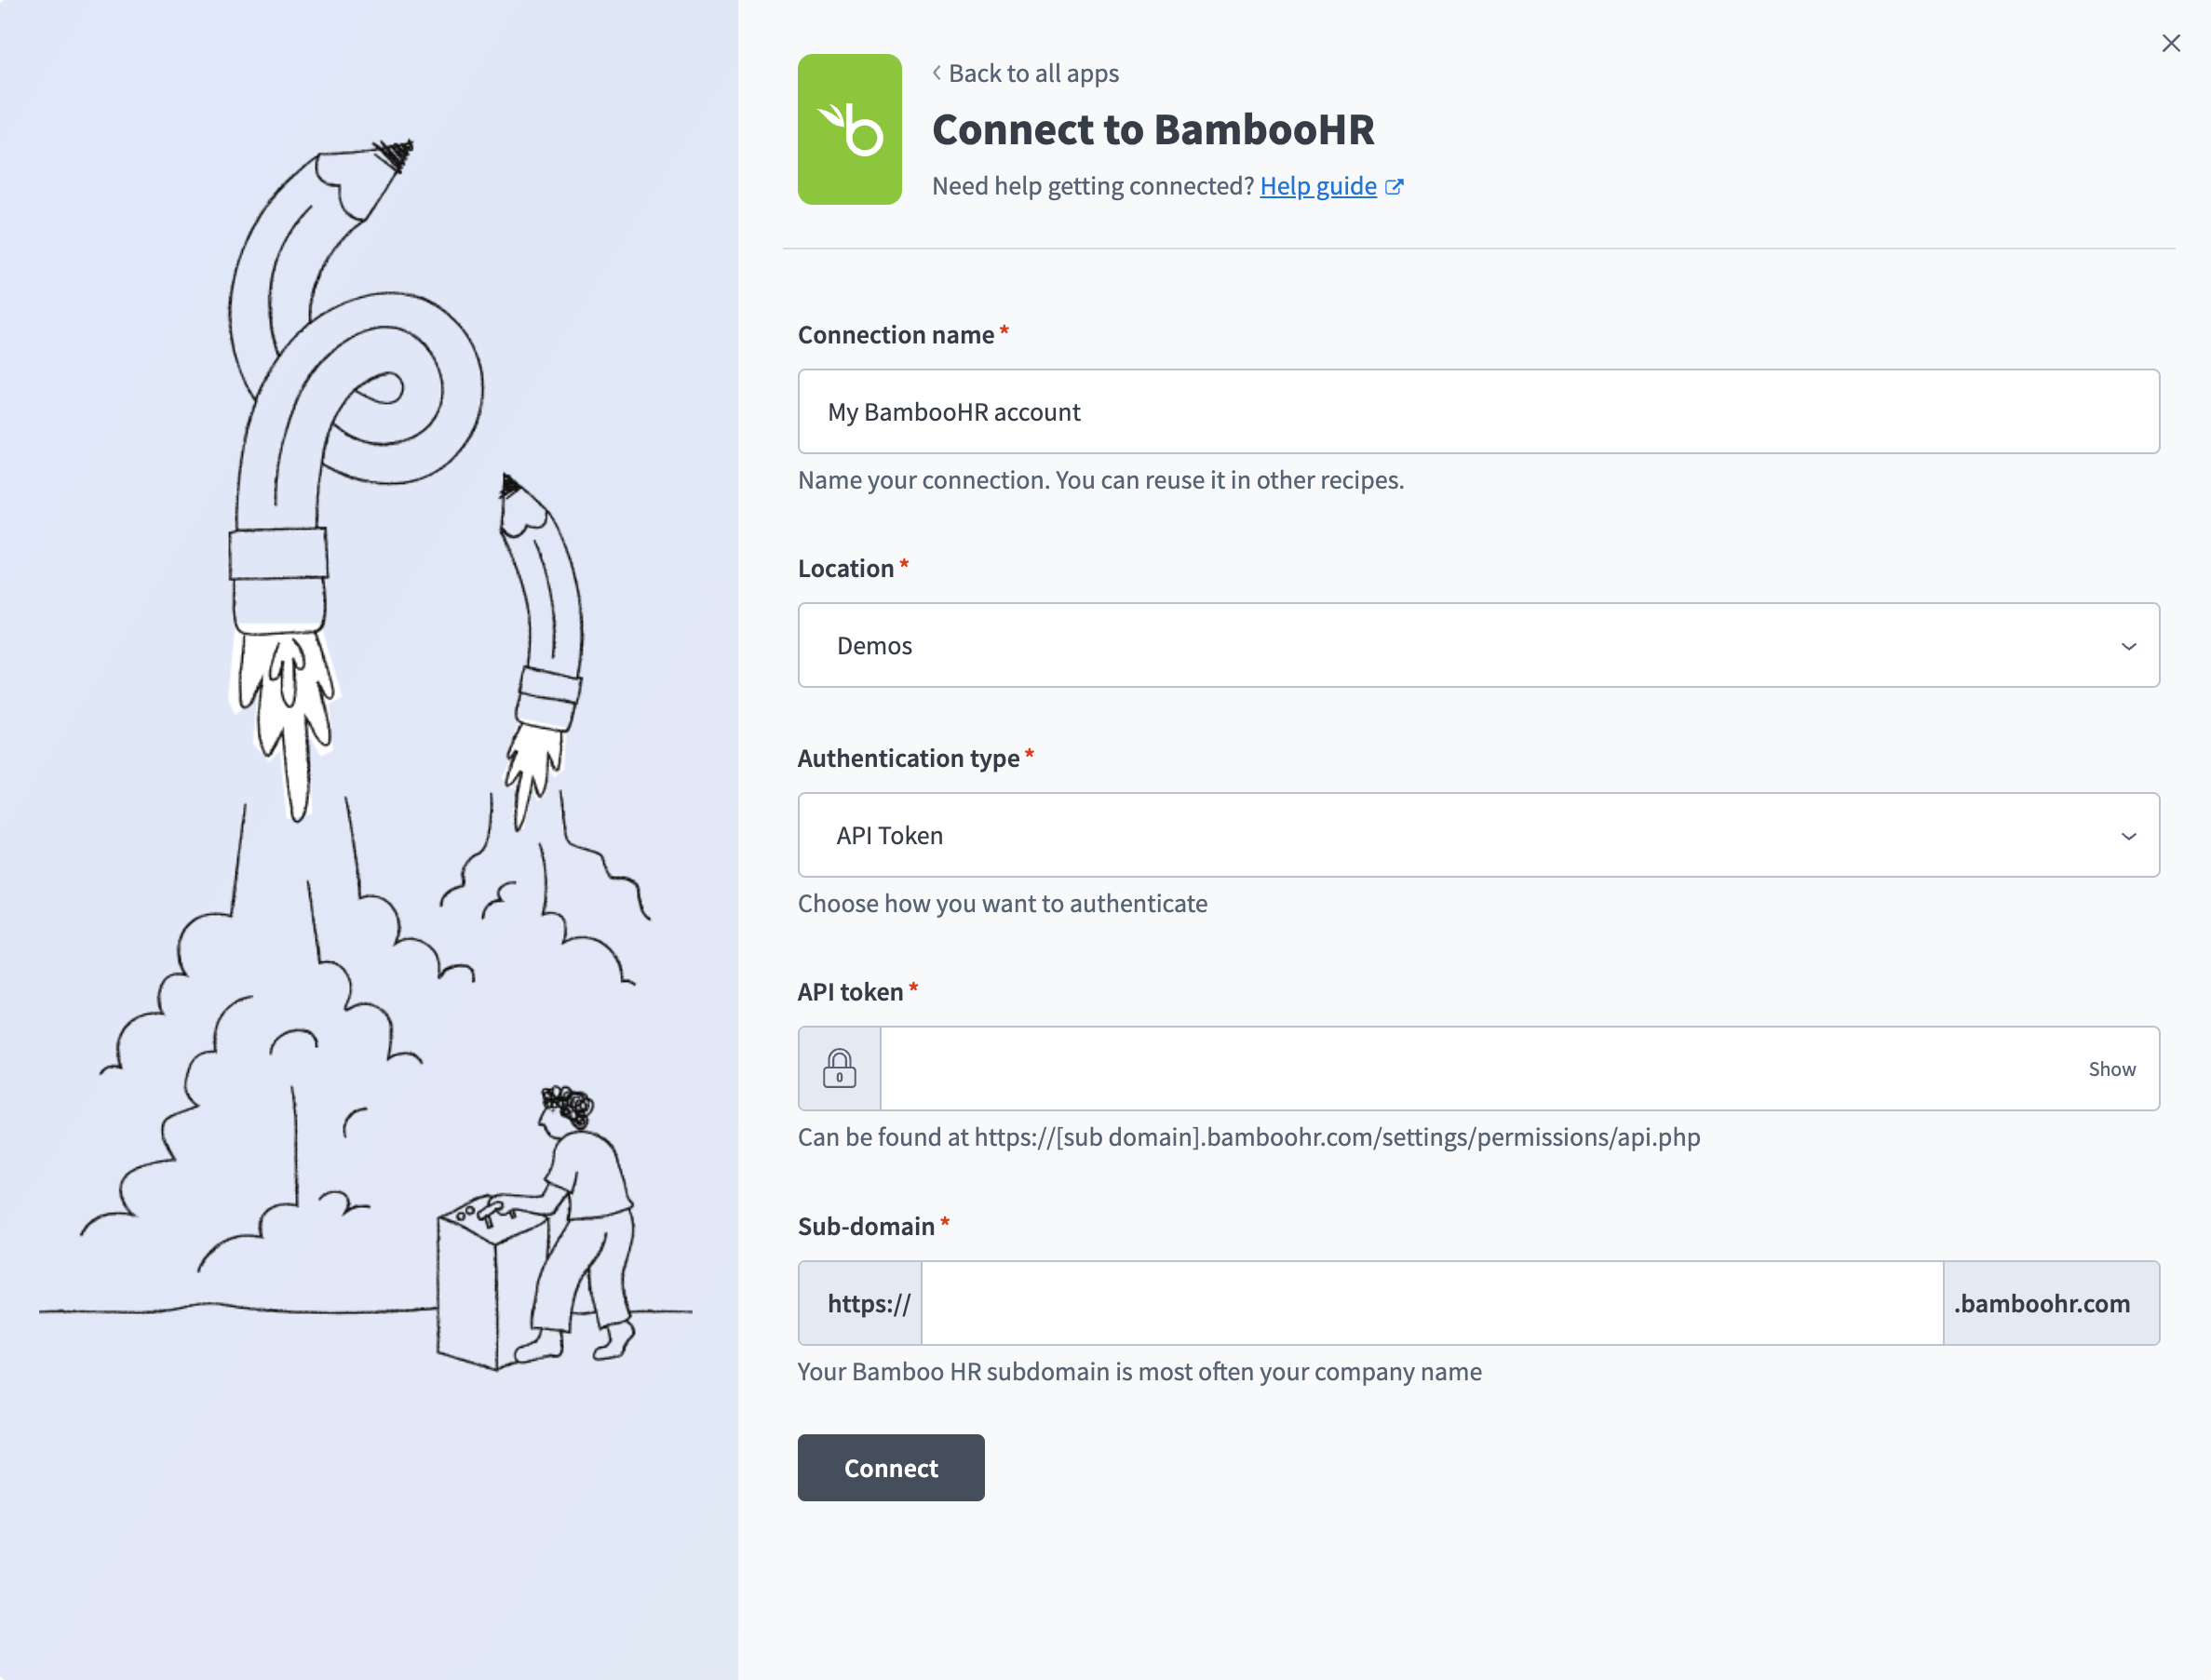 BambooHR connection setup
Use the Location drop-down menu to select the project where you plan to store the connection.
Enter your API token in the API token field. Refer to the How to create an API key in BambooHR section for more information.
Enter your subdomain in the Sub-domain field. For example, enter acme if your subdomain is https://acme.bamboohr.com/.
Click Connect.
Go back to your project and click Create > Recipe or press C+R.
Enter a name for your recipe in the Name field.
Use the Location drop-down menu to select the project where you plan to store the recipe.
Click Start building.
Click Pick a starting point and select Trigger from an app.
Click Select an app and trigger event.
Set up your BambooHR New employee trigger.
Set up your BambooHR New employee trigger
This step creates a trigger that runs when a new employee is detected in BambooHR.
Complete the following steps to set up your trigger:
Search for and select BambooHR as your app.
Select the New/updated employee trigger.
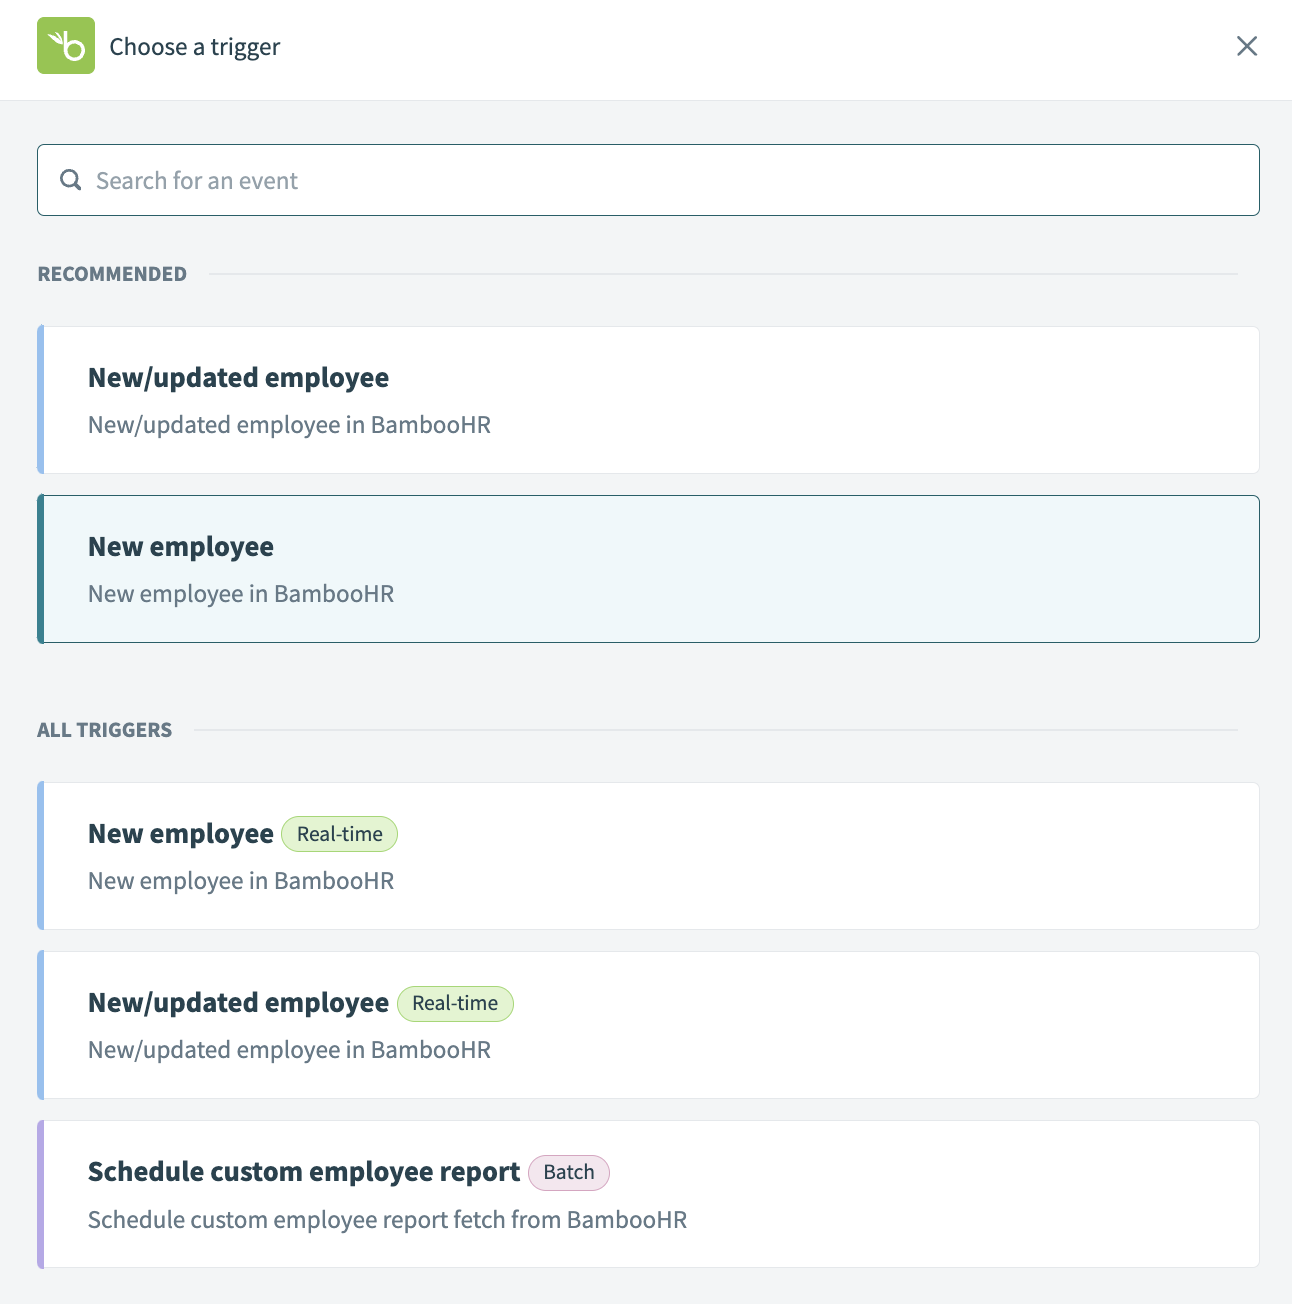 Select New employee as your trigger
Go to the When first started, this recipe should pick up events from field and use the calendar modal to select the date from which your recipe begins to monitor events. The trigger checks for new events every five minutes by default. Leave this field empty to fetch events from the last hour. You can't change this value after you run or test the recipe.
Refer to Triggers to learn more about this input field.
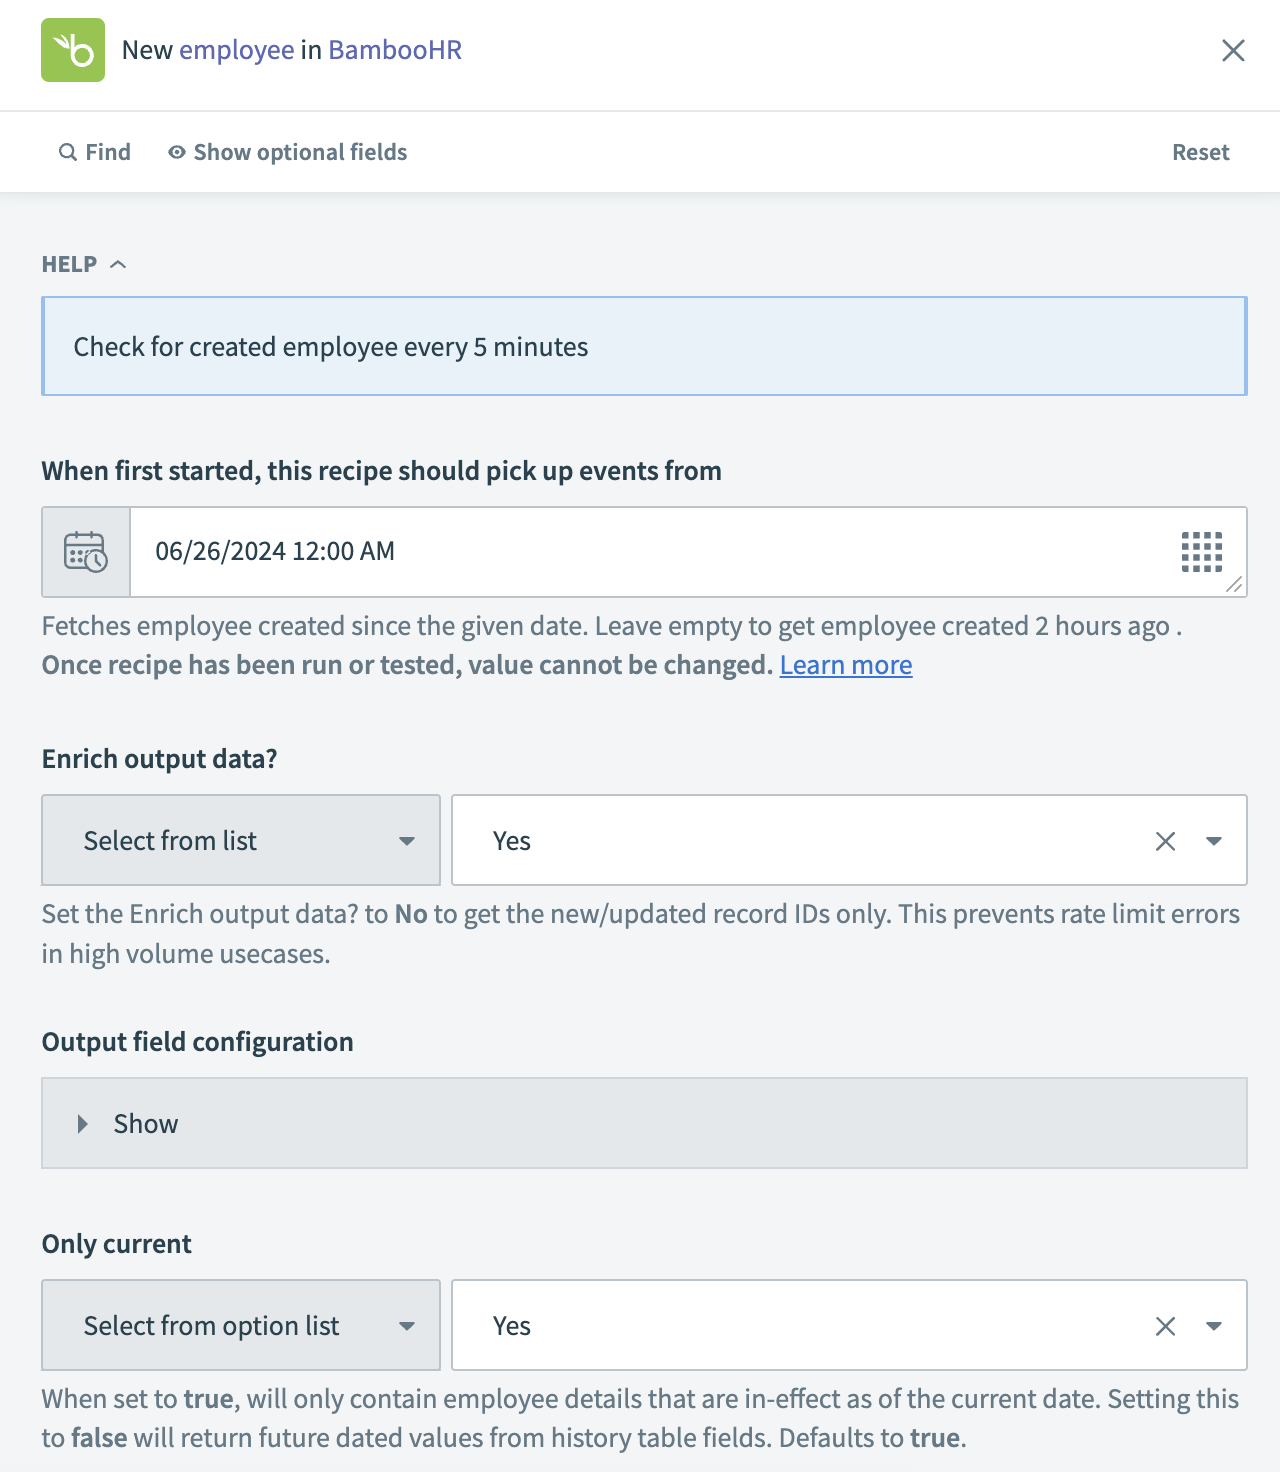 Set up your trigger
Click Save.
Click + Add step and select Action in app.
Set up your HTTP action.
Set up your HTTP action
This step sets up your HTTP action to map your request to the API endpoint and the response from the API endpoint.
Search for HTTP and select it as your app.
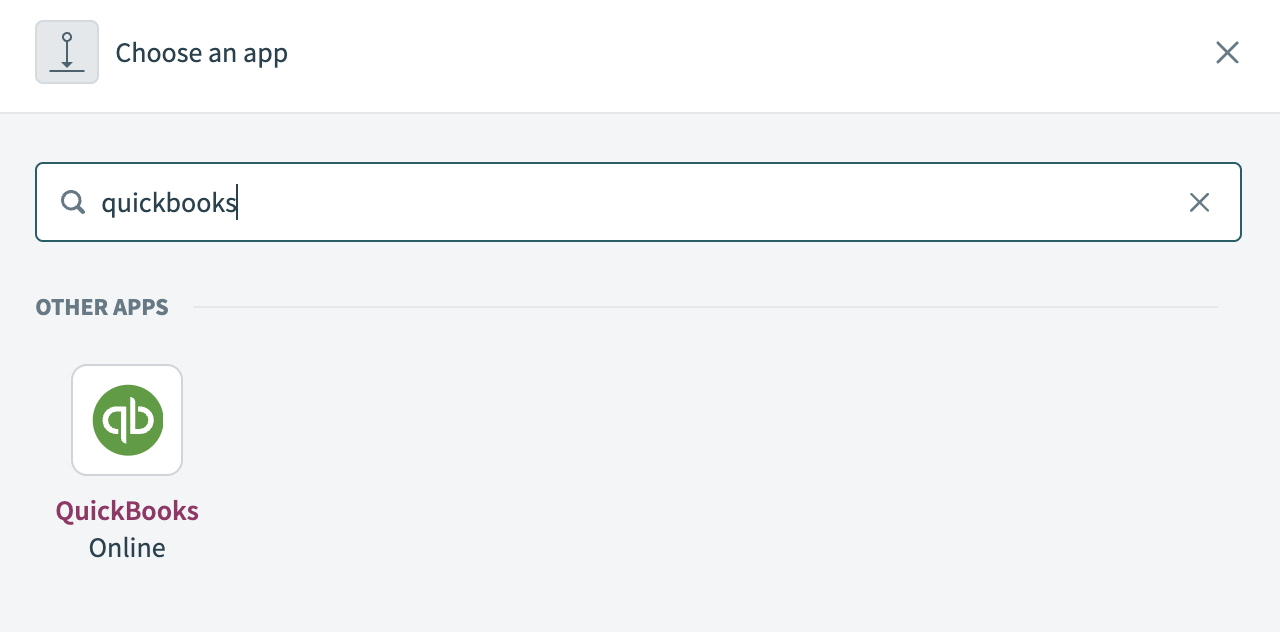 Choose an app
Select the Send request action.
Provide a name for your request in the Request name field.
Use the Method drop-down menu to select Post.
Paste the endpoint URL you created in the preceding steps into the Request URL field.
Go to the Request headers section and click Add header.
Enter API Token in the Header name field and paste your endpoint API token in the Value field.
Use the Request content type drop-down menu to select JSON request body.
Click Use JSON.
Paste the following code into the JSON sample field:
{
"users": [
{
"username": "",
"firstname": "",
"lastname": ""
}
]
}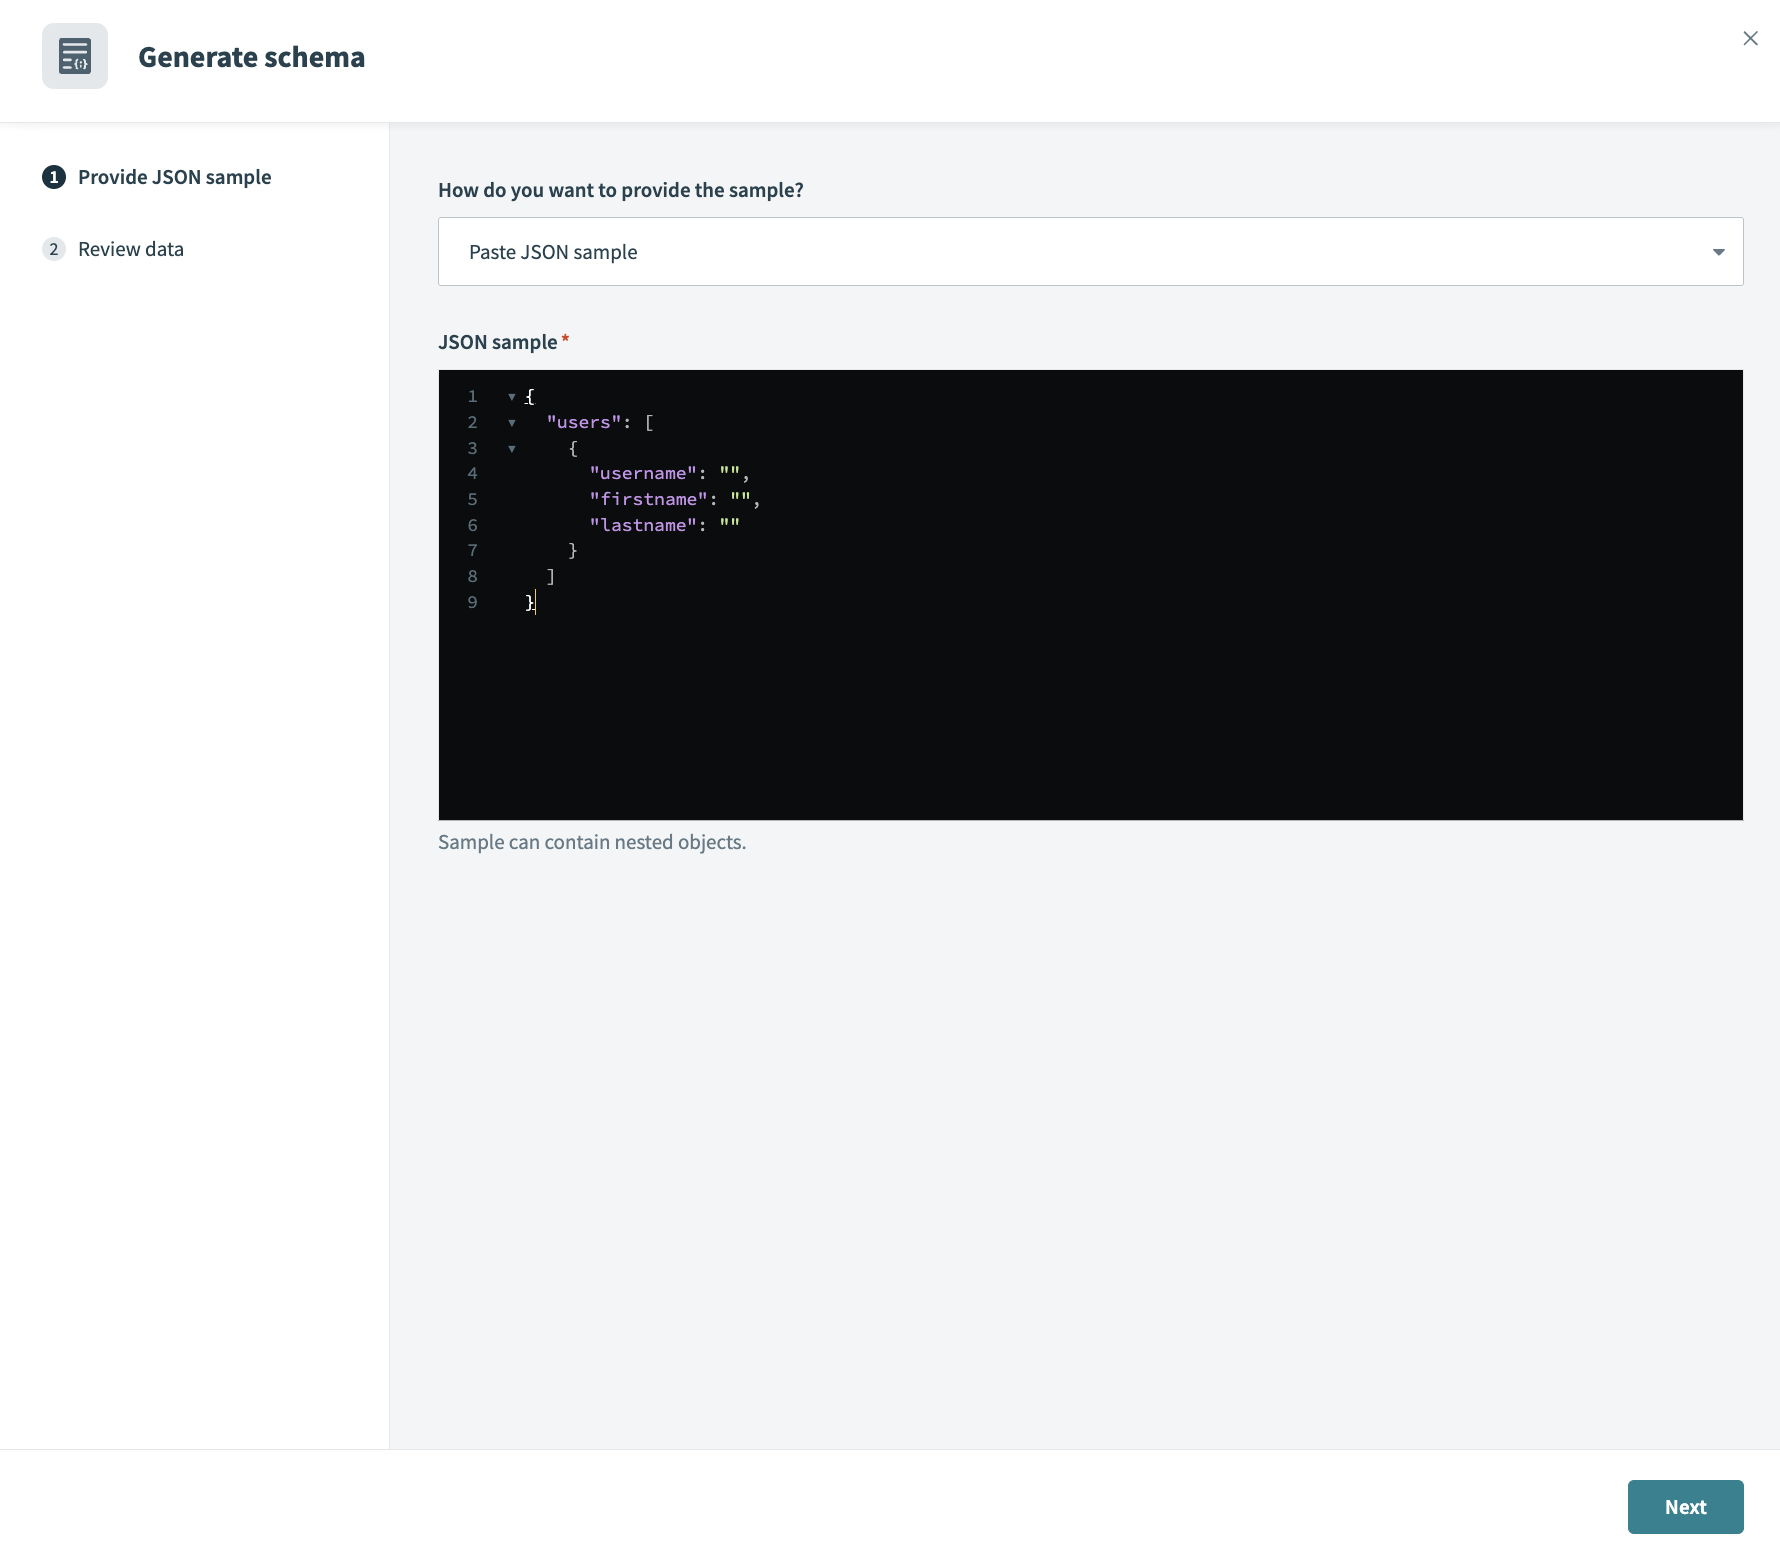 Request schema
Click Next.
Review the data to ensure accuracy and then click Generate schema.
Go to the Request body section.
Map the BambooHR Work emailStep 1 datapill to the Username field.
Map the BambooHR First nameStep 1 datapill to the Firstname field.
Map the BambooHR Last nameStep 1 datapill to the Lastname field.
Go to the Response section and ensure that Response content type is set to JSON.
Go to the Response schema section and click Use JSON.
Paste the following code into the JSON sample field:
{
"result": "User added successfully",
"username": "",
"firstname": "",
"lastname": ""
}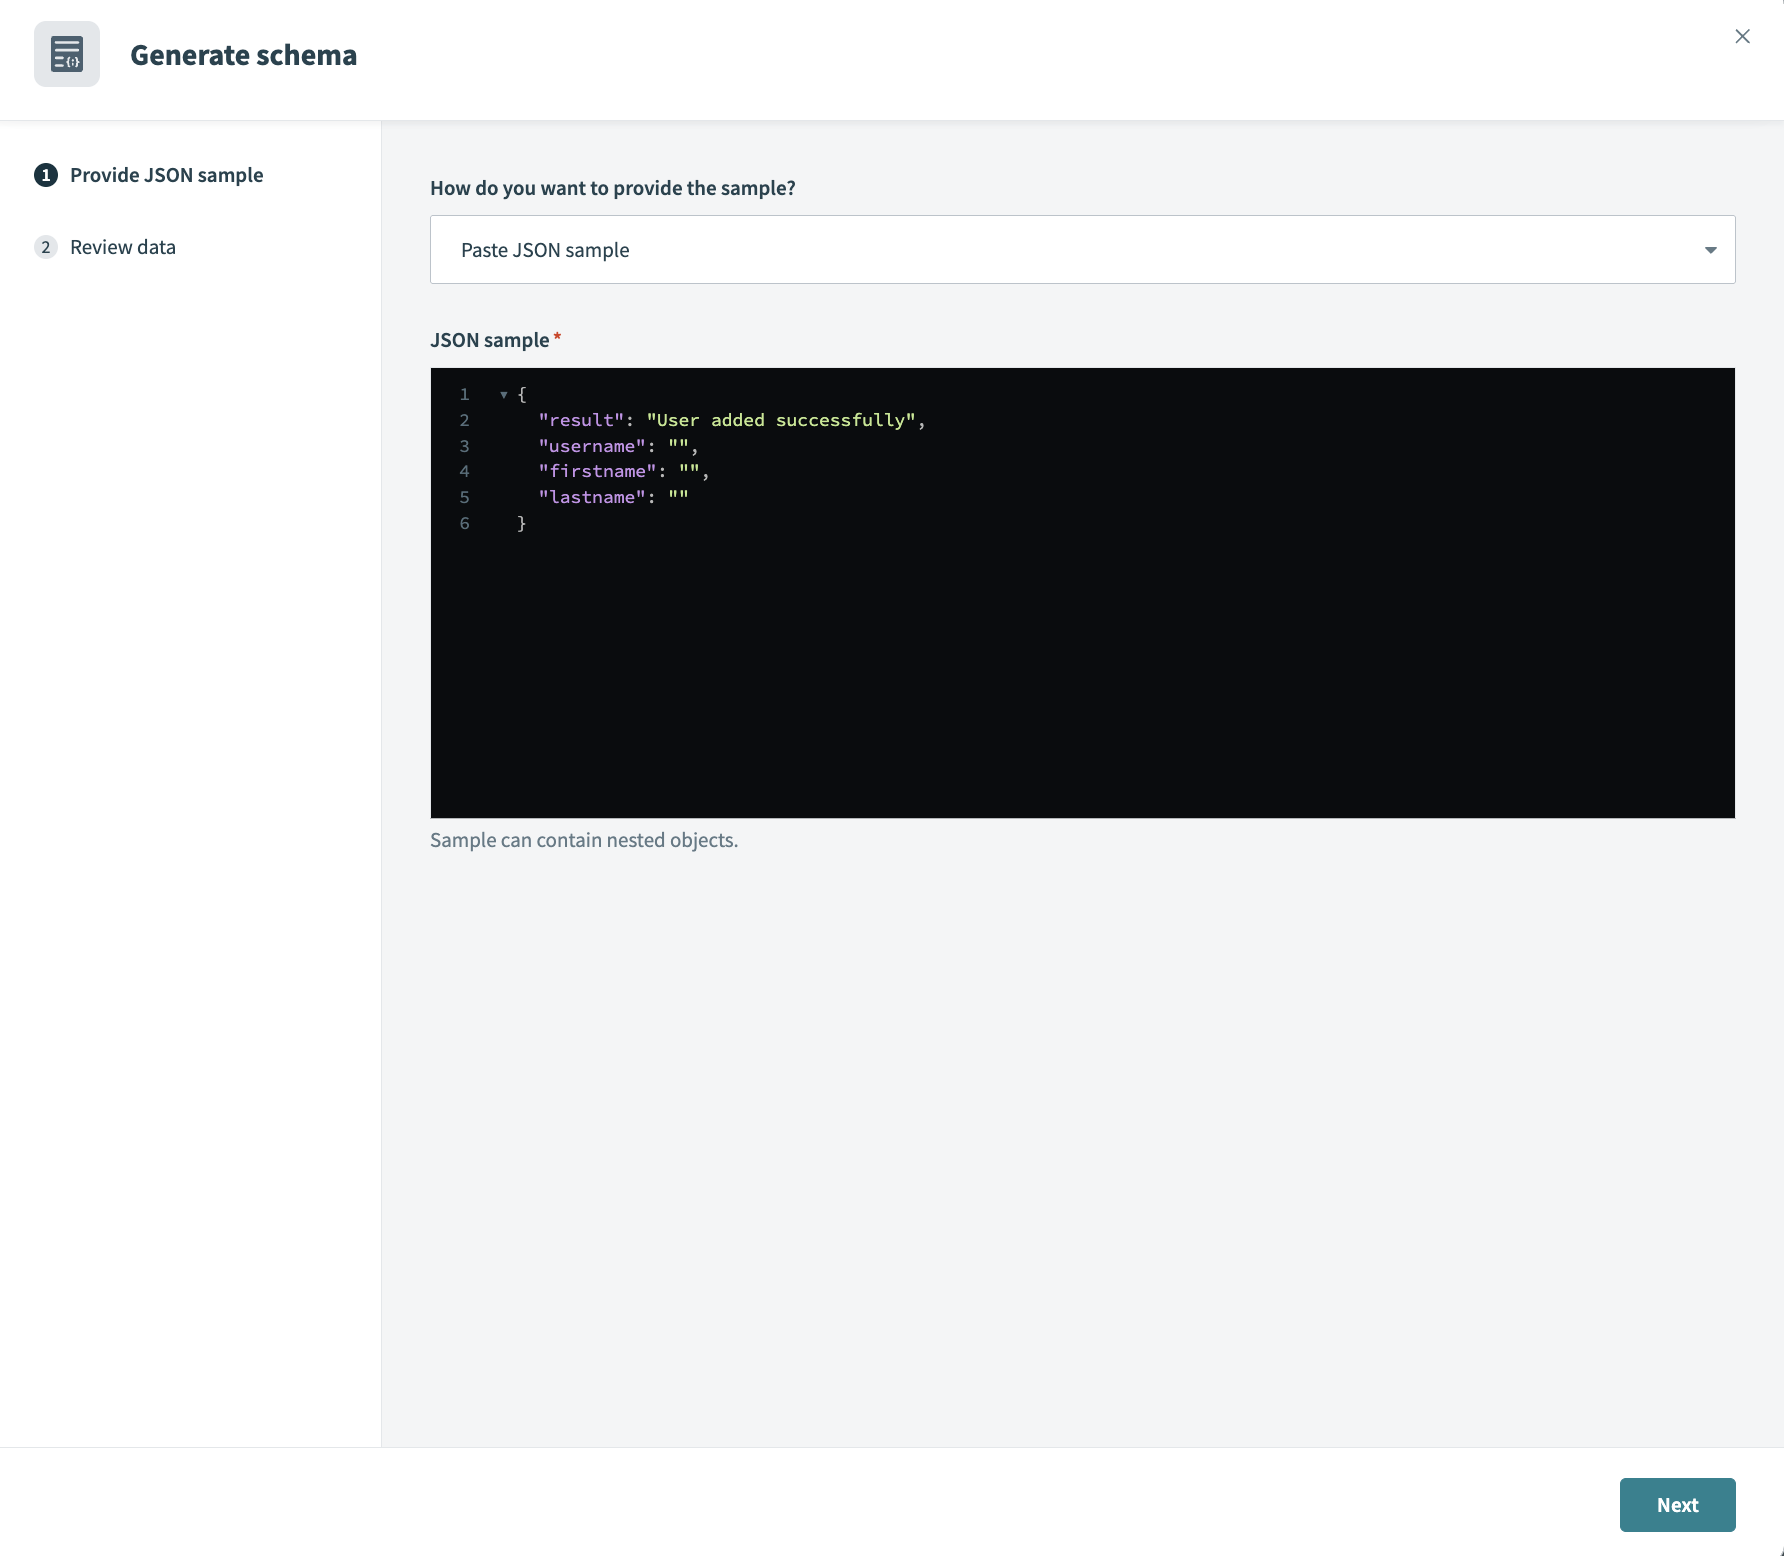 Response schema
Click Next.
Review the data to ensure accuracy and then click Generate schema.
Click Save.
Last updated: