# Configure output settings
Configure the output settings to define how and where your data outputs after SQL transformations. This section guides you through choosing between streaming the output as a content stream or saving it as a file in FileStorage, with various options for formatting and structuring your output data.
# Prerequisites
Before configuring your output settings, ensure you have completed the following steps:
# Configure your output
In this section, configure the output type and additional features for the output data.
Output type
Select the output type. Use Content stream to share the contents as a streamable datapill to downstream actions. Use the FileStorage file option to save the output as a file in the FileStorage system.
Content stream input fields
Configure the following fields when you choose Content stream as your output type:
File type
Select CSV or Excel as the file format of your output data.
Include header row
Set to Yes to include column names from the SQL as a header row. The default is set to
No.Column delimiter
Choose the character to separate columns in the CSV contents. This option is available only when you choose CSV as the file type. The default is set to
comma.Quote type
Choose whether to use quotation marks around values. This option is available only when you choose CSV as the file type. The default is
Use when necessary.Quote character
Choose the type of quotation marks to use around the values in the output. This option is available only when you choose CSV as the file type. The default is
Double.Sheet name
Set a custom sheet name for the Excel file. This option is available only when you choose Excel as the file type. The output data is always added to the first sheet with this name. This field defaults to
Sheet 1if a sheet name is not provided.Start from
Enter the cell to start inserting data from. This option is available only when you choose Excel as the file type. For example,
C1. This field defaults toA1.
FileStorage file input fields Configure the following fields when you choose FileStorage file as your output type:
FileStorage file path
Provide the file path value. For example,
samplepath/path1/.FileStorage output file name
Define the output file name for storage in Workato FileStorage.
File type
Select CSV or Excel as the file format of your output data.
Include header row
Set to Yes to include column names from the SQL as a header row. The default is set to
No.Column delimiter
Choose the character to separate columns in the CSV contents. This option is available only when you choose CSV as the file type. The default is set to
comma.Quote type
Choose whether to use quotation marks around the values in the output. This option is available only when you choose CSV as the file type. The default is
Use when necessary.Quote character
Choose the type of quotation marks to use around the values in the output. This option is available only when you choose CSV as the file type. The default is
Double.Sheet name
Set a custom sheet name for the Excel file. This option is available only when you choose Excel as the file type. The output data is always added to the first sheet with this name. This defaults to
Sheet 1if a sheet name is not provided.Start from
Enter the cell to start inserting data from. This option is available only when you choose Excel as the file type. For example,
C1. This field defaults toA1.
# Example output setup: Store output in Workato FileStorage (CSV)
In this example, the query output is stored in Workato FileStorage with the filename Employee_Zipcode_SQL.csv under a specific folder called SQL. Column names from the query are included as the header row in the file, and , (comma) is set as the column delimiter separating the data in the output CSV file.
 Example output setup
# Example output setup: Store output in Workato FileStorage (Excel)
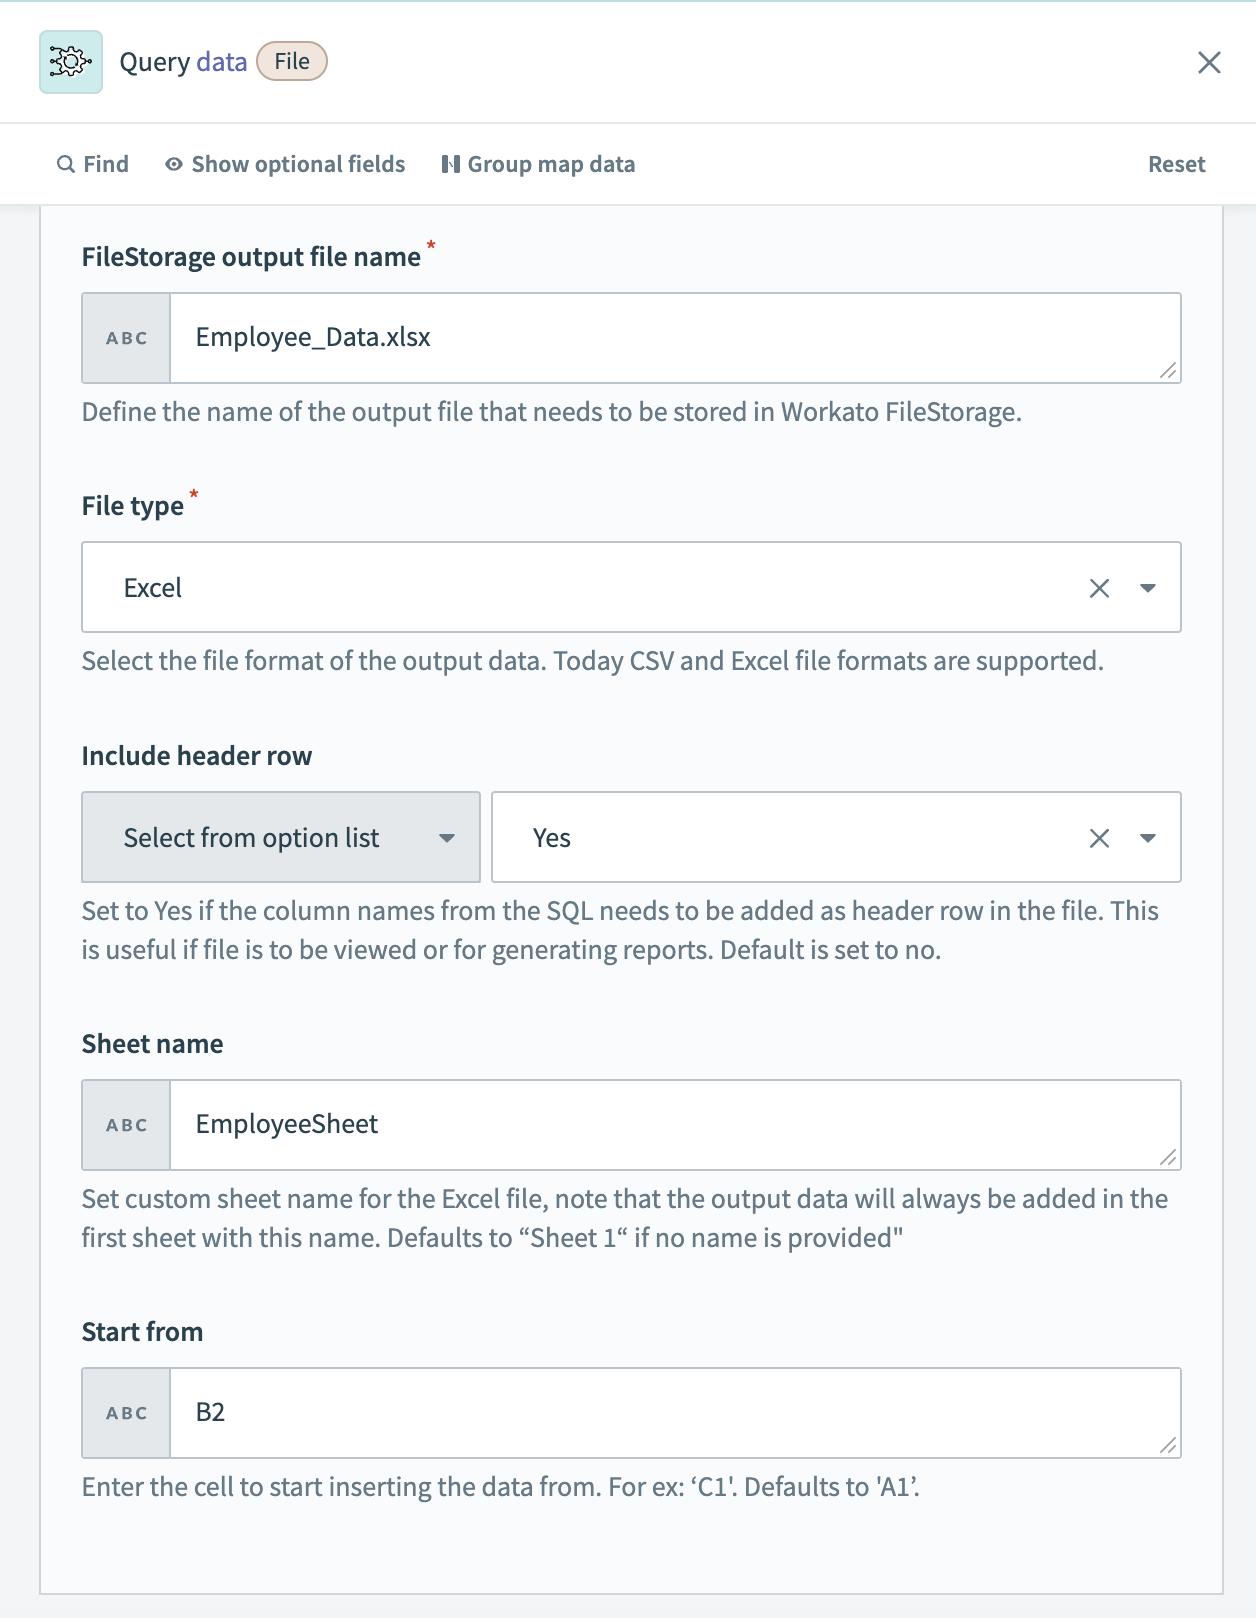
In this example, the query output is stored in Workato FileStorage with the filename Employee_Data.xlsx under a specific folder called SQL. The sheet name is set to EmployeeSheet, column names from the query are included as the header row, and data insertion starts from cell B2.
 Example output setup
# Read next
SAMPLE USE CASES
See our guides for step-by-step instructions on how to leverage SQL Transformations for the following use cases:
Last updated: 1/2/2026, 5:56:05 PM