Data destinations
Data destinations are the systems, applications, or locations where you can send data for storage, processing, and analysis.
Use the following links to set up connections to our supported destinations:
Refer to the connectors documentation for more information.
Example: Connect Workato to a Snowflake destination
These steps demonstrate how to use a Snowflake data warehouse as a destination for your Workato data pipeline. For more in-depth documentation on connecting Snowflake with Workato, refer to the Snowflake connector documentation.
To replicate this example, you need Workato and Snowflake accounts and a configured Snowflake data warehouse.
Add Snowflake as a connection
Complete the following steps to add Snowflake as a connection:
Select Create > Connection (or press C twice) in your Workato workspace.
Search for and select Snowflake.
Enter the Snowflake connection information.
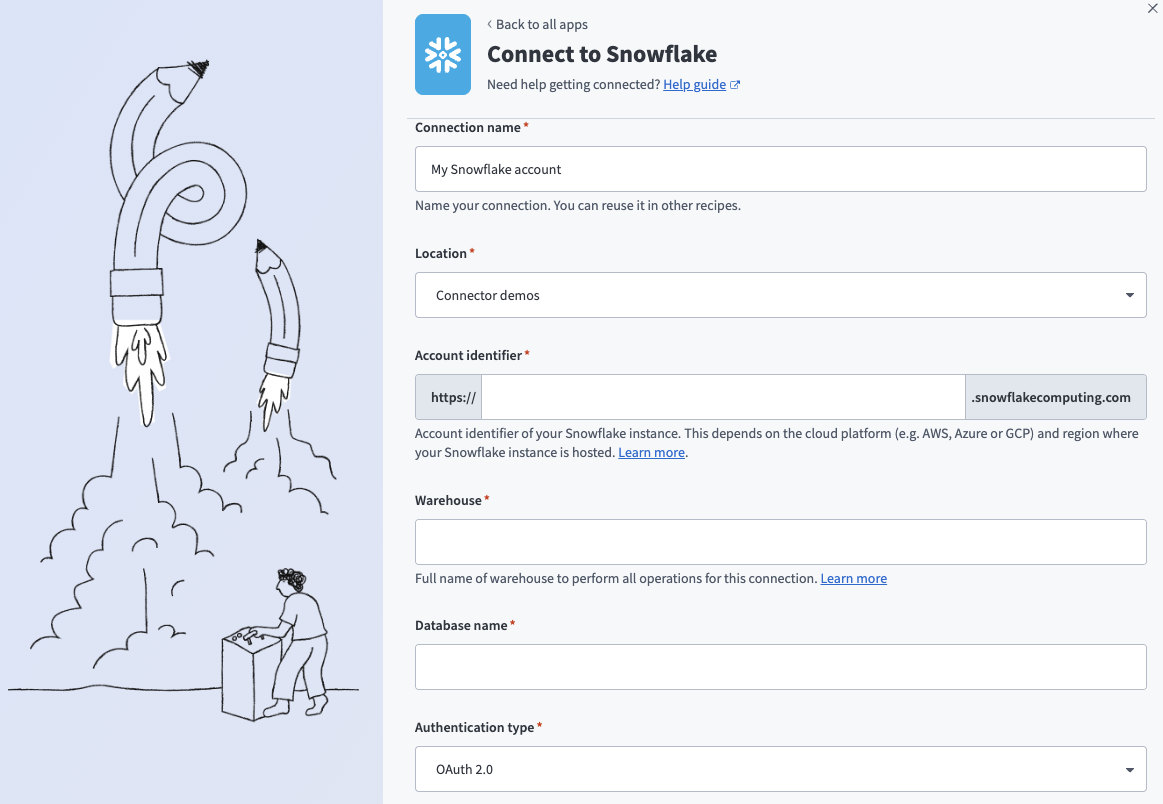 Snowflake connection
| Field | Description |
|---|---|
| Connection name | Give this Snowflake connection a unique name that identifies which Snowflake instance it is connected to. |
| Account identifier | Account identifier of your Snowflake instance. Snowflake has multiple methods of identifying an account. Workato supports all methods: account name, connection name, and account locator.
If you're using the account locator, note that
Learn more about connecting to your Snowflake account. |
| Authentication type | Choose an authentication type for this connection. Select between Username/Password and OAuth 2.0. |
| Warehouse | Name of the warehouse to use for performing all compute for this connection. See Warehouse considerations for more information. |
| Database | Name of the Snowflake database you plan to connect to. |
| Username | Username to connect to Snowflake. The role granted to the User should have SYSADMIN privileges or lower. Required if you selected Username/Password authentication type. |
| Password | Password to connect to Snowflake. The role granted to the User should have SYSADMIN privileges or lower. Required if you selected Username/Password authentication type. |
| Client ID | Client ID to be used for the OAuth 2.0 authorization flow and token request. Learn more about OAuth 2.0 setup. Required if you selected OAuth 2.0 authentication type. |
| Client secret | Client secret to be used for the OAuth 2.0 token request. Required if you selected OAuth 2.0 authentication type. |
| Schema | Optional. Name of the schema within the Snowflake database you wish to connect to. Defaults to public. |
| Database timezone | Optional. Apply this to all timestamps without timezone. |
Select Connect.
Use Marketo activity to update rows in Snowflake
This example borrows from the steps in the Marketo, Salesforce, and Snowflake recipe use case. These steps assume an existing connection with Marketo and Snowflake but can be modified to fit your pipeline's needs.
Create a new recipe or update an existing recipe to add a set of values to rows in Snowflake.
Add a new action to the recipe with Add step > Action in app.
Search for and select Marketo in the Choose an app search box.
Select New lead activity in Marketo batch as the trigger.
Use the calendar modal to select the date from which the recipe should begin to monitor events in the When first started, this recipe should pick up events from field.
Refer to Triggers to learn more about this input field.
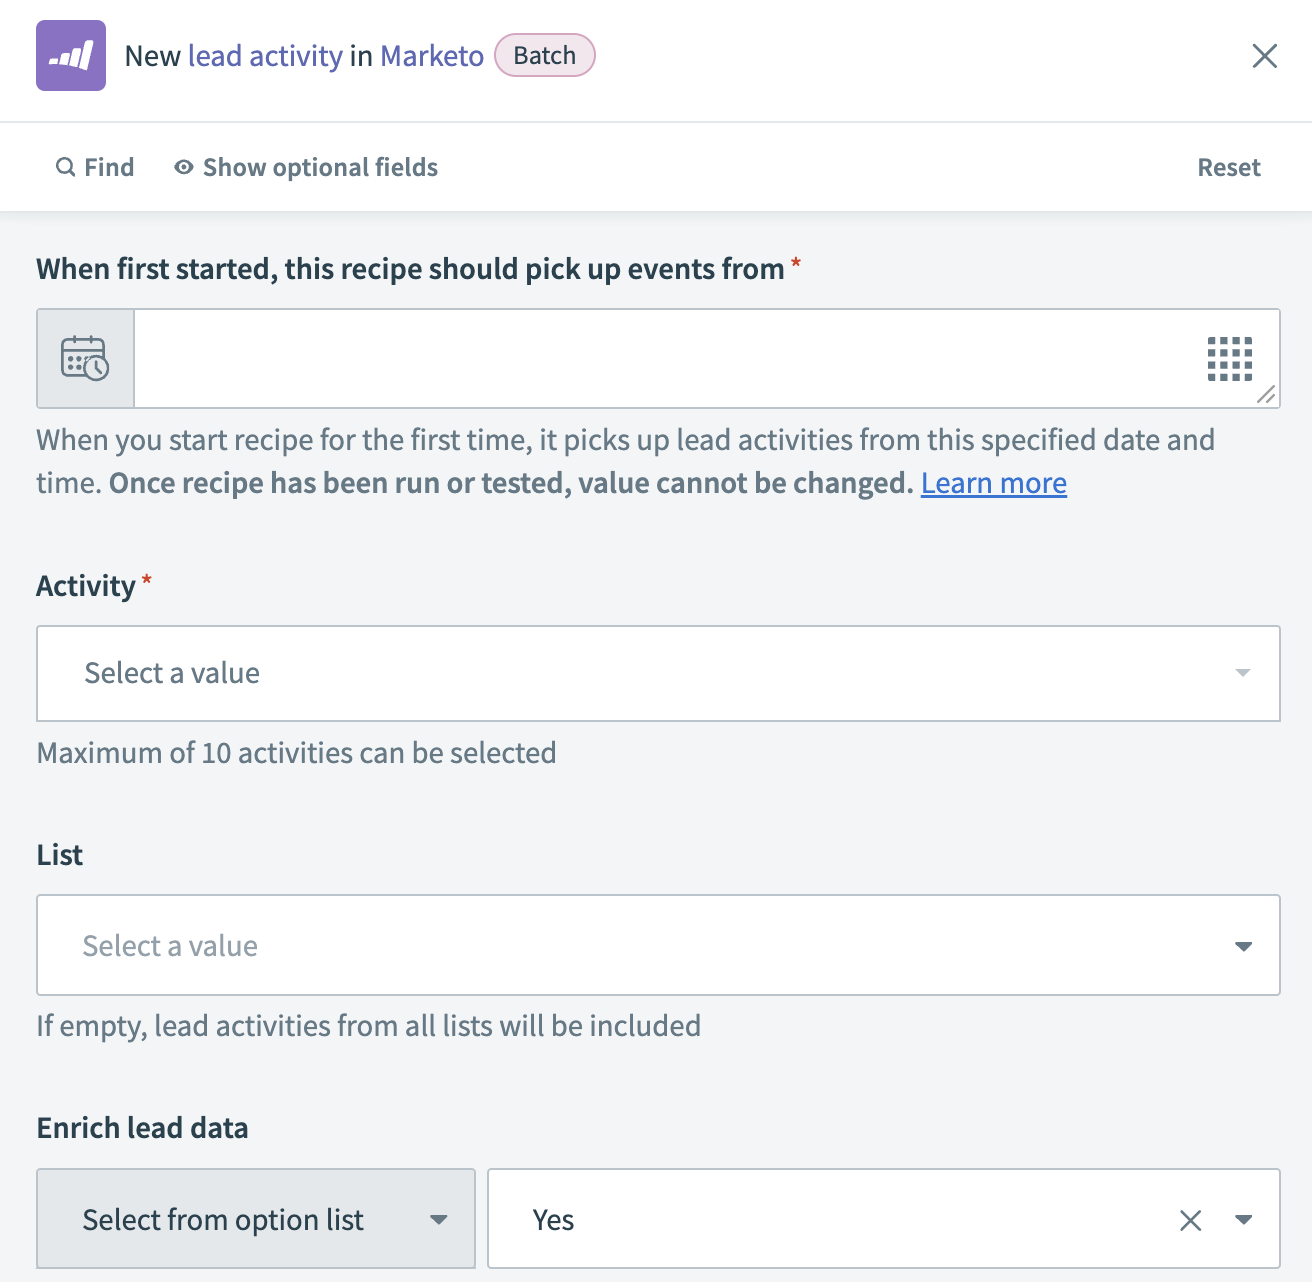 New lead activity batch trigger
Search for and select New Lead in the Activity field.
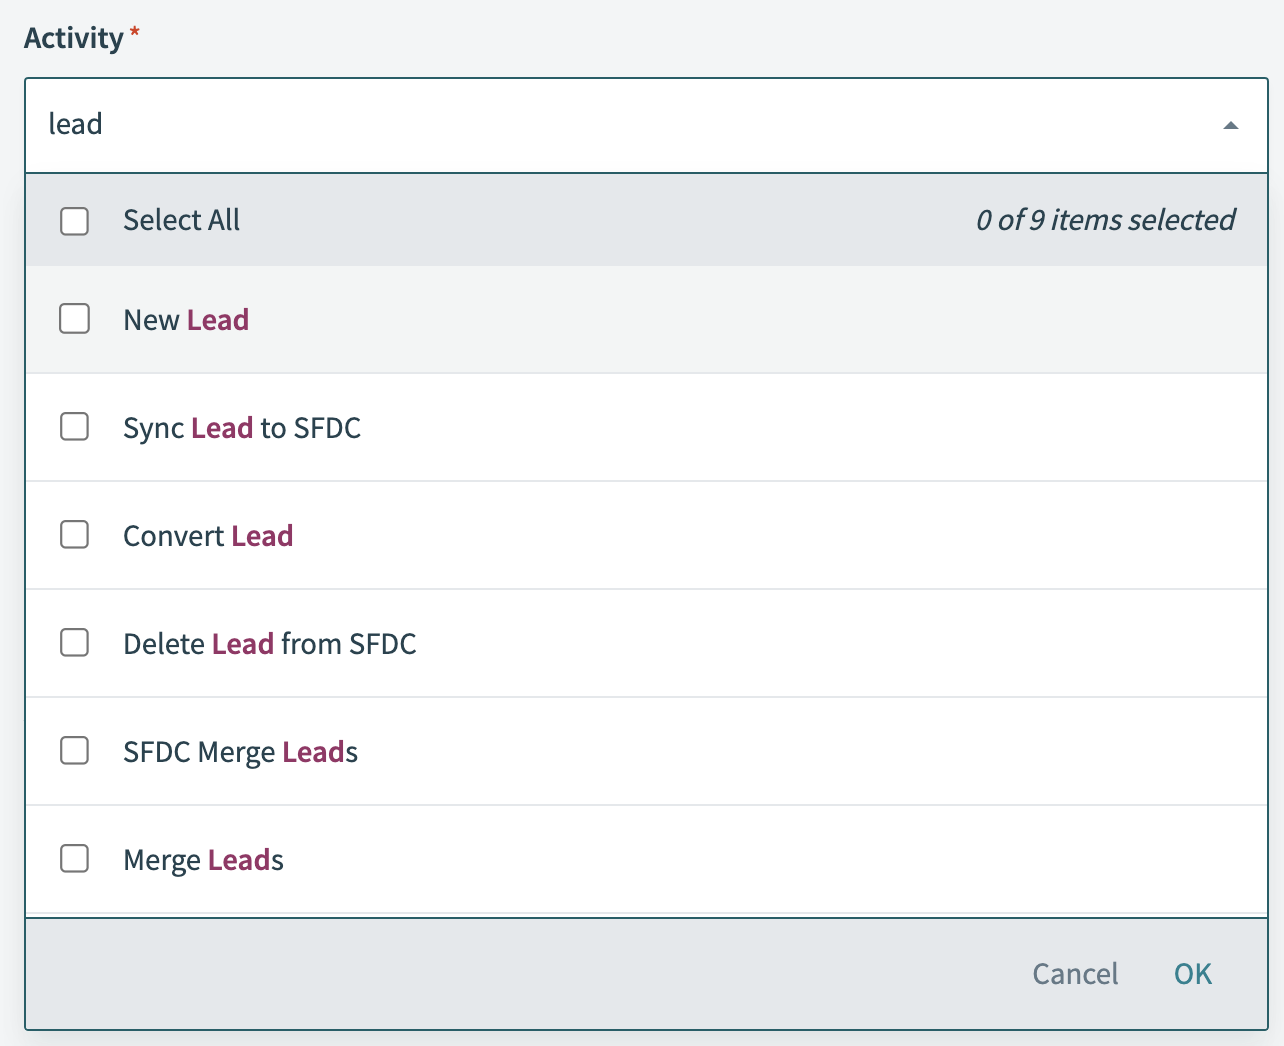 Select New lead as the activity
Use the List drop-down menu to limit lead activity monitoring to a specific list. Lead activities from all lists are included if this field is empty.
Select an option for Enrich lead data:
Yes: The trigger output performs additional requests to supplement each activity record with the associated lead data.
No: Excludes lead enrichment requests to reduce the number of API requests.
Select Save.
Select the + Add step button and select Action in app.
Search for and select Snowflake in the Choose an app search box.
Select Insert row for your action.
Use the Table drop-down menu to select the name of the Snowflake table in which you plan to insert rows.
Select Save.
Last updated: