Workday
Workday offers cloud-based financial management and human capital management software. It combines finance and HR functionalities, enhancing business performance and providing deeper insights into organizational data.
Workday provides three primary types of services for data orchestration:
Workday Web Services
Provides a set of Simple Object Access Protocol (SOAP) APIs that enable users to read and write data in and out of Workday.
Workday REST
Offers REST APIs primarily used for manipulating custom objects.
Workday Report-as-a-Service (RaaS)
Allows you to extract data from custom reports that are web service enabled.
Workato uses these services to create powerful integration scenarios and sync data between your Workday instance and other cloud applications.
Workday Approved
![]() Workday Approved Badge
Workday Approved Badge
Our Workday connector is Workday Approved for all HR Onboarding/HCM use cases.
Use cases
Integrate Workday with your business applications to automate HR processes and improve workforce management. You can sync employee data, streamline user provisioning, secure access management, and ensure efficient data handling. Explore our use cases to discover how you can optimize your Workday workflows:
- Provision Jira and Okta users for new employees in Workday.
- Export Workday workers to CSV with Python and upload the file to Google Drive.
API version
Workato supports the following versions for each of Workday's services:
Workday Web Services
Supported versions
- v46.1
- v45.1
- v44.1
- v42.1
- v41.1
VERSION 41.1 REMOVAL
Workato will remove support for version 41.1 on September 1, 2026. Any connections using version 41.1 on September 1 will be automatically upgraded to version 42.1. Refer to the Version support policy section for more information.
Version support policy
- Workato primarily supports even-numbered major version releases (for example, 42 and 44), following Workday's schedule of releasing one major version every six months. However, Workato may support odd-numbered versions when critical functionality isn't available in even-numbered releases. For example, Workday API v45 is supported to enable multiple concurrent jobs for contingent workers.
- Workato generally supports up to three API versions at any given time. In some cases, additional versions may be temporarily supported to accommodate customer requirements or ensure a smooth transition between releases. All connections using removed versions are automatically upgraded to the oldest available version. For example, if versions 42, 44, and 45 are supported and version 46 is added, version 42 may be removed, leaving 44, 45, and 46.
- Workato applies enhancements and bug fixes only to the latest supported version. Previous versions are offered as-is and don't receive updates.
- Workato intends to follow this approach but may adjust support coverage if the annual release cycle doesn't align with customer needs.
Workday REST
- v1
Workday Report-as-a-Service (RaaS)
There are no versions associated with the Workday RaaS.
How to connect to Workday on Workato
Before connecting to Workday
We recommend that you create an Integration System User (ISU) before you integrate your Workday with Workato. An ISU ensures that all integration operations are logged under a designated user, separate from regular workflow processes. This is essential as changes to a regular worker’s security profile or their termination could disrupt integrations reliant on their account. Limit each ISU to a single integration system, such as Workato, for enhanced security.
The Workday REST API requires authentication through an OAuth client setup. This means you must register a Workday API client if your integration includes Workday custom objects.
Register Integration System User (ISU) in Workday
Your Integration System User (ISU) must be assigned the required permissions to create a successful integration. You may receive a 403 error if your ISU has insufficient permissions.
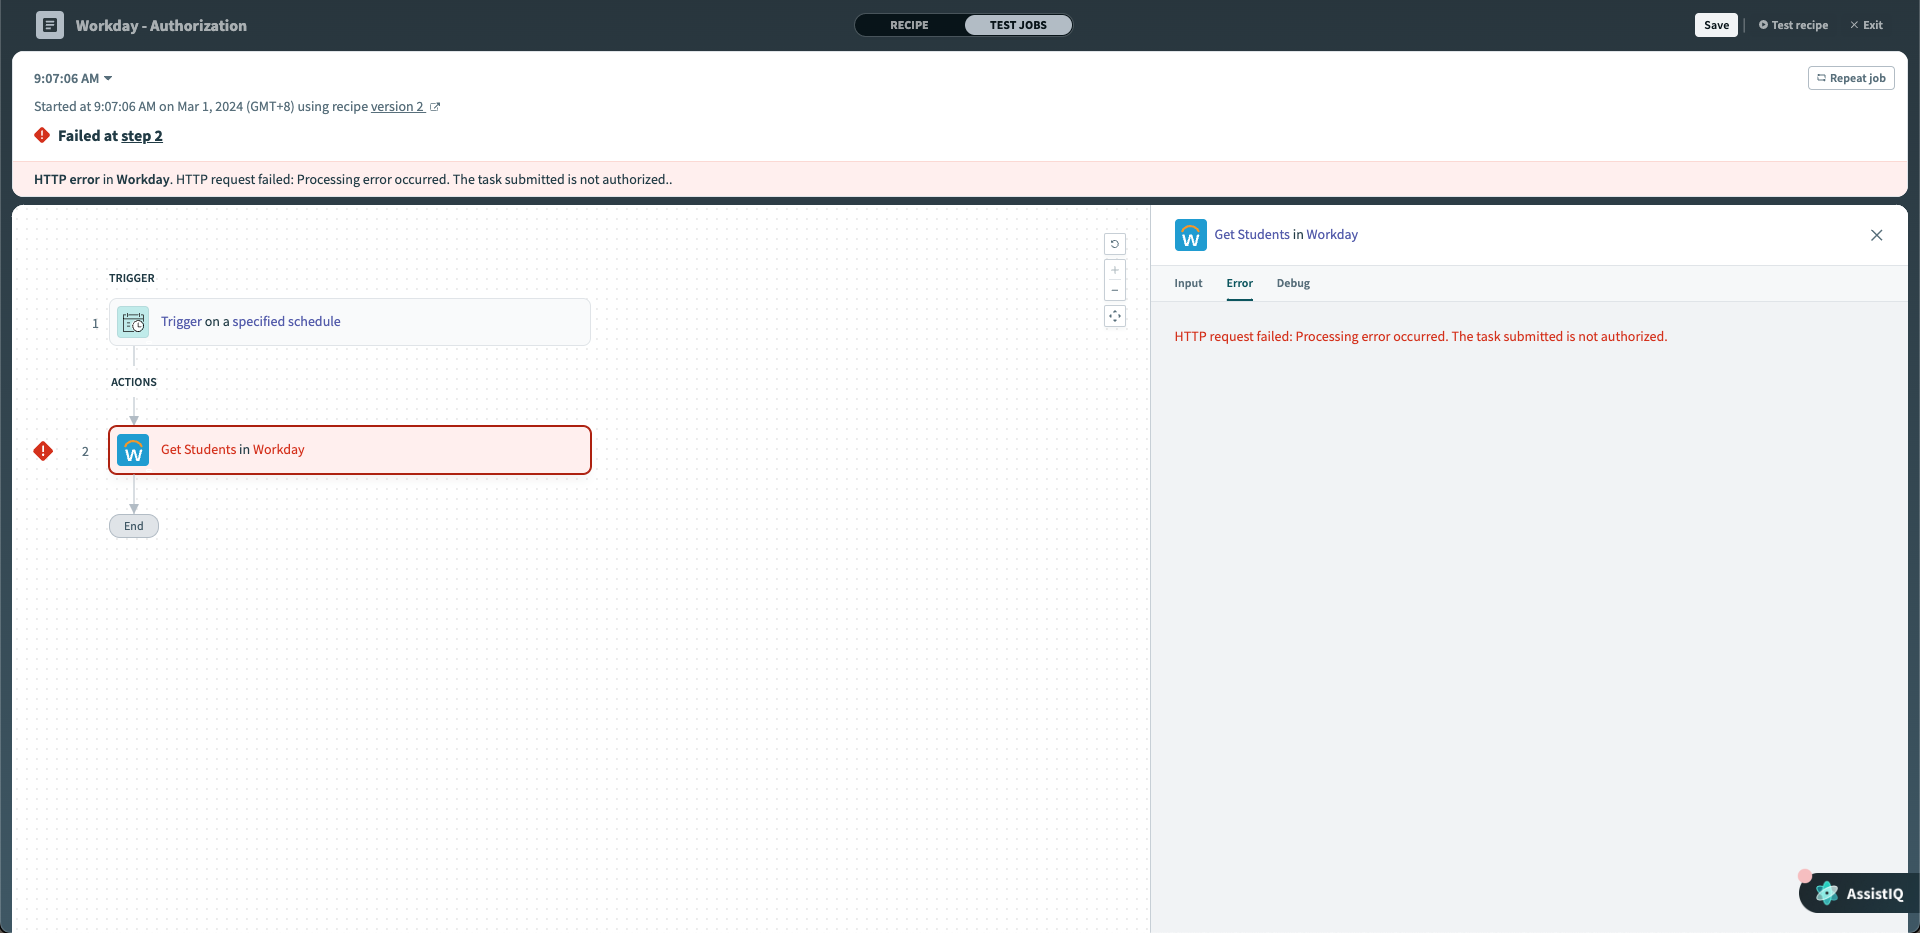 Error message when ISU doesn't have enough permissions
A 403 error may indicate that the ISU lacks the required domain-level permissions. Refer to the Grant domain access to security group section to ensure that your ISU is granted the appropriate permissions.
Create an Integration System User (ISU)
Complete the following steps to create an ISU in Workday:
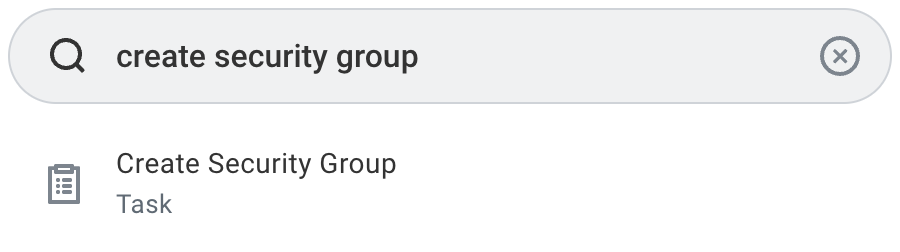
Type Create Integration System User into Workday's search bar and select the task from the results.
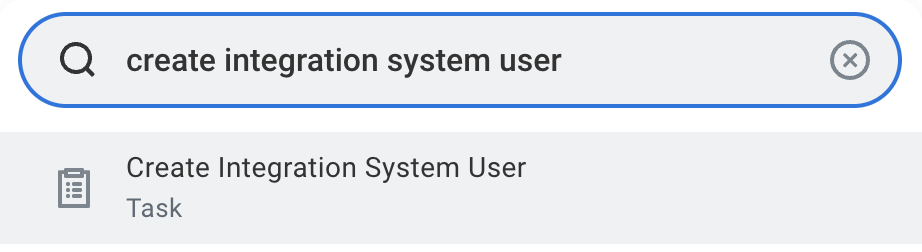 Search for Create Integration System User task in Workday
Enter a username and set a password in the Create Integration System User task.
ISU USERNAMES
Spaces in Workday ISU usernames can cause encoding and formatting issues. We strongly recommend that you use underscores (_) or hyphens (-) instead of spaces.
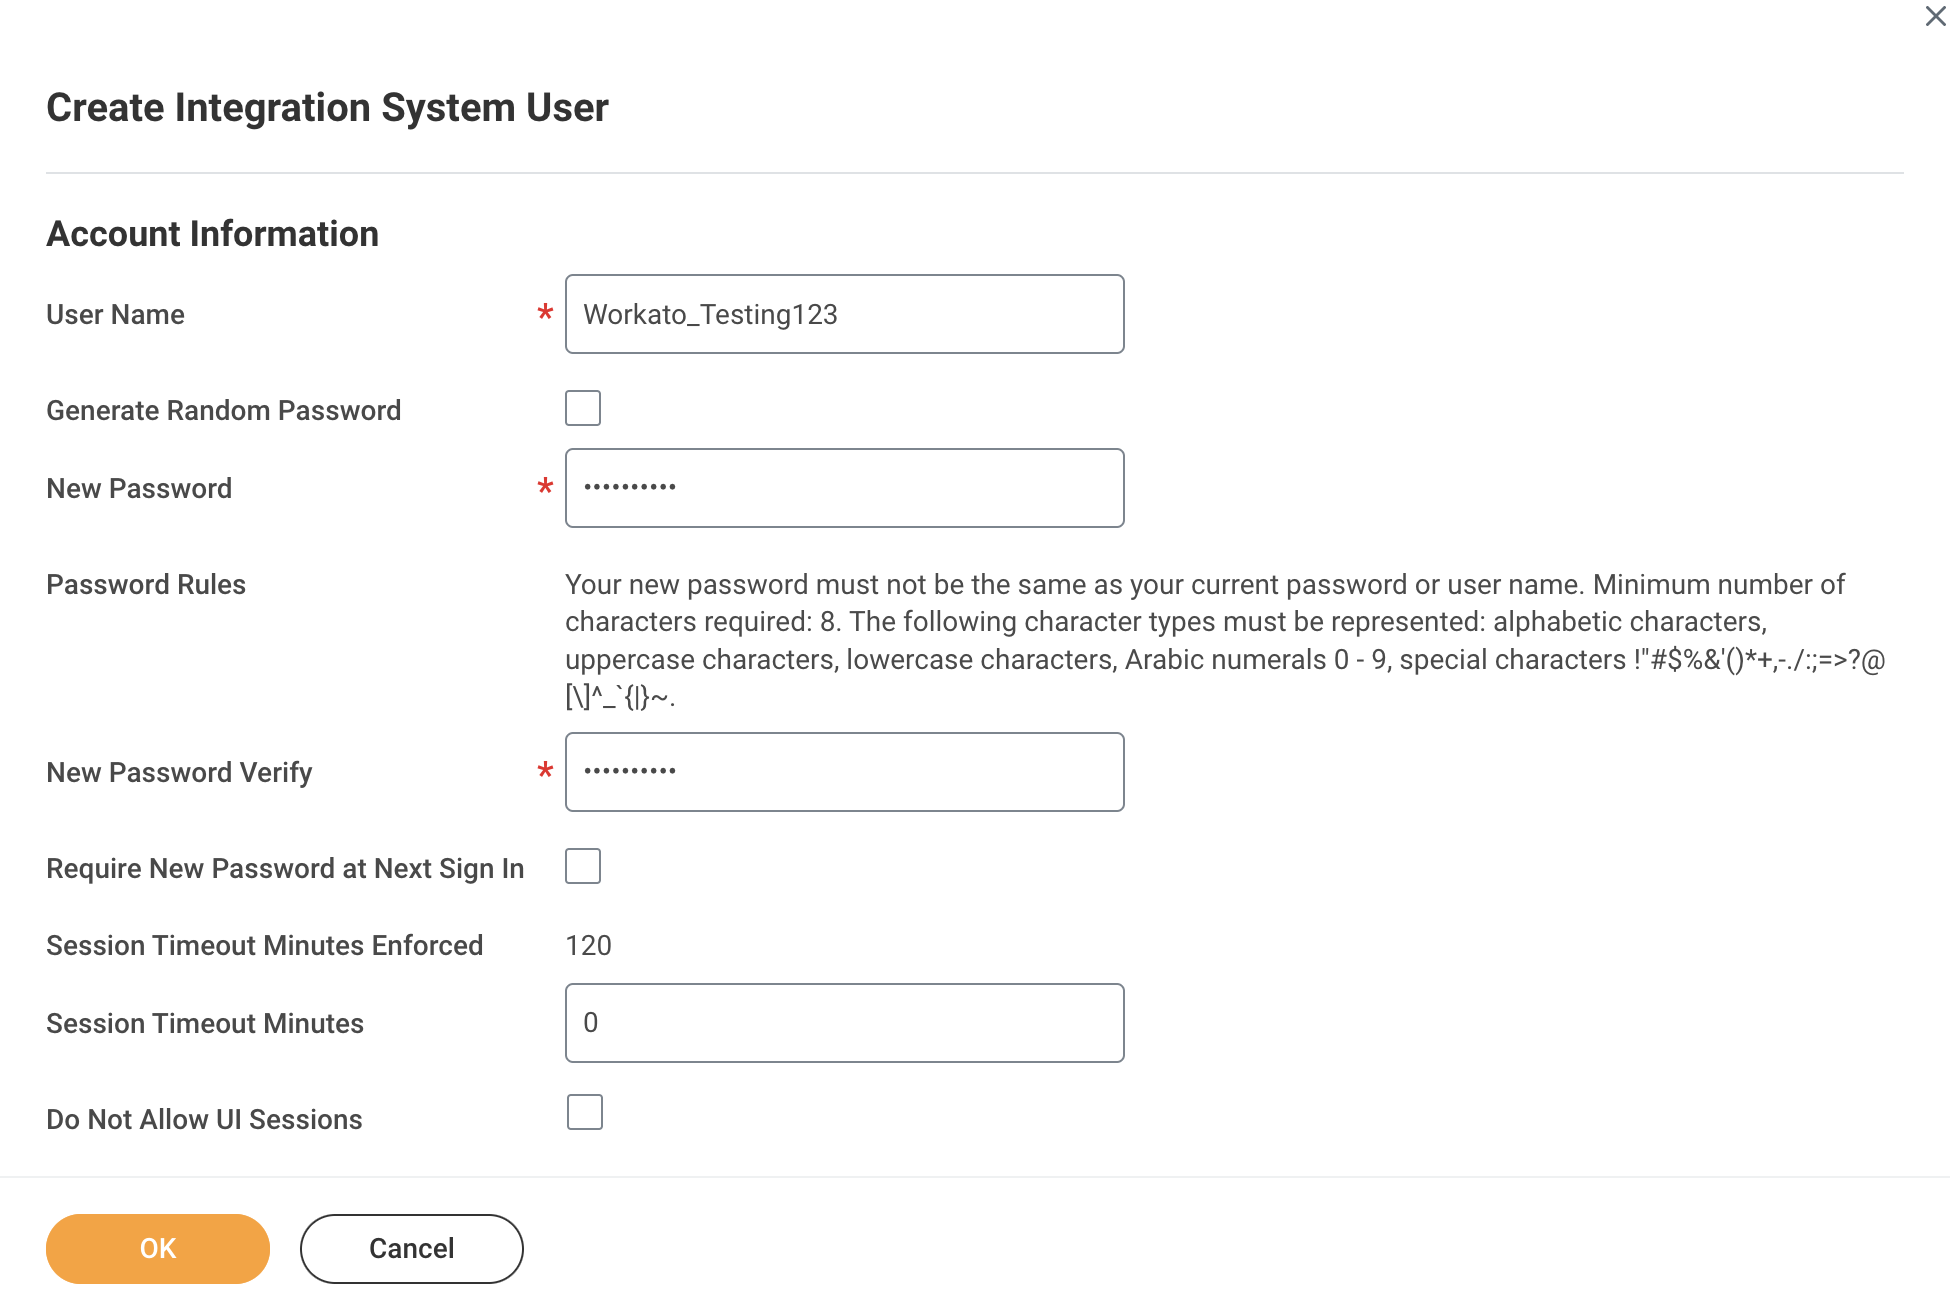 Create Integration System User
Set Session Timeout Minutes to 0 to prevent the ISU from timing out.
Ensure that the Do Not Allow UI Sessions checkbox isn't selected.
Go to the Maintain Password Rules task.
Exempt the integration system user from password expiration by adding them to the System Users exempt from password expiration field.
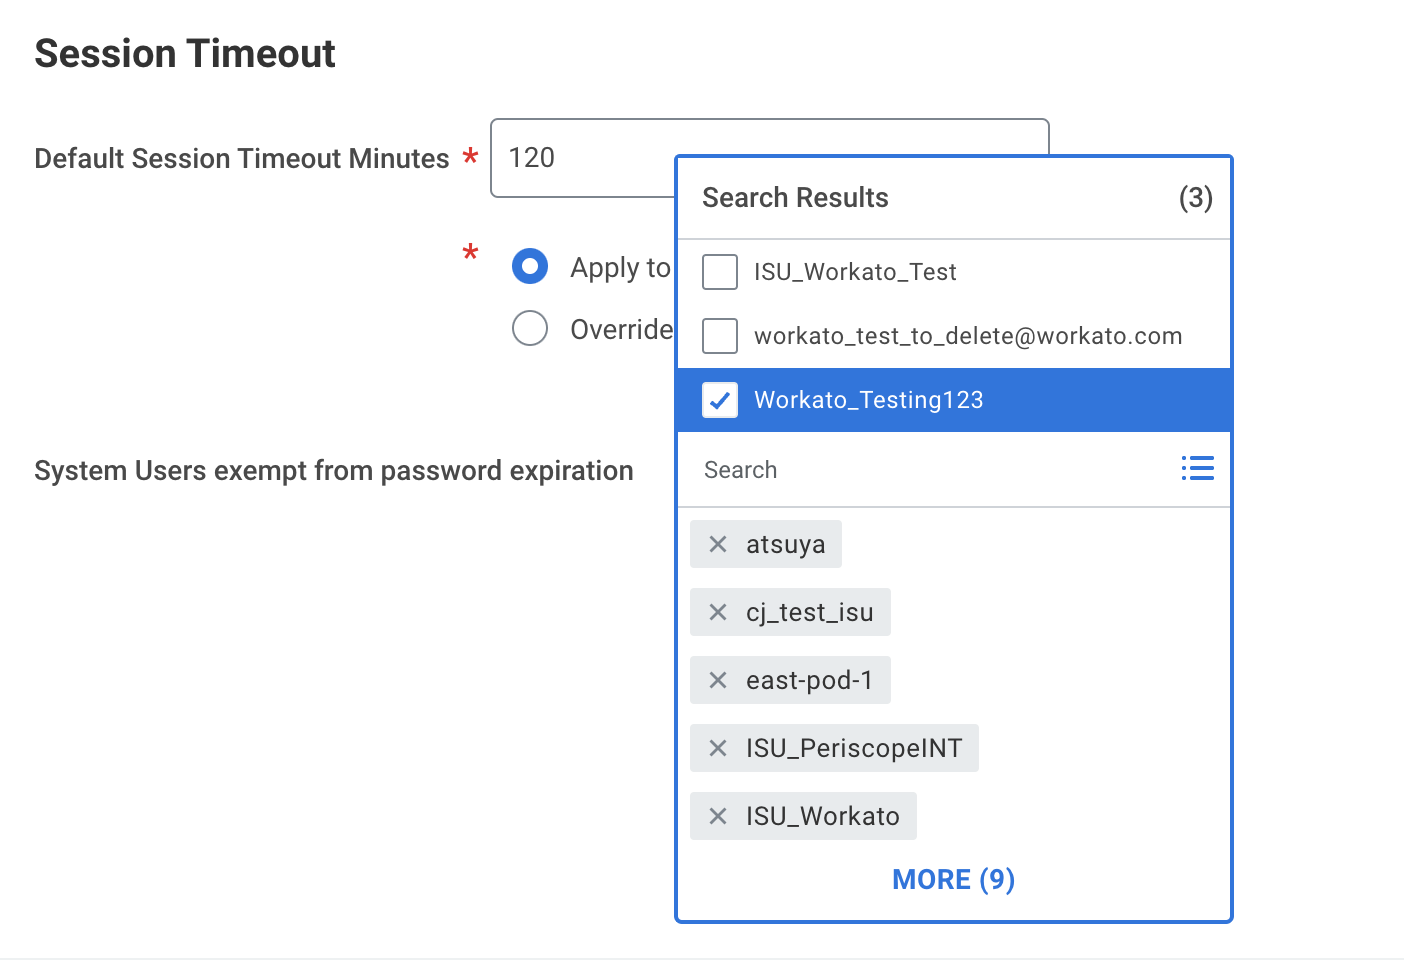 Exempt ISU from password expiration
Create an integration security group
Complete the following steps to create either an unconstrained or constrained integration system security group and then assign your newly created ISU:
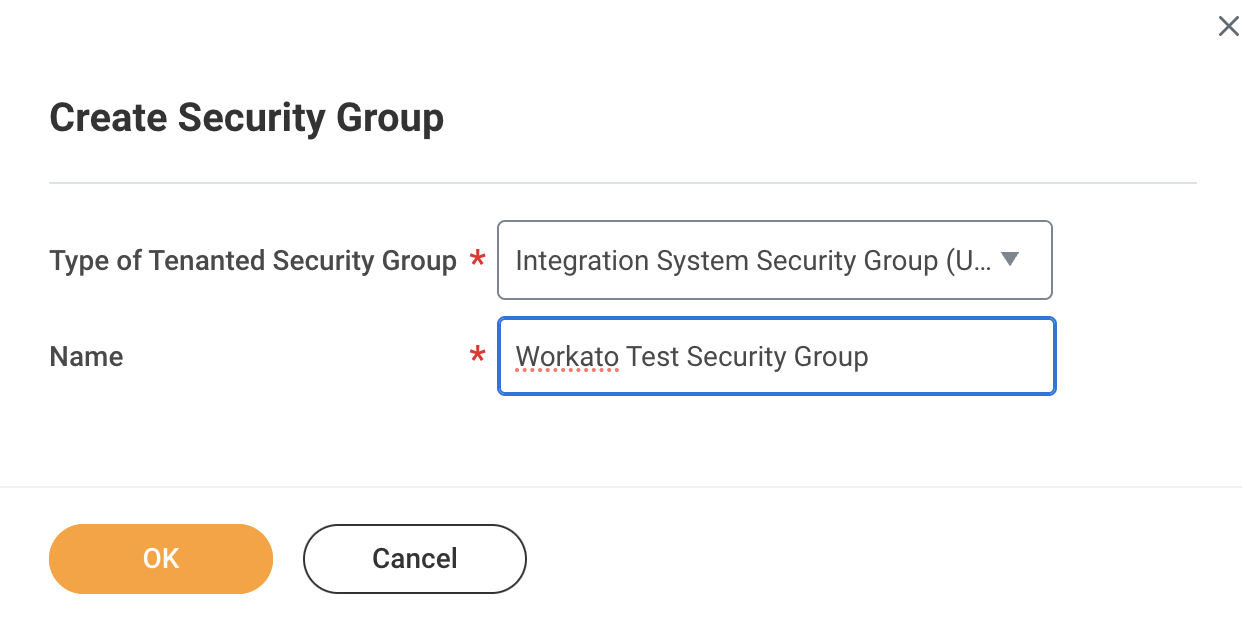
Search for Create Security Group in Workday and select the corresponding task.
 Select the Create Security Group task in Workday
Locate the Type of Tenanted Security Group field, and select and name your security group. Workday offers two types of integration system security groups:
Integration System Security Group (Unconstrained): Allows group members to access all data instances secured by the group.
Integration System Security Group (Constrained): Grants access to a subset of data instances based on context.
 Choose the security group type
Contact your Workday integration partner before selecting an option to ensure that the appropriate security group type is used for your integration.
Assign members to your newly created security group. You must add the ISU you registered in the preceding steps. You must also specify the organization scope if you plan to use a constrained group.
 Add ISU to the security group
Select Done to save all changes.
Grant domain access to security group
Complete the following steps to grant your security group access to the domains required for your integration:
Search for Maintain Permissions for Security Group in Workday and select the task.
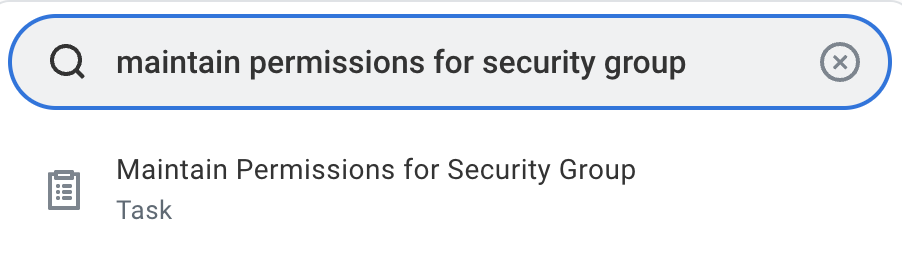 Select the Maintain Permissions for Security Group task
Choose the security group you created from the Source Security Group list to modify the permissions.
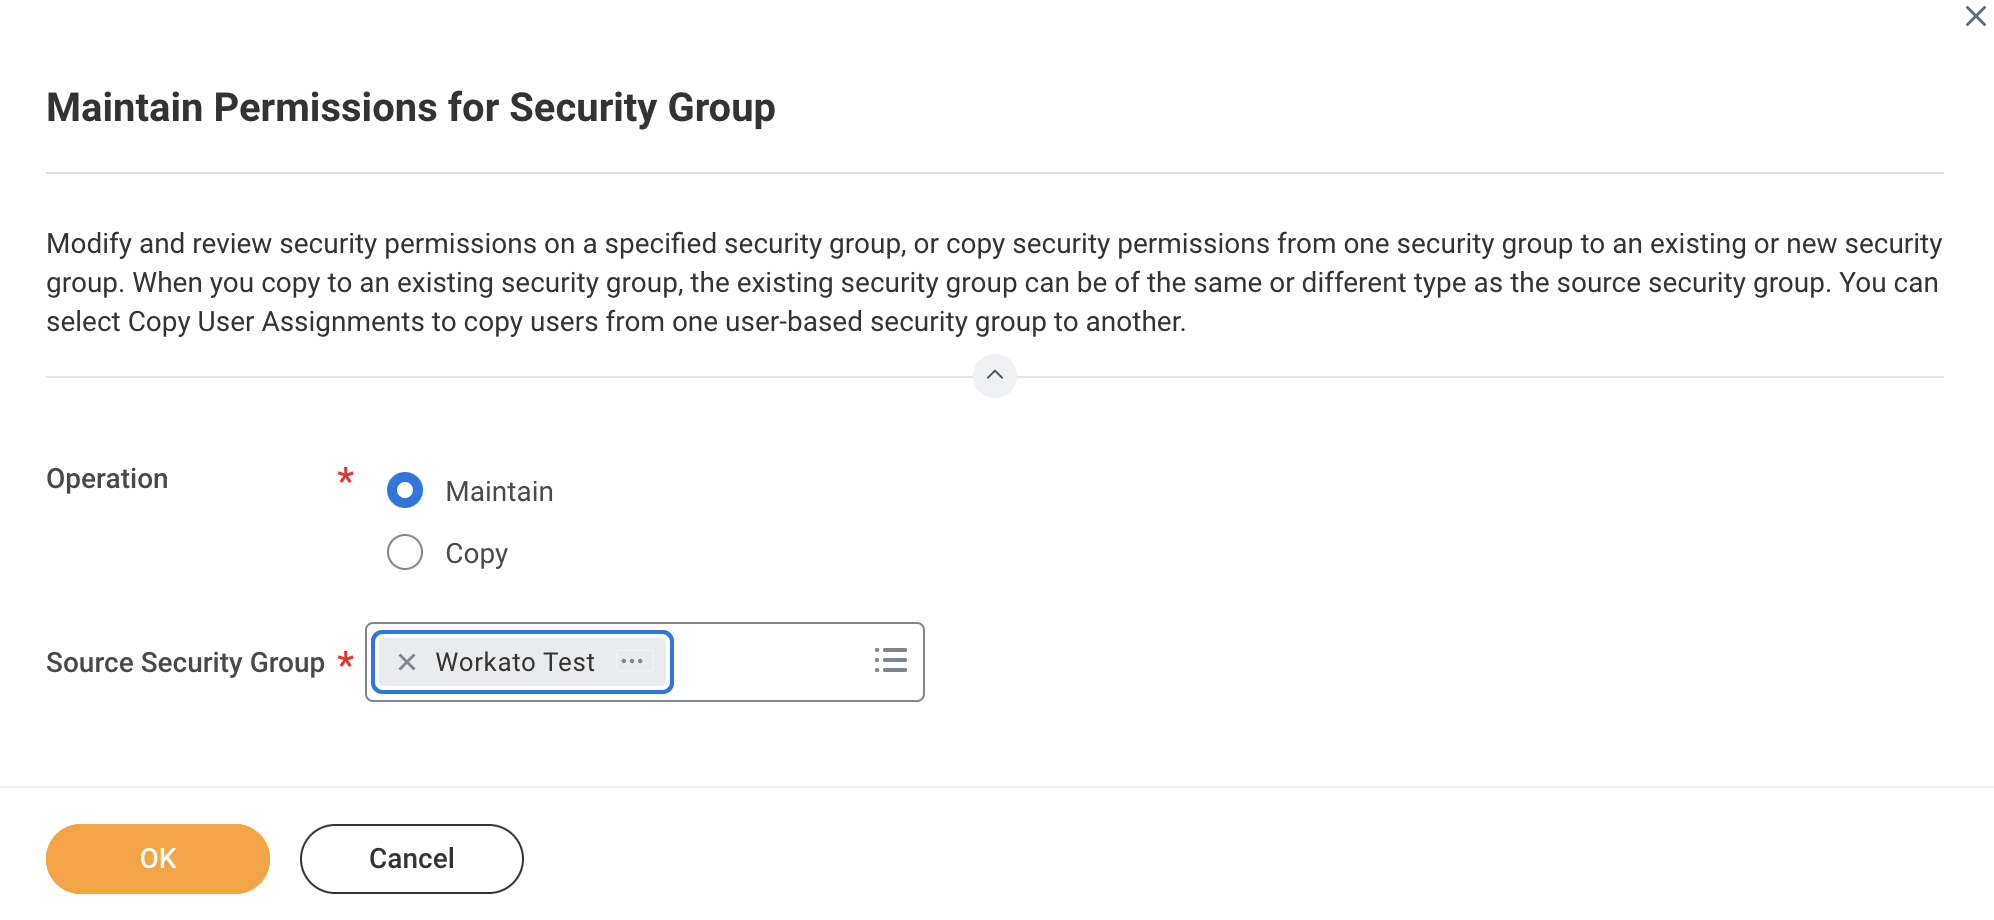 Select the created security group
Click OK to confirm your selection.
Go to the Maintain Permissions for Security Group > Domain Security Policy Permissions tab and assign the necessary permissions for each domain, such as GET and PUT operations.
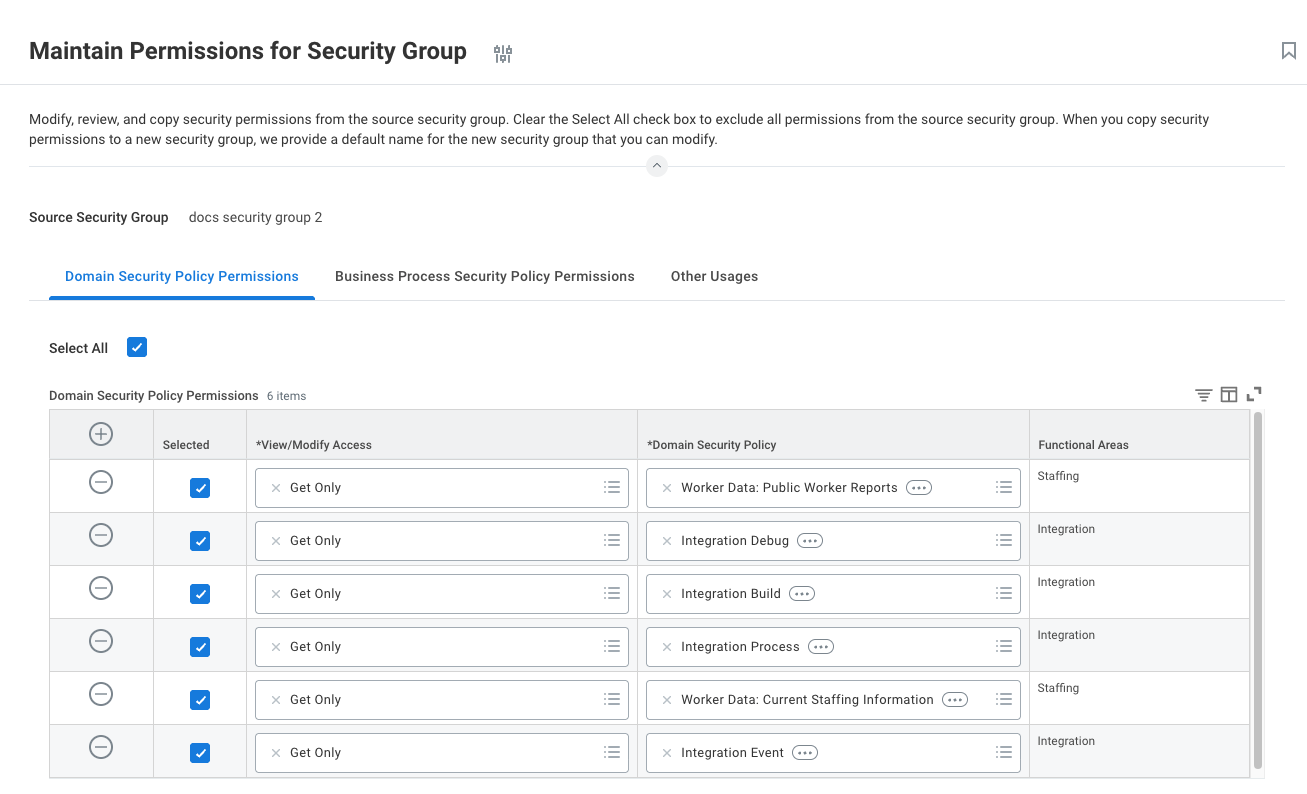 Assign permissions for each domain
Ensure the security group has GET permissions for the following domain security policies:
- Integration Process
- Integration Debug
- Worker Data: Current Staffing Information
- Worker Data: Public Worker Reports
Click OK to apply the permissions.
Click Done to save your changes.
Activate security policy changes
You must activate permissions you assign to your policy.
Complete the following steps to activate security policy changes:
Type Activate Pending Security Policy Changes into Workday's search box and select the task.
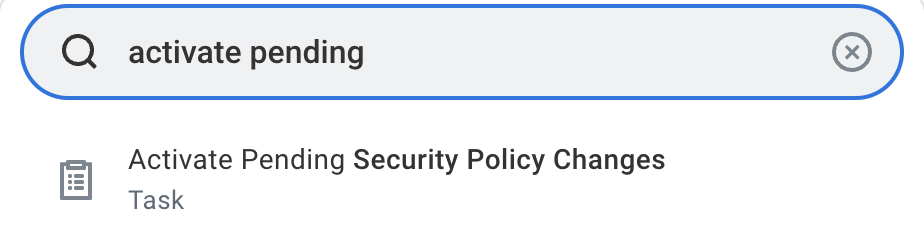 Search for the Activate Pending Security Policy Changes task
Start the Activate Pending Security Policy Changes task by entering a reason for your audit in the comment field, then click OK.
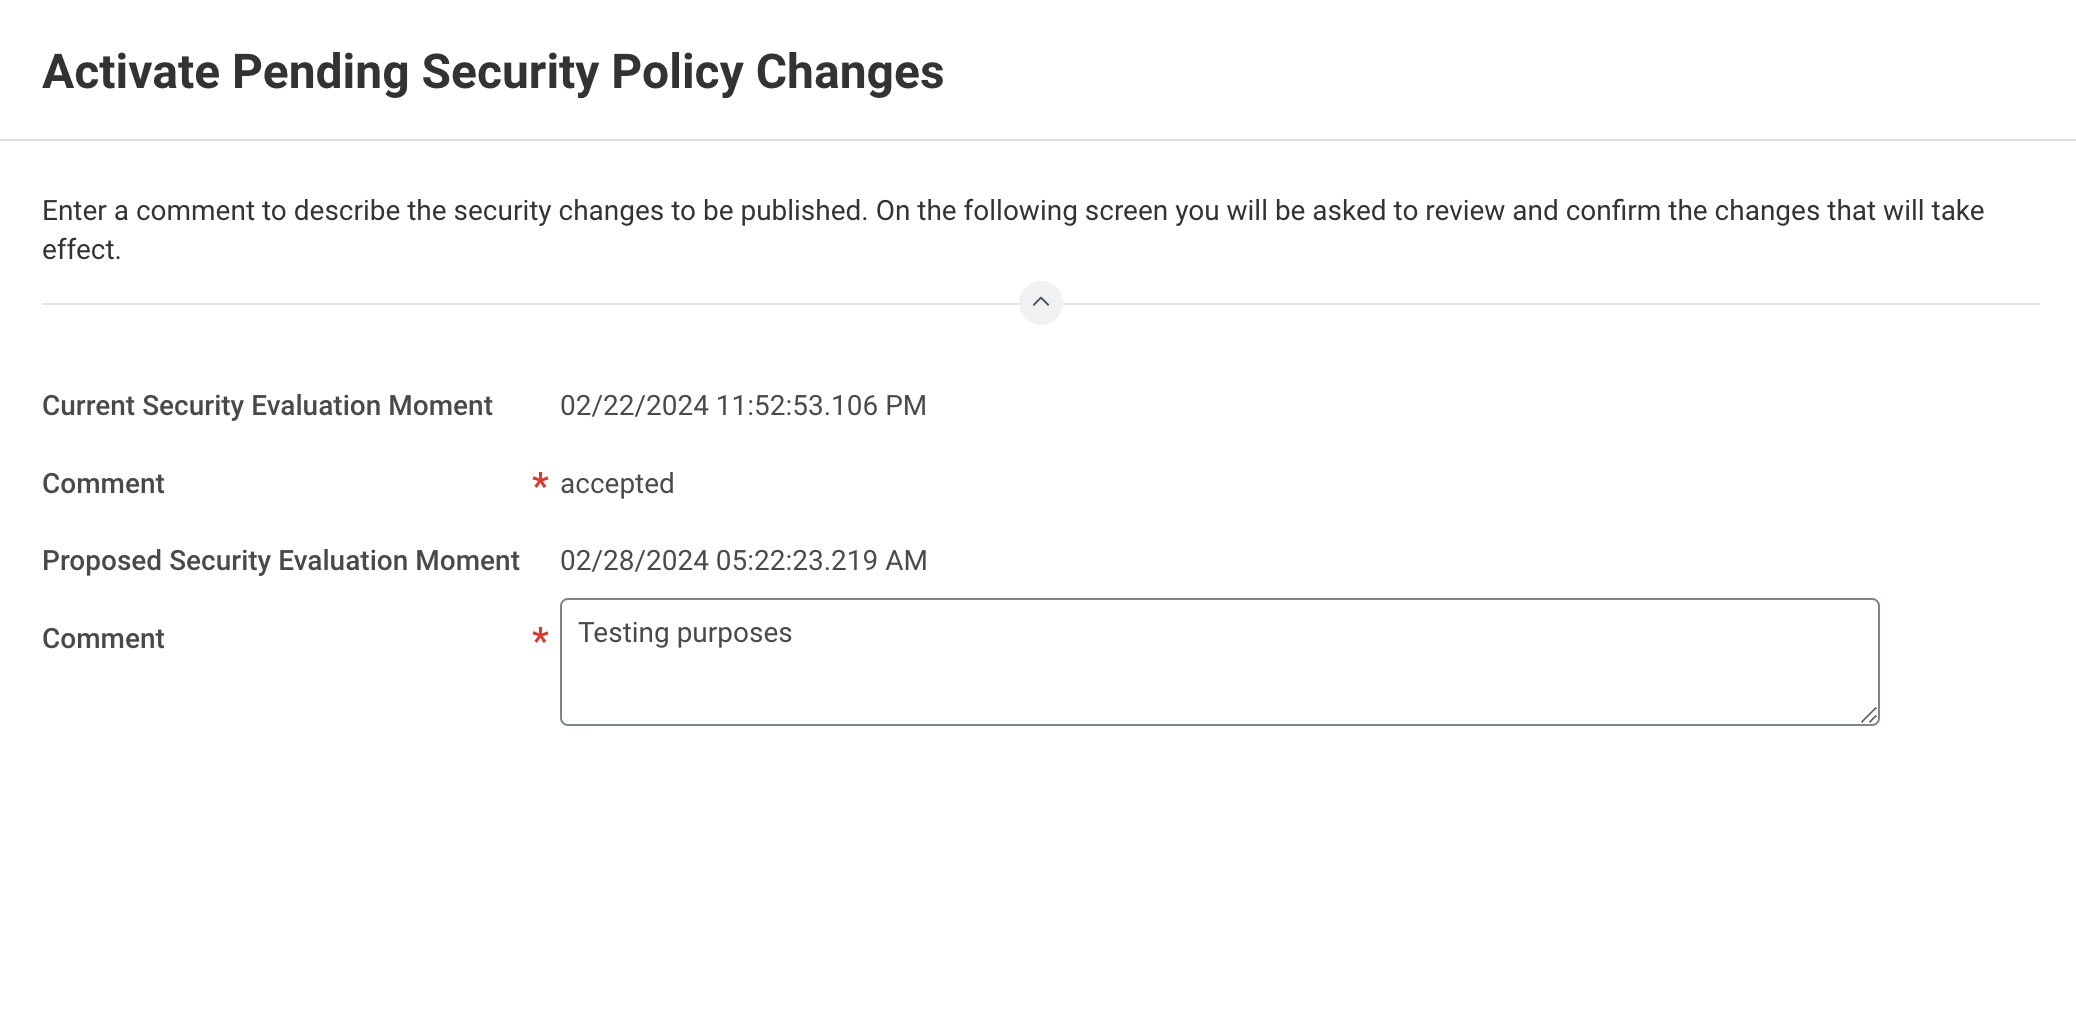 Enter a comment for audit purposes
Select the Confirm checkbox to complete the task and click OK.
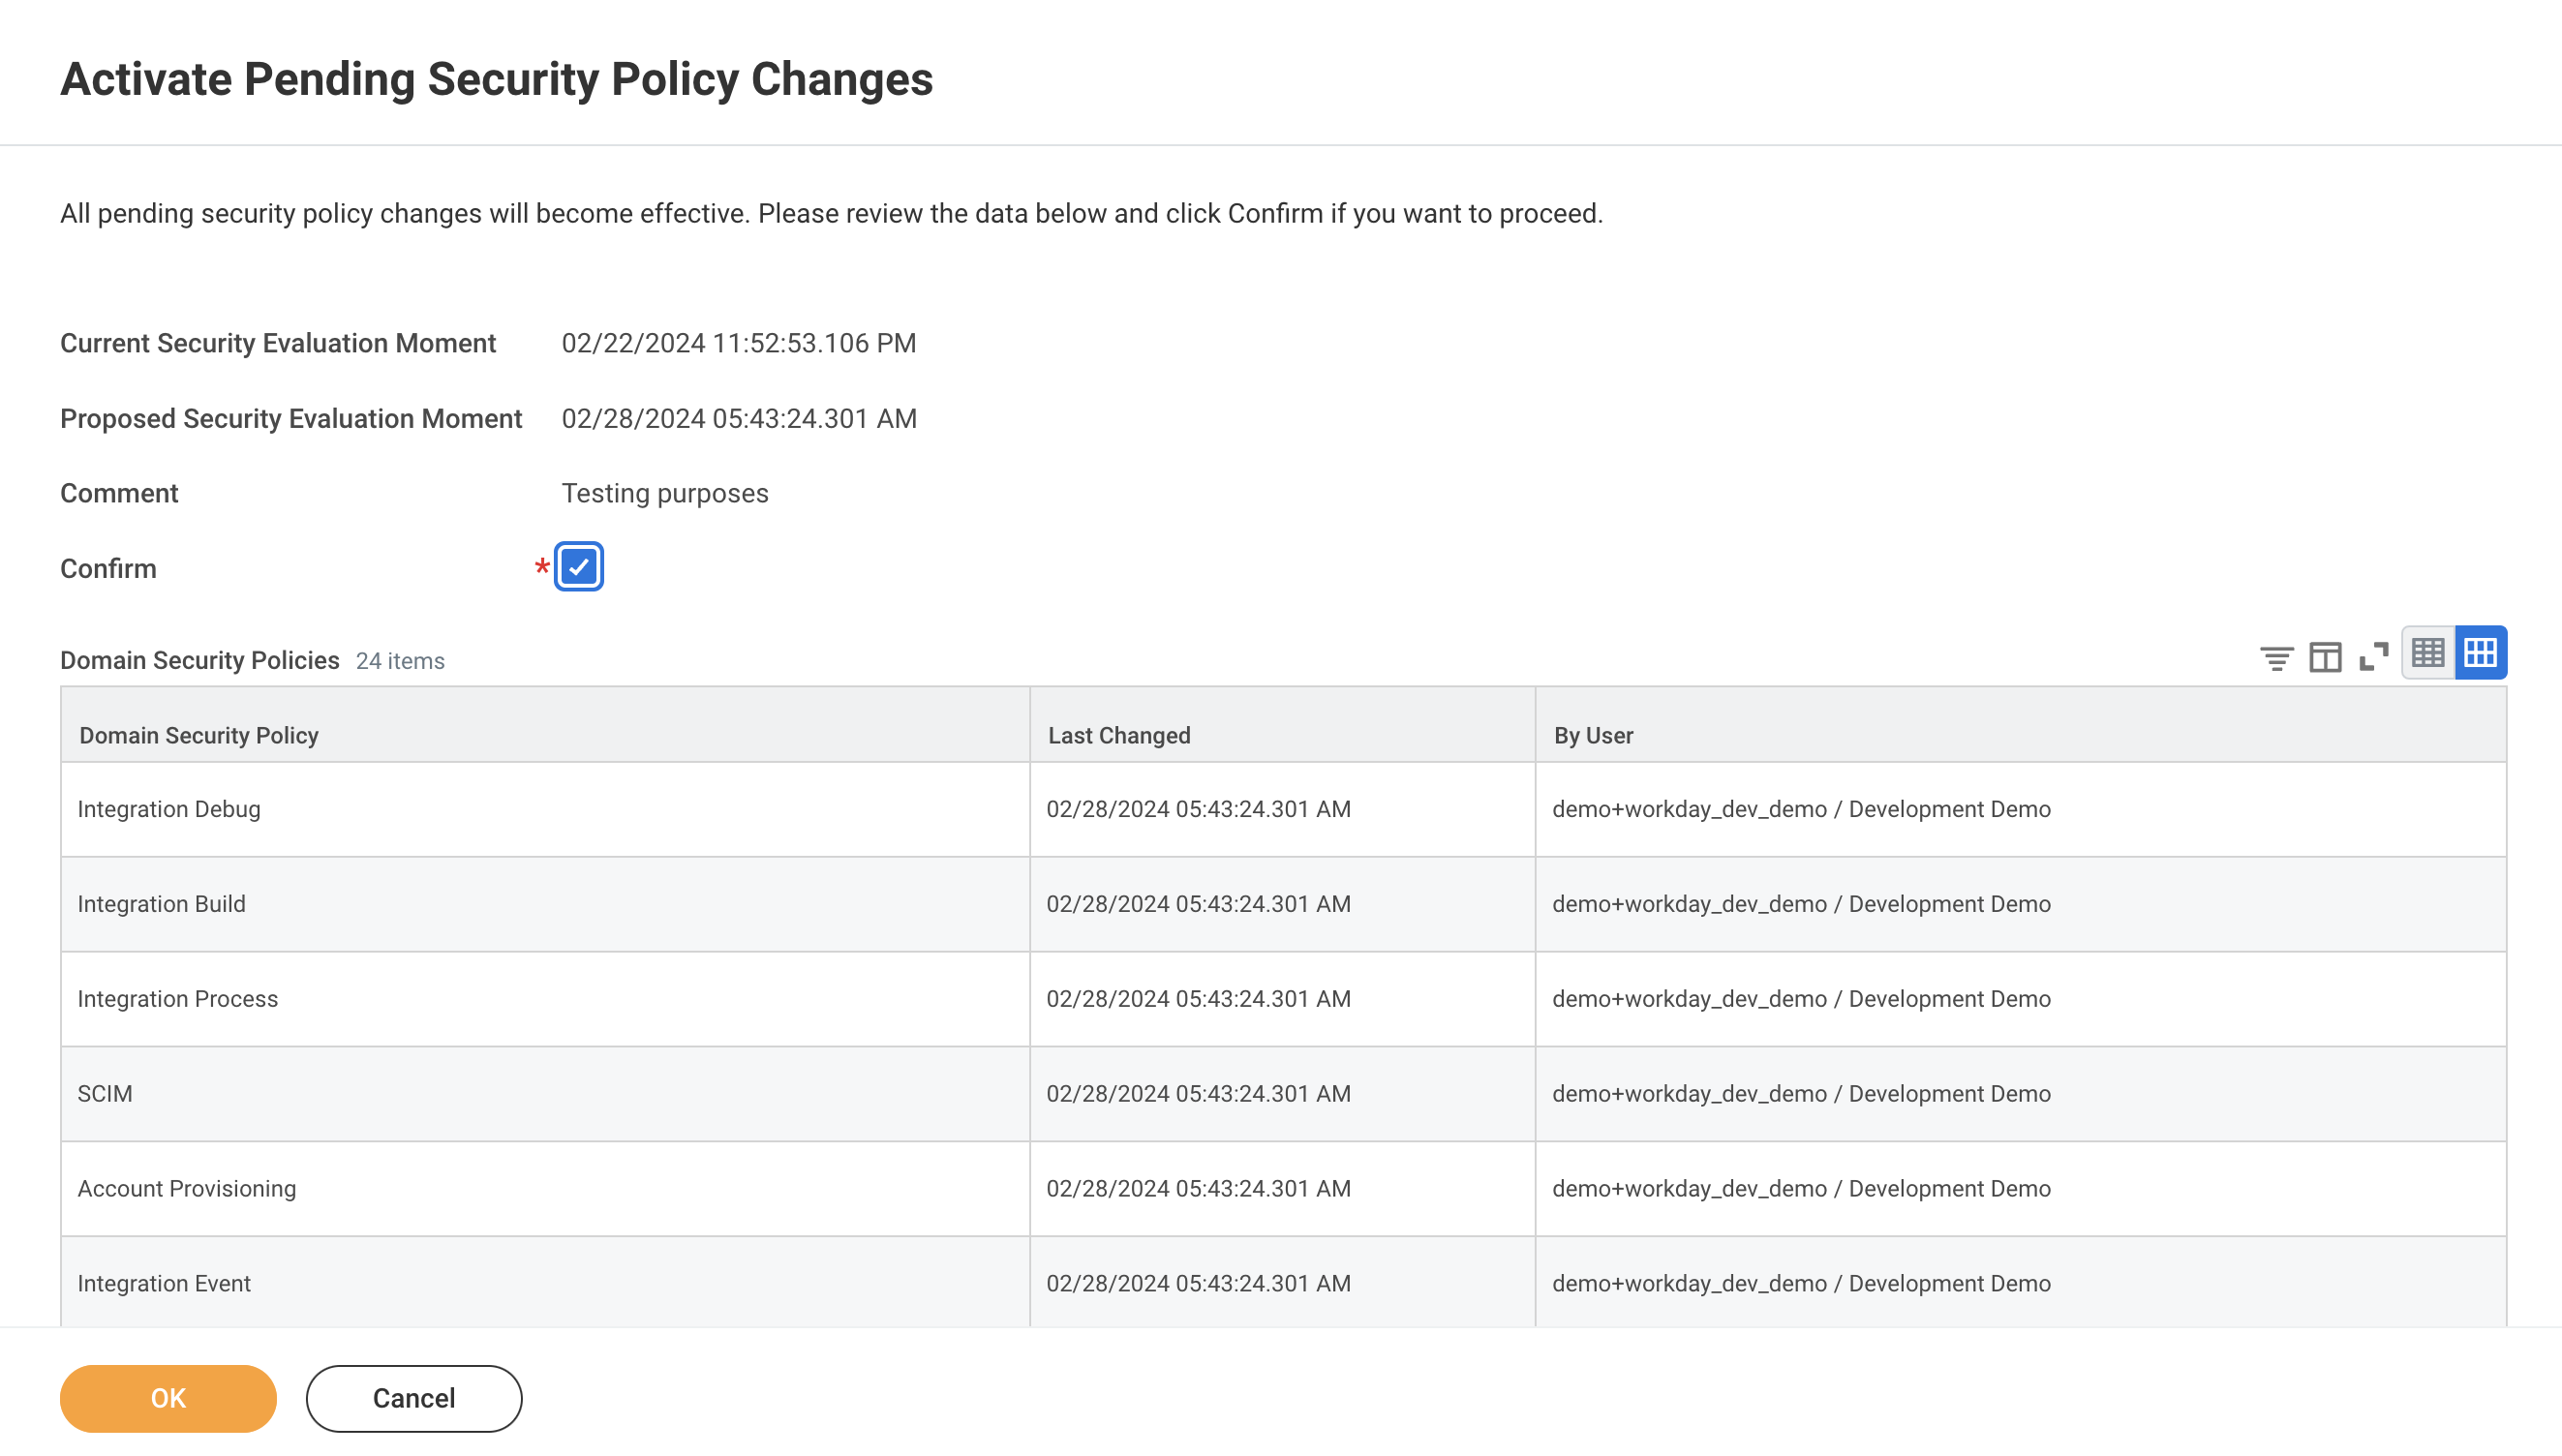 Activate the policy changes
Register a new API client for integrations
This step is required only if you plan to work with custom objects in Workday.
Ensure you meet the following prerequisites before you begin registering a new API client for integrations in Workday:
- You have admin access to your company’s Workday account.
- You are logged in to Workday with your admin credentials.
- You have authenticated the Integration System User (ISU) and enabled both GET and View access in Workday.
Complete the following steps to register an API client for integrations in Workday:
Search for Register API Client for Integrations in Workday's search field.
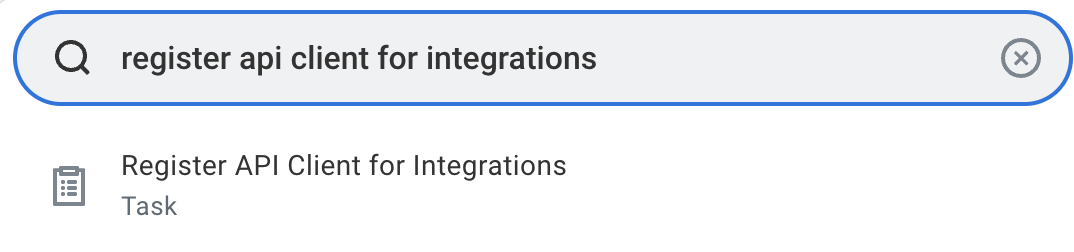 Select the Register API client for Integrations task
Select the Register API Client for integrations task to access the registration page.
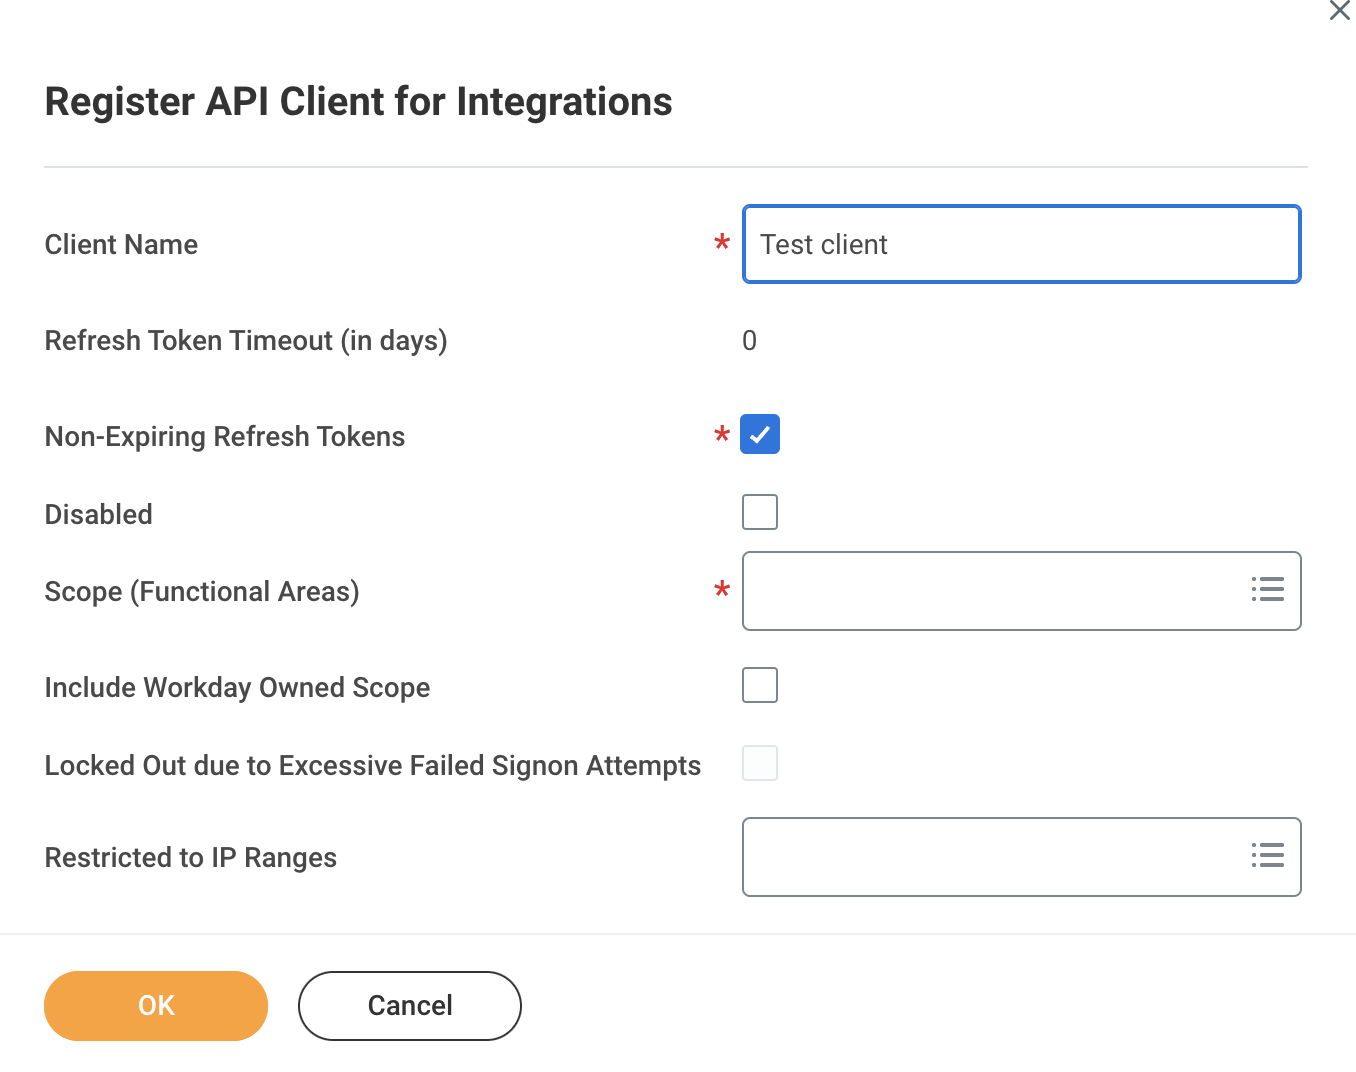 Register API client for integrations
Enter a name for your API client in the Client Name field.
Select the Non-Expiring Refresh Tokens option.
Specify the scope of access for the API client. Ensure to include the Integration scope, which covers essential domain security policies such as Integration Build, Integration Debug, Integration Process, and Integration Event. Including this scope is a minimum requirement for establishing a connection with Workday, in addition to any specific call operations required for your integration.
Click OK to generate the Client ID and Client Secret.
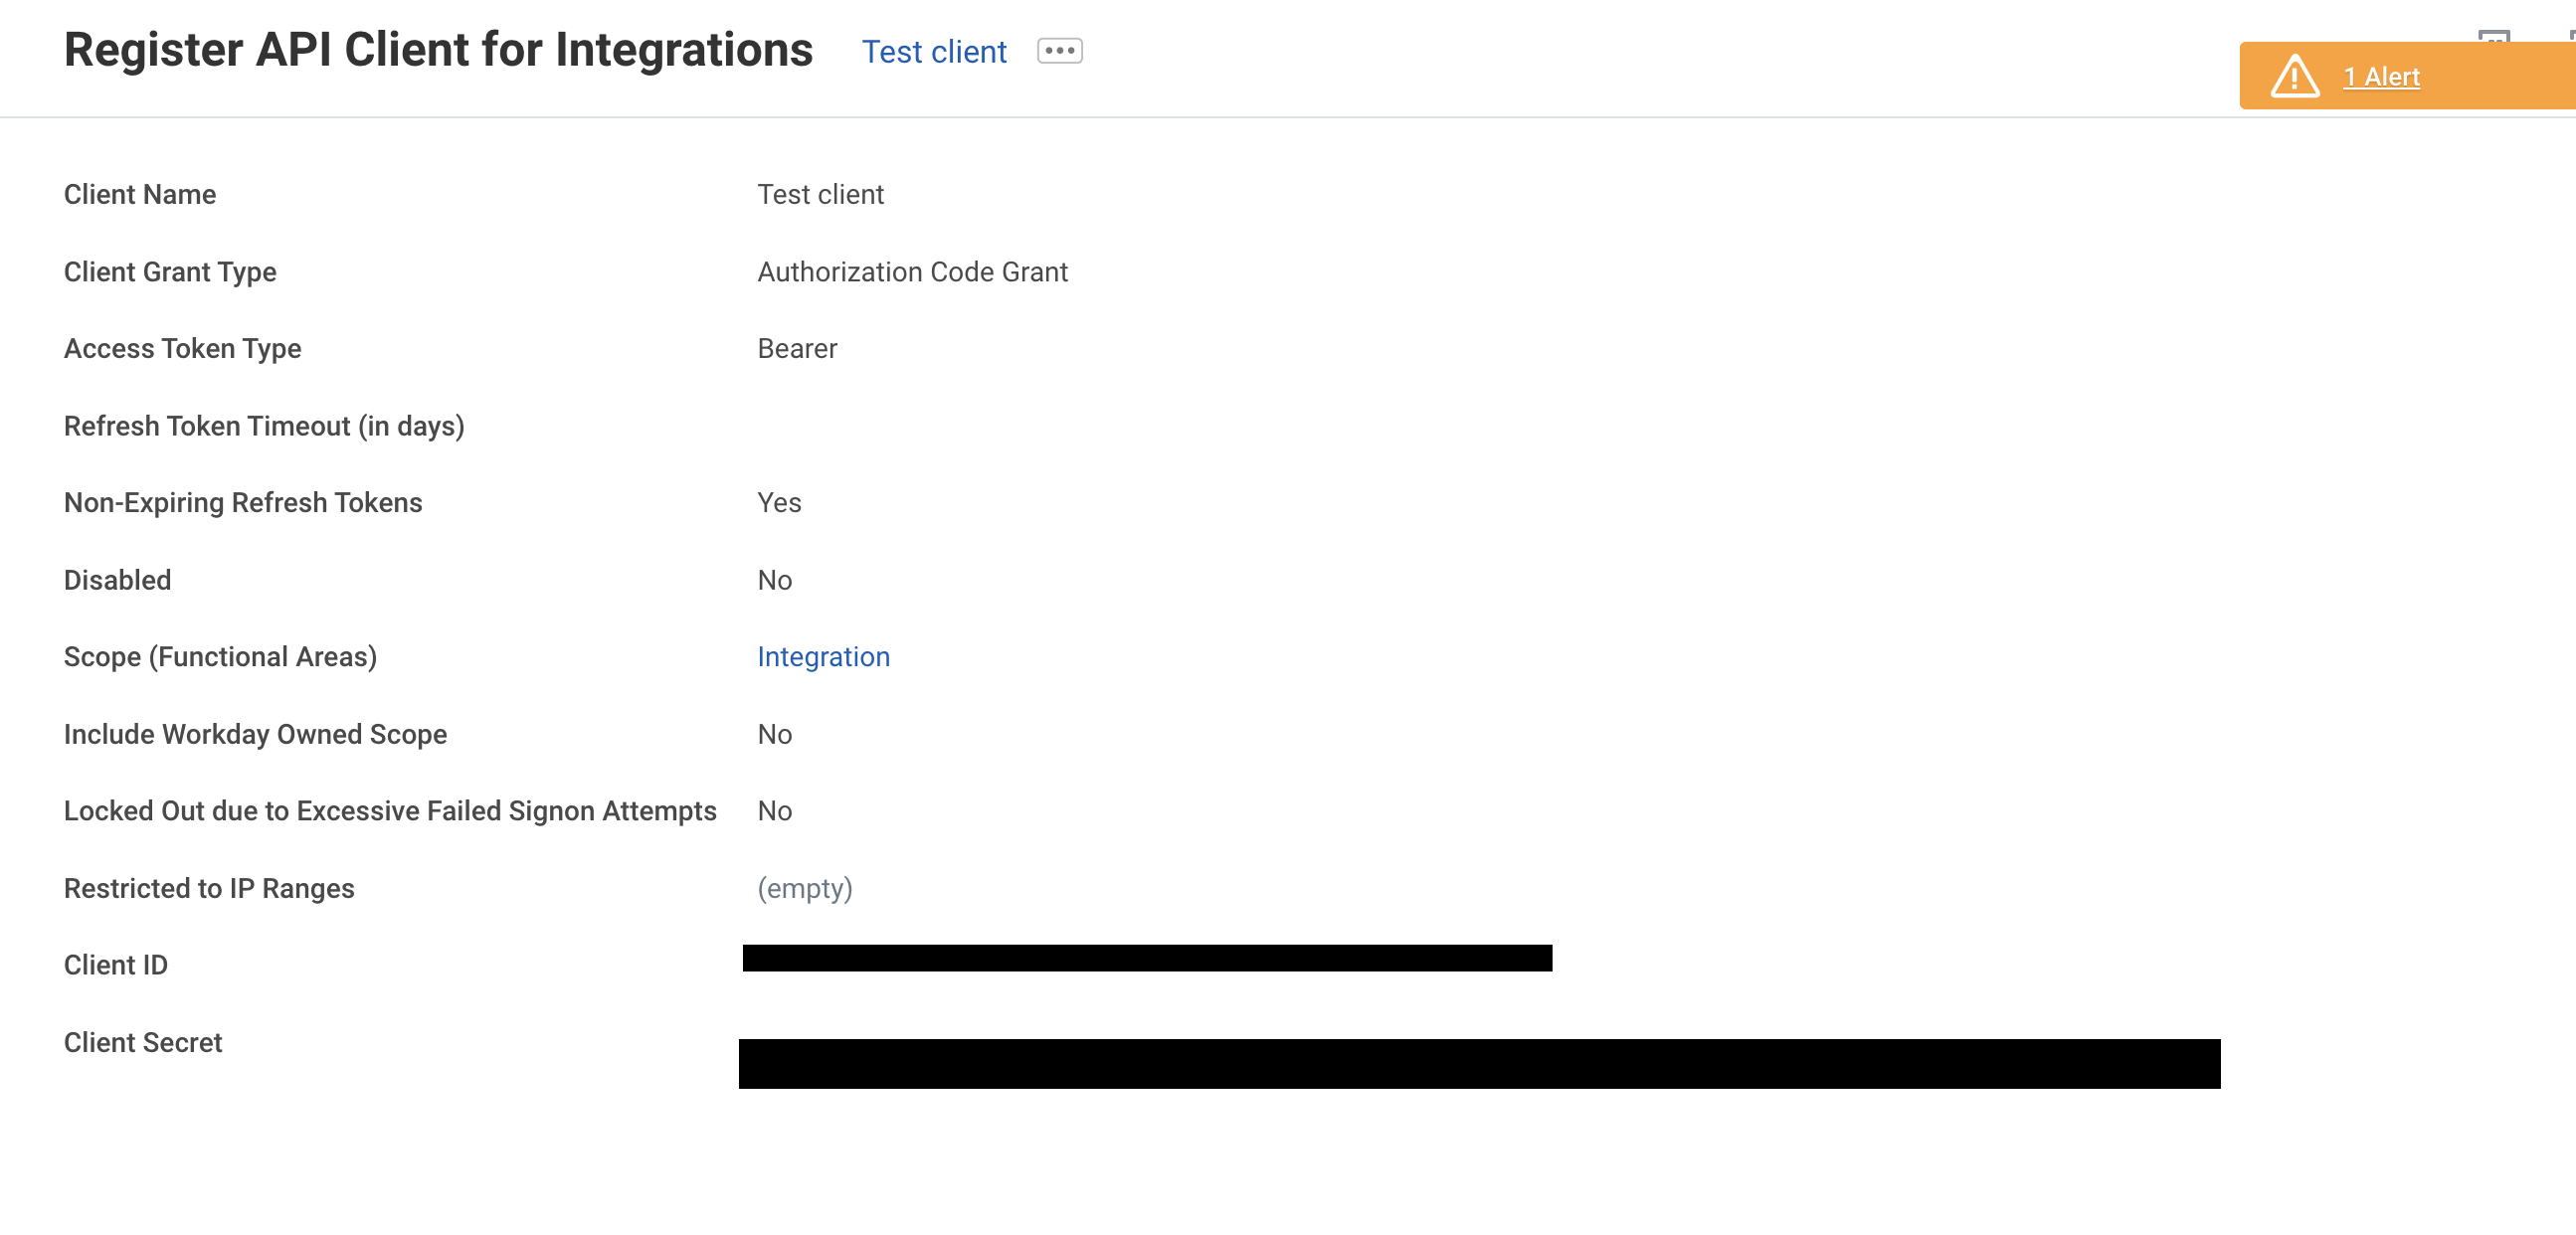 Generate API client credentials
Save the Client Secret and Client ID.
Click Done.
Generate a non-expiring refresh token
Complete the following steps to create a non-expiring refresh token for your API client:
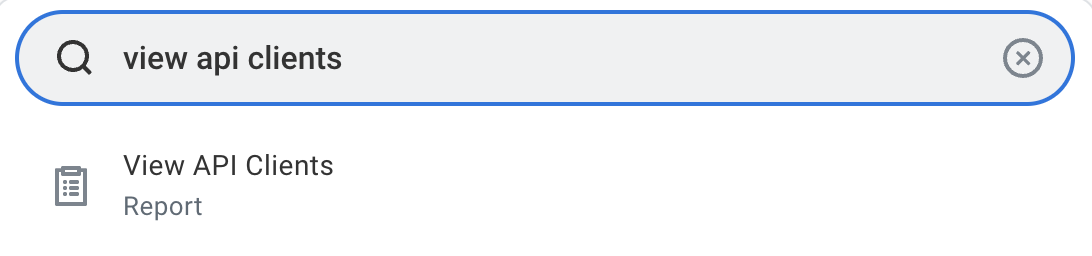
Type View API Clients in the search field in Workday.
Open the View API Clients report from the search results.
 Access the View API Clients report
Go to the API Clients for Integrations tab.
Select the API client you registered in the preceding steps.
Click the ellipsis (...) next to the client name and choose API Client > Manage Refresh Tokens for Integrations for token management.
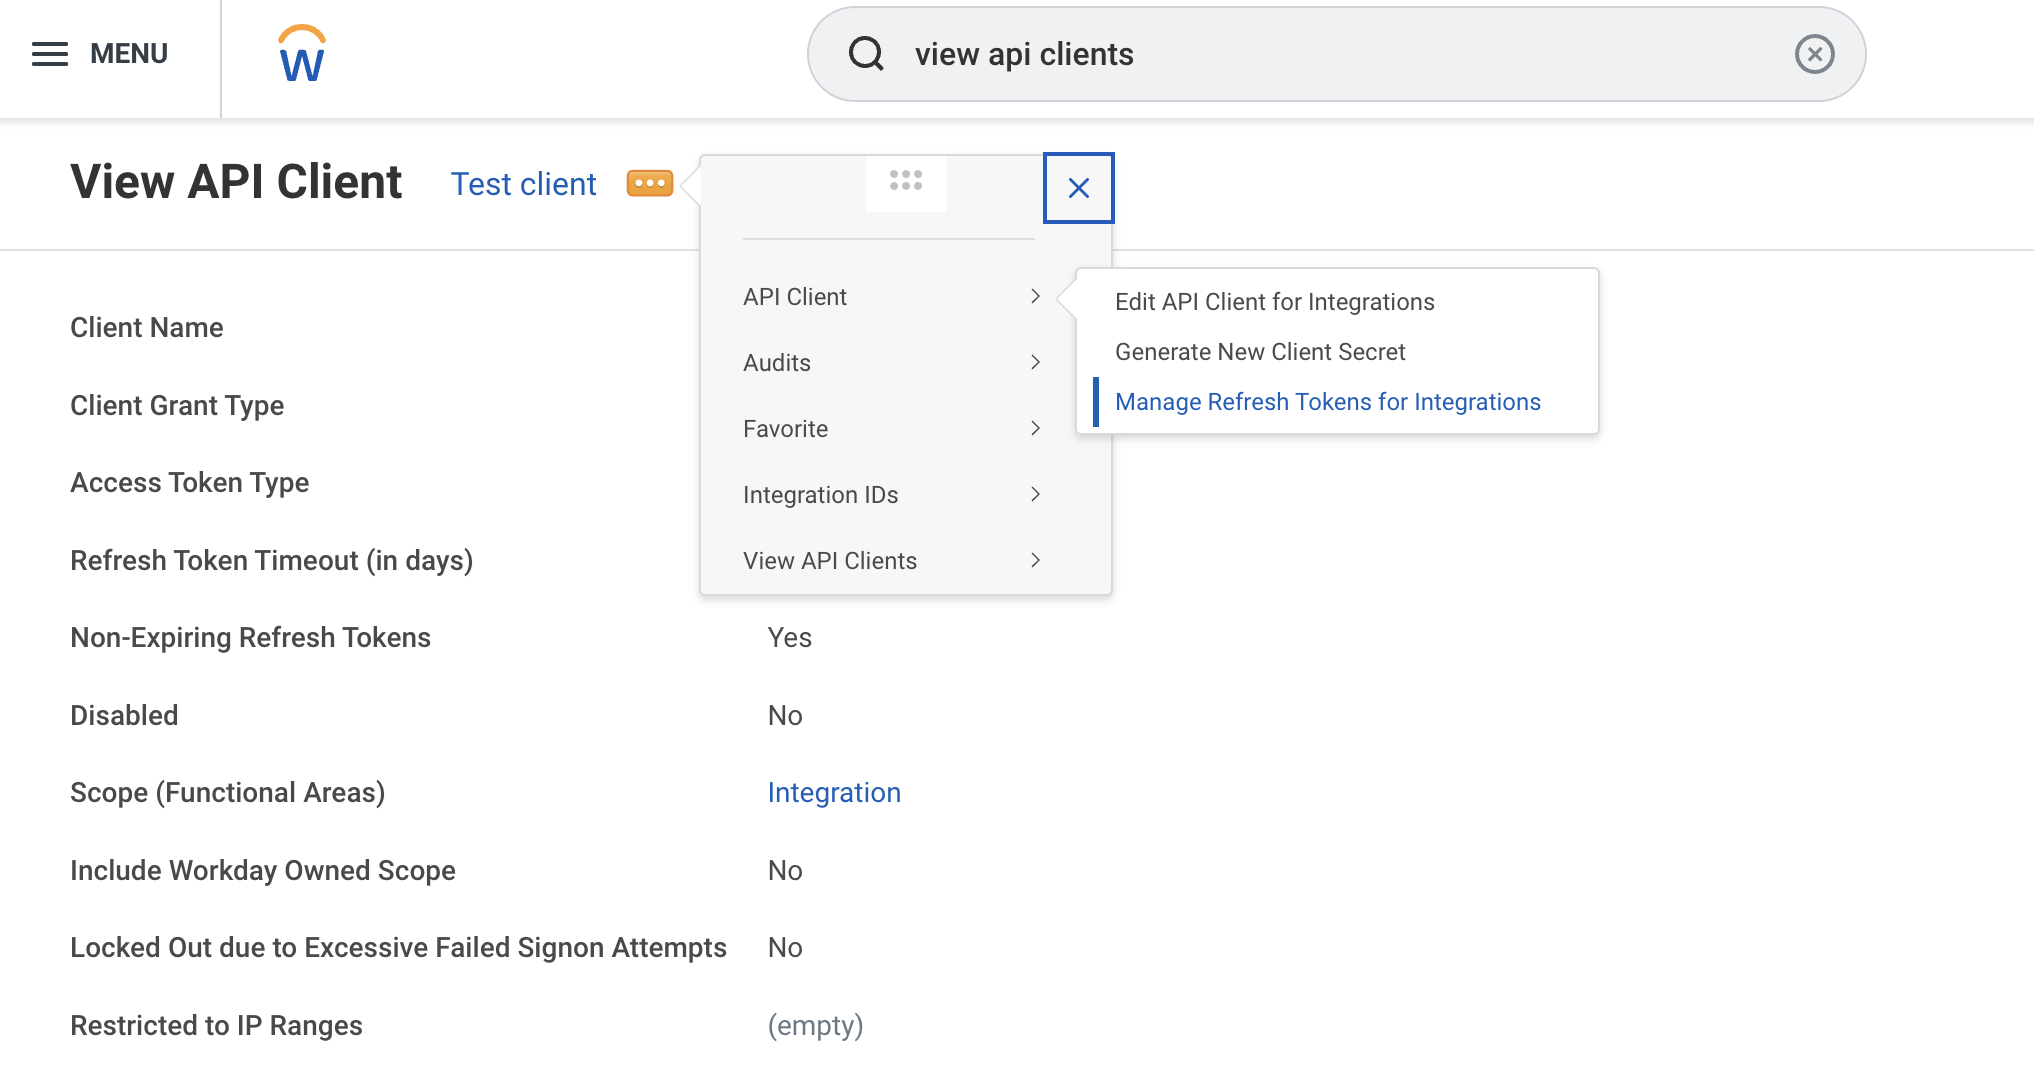 Manage refresh tokens for the API client
Input the Workday account of a user authorized to access the custom report in the Workday Account field.
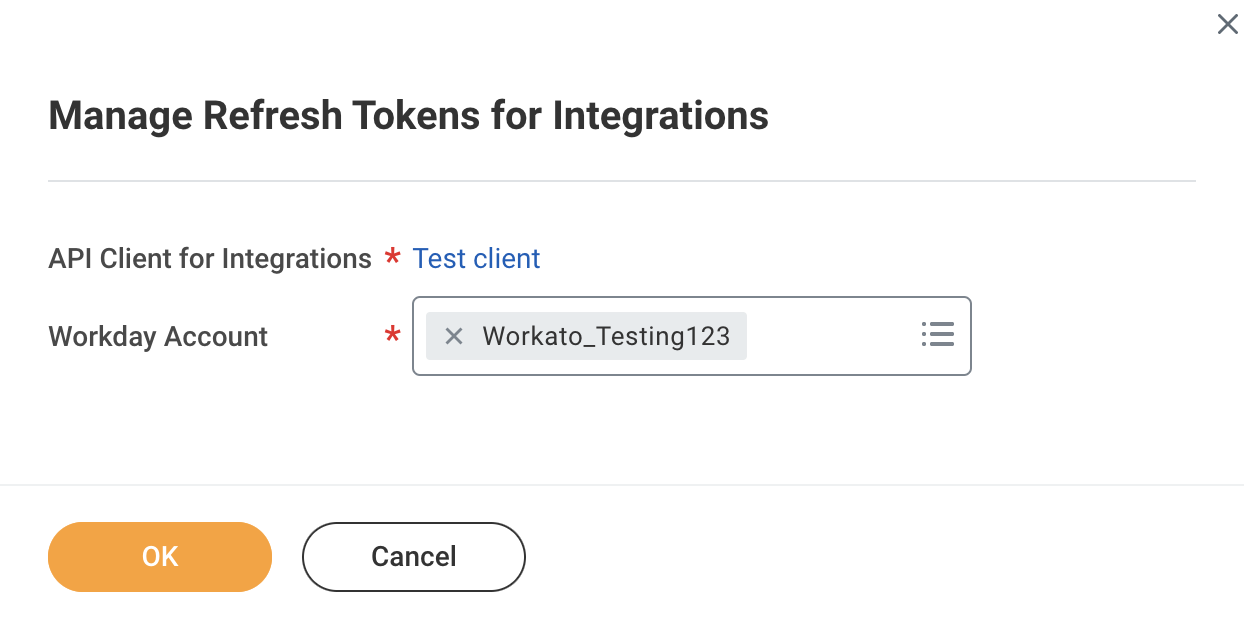 Enter an authorized Workday account
Click OK.
Go to the Delete or Regenerate Refresh Token page and select the Generate New Refresh Token option.
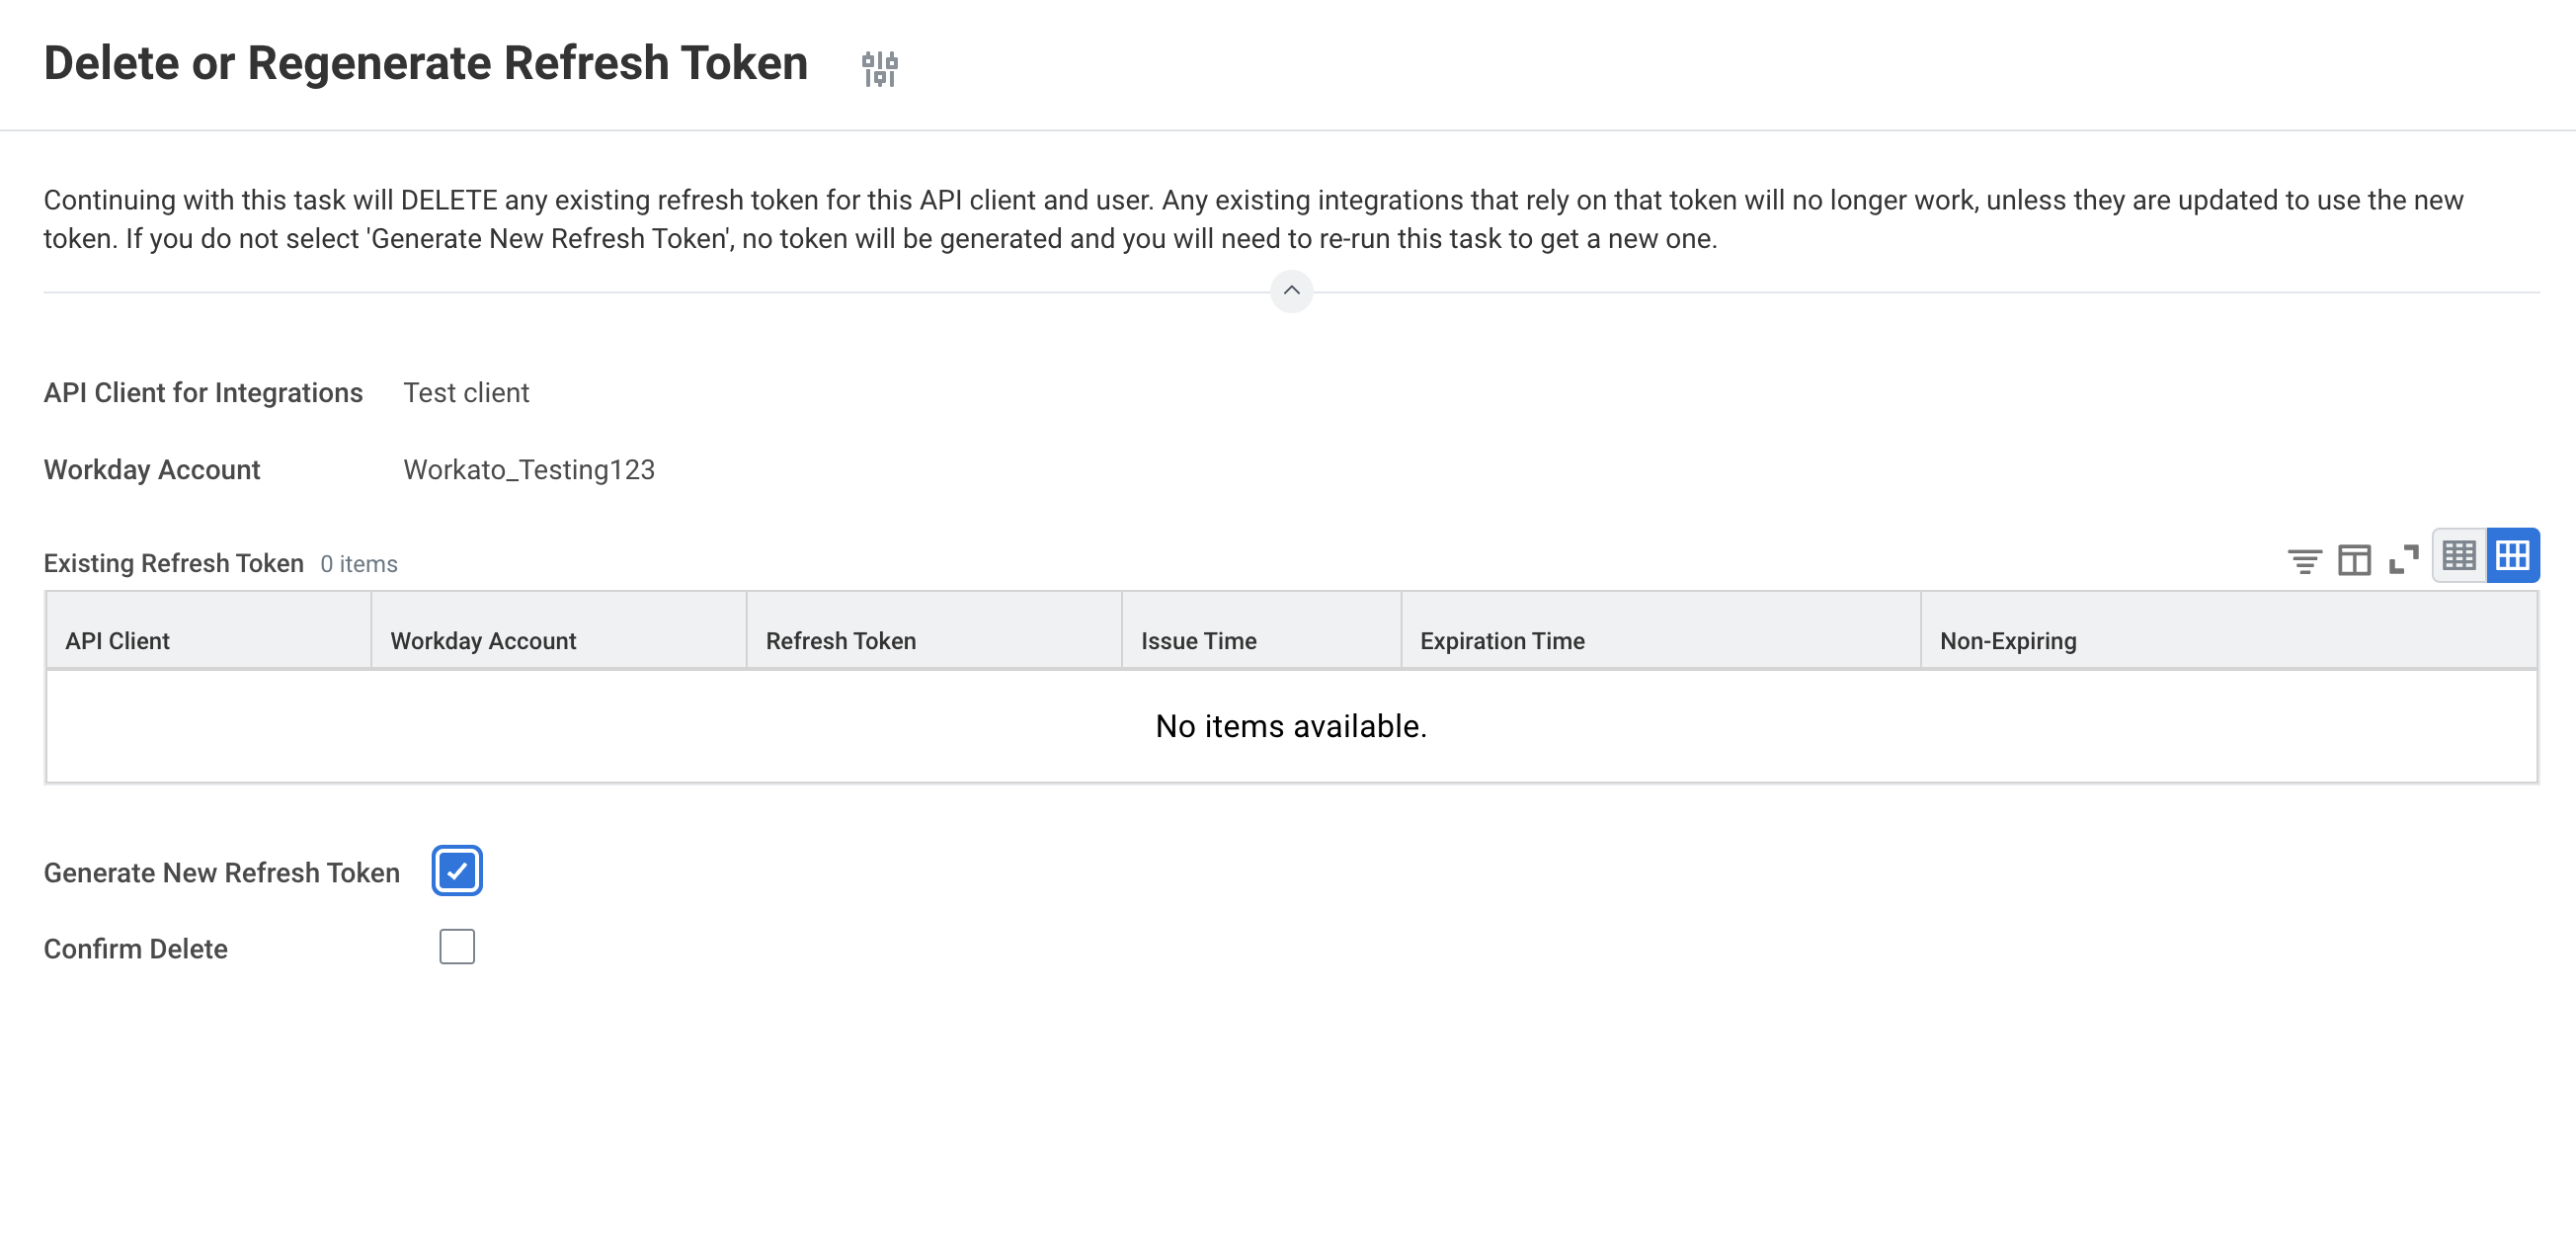 Generate a new refresh token
Click OK.
Copy the refresh token from the Successfully Regenerated Refresh Token page.
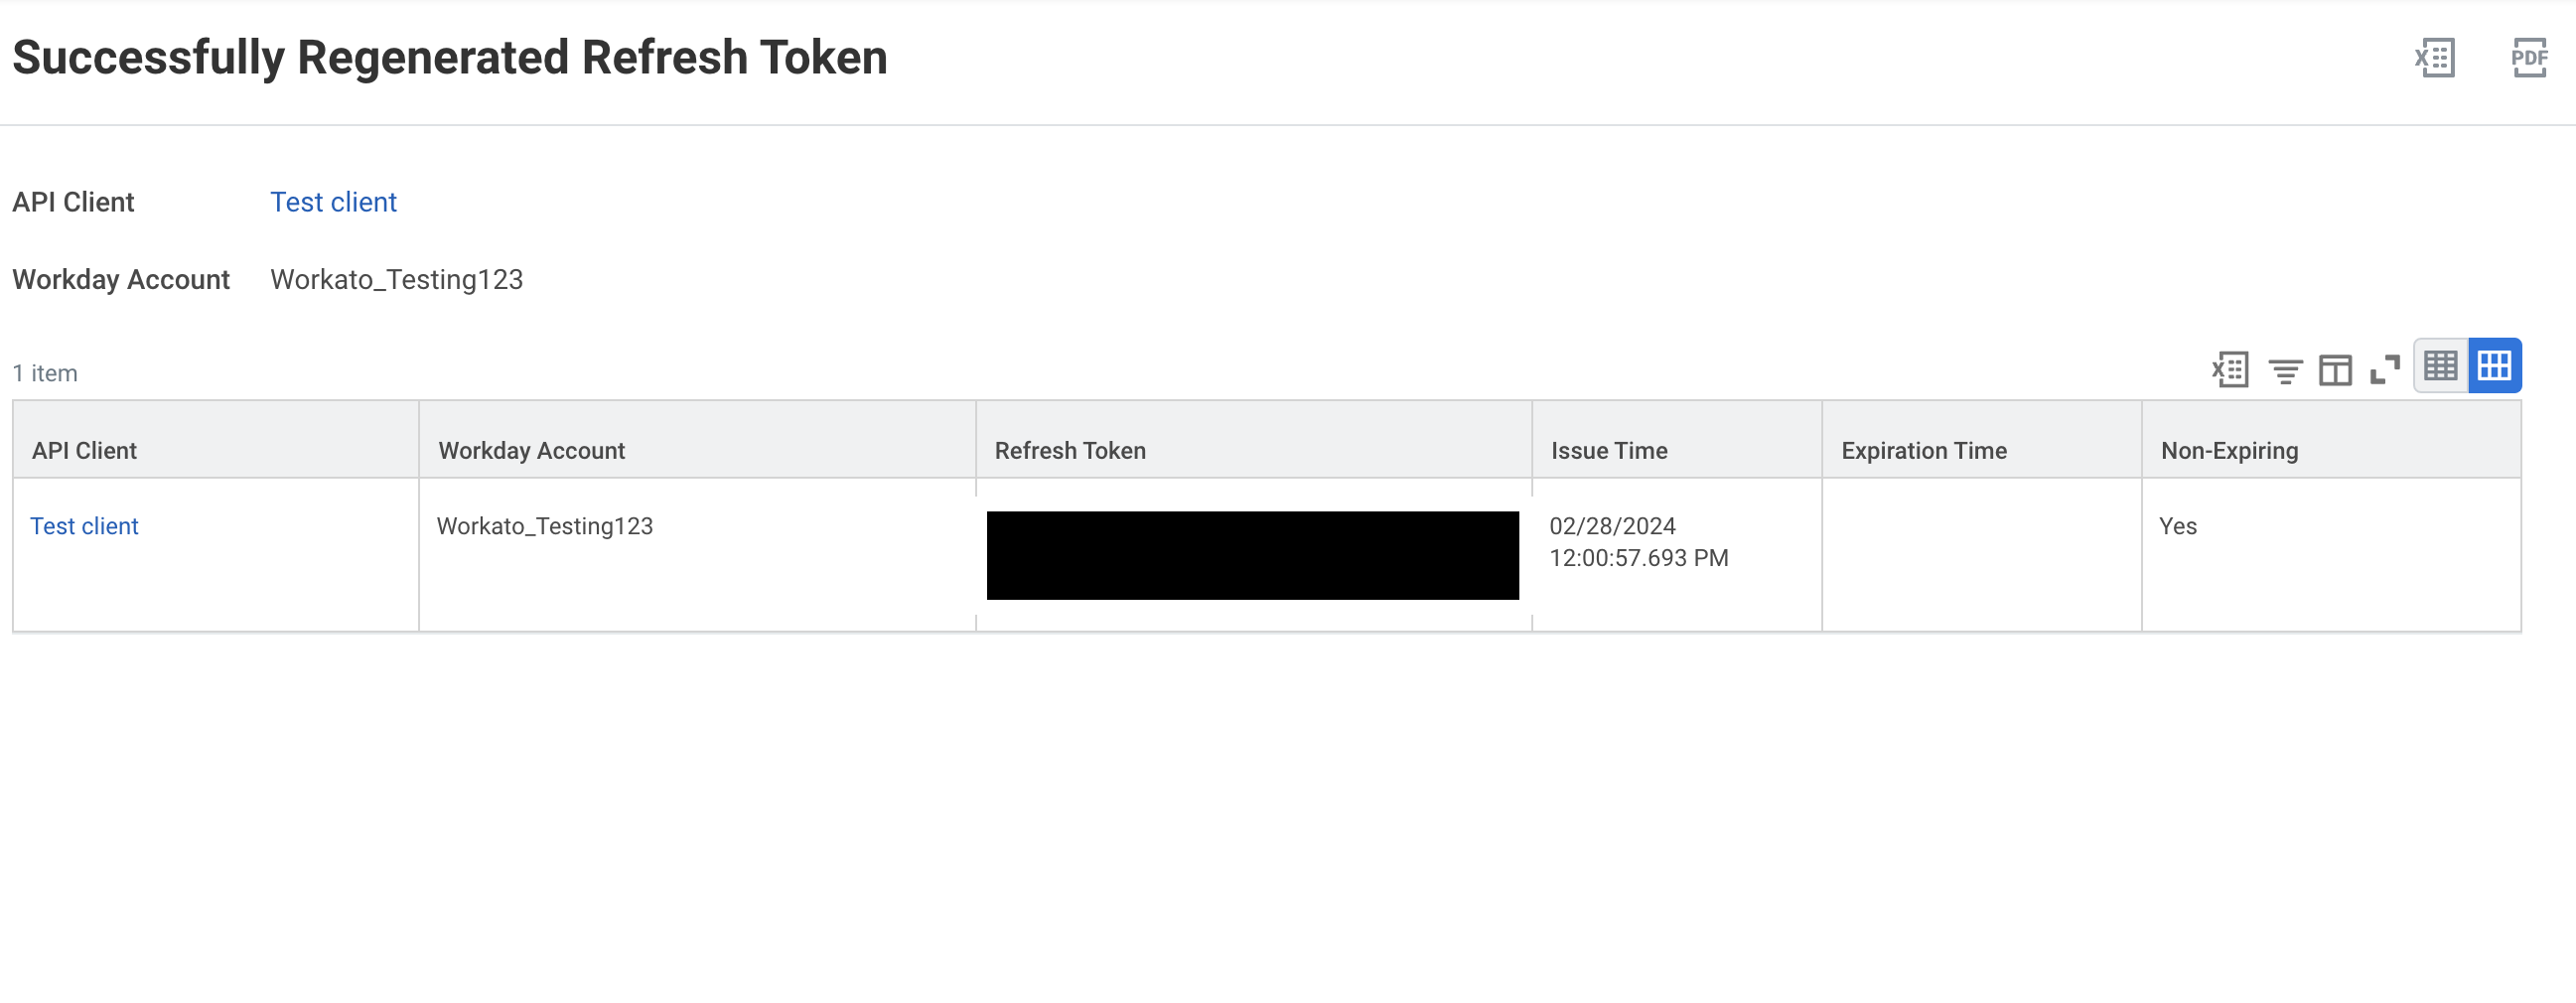 Copy the generated refresh token
Click Done to complete the process.
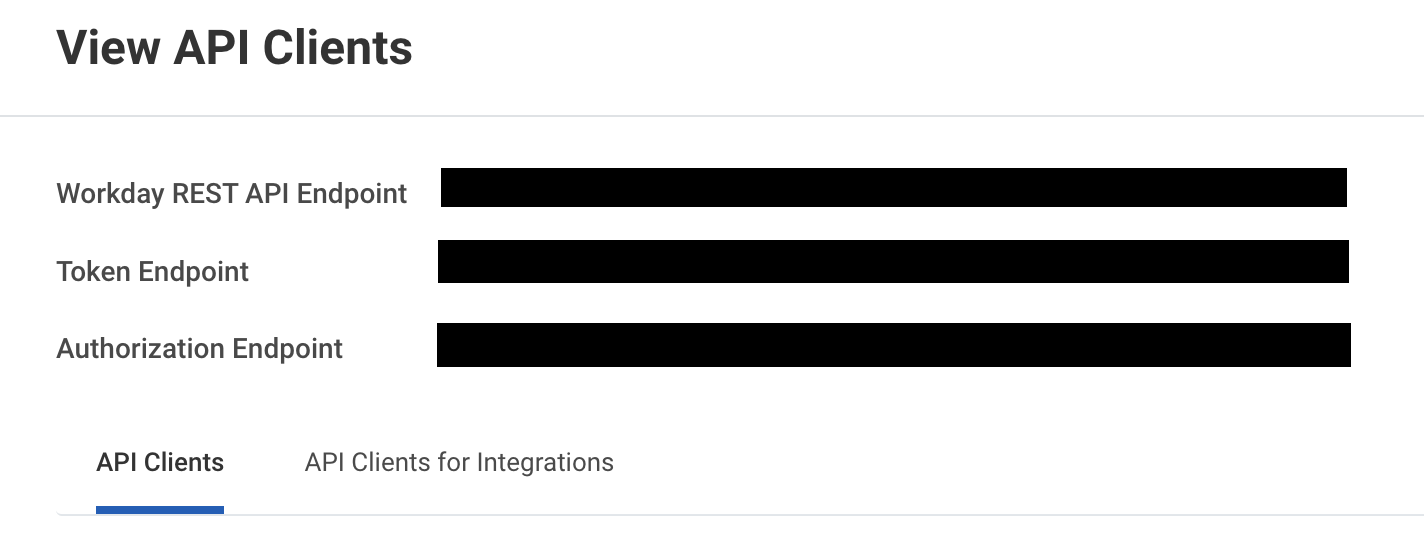
Find your token endpoint URL
Complete the following steps to find your token endpoint URL in Workday:
Enter View API Clients into the search field in Workday.
Access the View API Clients report from the search results.
Save the URLs listed in the Token Endpoint and Authorization Endpoint fields. These URLs are required for the OAuth 2.0 connection.
 Save the token endpoint and authorization endpoint URLs
Setting up the connection to Workday
The Workato Workday connector is categorized into three distinct types: the main Workday connector, the Workday Web Services connector, and the Workday REST connector. Each type follows a similar authentication pattern but differs slightly in support capabilities and functionalities.
Connection setup using OAuth 2.0 authentication
Complete the following steps to configure your Workday connection in Workato using OAuth 2.0 authentication:
OAuth 2.0 authentication is required if you plan to work with the Workday REST API or custom objects. We recommend that you avoid using the deprecated Hybrid authentication method.
Enter a unique Connection name to identify your Workday account in Workato.
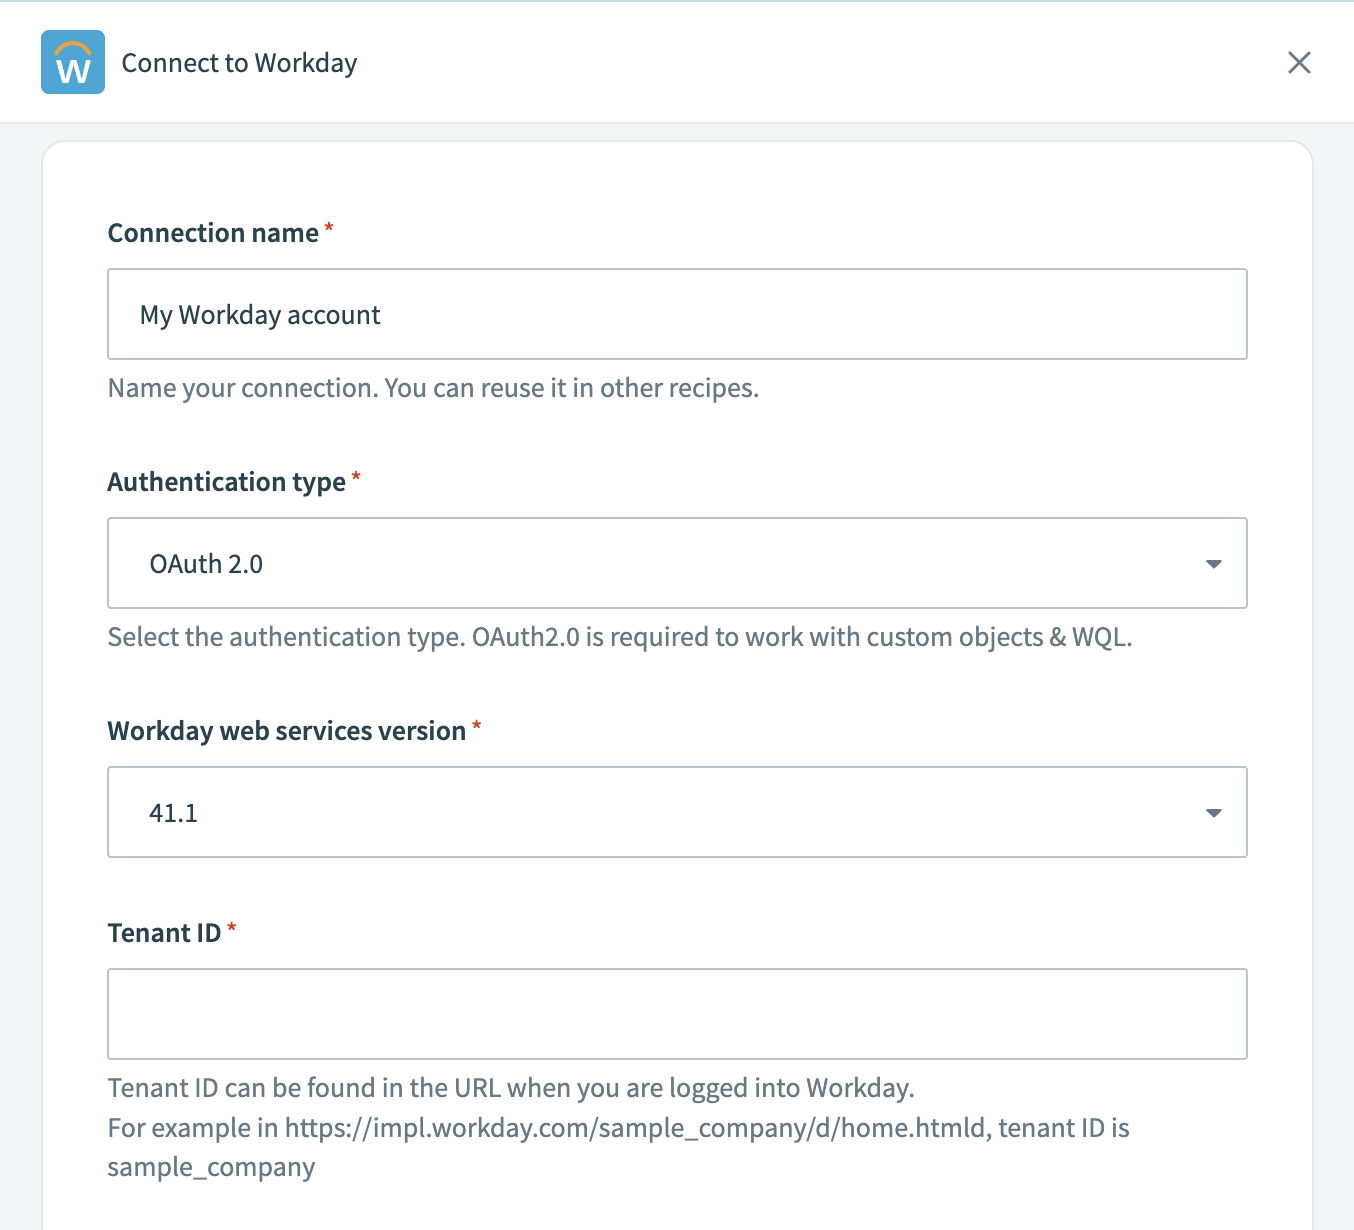 Label your connection
Use the Location drop-down to select the project or folder to store this connection.
Choose OAuth 2.0 as the Authentication type. This method is required for working with custom objects and for querying data using Workday Query Language (WQL) with the Workday REST API.
Select the Workday web services version appropriate for your Workday tenant. We recommend choosing the newest version available for access to the latest features and updates.
Locate and enter your Tenant ID. You can find your tenant ID in your Workday URL. For example, your tenant ID is sample_company if your URL is https://impl.workday.com/sample_company/d/home.htmld.
Provide the WSDL URL associated with your Workday services.
Enter the Client ID and Client Secret from your API client settings.
Provide your Refresh token if using an API client for integrations.
DON'T PROVIDE A REFRESH TOKEN FOR Workday End User MCP server
Don't provide a refresh token if you're connecting to the Workday End User MCP server.
Enter your Authorization endpoint and Token endpoint from your API Client settings to complete the OAuth flow.
Select the Workday tenant timezone that matches your Workday tenant's settings. Workday uses Pacific Standard Time (PST) by default.
Click Advanced settings to configure the Advanced XML payload for multiple ID values.
Workato wraps each value in fields with multiple values within its own container by default when constructing the XML from your input.
For example:
<languages><language>english</language></languages><languages><language>chinese</language></languages>Workato unwraps these values and presents them in a single container if you set the value to Yes:
<languages><language>english</language><language>chinese</language></languages>Consider enabling this when you encounter invalid payload errors.
Review the information you entered to ensure it is correct.
Click Connect to initiate the authorization process and complete the connection setup.
Connection setup using basic authentication
Complete the following steps to set up your Workday connection in Workato with basic authentication:
Enter a unique Connection name to identify your Workday account in Workato.
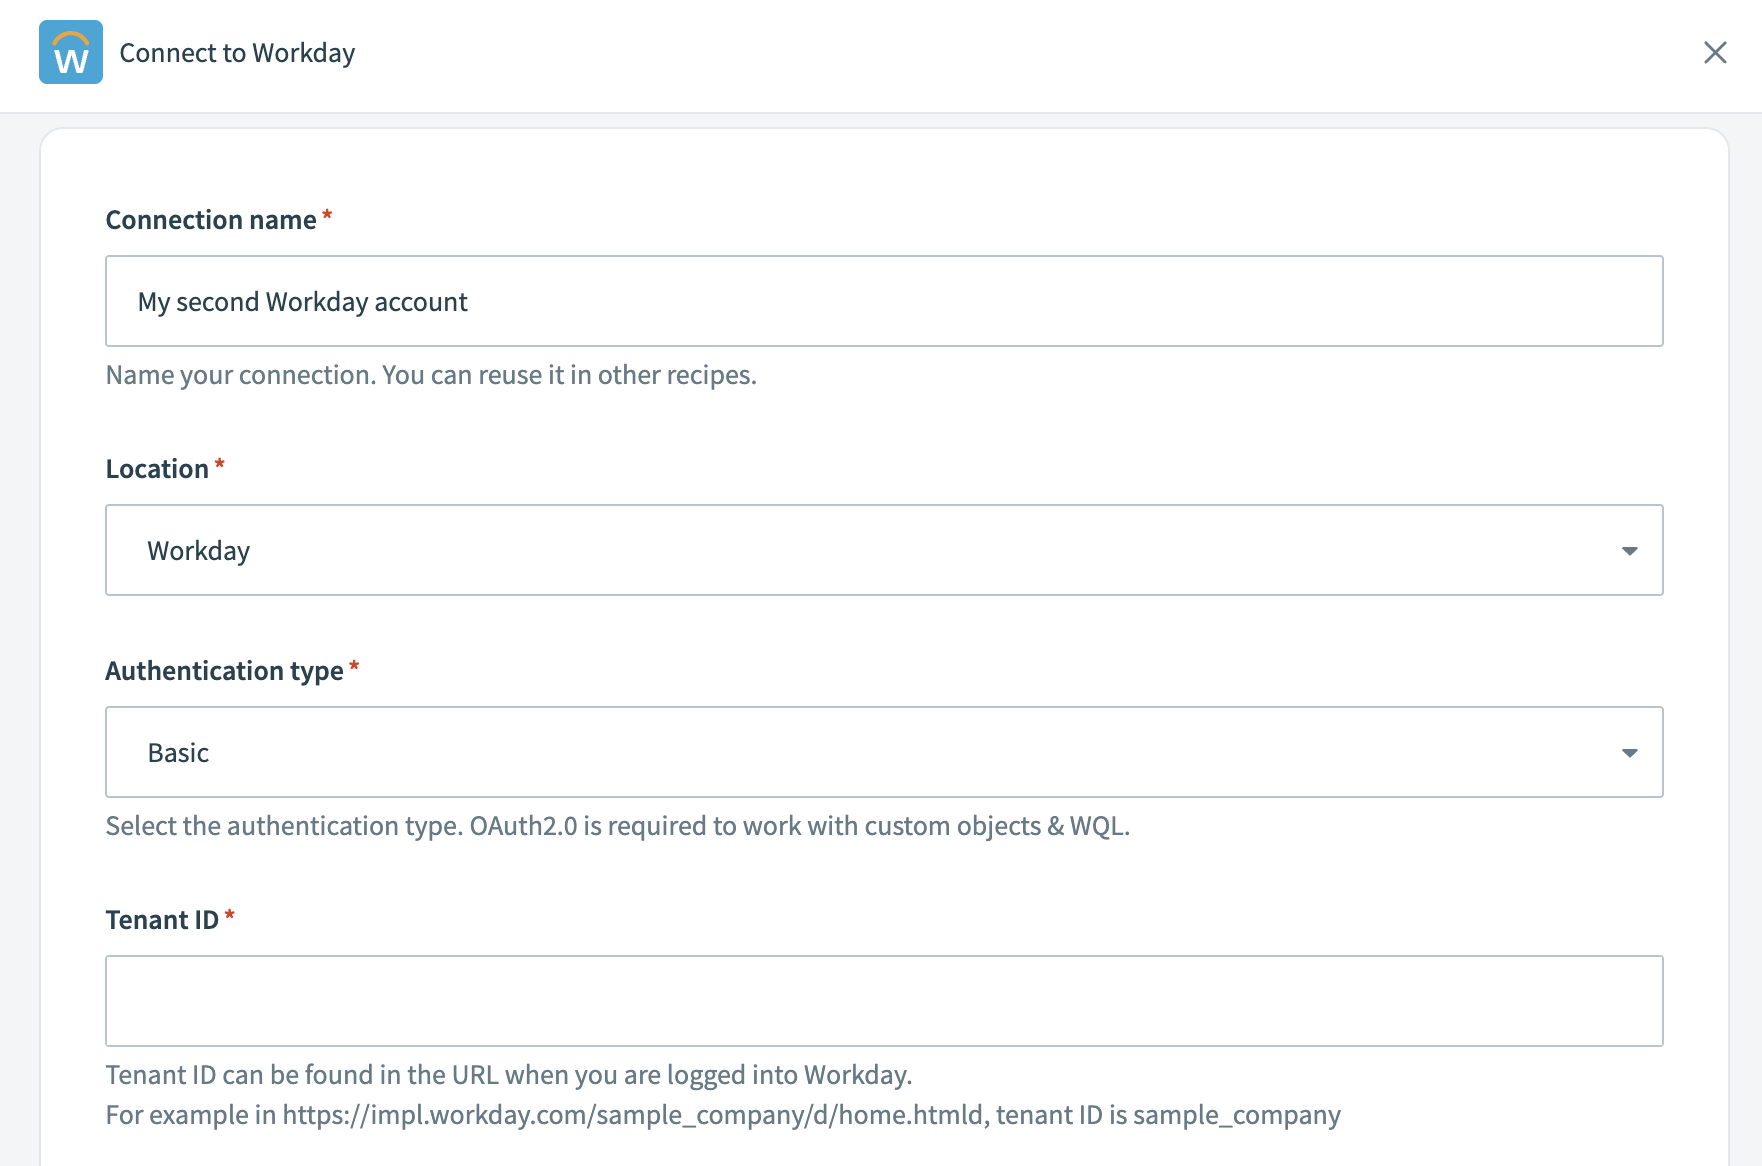 Label your connection
Use the Location drop-down to select the project or folder to store this connection.
Select Basic as the Authentication type. This method uses your Workday username and password for integration.
Locate and enter your Tenant ID. You can find your tenant ID in your Workday URL. For example, your tenant ID is sample_company if your URL is https://impl.workday.com/sample_company/d/home.htmld.
Provide the WSDL URL associated with your Workday services.
Provide your Workday Login name and Password.
Select your Workday tenant timezone that matches your Workday tenant's settings. Workday uses Pacific Standard Time (PST) by default.
Click Advanced settings to configure the Advanced XML payload for multiple ID values if required. Fields with multiple values are wrapped within a container by default. Set this option to yes to unwrap the values.
Review the information you entered to ensure it's correct.
Click Connect to initiate the authorization process and complete the connection setup.
What's next
More details on the capabilities of the Workday connector can be found in the following sections:
Triggers
- New/updated business object trigger
- New/updated business object batch trigger
- Scheduled report trigger
- Scheduled report using WQL trigger
Actions
- Call operation action
- Get custom object action
- Get report action
- Get report using WQL action
- List custom object definitions action
- Create/update custom object action
- Search business objects batch action
Wiki
Last updated: