# Configure Oracle Fusion Cloud as your data pipeline source
Set up Oracle Fusion Cloud as a data pipeline source to extract and sync records into your destination. This guide covers connection setup, pipeline configuration, and key behavior when using Oracle Fusion Cloud as a source.
# Features supported
The following features are supported when using Oracle Fusion Cloud as a data pipeline source:
- Extract data from Oracle Fusion Cloud modules
- Support for full and incremental sync (where supported)
- Field-level selection for object extraction
- Schema drift detection and handling
- Field-level data masking
# Prerequisites
Ensure you have the following configuration before creating the connection:
- Access to an Oracle Fusion Cloud instance
- Valid Oracle Fusion Cloud user credentials
- Required permissions to access the objects used in the pipeline
# API version
The Oracle Fusion Cloud connector uses the Oracle Fusion Cloud API v11.13.18.05 (opens new window) and SOAP Web Services for Financials (opens new window) (no versioning).
# How to connect
Complete the following steps to create an Oracle Fusion Cloud connection:
Connect to Oracle Fusion Cloud
The Oracle Fusion Cloud connector supports the following authentication methods:
# Basic
Complete the following steps to connect to Oracle Fusion Cloud using basic authentication:
Sign in to Workato.
Select the project where you plan to store the connection.
Click Create > Connection.
Search for Oracle Fusion Cloud and select it as your app.
Enter a name for your connection in the Connection name field.
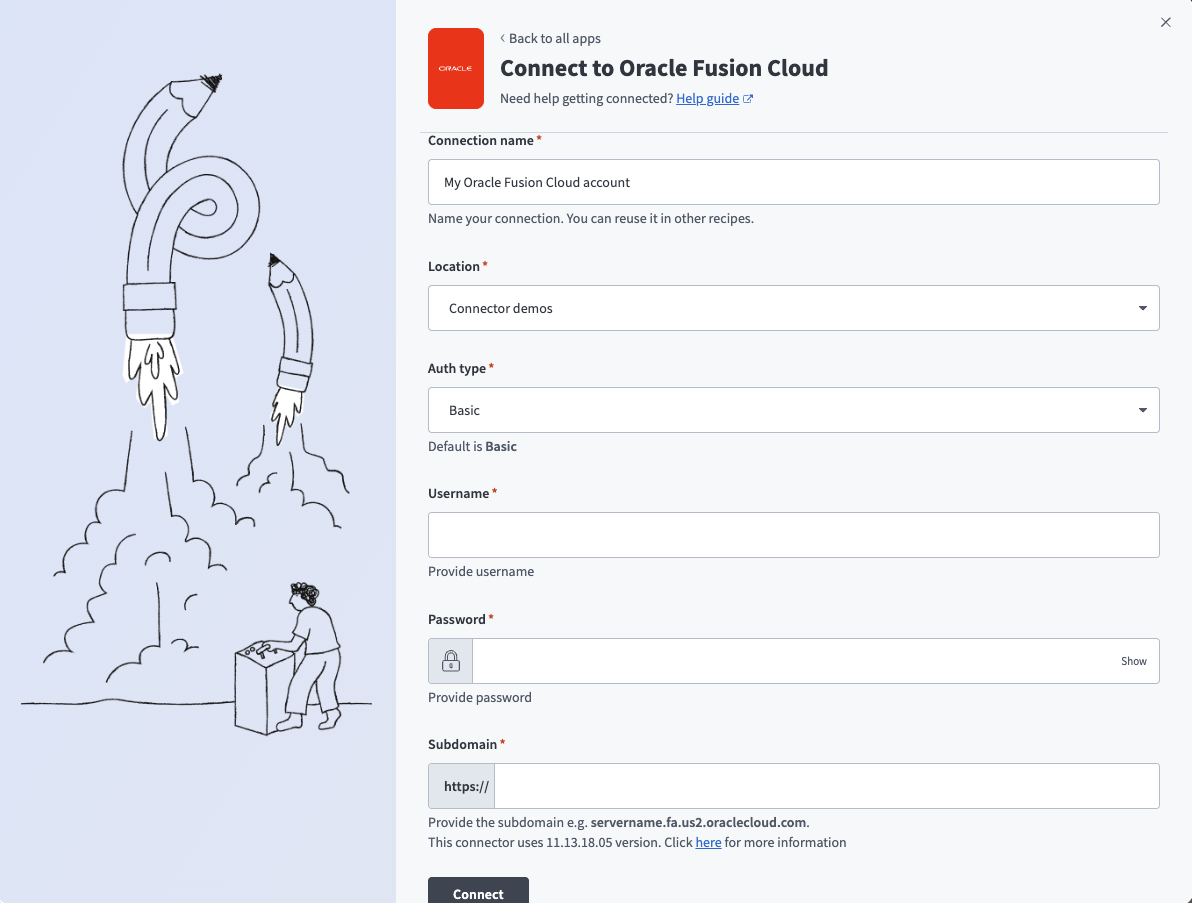 Connect to Oracle Fusion Cloud (basic authentication)
Use the Location drop-down menu to select the project or folder where you plan to store the connection.
Use the Auth type drop-down menu to select Basic.
Enter the username for your Oracle Fusion Cloud account in the Username field.
Enter the password for your Oracle Fusion Cloud account in the Password field.
Enter the subdomain of your specific Oracle Fusion Cloud instance in the Subdomain field. For example, servername.fa.us2.oraclecloud.com.
Click Connect.
# JWT token
The following items are required to connect to Oracle Fusion Cloud using JWT token authentication:
- Generate a X.509 key pair
- Retrieve the certificate fingerprint
- Configure token-based authentication in Oracle Fusion Cloud
- Complete setup in Workato
You can also refer to the Oracle Configure JWT Authentication Provider (opens new window) tutorial for more information about this process.
# Generate a X.509 key pair
X.509 key pairs are used to establish secure communication by verifying the authenticity of the public certificate.
Complete the following steps to generate a X.509 key pair:
ENVIRONMENT REQUIREMENT
These steps use openssl.
- macOS and Linux include OpenSSL by default
- Windows doesn't include OpenSSL by default. Install OpenSSL or run these commands using tools such as Git Bash or WSL (Windows Subsystem for Linux).
Open a new terminal window.
Run the following command to generate a private key:
openssl genrsa -out private.key 2048
This command creates a 2048-bit RSA private key and saves it to private.key.
Run the following command to generate an X.509 certificate containing the public key:
openssl req -new -x509 -key private.key -out publickey.cer -days 365
This command generates a self-signed X.509 certificate (publickey.cer) valid for 365 days.
Open the private.key file in a text editor and copy the contents, starting from -----BEGIN RSA PRIVATE KEY----- and ending with -----END RSA PRIVATE KEY-----.
Store this key securely for later use in complete setup in Workato.
# Retrieve the certificate fingerprint
The certificate fingerprint is a unique identifier used to verify the authenticity of a certificate.
Complete the following steps to retrieve the certificate fingerprint:
ENVIRONMENT REQUIREMENT
These steps use openssl.
- macOS and Linux include OpenSSL by default
- Windows doesn't include OpenSSL by default. Install OpenSSL or run these commands using tools such as Git Bash or WSL (Windows Subsystem for Linux).
Run the following openssl command to generate the x5t value from the publickey.cer file:
openssl x509 -sha1 -in publickey.cer -noout -fingerprint
The fingerprint output is in hexadecimal format:
Fingerprint=00:6D:6F:4A:5F:36:71:10:24:F8:F0:FD:33:89:6D:C5:EB:92:00:0F
Convert the fingerprint to base64 format. Replace the string with your actual certificate fingerprint:
echo "00:6D:6F:4A:5F:36:71:10:24:F8:F0:FD:33:89:6D:C5:EB:92:00:0F" | xxd -r -p | base64
The fingerprint output is in base64 format:
AG1vSl82cRAk+PD9M4ltxeuSAA8=
Copy the base64-encoded certificate fingerprint and store it securely. This value is required to complete setup in Workato.
Remove any trailing = when you store the fingerprint.
# Configure token-based authentication in Oracle Fusion Cloud
Complete the following steps to configure token-based authentication in Oracle Fusion Cloud:
Sign in to Oracle Fusion Cloud.
Click the ☰ Navigator icon to expand the sidebar and go to Tools > Security.
Click API Authentication.
Click + Create Oracle API Authentication Provider.
Click Edit.
Enter the name of the calling provider in the Trusted Issuer field. For example, Workato.
Select the JWT checkbox as the Token Type.
 Configure token-based authentication in Oracle Fusion Cloud
Click Save and Close.
Click Inbound API Authentication Public Certificates.
Click + Add New Certificate.
Enter a name in the Certificate Alias field.
Click Choose File and select the public certificate (publickey.cer) generated in the Generate a X.509 key pair step.
Click Save.
# Complete setup in Workato
Complete the following steps to connect to Oracle Fusion Cloud using JWT token authentication:
Sign in to Workato.
Select the project where you plan to store the connection.
Click Create > Connection.
Search for Oracle Fusion Cloud and select it as your app.
Enter a name for your connection in the Connection name field.
 Connect to Oracle Fusion Cloud (JWT token authentication)
Use the Location drop-down menu to select the project or folder where you plan to store the connection.
Use the Auth type drop-down menu to select JWT token.
Enter the trusted issuer name for your Oracle API authentication in the Issuer field.
Enter the username for your Oracle Fusion Cloud account in the Username field.
Enter the private key associated with your public certificate in the Private key field.
Enter your base64-encoded certificate fingerprint in the Certificate fingerprint field.
Enter the subdomain for your Oracle Fusion Cloud instance in the Subdomain field. For example, servername.fa.us2.oraclecloud.com.
Click Connect.
:::
# Configure the pipeline
Complete the following steps to configure Oracle Fusion Cloud as your data pipeline source in Workato:
Return to your Workato account.
Select Create > Data pipeline.
Provide a Name for the data pipeline.
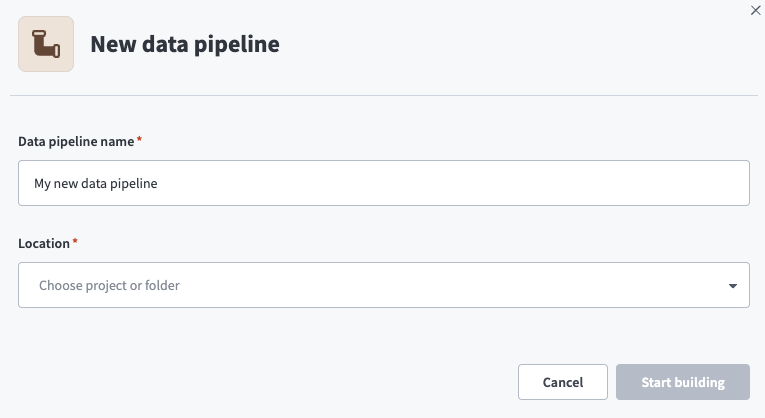 Data pipeline setup
Use the Location drop-down menu to select the project where you plan to store the data pipeline.
Click Start building.
Click the Extract new/updated records from source app trigger. This trigger defines how the pipeline retrieves data from the source application.
 Configure the Extract new/updated records from source app trigger
Use the Your Connected Source Apps drop-down menu to select Oracle Fusion Cloud.
Choose the Oracle Fusion Cloud connection you plan to use for this pipeline. Alternatively, click + New connection to create a new connection.
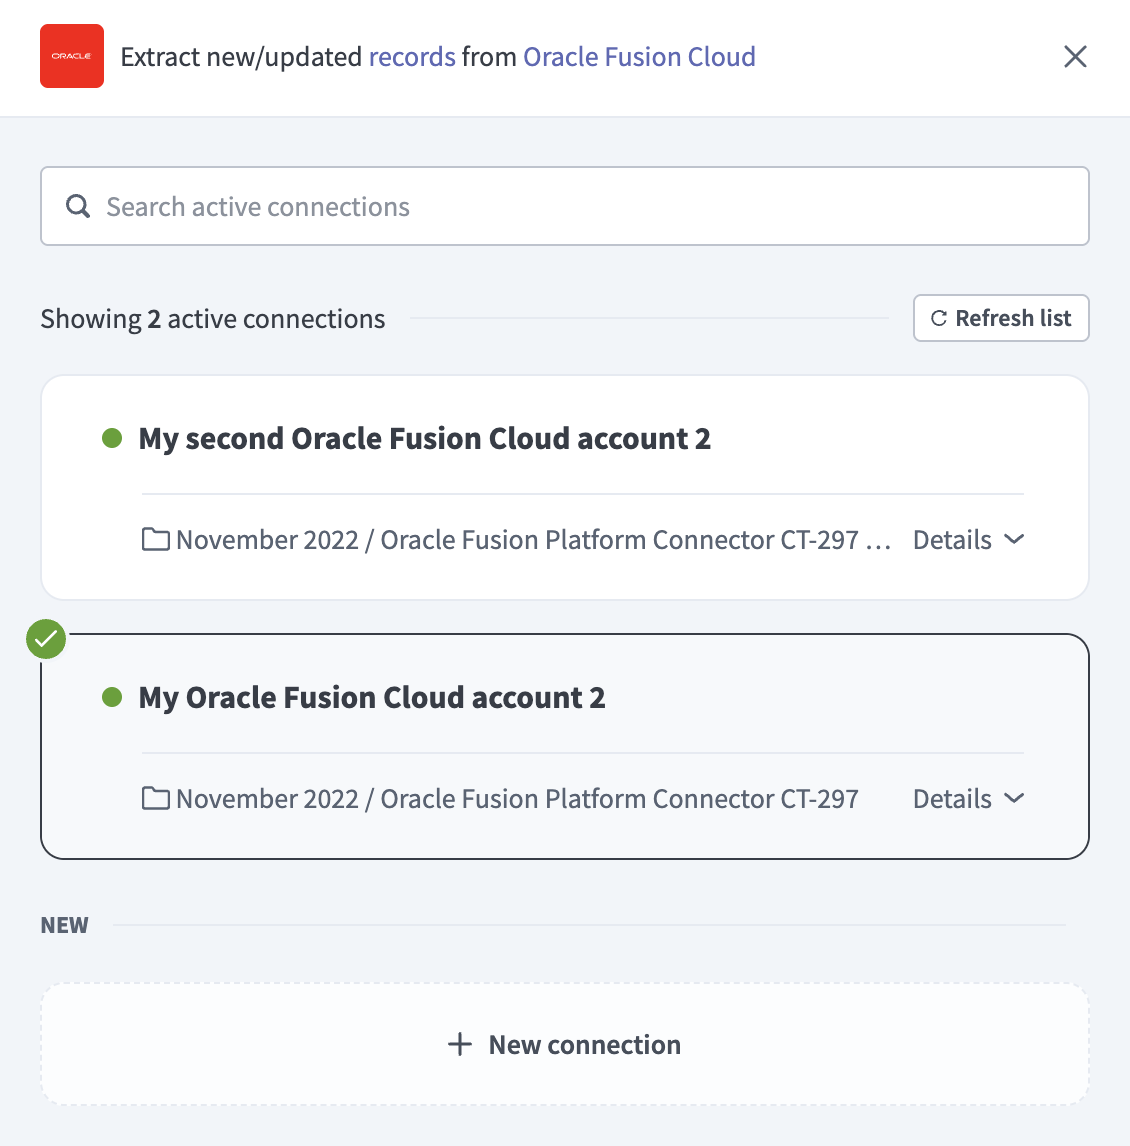 Choose a Oracle Fusion Cloud connection
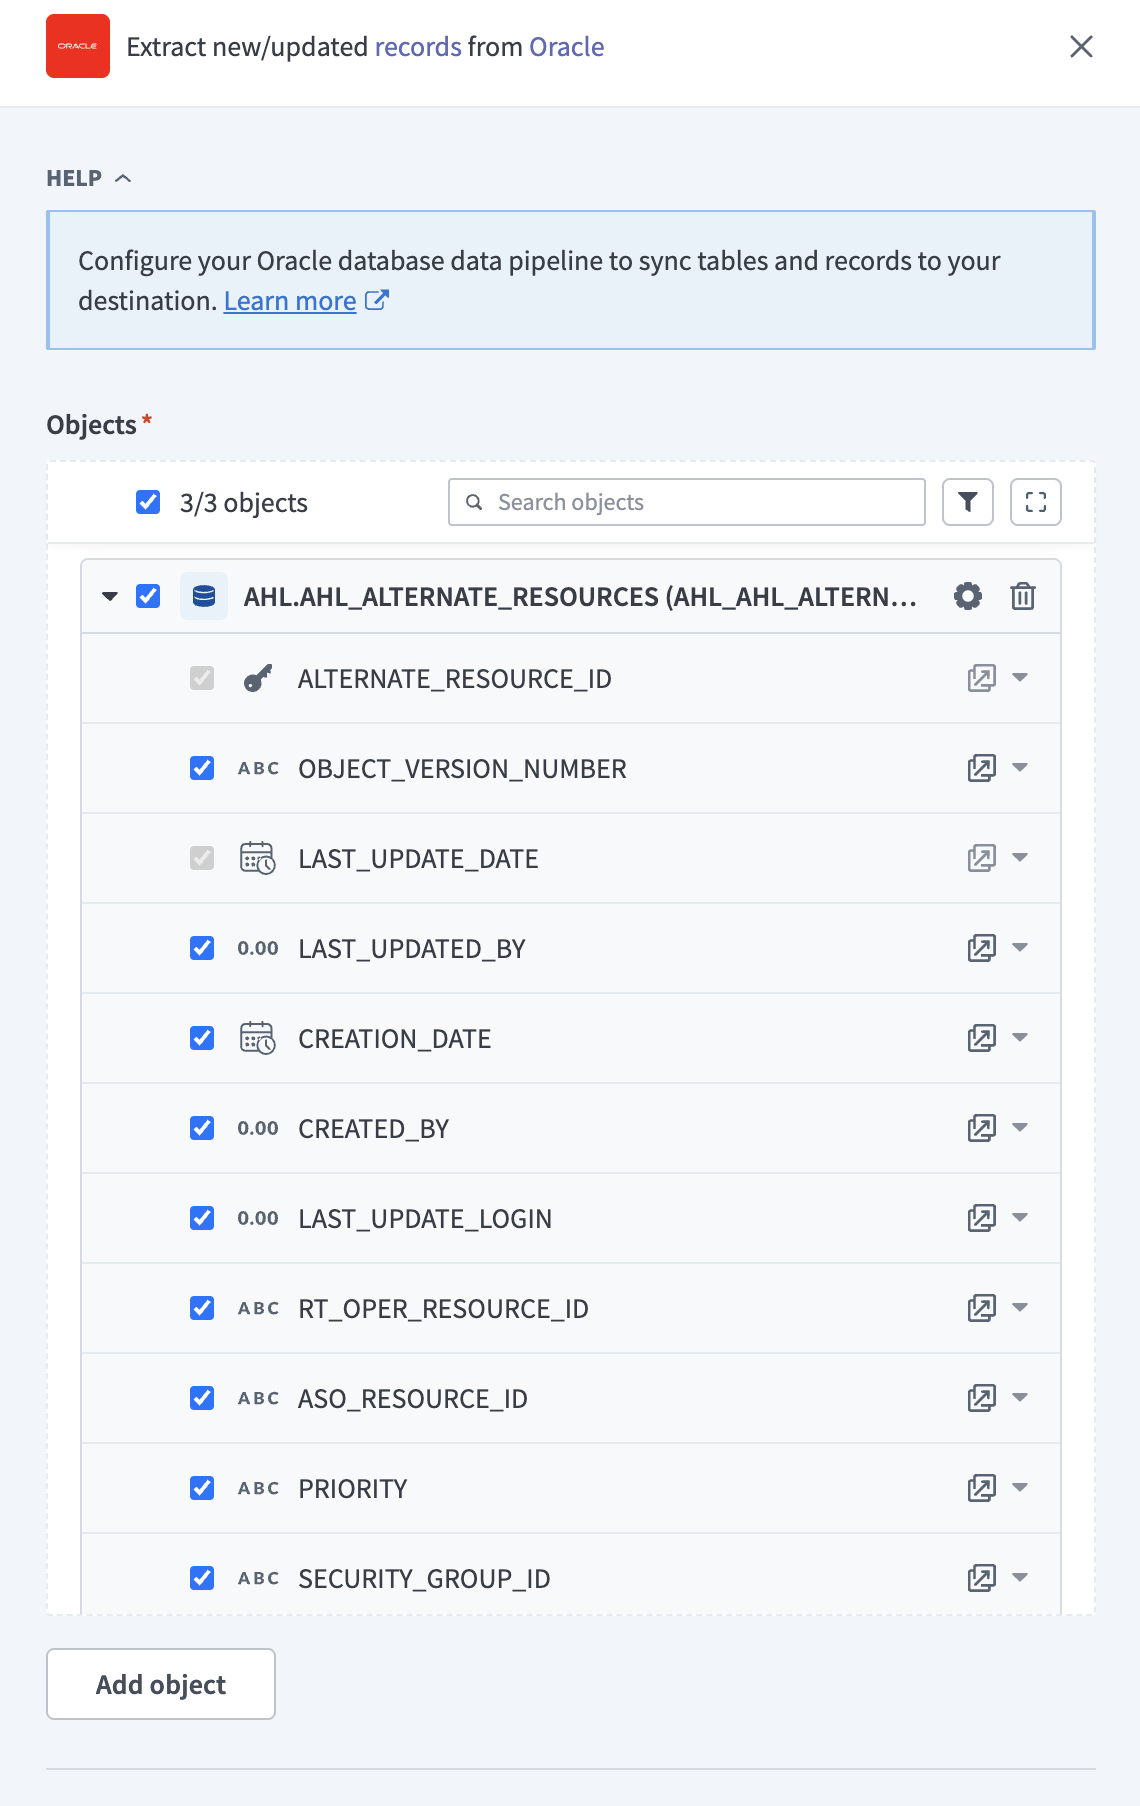
Click Add object to open the object modal.
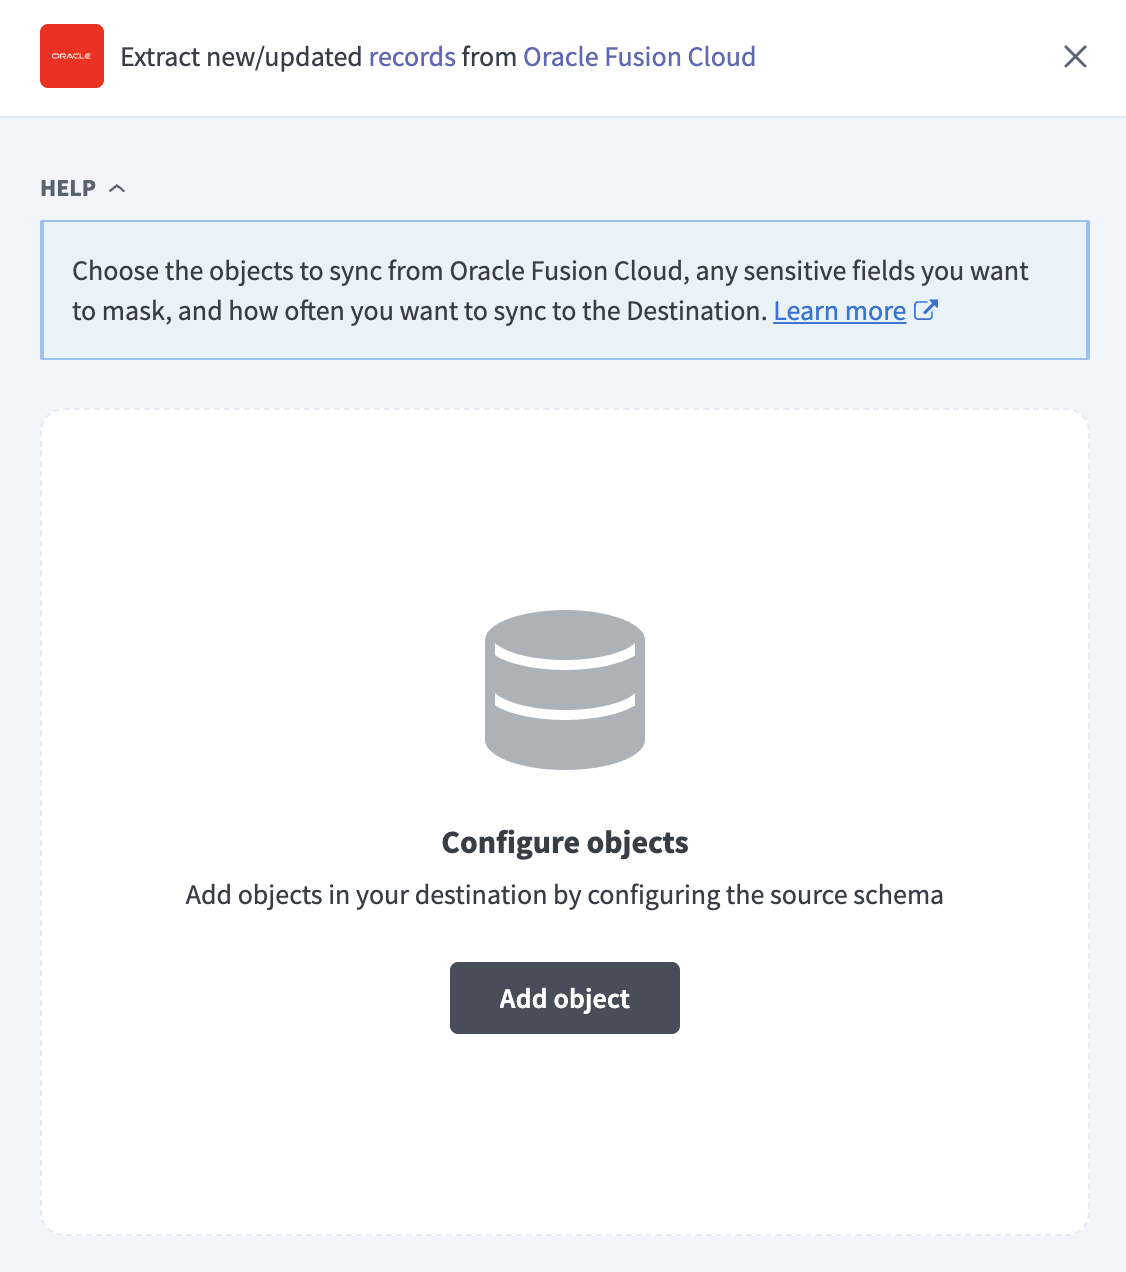 Add object
Search or browse the list of available Oracle Fusion Cloud tables and select the tables you plan to sync.
Click Add.
Review and customize the schema for each table you select. The pipeline automatically fetches schemas for each to ensure the destination matches the source.
 Expand object
You can expand a table to view its fields. Keep all fields selected to extract all available data, or deselect specific fields to exclude them from extraction and schema replication.
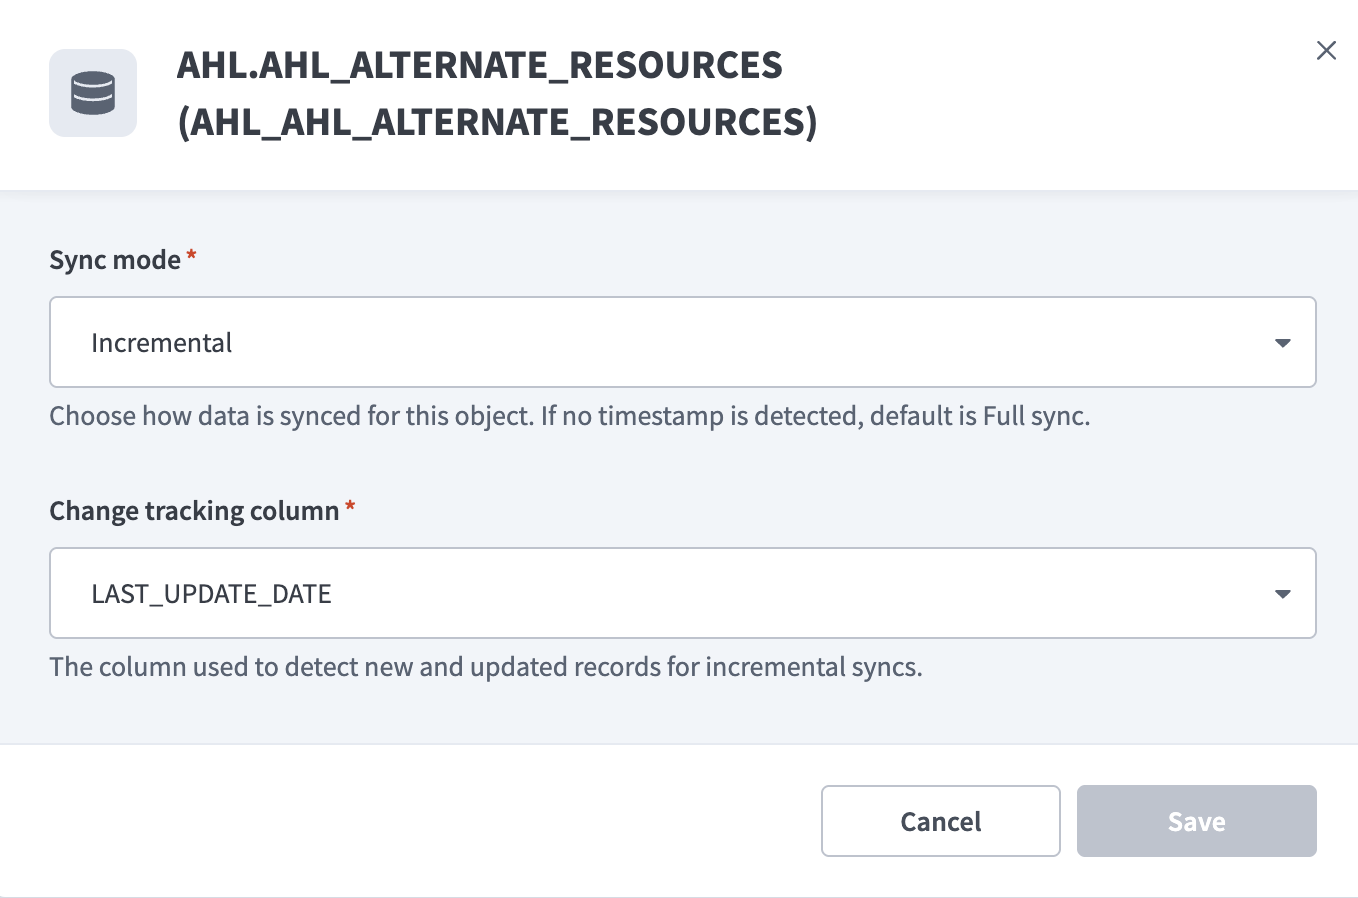
Configure sync settings for each table:
Click the Settings (gear) icon next to the table.
![]() Configure sync settings
Configure sync settings
Select a Sync mode:
 Configure sync settings
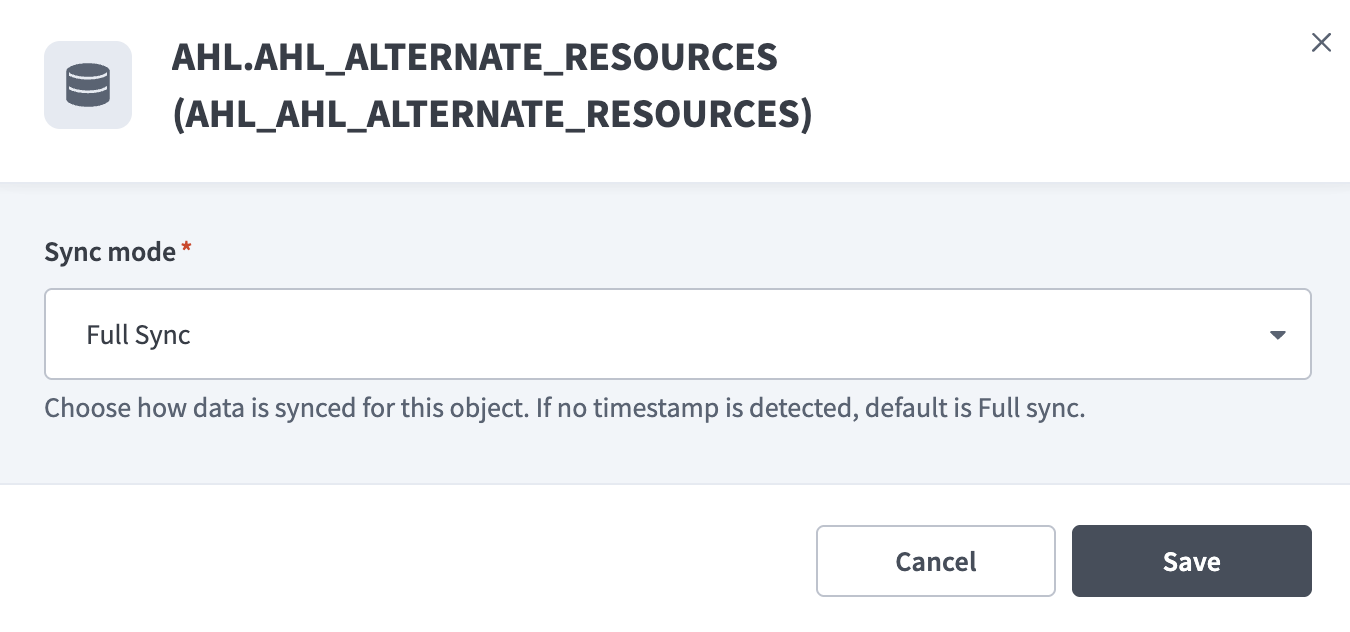 Configure sync settings
Review the impact of sync configuration changes.
FULL RE-SYNC BEHAVIOR
Changing the Sync mode or Change tracking column triggers a full re-sync of the affected table on the next pipeline run.
During a full re-sync, the pipeline reloads all records for that table. This process may increase runtime and reprocess existing data in the destination.
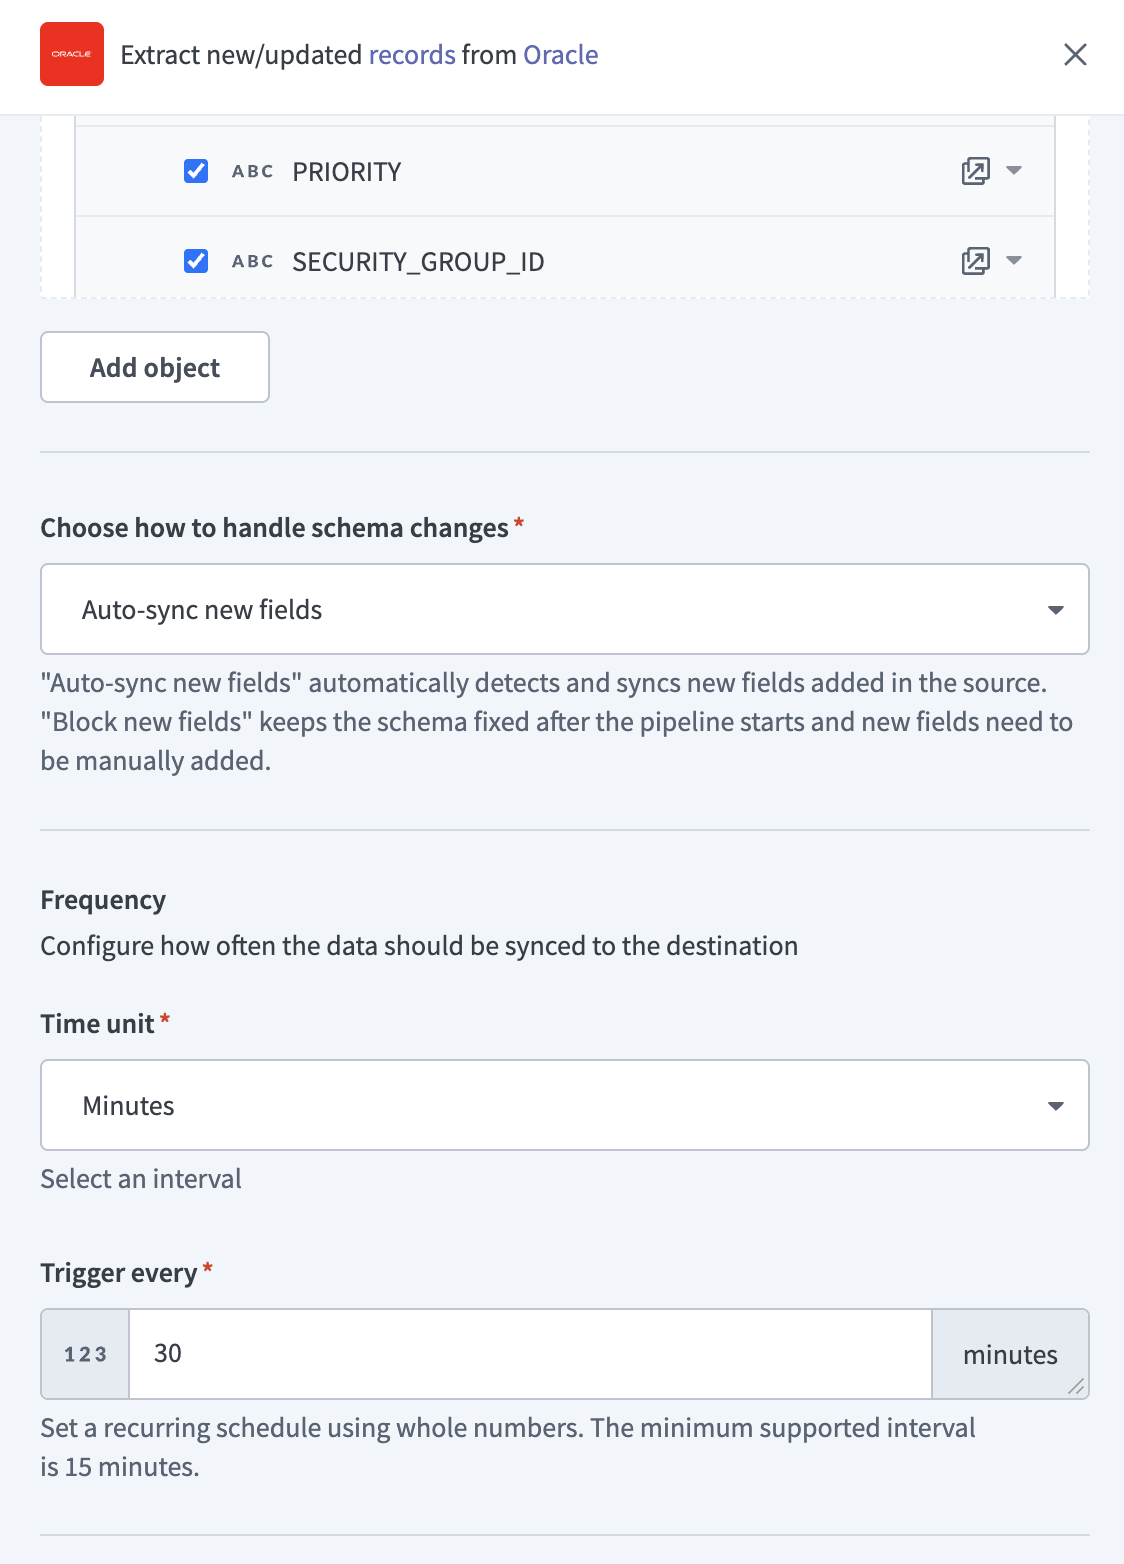
Click Add object again to add additional tables using the same flow.
Choose how to handle schema changes:
- Select Auto-sync new fields to detect and apply schema changes automatically.
- Select Block new fields to manage schema changes manually. This option may cause the destination to fall out of sync if the source schema updates.
Unsynchronized schema changes, also known as schema drift, can cause issues if not managed. Refer to the Schema drift section for more information.
Configure how often the pipeline syncs data from the source to the destination in the Frequency field. Choose either a standard time-based schedule or define a custom cron expression.
 Configure sync frequency
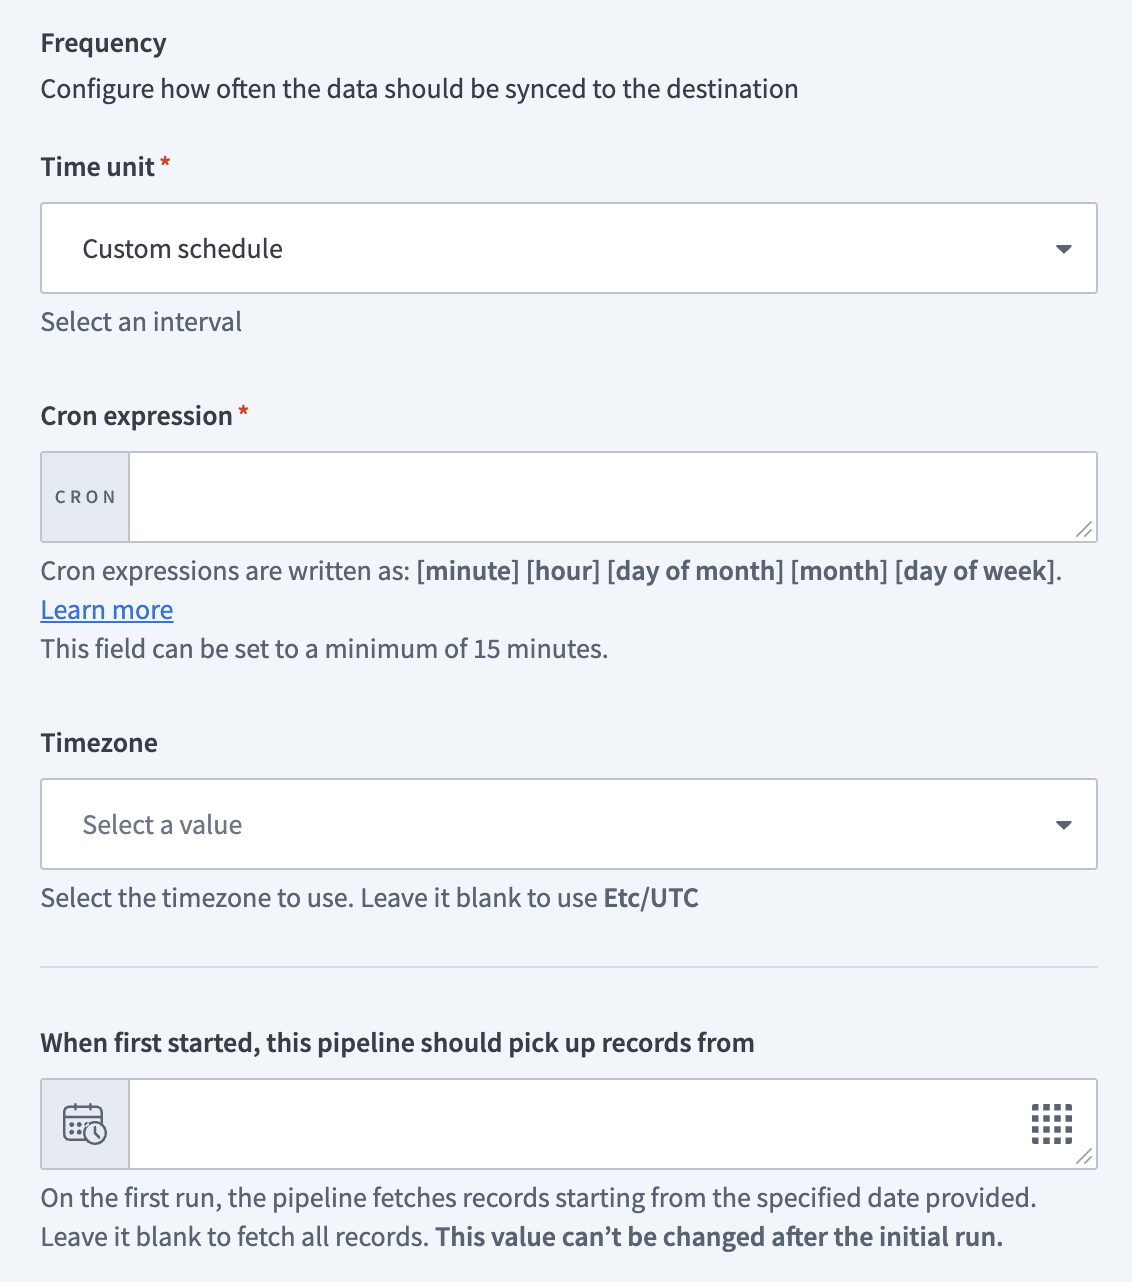 Configure sync frequency
# Supported Oracle Fusion Cloud objects
The Oracle Fusion Cloud connector supports a wide range of business objects across multiple modules, including:
- Financials
- Procurement
- Supply chain
- Order management
- Human capital management
The available objects depend on:
- Enabled Oracle Fusion Cloud modules
- User permissions and roles
Last updated: 4/29/2026, 2:37:19 PM