Getting started
Workflow apps allow you to create business applications within Workato's low-code environment. Workflow apps provide a unified interface where you can generate assets, including data tables, recipes, and pages.
Workflow apps are created at the project level, ensuring app content is governed by role-based access control (RBAC) and compatible with recipe lifecycle management (RLCM).
You can build a Workflow app using a template, manually, or by converting an existing project. You can create a Workflow app in Platform > Workflow apps portal or in the Projects section.
Watch the Workflow apps video guide
Create a Workflow app
Workflow apps can be built with or without request and approval processing, depending on your use case.
- Generic apps: Build apps that connect with external systems using recipes to display, update, and sync data in real-time, or create custom applications tailored to your specific needs. For example, employee directories or data management tools.
- Apps with request and approval processing: Enable users to submit requests that require review and approval. For example, expense reimbursements or access requests.
You can create a generic app without request and approval functionality and add it later by creating a new tab with this capability enabled.
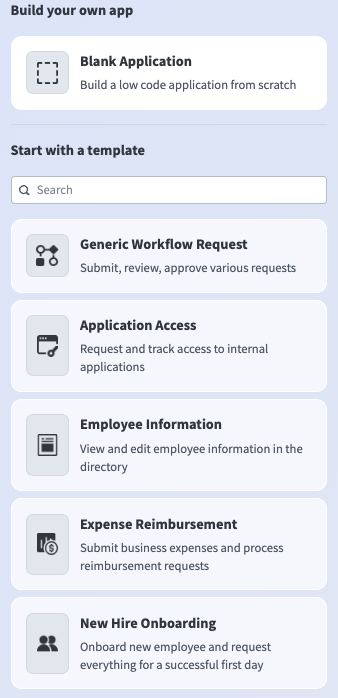
You can use templates based on common use cases to build your Workflow apps. App templates provide a foundation for your apps, highlight best practices, and simplify the app-building process. App templates include pages, data tables, and automations required to power your app.
The following app templates are available:
- Generic Workflow Request: Submit, review, and approve a variety of requests
- Application Access: Request and track access to internal applications
- Employee Information: View and update employee details in the directory
- Expense Reimbursement: Submit business expenses and process reimbursement requests
- New Hire Onboarding: Onboard new employees and ensure a successful first day
Complete the following steps to create a Workflow app using a template:
Sign in to Workato.
Go to Platform > Workflow apps portal.
Click + New app.
Select an app template from the Start with a template section.
Alternatively, select Blank Application to create a new Workflow app manually.
 App templates
Review the template preview to ensure this template is appropriate for your use case. The template preview displays pages included in the app and how the app appears in the Workflow apps portal.
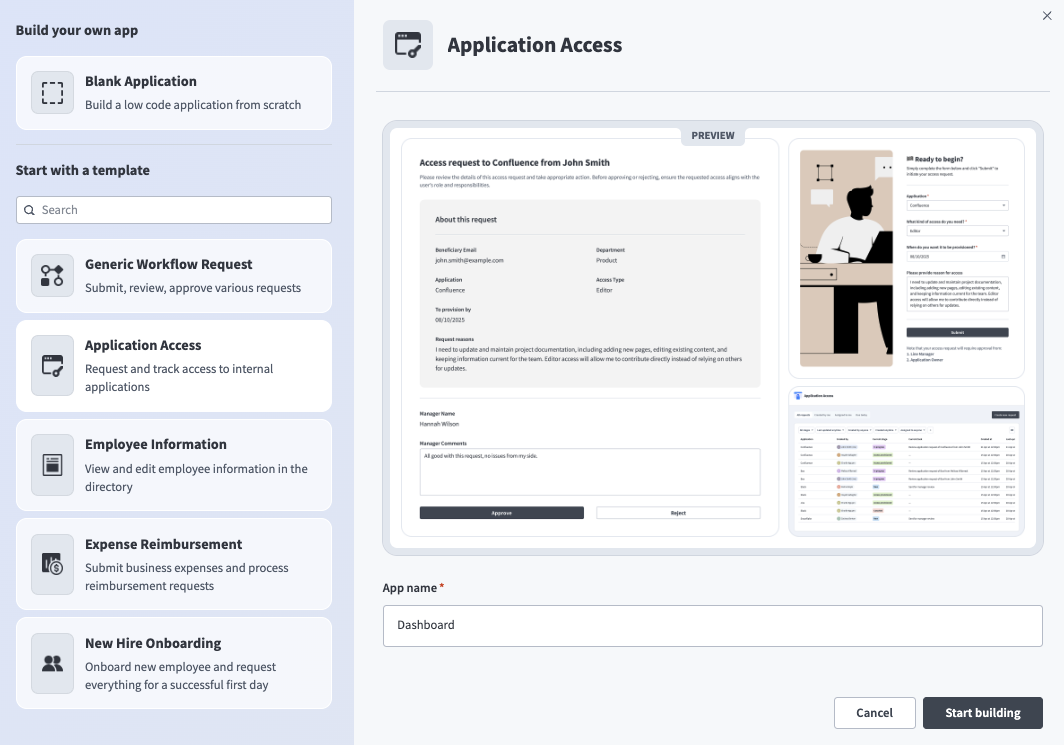 Template preview
Enter a unique App name. Workflow apps use the template name if you leave this field blank.
Click Start building.
Open your project to view the data tables, pages, and recipes that form the core functionality of your Workflow app.
Create a Workflow app from an existing project
You can convert any existing project into a Workflow app.
REVERTING APPS ISN'T SUPPORTED
You can't revert a Workflow app to a project after converting it into a Workflow app.
Complete the following steps to convert an existing project into a Workflow app:
Sign in to Workato.
Go to Projects and select an existing projects.
Go to Settings > General > Workflow app setup.
Click Set up workflow app.
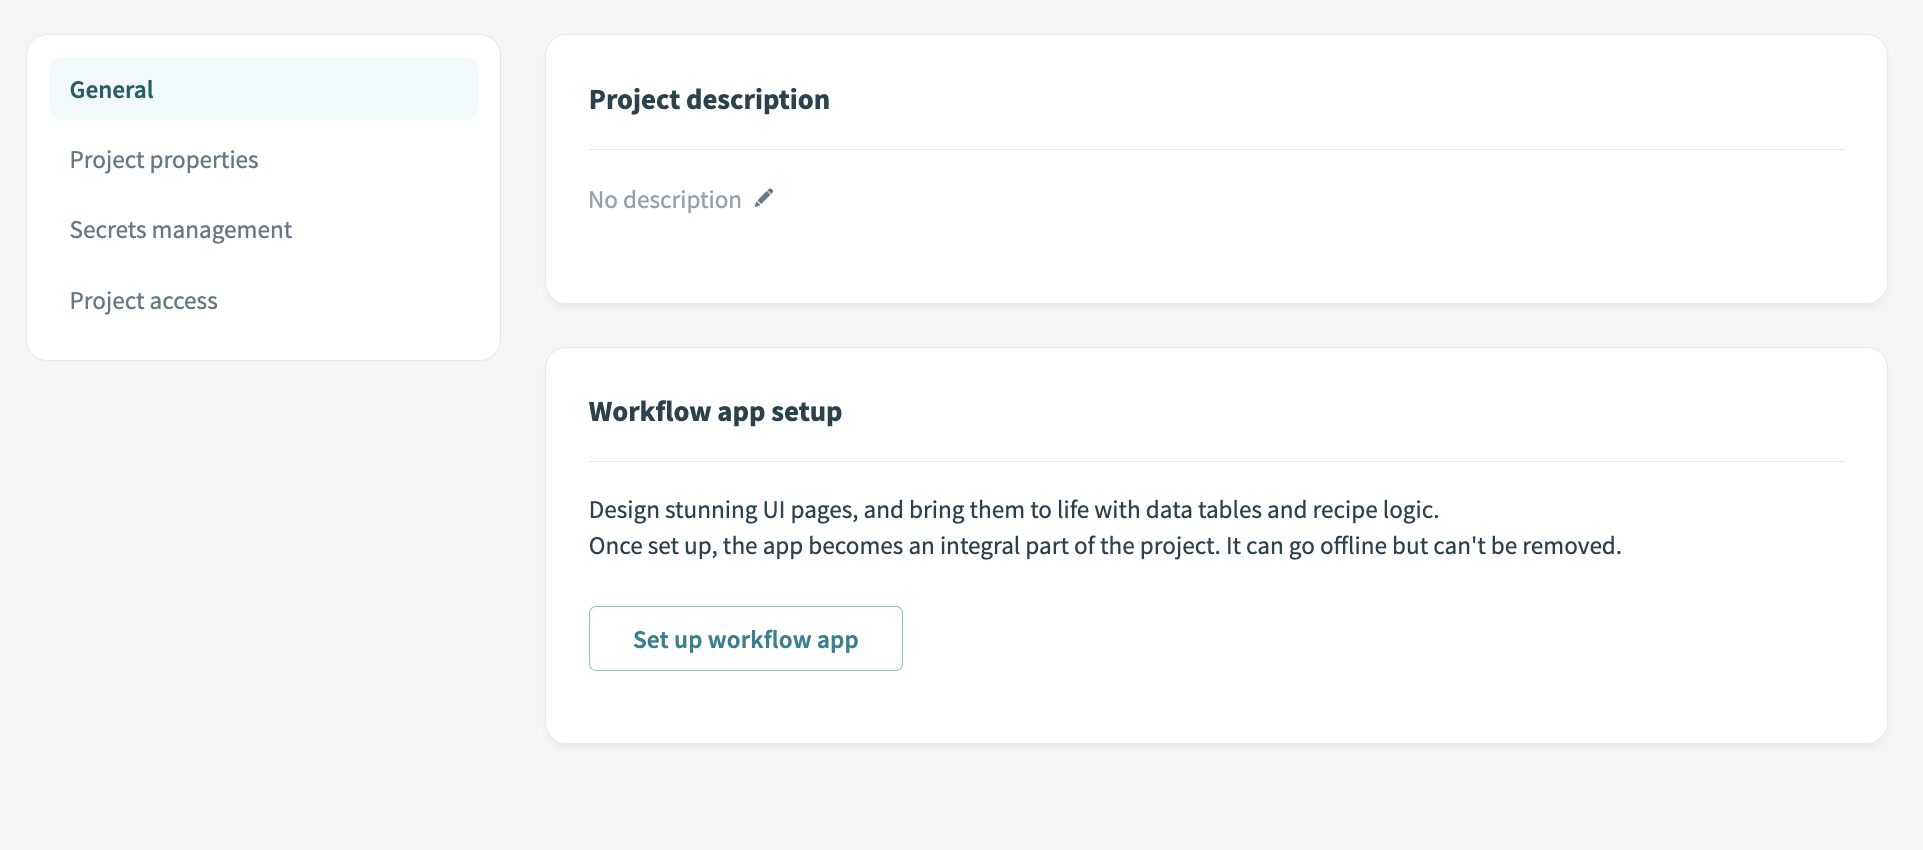 Click set up workflow app
Select an app template from the Start with a template section.
App templates
Review the template preview to ensure it's appropriate for your use case. The template preview displays pages included in the app and how the app appears in the Workflow apps portal.
Preview all assets in your app
Click Start building.
Open your project to view the data tables, pages, and recipes that form the core functionality of your Workflow app. You can add request and approval functionality at any time by creating a new tab with this capability enabled.
Next steps
The created app has all the essential components of a Workflow app, including the user interface, data storage, and business logic required to power it.
Complete the following steps to enable your application for end-users:
Additionally, you can customize all aspects of app behavior to tailor it to your use case:
Last updated: