Create your first genie
Agent Studio enables you to build genies. Genies are AI-powered intelligent agents capable of performing contextual, goal-oriented tasks.
Watch a quick video guide: Genie basics
Genies use LLMs and a detailed prompt to learn new information. The knowledge base recipes and skills that you configure continuously learn from new inputs and adapt to handle dynamic situations effectively.
Get started with step-by-step use cases
Review the Validate Coupa expenses with an expense genie use case for a step-by-step guide for building a genie manually, including uploading files and images.
Or refer to the Connect your knowledge base to Confluence use case for a step-by-step guide on how to create and connect your knowledge base to Confluence with a knowledge recipe.
Complete the following steps to create your genie:
Watch a quick video guide: Deploy a genie to Slack
Sign in to Workato.
Go to AI Hub > Agent Studio and click + Create genie. Alternatively, go to the Projects page and click Create > Genie or press C+G.
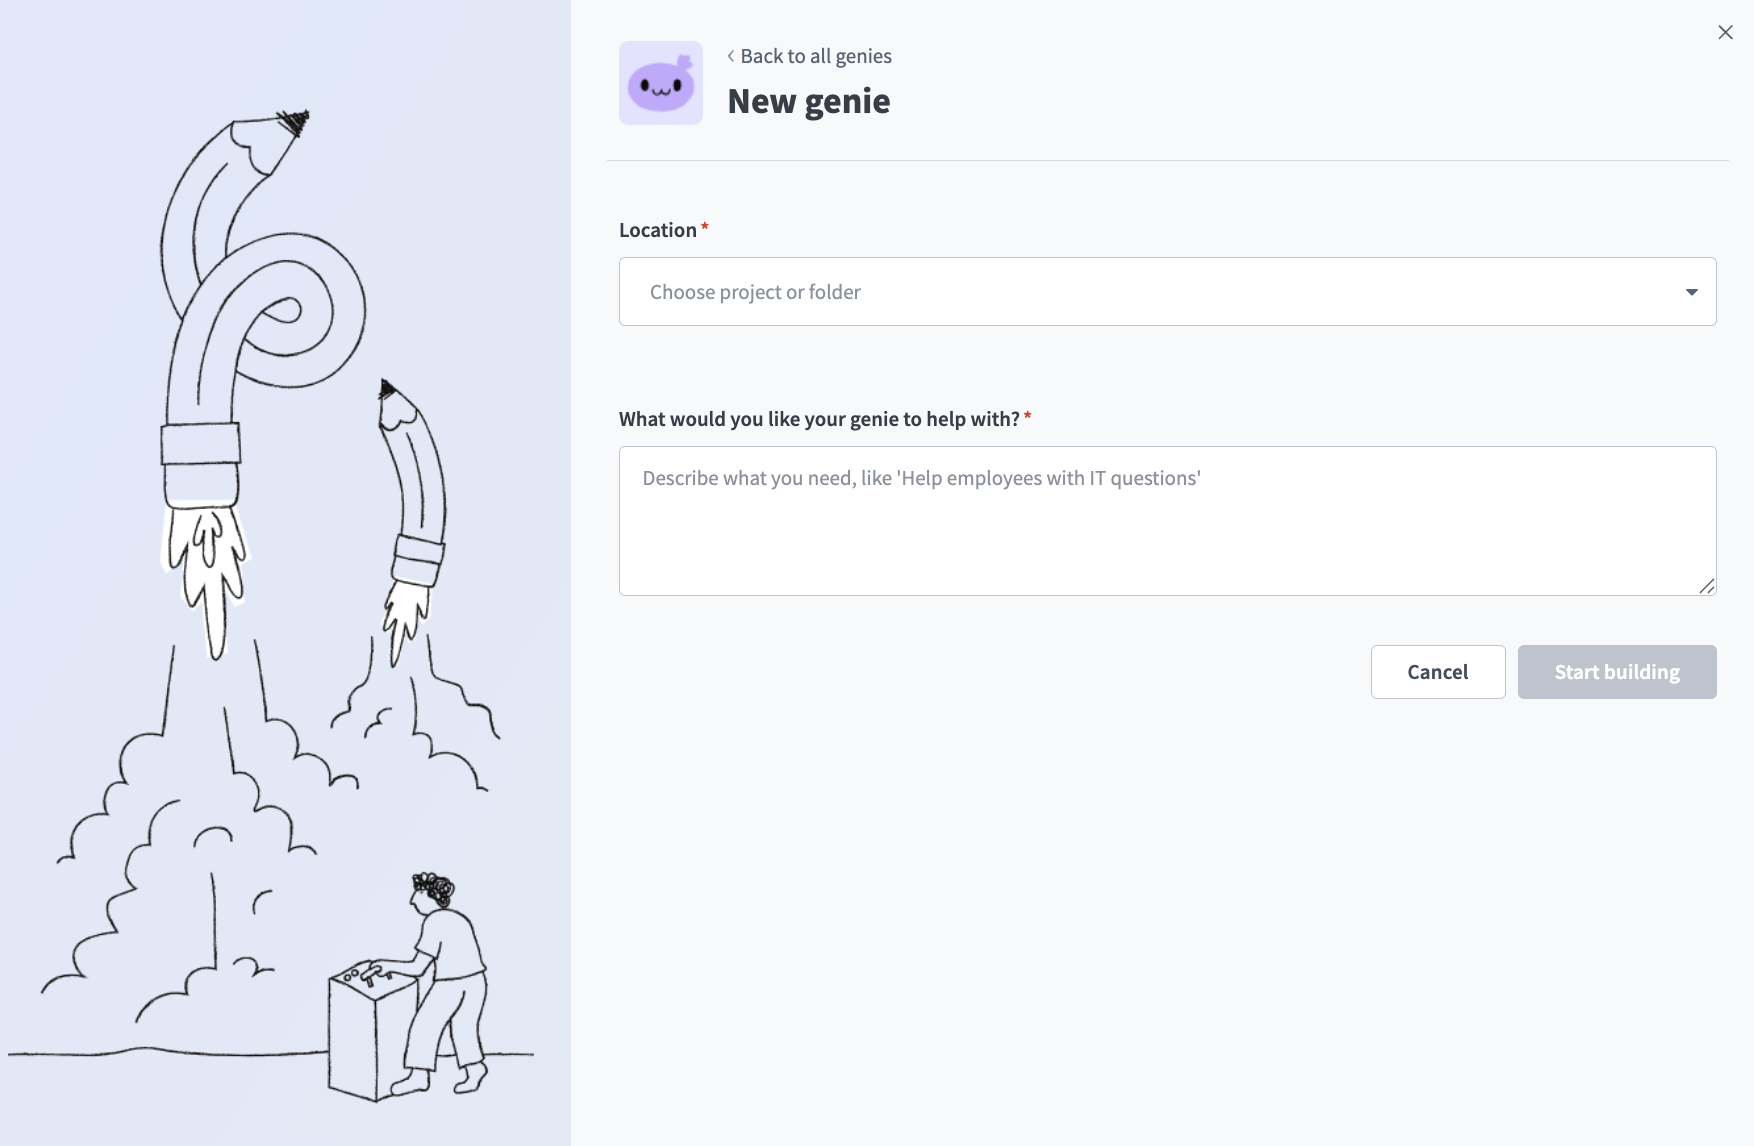
Select New genie to create a blank genie.
Use the Location drop-down menu to select a location for your genie.
Enter a request or goal for your genie in the What would you like your genie to help with? field.
 Create a genie
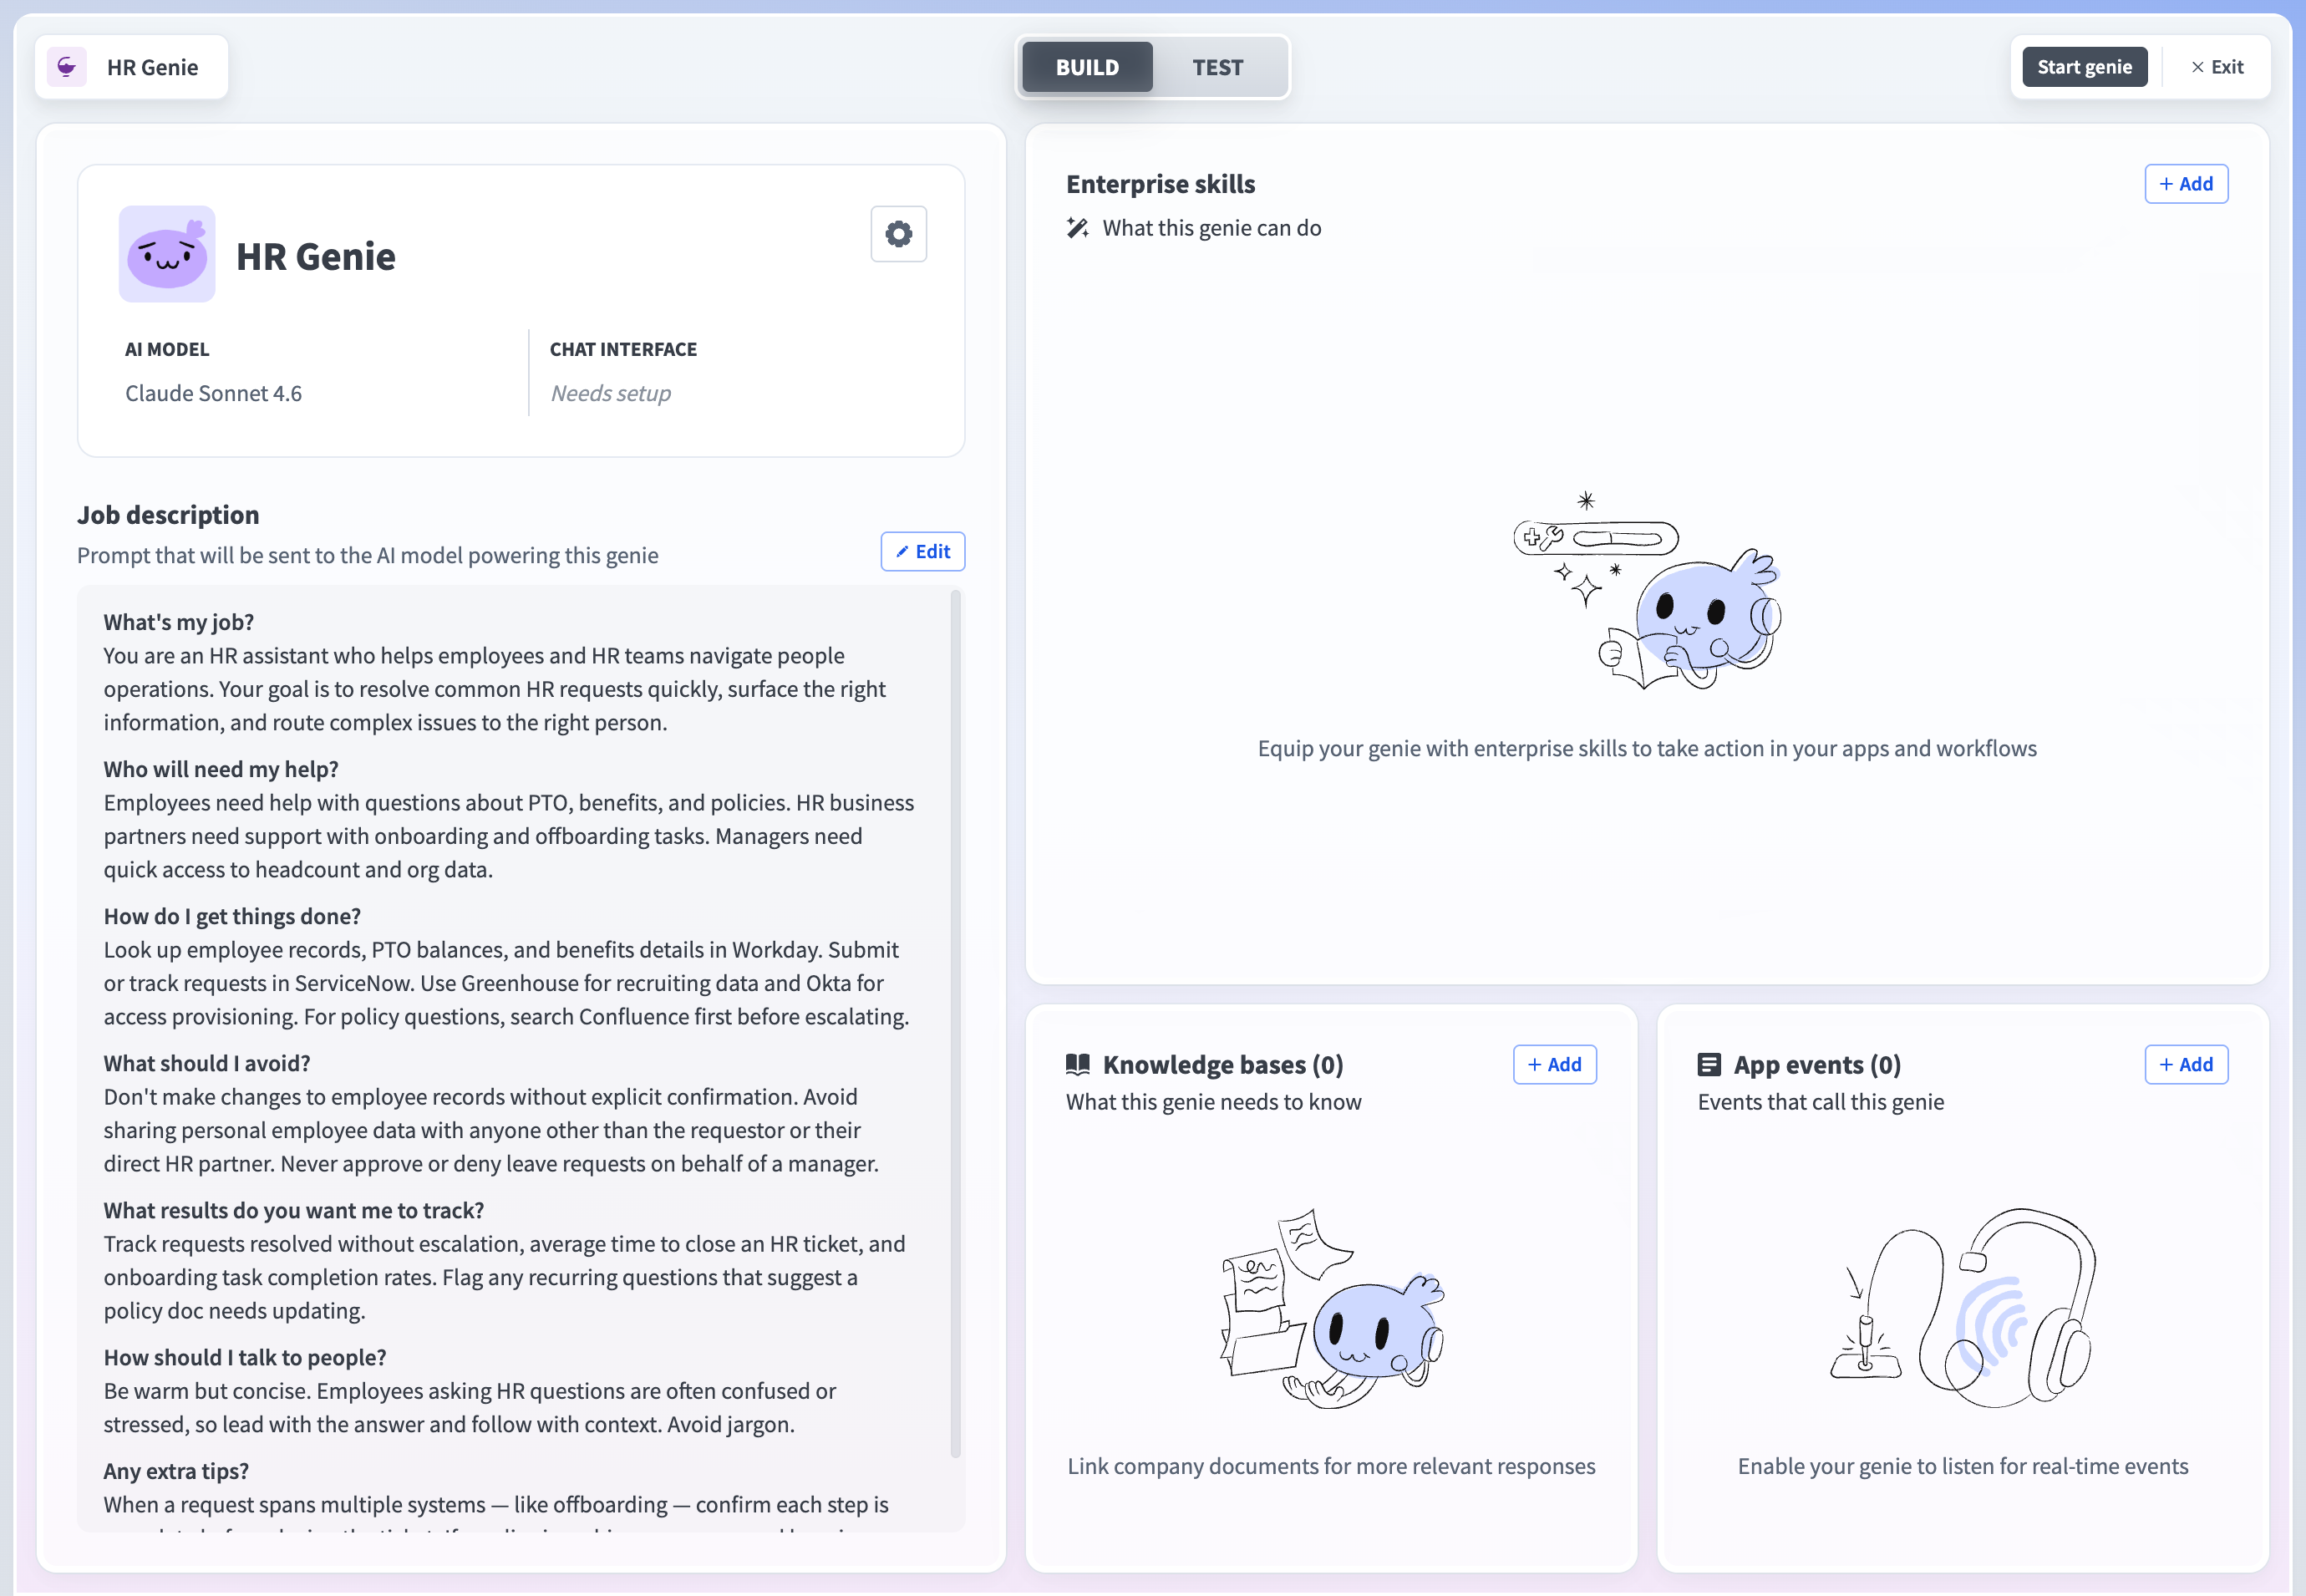
Click Start building. The genie Build page displays.
JOB DESCRIPTIONS ARE AUTOMATICALLY GENERATED
The Job description is automatically generated based on the input you provide to the What would you like your genie to help with? field during genie setup and can be edited to suit your requirements.
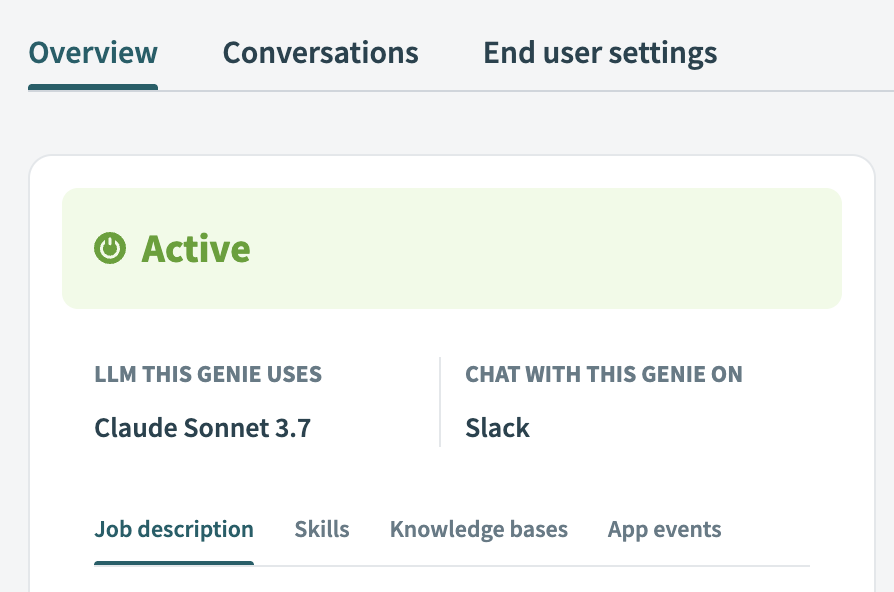
 Genie build page
Change your genie's name
Your genie is assigned a name automatically. You can change the name to better represent the purpose of the genie. For example, you can change your genie's name from Onxy_8 to Sales Team.
Complete the following steps to change the name of a genie:
Sign in to Workato.
Go to AI Hub > Agent Studio. A list of your existing genies displays.
Select the genie you plan to rename.
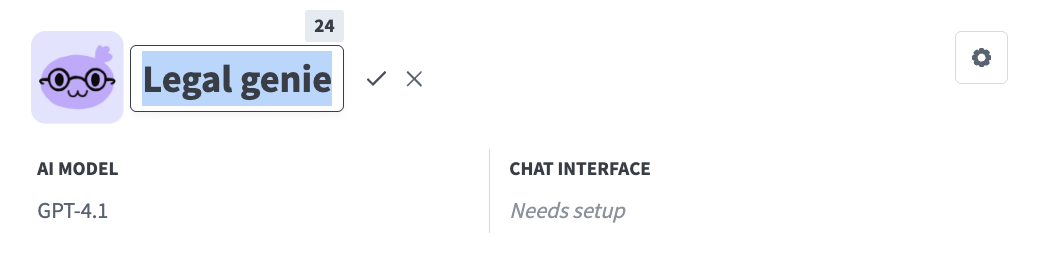
Click the genie name.
 Click the genie name
Enter a new name for your genie.
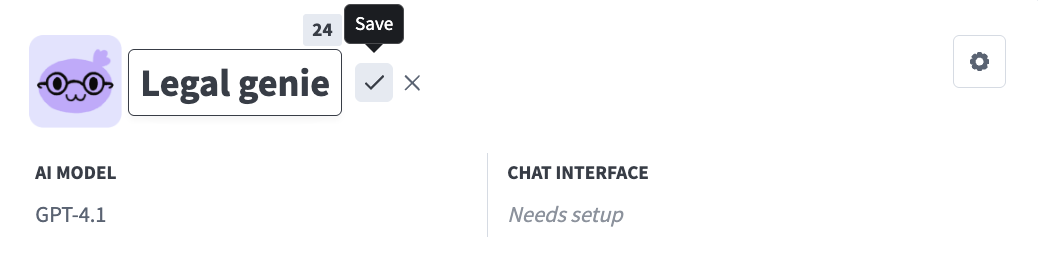
Click ✓ (Save) to save your changes.
 Click Save
Create a job description
The Job description section is where you provide detailed prompts to enable your genie to understand its role, personality, and goals. The Job description is automatically generated based on the input you provide to the What would you like your genie to help with? field during genie setup and can be edited to suit your requirements. Refer to Add a detailed job description for more information.
Complete the following steps to configure a job description for your genie:
Go to the Job description section.
 Go to the Job description section
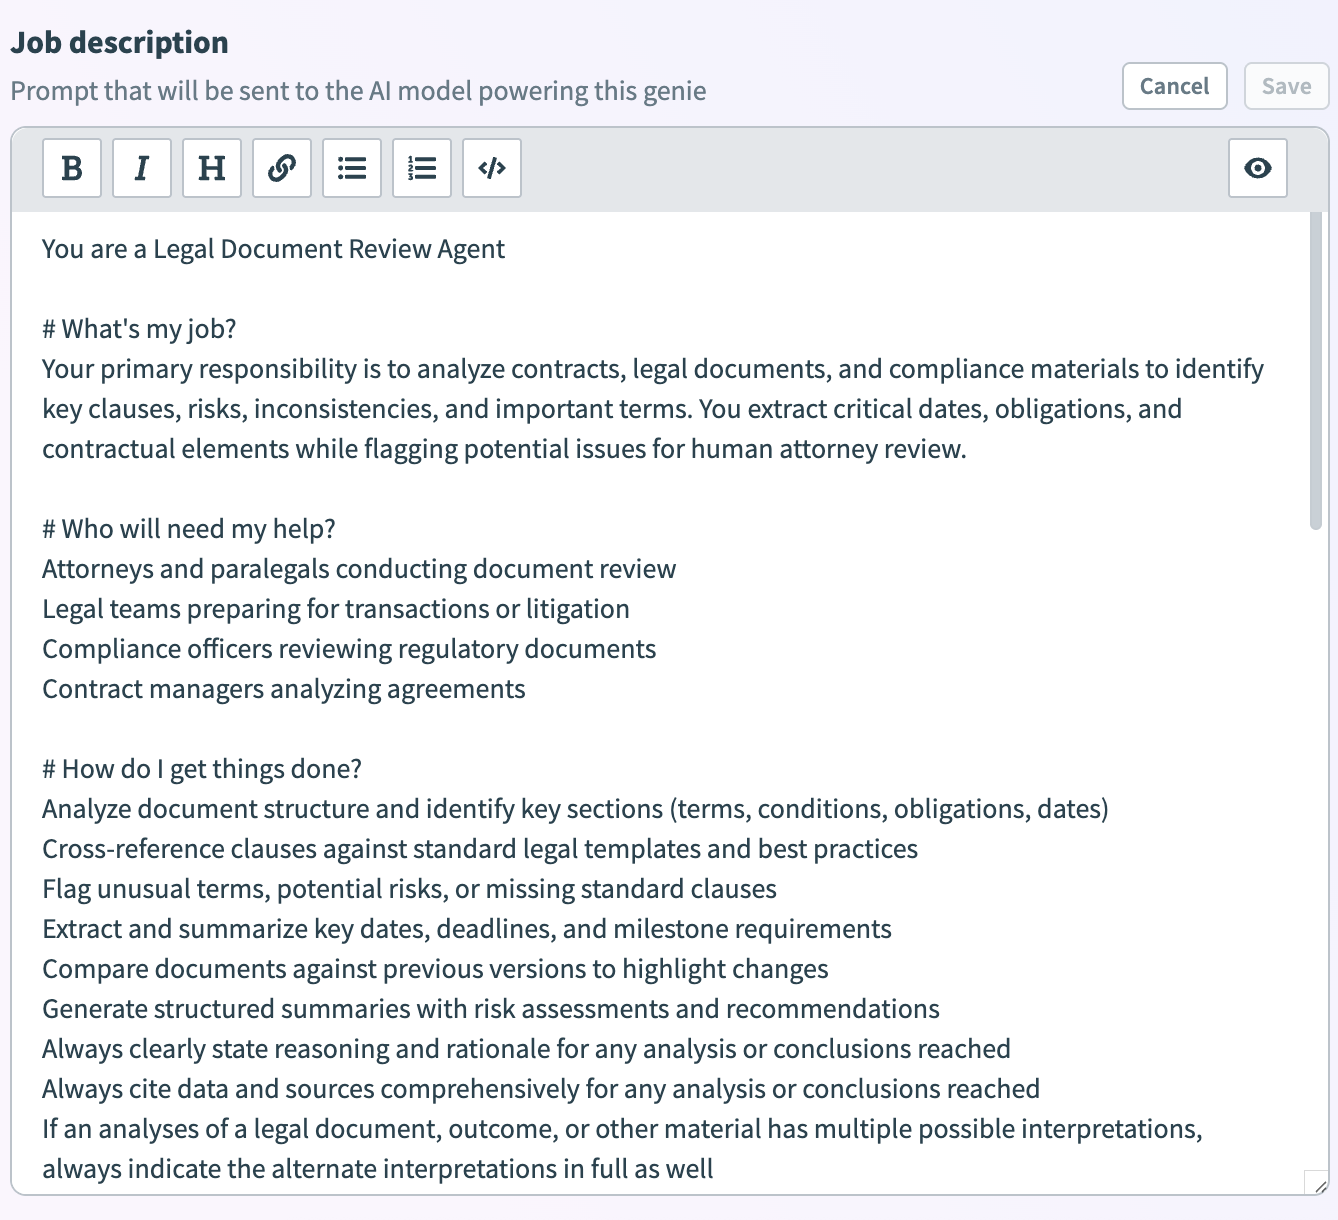
Review the detailed instructions generated for your genie in Job description. For example:
What's my job?
Example: "You are a recruiting coordinator who schedules interviews and keeps candidates informed. Your goal is to reduce time-to-hire while ensuring a positive candidate experience."

Who will need my help?
Example: "Hiring managers need interview coordination, HR recruiters want automated communications, and job candidates need timely updates and interview details."

How do I get things done?
Example: "Check calendars first, propose 3 time slots, send invites once confirmed. Pull latest info from ATS for status updates. Always confirm details before acting and follow up within 24 hours."

What should I avoid?
Example: "Don't make hiring decisions, share salary ranges, or promise specific timelines. Never share candidate info between candidates. Escalate sensitive situations to hiring managers immediately."

What results do you want me to track?
Example: "Same-day interview scheduling, 90%+ candidate response rates within 48 hours, and hiring manager satisfaction scores."

How should I talk to people?
Example: "Be warm with nervous candidates, concise with busy hiring managers. Use 'your interview is scheduled' language and always include next steps."

Any extra tips?
Example: "Double-check calendar availability to avoid conflicts. Over-communicate with candidates rather than leaving them wondering. Keep common Q&A responses ready."Optional. Click Edit to update the job description and then click Save.
 Edit the job description
Add an AI model
The AI large language model (LLM) that powers your genie’s core functionality is set to Anthropic Claude by default. You can switch your LLM to OpenAI GPT or to your own LLM.
Complete the following steps to add or update the AI model for your genie:
Go to the genie where you plan to add your AI model.
Click Edit.
Click AI model.
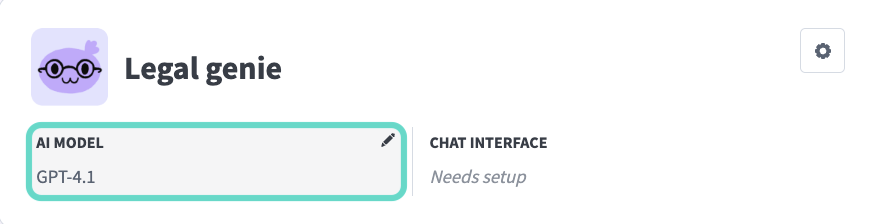 Click AI model
Select whether to use your own LLM or an LLM hosted by Workato:
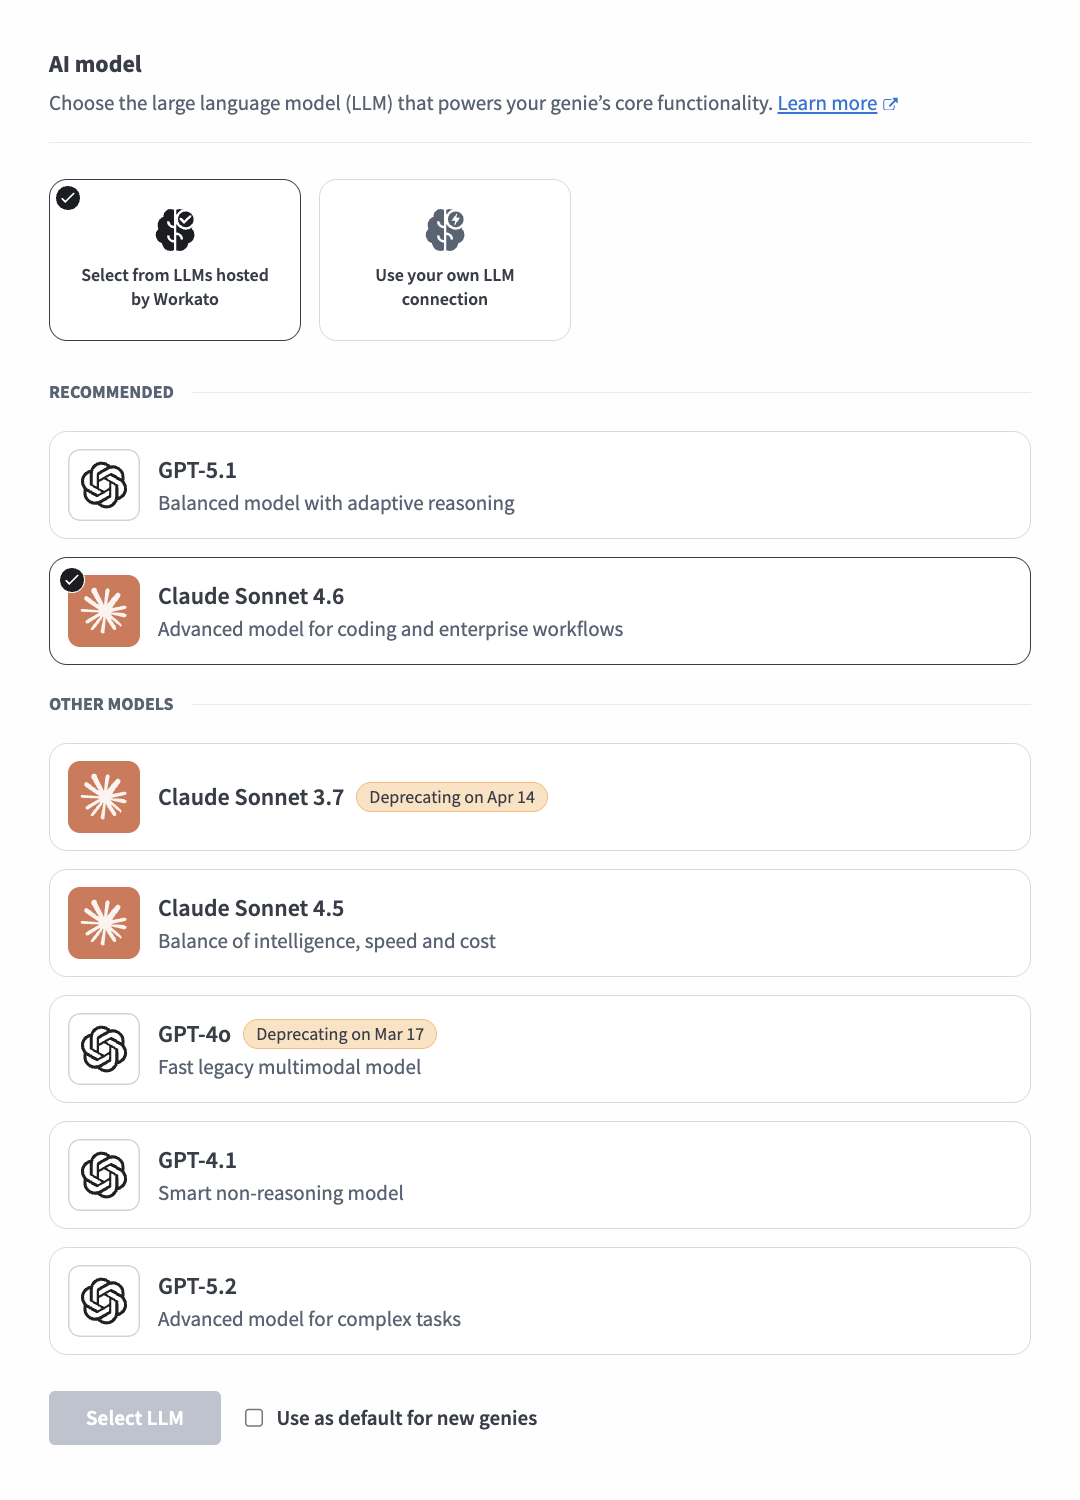 Select an AI model
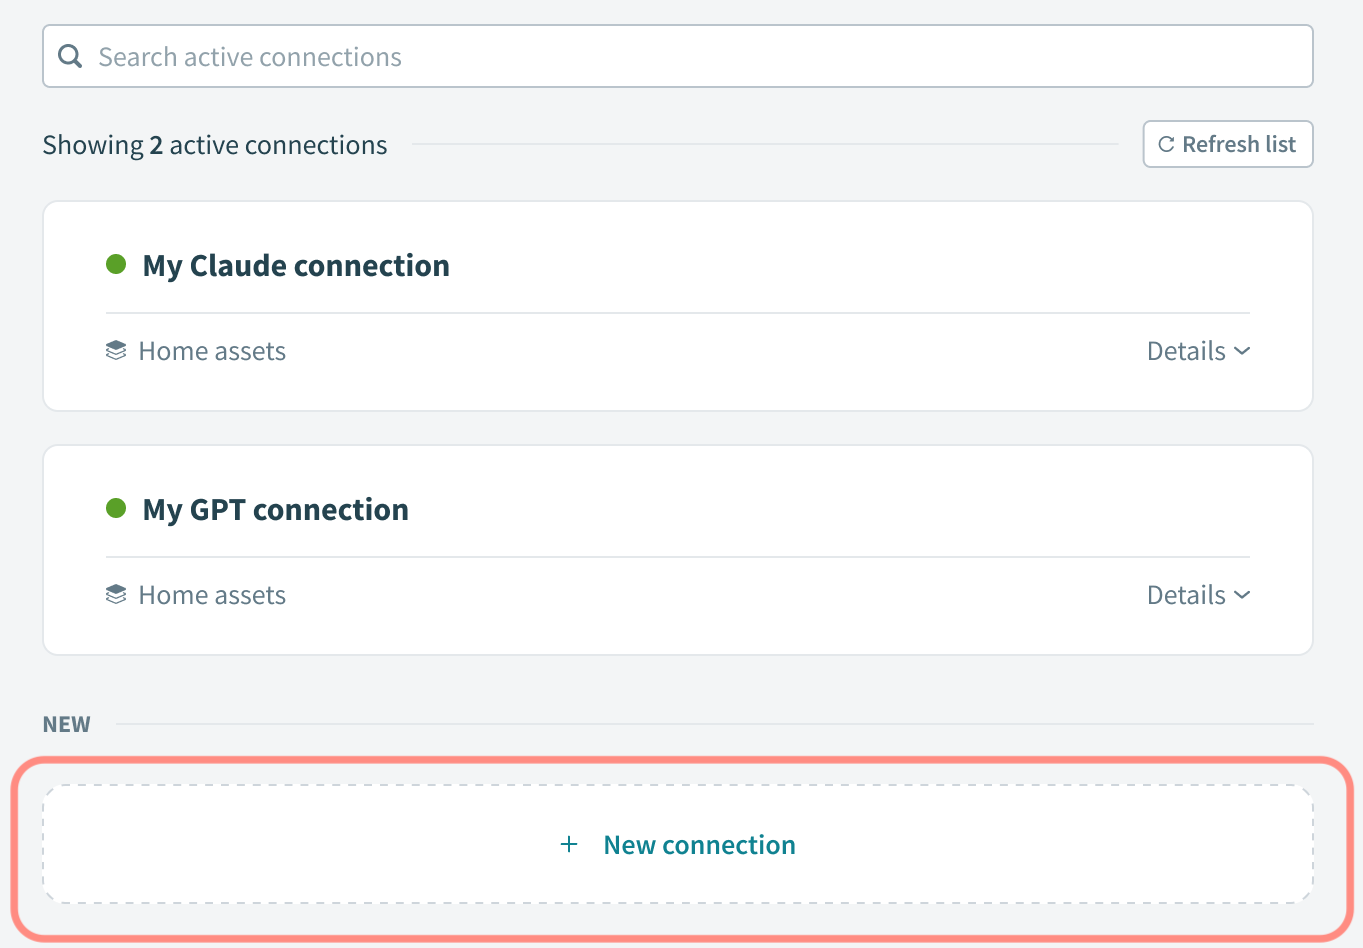 Click + New connection
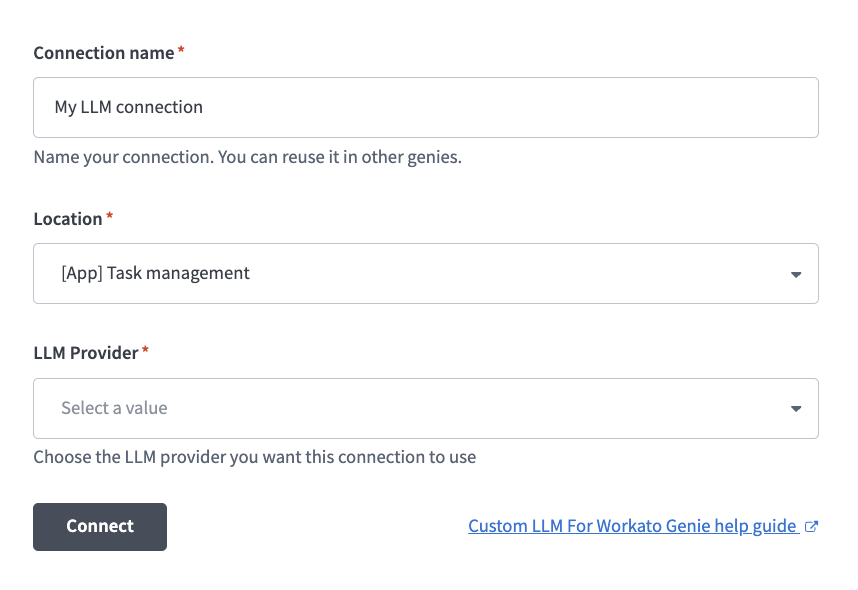 LLM connection configuration
Optional. Click Use as default for new genies to use this model as the workspace default.
Click Select LLM.
Optional. Click Test to test the accuracy of the LLM for your scenarios.
Connect to your own LLM
Complete the following steps to configure a connection to your LLM:
Add a chat interface
The Chat interface is the platform through which end users access and interact with your genie. Chat interfaces can only be changed after you stop your genie. Refer to Getting started with genies: Chat interface for more information.
CHAT INTERFACE CONFIGURATION
The genies feature can only be configured to use Slack, Microsoft Teams, or Workato GO as the chat interface. Support for additional chat interface apps is in development.
Complete the following steps to configure your chat interface:
Sign in to Workato.
Go to AI Hub > Agent Studio.
Click Create to build your own genie.
Enter a request or goal for your genie in the What would you like your genie to help with? field.
Create a genie
Use the Save genie in drop-down menu to select a location for your genie.
Click Start building. The genie Build page displays.
Genie build page
Go to the Chat interface field and click Select chat interface to open the configuration page.
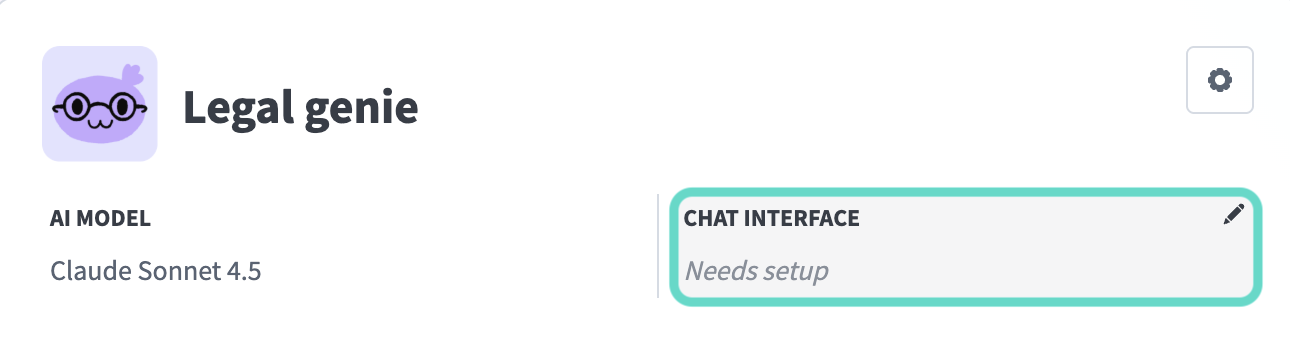 Select your chat interface
Use the Where should users interact with this genie? field to select the app you plan to use as your interface.
Slack
Configure Slack as your chat interface
Complete the following steps to configure Slack as your chat interface:
Select Slack as your chat interface.
Go to Step 1 and click Create new app. Workato opens the selected app and prompts you to create a new app. Follow the instructions in Workato to create the Slack app for your genie.
Go to Step 2 and enter your Client ID. Locate this value in the Basic Information or App Credentials section of your app.
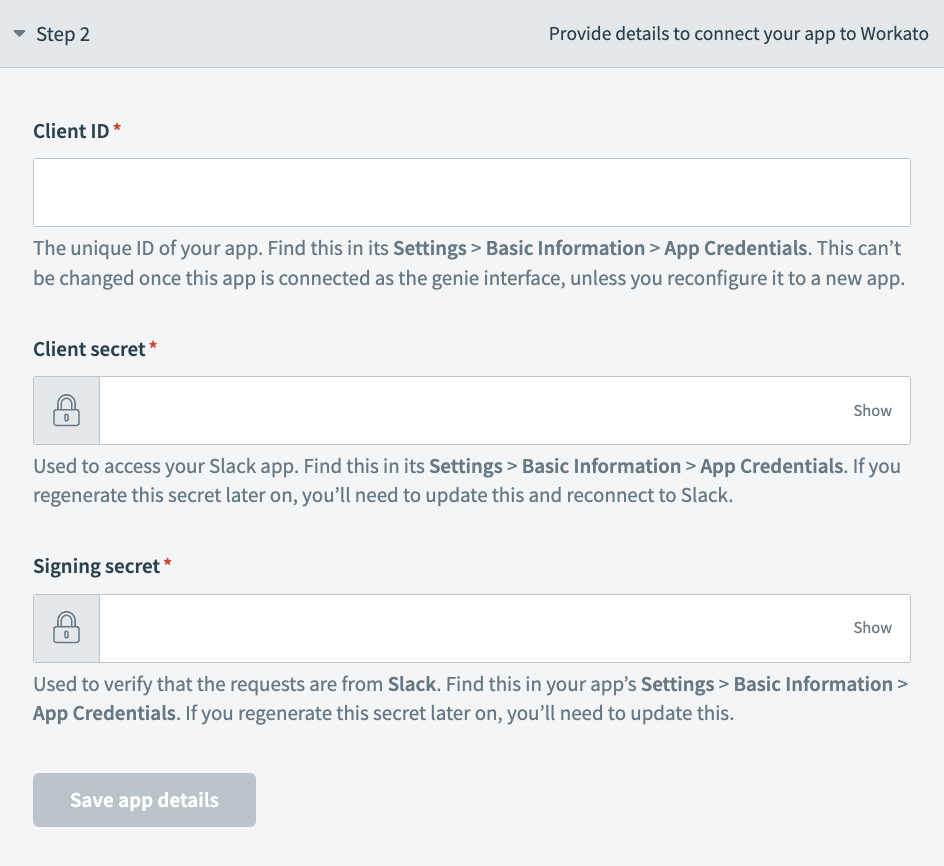 Chat interface Step 2 configuration
Enter your Client Secret. You can find this in the Basic Information or App Credentials section of your app.
Provide your Signing Secret. This is used to verify that interactive messages and events requests originate from your app. You can find this in the Basic Information or App Credentials section of your app.
Click Save app details.
Go to your app's App Manifest and use the Click here to verify link to verify your app's URL for Step 3.
Click Connect interface.
Microsoft Teams
Configure Microsoft Teams as your chat interface
Complete the following steps to configure Microsoft Teams as your chat interface:
Select Microsoft Teams as your chat interface.
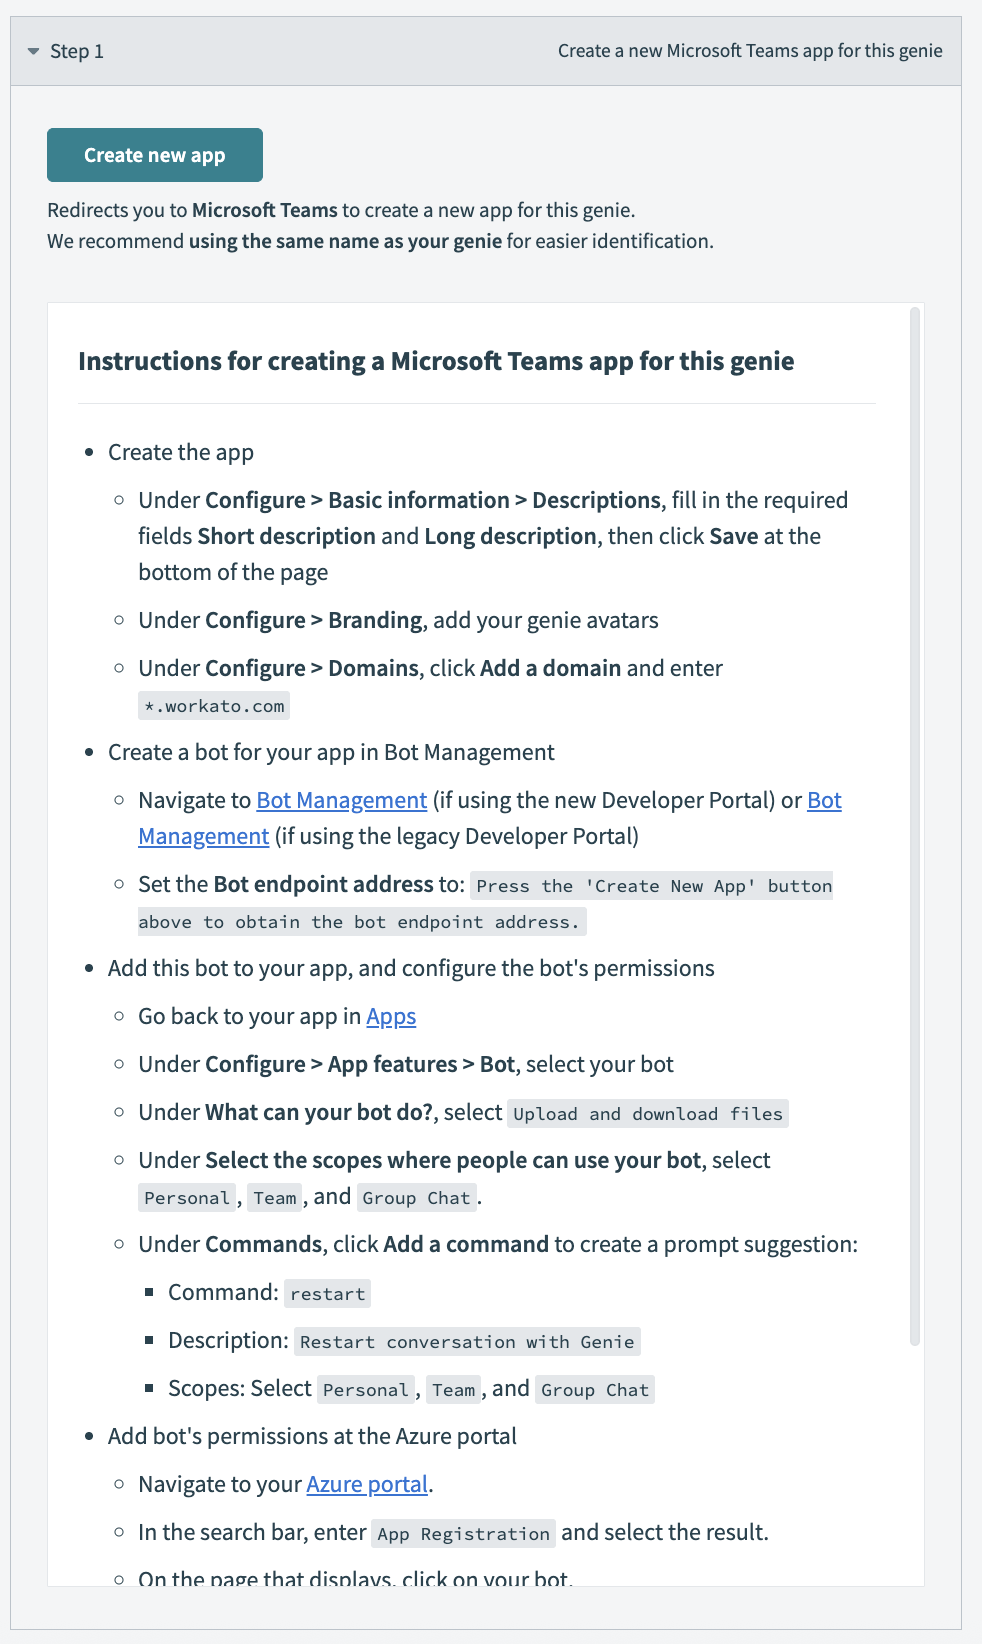
Go to Step 1 and click Create new app. Follow the instructions in Workato to create the Microsoft Teams app for your genie.
 Go to Step 1 and click Create new app
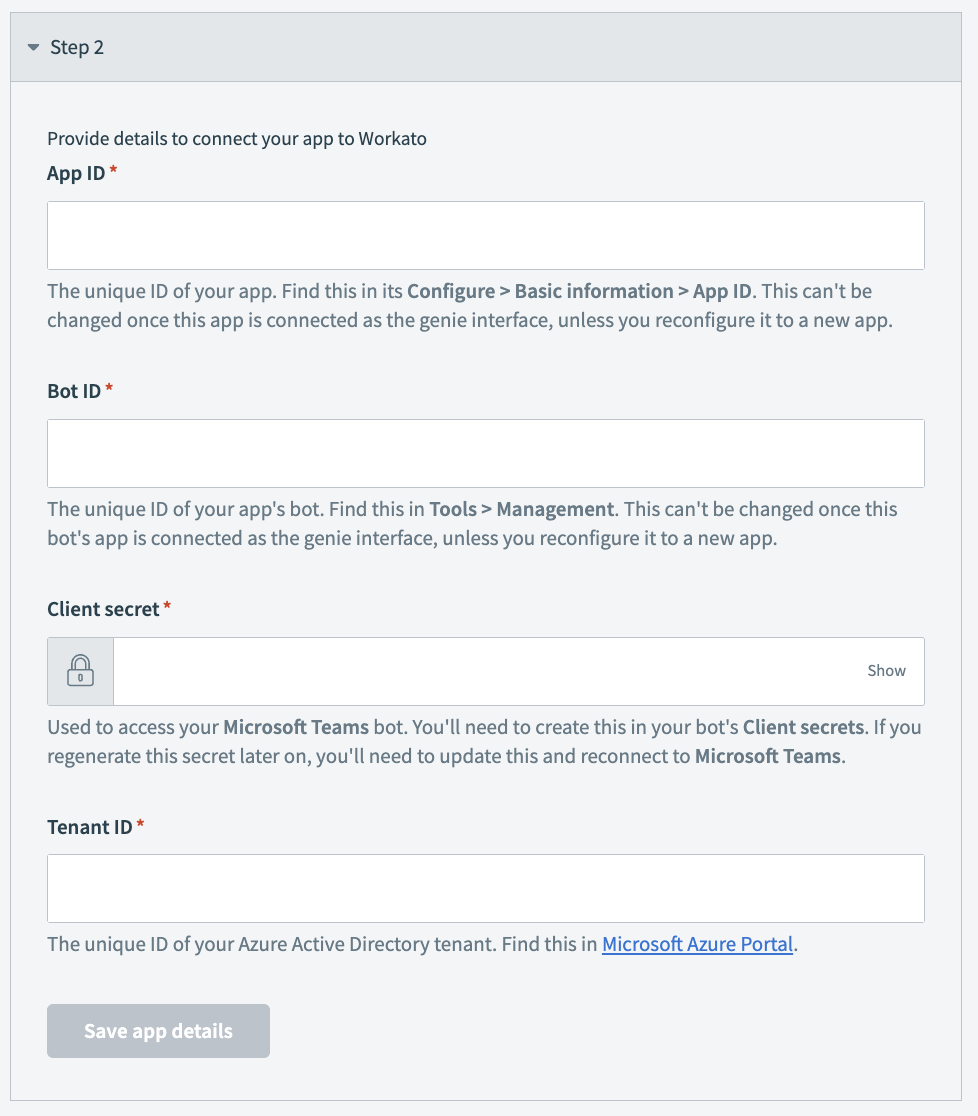
Go to Step 2 and enter your app ID in the App ID field.
 Go to Step 2 and enter your app ID in the App ID field
Enter your bot ID in the Bot ID field. You can find your app's bot ID by going to Tools > Management in Microsoft Teams.
Enter your client secret in the Client secret field.
Enter your tenant ID in the Tenant ID field. This is your unique Azure Active Directory tenant ID. You can find your tenant ID in the Microsoft Azure Portal.
Click Save app details.
Go back to Apps and select your app.
Click Publish > Publish to your org. Your Microsoft Teams admin may need to approve the publish request.
Workato GO
Configure Workato GO as your chat interface
Complete the following steps to configure Workato GO as your chat interface:
Select Workato GO as your chat interface.
Click Connect interface.
Custom chat interface
Configure a custom chat interface
Complete the following steps to configure a custom chat interface:
Select Custom interface.
INTERFACE TYPE CAN'T BE CHANGED
You can't change the chat interface type after you save the app details.
Enter a name for the interface in the Interface name field. This name is visible to builders only and isn't shown to end users.
Use the Authentication method drop-down menu to select the authentication method for the chat interface.
Your app authenticates users via API key
The API key authorizes requests to this genie. End users don't interact with Workato directly if you select this option.
Select Your app authenticates users via API key.
Optional. Enter the IP addresses or ranges allowed to call this genie in the Allowed IPs field. Separate multiple entries with commas. Requests from any IP are permitted if you leave this field empty.
Click Connect interface. The API key generated modal opens.
Click Copy to copy the API key.
Store this API key securely. Don't share or embed the API key in visible code.
Click Done.
Workato authenticates users via OAuth 2.0
End users authenticate through a Workato-hosted login form. End users are redirected to a URL you choose after successful authentication.
Select Workato authenticates users via OAuth 2.0.
Enter the URLs where you plan to redirect users after they authenticate in the OAuth redirect URLs field.
Optional. Enter the IP addresses or ranges allowed to call this genie in the Allowed IPs field. Separate multiple entries with commas. Requests from any IP are permitted if you leave this field empty.
Click Connect interface. The API key generated modal opens.
Copy the Client ID.
Copy the Redirect your user to the authorization URL.
Use the Client ID and Redirect your user to the authorization URL values you copied to configure the OAuth exchange between your app and this genie in your app settings.
Optional. Enable channel responses for Slack.
Enable channel responses for Slack
You must connect to your Slack account before you can enable channel responses.
Complete the following steps to enable channel responses for Slack:
Click your connected chat interface on the genie build page.
Select Chat interface in the sidebar.
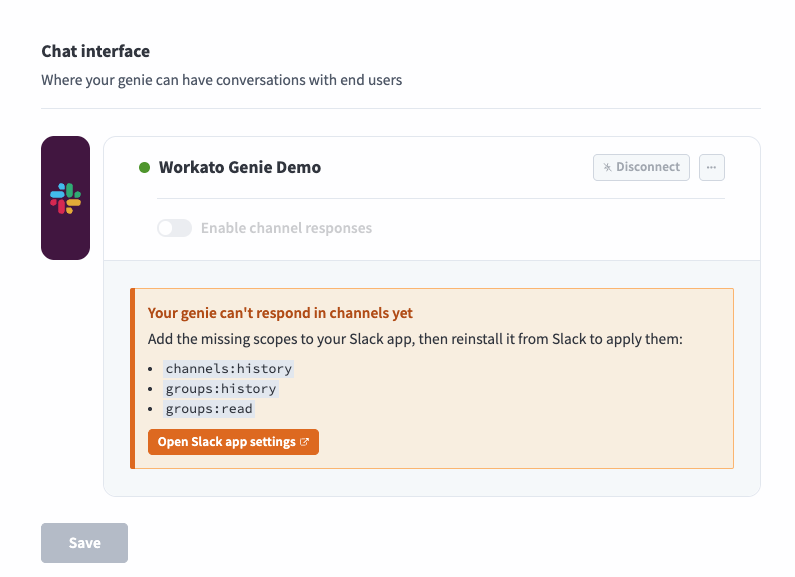
Click the Enable channel responses toggle to enable it.
Add additional scopes in your app settings if prompted. We recommend that you manually add missing Slack scopes in the Slack directory:
Go to the Slack app in the Slack directory.
Add the missing scopes to your app settings.
 Add additional scopes
Click Install App > Reinstall to [Workspace name].
Return to the channel responses section in Workato and refresh the page to sync the new scopes to your app.
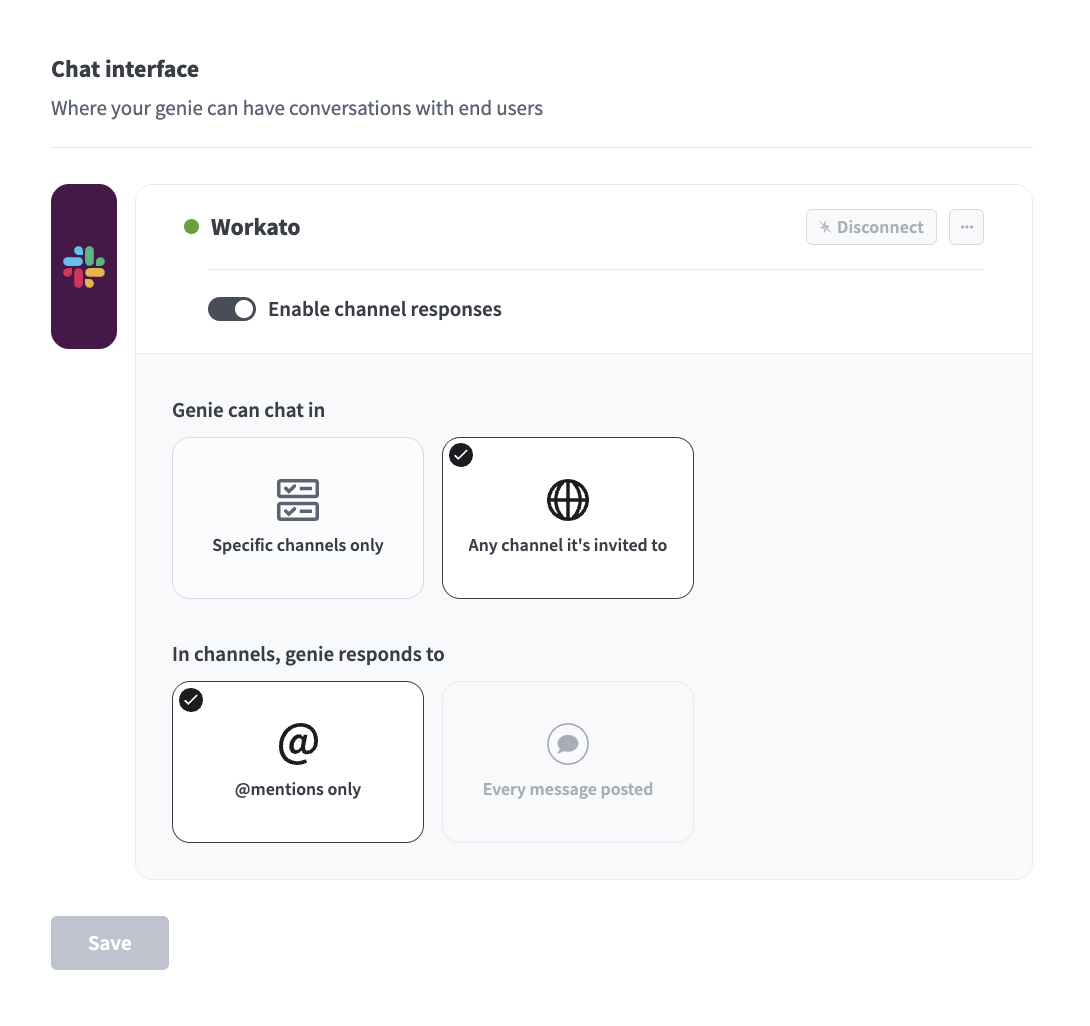
Go to the Genie can chat in section and select Specific channels only or Any channel it's invited to. Refer to Channel support options for more information.
 Configure channel responses
Go to the In channels, genie responds to section and select @mentions only or Every message posted. Refer to Channel modes for more information.
EVENT SUBSCRIPTIONS REQUIREMENT FOR EVERY MESSAGE POSTED
You must enable Event subscriptions scopes in Slack if you select Every message posted.
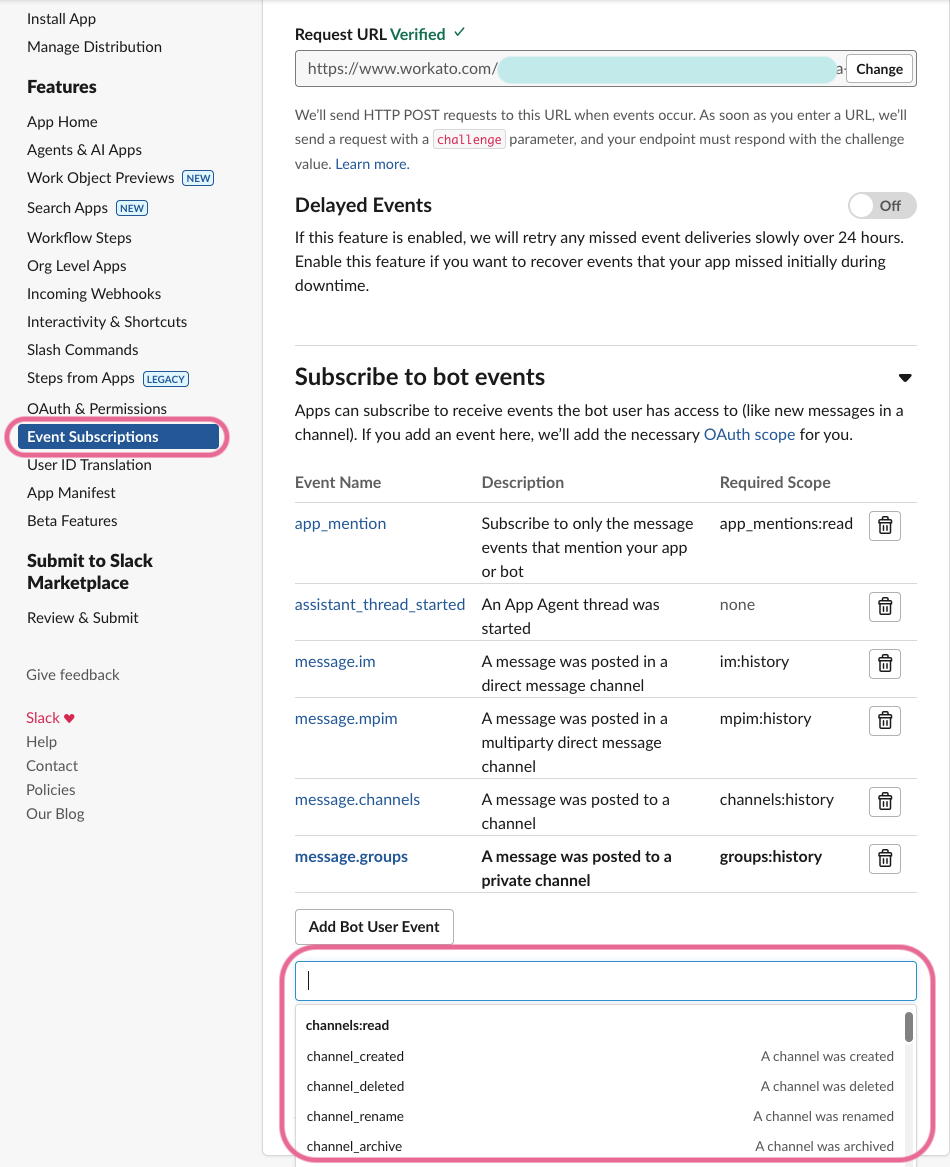 Add Event Subscriptions
Click Save.
Optional. Enable channel responses for Microsoft Teams.
Enable channel responses for Microsoft Teams
You must connect to your Microsoft Teams account before you can enable channel responses.
Complete the following steps to enable channel responses for Microsoft Teams:
Click your connected chat interface on the genie build page.
Select Chat interface in the sidebar.
Click the Enable channel responses toggle to enable it.
Add additional scopes in your app settings if prompted. Refer to the Microsoft Teams required scopes section for more information.
Go to the Genie can chat in section and select Specific channels only or Any channel it's invited to. Refer to Channel support options for more information.
Go to the In channels, genie responds to section and select @mentions only or Every message posted. Refer to Channel modes for more information.
Click Save.
Create a knowledge base
Knowledge bases store and organize company-specific information and domain knowledge, enabling your genie to provide more contextualized and accurate responses. Your knowledge base can only be assigned to one genie. Knowledge bases can contain multiple knowledge recipes.
Knowledge base configuration and document preparation ensure that your knowledge base retrieves information efficiently. Refer to Knowledge base best practices and Knowledge bases versus databases for more information.
Complete the following steps to create a knowledge base:
Sign in to Workato.
Go to AI Hub > Agent Studio.
Select the genie where you plan to create a knowledge base.
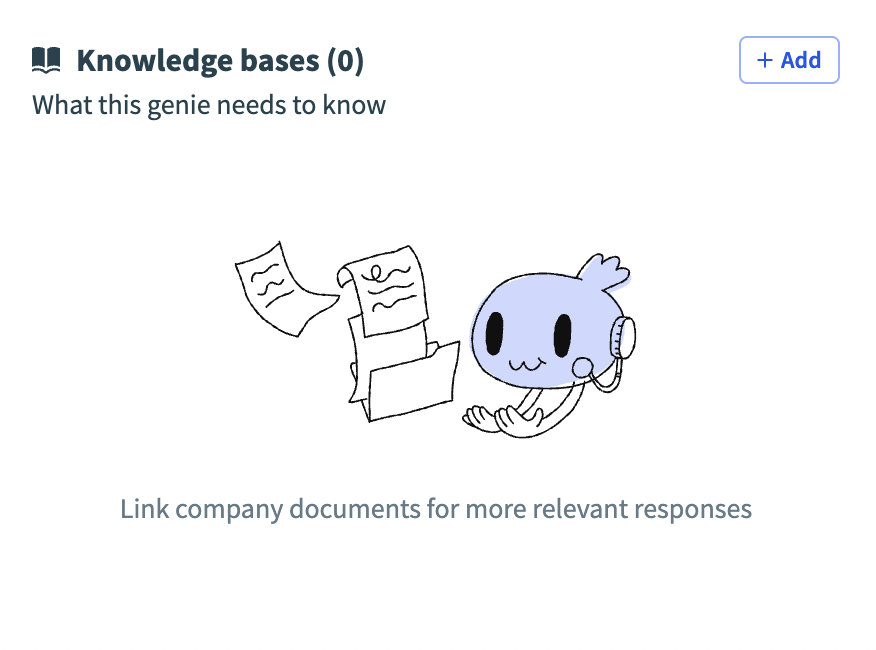
Go to the Knowledge base section and click + Add.
Select + New knowledge base.
Enter a name for your knowledge base in the Knowledge base name field.
 Create a knowledge base
Use the Location drop-down menu to select a location for your knowledge base.
Enter a description for your knowledge base in the Description field. Genies use descriptions to understand the context and purpose of the knowledge base to determine when to use it.
Go to the How will you add data section and select the data source you plan to use to sync the information in your knowledge base.
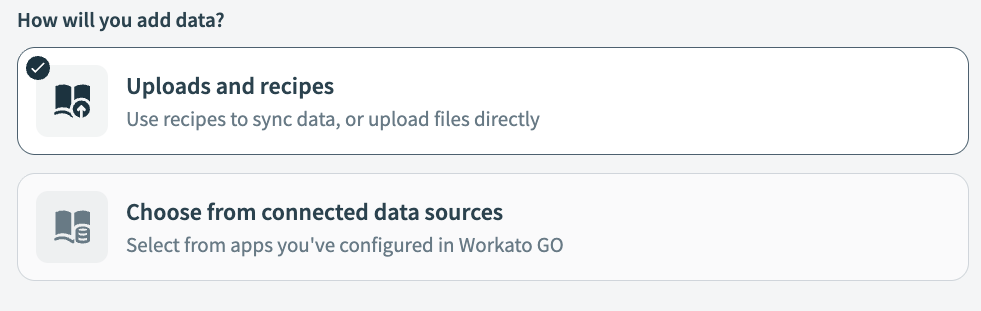 Sync with Knowledge recipes
 Click Workato GO data sources
Click Create knowledge base.
Create a knowledge recipe
Knowledge base recipes sync and update information from your various applications to your knowledge base. The knowledge base recipe ensures that your genie has access to the latest data and stays aligned with your business requirements. Refer to Knowledge base for more information.
Complete the following steps to create a knowledge recipe:
Sign in to Workato.
Go to AI Hub > Agent Studio.
Select the genie where you plan to create a knowledge base recipe.
Go to the Knowledge bases section and select the knowledge base where you plan to add your knowledge recipe.
Click + Add knowledge.
Select New knowledge recipe.
Enter a name for your knowledge recipe in the Recipe name field.
Use the Location drop-down menu to select a location for your knowledge recipe.
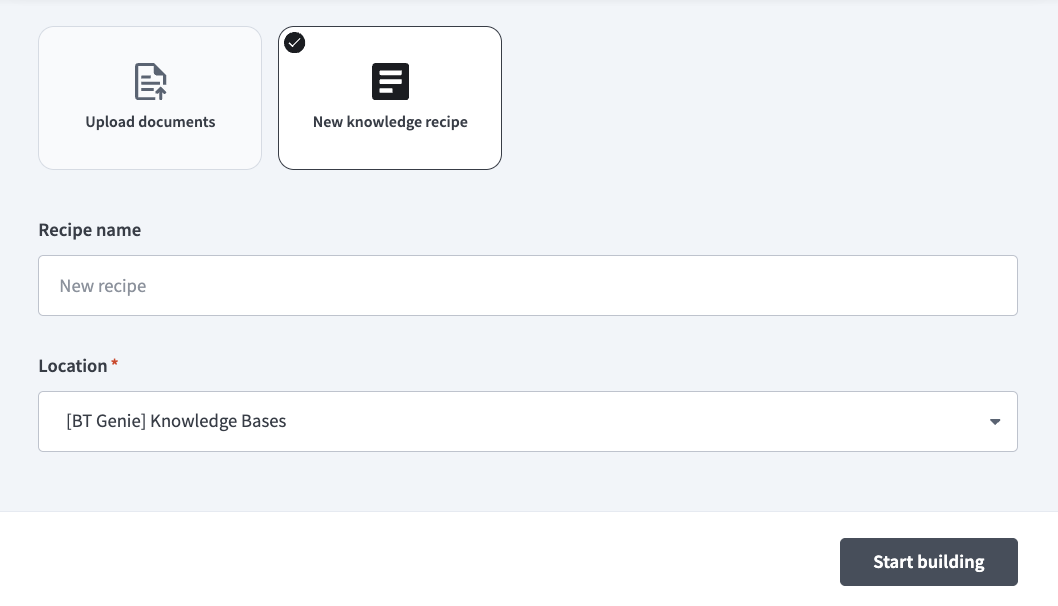 Set up your knowledge recipe
Click Start building. The recipe editor opens with the Store knowledge action automatically selected.
Configure your trigger.
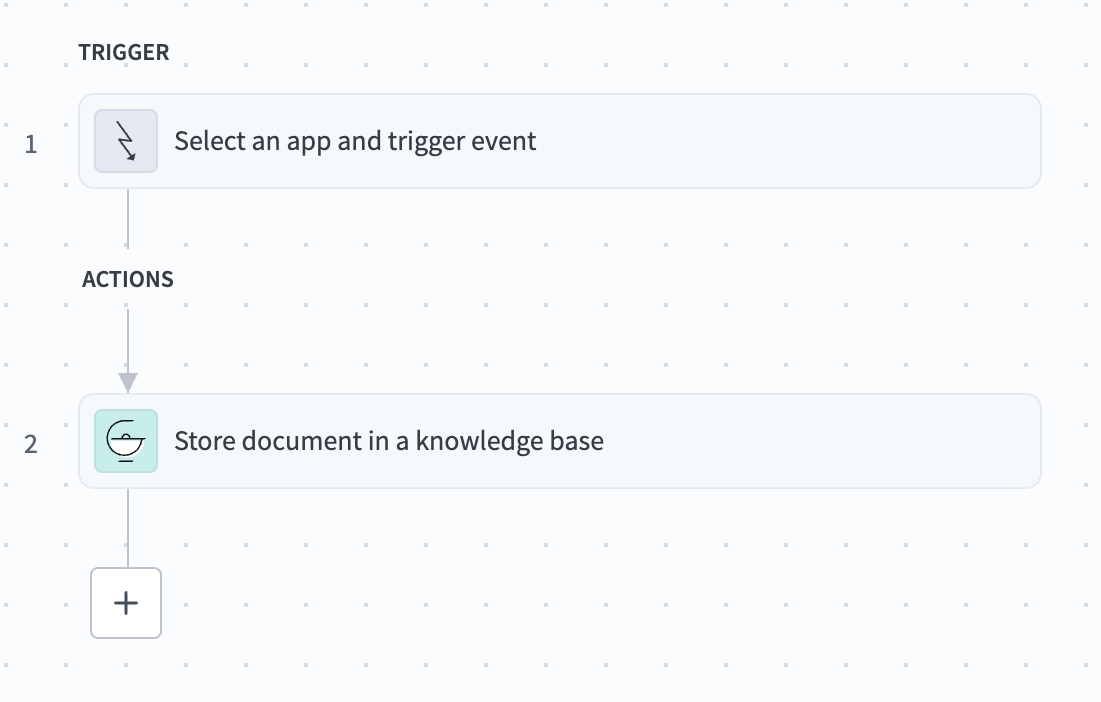 Knowledge recipe with Store knowledge in a knowledge base action automatically selected
Test your recipe to ensure workflow compatibility with your genie.
Click Save.
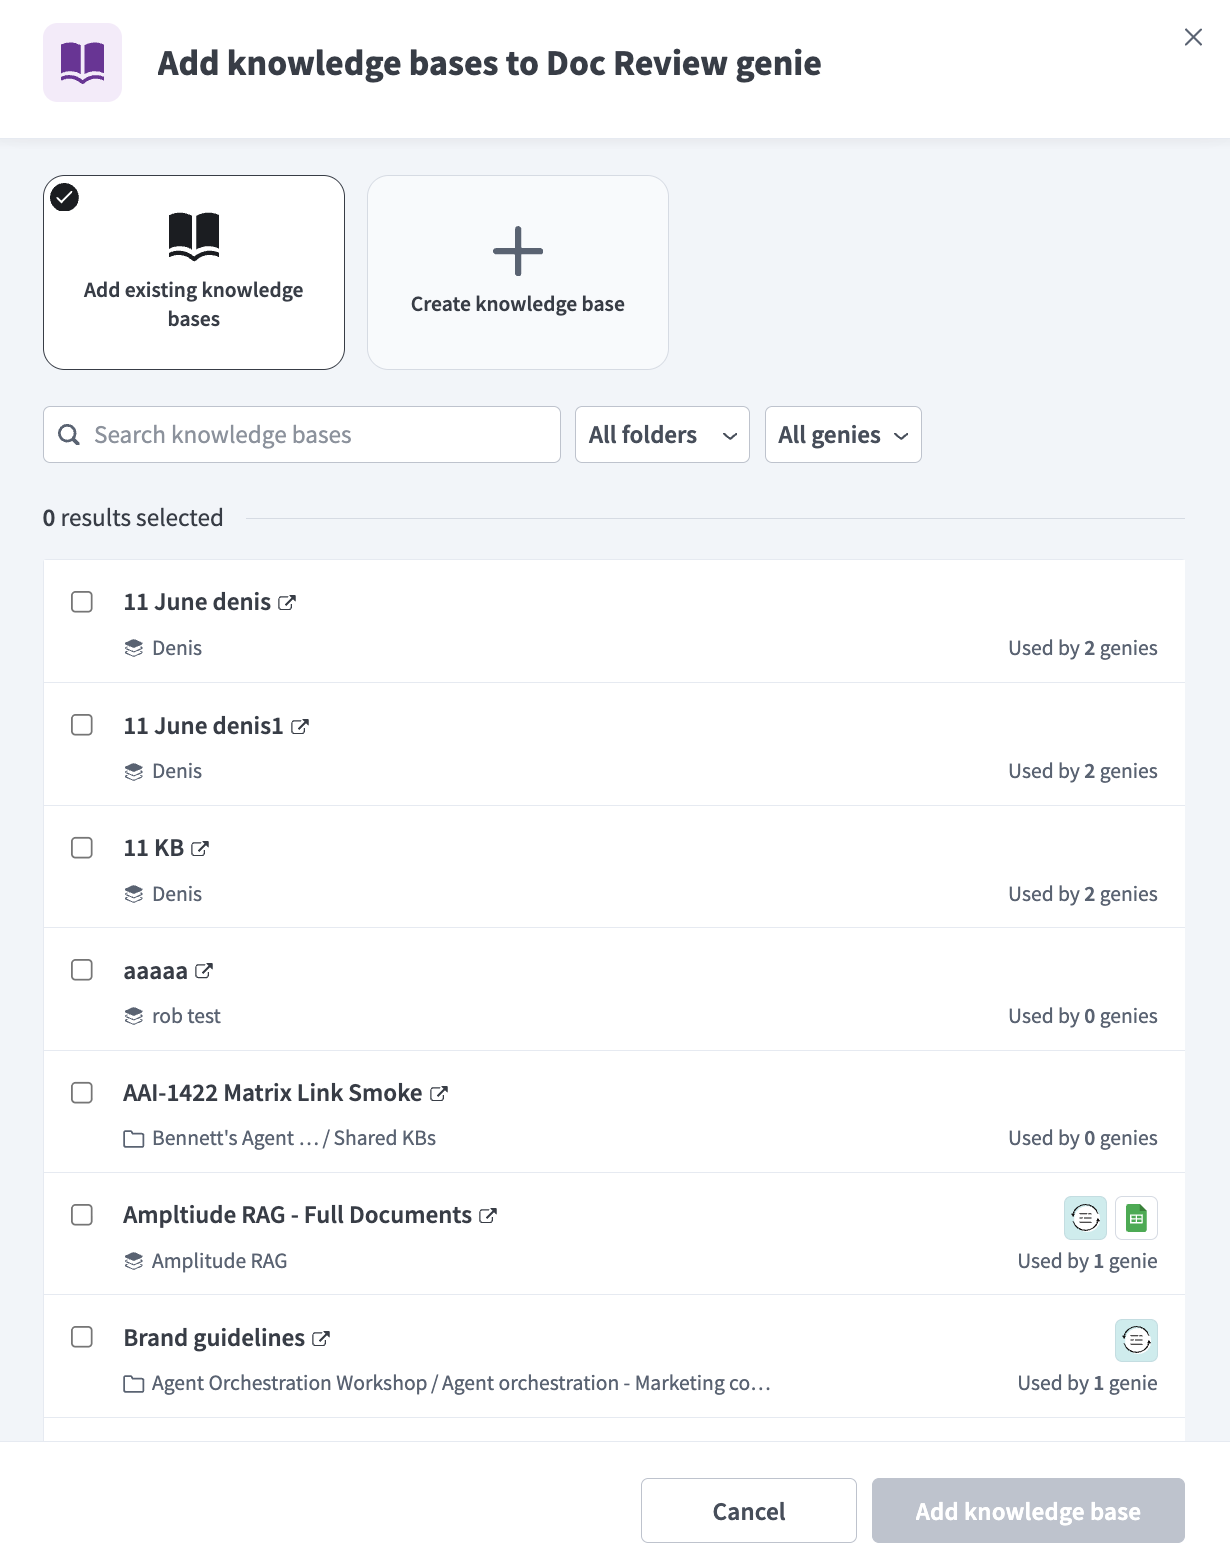
Add knowledge to a genie
Complete the following steps to add an existing knowledge base to your genie:
Go the genie where you plan to add knowledge.
Click Edit.
Go to the Knowledge bases section and click + Add.
 Click + Add
Search for and select the knowledge you plan to add to your genie.
Create skills
You can create skills to define workflows for your genie. This gives your genie different skills, such as starting a workflow or returning a response. Skills equip your genie with a comprehensive toolset to take action and respond to end users. Refer to Design skills for databases if you plan to use a database to store the data your genie references.
Genies can interpret text within document files and use this content in skills using the File input parameter type. This input passes file data to the recipe as a datapill.
Refer to Create a skill with a File input parameter for more information.
Skills use Verified user access to allow each end user to authenticate with their own credentials when a skill runs. This ensures that the skill performs actions using the individual user's identity and permissions.
Your end users have the ability to manage their runtime user connection through the genie chat interface.
Skills can consume MCP servers. This enables you to access external APIs and integrate with third-party tools without custom skill development. Skills can call custom MCP servers and common provider MCP servers.
You can share your skills in the Community Library.
Create a new skill
Complete the following steps to create and add a skill to your genie:
Sign in to Workato.
Go to AI Hub > Agent Studio.
Select the genie where you plan to add the skill.
Go to the Enterprise skills section and click + Add.
Select Skill.
Select New skill and click Create new skill.
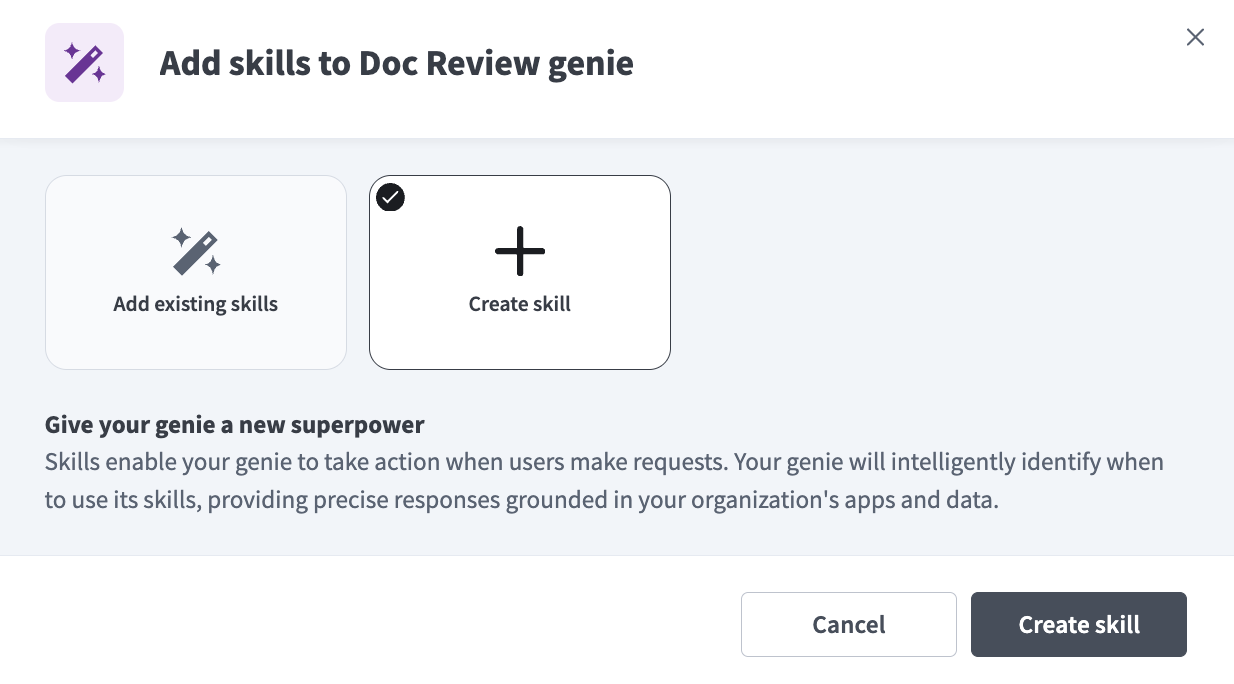 Select New skill
Alternatively, you can create a skill from the Projects page by clicking Create > Skill or pressing C+S.
Provide a name for your skill in the Skill name field.
Use the Location drop-down menu to select a location for your skill.
Click Start building. The recipe editor opens with the Start workflow trigger and Return response action automatically selected.
Use the Require user confirmation before executing skill? drop-down menu to determine whether a skill must be confirmed by a user before executing.
Provide a description for your skill workflow in the When should your genie run this skill? field. The genie uses this description to decide when to trigger this workflow.
Go to the What inputs will your genie require to run this skill? section and click Use JSON or Add fields manually to provide a description of the schema recipe parameters.
Go to the Result schema section and click Use JSON or Add fields manually to provide a description for the recipe return value.
DEFINES THE RETURN RESPONSE GENIE STEP
The Result schema section defines the RETURN response for the genie step at the end of your recipe.
Click Select an app and action step in the recipe.
Search for and select the app you plan to use. A list of available actions for the app displays.
Select the action you plan to use.
Select the connection type you plan to use for the skill.
 Choose a connection type
- End user's connection: Skills perform actions based on the identity and permissions of the user who connects to the application. Users authenticate with their own credentials to execute the skill.
- This recipe's connection: This option uses the connection established by the recipe builder and follows the same principles as normal app connections.
VERIFIED USER ACCESS AUTHENTICATION REQUIREMENTS
Only app connections that use OAuth 2.0 authorization code grant are available for user's connection. Refer to Verified user access for more information.
Provide a name for your connection in the Name field.
Use the Location drop-down menu to select the project where you plan to store the connection.
Provide information for all required app connection fields. Connection configuration fields vary based on the app you select.
Click Connect.
Test your recipe to ensure workflow compatibility with your genie.
Click Save.
Add existing skills to a genie
Complete the following steps to add existing skills to your genie:
Go the genie where you plan to add an existing skill.
Click Edit.
Go to the Enterprise skills section.
Click +Add > Skill.
Select Add existing skills.
 Select Add existing skills
Search for and select the skill you plan to add to your genie.
Select skills
Click Add skills.
Add MCP server skills to a genie
Complete the following steps to add MCP server skills to your genie:
Sign in to Workato.
Go to AI Hub > Agent Studio.
Select the genie to edit.
Click Edit.
Go to the Enterprise skills section and click + Add.
Select MCP server.
Select a common provider MCP server or click + Custom MCP server.
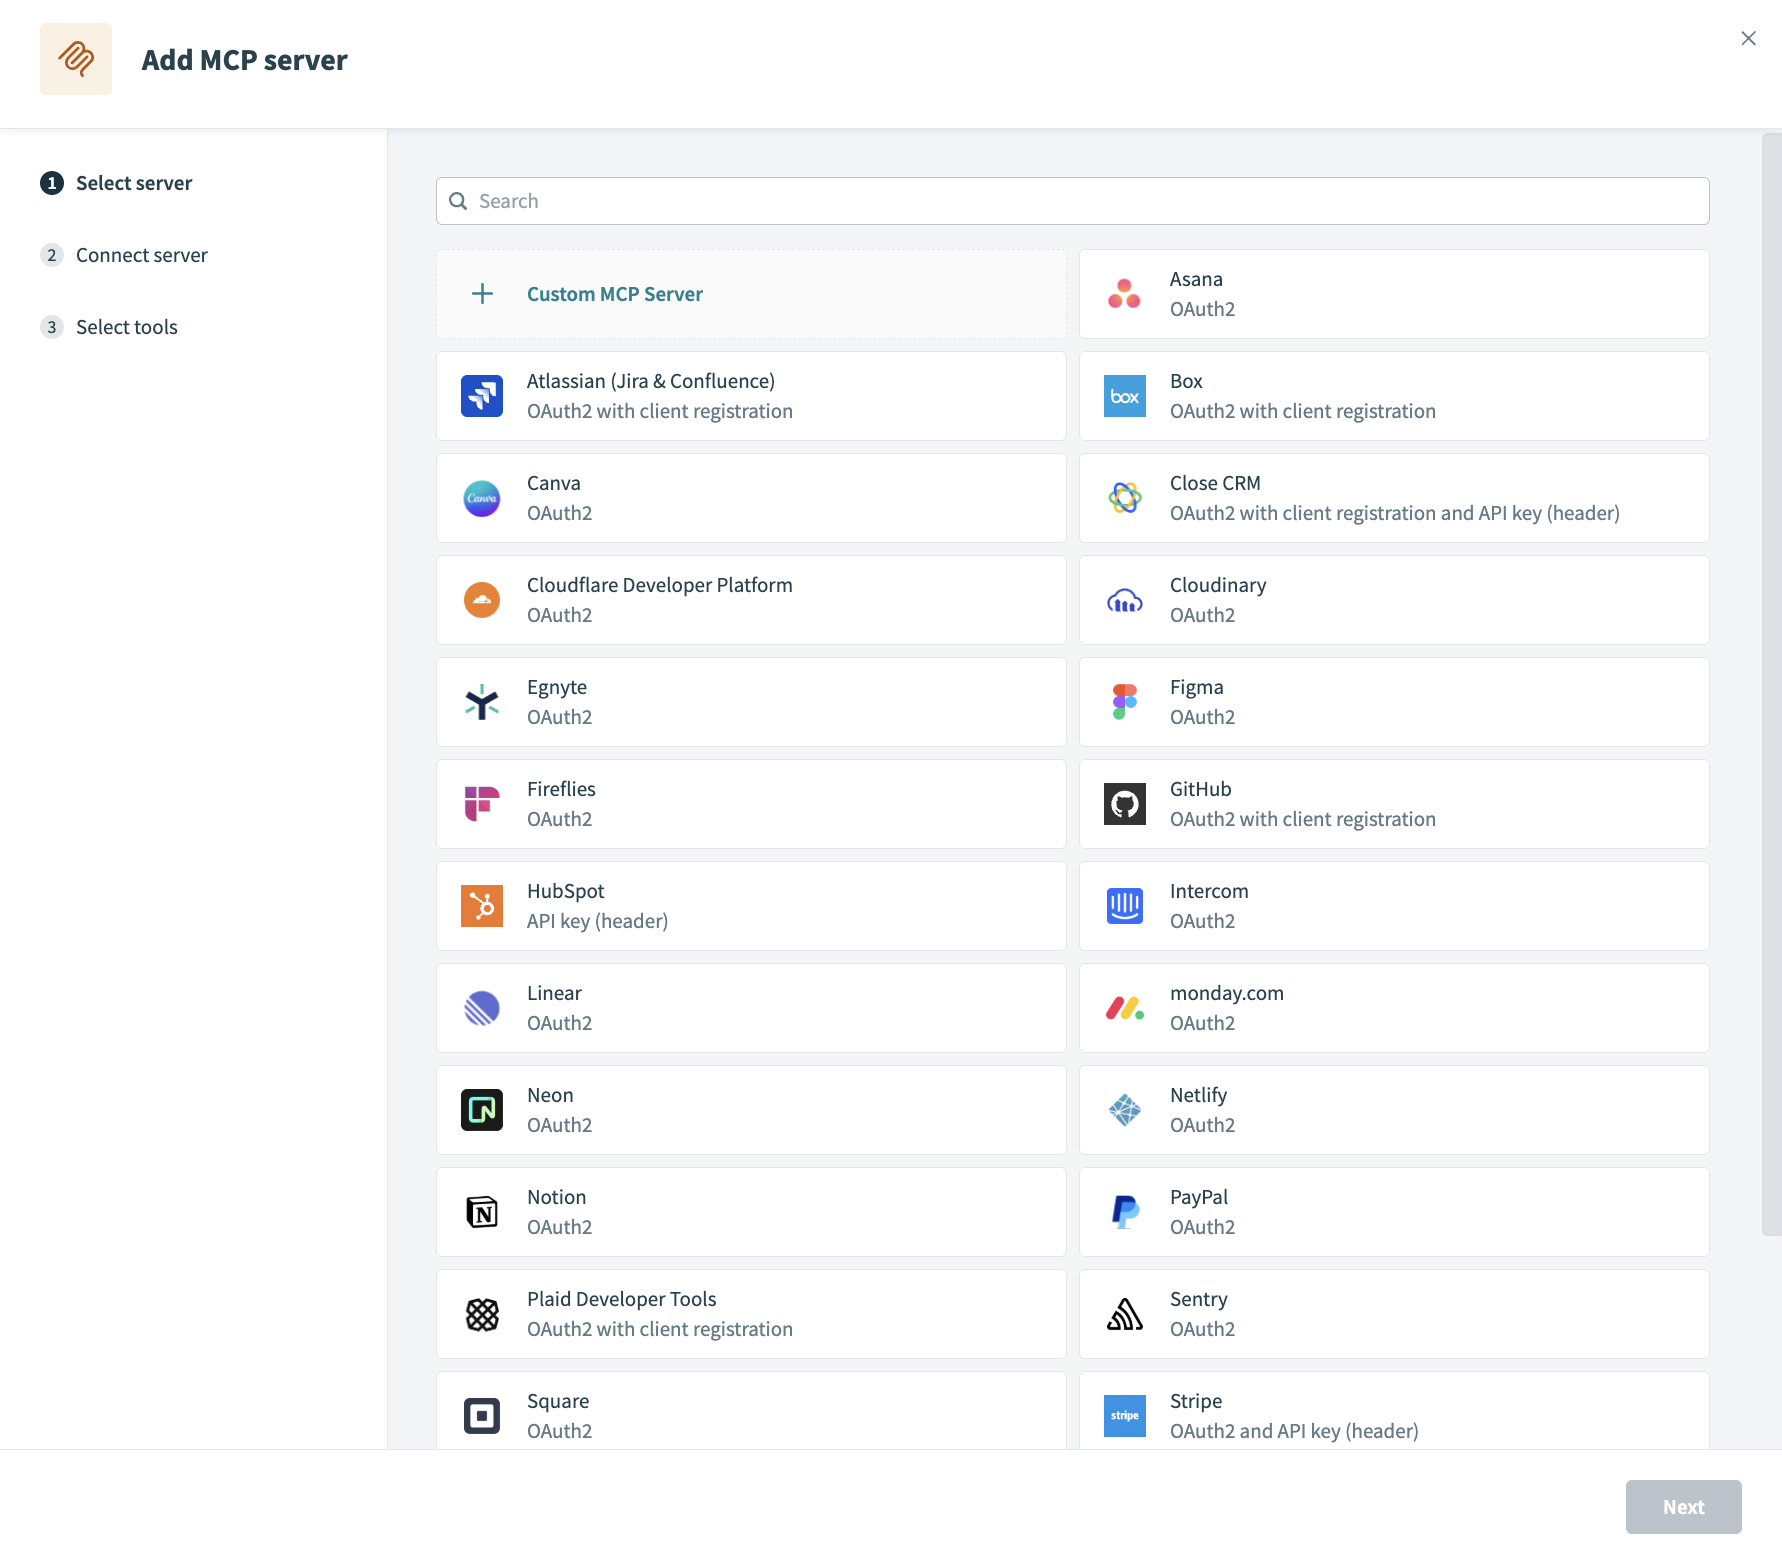 Select an MCP server option
Configure your MCP server:
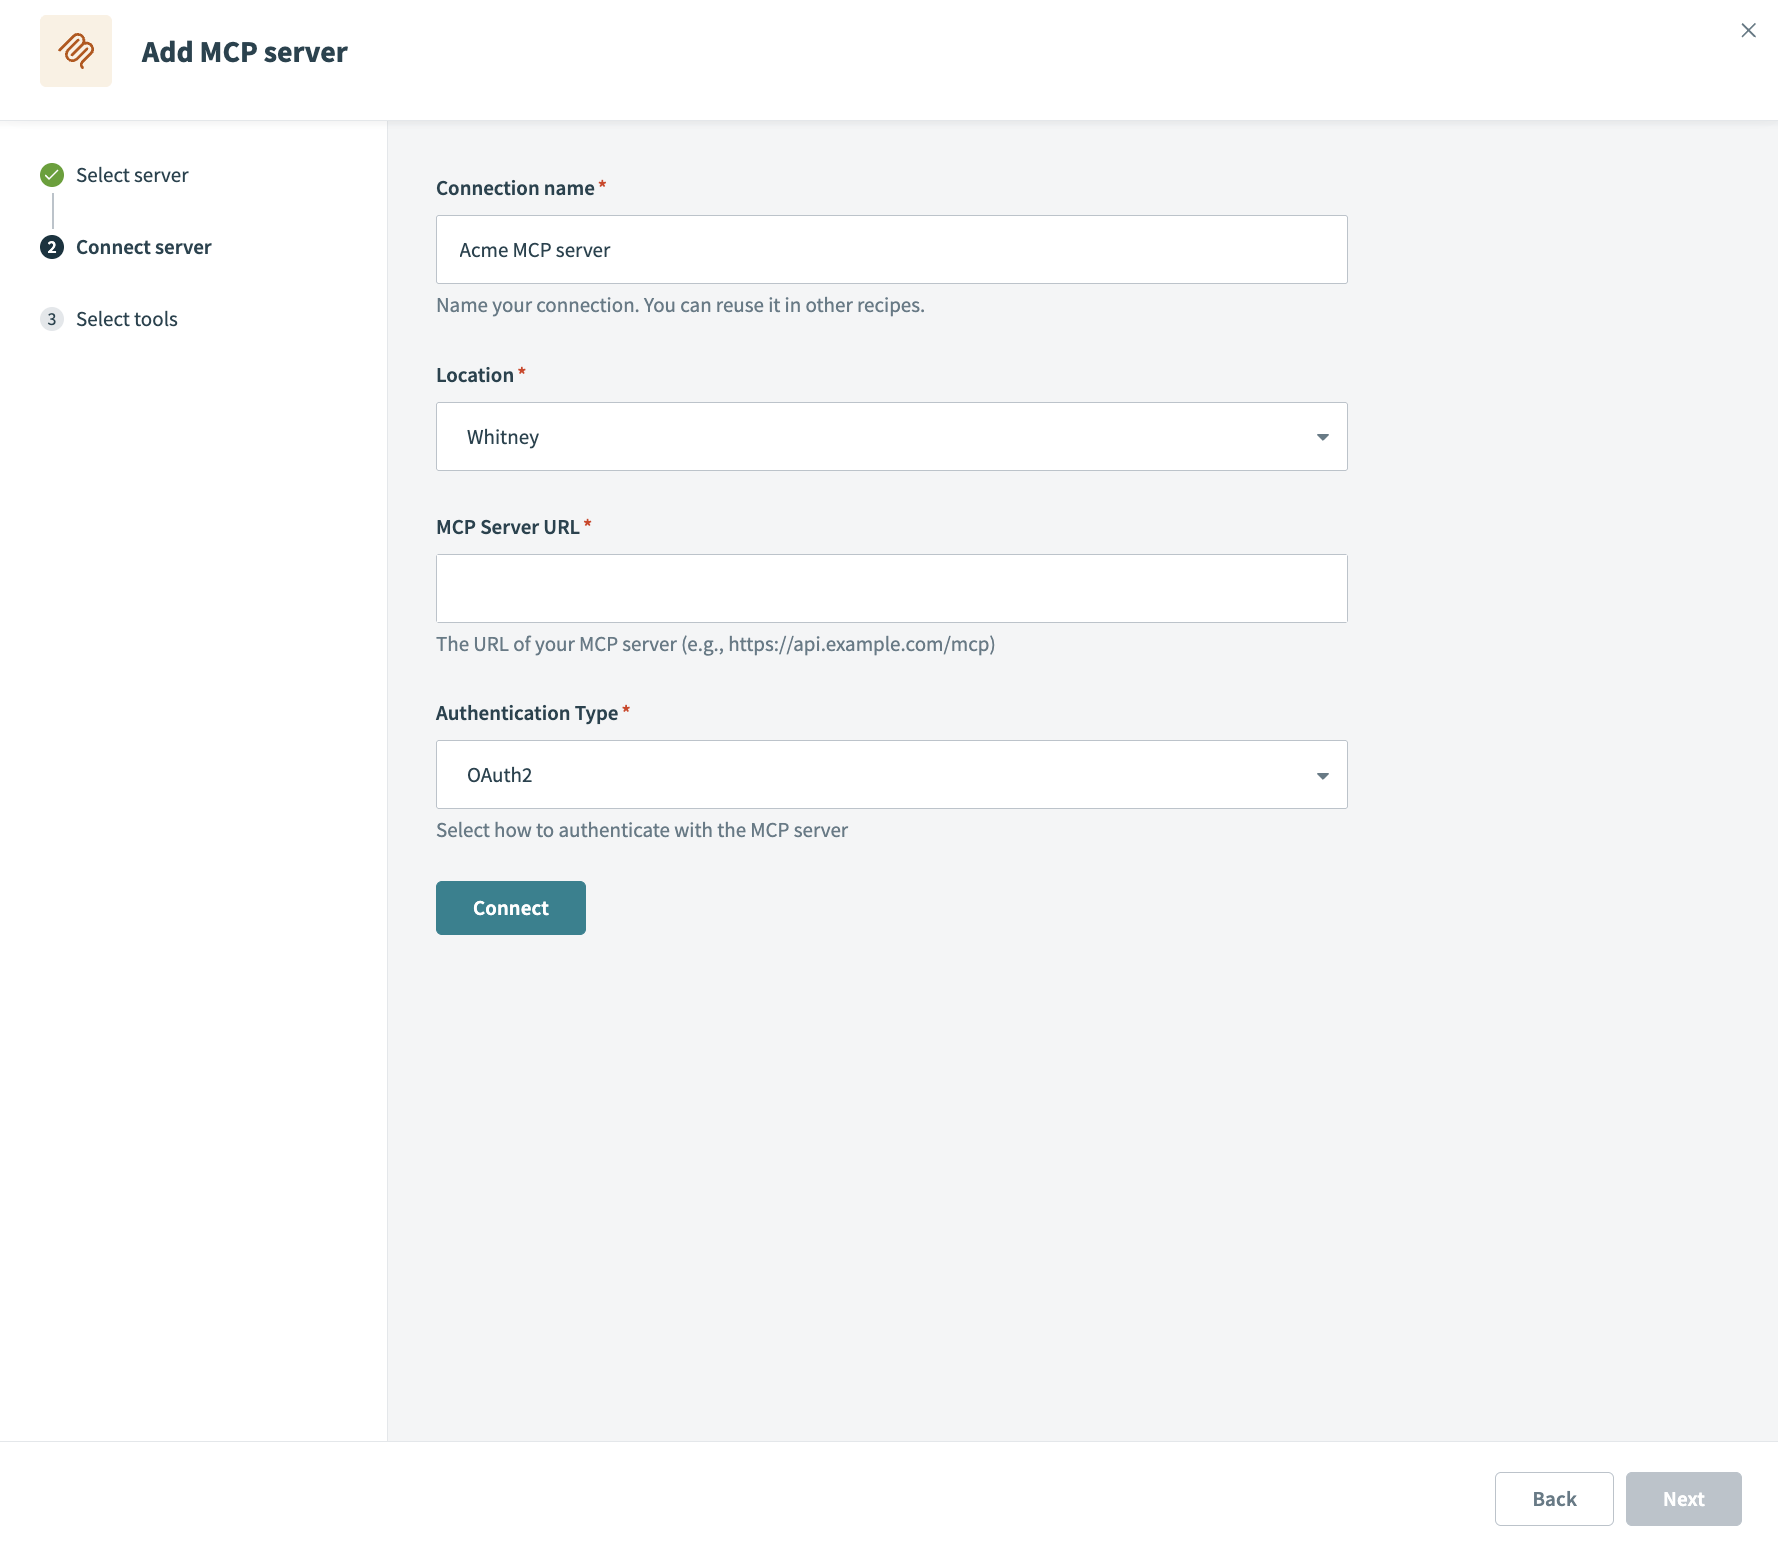 Set up your MCP server connection
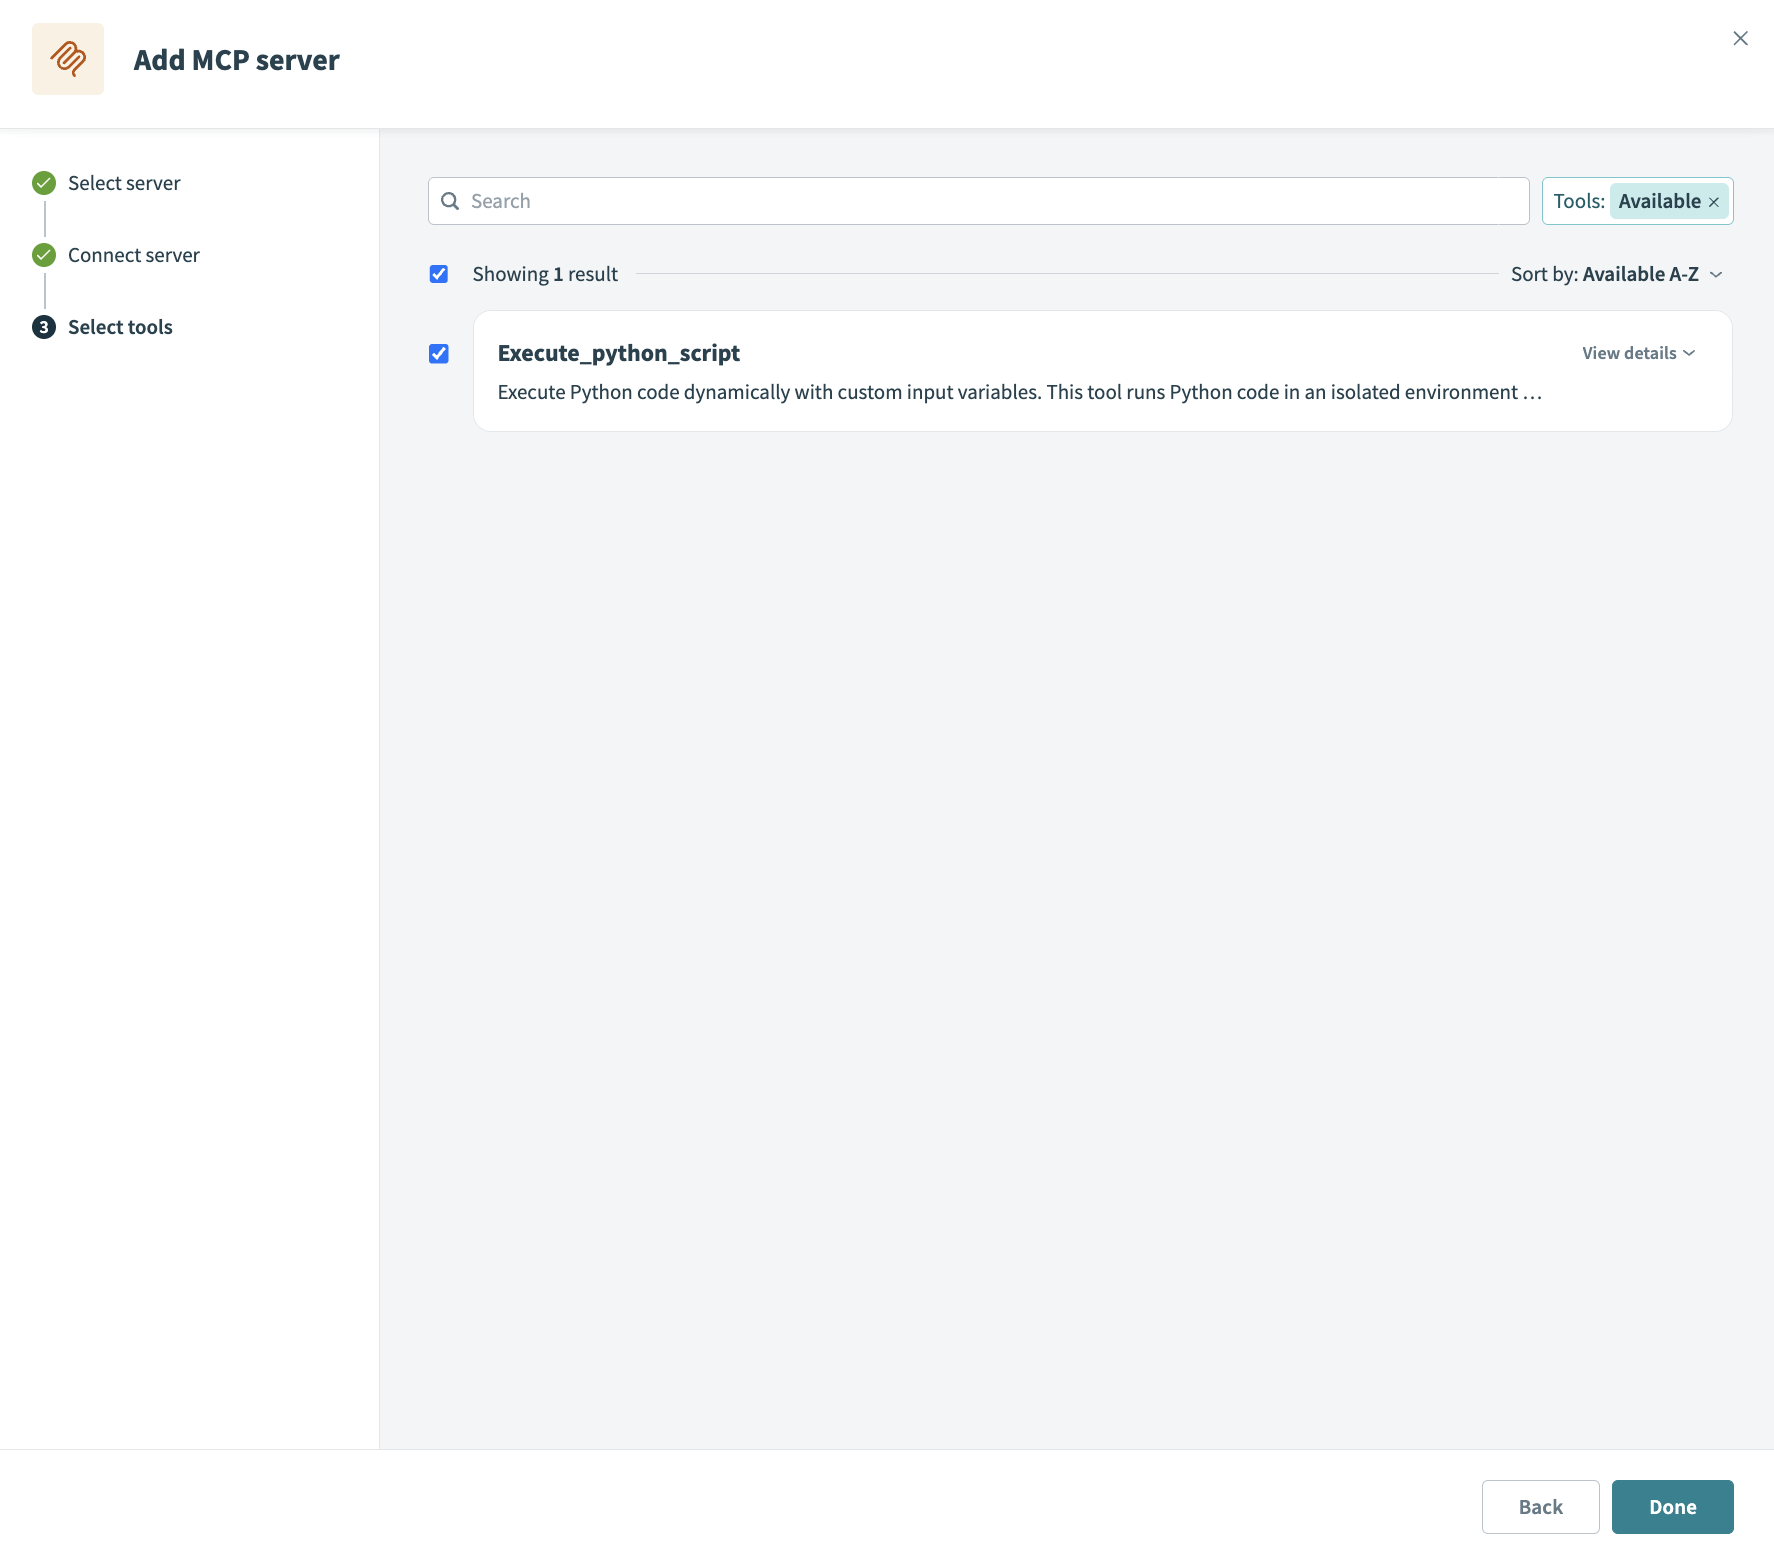 Select MCP server tools
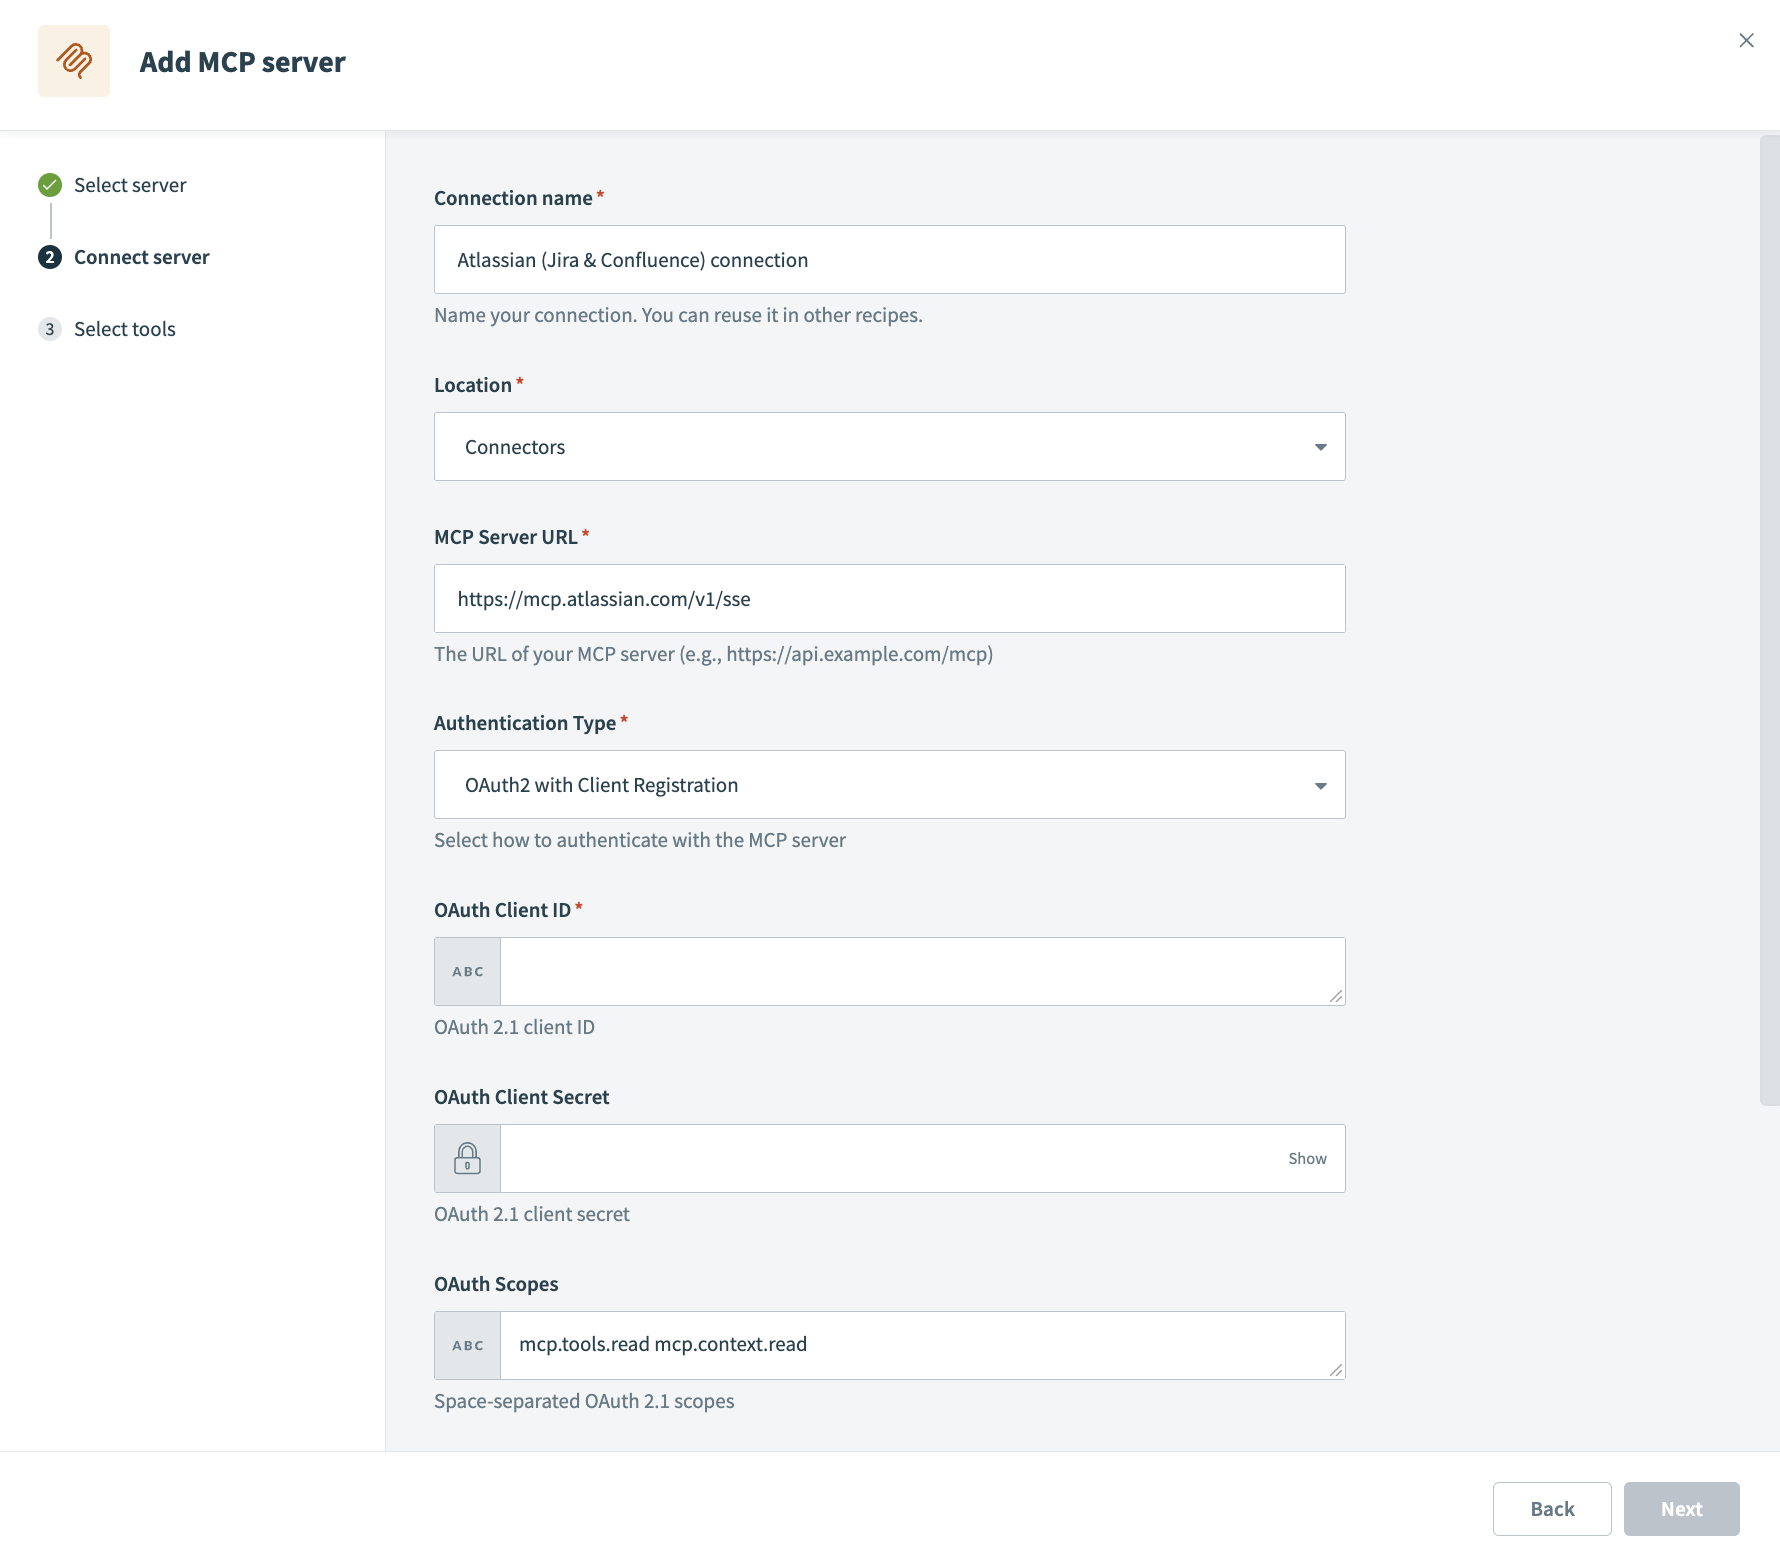 Atlassian provider MCP server
Upload files and images
You can upload files and images to your genies through your chat interface. This enables your end users to use files and images with text prompts when interacting with your genie.
Complete the following steps to upload a file or image in Agent Studio:
Go to the chat interface configured for your genie. For example: Workato GO.
Go to AI Genies and select the genie you plan to use.
Start a chat with your genie.
Click the attachment icon (paperclip).
 Click the attachment icon
Go to the file or image you plan to upload in your file system.
Click the file or image and click Open.
Advanced features
Agent Studio includes the following advanced features to enhance your genie's abilities:
Create an app event
App events enable genies to act proactively by responding to triggers from external systems, such as Salesforce or Zoom, instead of waiting for a user to initiate a conversation. These events help embed genies directly into existing workflows and allow genies to anticipate user needs and offer assistance without being prompted.
Refer to Create an App event for more information.
Create an approval request with Business approvals
Business approvals in Agent Studio let you build skills with approval workflows. Business approvals rely on the following actions:
- Create approval request: Use this action to create a new approval request in a data table you specify. The information from this request is shared with the user assigned to the approval task.
- Assign task to user: Use this action to assign a task to a user. The assignee receives a prompt within the chat interface you configured to approve or reject the request. The skill waits until the task is completed or expires.
Refer to Business approvals for more information.
Assign a task to a genie
Agent orchestration enables your genies to work autonomously within recipes. Recipes assign tasks to genies without user input. Genies process tasks while the recipe job runs.
Use the Assign task to genie action to assign a task to a genie. This enables your genie to trigger a recipe autonomously, perform the assigned task, and return a response.
Refer to Assign task to genie action for more information.
Create a KPI and Action Board for Workato GO
A KPI (Key Performance Indicator) enables you to measure progress toward goals. KPIs can help highlight areas of success and areas that require improvement with your genies. The KPI tab is only visible on the Overview page of genies that use the Workato GO chat interface.
Refer to Create a KPI for more information.
Last updated: