Install an on-prem agent on Windows
Refer to the information on this page to install an on-prem agent using Windows package.
PREREQUISITES
You must create an on-prem group before you can set up an on-prem agent.
Complete the following steps to create an on-prem agent (OPA) for a Windows operating system (OS):
Sign in to your Workato account.
Go to Tools > On-prem groups and select the group where you plan to add an agent.
Click Add agent. The Add agent dialog opens.
Provide an Agent name, use the Operating system drop-down menu to select Windows, and then click Next.
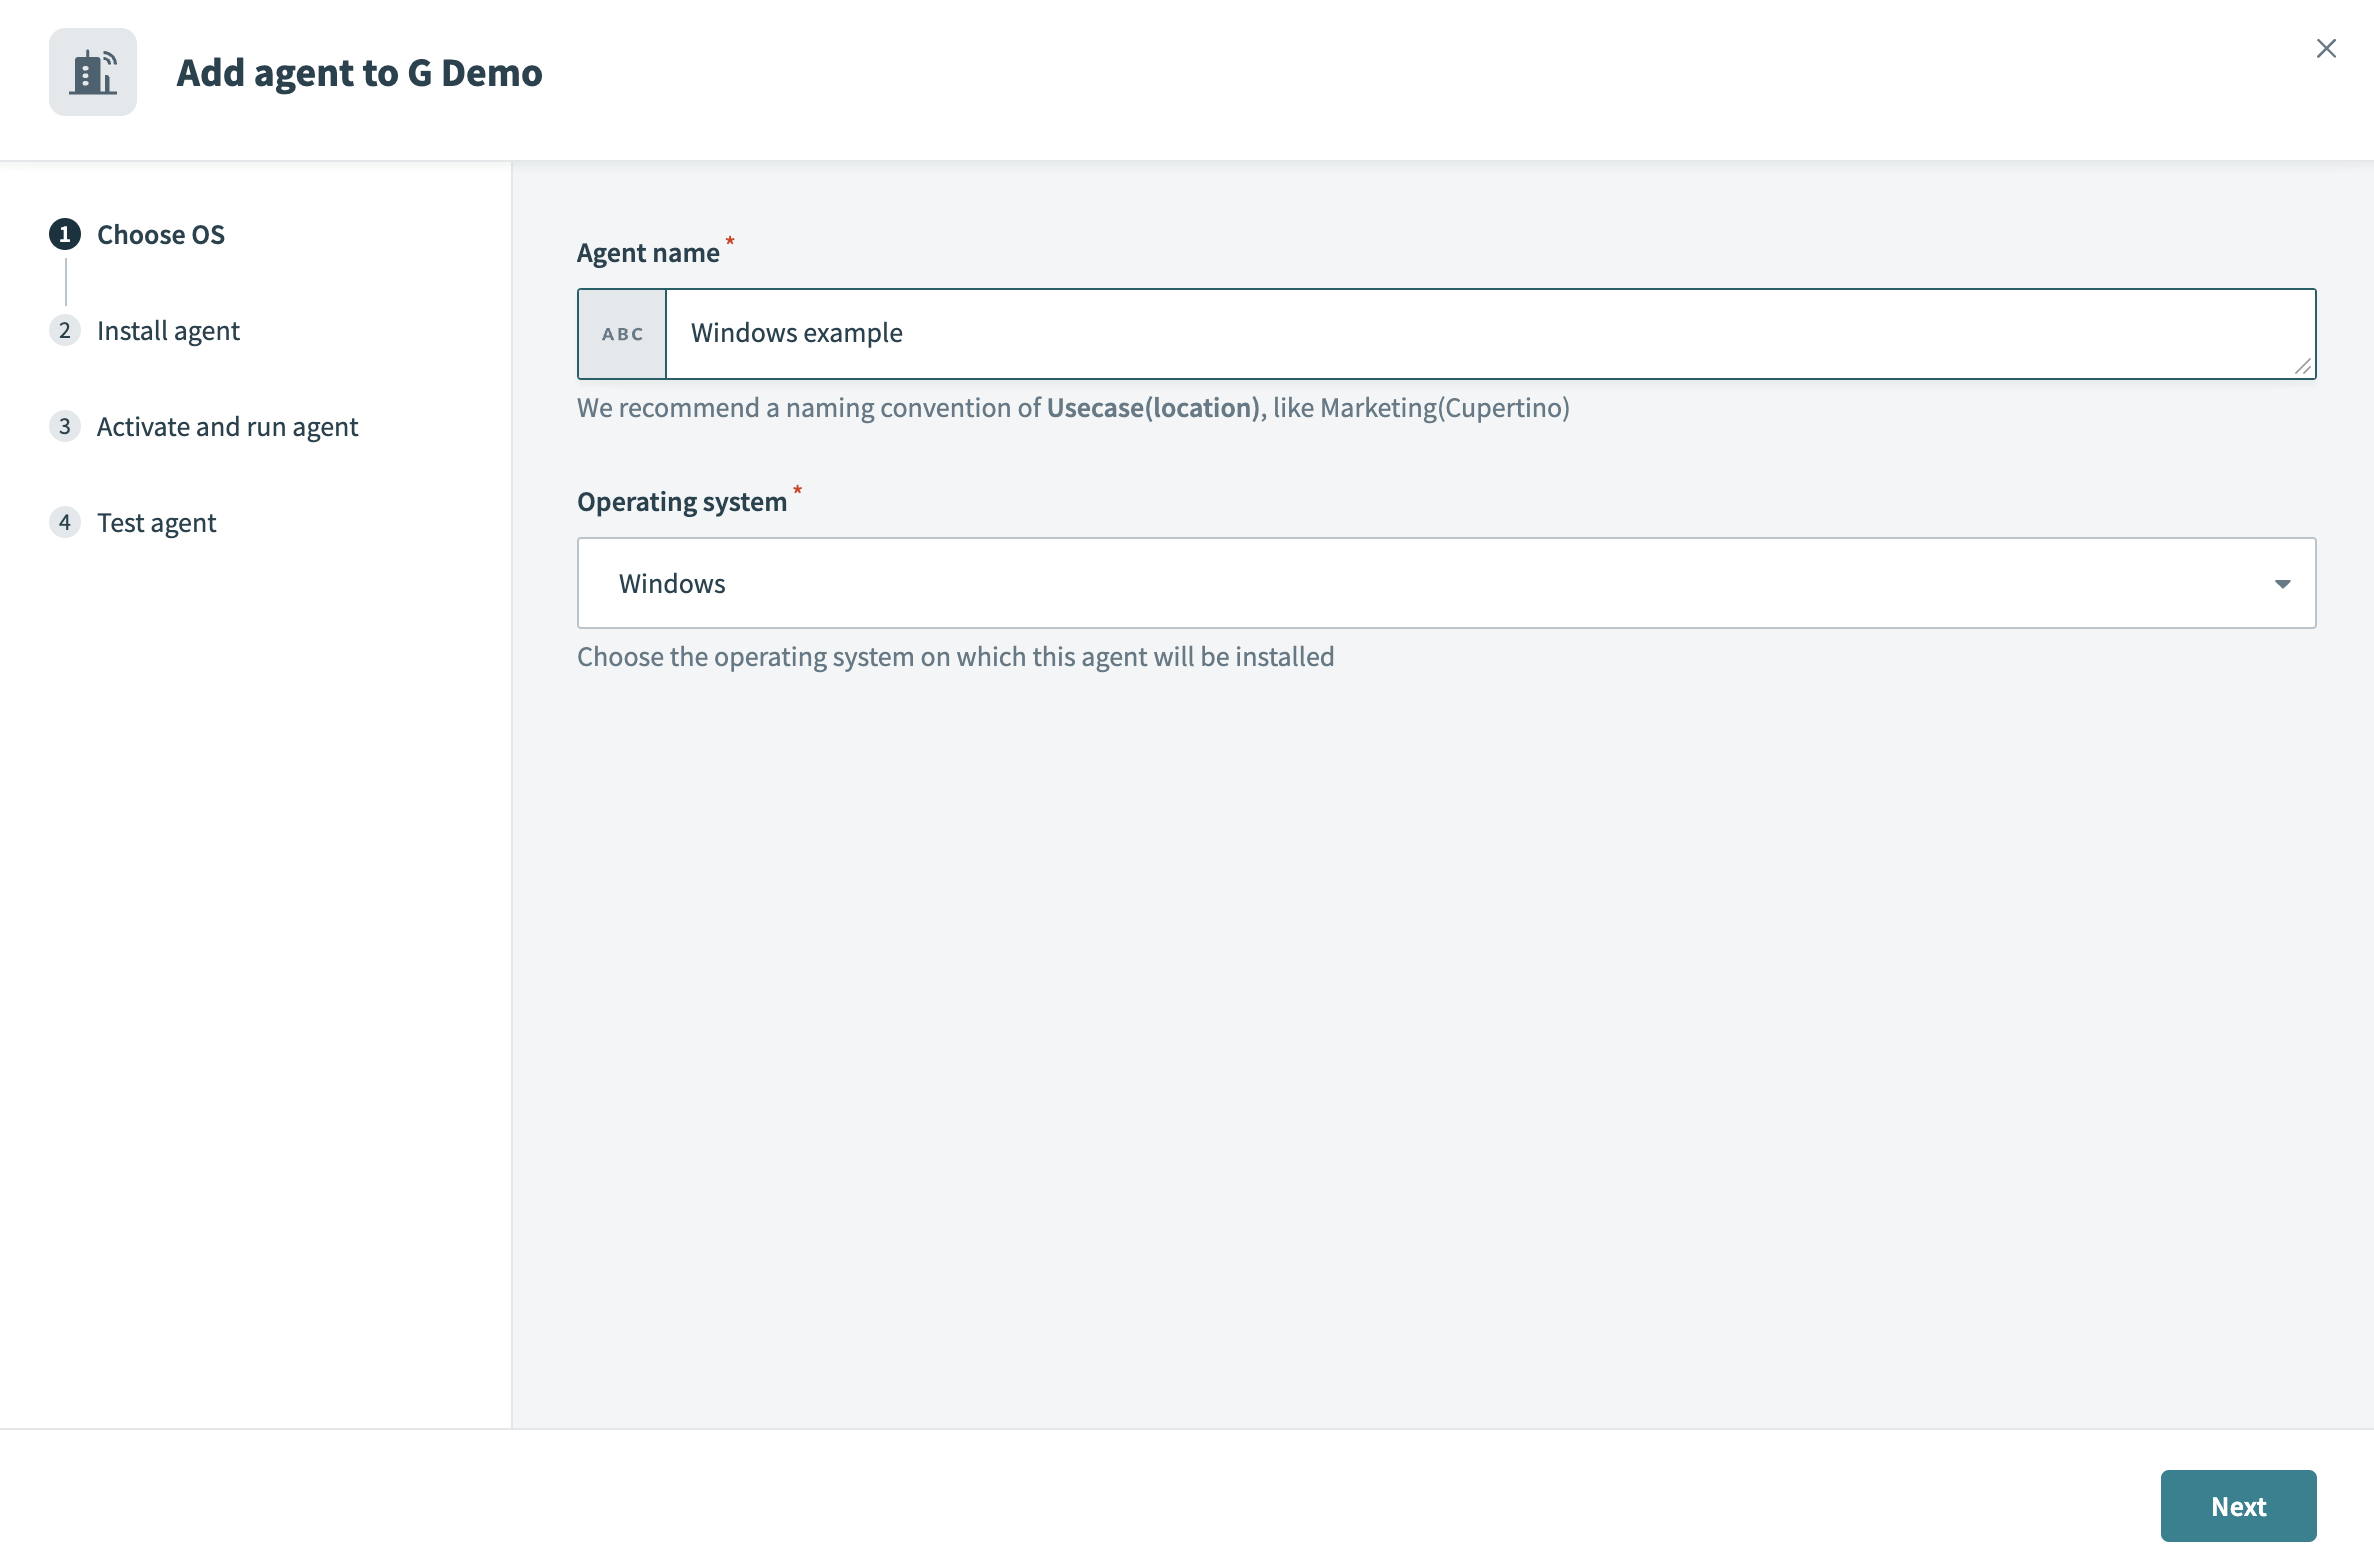 Select Windows as your operating system
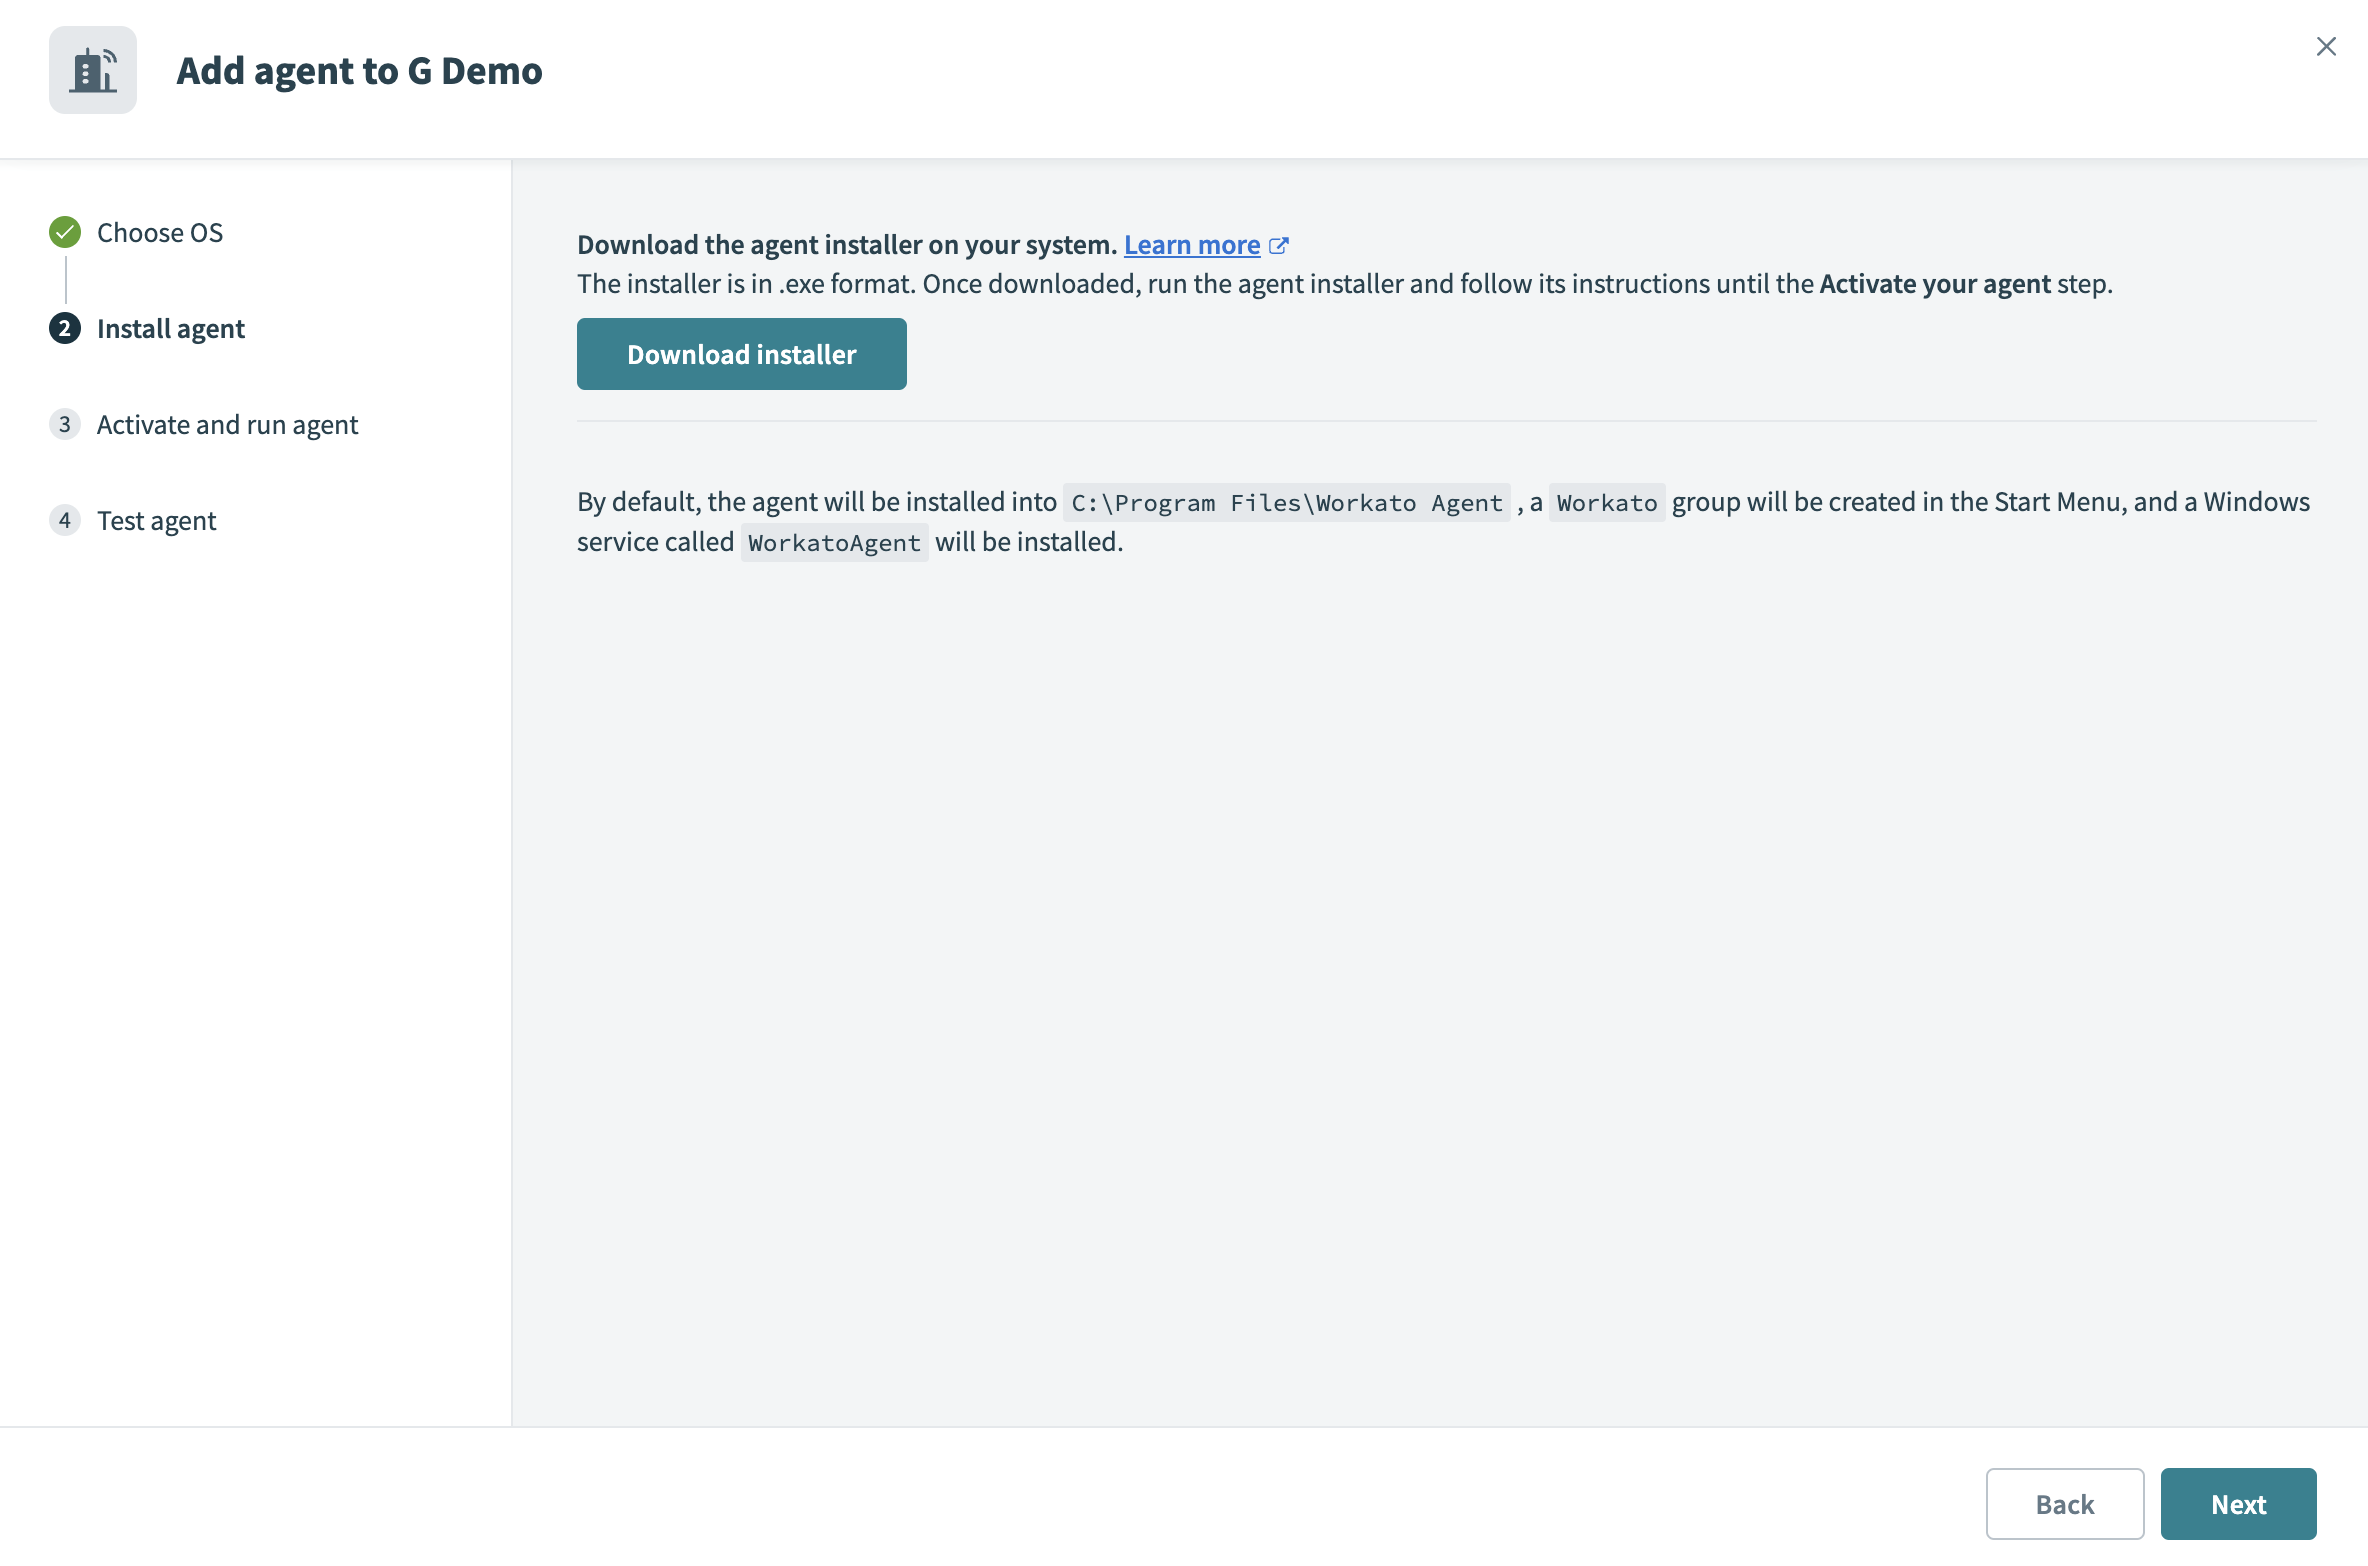
Click Download installer and click Next.
 Click Download agent package
Run the installer. The installer creates a Workato group in the Start menu, and installs a Windows service called Workato on-prem agent by default.
OPA WINDOWS SERVICE USER ACCOUNTS
From OPA version 2.18.0 onwards, the Workato OPA Windows service user account is set to Local Service instead of Local System, which was used in previous versions.
Complete the following steps to access the settings of an OPA Windows service user account:
Press Win + R, type services.msc, and press Enter.
Go to the Services window and locate the agent.
Right-click the agent and select Properties
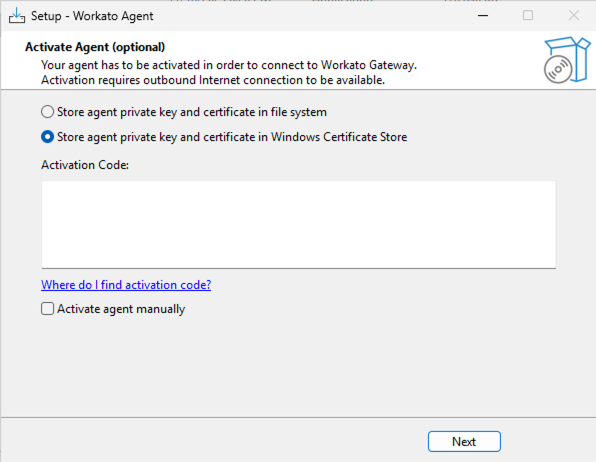
Select where to store the agent private key and certificate:
- Windows Certificate Store: Stores the private key and certificate in the system-managed certificate store. Access requires appropriate Windows permissions on both the certificate store and private key. This is the default option.
- File system: Stores the private key and certificate in the
C:\Program Files\Workato Agent\conffolder. You must protect theconffolder from unauthorized access if you select this option as your storage location. This option is only available in OPA versions 30.0 and later. Refer to the Security section for more information.
CERTIFICATE NOT FOUND
You may encounter a Certificate not found error when activating the agent with Windows Certificate Store selected. This is typically caused by insufficient permissions to access the certificate store on your machine. You can resolve this issue by storing the key and certificate in the file system or updating your Windows account permissions.
 Choose where to store OPA key and certificate
Copy and paste the Activation command from Workato. The code is valid for one hour. Click Regenerate code to generate a new code if it expires.
Alternatively, you can select Activate agent manually and activate the OPA after installation using the activation script.
Activate an agent after installation
Complete the following steps to activate the agent using a command script:
Go to the bin folder inside your OPA installation folder. C:\Program Files\Workato Agent is the default path for Windows.
Run the activate.cmd script. Refer to the Set up proxy access for your on-prem agent page to configure the activate.cmd script for use with a proxy.
You can run the activate.cmd script with the --help parameter to display the full list of accepted input properties.
Provide the Activation command from Workato's OPA setup wizard when prompted. The code is valid for one hour. Click Regenerate code in the setup wizard to generate a new code if it expires.
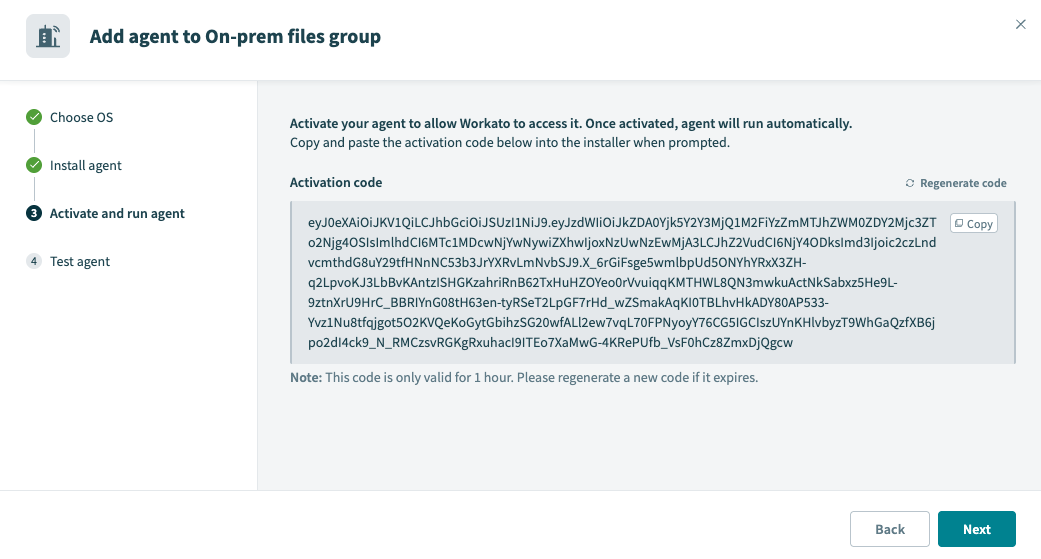 Copy and paste the Activation code
ALLOW TRAFFIC TO WORKATO FROM YOUR SERVER
Ensure traffic to Workato is allowed from your server to use OPA. Refer to security allowlists to add Workato to your allowlist.
Return to Workato and click Next.
Click Test agent to confirm that your on-prem agent is working as expected.
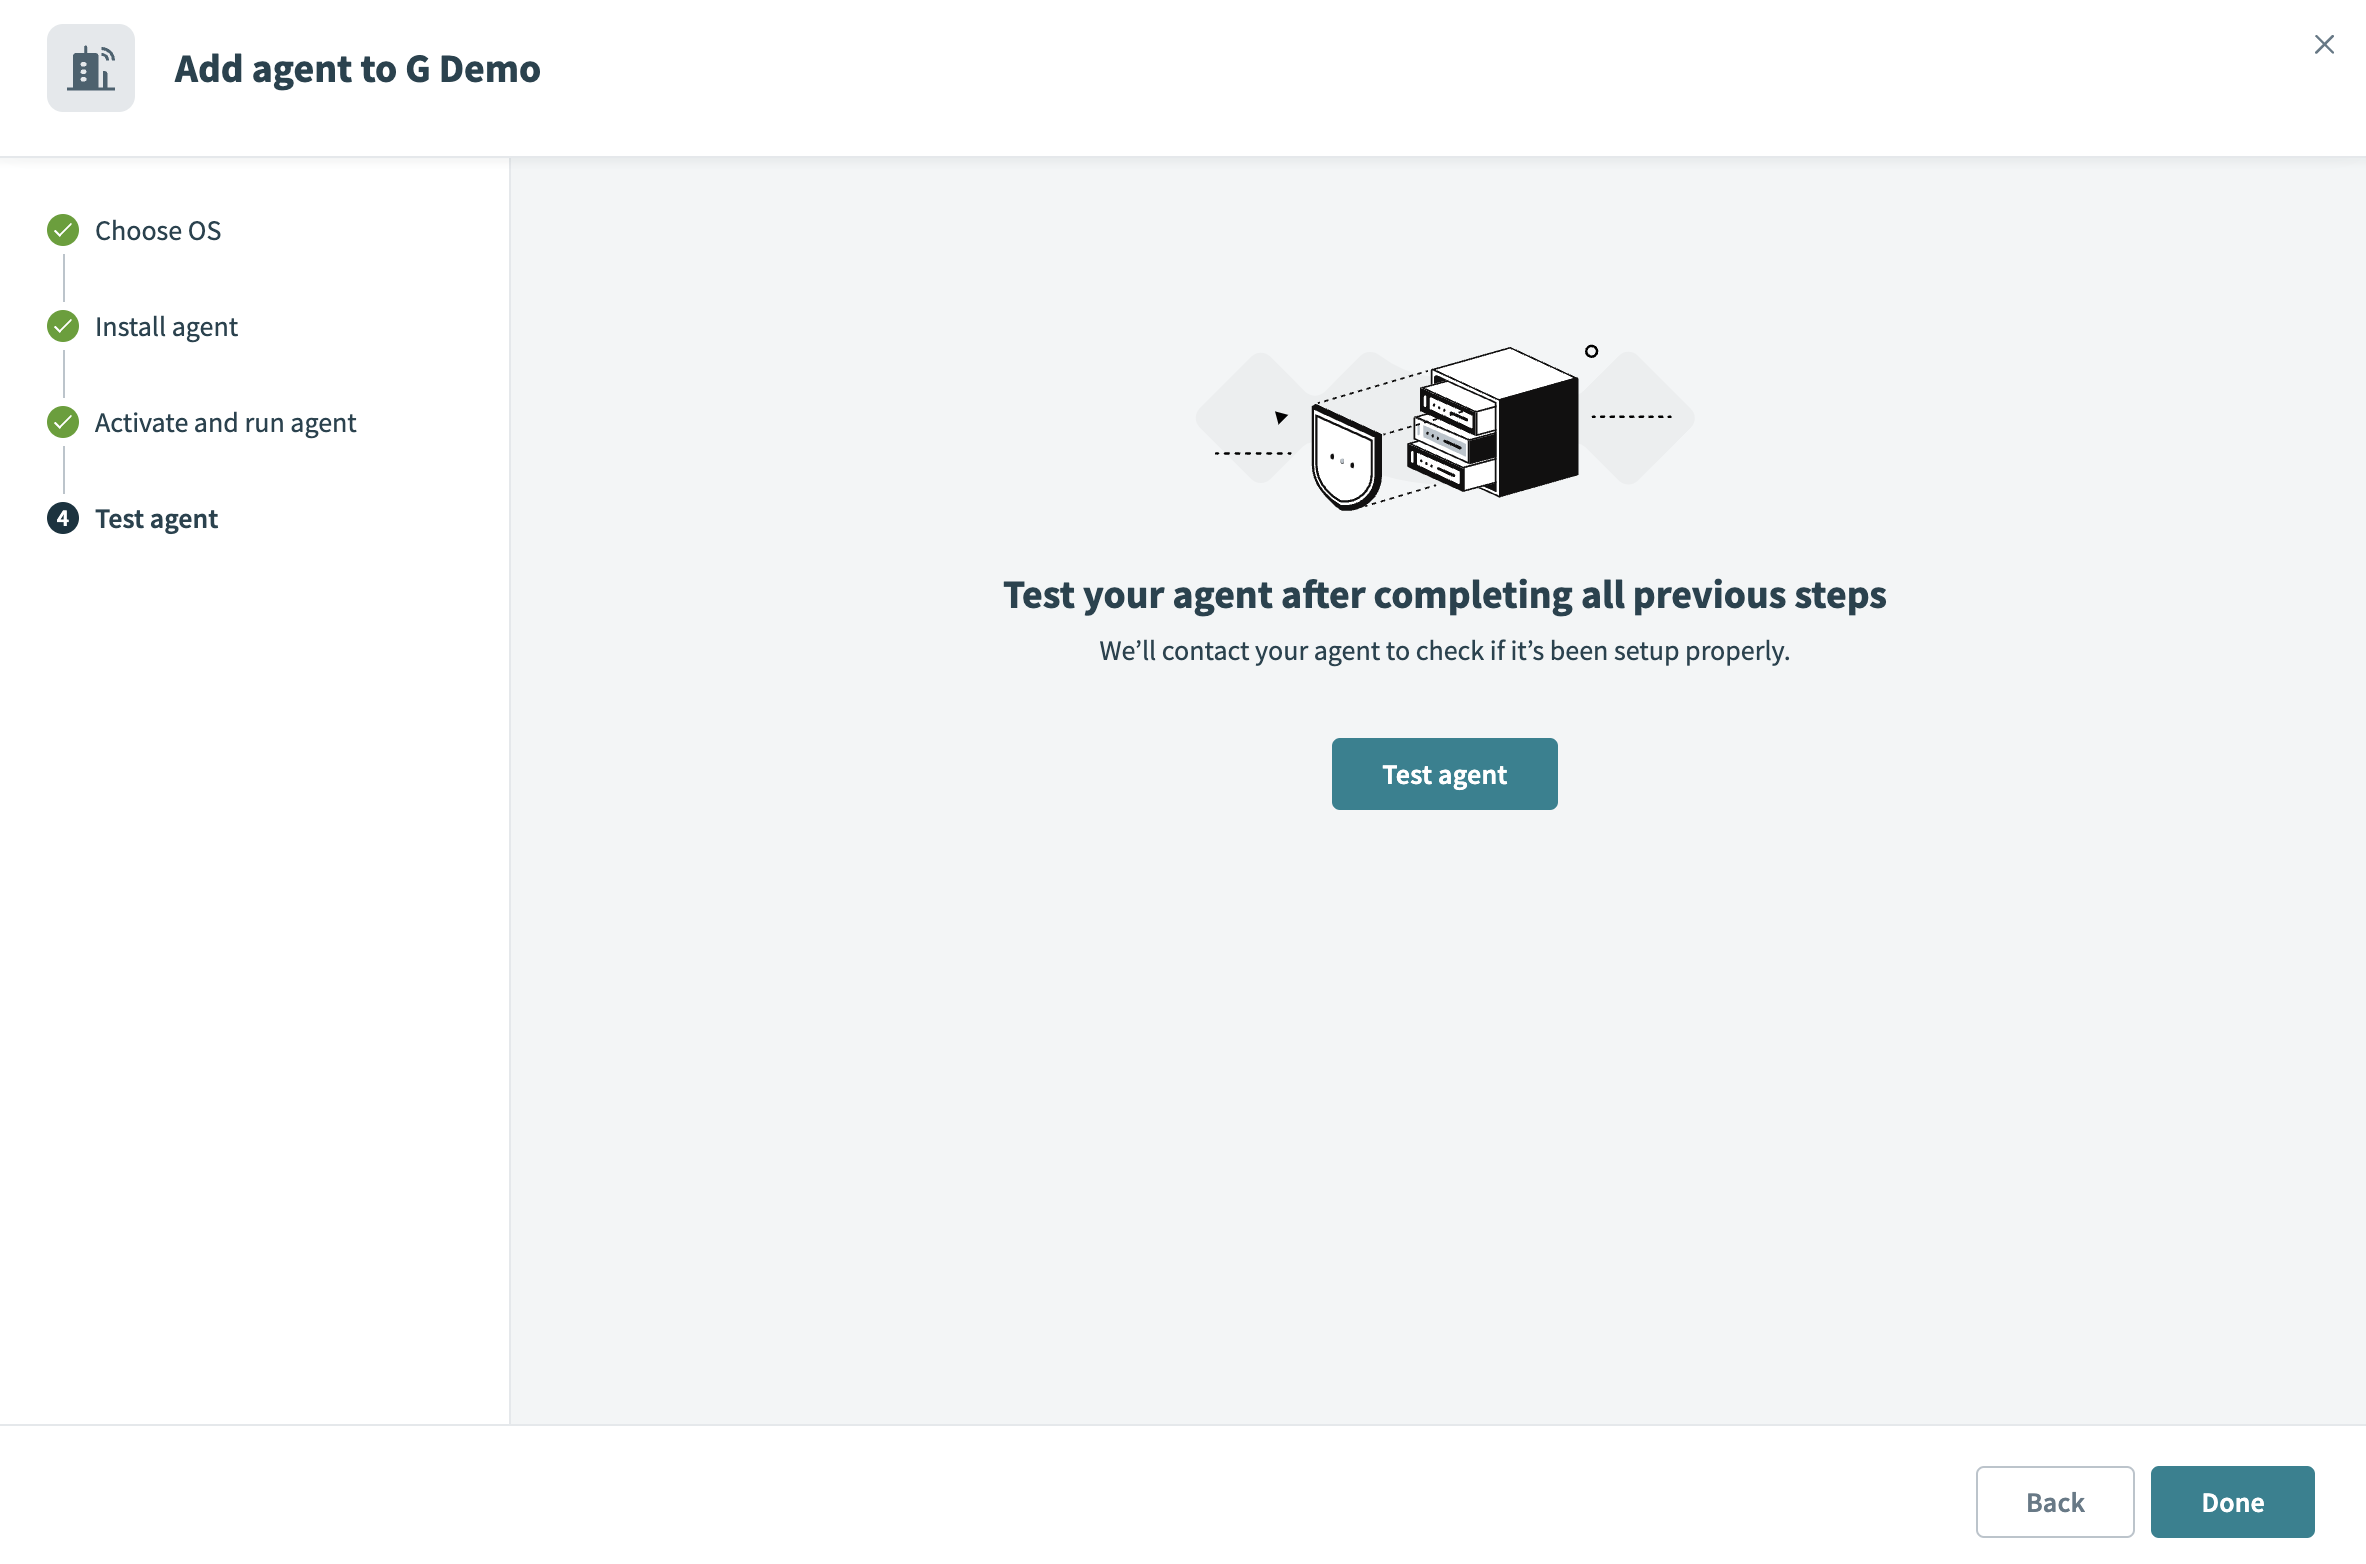 Test the on-prem agent
Click Done to complete the installation.
CERTIFICATE VALIDITY PERIOD
The agent certificate remains valid for 1 year after the generation date.
Renew the certificate before its expiration date to avoid interruptions. Refer to the Renew agent keys guide for more information.
Security
OPA 2.18.0 and later versions run the OPA Windows service under the Local Service system account by default. You can alter this account to better match your security requirements, for example, by running it under a domain user account with dedicated privileges.
OPA 30.0 and later versions enable you to choose whether to store the agent private key (cert.key) and certificate (cert.pem) in the conf folder or the Windows Certificate Store. The default storage location is the Windows Certificate Store.
It's extremely important to restrict access to the OPA conf folder if you store the private key and certificate in the local file system. Workato doesn't have access to your private key.
The conf folder also contains a config.yml file where you can configure options and connection properties if you aren't using cloud profiles. Ensure you protect this file from unauthorized access.
How to set permissions
Complete the following steps to protect the OPA's conf folder:
Right-click the conf folder and select Properties.
Go to the Security tab.
Click Advanced and remove any unnecessary explicit or implicit access to the conf folder.
Explicitly allow Read access to the conf folder for the LOCAL SERVICE system account (or the account assigned to run OPA as a Windows service).
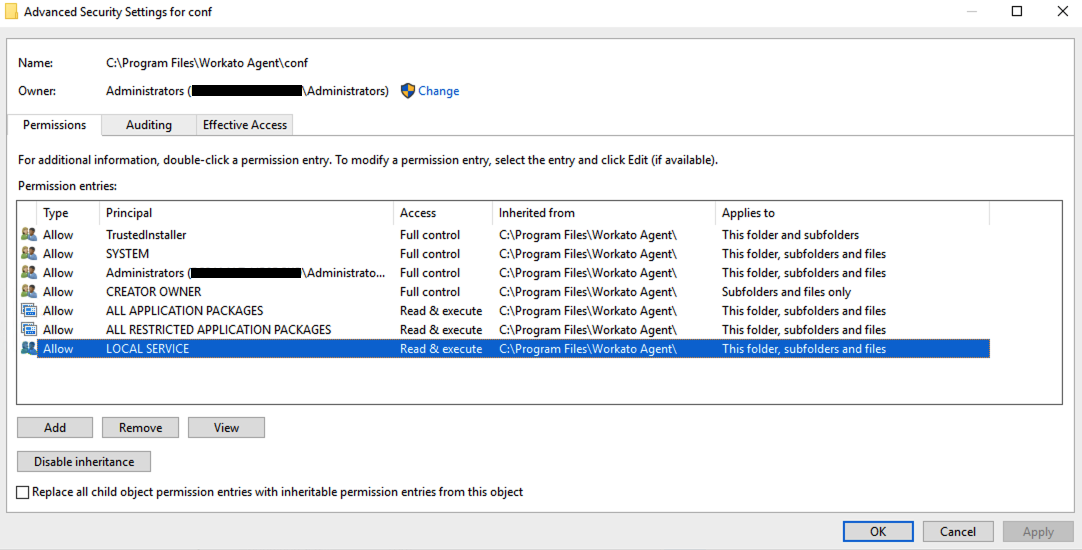 OPA conf directory permissions
Click Apply, then OK.
Last updated: