Create a Snowflake connection.
Click Create > Connection.
Search for and select Snowflake on the New connection page.
Provide a name for your connection in the Connection name field.
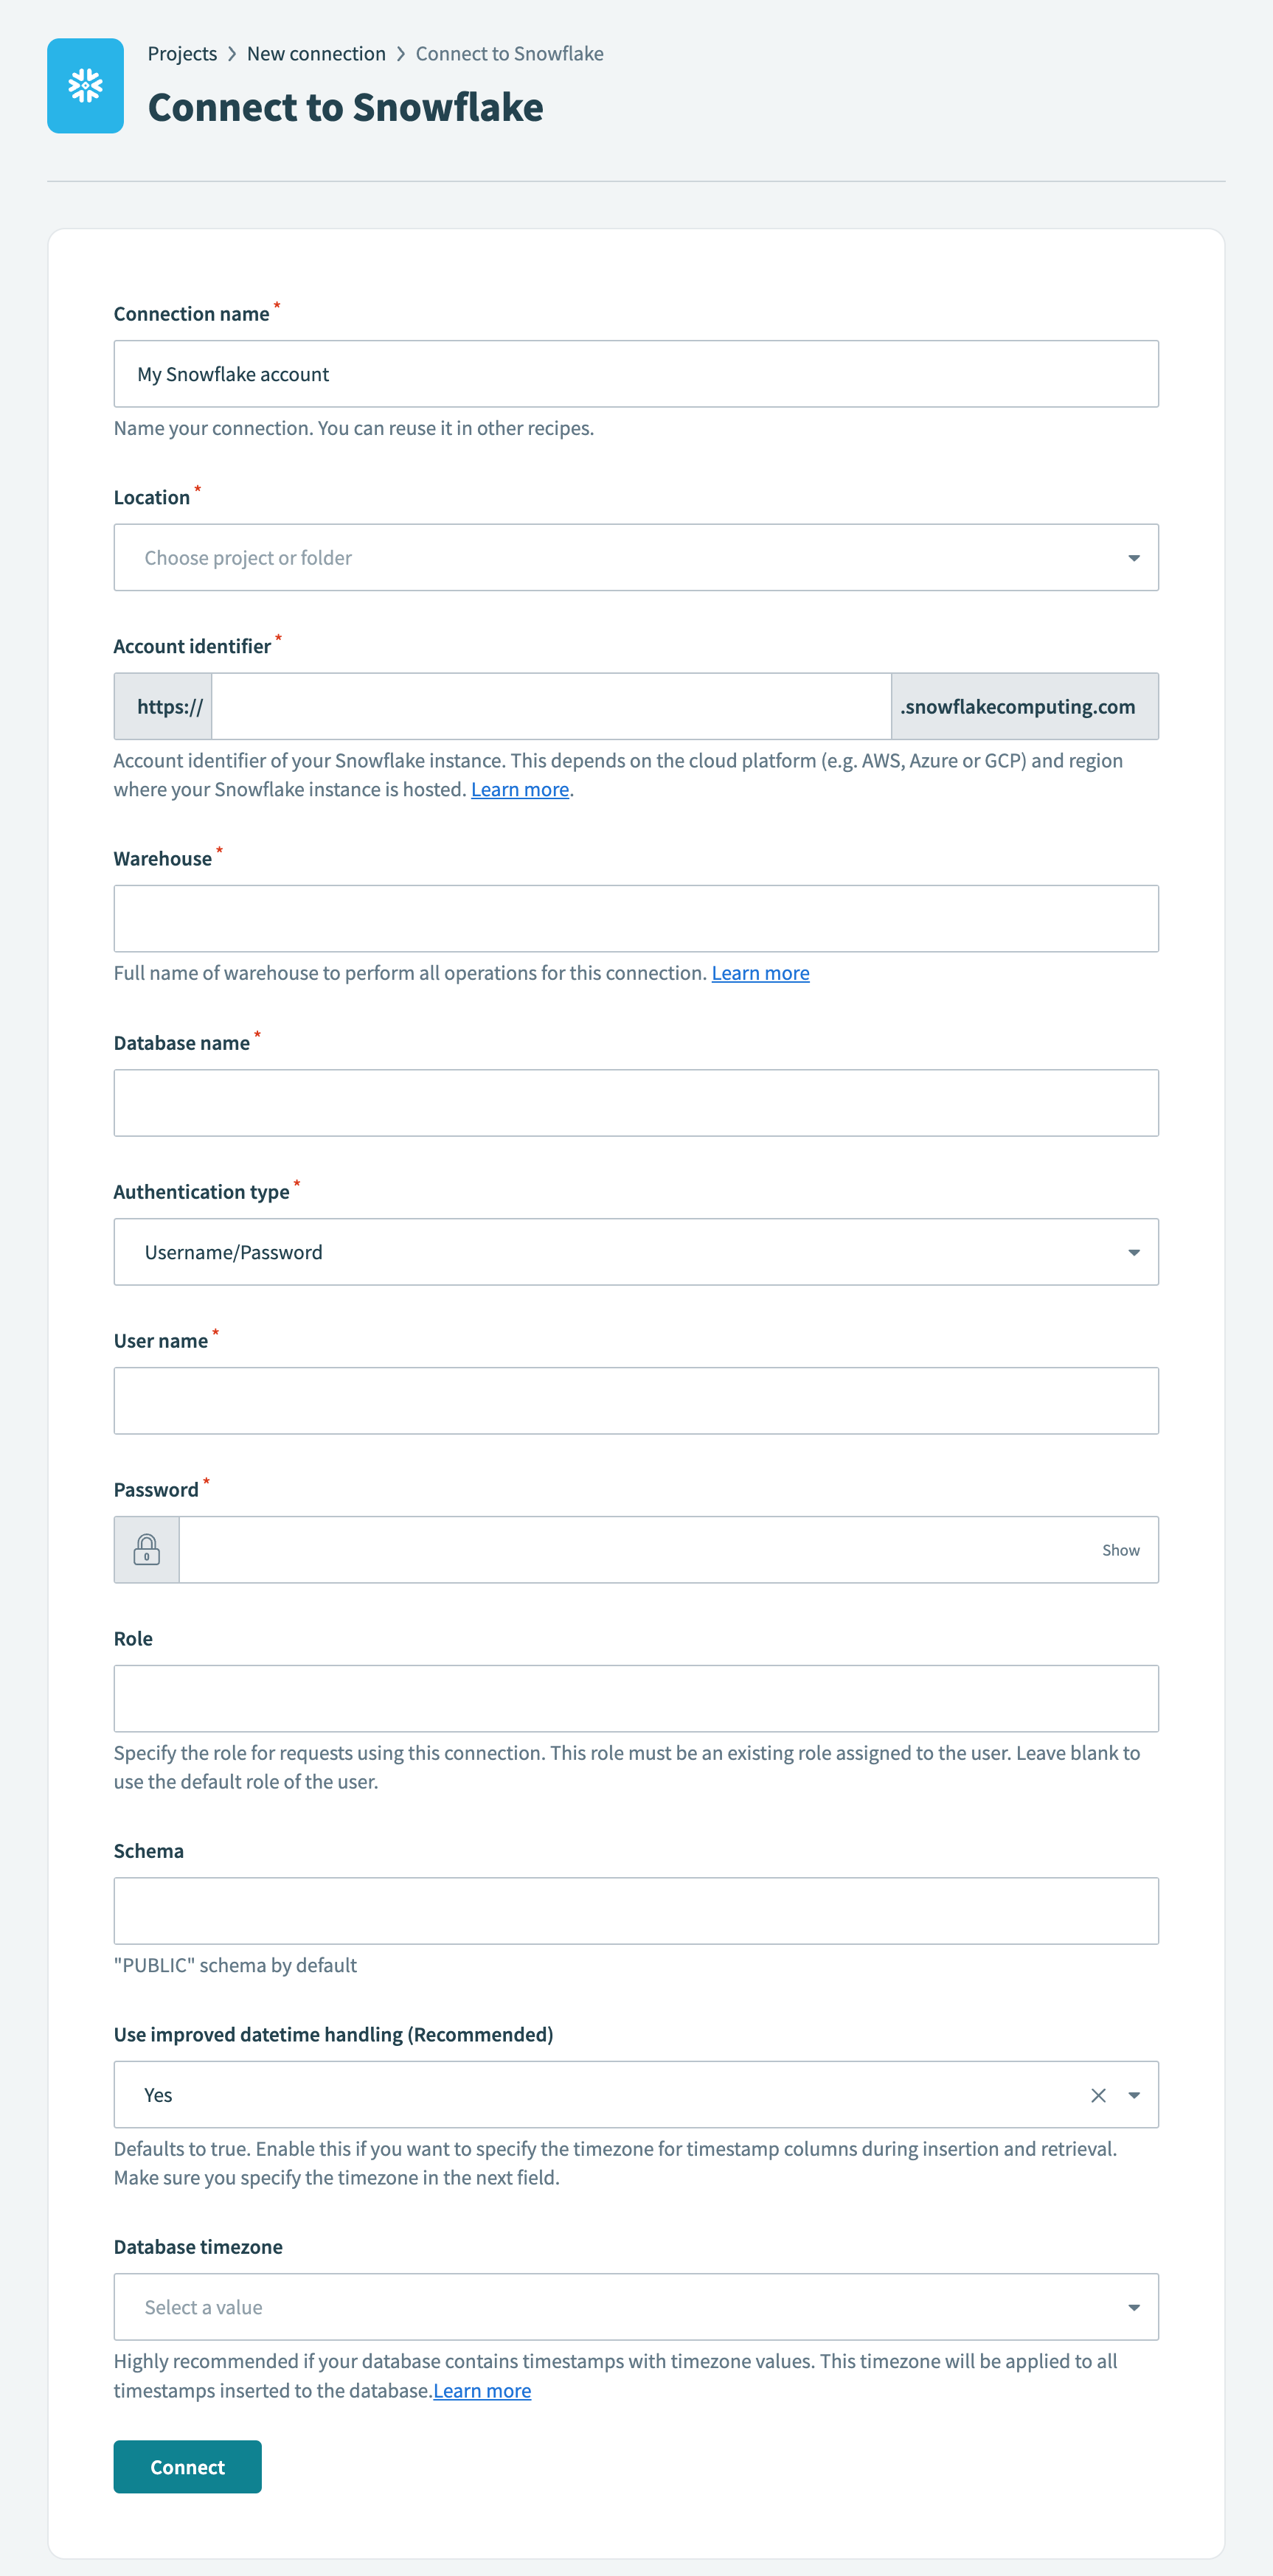 Snowflake connection setup
Use the Location drop-down menu to select the project where you plan to store the connection.
Enter your account identifier in the Account identifier field. Snowflake has multiple methods of identifying an account. Workato supports all methods:
- Account name:
https://{org.name}-{account_name} - Connection name:
https://{org.name}-{connectionname} - Account locator:
https://{account.locator}.{region}.{cloud}
If you're using the account locator, note that {region} and {cloud} are only required for certain locations. For example:
- If your account is hosted in AWS US West (Oregon), use
your-account-locator. - If your account is hosted in AWS US East (Ohio), use
your-account-locator.us-east-2. - If your account is hosted in Azure West Europe, use
your-account-locator.west-europe.azure.
Enter the full name of the warehouse where you plan to perform all operations for this connection in the Warehouse field. For example, compute_wh.
Enter the database you plan to use in your recipe connection in the Database name field.
Use the Authentication type drop-down menu to select your authentication type.
- Username/Password: Enter your username and password if you select this option.
- OAuth 2.0: Enter your Client ID and Client Secret if you select this option.
Click Connect.
Last updated: 1/16/2025, 9:16:49 PM