Add an agent to an on-prem group
Refer to the information on this page to add an agent to an on-prem group.
PREREQUISITES
You must create an on-prem group before you can set up an on-prem agent.
Complete the following steps to set up an on-prem agent in Workato:
Sign in to Workato.
Go to Tools > On-prem groups and select the on-prem group in which you plan to add an agent.
Click Add new agent.
Provide a meaningful Agent name and select the Operating system (OS) where you plan to install the agent.
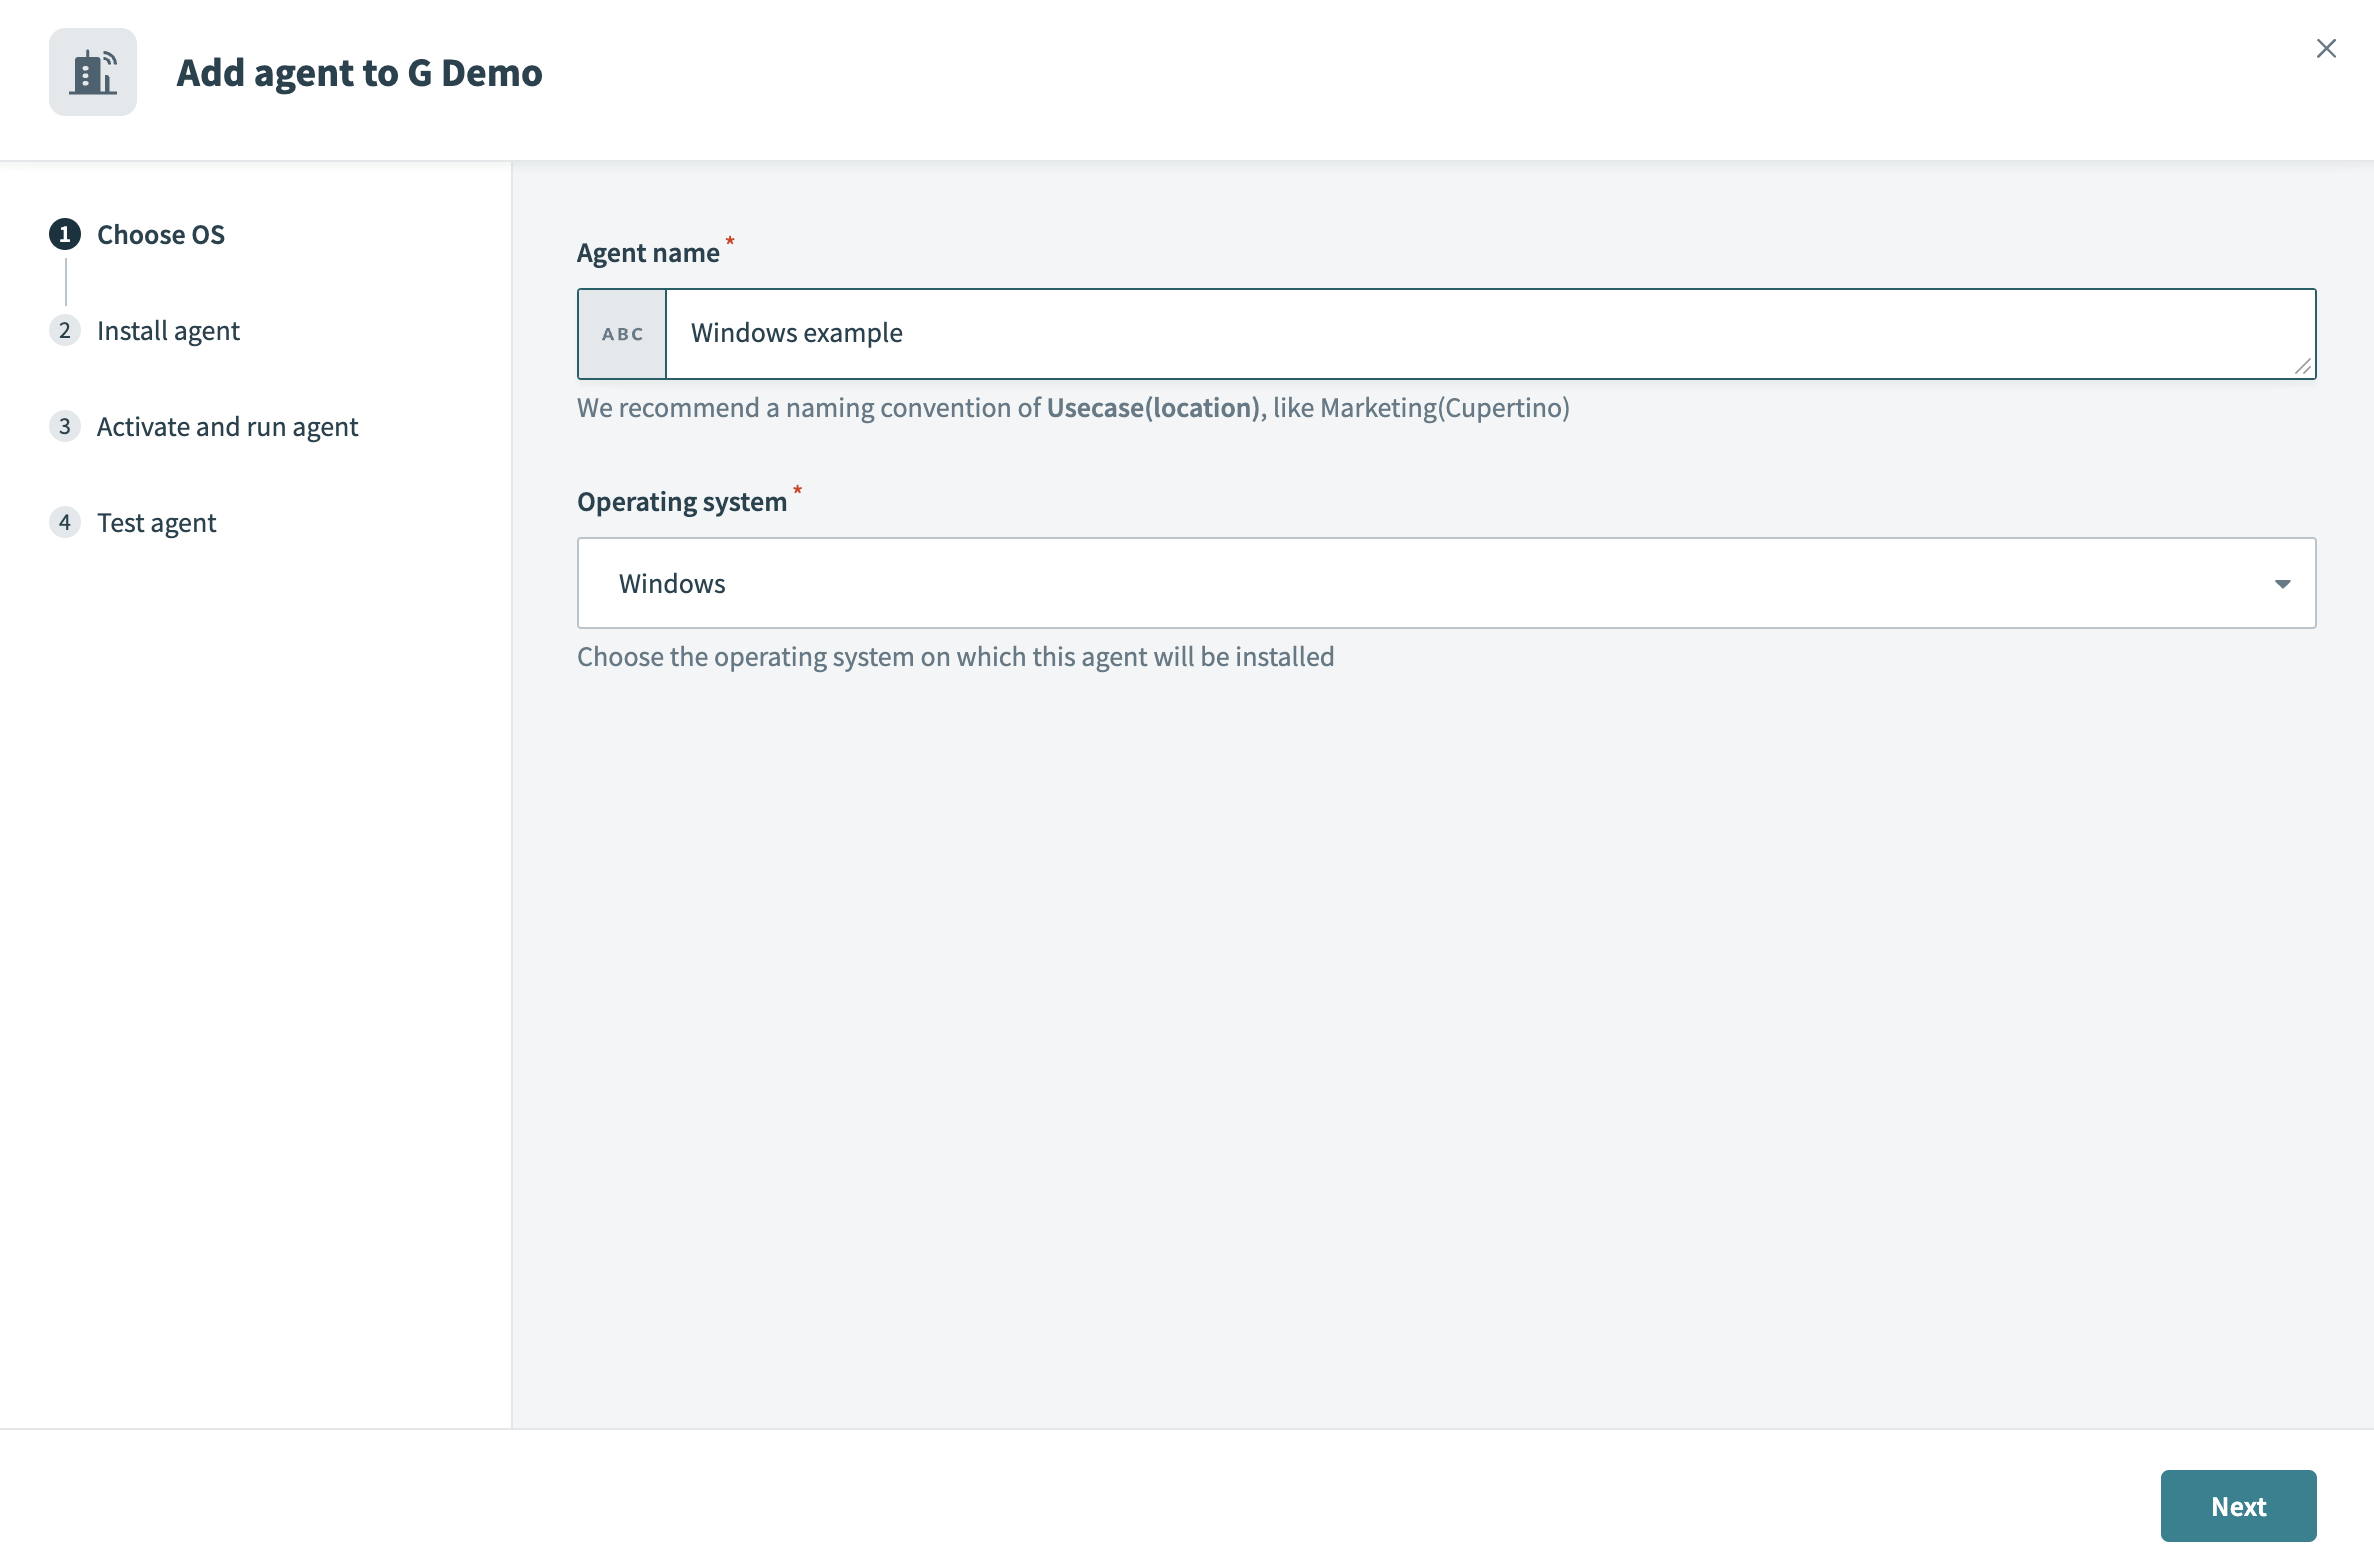 Choose OS
Download and then start the installer. 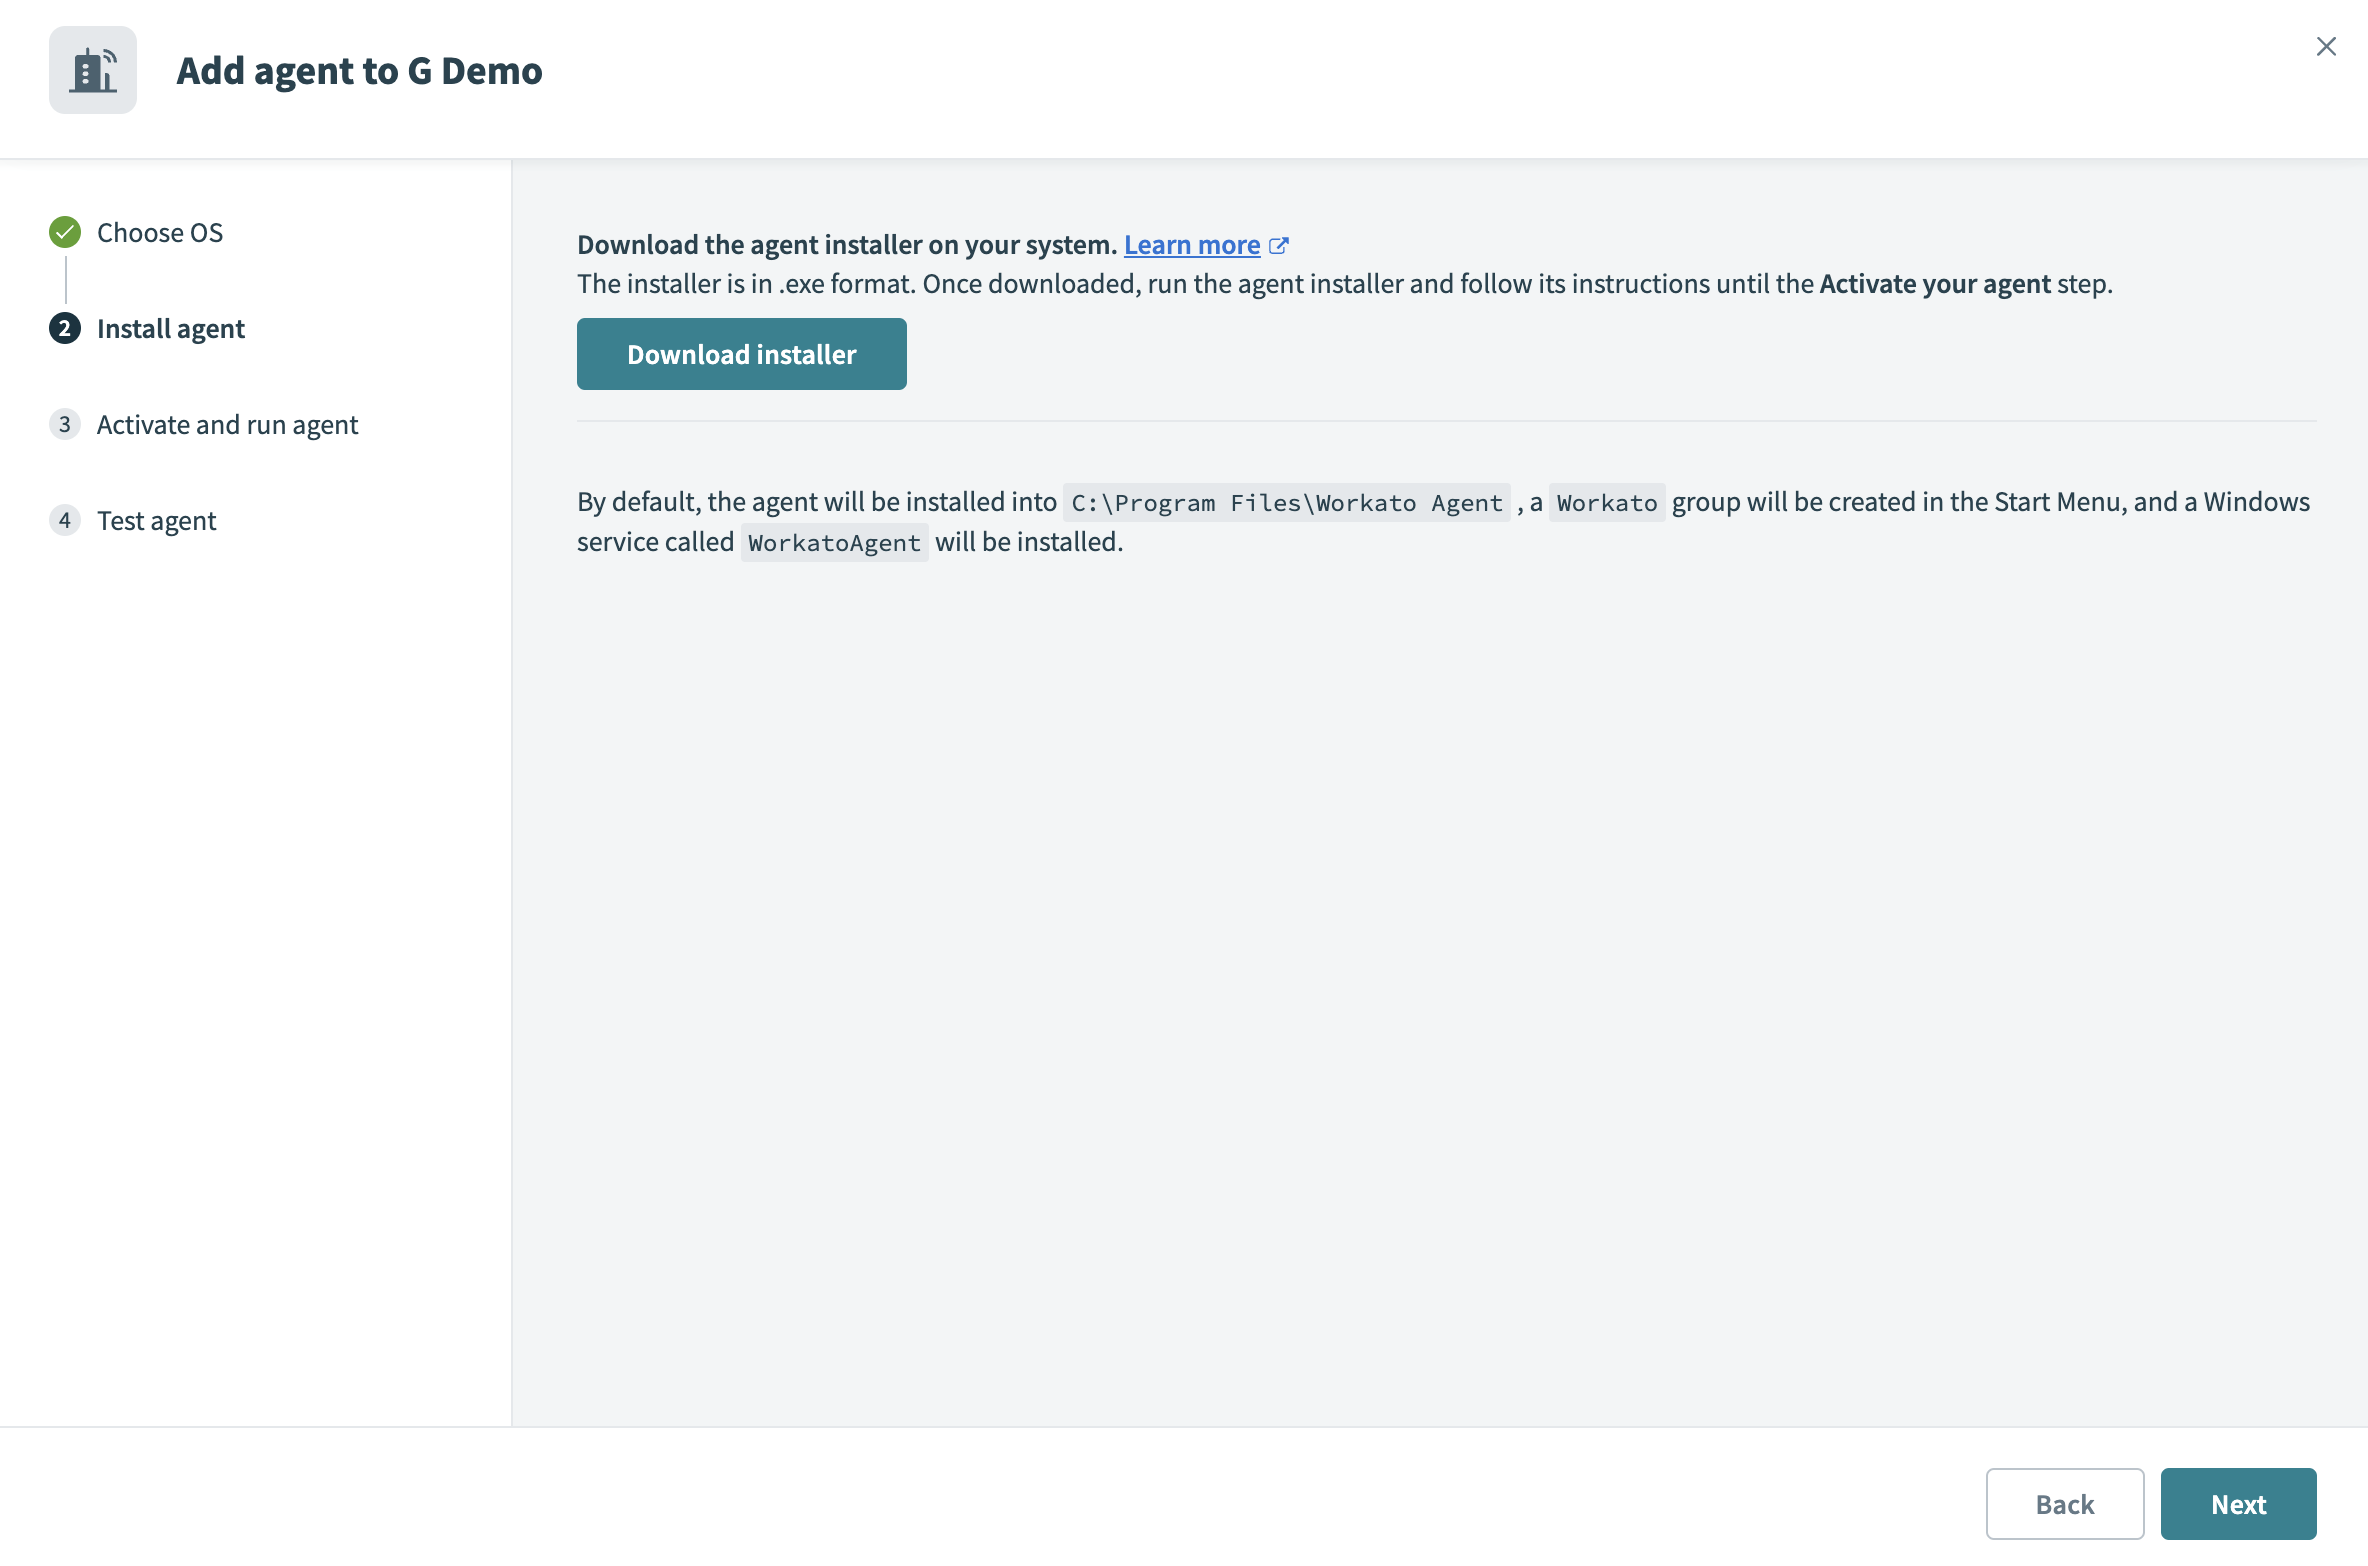 Install agent
Refer to the following OS-specific guides to complete the remaining installation steps:
Refer to Run an on-prem agent to start an agent after installation.
Next steps
You can perform the following actions after setting up an on-prem group and adding an on-prem agent:
- Set up recipe connections with on-prem agents.
- Configure connection profiles for your agents.
- Upgrade your on-prem agent.
- Set up password encryption.
- Set up a proxy environment for your on-prem agent.
- Toggle the active/inactive status of your on-prem agents.
- Connect to legacy applications using Java.
Last updated: