Create an Active Directory connection.
Click Create > Connection.
Search for and select Active Directory on the New connection page.
Enter a name for your connection in the Connection name field.
Use the Location drop-down menu to select the project where you plan to store the connection.
Select an on-premise group if your database runs in a network that does not support direct connection. Ensure your on-premise group has an active on-premise agent.
Provide the profile name defined in your OPA's config.yml file in the On-prem LDAP connection profile field. This option is only visible when you select an on-premise group that supports connection profiles.
Provide the LDAP URL. Use the format ldap://myserver.example.com:389 for non-SSL connections or ldaps://myserver.example.com:636 for SSL connections.
Enter the Username (principal), typically the distinguished name (DN) of an admin user, to authenticate with the LDAP server.
Provide the Password (credentials) for LDAP server authentication.
Provide the Base DN for LDAP requests. This setting ensures all DNs you use or receive in LDAP operations are relative to this LDAP path.
Expand the Configure SSL settings section and configure the following fields if your connection requires SSL encryption:
Enter the path for the PEM-encoded certificate or a trusted CA in the Certificate field.
Enter the full content of a PEM-encoded client certificate in the SSL certificate field.
Enter the private SSL certificate key for mutual SSL setup. This field is required if you specify an SSL certificate.
Use the Trust all drop-down menu to enable or disable self-signed certificates.
Click Connect.
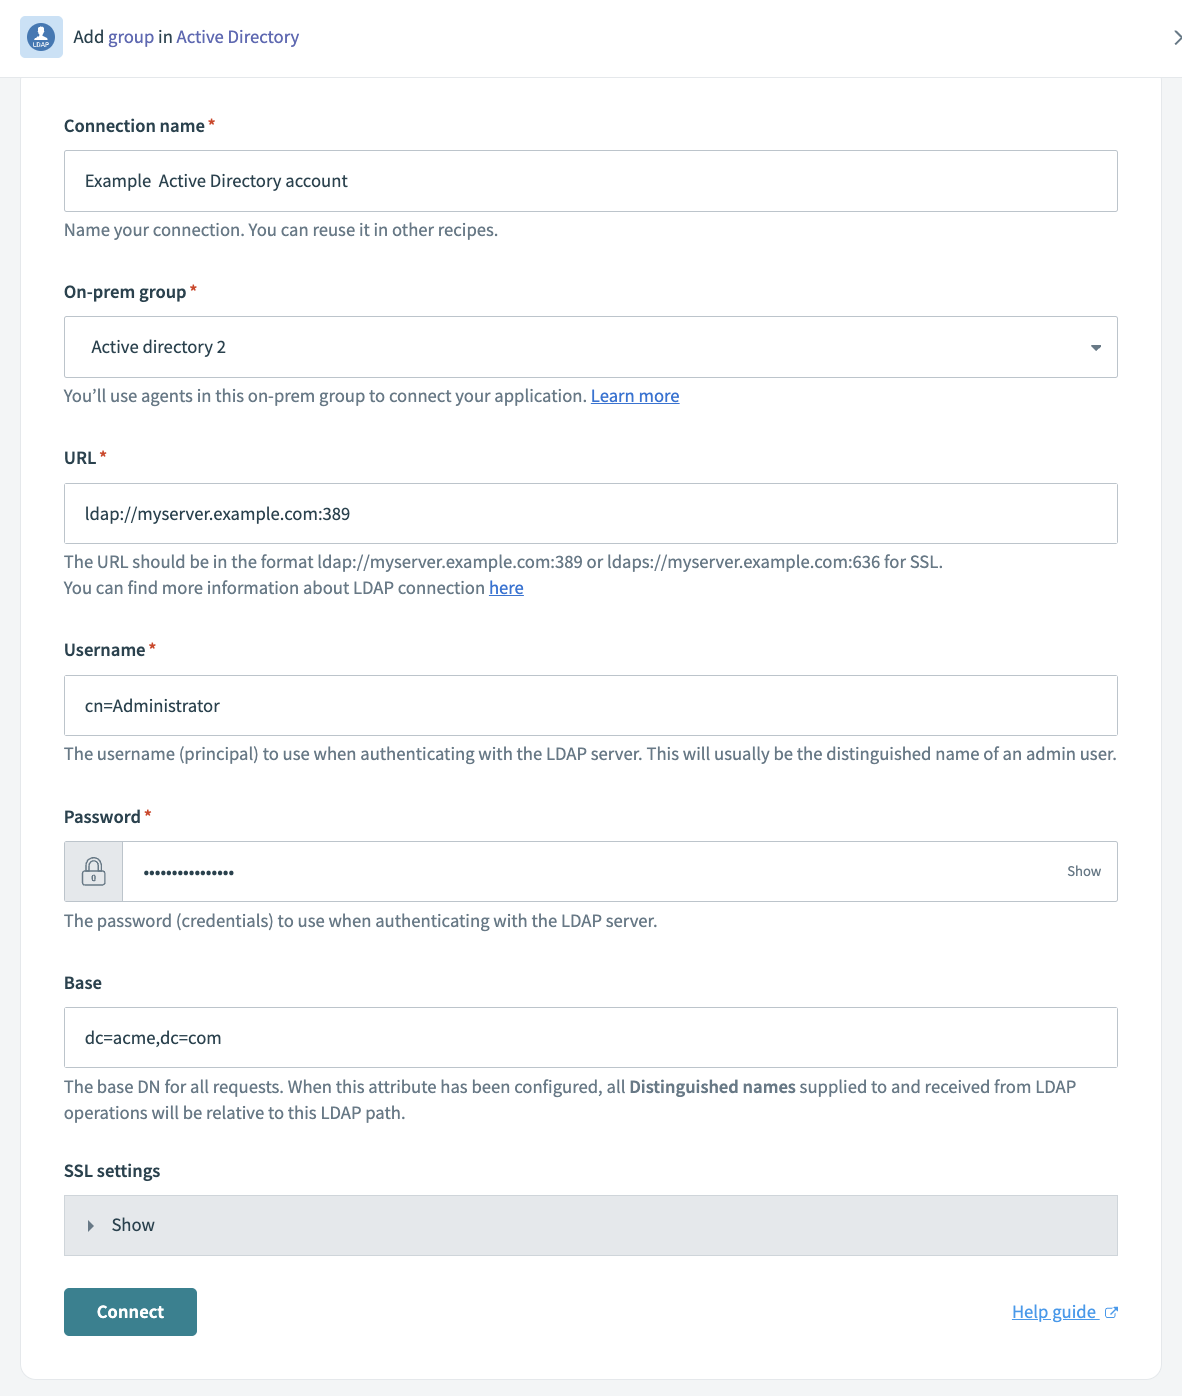 Complete the connection fields and click Connect
Last updated: 1/21/2025, 10:07:09 PM