Using the OpenAPI connector to create custom connectors
An application-specific connector gives you full flexibility and the best user experience. However, building a connector from scratch might take a long time. To reduce the time building a connector, use the OpenAPI connector as a basis or template for creating an application connector.
Once converted, the new application-specific connector can be used in Workato recipes in place of the universal OpenAPI connector.
Not sure if this is the right approach for you? In most cases, the OpenAPI connector can be used as-is. There are, however, some situations where creating a custom connector may be required. For example:
- Customizing the connector's name or icon
- Implementing a custom authentication flow
- Adding app-specific connection fields
- Simplifying connection settings
If any of the above are applicable, creating a custom connector is likely the best approach.
Prerequisites
To set up an OpenAPI connection, you'll need:
Familiarity with the Workato Connector SDK. Refer to the SDK documentation for more info.
Privileges in Workato that allow you to:
- Create connections
- Create and modify SDK connectors
A Swagger file that:
- Conforms to the OpenAPI v2 or v3 specification
- Is valid JSON or YAML
Step 1: Install the connector
The first step is to install the connector in your Workato account. If you've already done this, skip to Step 2.
Click Install connector.
Click Release latest version.
Step 2: Create a new SDK connector in Workato
Step 2.1: Copy OpenAPI connector source code
Sign in to your Workato account if you aren't already.
Navigate to Tools > Connector SDK.
Click the OpenAPI tile.
Select and copy the contents of the Source code.
Step 2.2: Create an SDK connector
Navigate back to the Connector SDK page.
Click + New connector.
Replace the contents of the Source code with the code you copied from Step 2.1.
Click the pencil icon or the connector's name and re-name the connector:
If you want to replace the connector's icon:
Hover over the default icon until Upload appears:
![]()
Click the icon.
Select and upload a new icon.
Click Save to save the connector.
Step 3: Customize the connector's configuration
This step will show you how to modify the connector's connection settings. There are two ways to accomplish this:
TIP
We recommend customizing the source code only when necessary to simplify version upgrades. The more customization a connector has, the more complex an upgrade can be.
- Add custom fields or modify default connection fields.
- Hard-code connection values. This approach is useful for simplifying connection setup for your users. For example: Instead of asking a user to provide a link to an OpenAPI document, you can hard-code it.
Refer to the OpenAPI default connection fields reference for more info about connection fields.
Adding and modifying connection fields
To add or modify connection fields, locate the connection.fields list. Workato uses this list to generate the connection user interface.
By default, Workato populates this list with fields like OpenAPI document source, Document URL, and so on. If you don't want a field to display, you can remove it from the list, or hard-code its value so users don't have to provide it.
For example: Your application only requires an API key for authentication. You could remove all default fields and add a single api_key field, where the user will be prompted to provide their API key:
connection: {
  fields: [
    {
      name: 'api_key',
      label: 'API key',
      hint: 'Refer to <a href="<YOUR_DOC_URL>"><APP> docs</a> ' \
            'for help retrieving your API key.',
      optional: false,
      control_type: 'password'
    }
  ]
}
TIP
Refer to the SDK Schema reference for more info about defining fields and their properties.
Hard-coding connection values
To simplify connection setup for your users, you can hard-code connection values. This removes a step from setup by providing required connection values on behalf of the user.
Except for authentication-related fields, connection values can be hard-coded in the adjust_connection method. This method is invoked from other methods across the source code and affects the connector's behavior. When changes are made to this method, they're applied everywhere the method is invoked.
Use the following convention to add a field to adjust_connection. Replace <FIELD_NAME> with the name of the field, and value with its hard-coded value.
methods: {
  adjust_connection: lambda do |connection|
    connection.merge (
      {
        '<FIELD_NAME>' => '<VALUE>',
        '<FIELD_NAME>' => '<VALUE>'
      }
    )
  end,
  [...]
}
For example: In the previous section, all default connection fields were removed from connection.fields. These field values must be hard-coded in adjust_connection to successfully configure the connector.
In the example above, we removed the existing connection fields from connection.fields. To successfully configure the connector, we need to hard-code the fields in adjust_connection:
methods: {
  adjust_connection: lambda do |connection|
    connection.merge (
      {
        'definition_mode' => 'url',
        'definition_url' => 'https://petstore3.swagger.io/api/v3/openapi.yaml',
        'base_url' => 'https://petstore3.swagger.io/api/v3/',
        'advanced' => {
          'test_endpoint' => '/pet/findByStatus?status=%3D%5B%22available%22%5D',
          'documentation_href' => 'https://redocly.github.io/redoc/?url=https://petstore3.swagger.io/api/v3/openapi.yaml'
        }
      }
    )
  end,
  [...]
}
Refer to the OpenAPI connection field reference for more info about fields, including names and descriptions.
Note: Required fields must be present in connection.fields or hard-coded in adjust_connection.
Step 4: Implement authentication
If authentication fields have been customized or a custom authentication flow is required, you'll need to modify the authorization section of the source code.
NOTE
If authentication details are provided via connection fields included in the default source code, you can skip this step.
The specific methods you'll need to modify can vary depending on your requirements and the authentication method being used. Refer to the SDK Authorization reference for more info.
For example: In Step 3, we replaced the default connection fields with a single api_key field. In this case, the authorization.apply method should be updated to correctly configure the custom authorization flow.
There are two ways to handle implementation, each with its own advantages:
Keep the code mostly as-is and only update the connection variable. Note: Keeping the original code makes applying source code upgrades easier.
View an example
rubyauthorization: { type: 'custom_auth', apply: lambda do |connection| connection = connection.merge( { 'auth_method' => 'header', 'auth_headers' => "api_key: Bearer #{connection['api_key']}", } ) auth_method = connection['auth_method'] # don't apply any credentials when requesting the API definition if connection['definition_mode'] == 'url' && current_url == connection['definition_url'] auth_method = nil end case auth_method when 'none' # nothing to do when 'basic' username = connection['basic_auth_user'] password = connection['basic_auth_password'] encoded = "#{username}:#{password}".encode_base64 headers(Authorization: "Basic #{encoded}") when 'header' auth_headers_input = connection['auth_headers'] lines = auth_headers_input.split(/\n+|\r+/) headers_hash = {} lines.each do |header| next if header.blank? header = header.split(':', 2) header_name = header[0] header_value = header[1].strip headers_hash[header_name] = header_value end headers(headers_hash) end end }, [...]Replace existing code with new, custom code. With this approach, the code is specific and easy to read. The downside, however, is that due to the customization, applying source code upgrades may be more complex.
View an example
rubyauthorization: { type: 'custom_auth', apply: lambda do |connection| headers(api_key: => "api_key: Bearer #{connection['api_key']}") end }, [...]
Step 5: Configure on-prem connectivity
If you require on-prem connectivity, you can configure the connector to communicate through an on-prem agent (OPA).
NOTE
You can skip this step if on-premise connectivity isn't required.
After configuring a new OPA, locate the secure_tunnel key at the beginning of your SDK connector's source code:
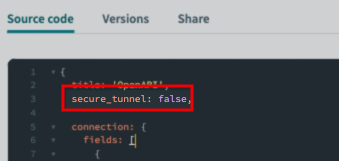
When set to true, the Is this app in a private network? field in the connector's setup will be available. Users can then select the OPA to connect to.
What's next?
That's it - you've created a custom connector! From here, you can:
Last updated: